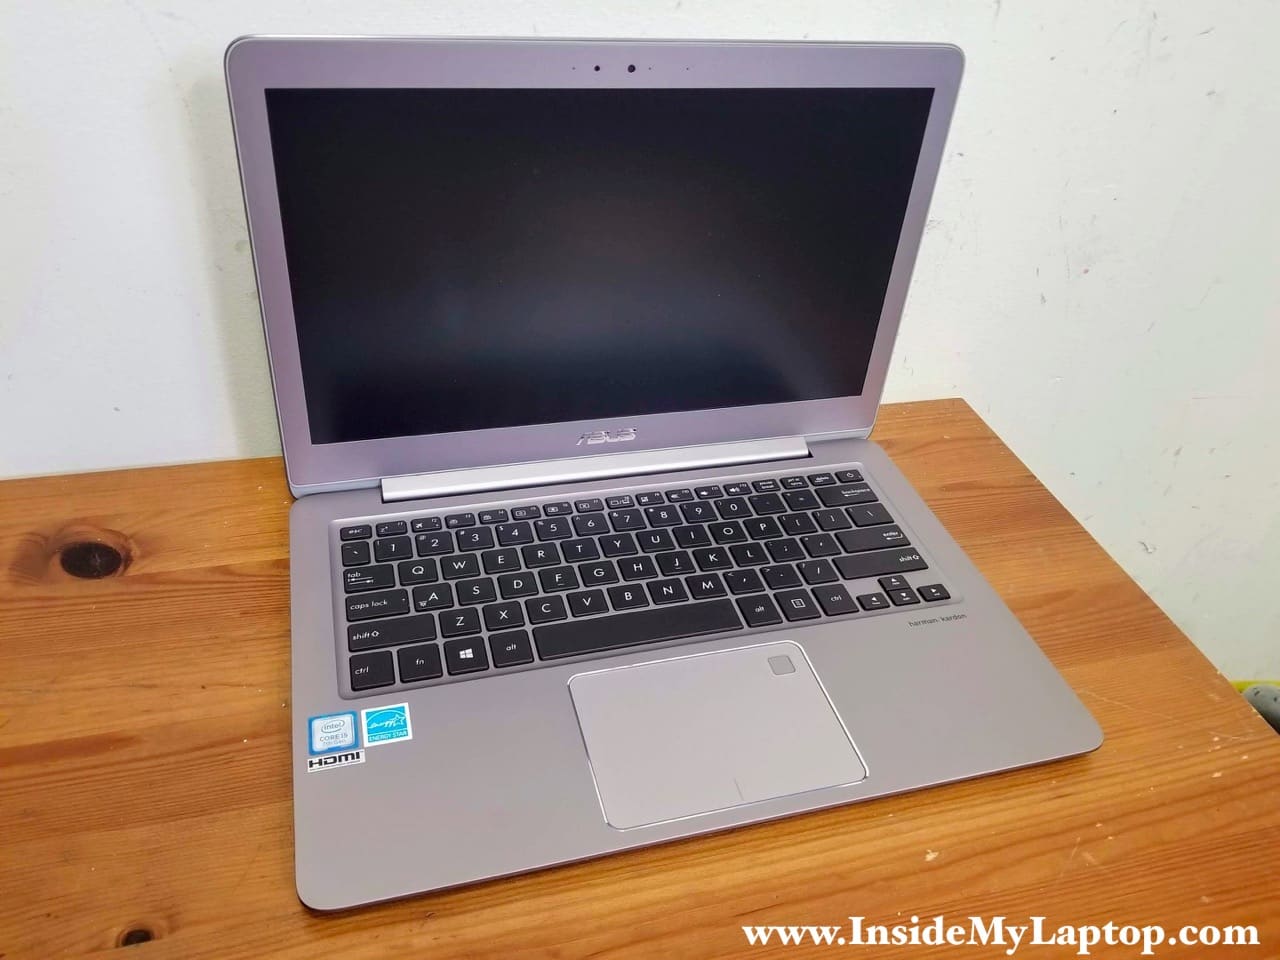
In this guide I explain how to take apart Asus ZenBook UX330 UX330U UX330UA laptops.
In this particular example I’m taking apart an Asus ZenBook UX330U but all other models should be identical.
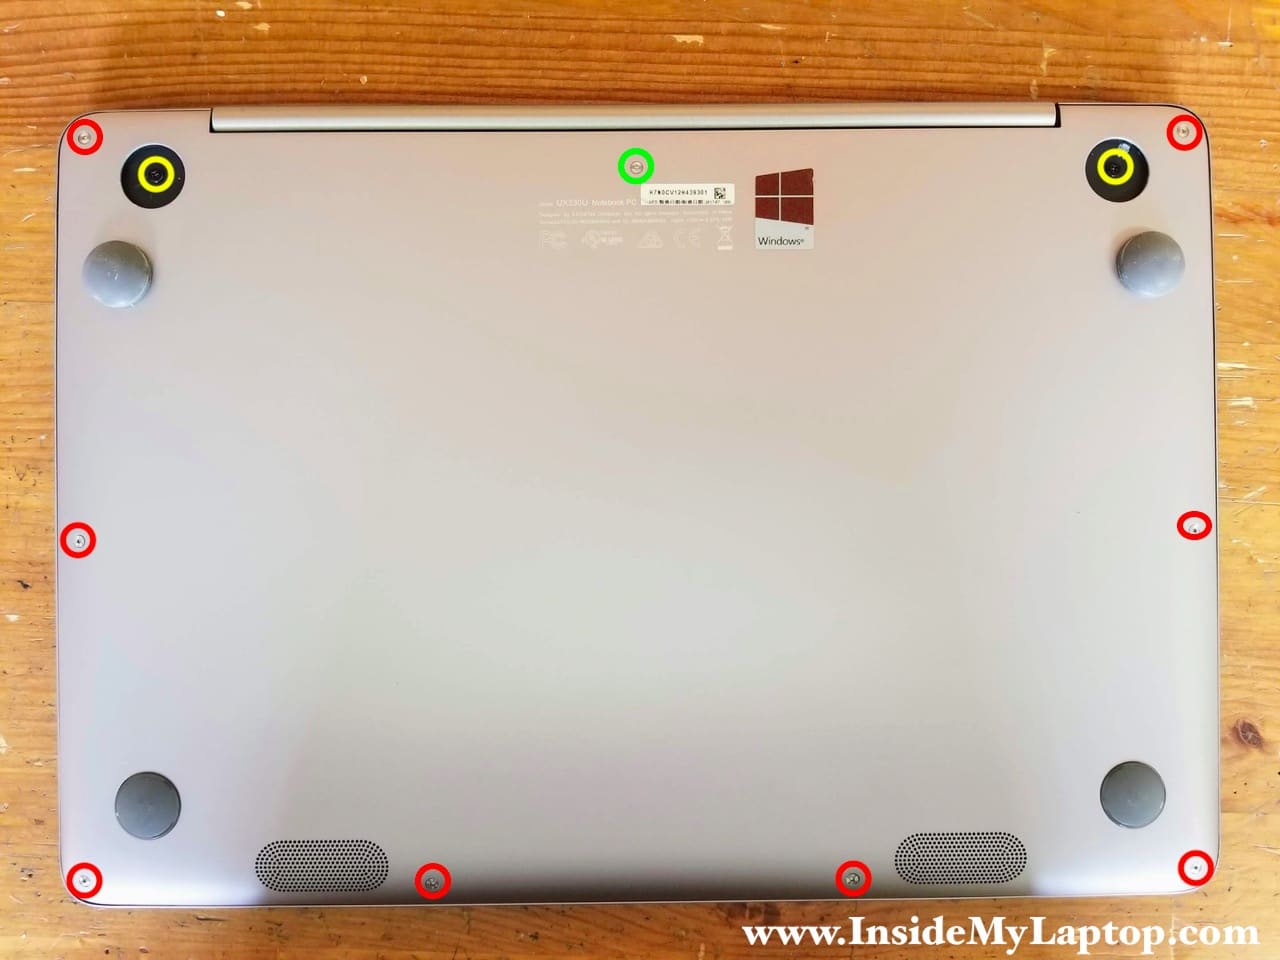
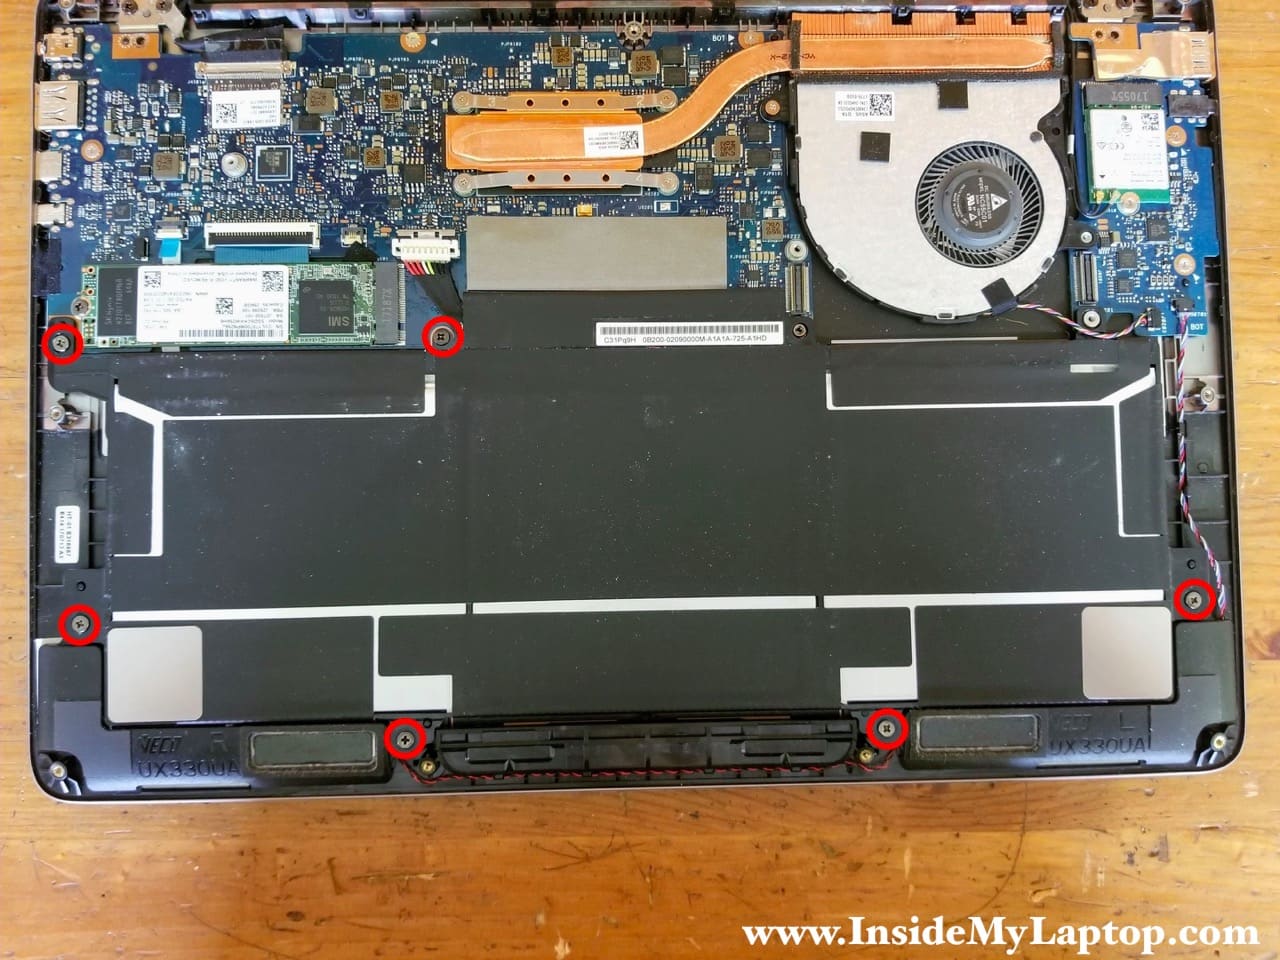
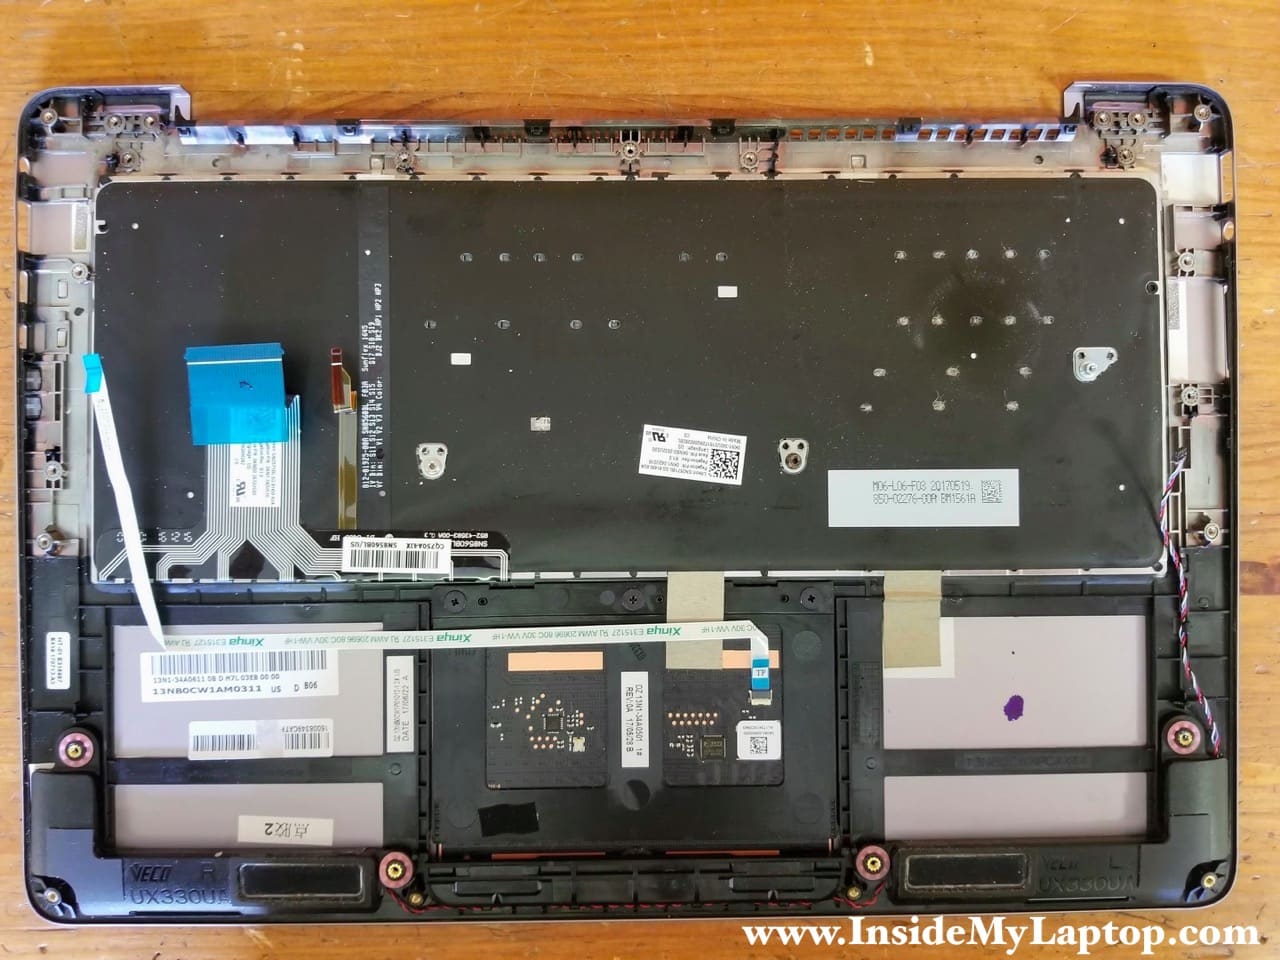
STEP 1.
Start the disassembly process with removing all screws from the base cover.
One Torx 5 screw (color-coded in green) is longer than eight other Torx 5 screws (color-coded in red).
Also, don’t forget to remove two Phillips screws hidden under two upper bottom feet (color-coded in yellow).
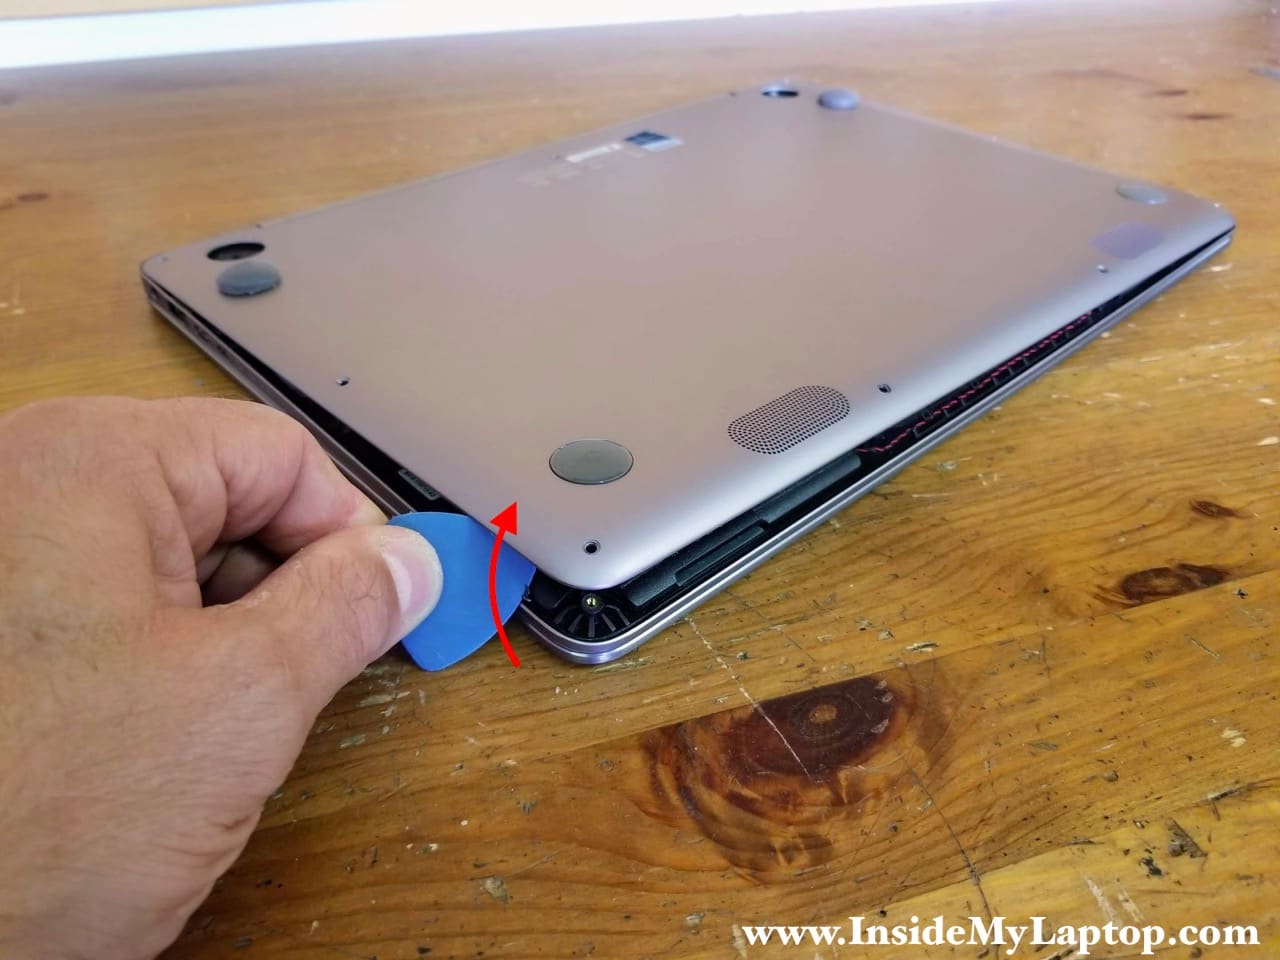
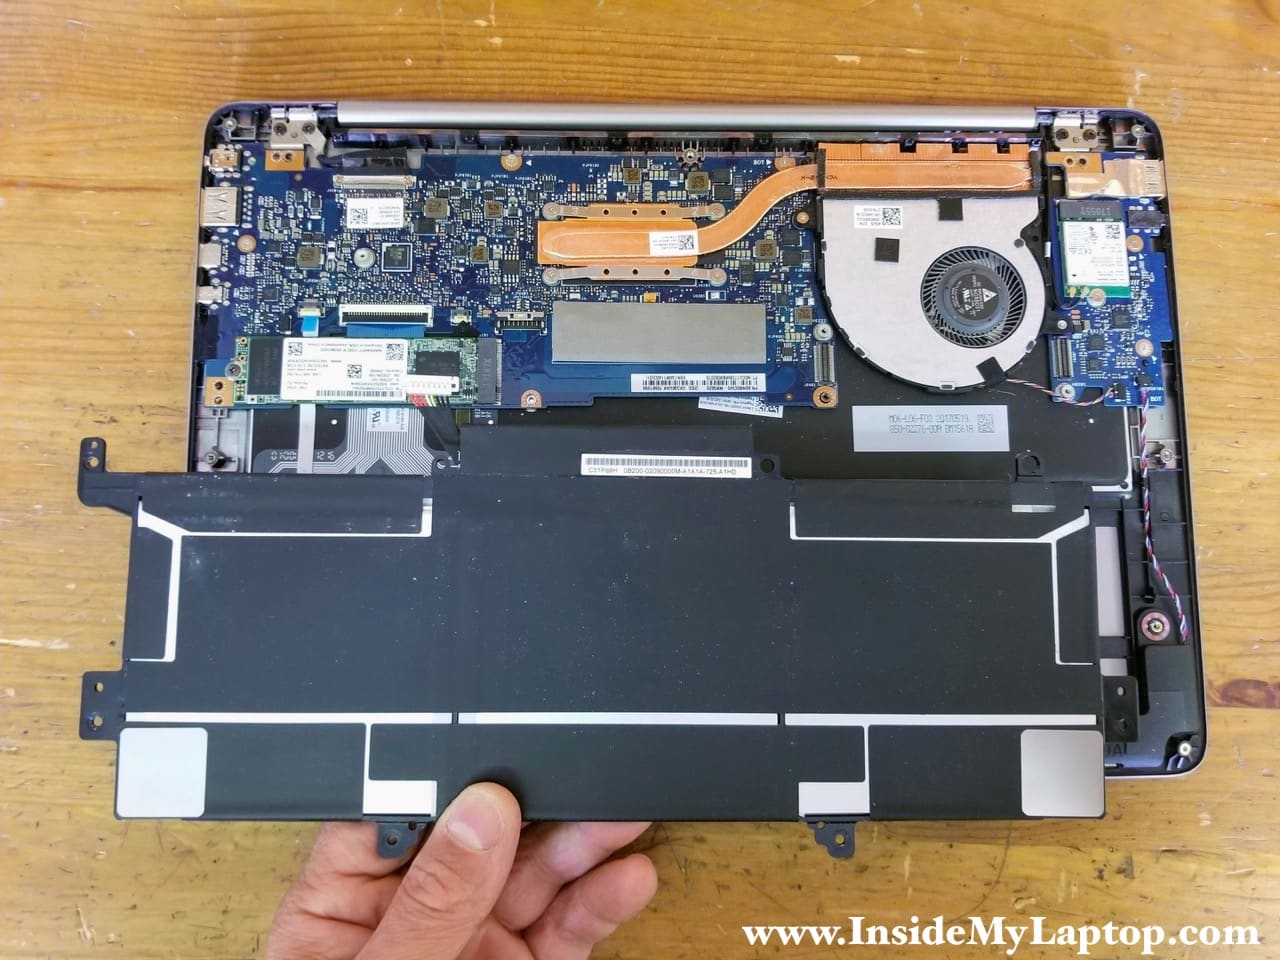
STEP 2.
Separate the base cover from the top case assembly.
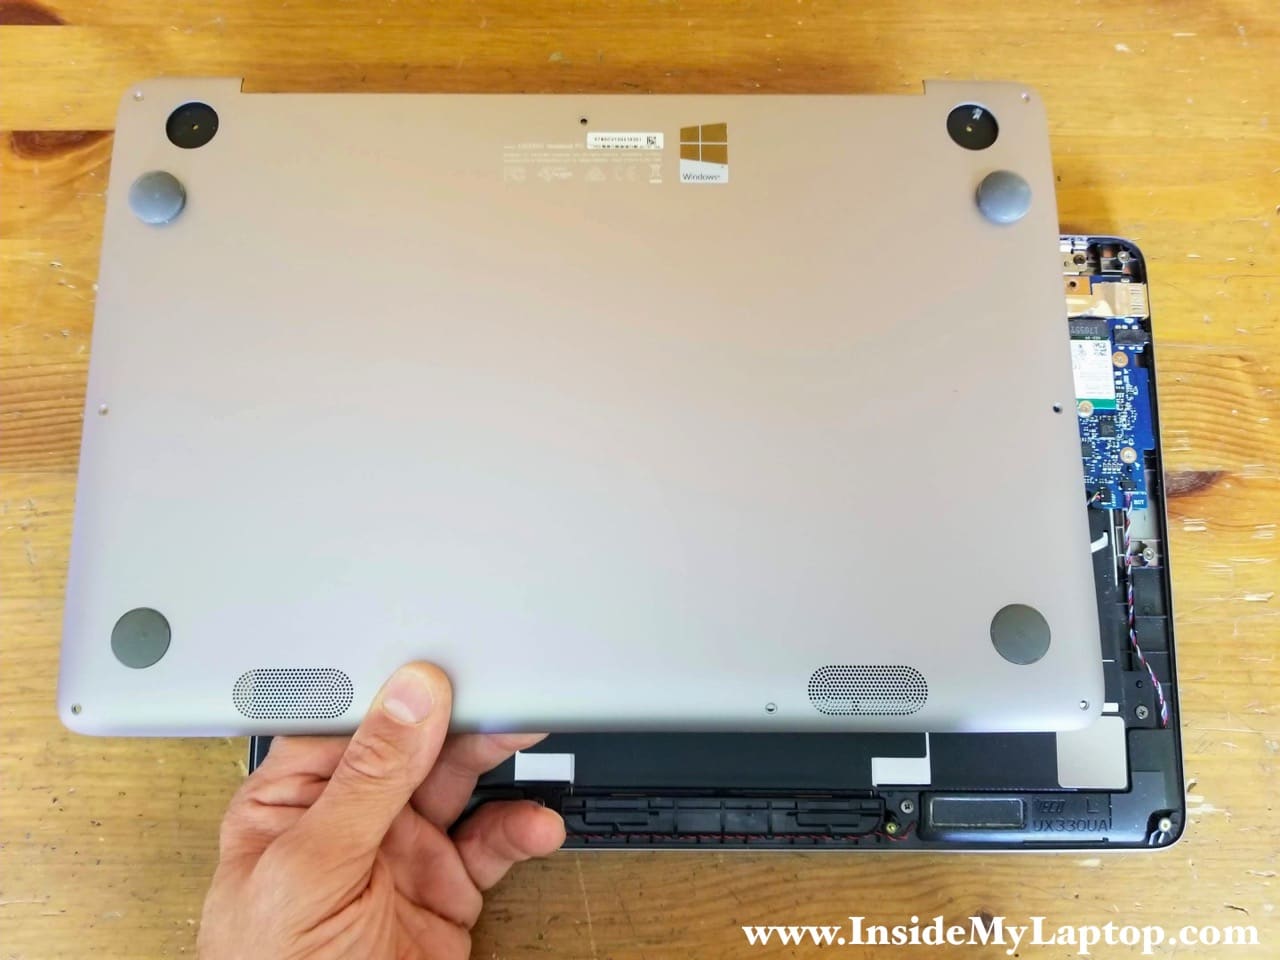
STEP 3.
Remove the base cover.
STEP 4.
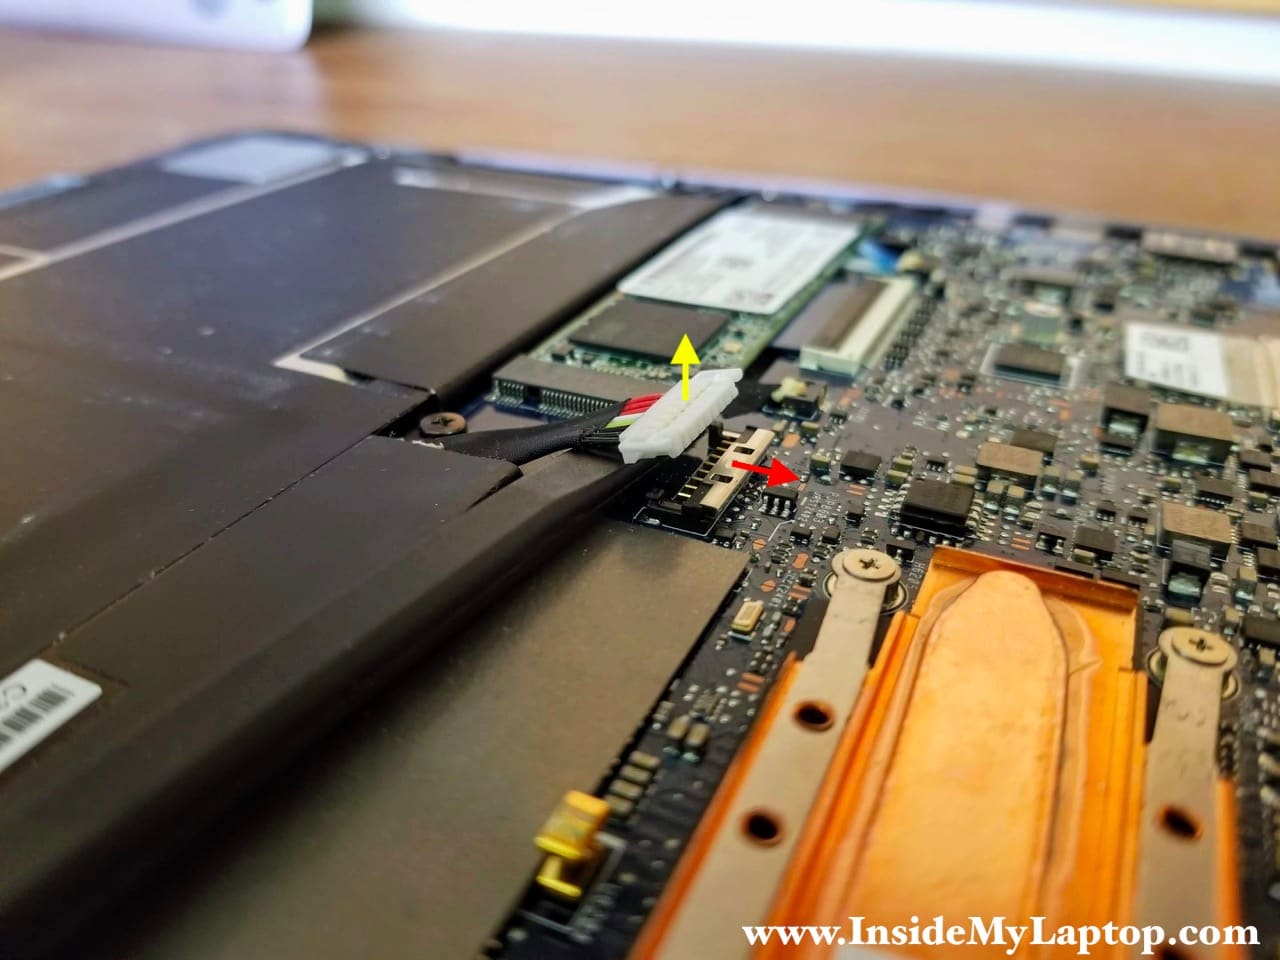
Make sure to disconnect the battery cable before continuing any further laptop disassembly.
In order to disconnect the battery cable, it’s necessary to unlock the connector first.
Slide the metal locking bracket to the shown direction (red arrow) to unlock the connector.
After that lift up the battery connector (yellow arrow) and unplug it from the motherboard.
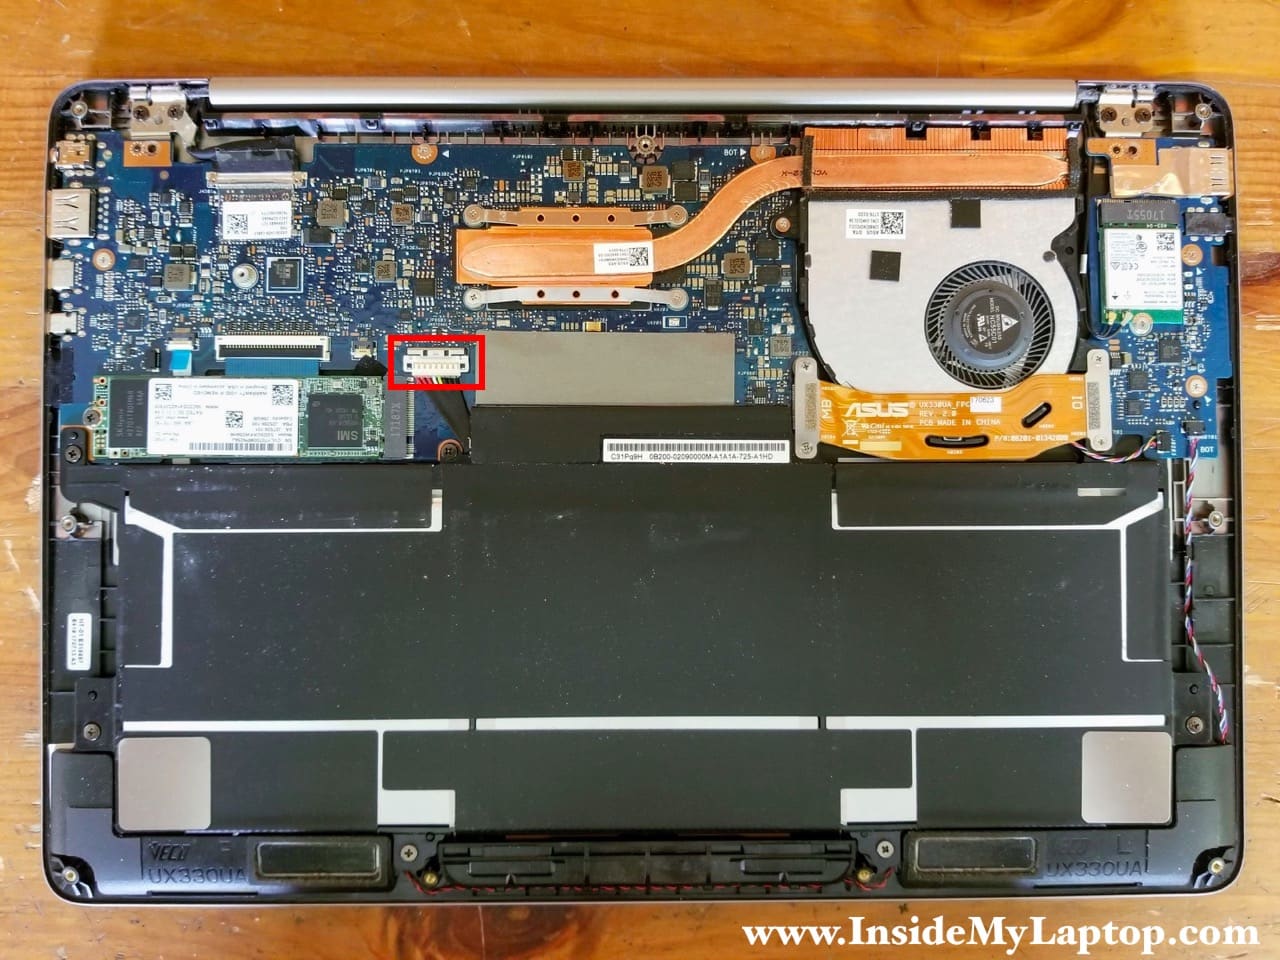
STEP 5.
In Asus ZenBook UX330 UX330U UX330UA laptops the battery is mounted under the I/O board cable. Let’s remove this cable first.
Remove two screws from each side of the I/O cable. Two of these screws (on the bottom) also securing the battery.
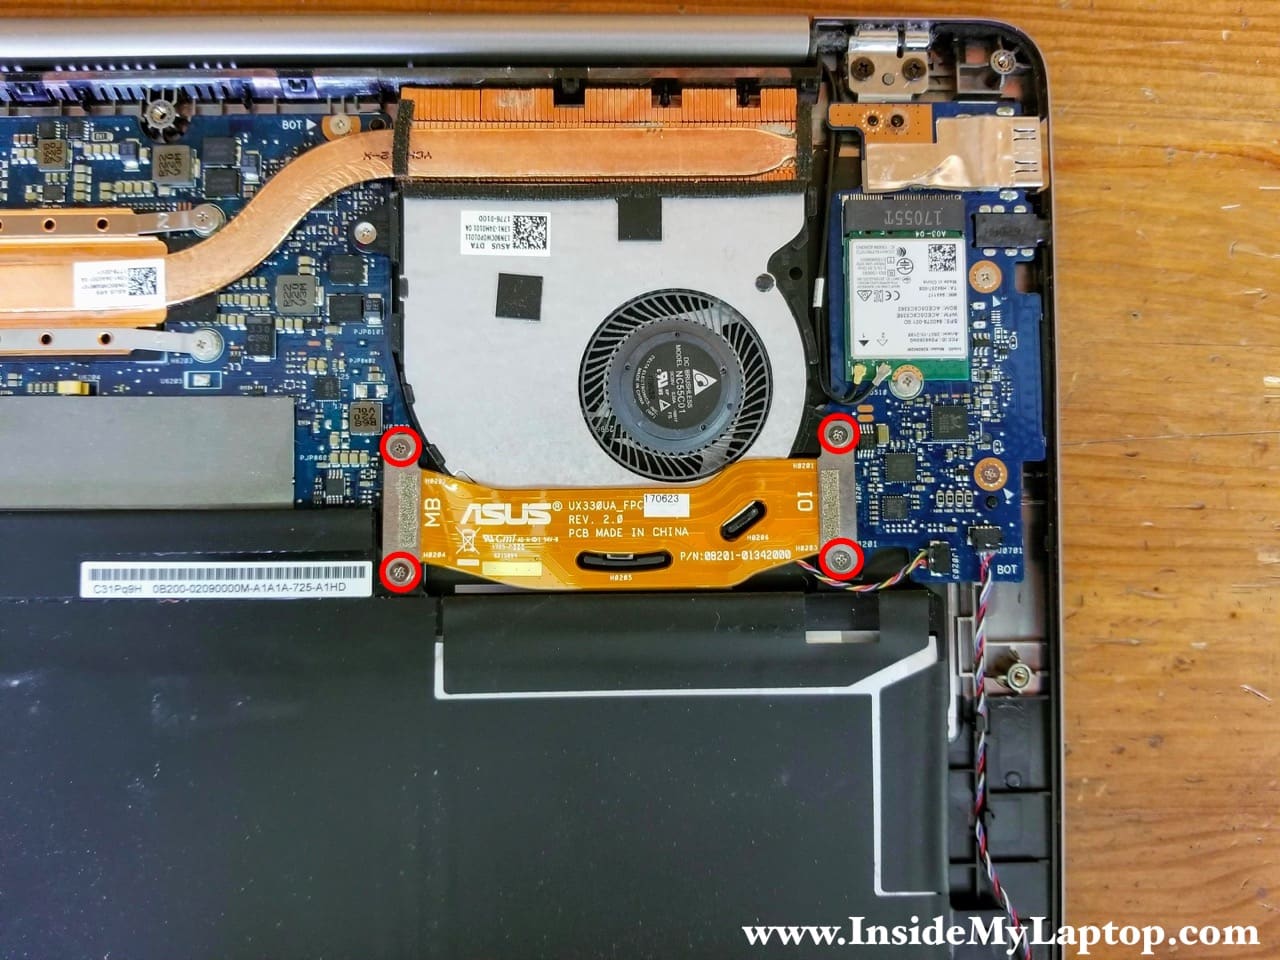
STEP 6.
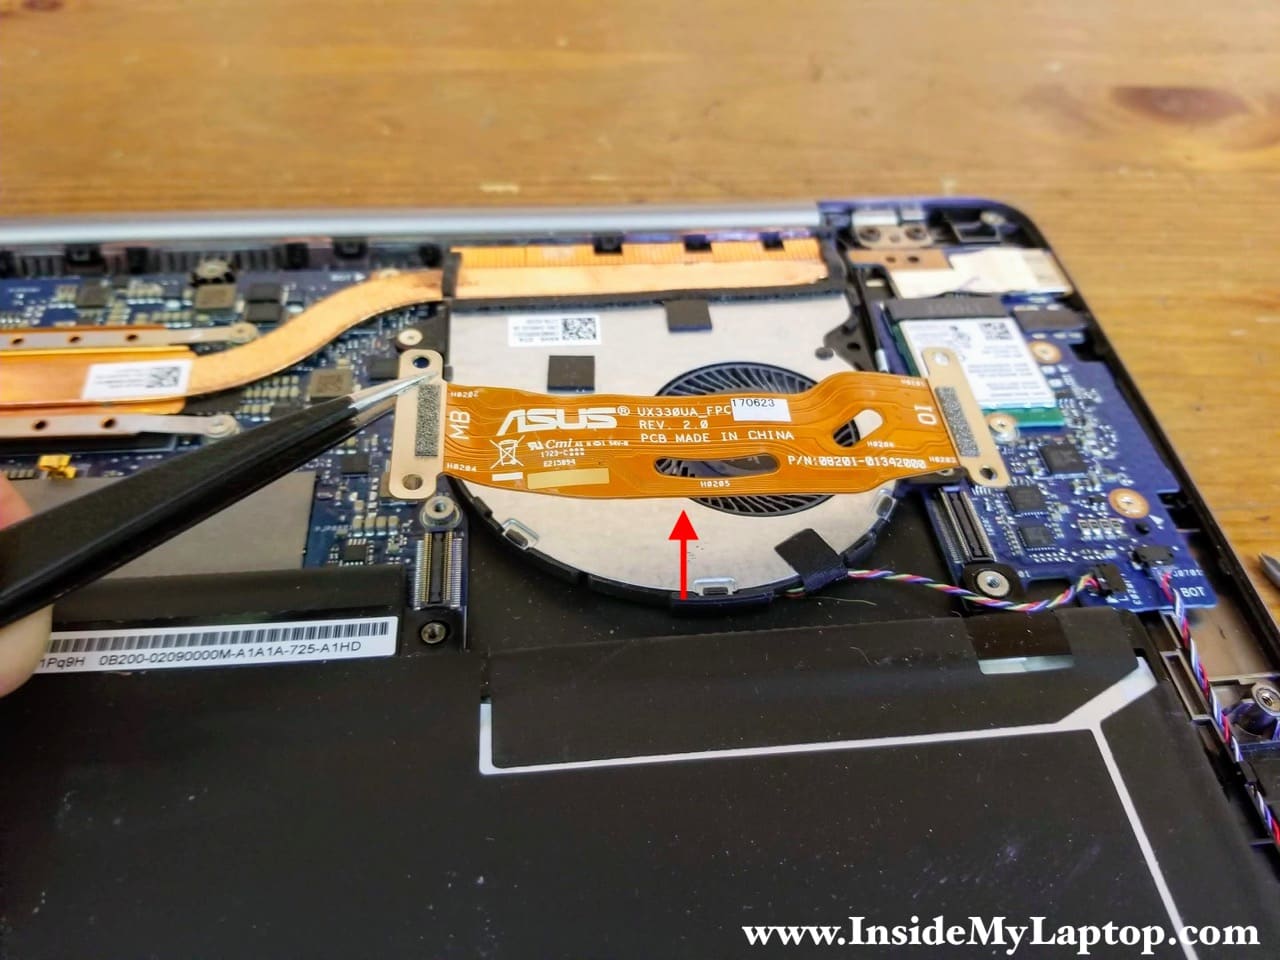
Lift up each side of the I/O cable to disconnect it from the motherboard and I/O board.
Remove the I/O cable.
Asus ZenBook UX330 UX330U UX330UA I/O cable part number: 08201-01342000.
STEP 7.
Remove six screws attaching the battery to the top case assembly.
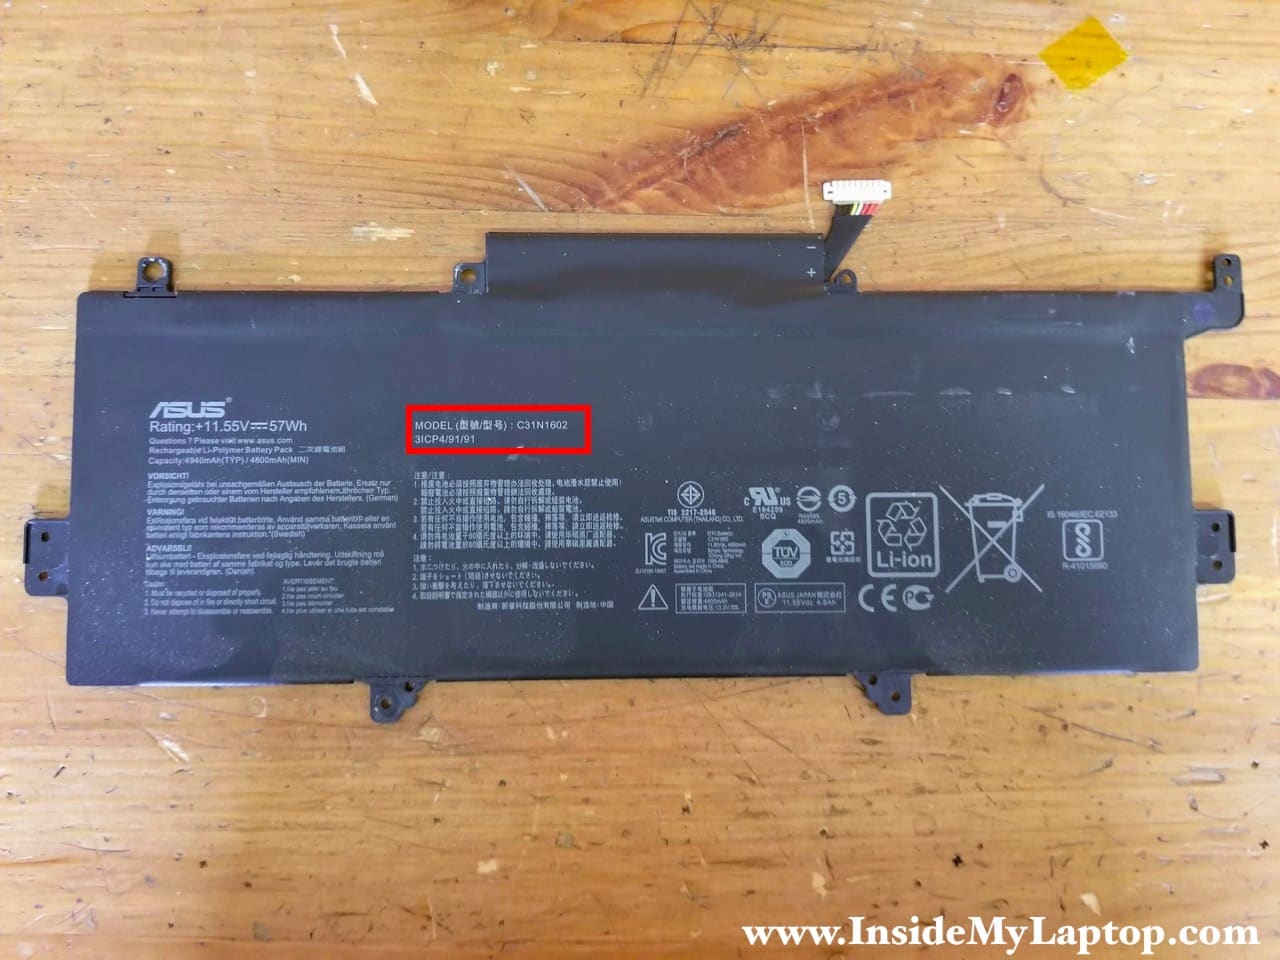
STEP 8.
Lift up and remove the battery.
Asus ZenBook UX330 UX330U UX330UA laptops have the following battery model installed: C31N1602.
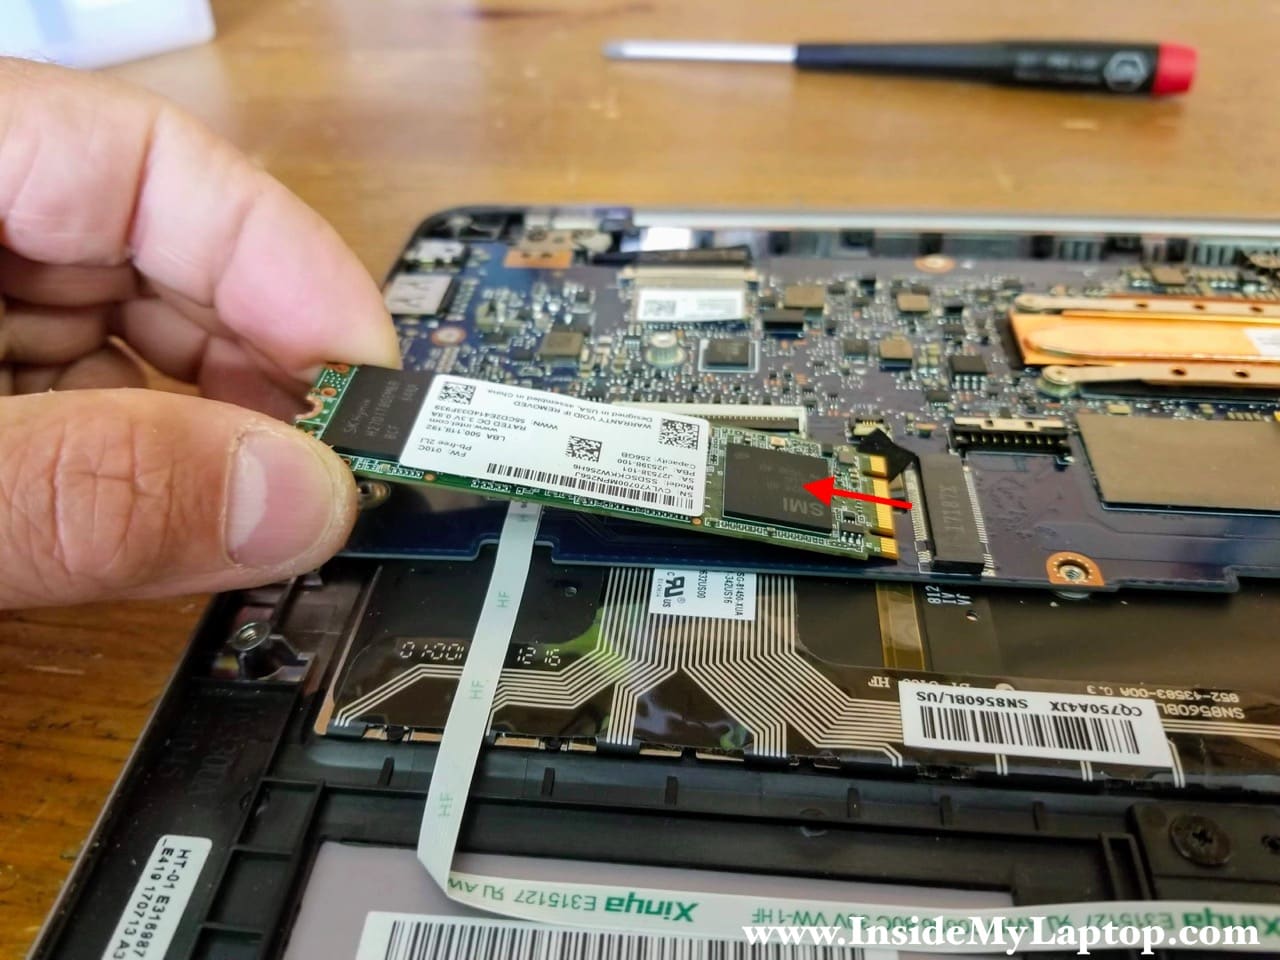
STEP 9.
Remove one screw securing the solid state drive.
Pull the SSD out. This is m.2 SATA III solid state drive (type 2280).
STEP 10.
Remove one screw securing the cooling fan and disconnect the fan cable from the I/O board.
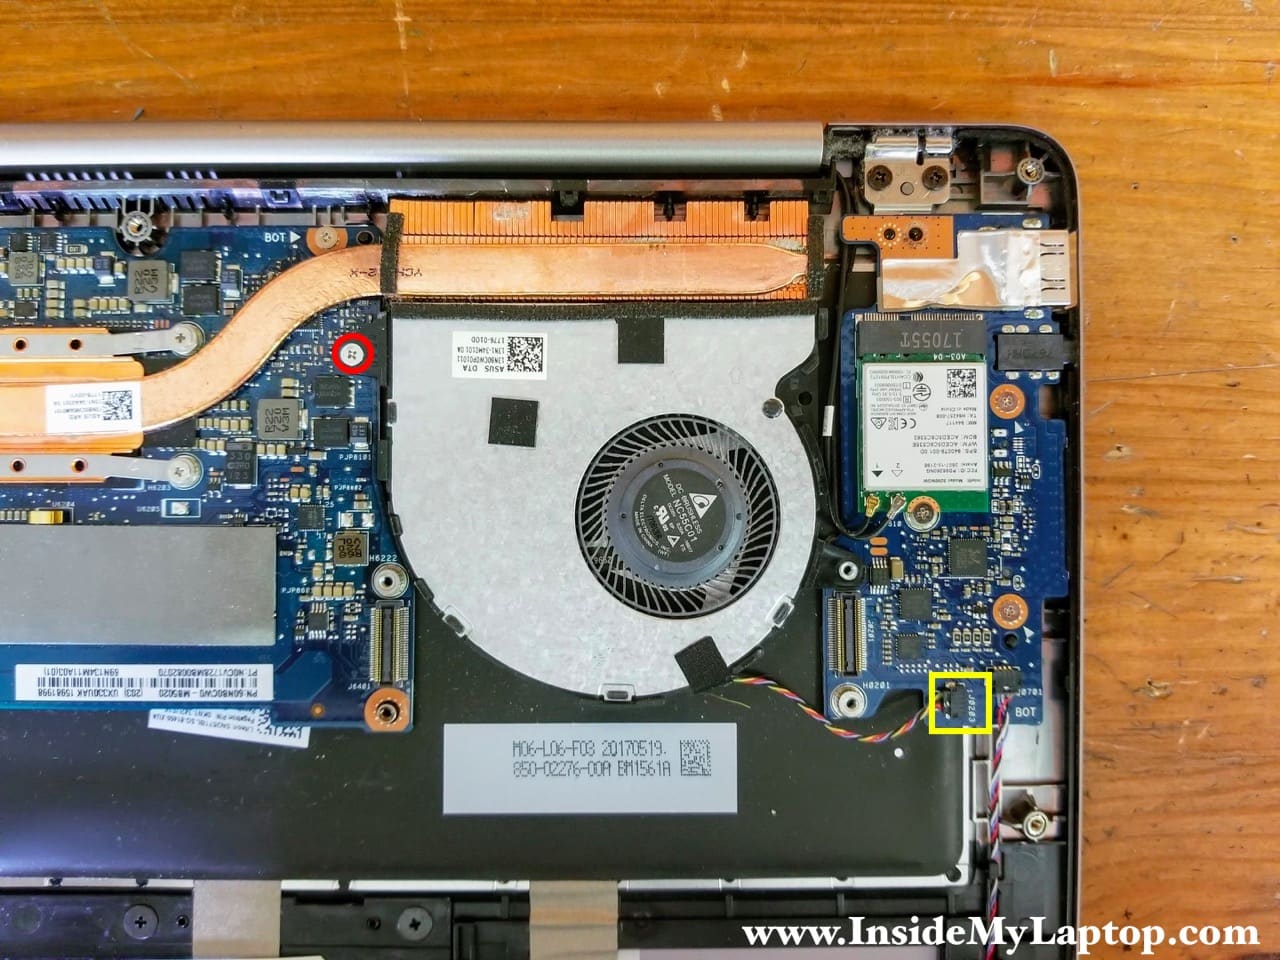
STEP 11.
Remove the cooling fan.

STEP 12.
Disconnect two Wi-Fi antenna cables from the wireless card.
Remove one screw securing the wireless card.

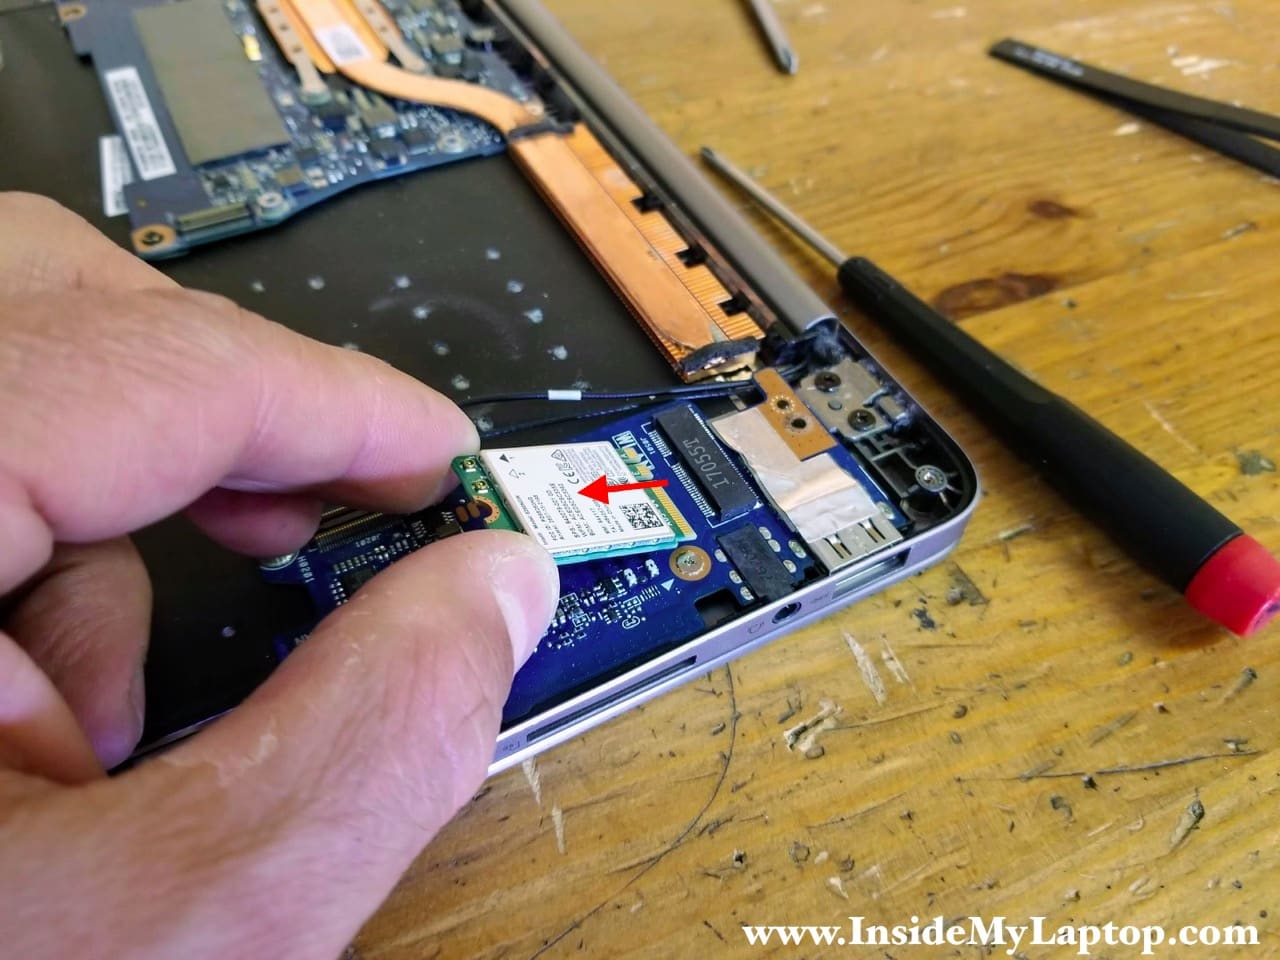
STEP 13.
Pull the wireless card out.
STEP 14.
Remove two screws securing the I/O board and unplug the speaker cable.
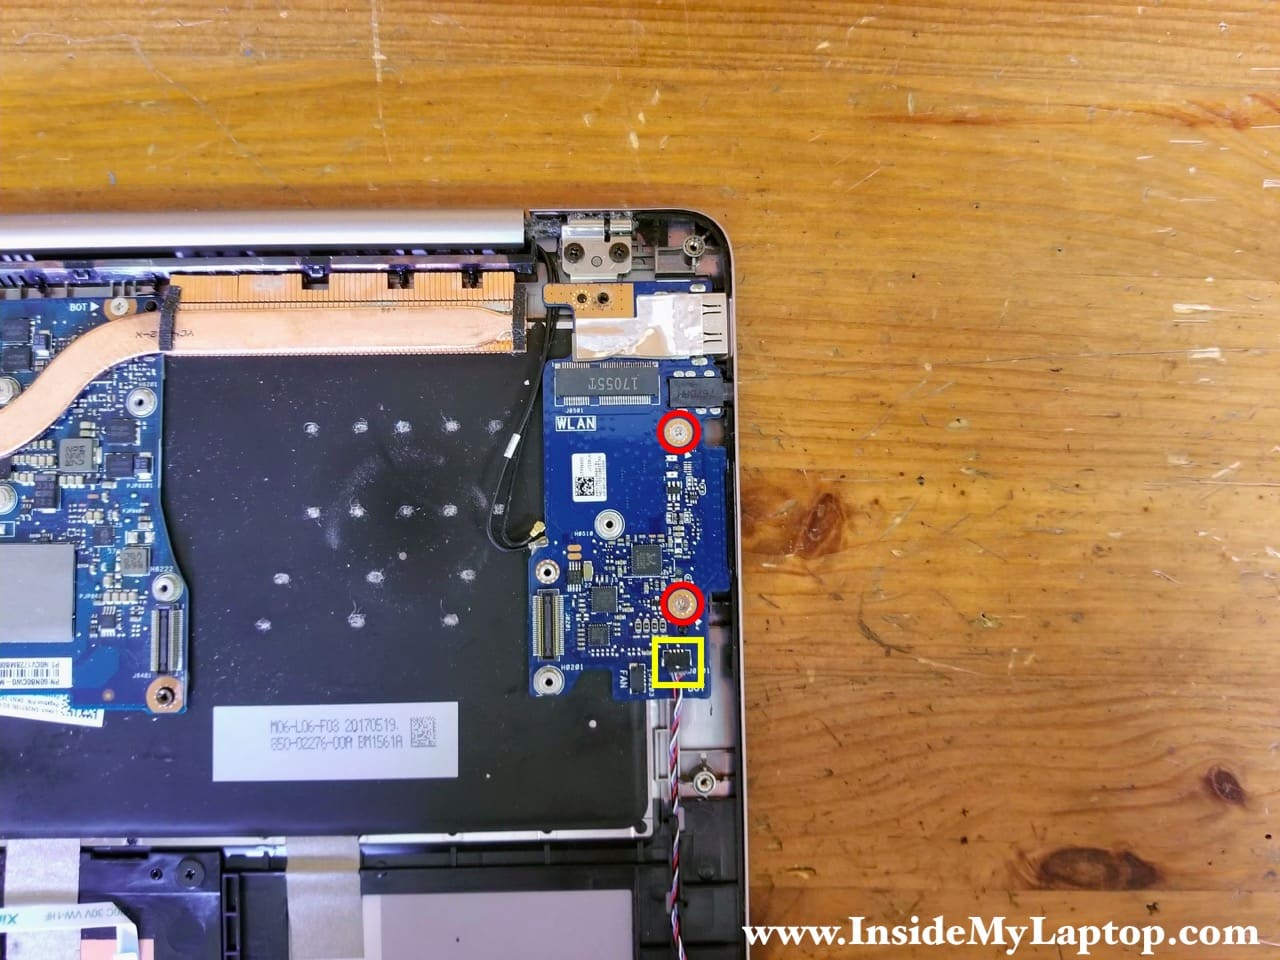
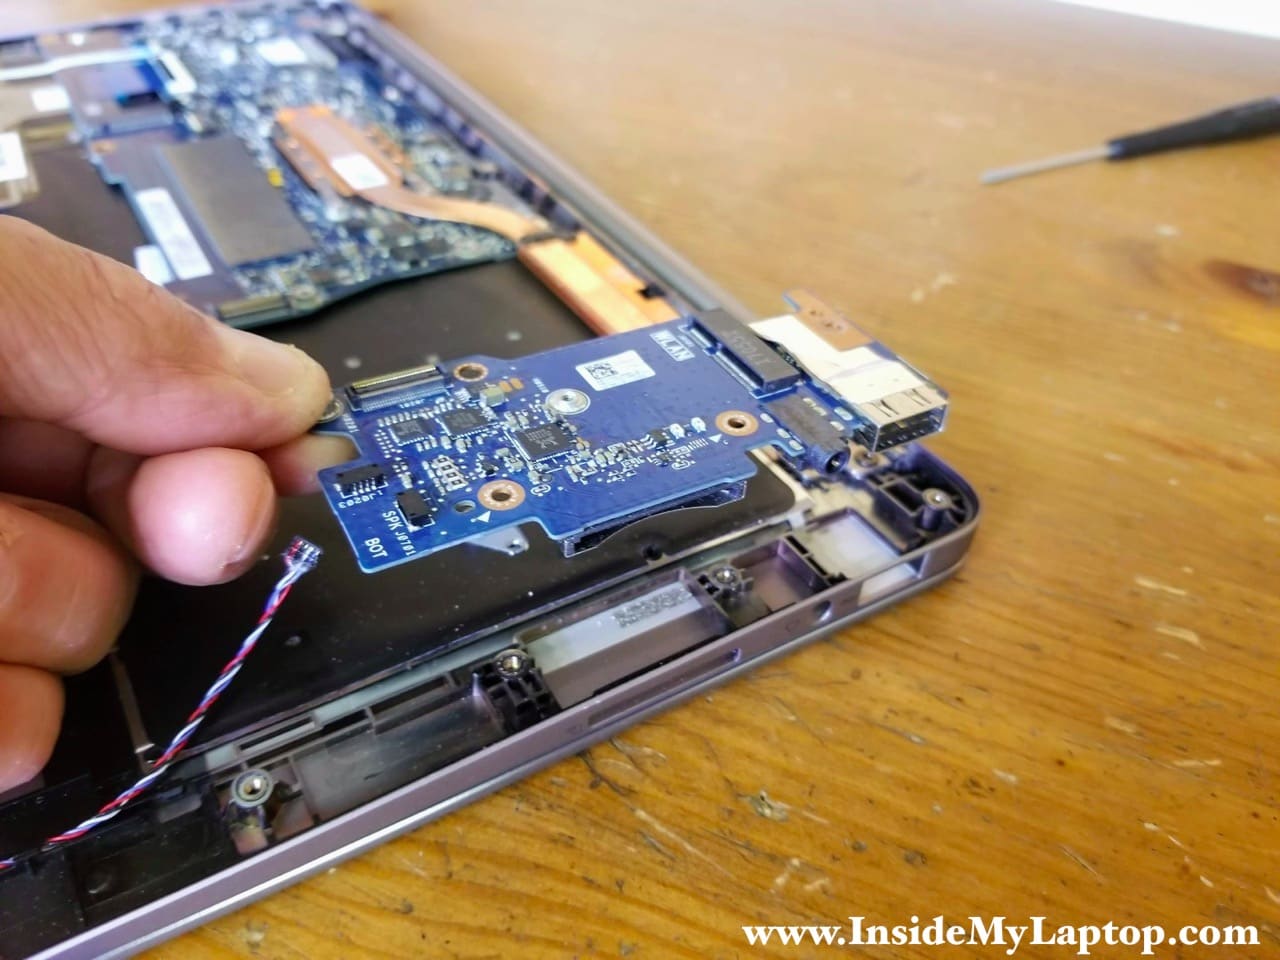
STEP 15.
Remove the I/O board (USB, SD card reader, audio jack board).
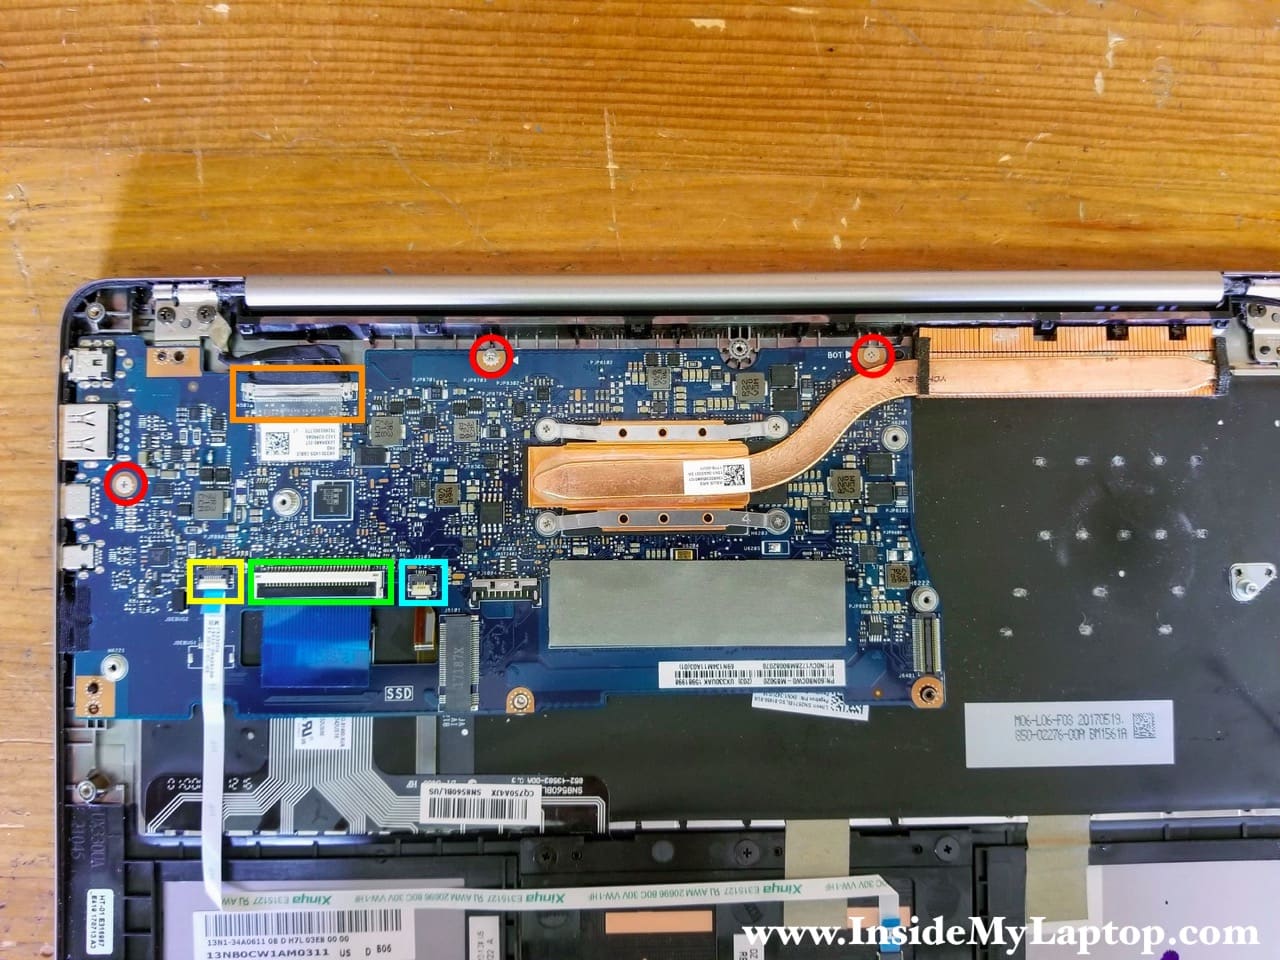
STEP 16.
Remove three screws attaching the motherboard to the top case assembly.
Disconnect the following color-coded cables:
– Display cable (orange).
– Touchpad cable (yellow).
– Keyboard cable (green).
– Keyboard backlight cable (blue).
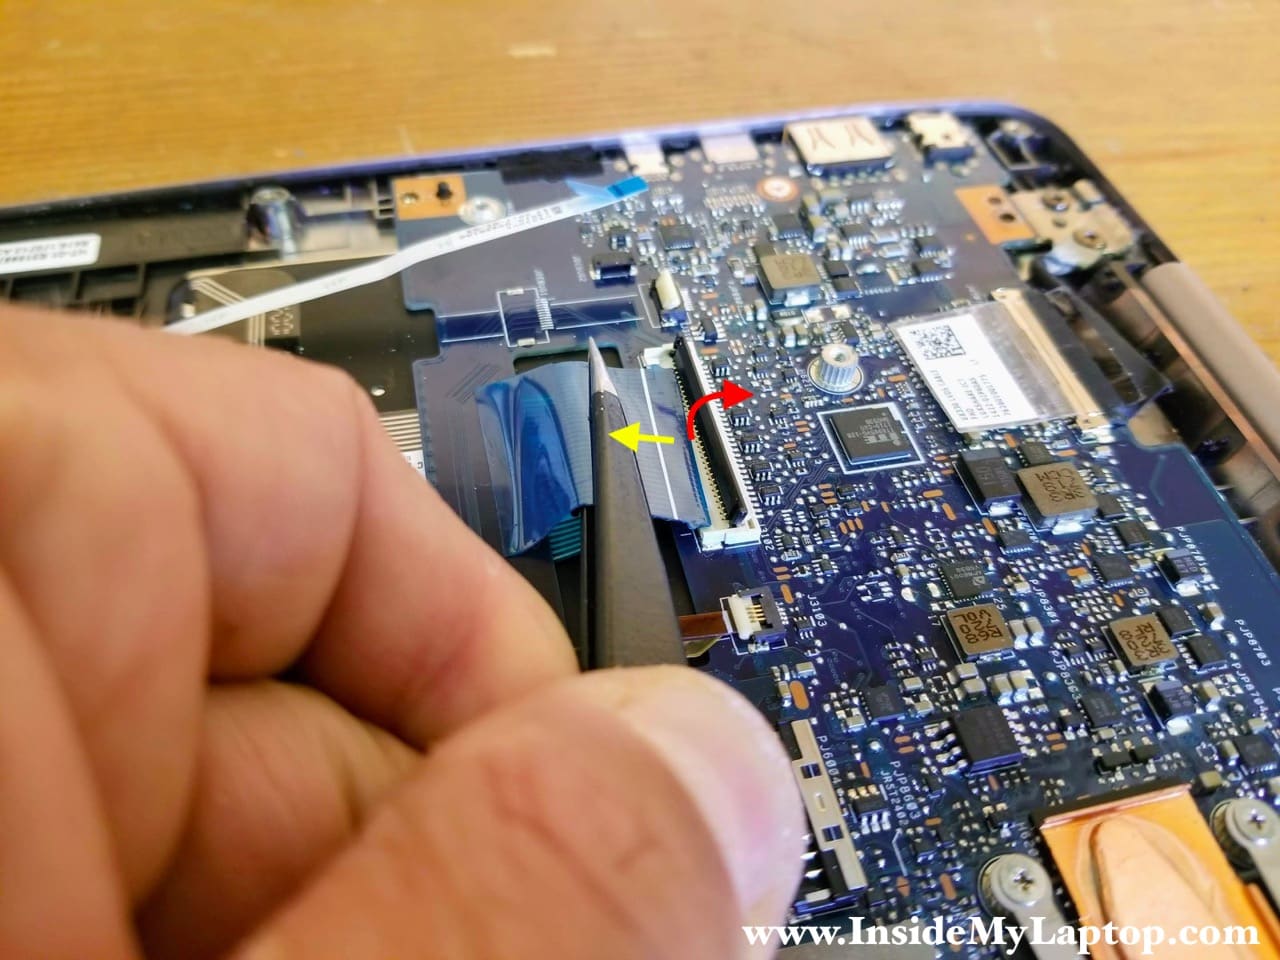
Here’s how to disconnect all flat cables on the lower side of the motherboard.
Unlock the connector by lifting up the locking tab (red arrow) and after that pull the cable out (yellow arrow).
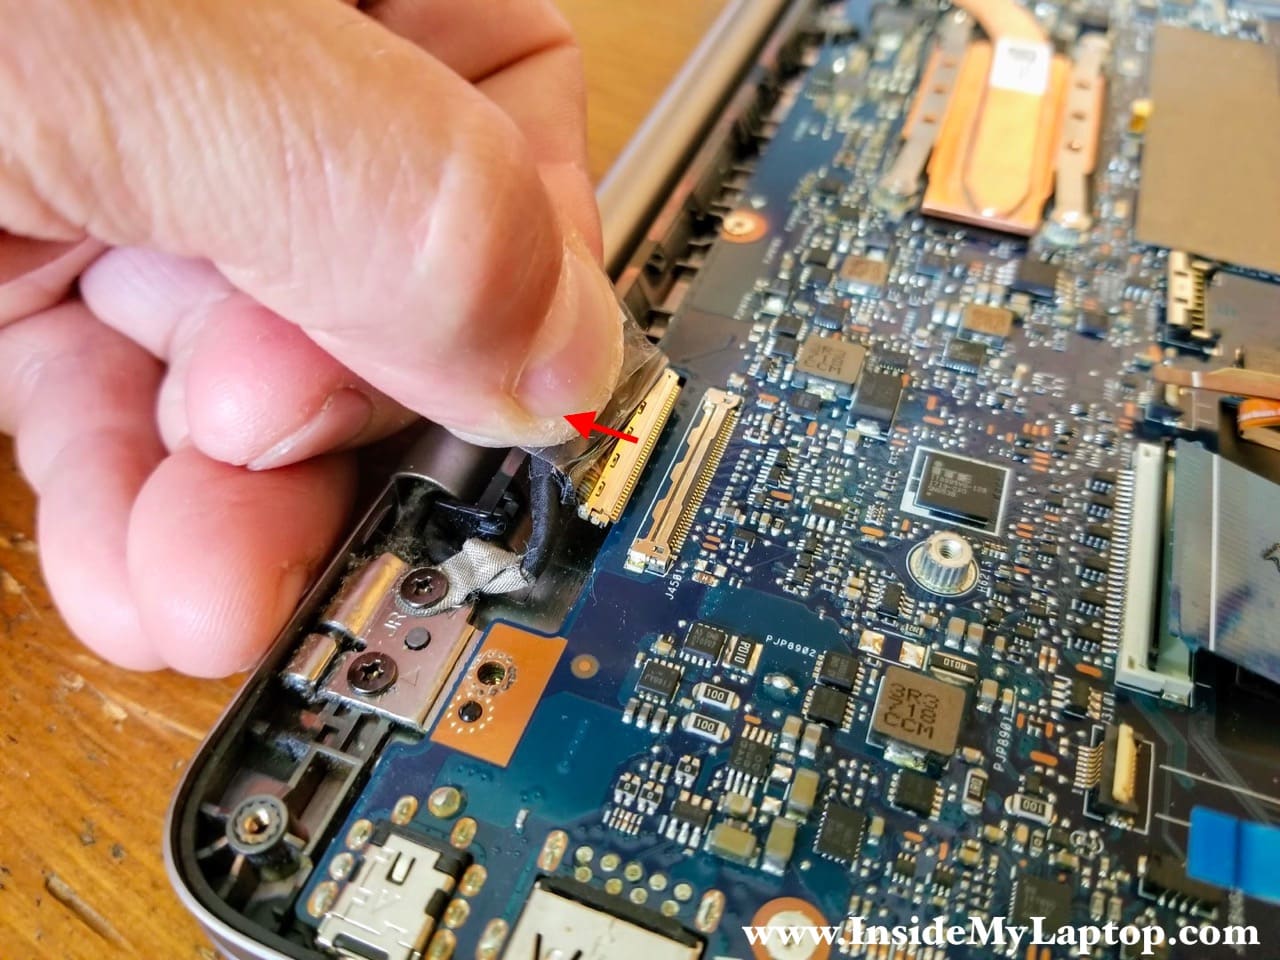
Here’s how to disconnect the display cable.
Peel off sticky tape securing the connection. Pull the cable out.
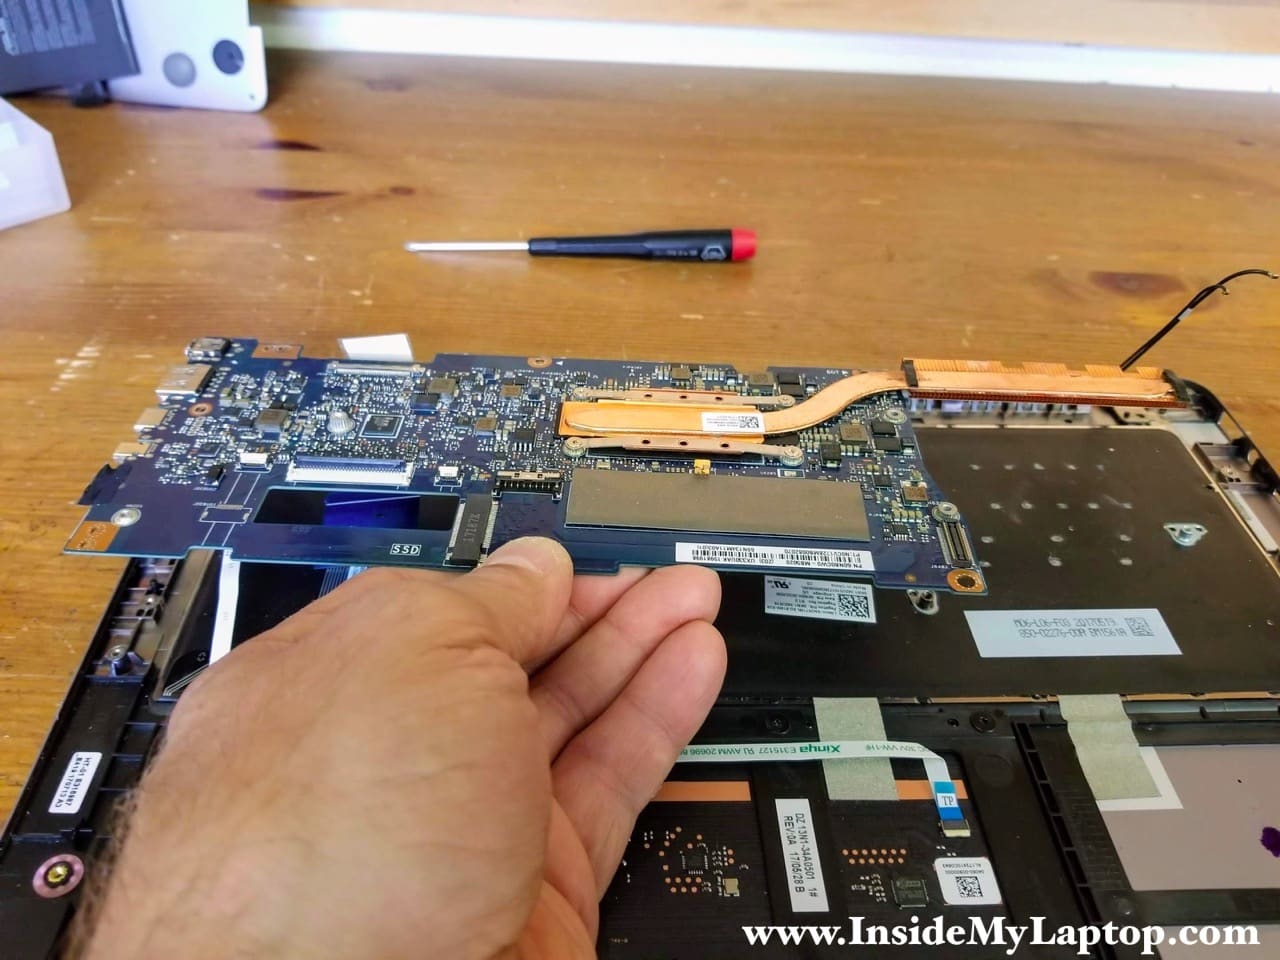
STEP 17.
Remove the motherboard from the top case assembly.
Here’s a photo of the other side of the motherboard.
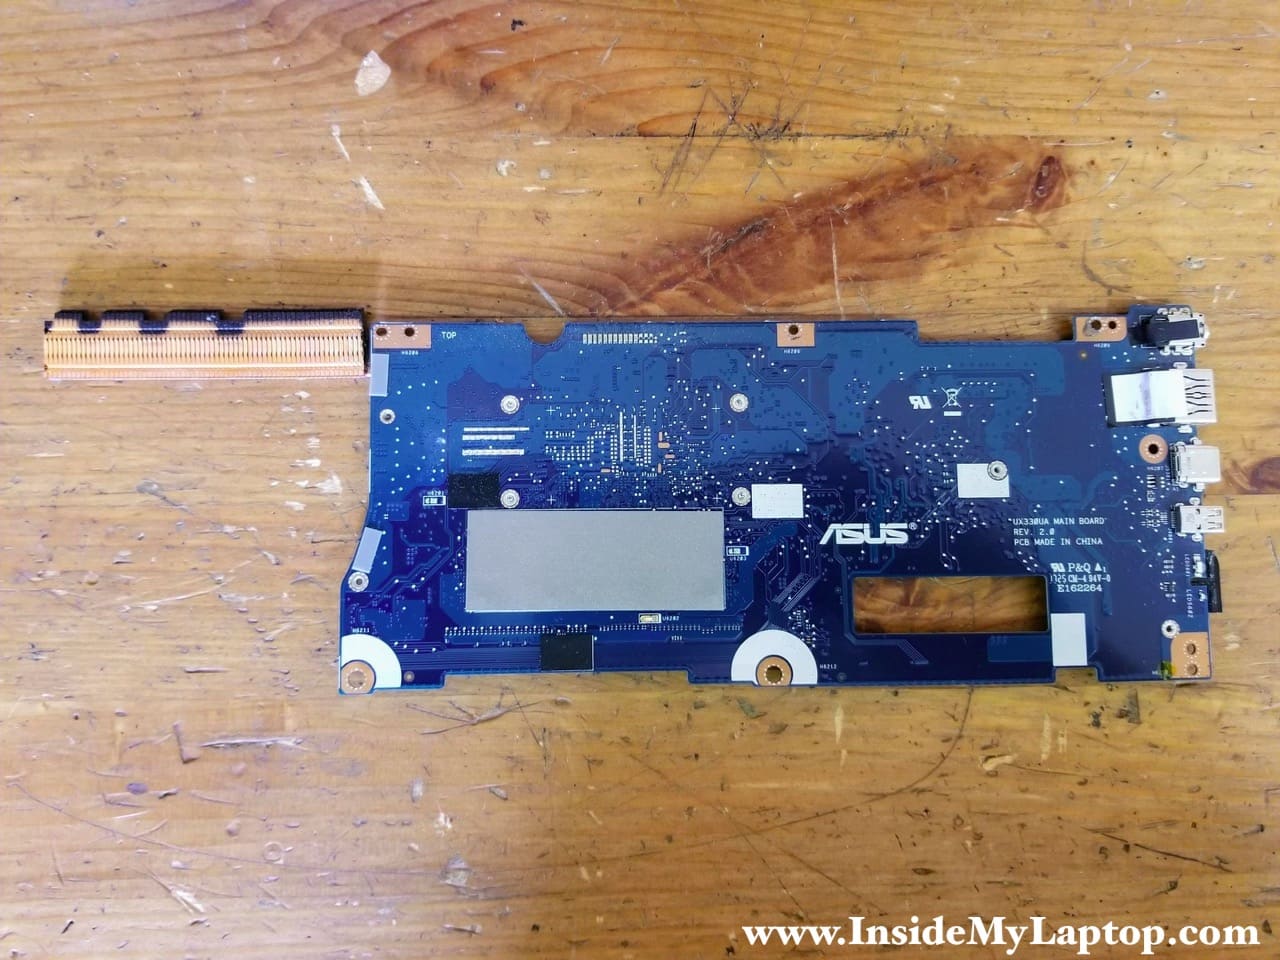
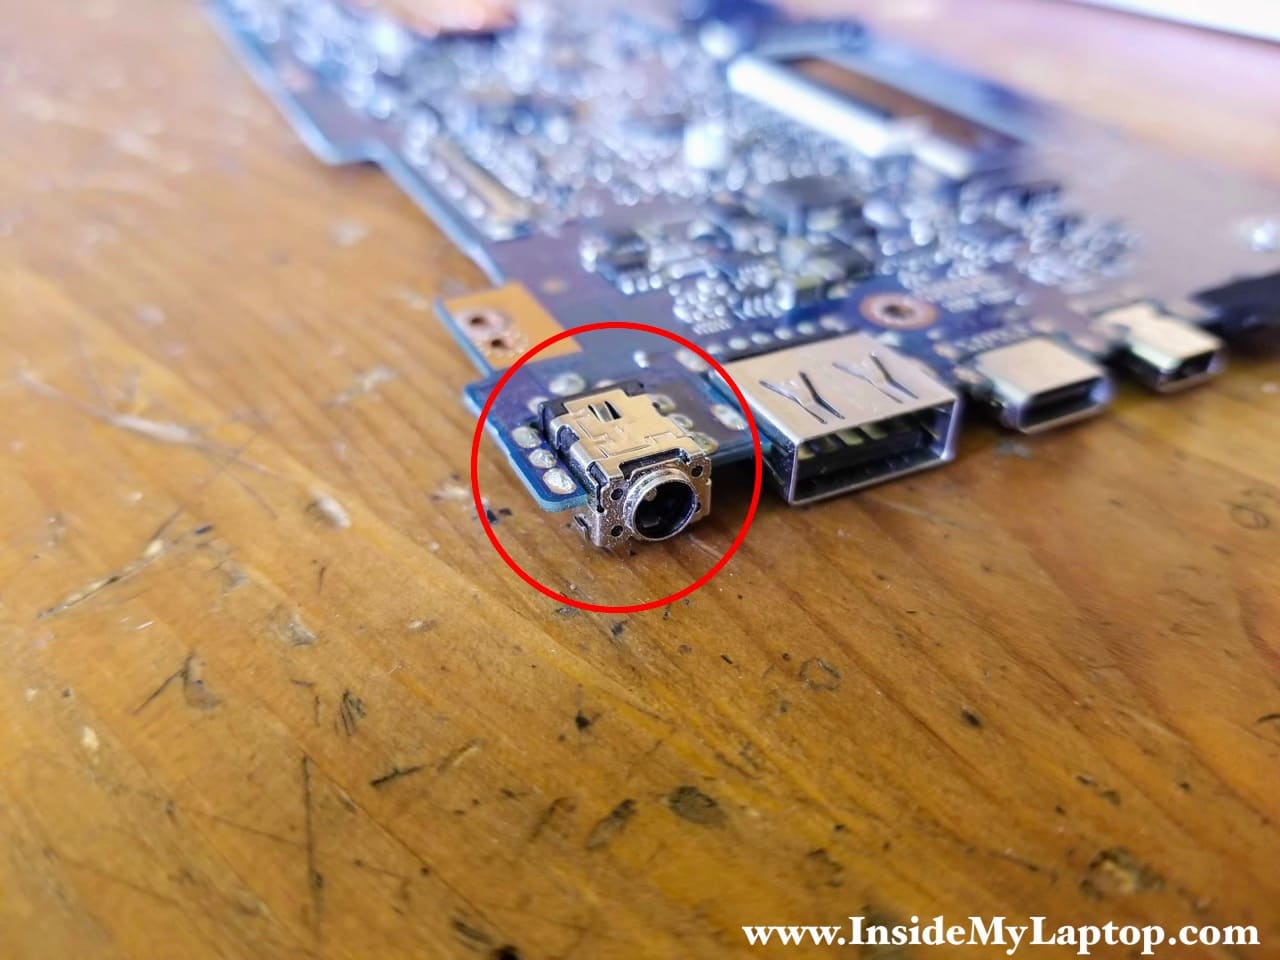
Asus ZenBook UX330 UX330U UX330UA motherboard has the DC power jack soldered.
If the DC jack fails, you’ll need a soldering station to replace the jack.
STEP 18.
Place the laptop upside down with the display opened up on the edge of the desk.
Remove two screws from each display hinge.
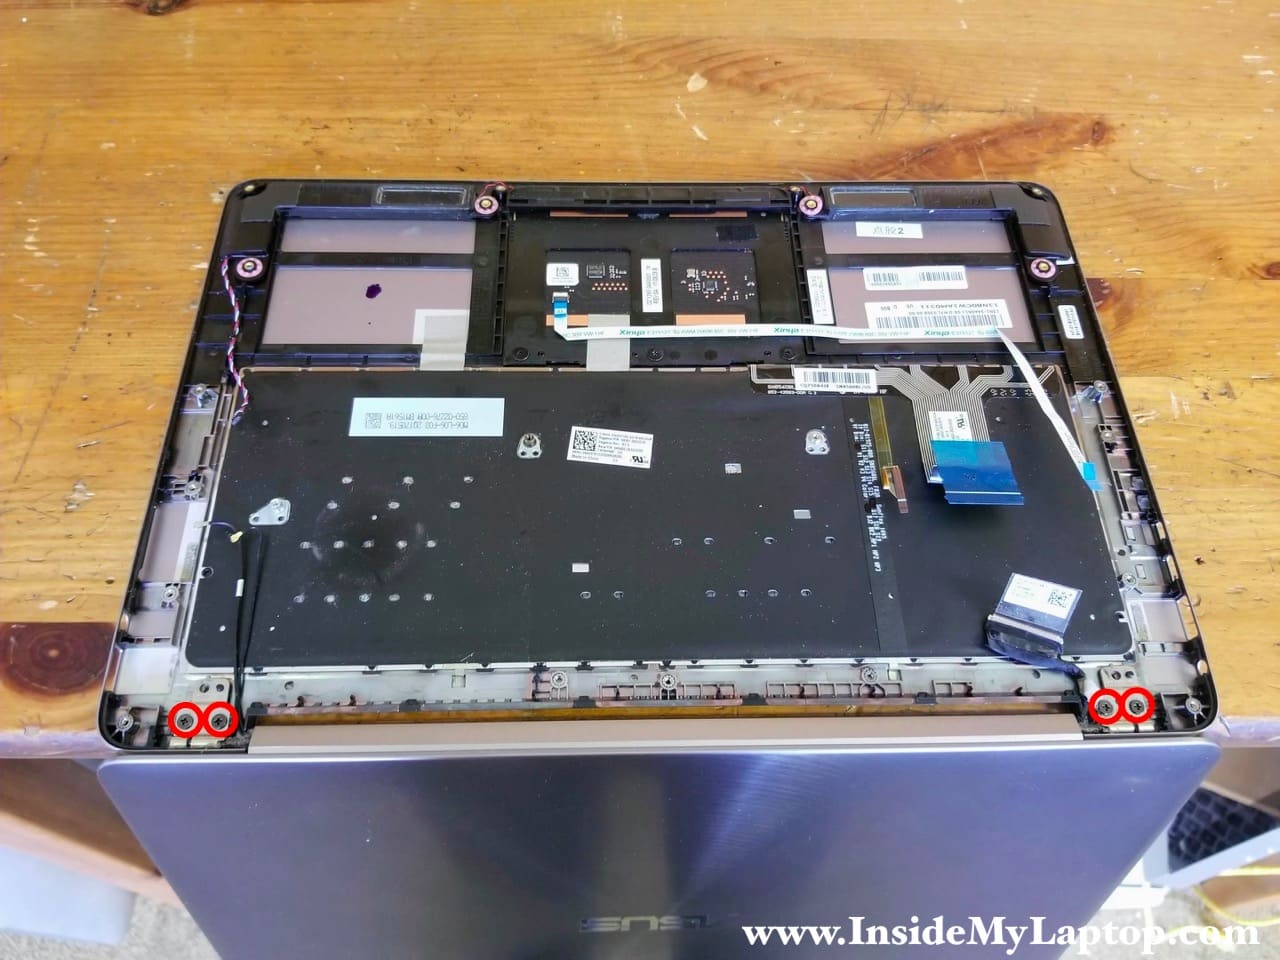
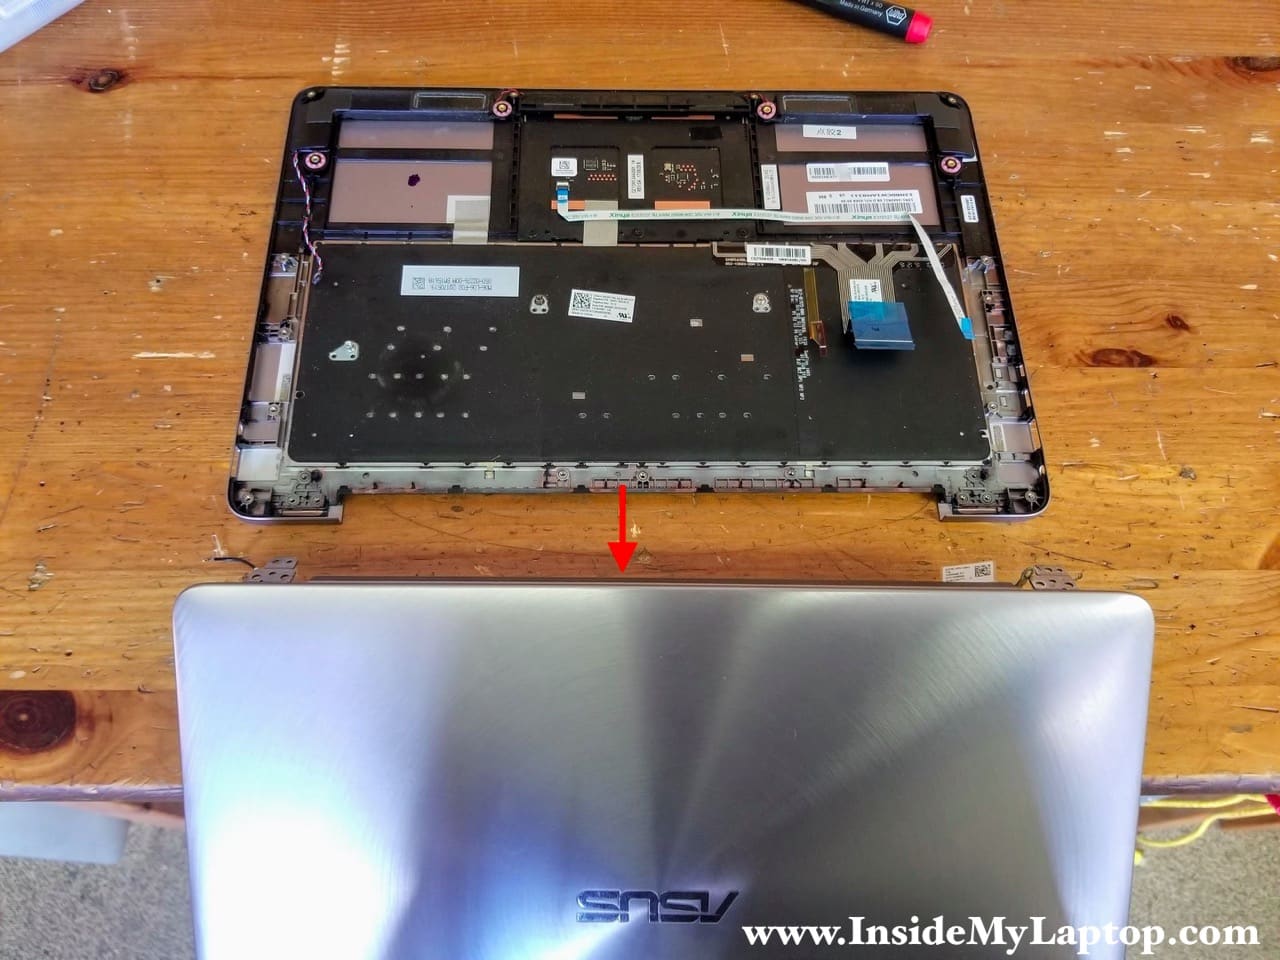
STEP 19.
Separate the display assembly from the top case assembly.
By the way, in Asus ZenBook UX330 UX330U UX330UA laptops the display can be removed only after you remove the motherboard. A part of the right display hinge is mounted under the motherboard.
The keyboard is permanently attached to the top case and cannot be easily removed and replaced. If the keyboard fails, you’ll have to replace the top case assembly or try this repair.
Matthew
hey I dropped my ASUS UX330U at school nothing else was damaged but the screen popped out a little bit and a magnet fell out when it hit the floor. this magnet is quite thick and it seems like its too thick to be on the screen but I still suspect it was suppose to be on the screen. because while running the magnet across the strip where the camera is, and it caught on to something on the right side but the left side the magnet did not catch on.
i would be thankful for you to help me because my father gifted this computer to me and this computer is very special
IML Tech
I don’t remember this model off the top of my head. It’s possible the magnet inside the display panel activates lid close switch – the switch that activates hibernation/sleep mode when the display is closed.
Does it work ok without mange? If yes, just use it as is. Otherwise you’ll have to take apart the display panel and locate the correct place for the magnet.
Matthew
thank you For your help!
Joe
Seemingly the only breakdown photos on the internet for this model. Thank you!! However, I can’t find the CMOS battery! I’ve taken mine apart even further down than your video and there is simply no CMOS battery to be found. Where the heck is it??
IML Tech
I don’t think this laptop has CMOS battery.