
In this guide I show how to disassemble an HP Pavilion 15-dk series laptop.
All disassembly steps should be identical or very similar for the following HP Pavilion gaming laptops:
– 15-dk0056wm, 15-dk0068wm, 15-dk0096wm, 15-dk0055nr, 15-dk0051wm, 15-dk0056nr
– 15-dk1045tg, 15-dk1056wm, 15-dk1035nr, 15-dk1514tx, 15-dk1006na
– 15-dk2097nr, 15-dk2095tx, 15-dk2096tx, 15-dk2076tx, 15-dk2012tx, 15-dk2100tx, 15-dk2075tx
and many other 15-dk configurations…
HP Pavilion 15-dk series design highlights:
– This model supports two hard drives – 2.5″ HDD and M.2 NVMe SSD.
– There are two memory (RAM) slots which is very convenient for RAM upgrade.
– Both cooling fans are attached to the heatsink but they are removable.
– DC power jack is not soldered to the motherboard and can be easily replaced.
For this disassembly you will need the following tools: PH0/PH1 Phillips screwdriver, fine tweezers and case opener tool.
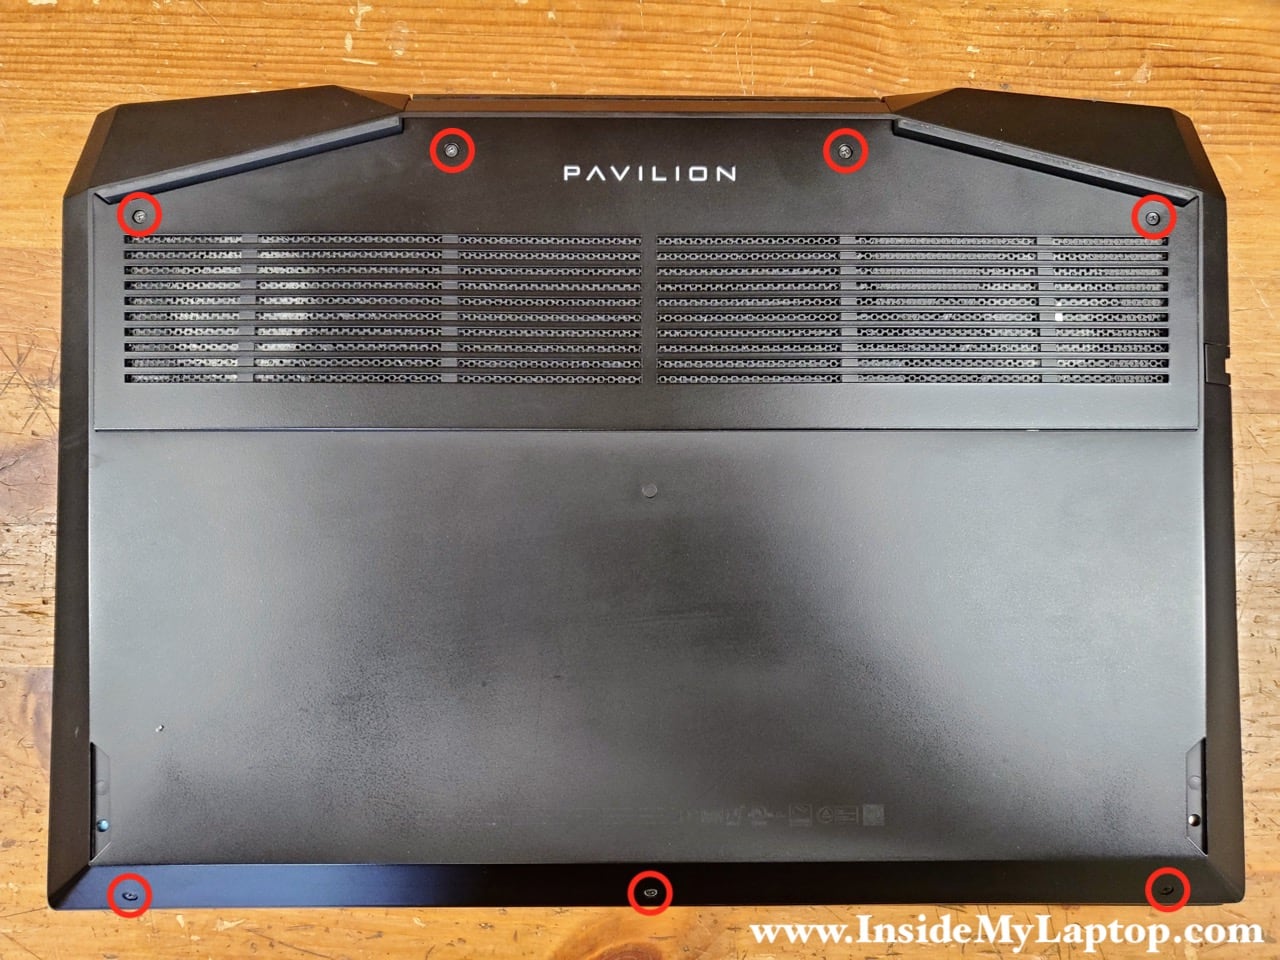
Bottom cover removal
Remove seven screws holding the bottom cover.
Using a case opener tool (or something similar), start separating the bottom cover from the rest of the laptop.
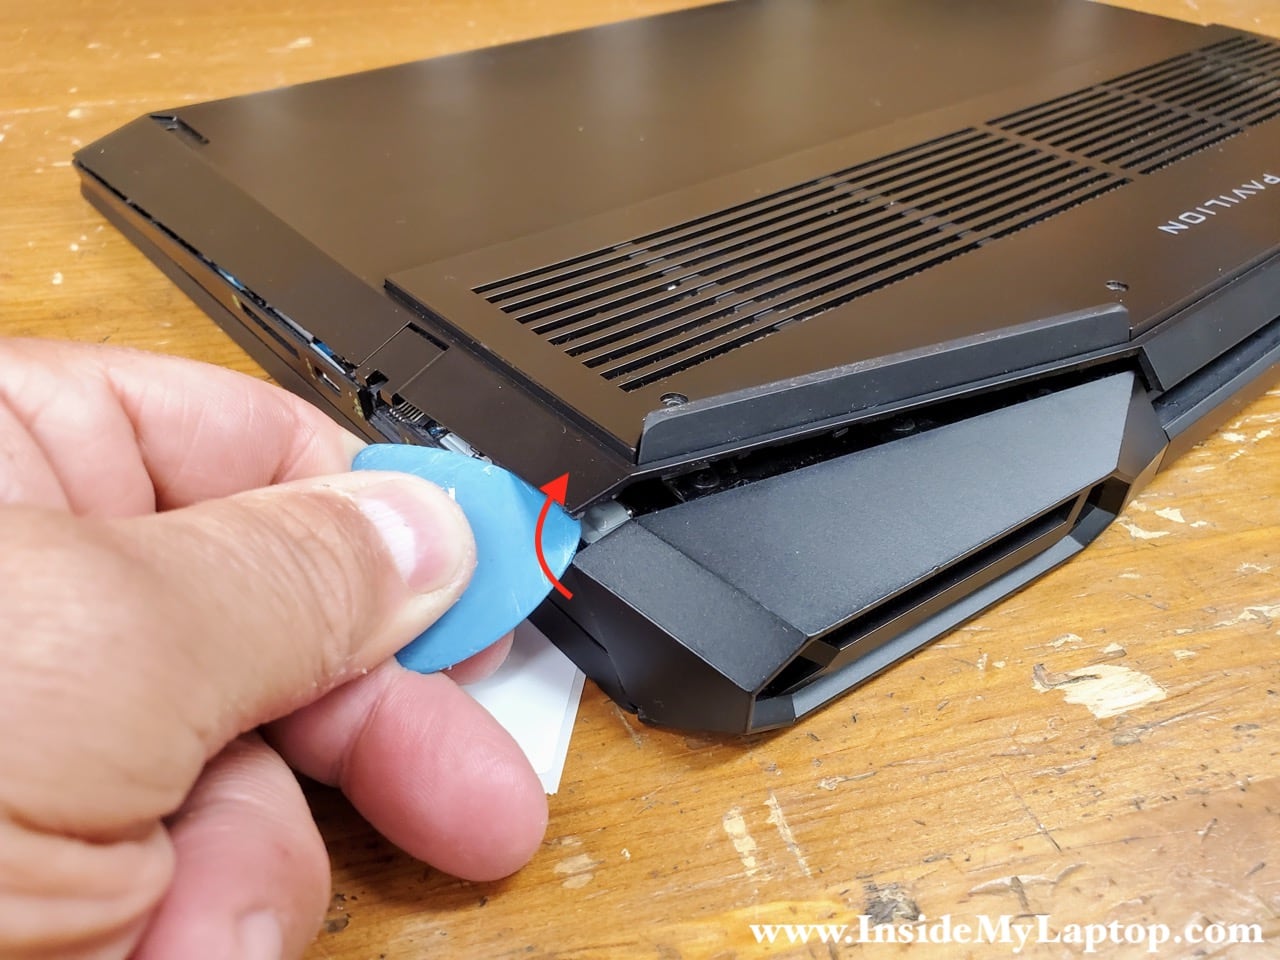
Continue removing the bottom cover with your fingers.
I found it easier to remove the bottom cover if you start working from the back side of the laptop.

Battery removal and replacement
Remove four screws attaching the battery to the laptop case.
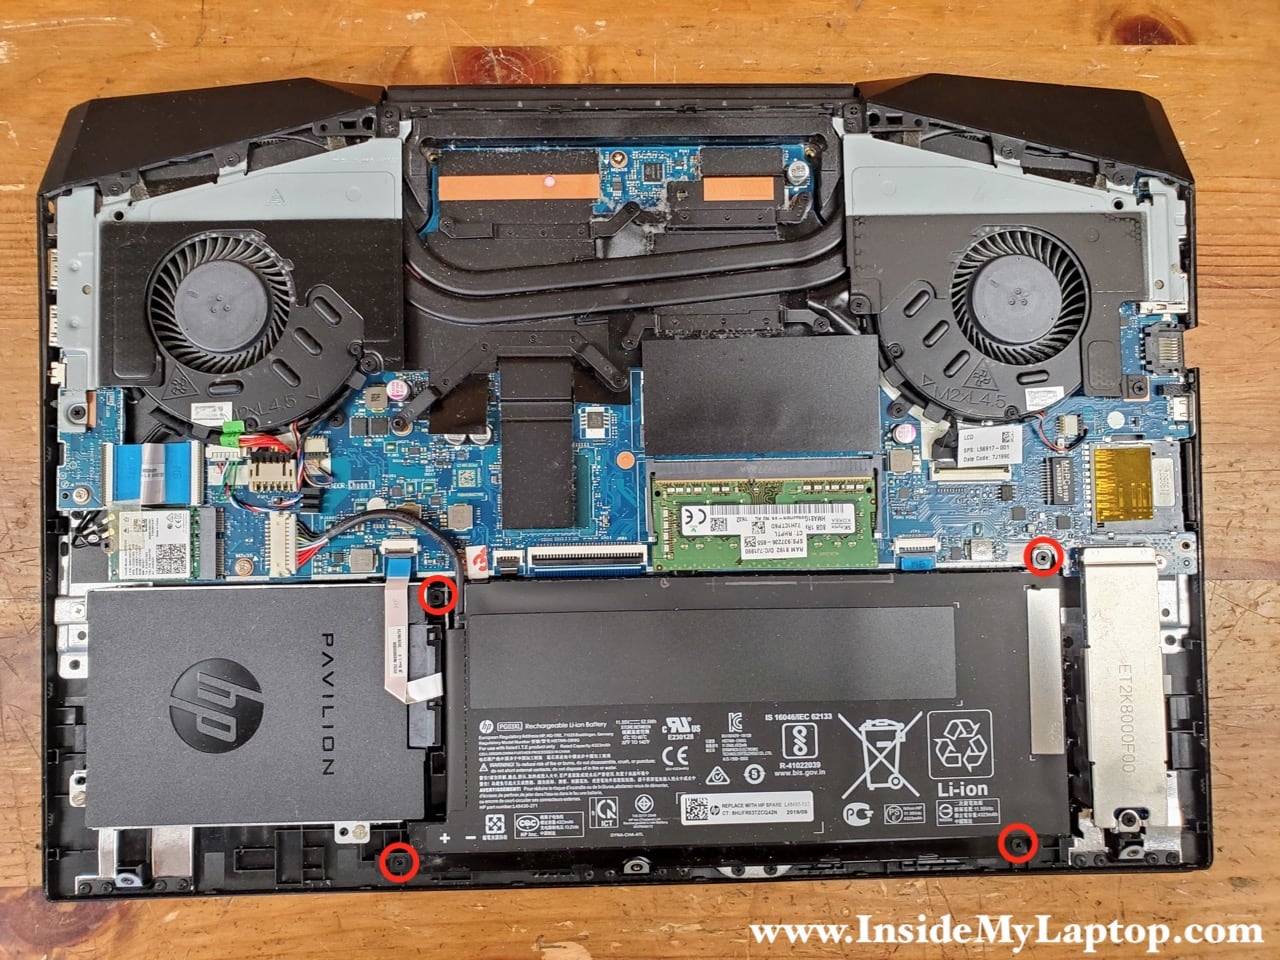
Unplug the battery cable from the connector on the motherboard.
Carefully remove the battery.
Attention. One of the battery screw mounts (circled in yellow) is located under the memory module. Probably it’s better to remove the memory module first just in case or just pay attention while removing the battery.
If you need to replace the battery, you can find replacement using HP spare part number L48495-005 or battery model number PG03XL. I recommend using genuine HP battery.

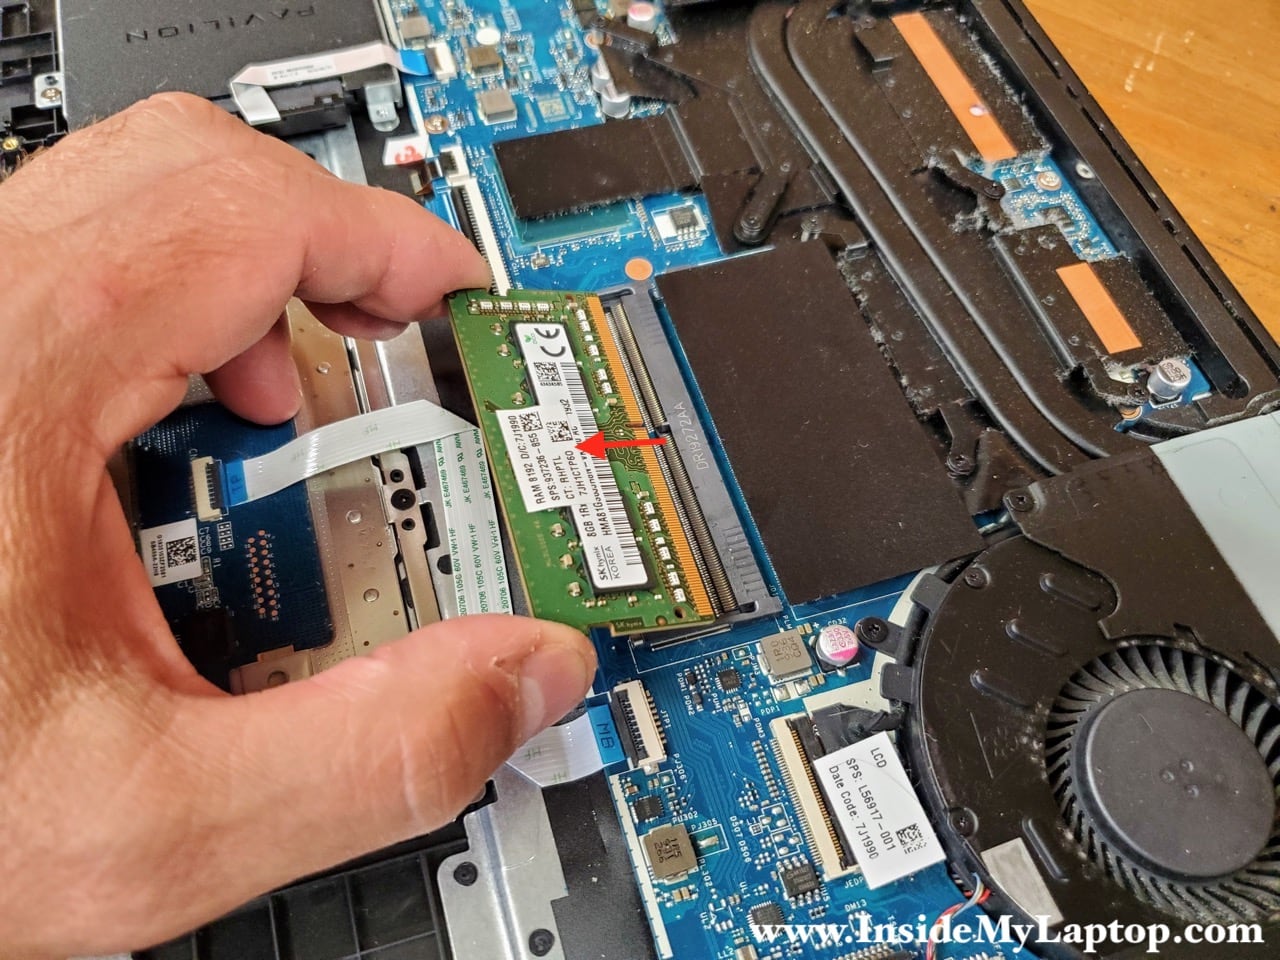
Memory removal and replacement
As I mentioned earlier, this laptop has two memory (RAM) slots. This particular laptop was configured with just one 8GB DDR4 PC4-2666 SoDIMM module.
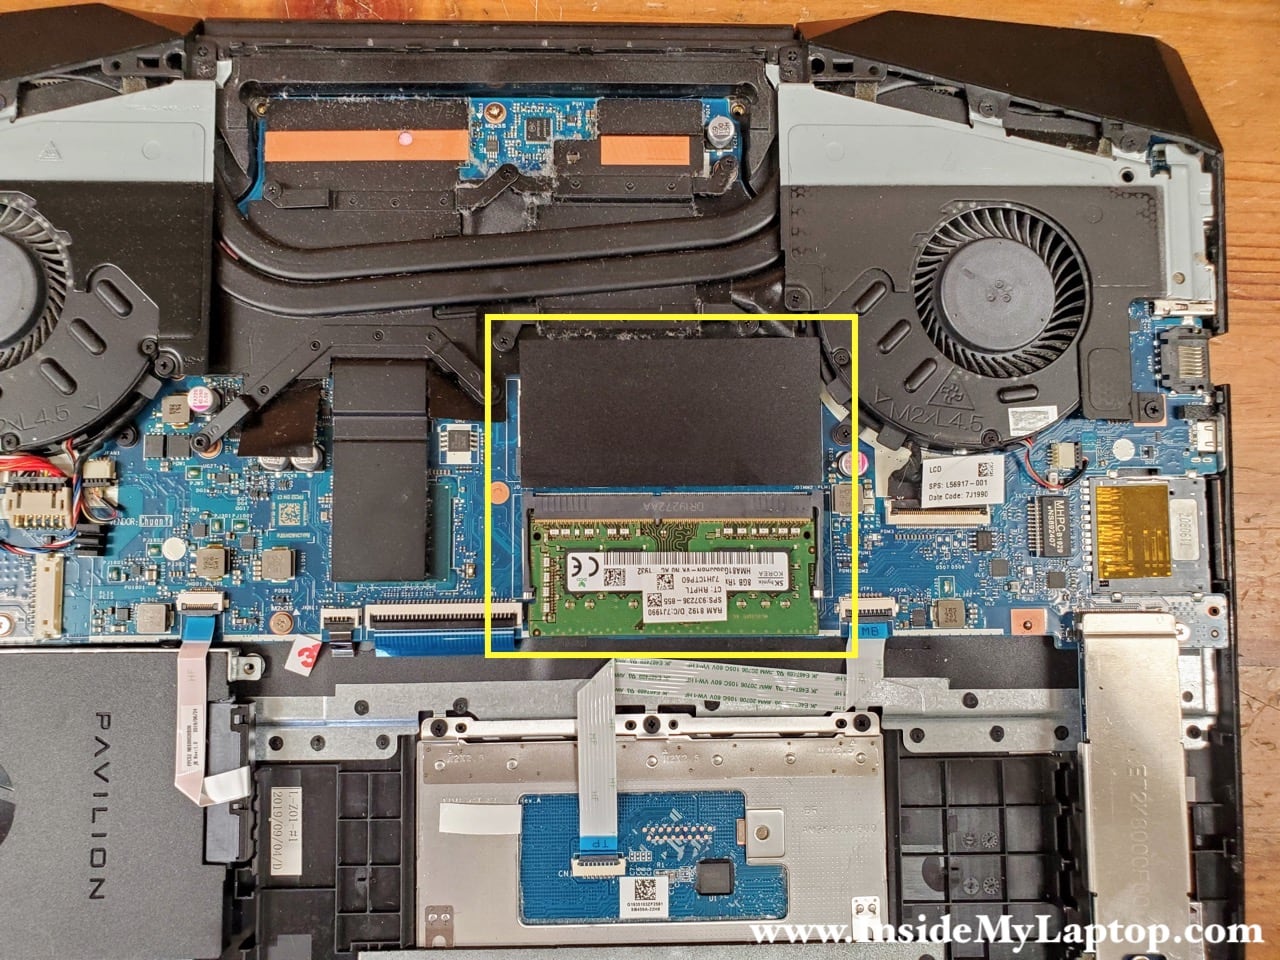
HP Pavilion 15-dk series laptop can be upgraded to 64GB (2x32GB) RAM. You can use DDR4-2666 SoDIMM or DDR4-3200 SoDIIM modules.
I recommend using two identical RAM modules in both slots so it operates in more efficient dual channel mode.
Hard drive removal and replacement
Let’s start with the regular 2.5″ SATA hard drive (HDD).
Even though in this particular laptop I had a dummy HDD placeholder installed, the removal steps will be identical for a real HDD.
Remove three screws attaching holding the HDD brackets and disconnect the SATA cable from the motherboard.
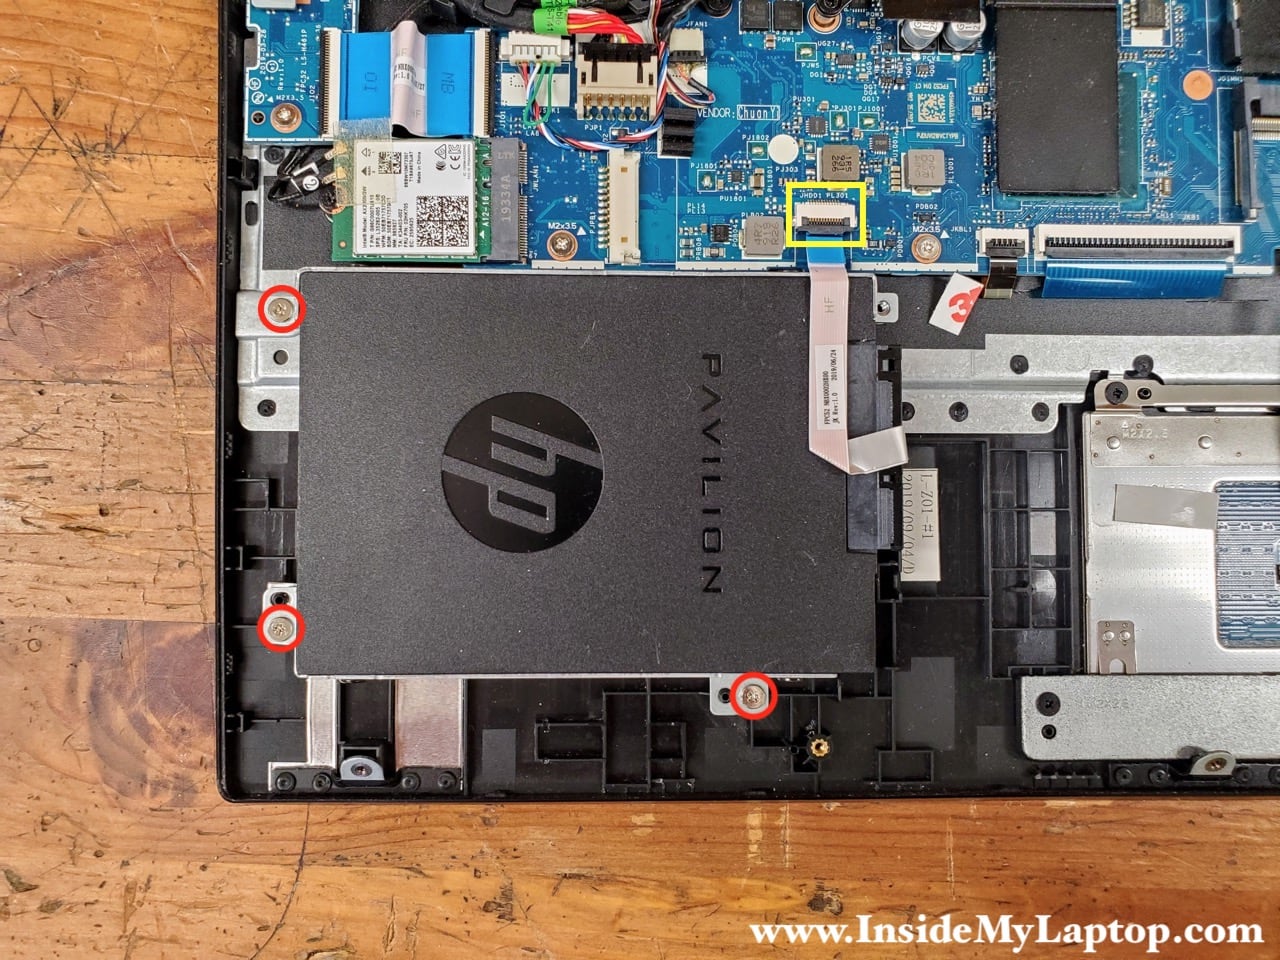
In order to release the SATA cable it is necessary to unlock the connector first. Lift up the locking tab (red arrow) to unlock the connector.

Remove the 2.5″ SATA hard drive (dummy placeholder in my case).

If you want to install a real hard drive instead, it is necessary to transfer the SATA cable and both mounting brackets to the new drive.
Here you can use any third party 2.5 SATA hard drive or preferably solid state drive.

SSD removal and replacement
The sold state drive is mounted under the aluminum cover. Remove one screw holding the cover and the SSD in place.
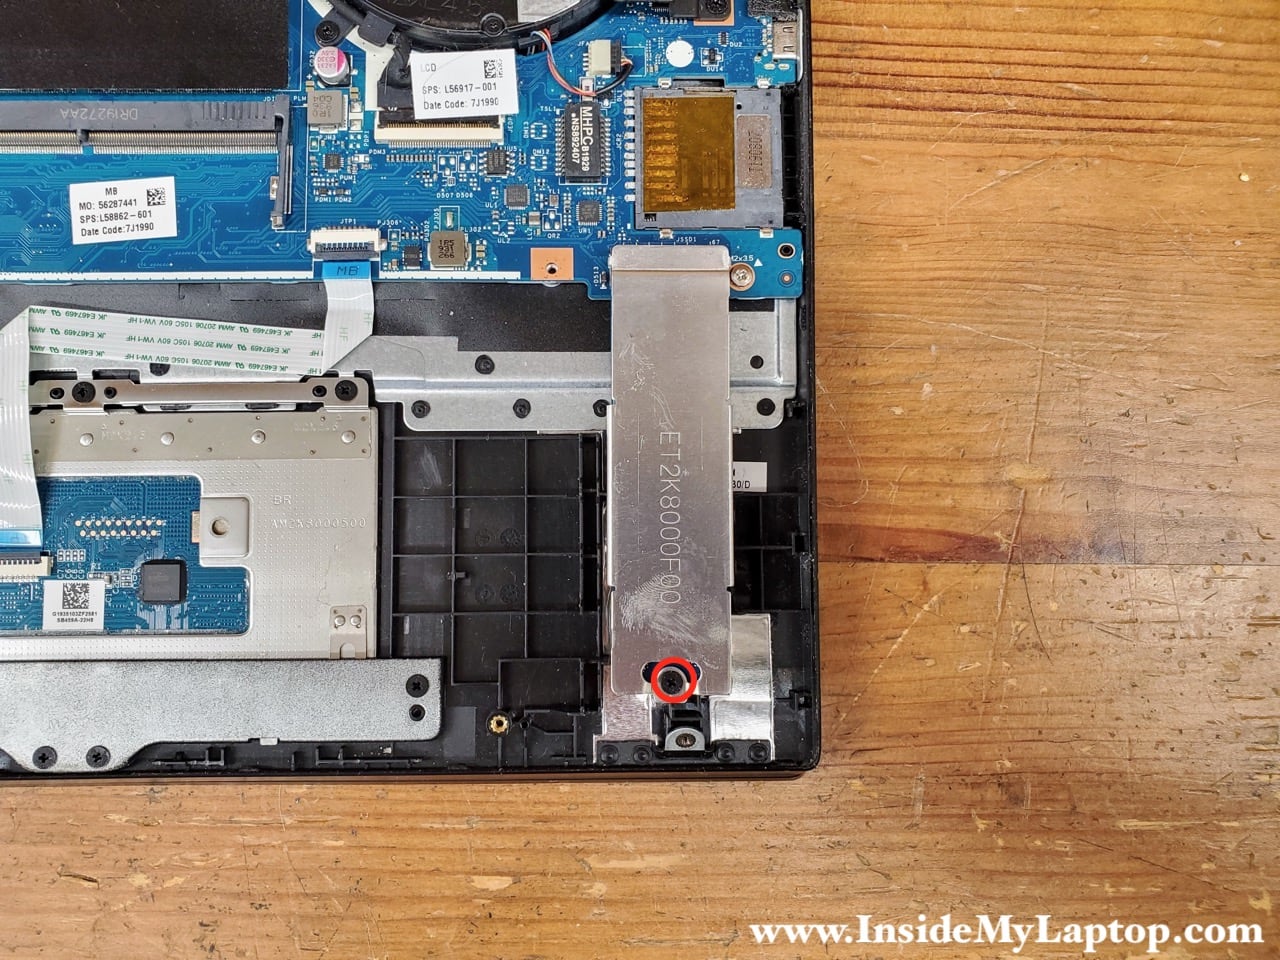
Remove the SSD cover.

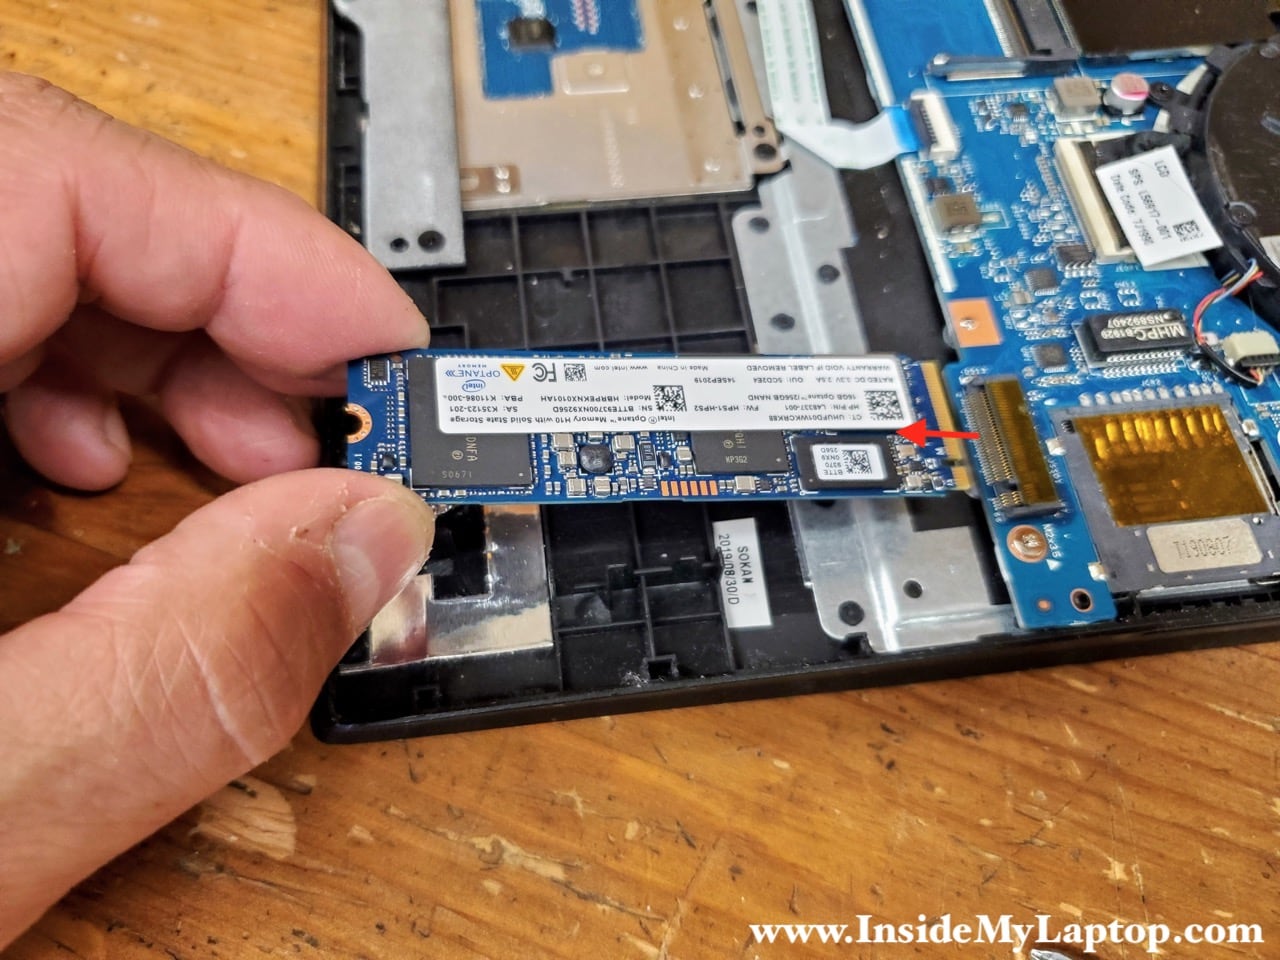
Pull the SSD out of the slot and remove it.
HP Pavilion 15-dk series laptop uses M.2 PCIe NVMe solid state drive type 2280.
In this laptop we have 256GB Intel PCI-Express 3.0 x4 NVMe SSD model: HBRPEKNX0101AH.
Cooling fans removal and replacement
In order to remove the cooling fans it’s necessary to remove the entire heatsink assembly. Both fans are attached to the heatsink.
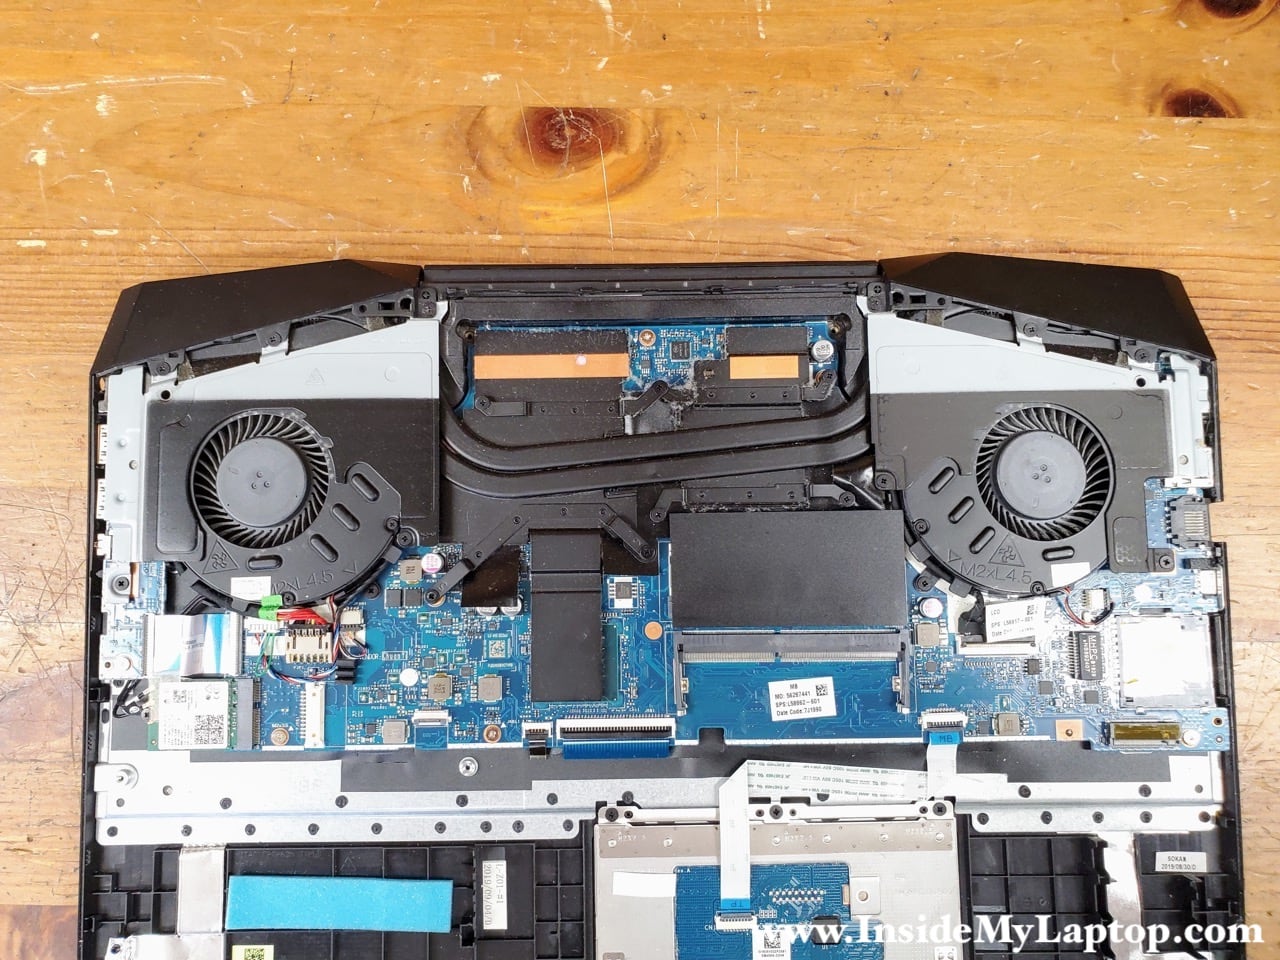
Let’s start disassembly with the right side (it’s the right side when the keyboard is facing up).
Remove three screws securing the right hinge cover.
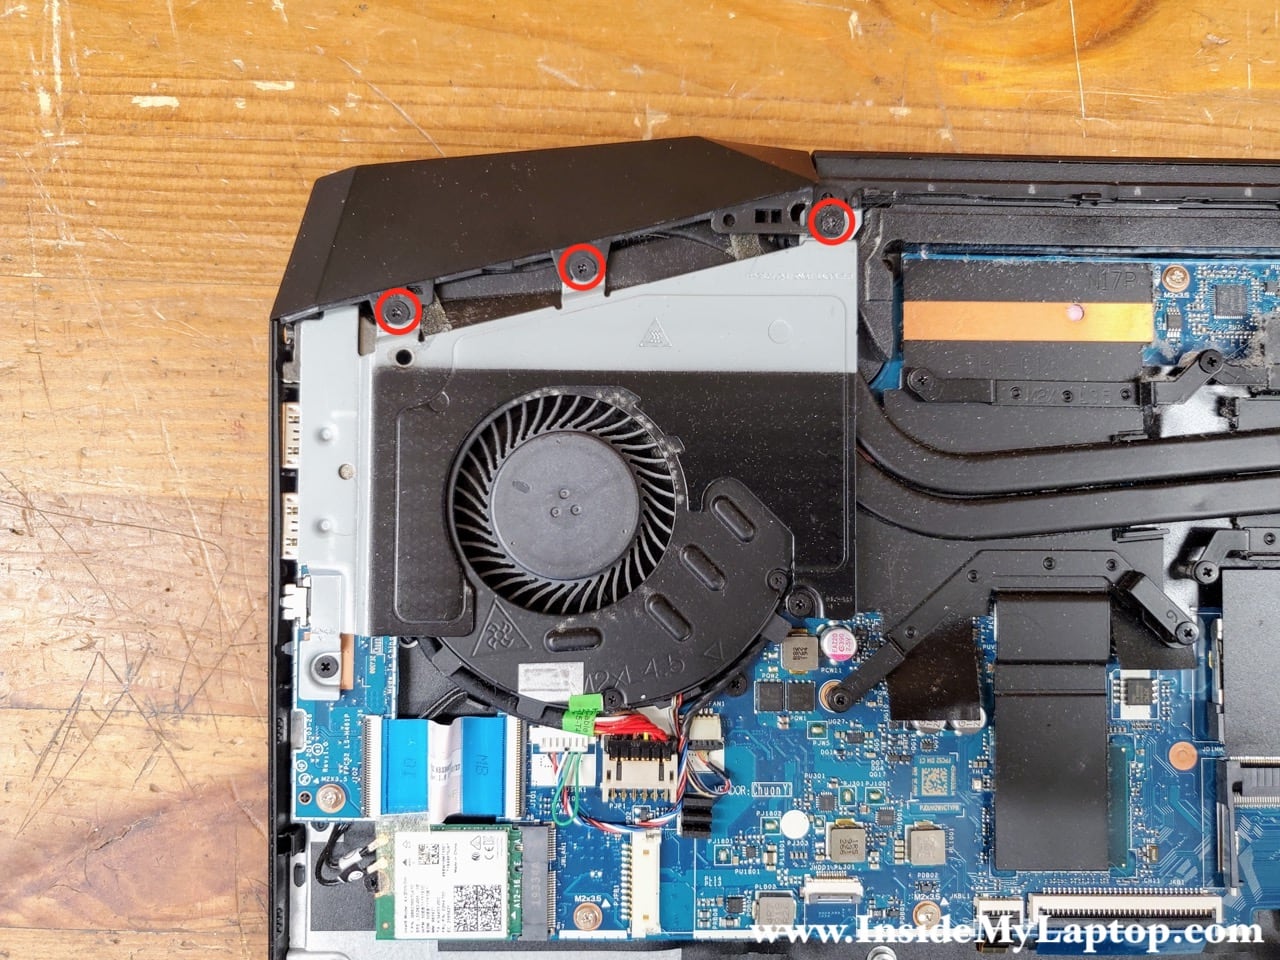
Remove the right hinge cover.

Remove three screw securing the right hinge bracket.

Remove the right bracket.

Remove three screws from the left hinge cover.

Remove the left hinge cover.
Here’s HP part number for the left and right hinge covers: L56911-001.

Remove three screws from the left hinge bracket.

Remove the left bracket.

Remove seven screws attaching the heatsink assembly to the motherboard.
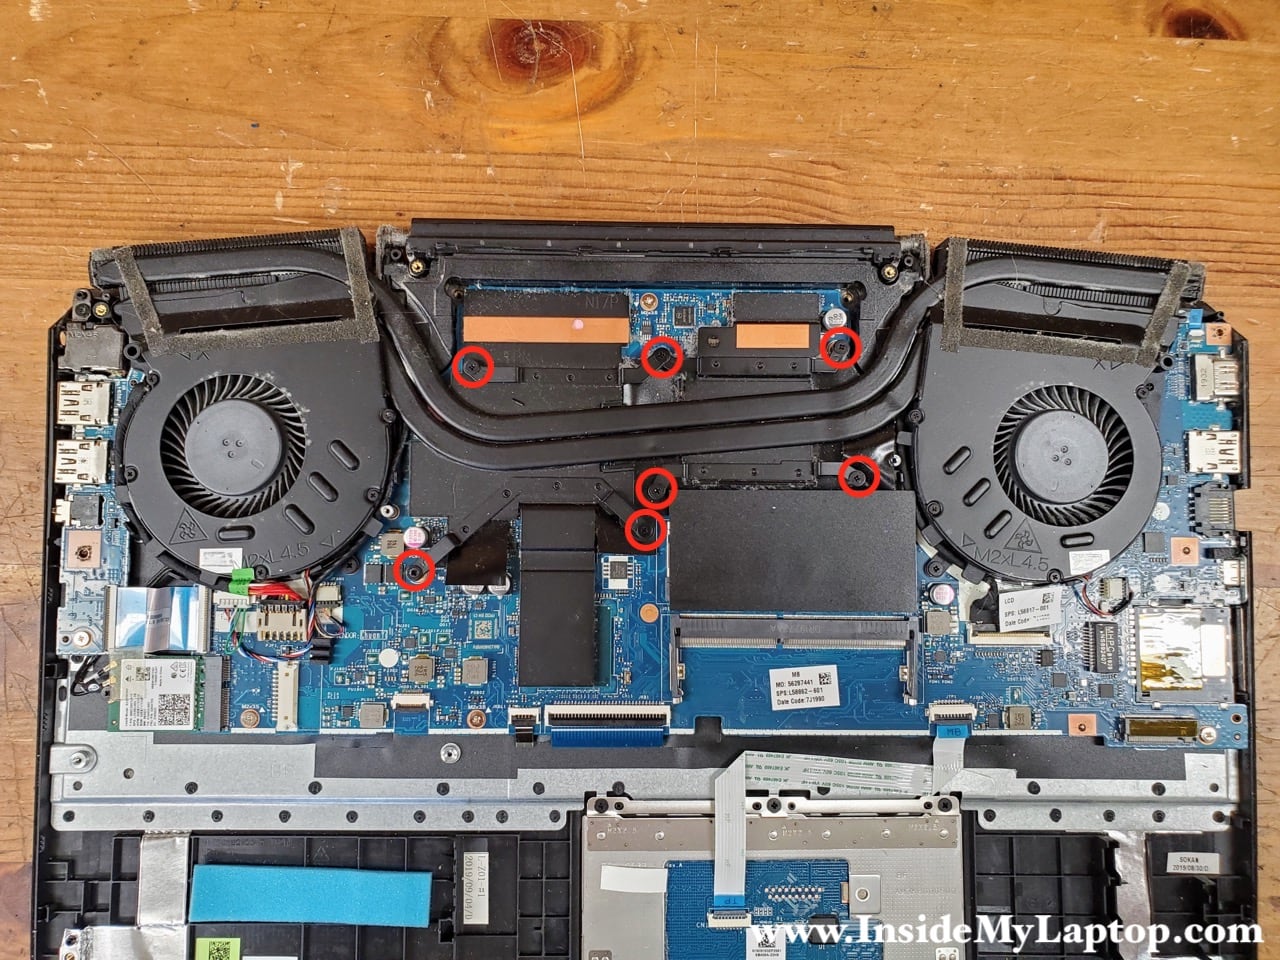
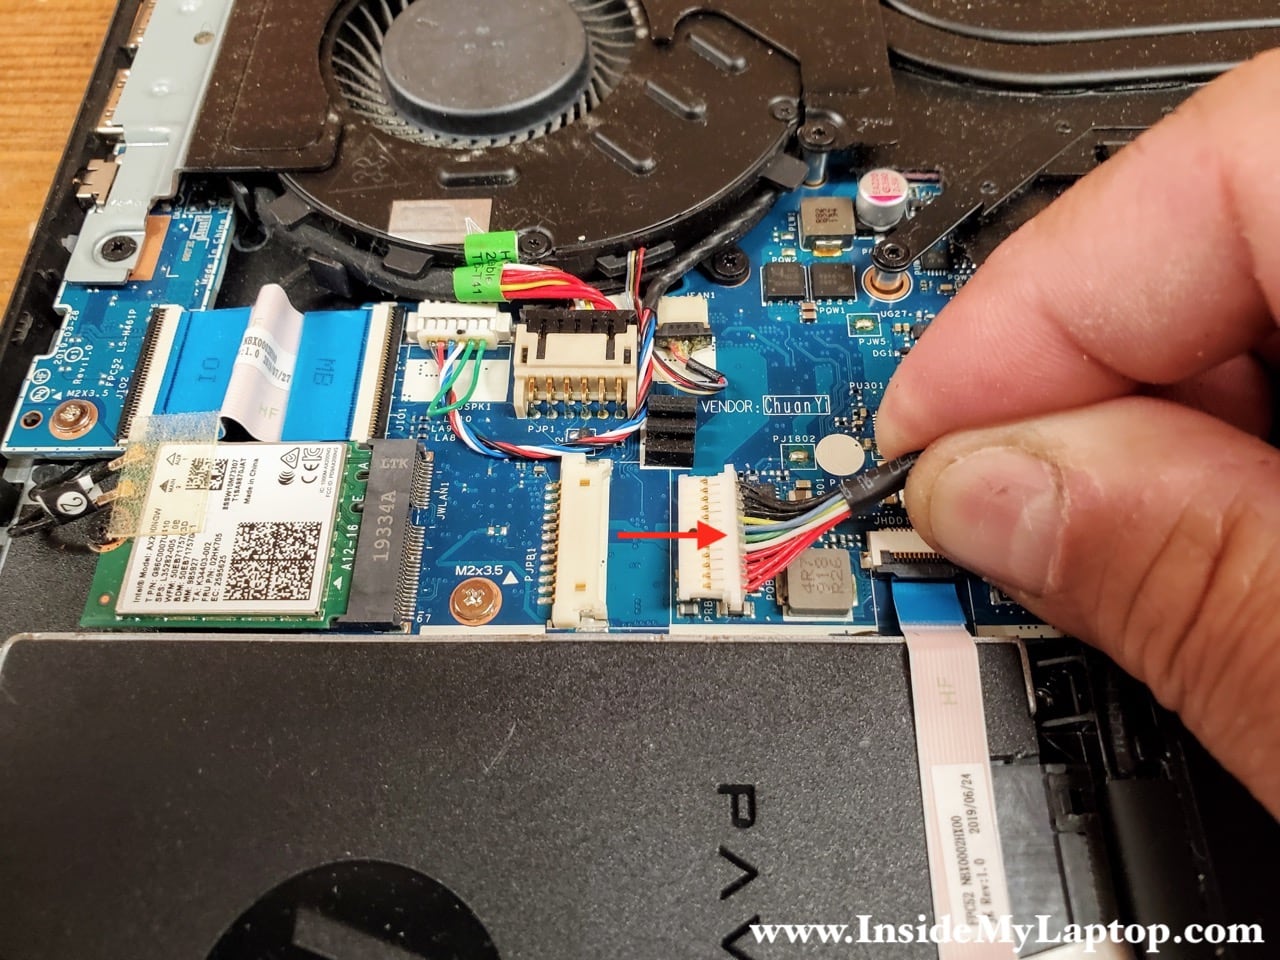
There are a few cables routed on the left and side sides of the fan.
Separate the DC jack cable, speaker cable and wireless antenna cables from the fan (yellow arrows).
Disconnect the right fan cable from the motherboard (red arrow).

Separate the display cable from the fan (yellow arrow). Disconnect the left fan cable from the motherboard.

Carefully lift up the heatsink assembly to separate it from the CPU and GPU chips.
Remove the heatsink assembly from the laptop.

Here’s the picture of the other side of the heatsink assembly.

Remove five screw attaching the right fan to the heatsink.

Now you can remove the right fan.

Remove four screws from the left fan and remove the fan.

Now you can clean up the heatsink and replace fans if necessary.
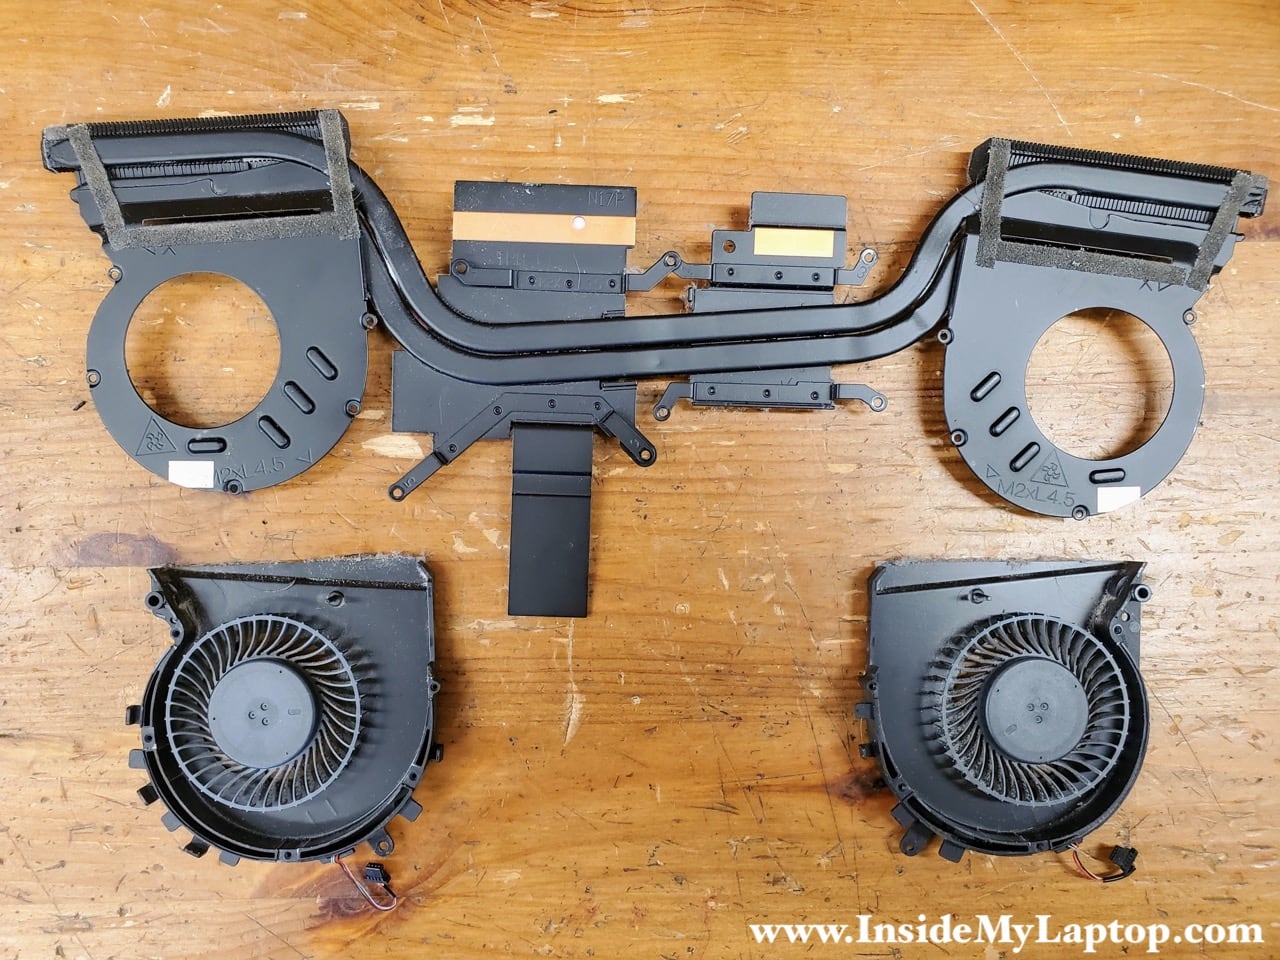
You can find replacement fans if you make a search using this HP spare part number: L56900-001.

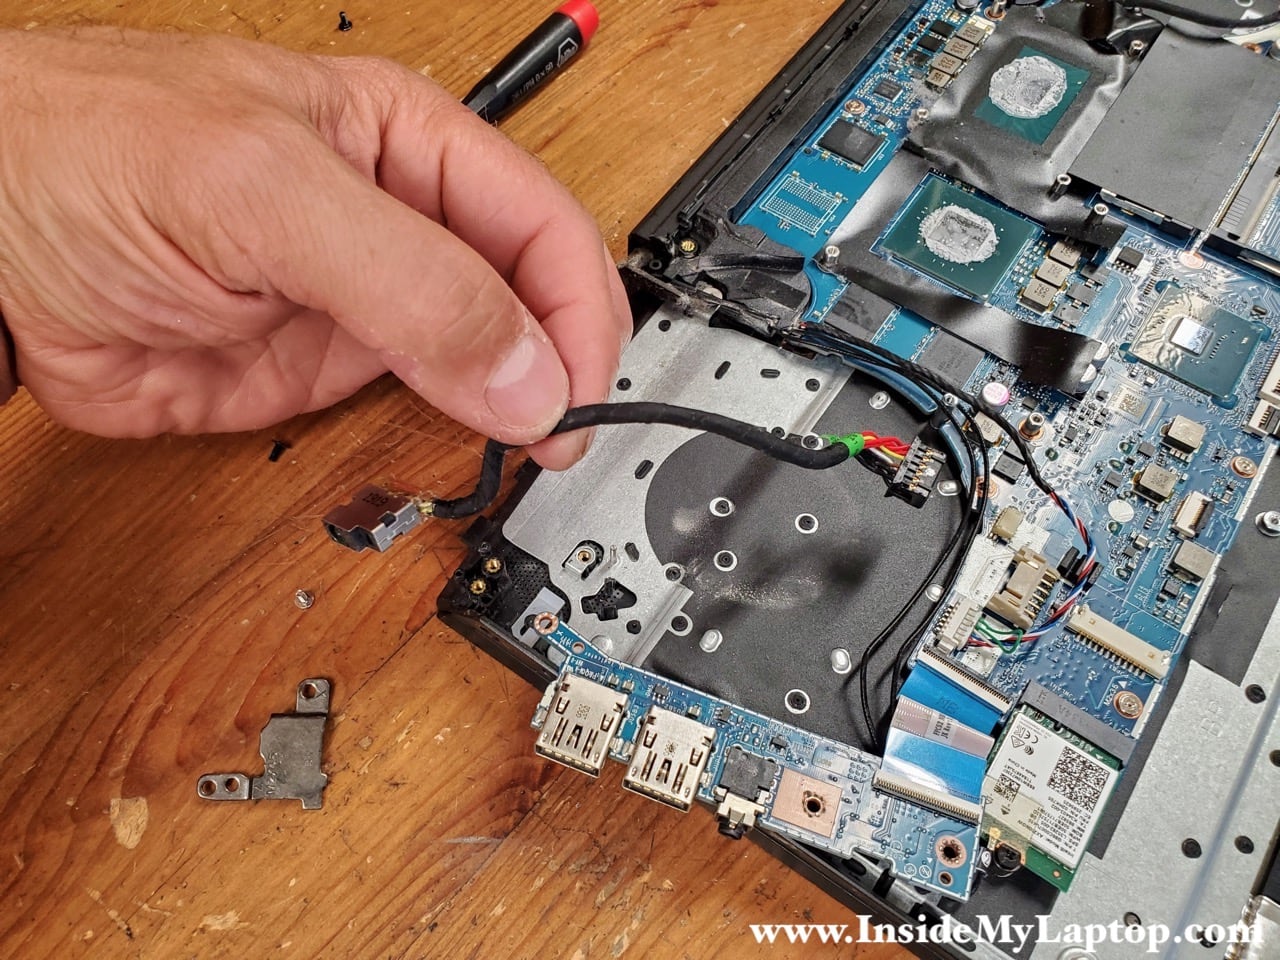
DC jack cable removal and replacement
In HP Pavilion 15-dk series laptop the DC jack is attached to a cable and can be removed/replaced without desoldering.
Remove one screw from the metal bracket holding the DC jack in place.
Remove one screw from the USB/audio board.

Remove the DC jack bracket.

Move the USB/audio board aside. Lift up and remove the DC jack cable (power connector cable).
Here’s part number for the DC jack cable: L56904-001.
Ahmed
Nice work