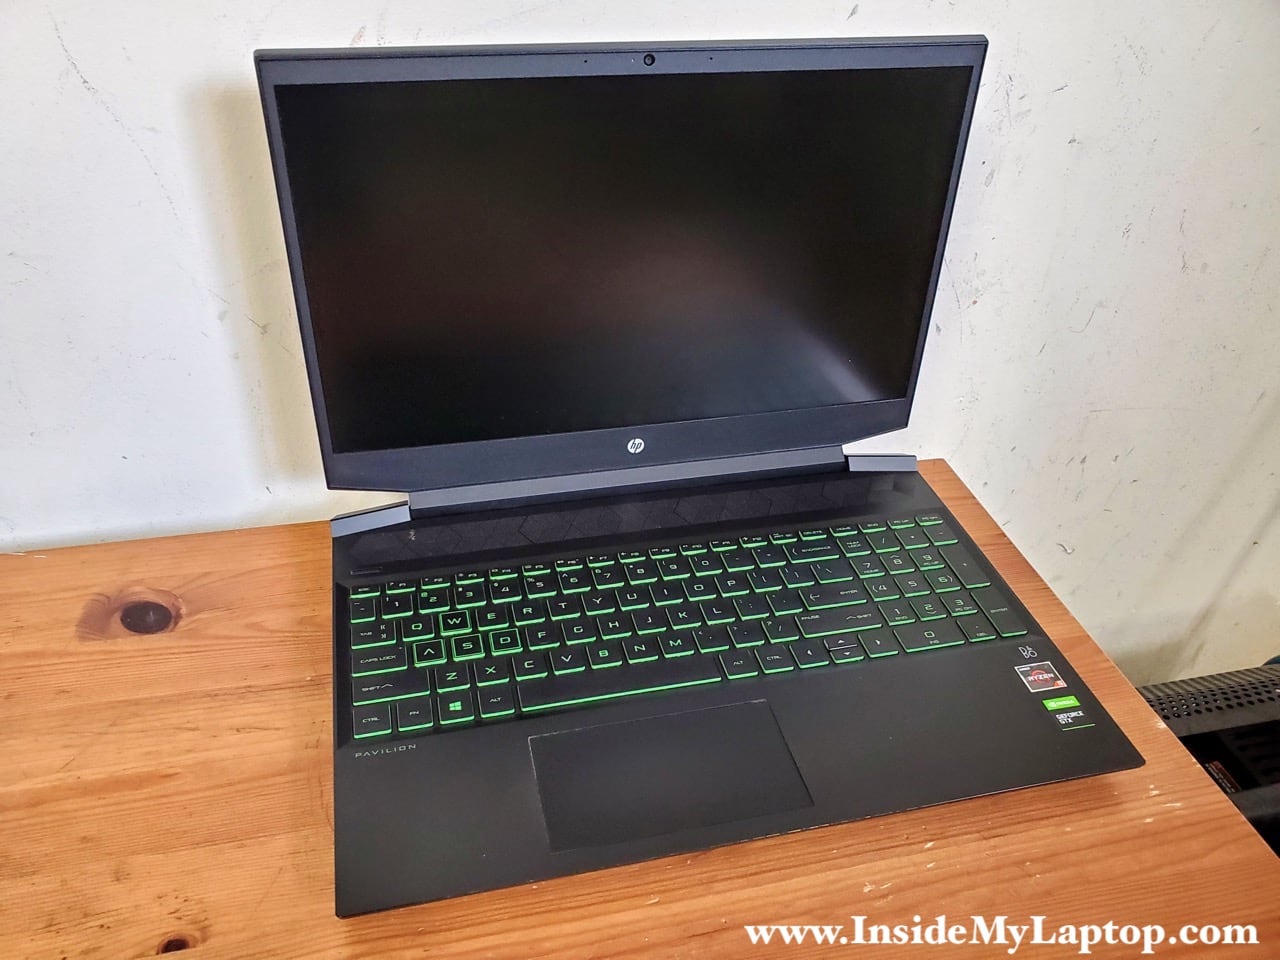
In this guide I explain how to disassemble an HP Pavilion 15-ec series gaming laptop. In this particular case I’m taking apart an HP Pavilion 15-ec-0751ms model.
All disassembly steps should be identical or very similar for the following models:
– 15-ec0013dx, 15-ec0095nr, 15-ec0043ax, 15-ec0035au, 15-ec0001ca, 15-ec0079ax
– 15-ec1010nr, 15-ec1073dx, 15-ec1023ax, 15-ec1512ax, 15-ec1050ax, 15-ec1023ax
– 15-ec2121nr, 15-ec2021nr, 15-ec2097nr, 15-ec2150ax, 15-ec2008ax, 15-ec2004ax, 15-ec2146ax, 15-ec2145ax, 15-ec2075ax, 15-ec2076ax
– and many more models…
For this disassembly I’ll be using these tools: PH0 Phillips screwdriver, case opener tool, tweezers.
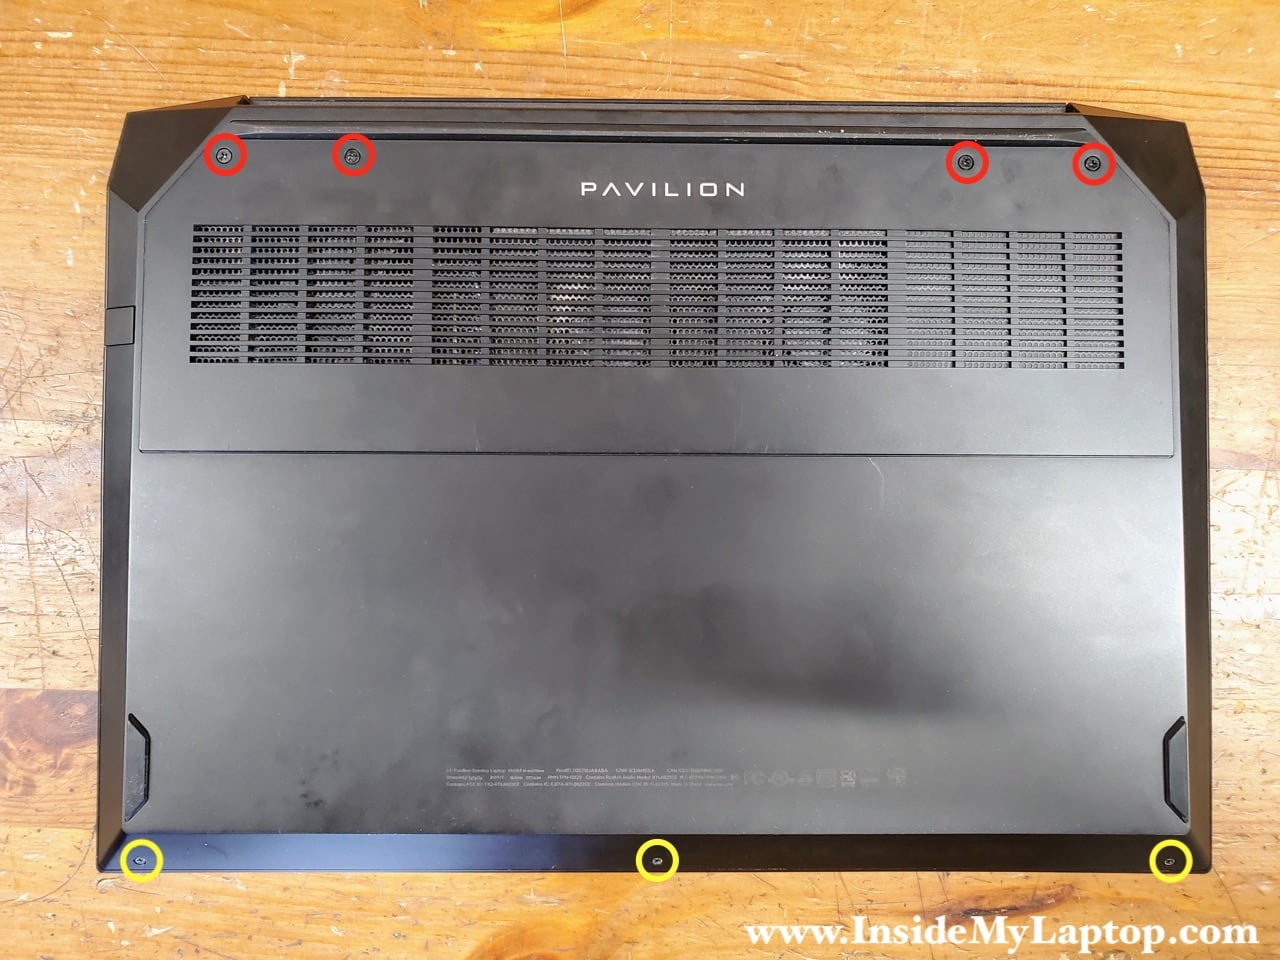
Bottom cover removal
Remove four long screws from the top and three short screws from the bottom.
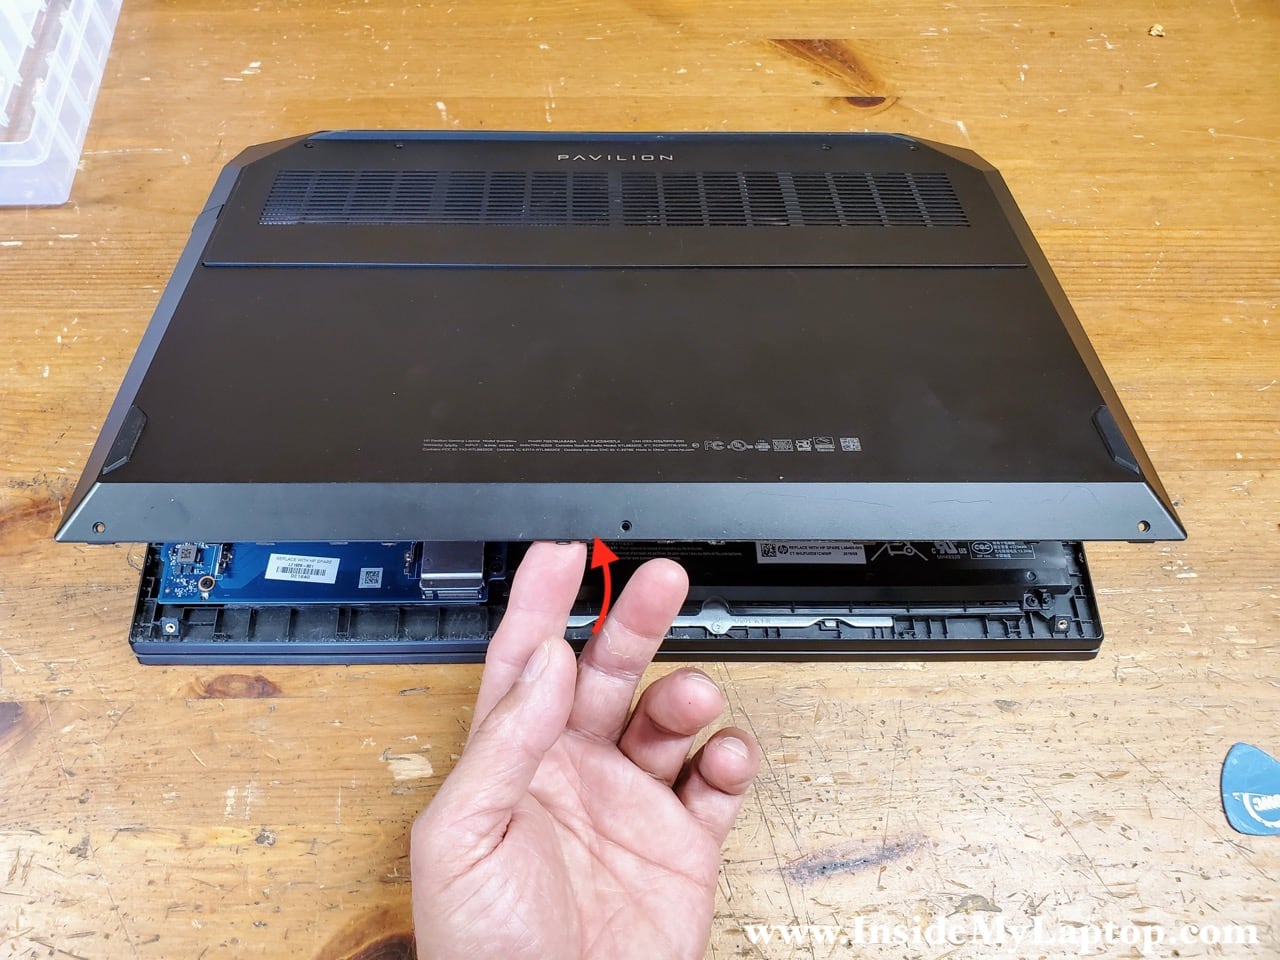
Insert a case opener tool between the bottom cover and the palmrest assembly. Pry up the bottom cover.

Continue removing the bottom cover with your hands.
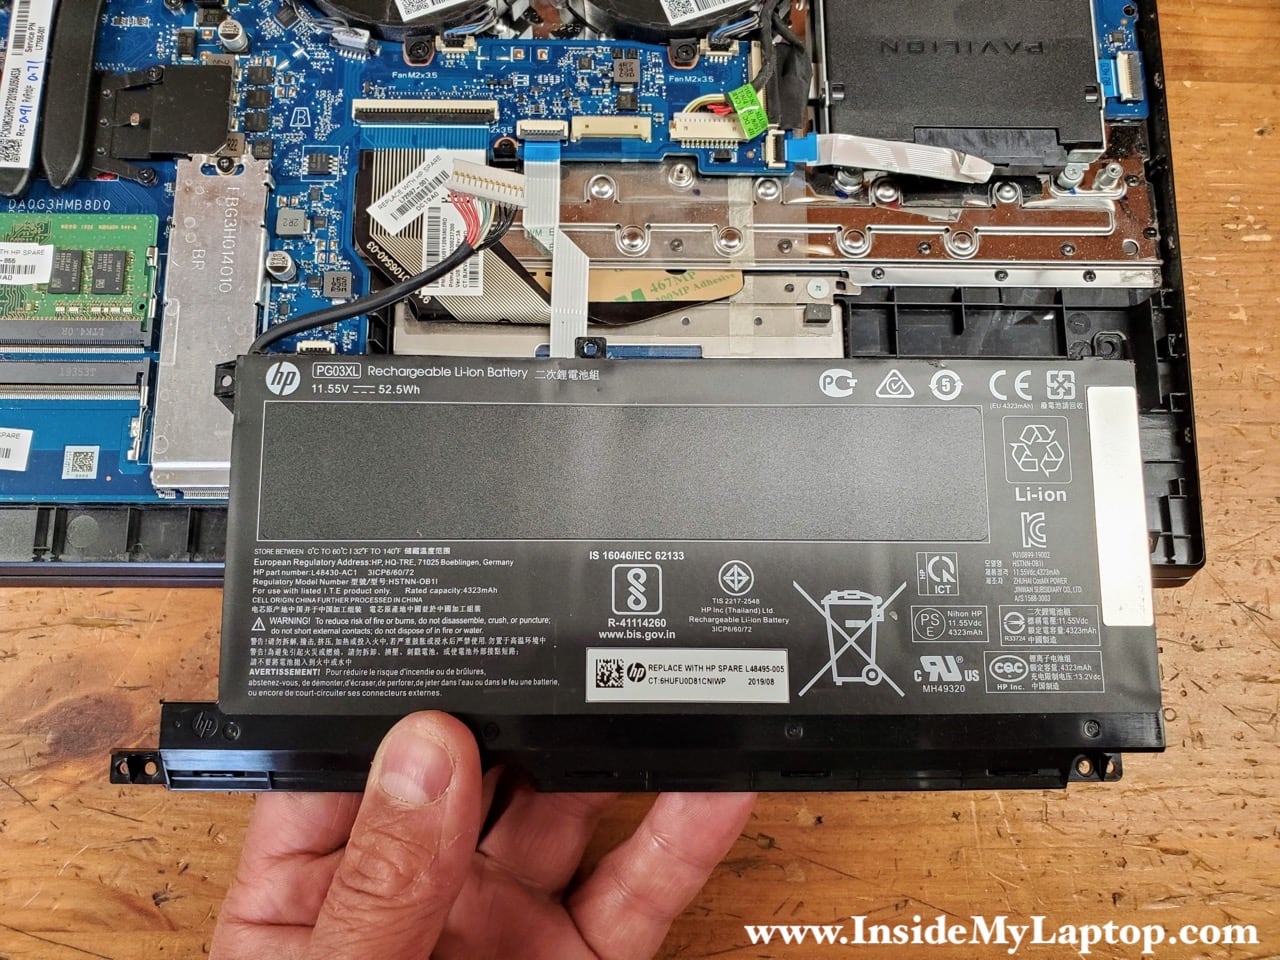
Battery removal and replacement
Remove four screws holding the battery in place.

Unplug the battery cable from the connector on the motherboard.
Remove the battery.
If you need to replace the battery, you can find a replacement using this model number PG03XL or HP spare part number L48495-005. Use genuine HP battery if possible.
Hard drive removal and replacement
Let’s start the hard drive removal with releasing the SATA cable.

Here’s how to disconnect the connector and release the hard drive cable. Lift up the right side of the connector (red arrow) to unlock it. After that lift up and remove the cable (yellow arrow).
Remove three screws holding the hard drive in place.
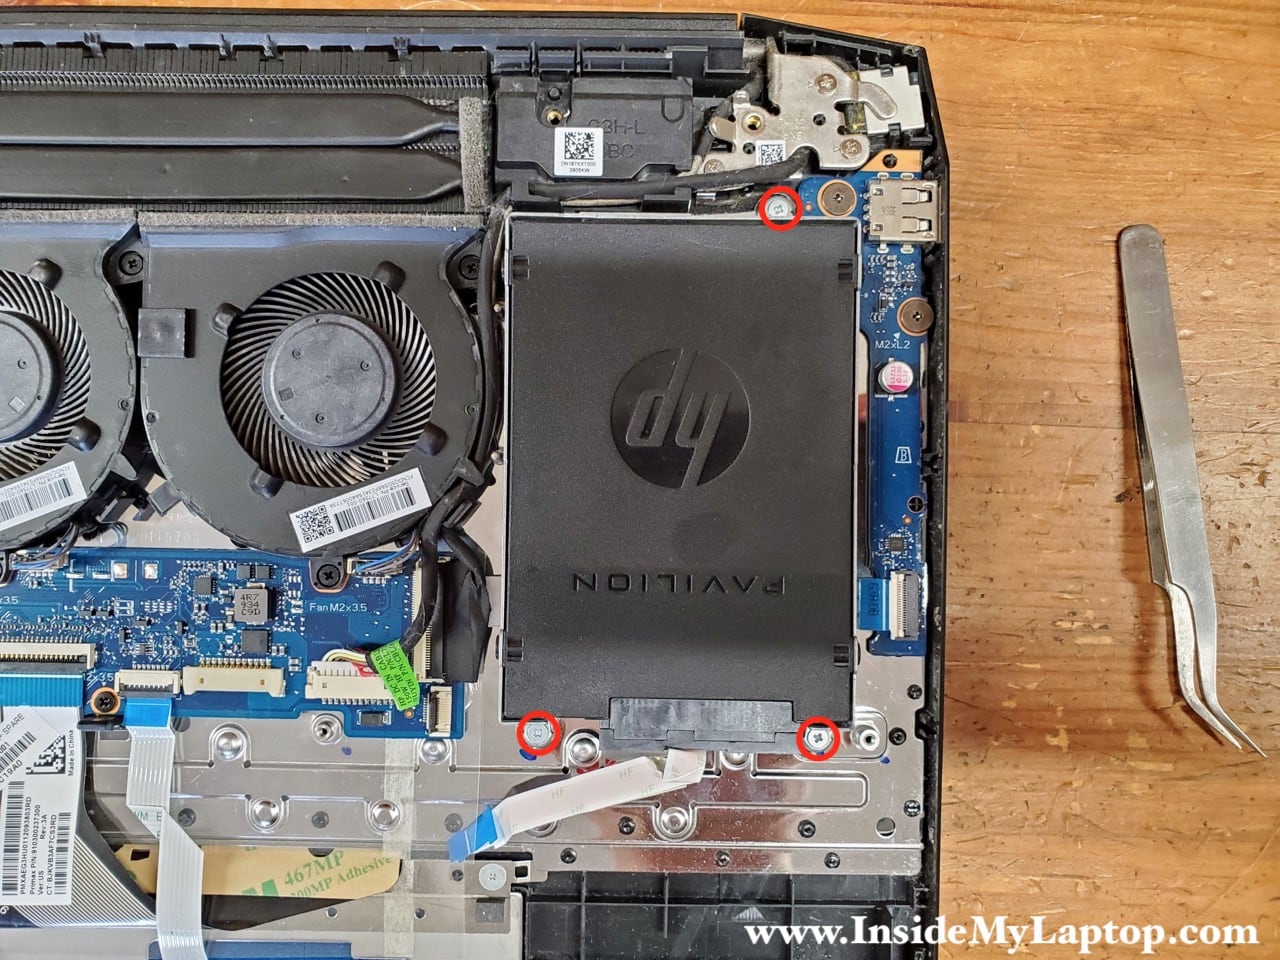
Remove the hard drive.

In this particular laptop there was no real hard drive installed, it was just a place holder.
When you install a real drive instead, you’ll have to transfer the SATA cable and mounting brackets to the new drive.
You can use any 2.5″ SATA hard drive here, preferable a solid state drive.

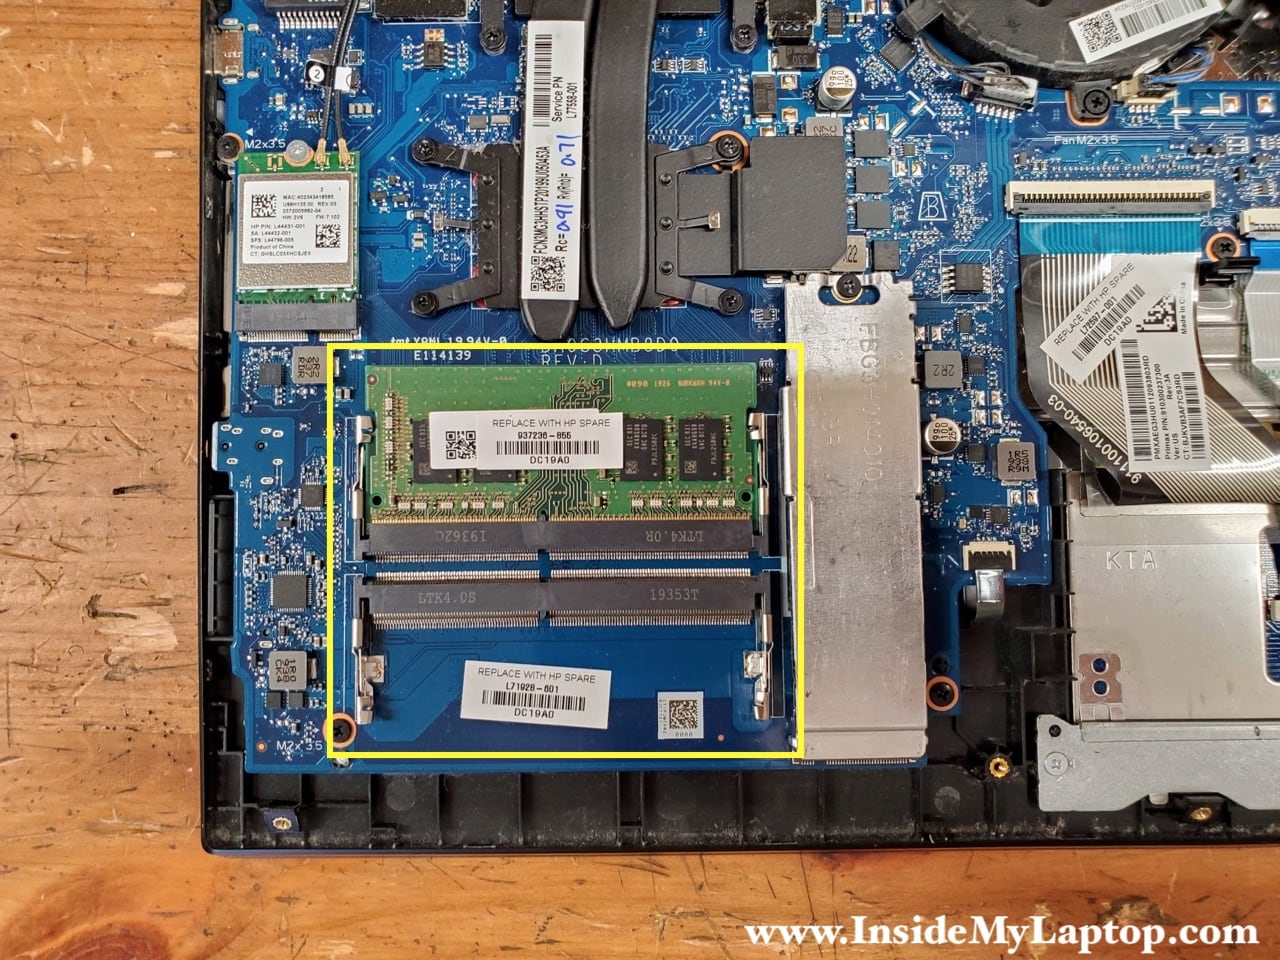
Memory removal and replacement
HP Pavilion 15-ec-0751ms laptop has two memory (RAM) slots but only one memory module installed.
This model can handle up to 32GB RAM (2x16GB modules) total. You should use DDR4-3200 memory modules.
This laptop can run in dual-channel memory mode which is more efficient and faster than single channel. In order to run in in dual-channel you need to install identical size and speed RAM modules in both slots.
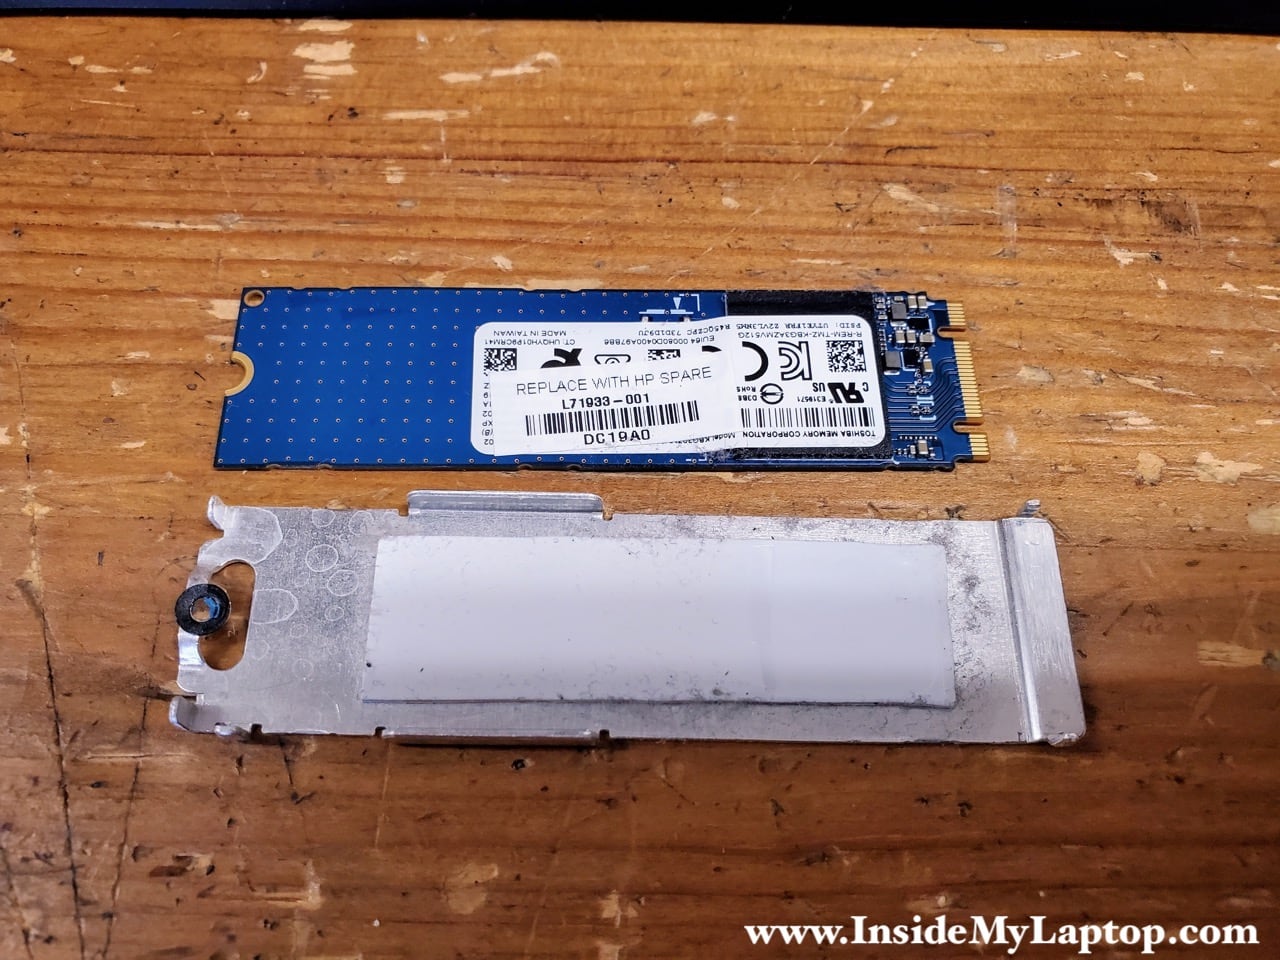
SSD removal and replacement
Remove one screw securing the solid state drive (SSD) and the heatsink. Pull the SSD out.
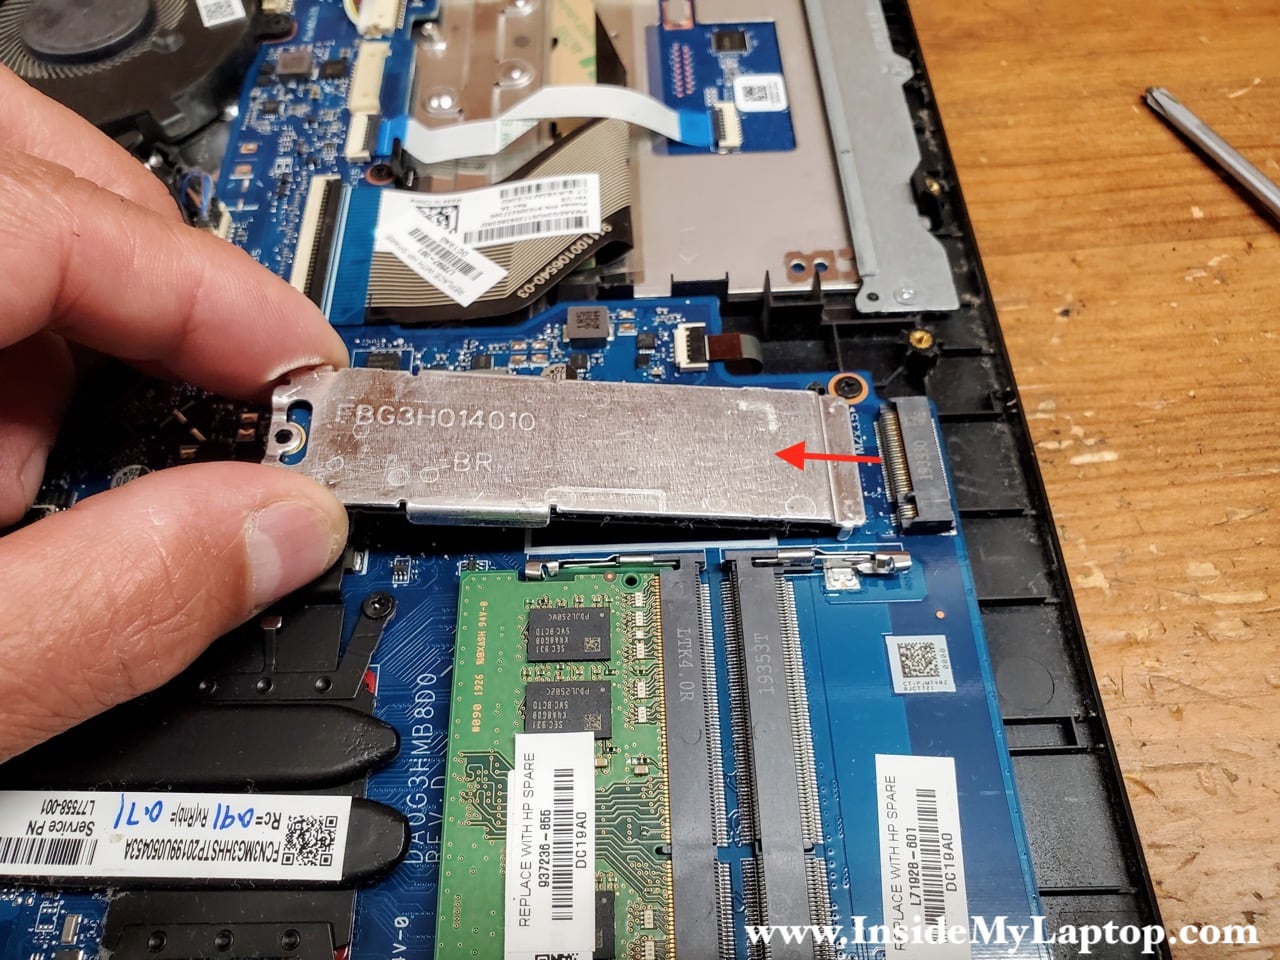
Carefully separate the SSD from the heatsink. It might be necessary to apply some reasonable force is the drive got stuck to the heatsink.

Now you can replace the SSD with a new one if necessary.
This laptop uses M.2 PCIe NVMe Gen3 SSD.
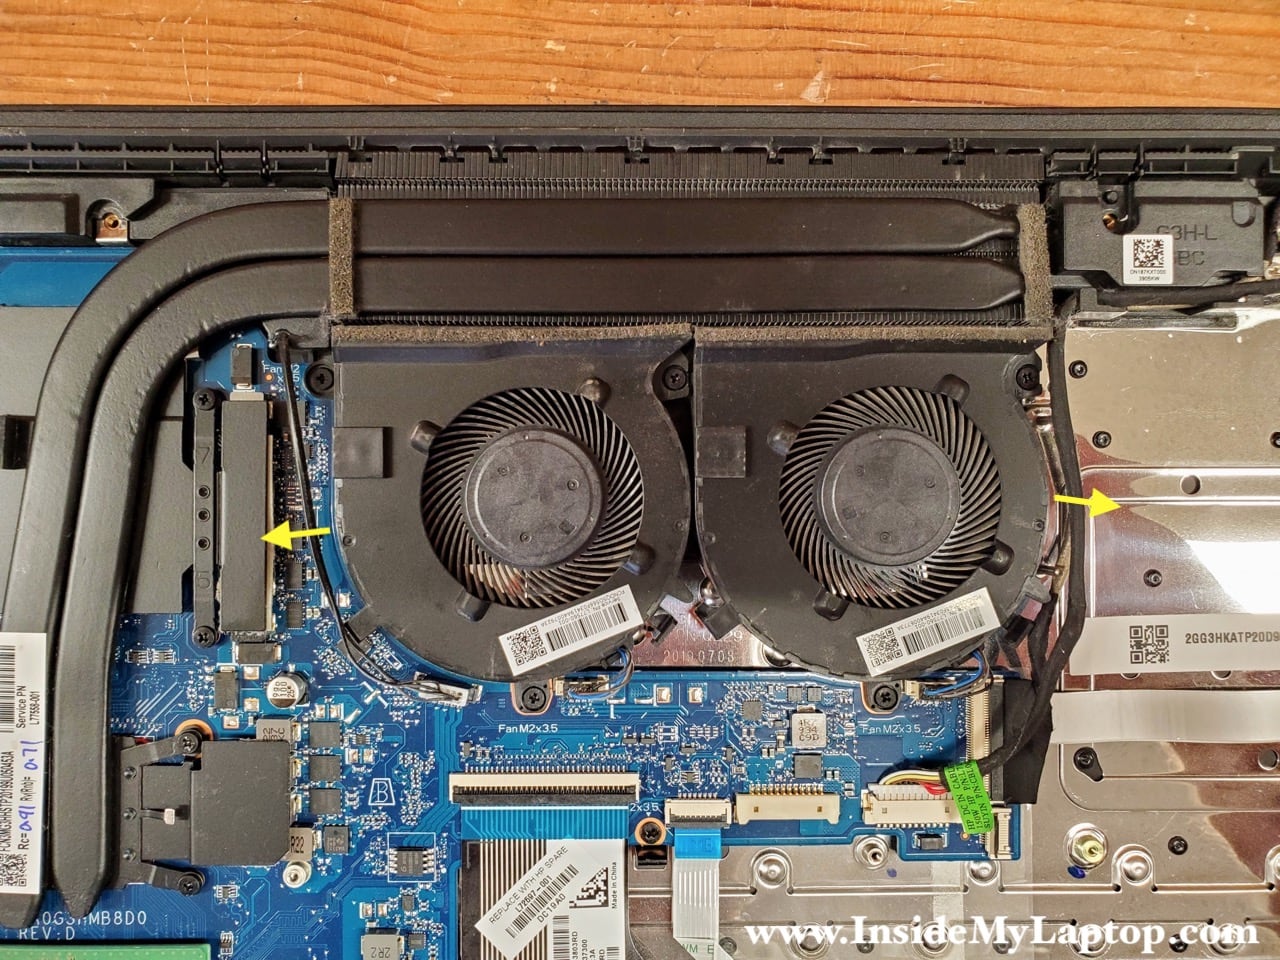
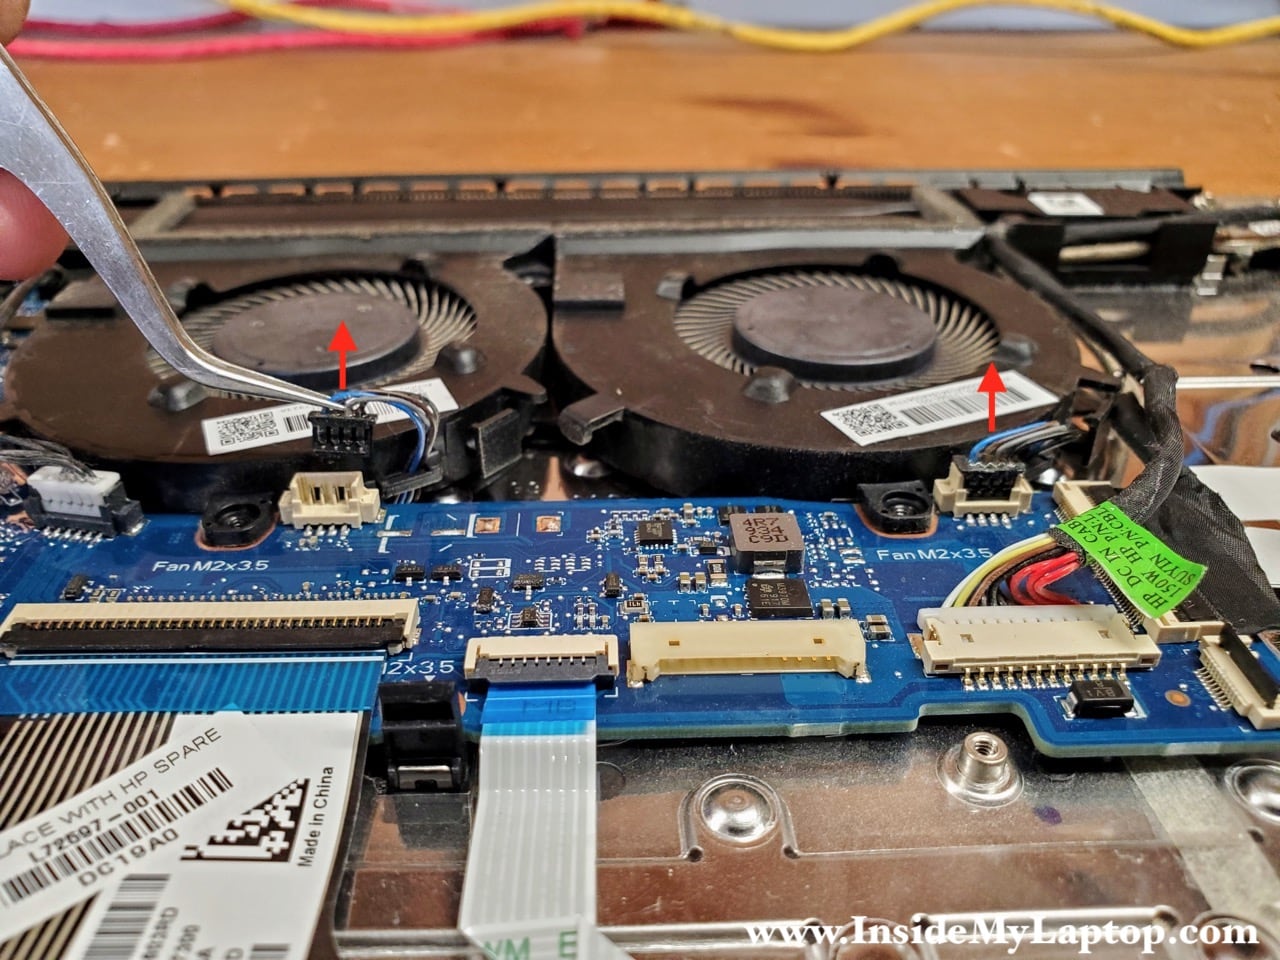
Cooling fans removal and replacement
Remove five screws holding both cooling fans in place.

Un-route cables from the left and right sides of the fans.
Disconnect fans cables from the motherboard.
Remove the left fan first. After that remove the right fan.

The left fan and the right fan are identical and interchangeable.
Here’s HP spare part number for the fan: L77560-001.

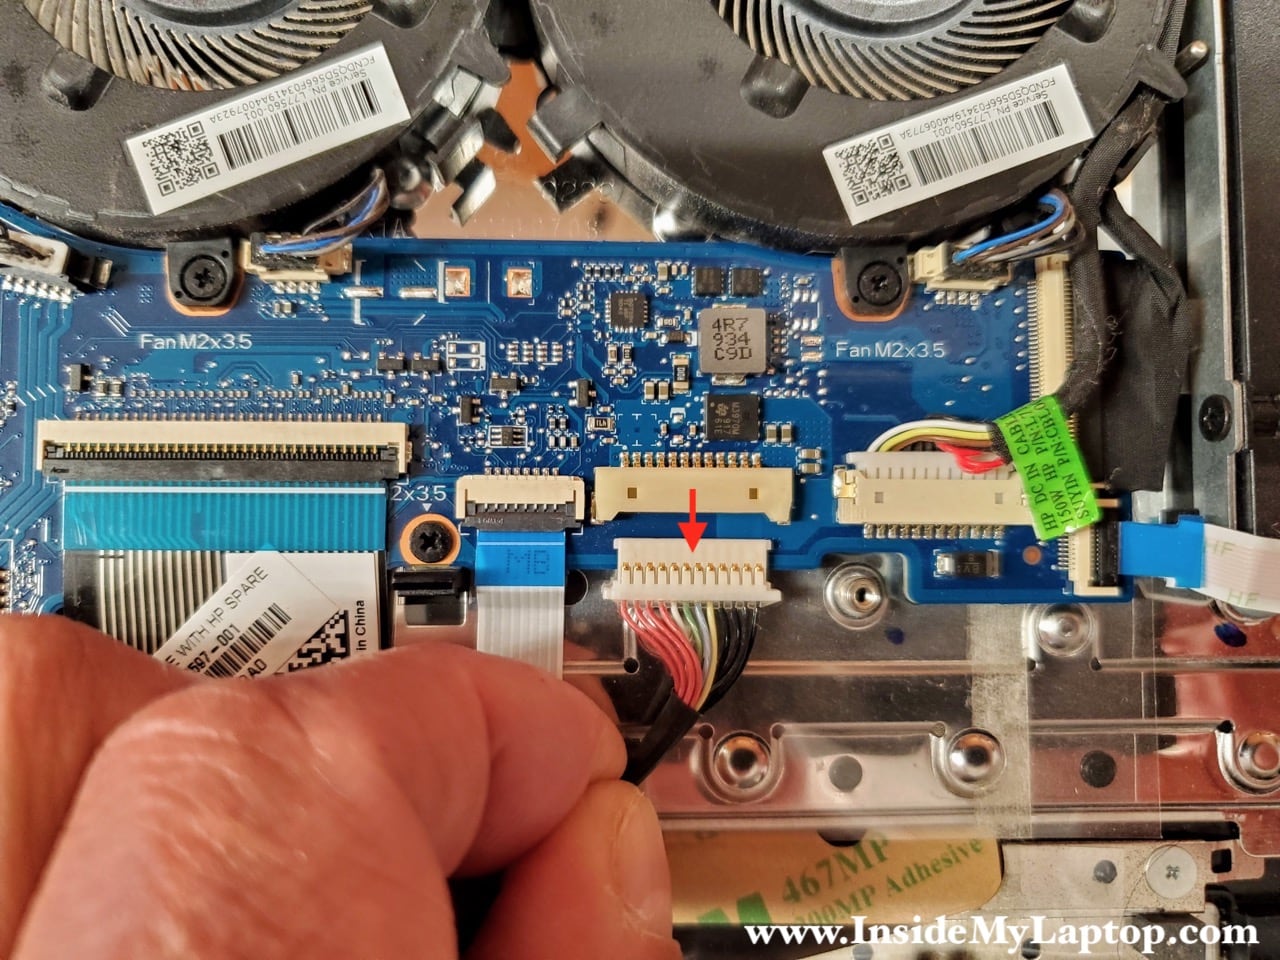
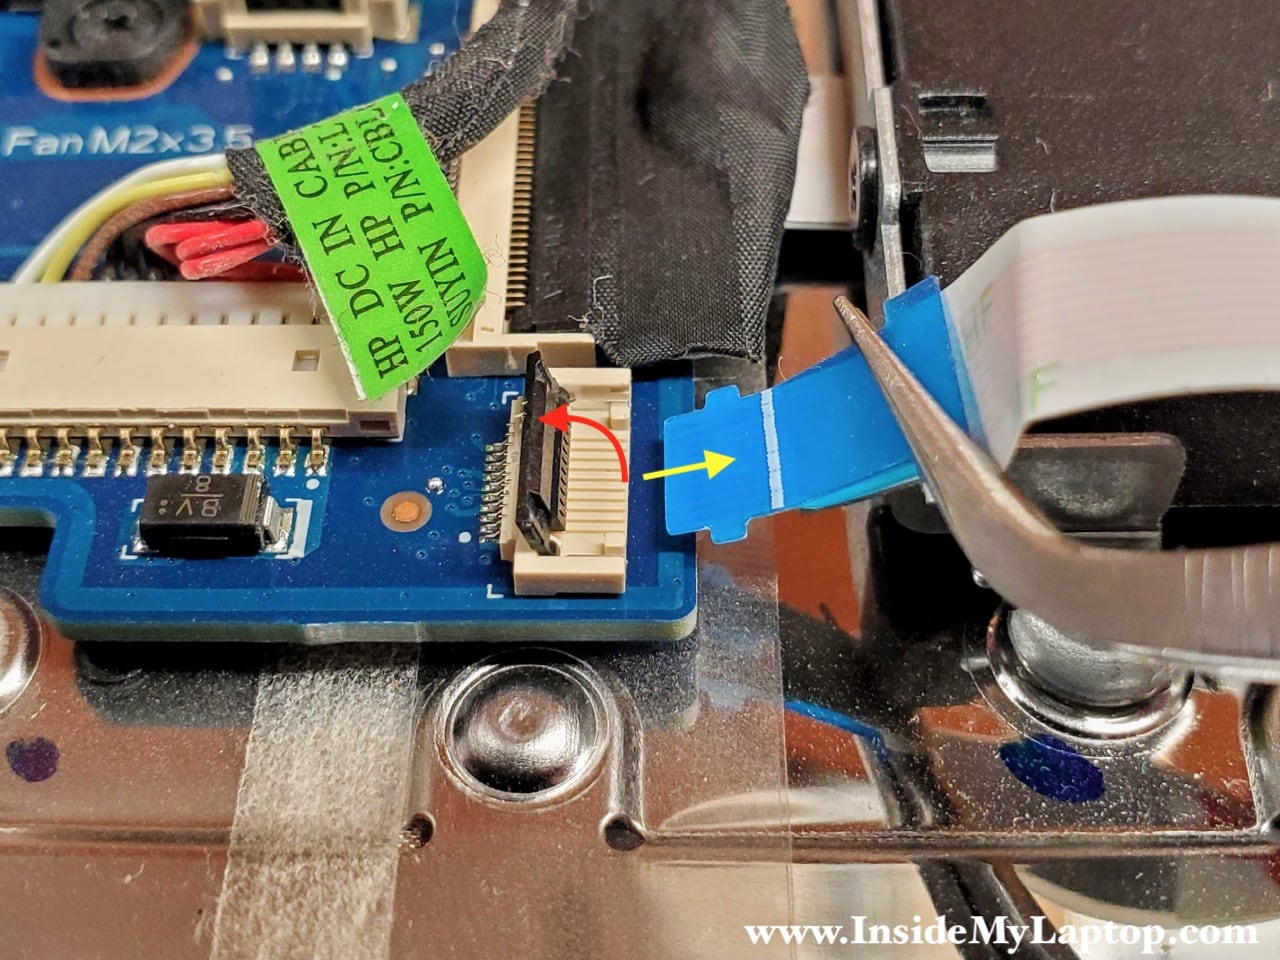
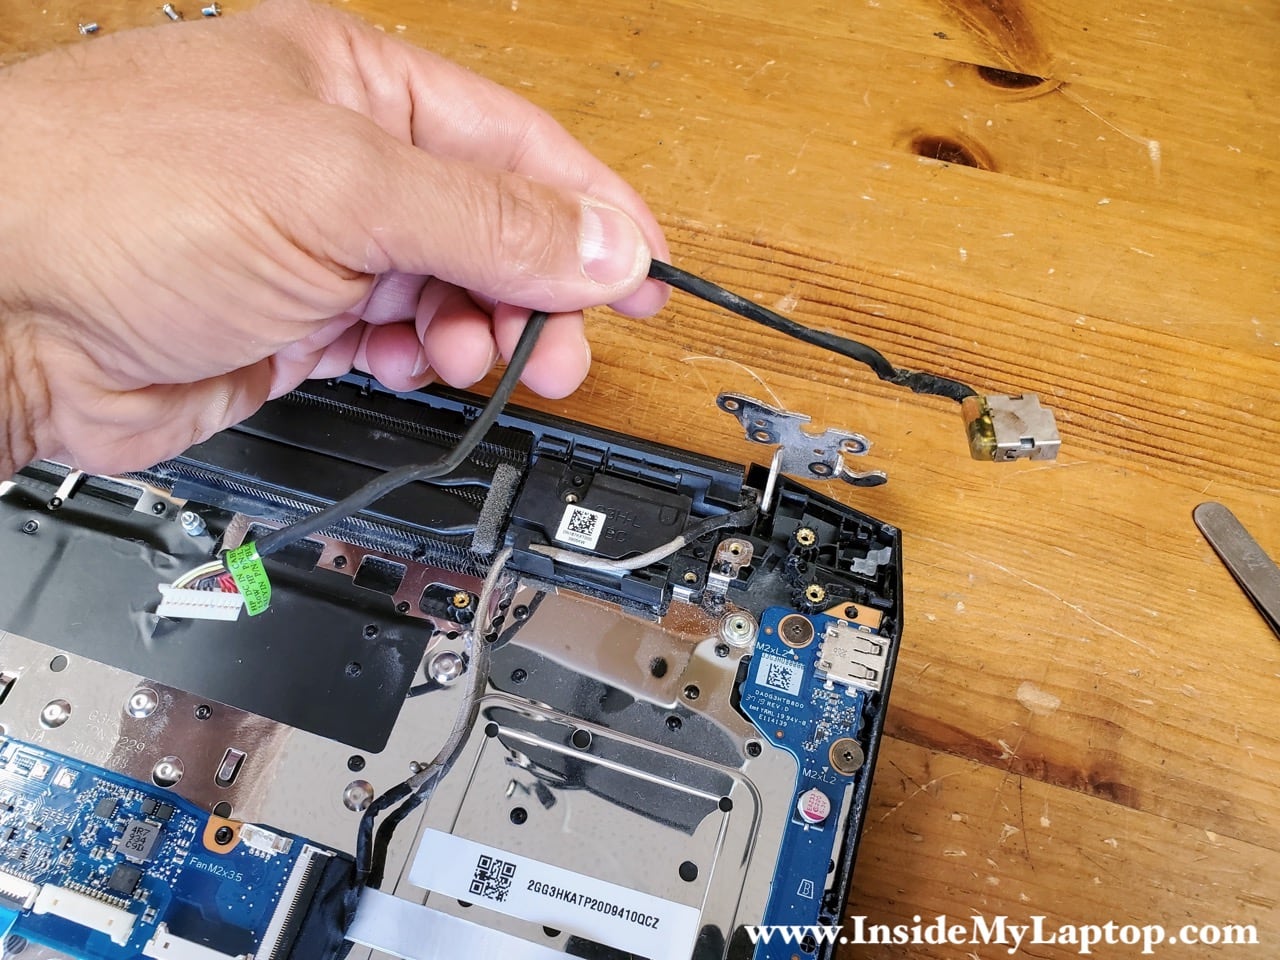
DC jack removal and replacement
The power connector (DC jack) is mounted under the display hinge. Remove three screw securing the hinge.
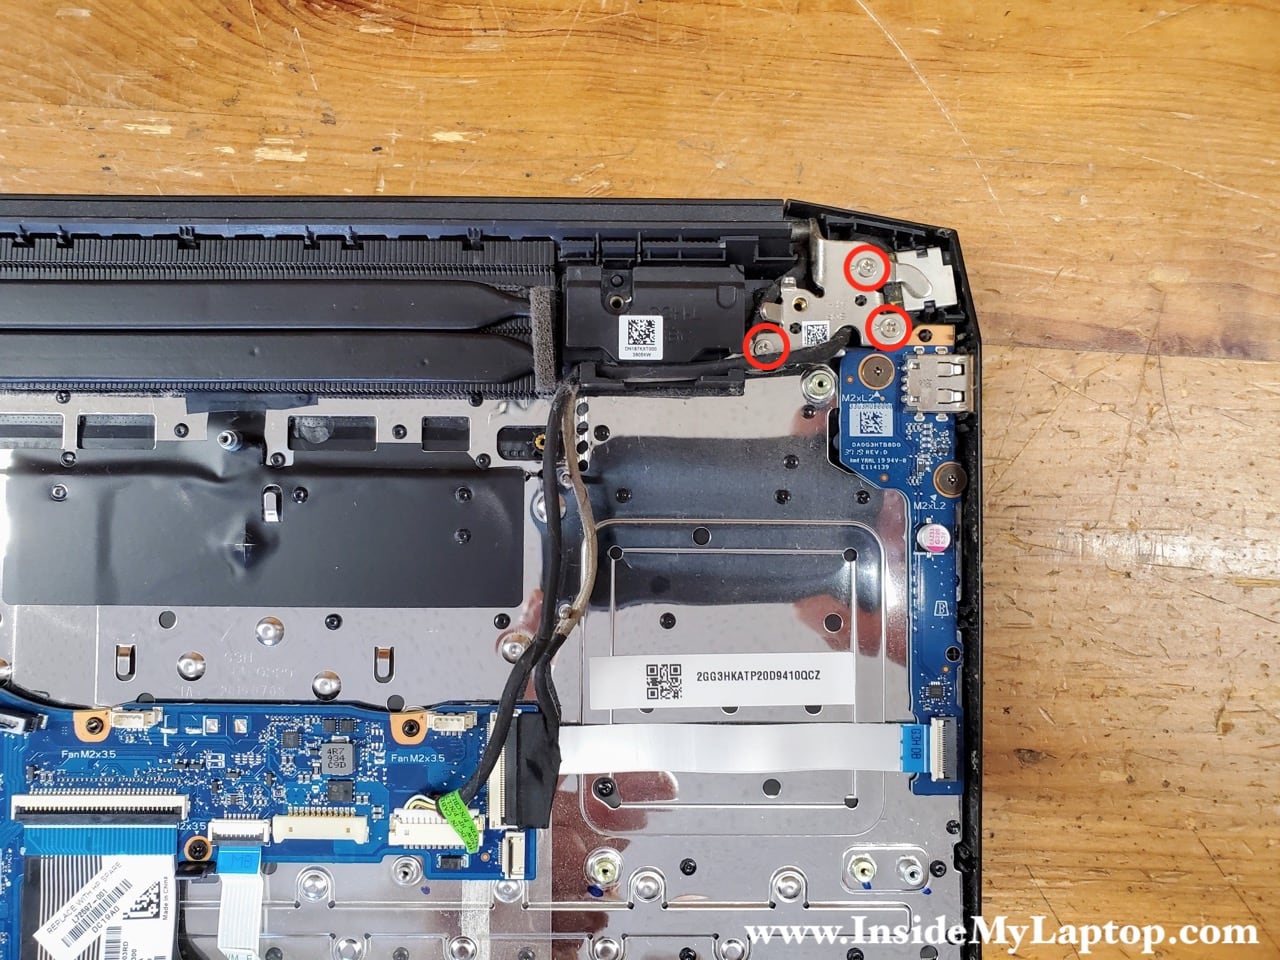
Open the hinge as it shown on the picture.

Unplug the DC jack cable from the motherboard.

Remove and replace the DC jack harness if necessary.
Here’s HP part number for the replacement DC jack harness: L71031-Y14.
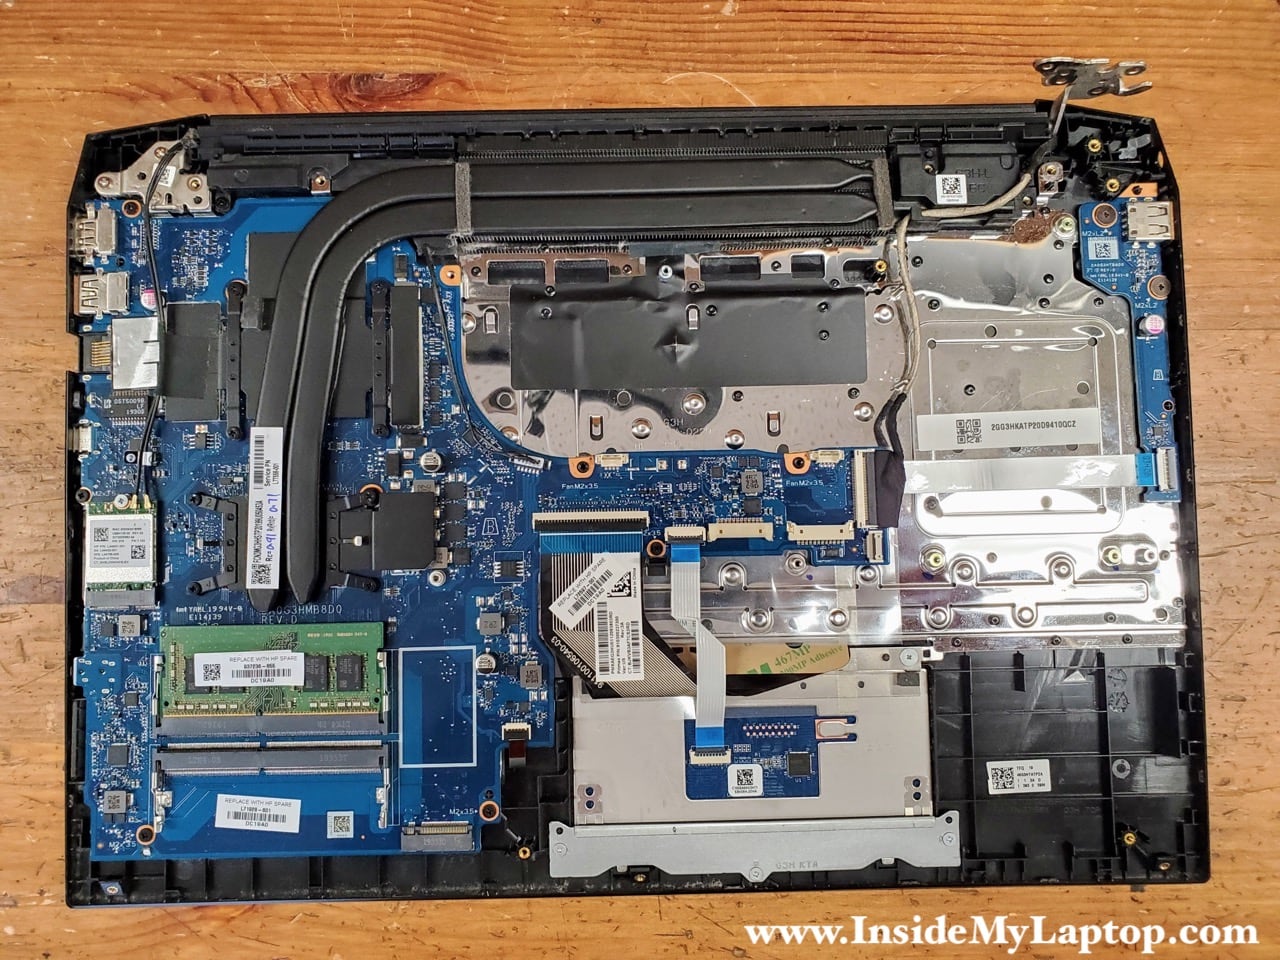
Other internal components removal
The left USB port is located on a separate board which can be easily removed and replaced. This board is secured in place by two screws.

The wireless card is replaceable. Simply remove one screws and disconnect two antenna cables. After that you can remove the wireless card.

The touchpad is secured to the palmrest assembly by six screws.

The keyboard in HP Pavilion 15-ec series laptop is permanently riveted to the palmrest assembly.
Jasen
do you know the bottom cover screw size (yellow circle)… of course I dropped the smallest one onto carpet and it’s gone. :/
IML Tech
No I don’t. Never paid attention to screw sizes.
Leighton
Thank you for writing this. It is very informative. I notice that the SSD you removed has both M and B notches. The SDD I bought as a replacement has only the M notch. Glancing at the slot on the motherboard, it looks like this won’t be an issue. I guess I will find out for sure when I open mine up tomorrow. Another thing: when I contacted HP asking about the max RAM, they said 16GB so I just bought another 8GB stick. Now that I have read this, I wish I had bought 2x16GB kit. They probably just looked at the maximum they offered in their builds (three years ago). I may do that now to see if I can maybe get another year or two out of this machine. Again thanks for the info. Sending a cup of coffee your way.