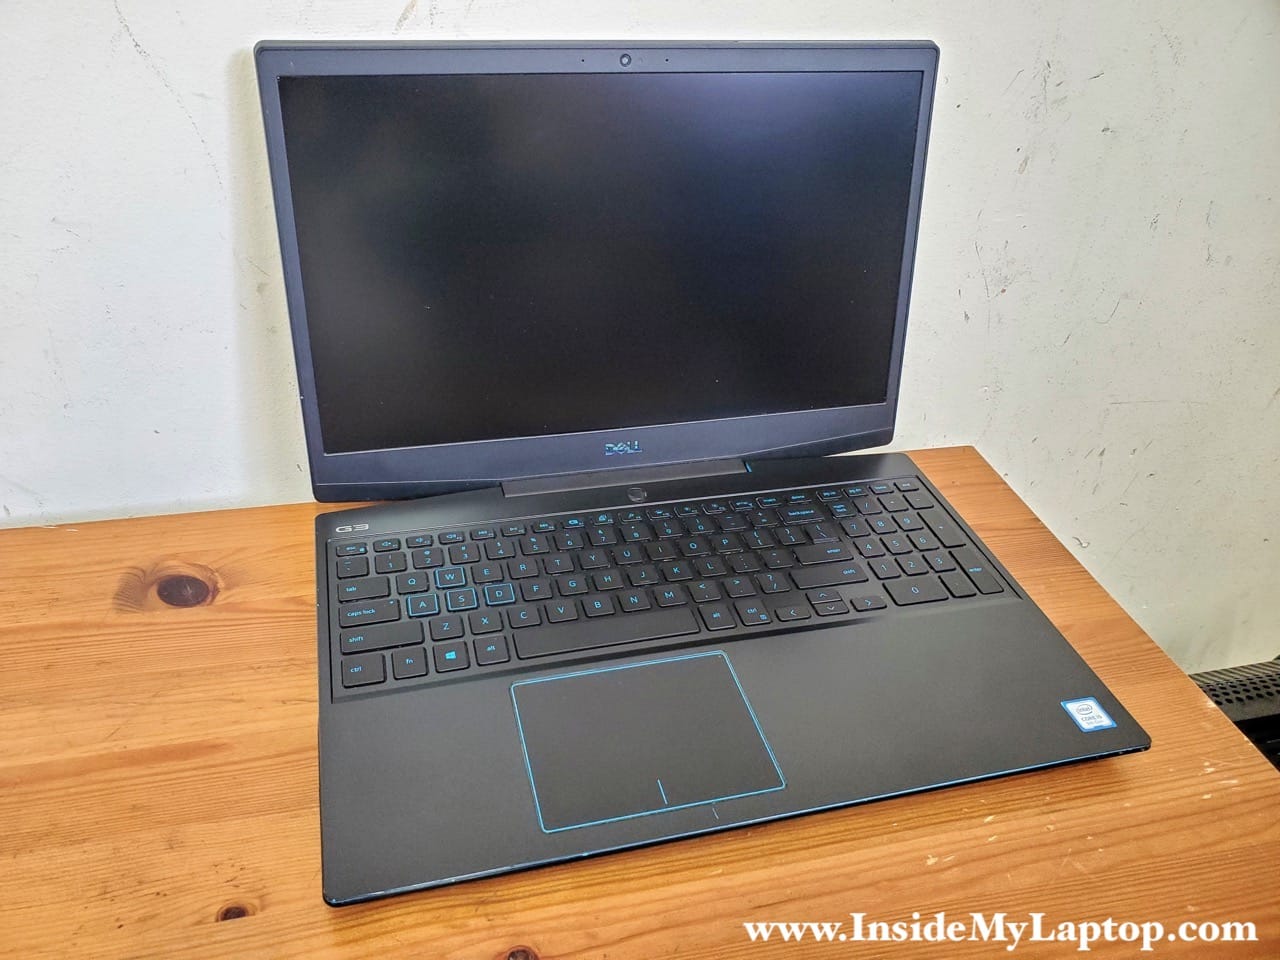
In this guide I show step-by-step Dell G3 15 3590 (model P89F) laptop disassembly.
Dell G3 15 3590 design highlights:
– This model supports two storage drives: PCIe NVMe solid state drive and 2.5″ SATA hard drive.
– There are two memory (RAM) slots on the motherboard.
– The DC power jack attached to a harness and can be replace without soldering.
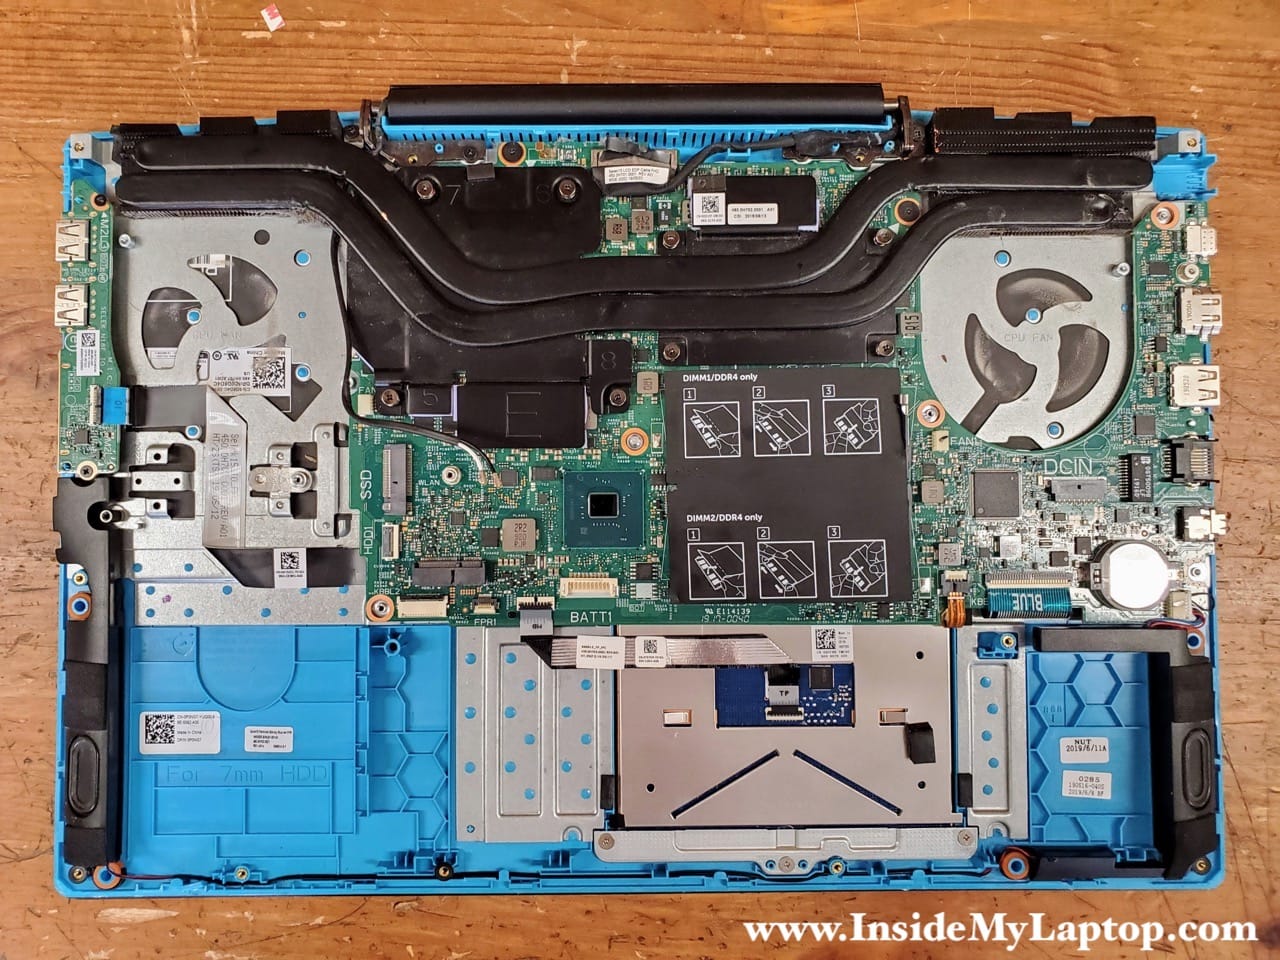
– Both cooling fans can be replaced without heatsink removal.
For this disassembly you will need only two essential tools: PH1/PH0 Phillips screwdriver and tweezers.
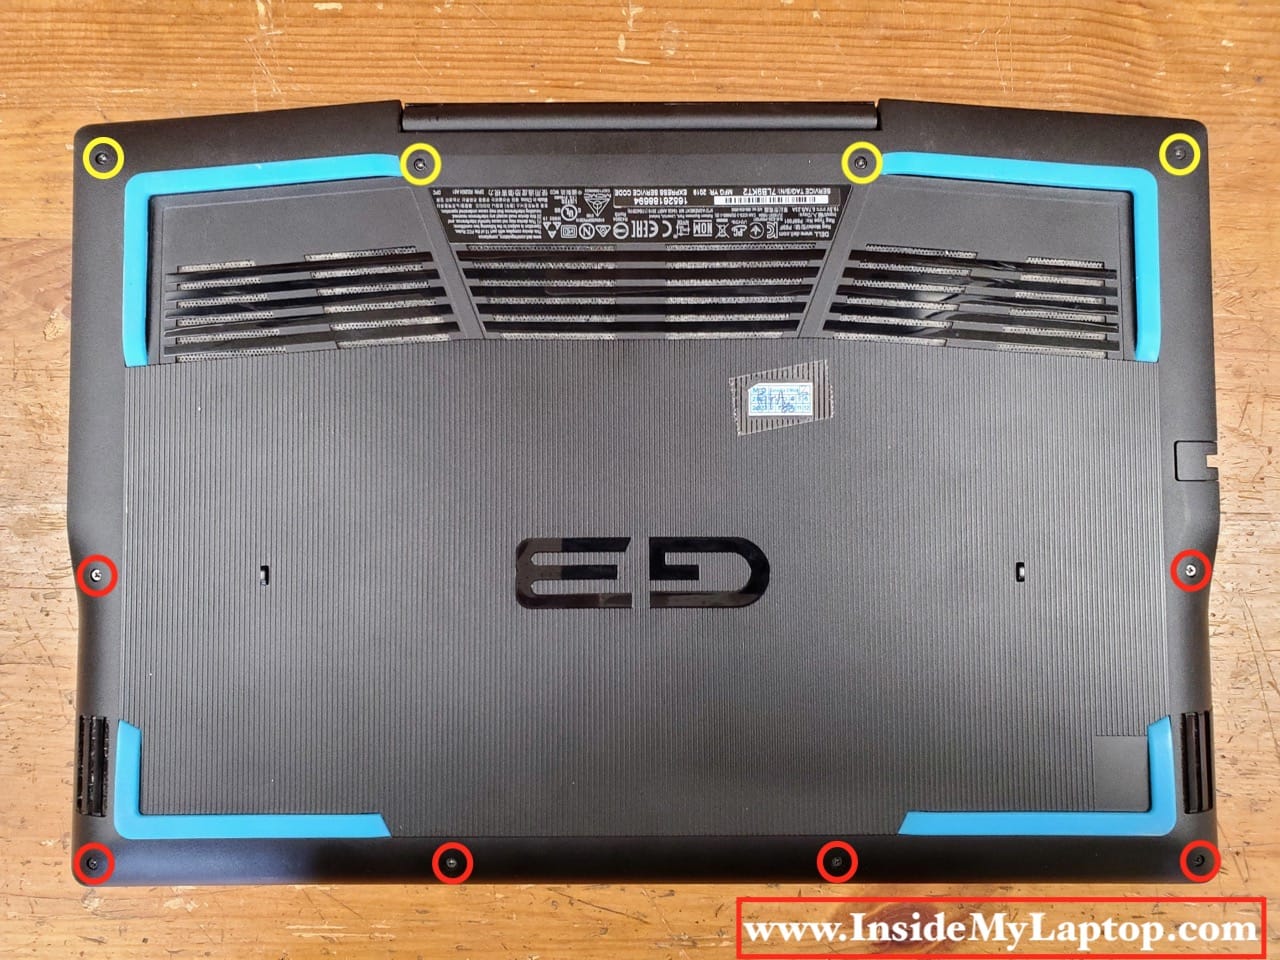
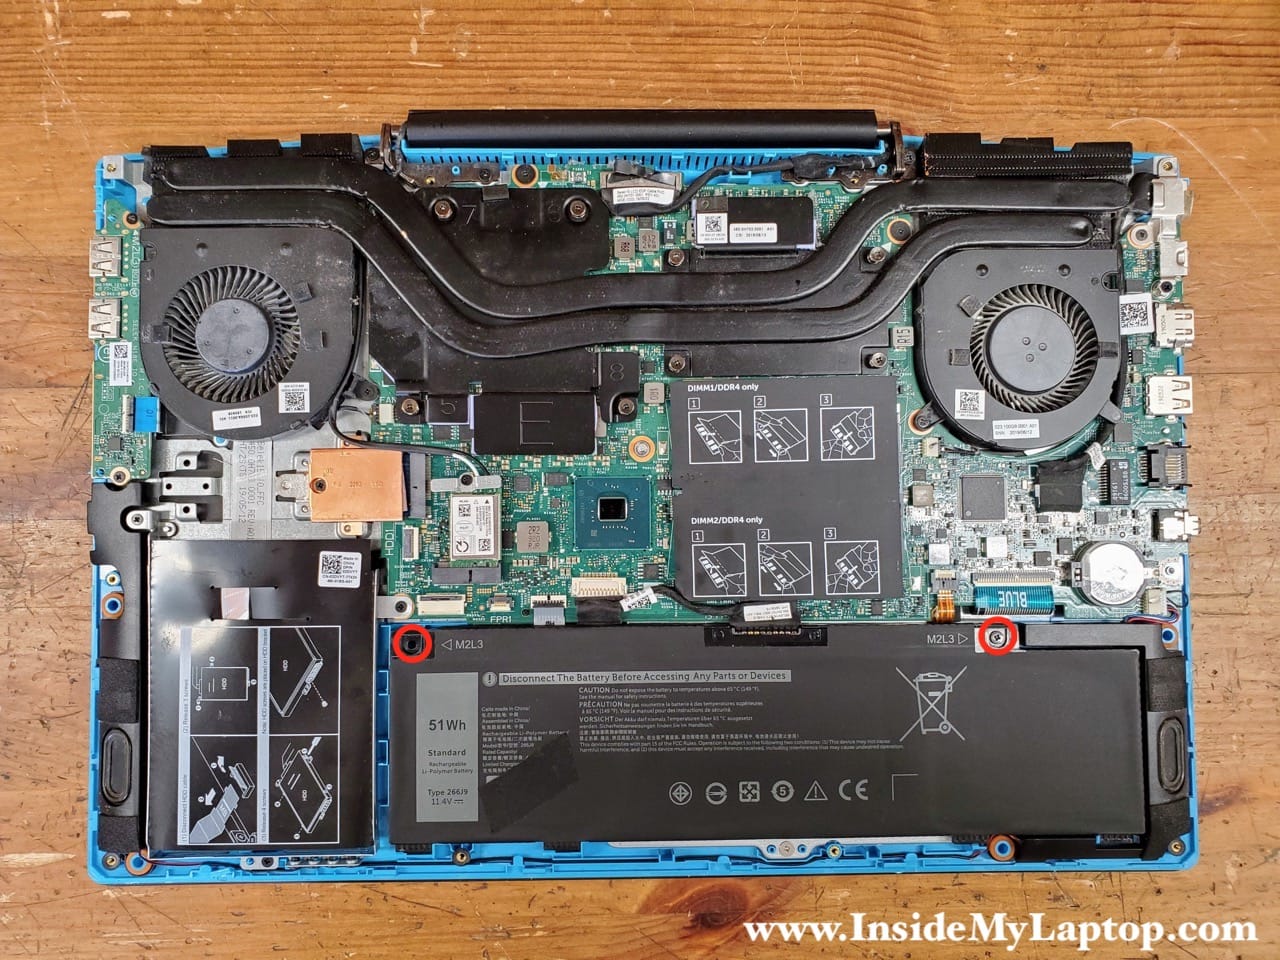
Bottom cover removal
Unscrew four captive screws located on the uppers side of the bottom cover. These screws are designed to remain attached to the cover.
Remove other six screws.
Start separating the bottom cover from the top case assembly with your fingers.
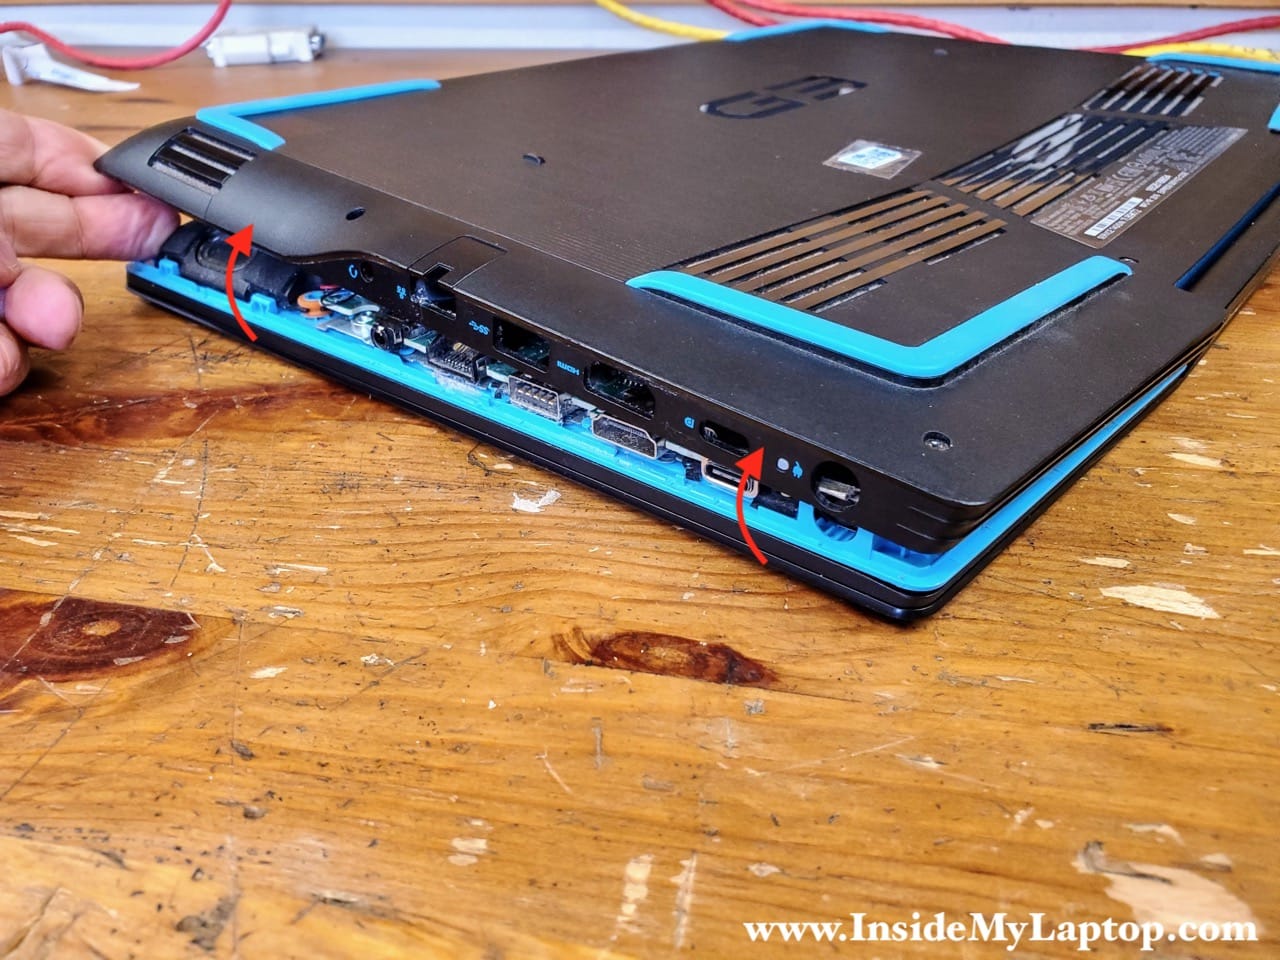
Continue removing the bottom cover on the back of the laptop. Wiggle it a little bit to separate from the display hinges.

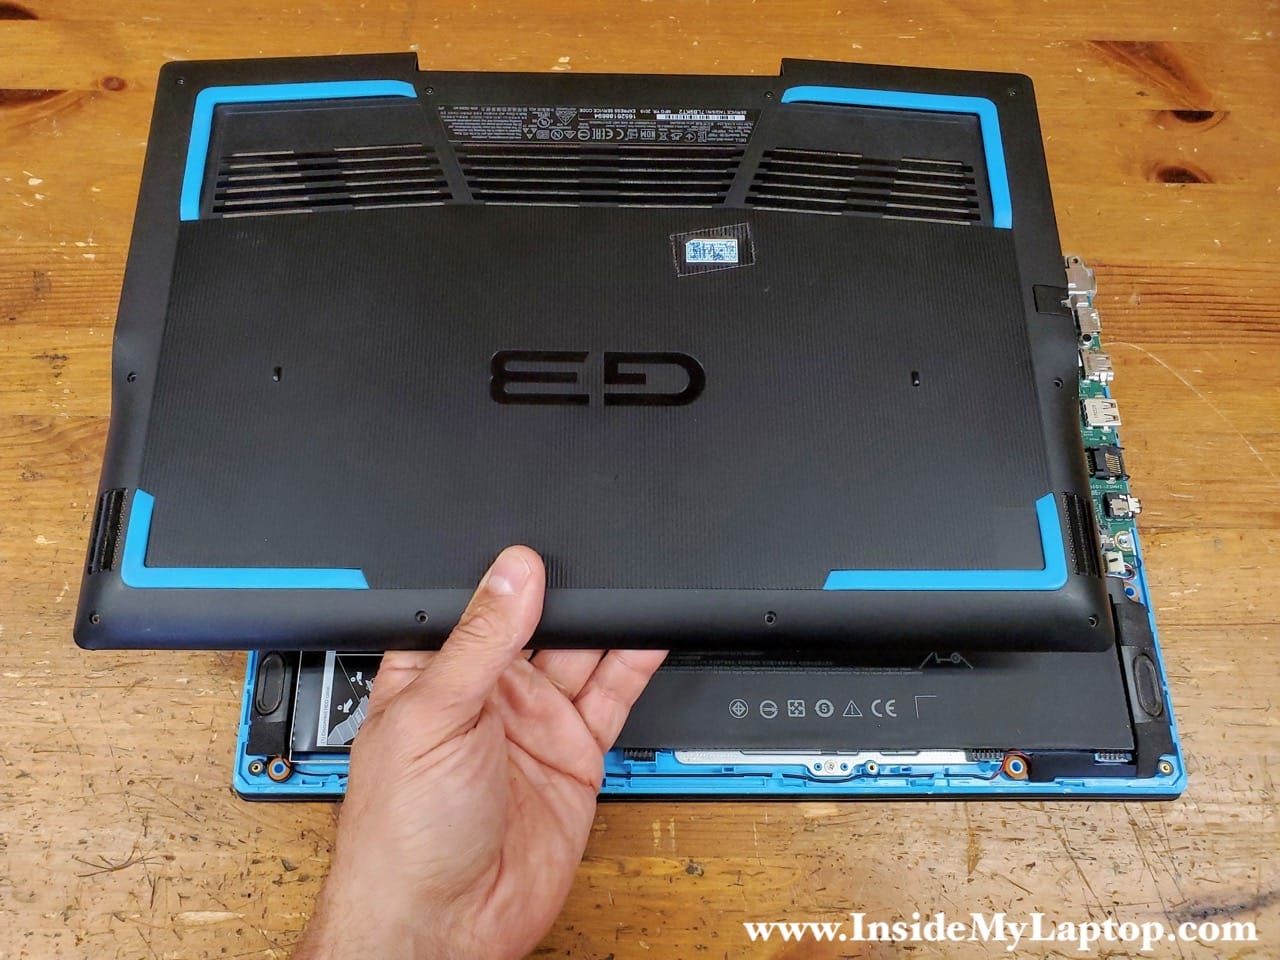
Remove the bottom cover completely.
Battery removal and replacement
Remove two screws attaching the battery to the top case assembly.
Lift up and separate the battery from the top case. It will give you easy access to the cable connector.
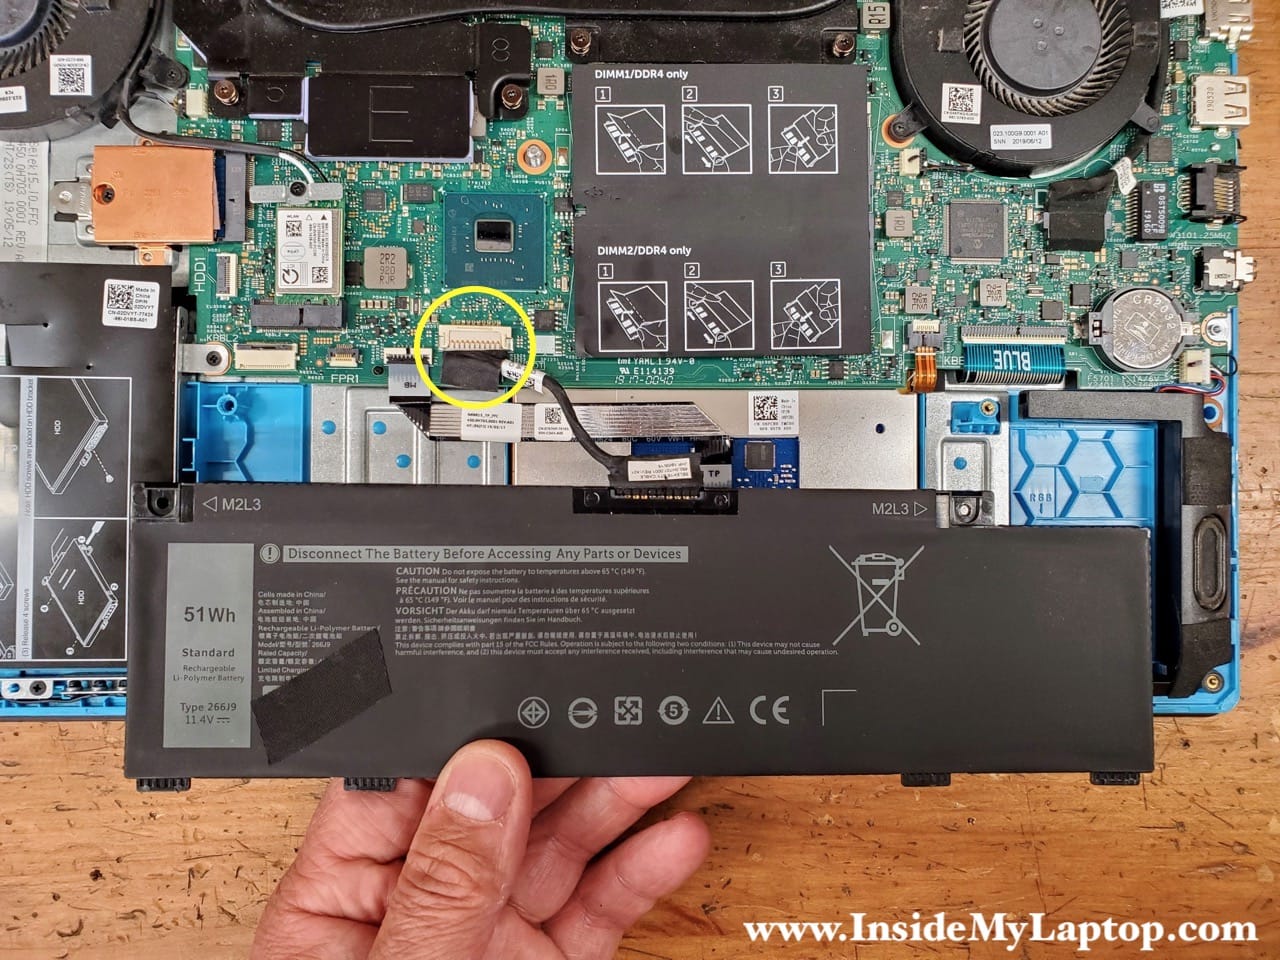
Carefully unplug the battery cable from the motherboard. Don’t lift up the cable, just pull it out to the shown direction.
NOTE: in my case someone replaced the battery before and damaged the connector. That’s why you can see all connector pins exposed.

SSD/HDD removal and replacement
Dell G3 15 3590 (model P89F) laptop supports two storage devices. In my particular case I have only M.2 solid state drive (SSD) installed but the 2.5″ hard drive (HDD) mounting brackets and SATA cable are available.
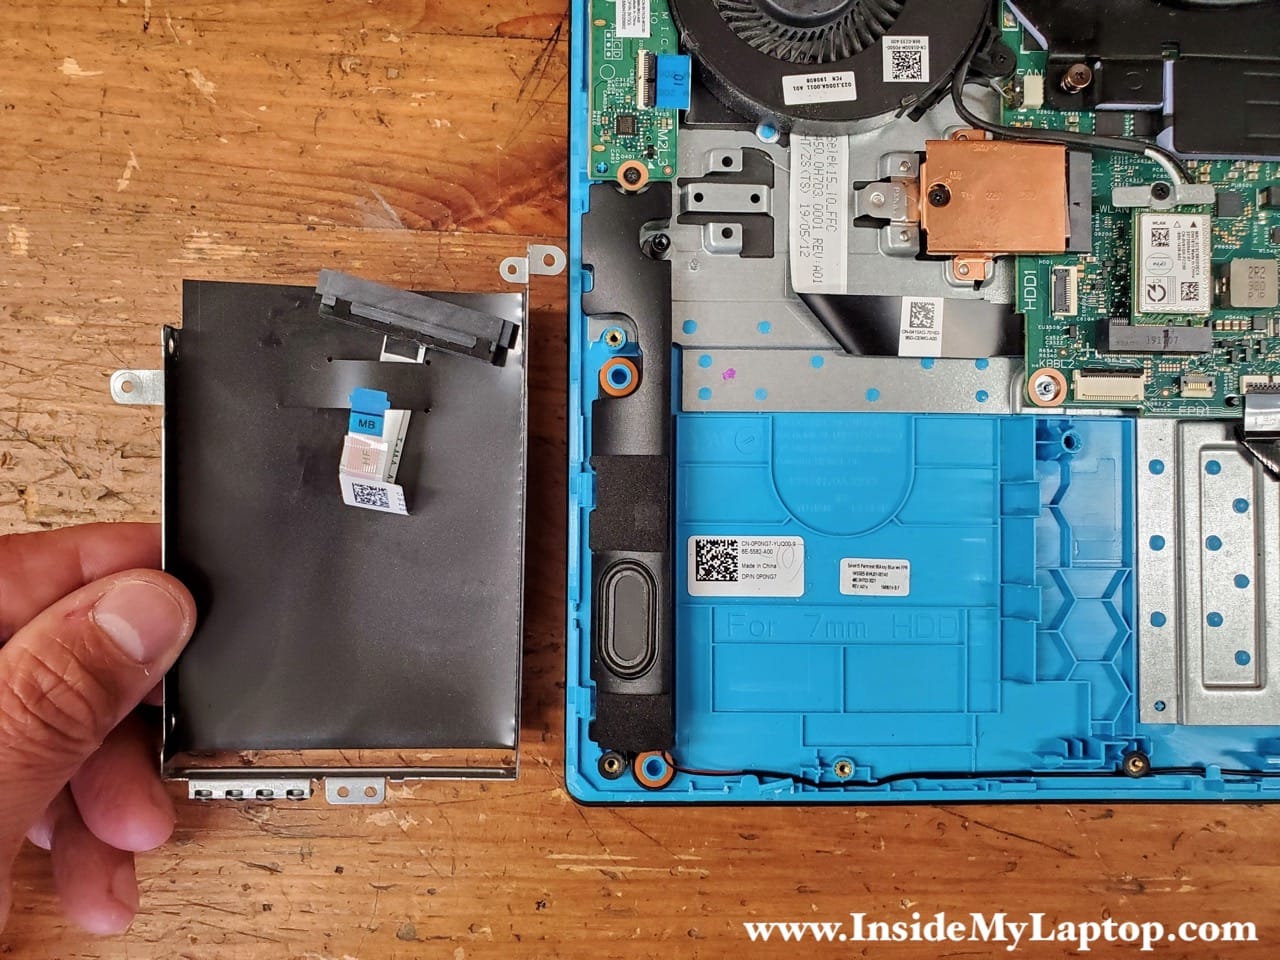
Remove three screws fastening the HDD mounting brackets.
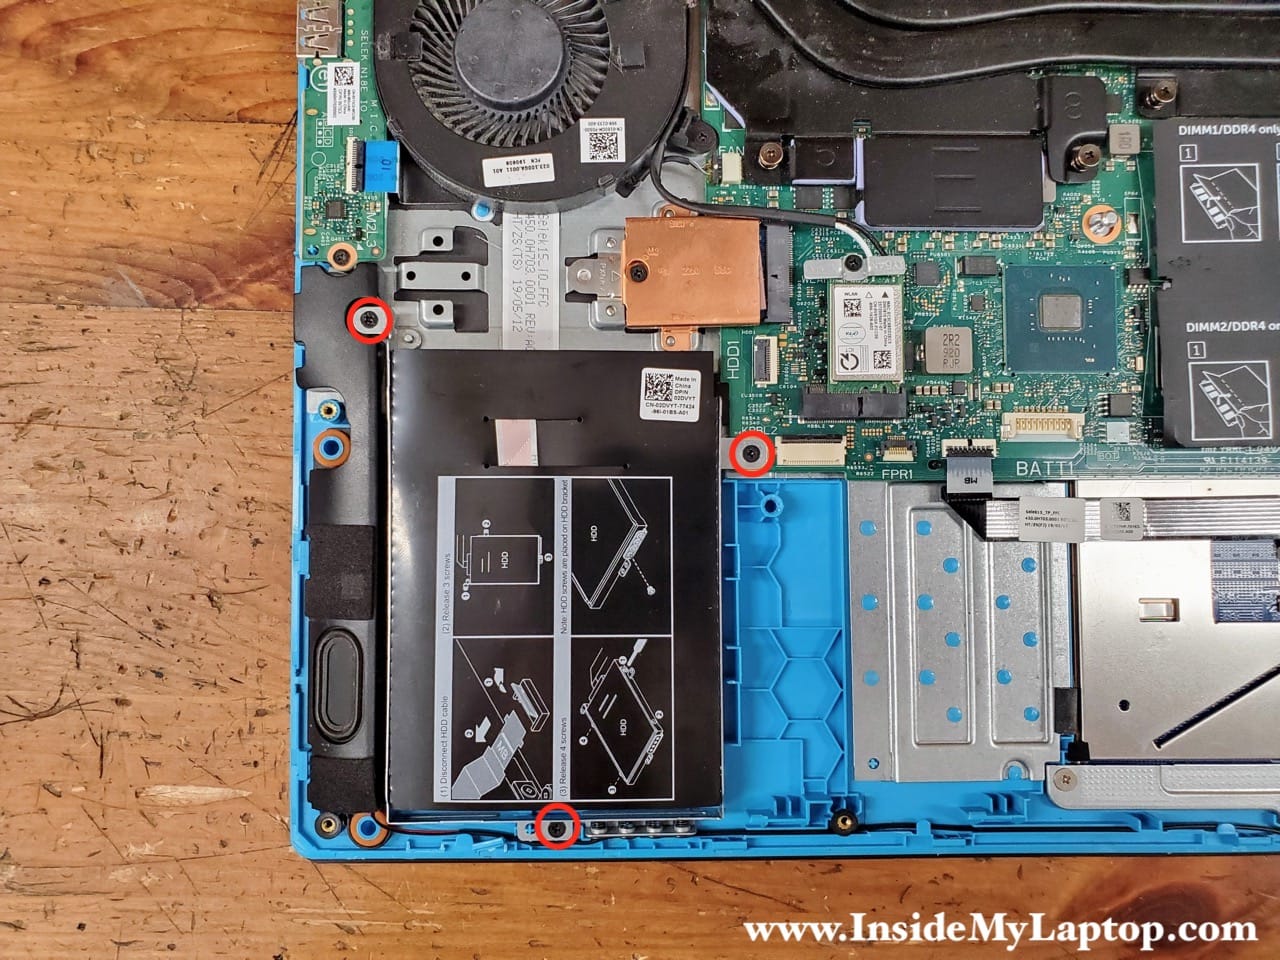
You will find the HDD SATA cable attached on the other side.
You can install any 2.5″ SATA hard drive here. All you need to do is attach the drive to the brackets and plug in the SATA cable.
This laptop is configured with a very small 512GB M.2 type 2230 Toshiba NVMe solid state drive (Dell part number 08C3CP).
Remove one screw attaching the SSD heatsink.
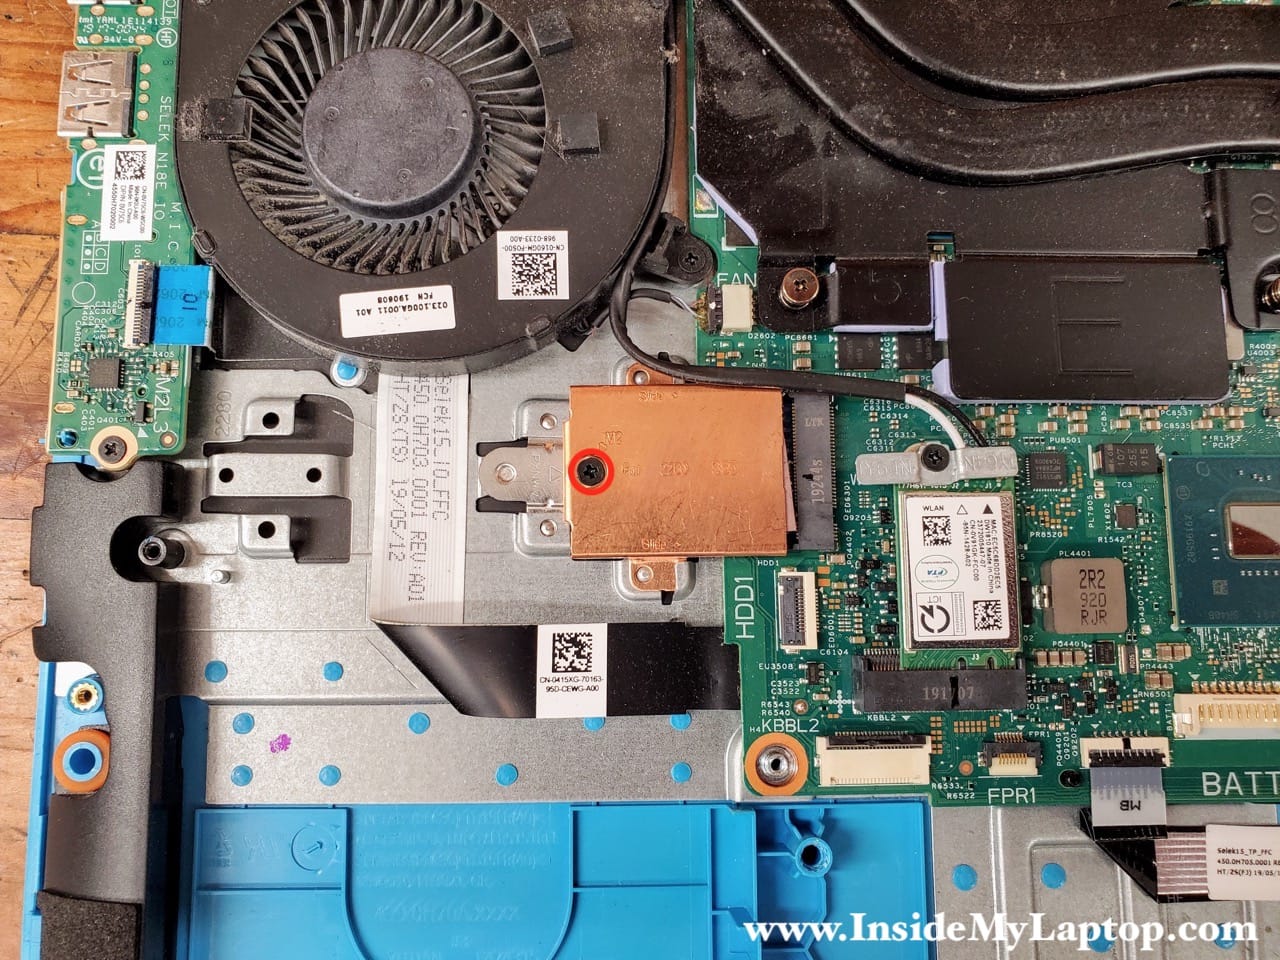
Remove the SSD heatsink.

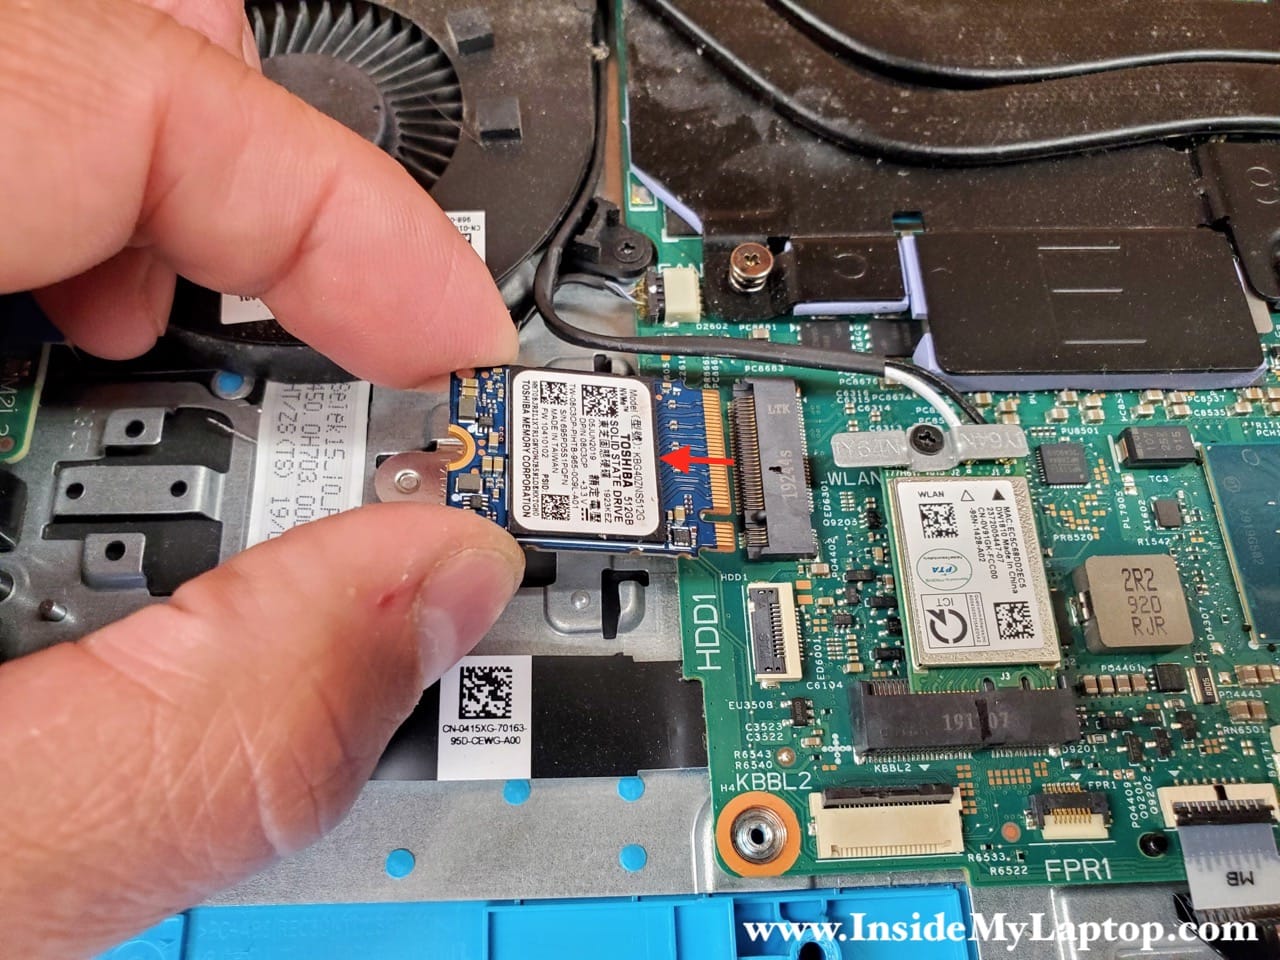
Pull the SSD out of the PCIe slot.
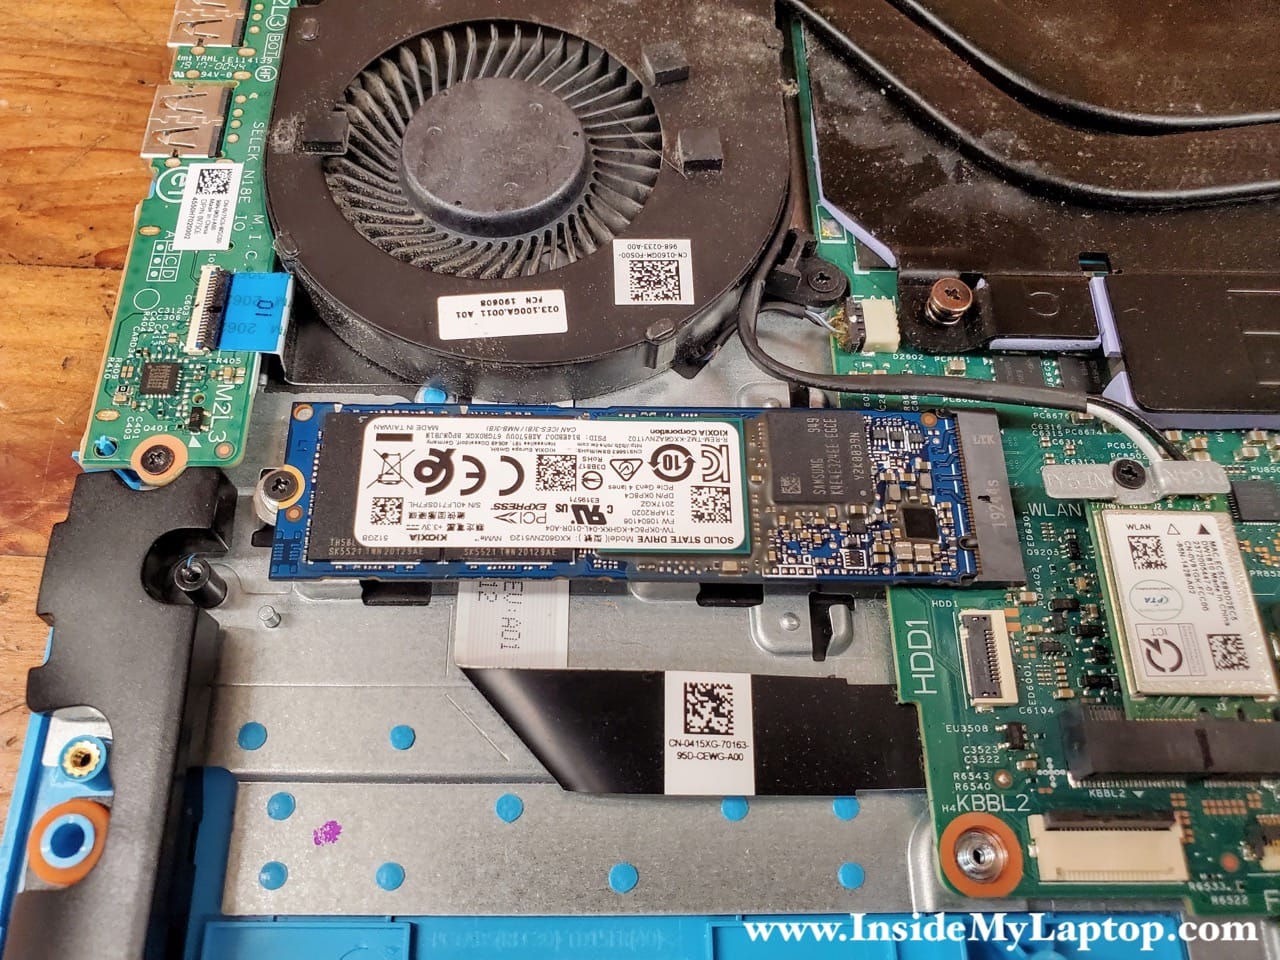
Dell G3 15 3590 can be configured with a regular size M.2 type 2280 NVMe SSD but it is necessary to move the mounting bracket further from the PCIe slot.
Slide the SSD mounting bracket to the right to separate it from the top case.

Now turn the bracket 180 degrees so the screw hole located closer to the laptop edge. Install the bracket as shown on the following picture.

Now you can install a regular M.2 type 2280 SSD.
You can use any third party NVMe SSD such as Samsung, Western Digital, Crucial, etc…
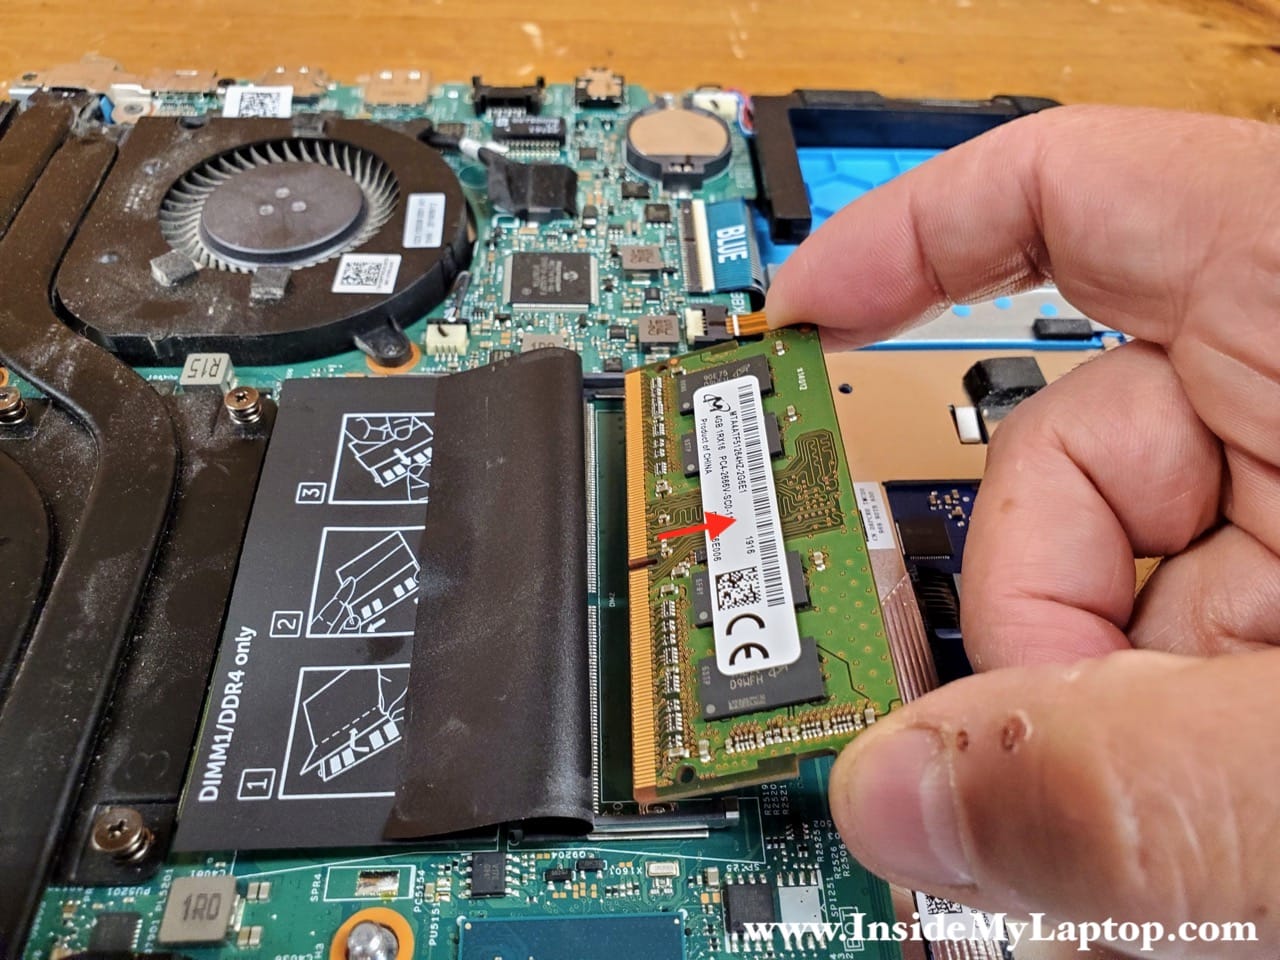
Memory removal and replacement
Dell G3 15 3590 laptop has two removable memory (RAM) modules. You can find them under the black mylar cover.
This laptop can handle up to 32GB (2x16GB) RAM. Compatible memory type is DDR4-2666 or DDR4-3200.
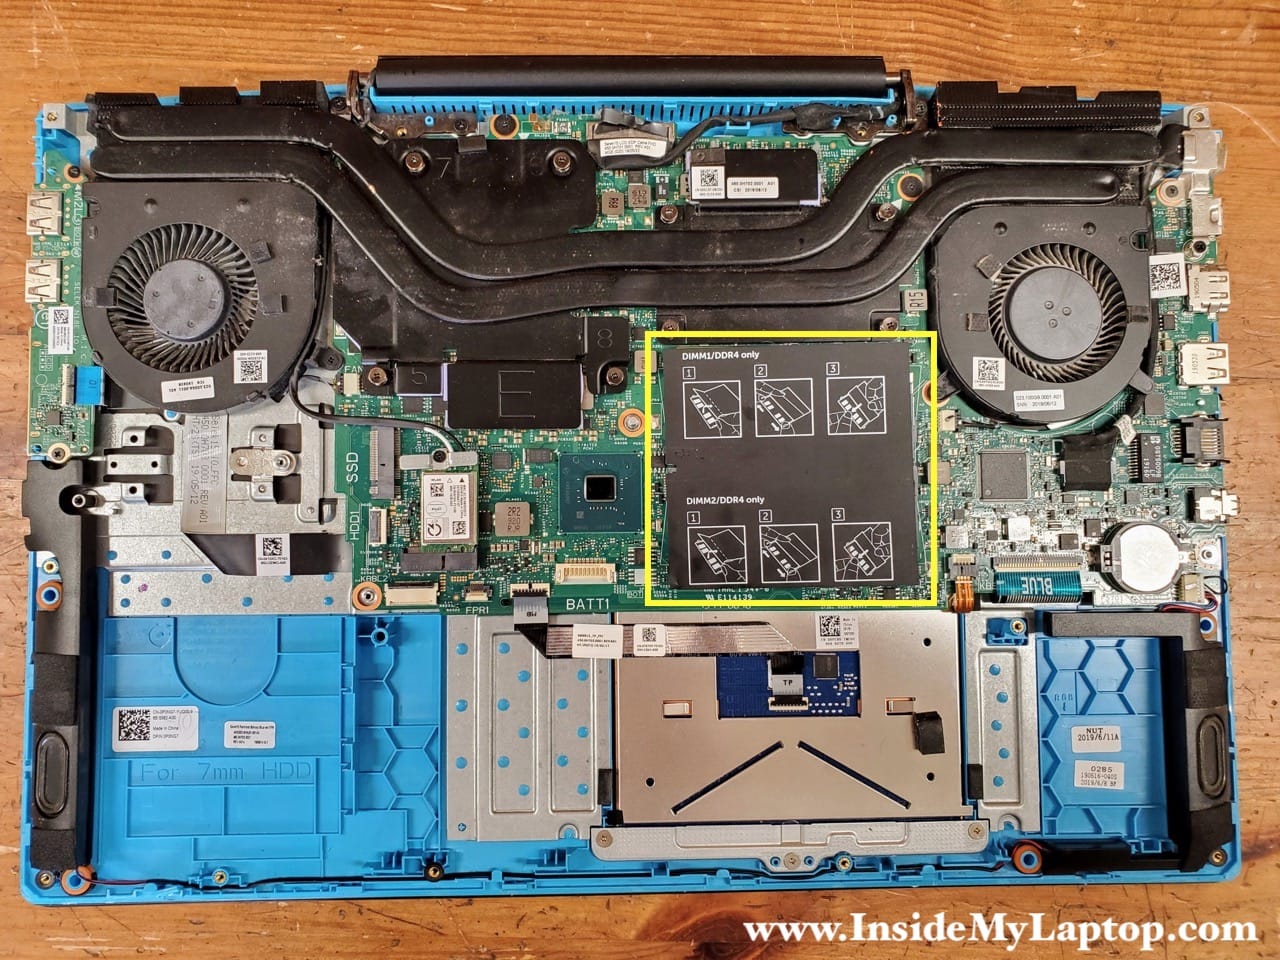
Remove the memory modules and upgrade them if necessary.
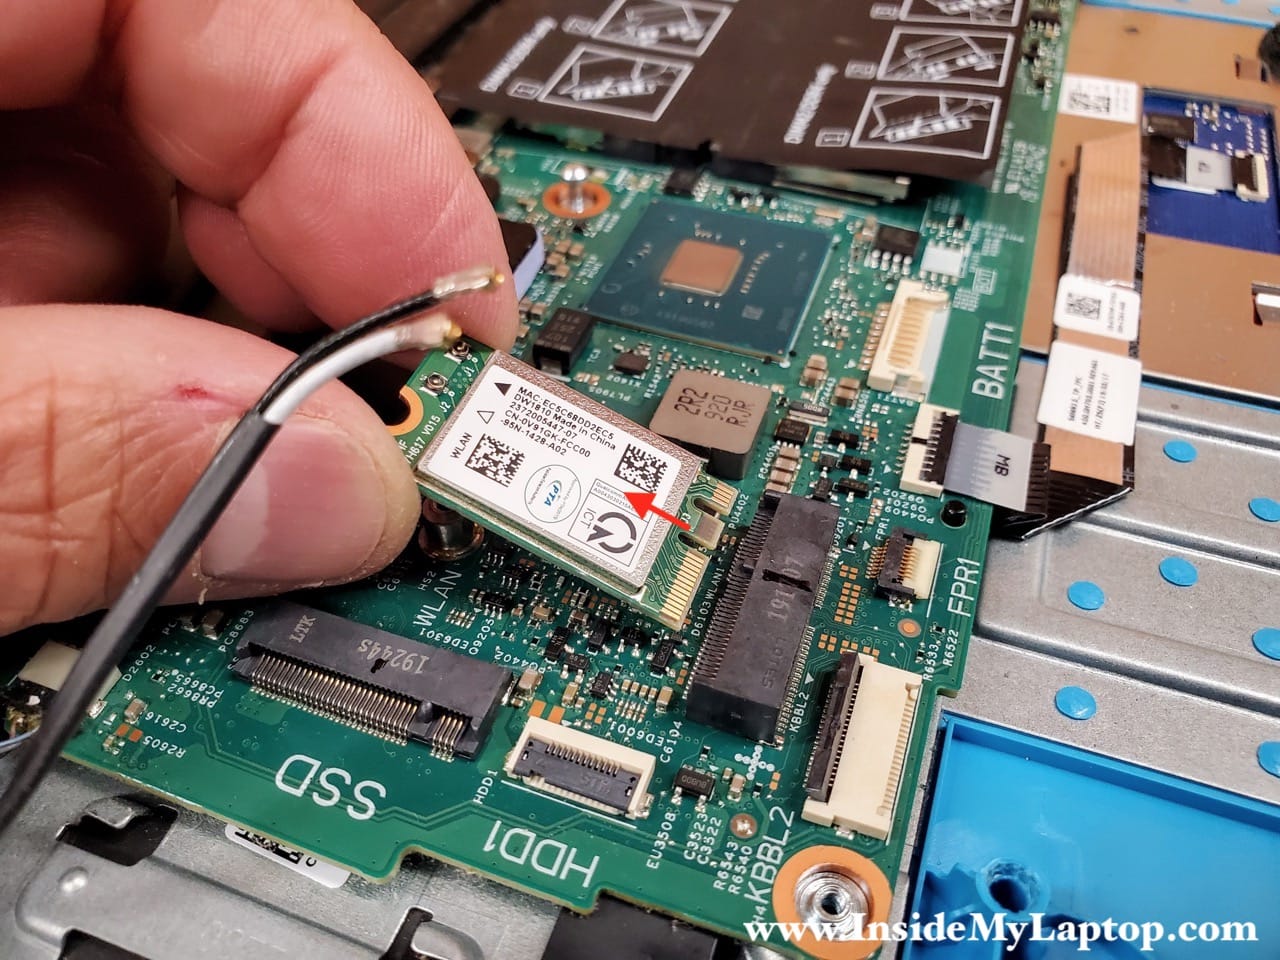
Wireless card removal and replacement
Remove one screws from the wireless card bracket.

Carefully disconnect two antenna cables from the wireless card.

Pull the wireless card out of the slot.
You can find a new replacement wireless card using dell part number 0V91GK. This is DW1810 WLAN WiFi 802.11AC + Bluetooth 4.1 Band M.2 Card.
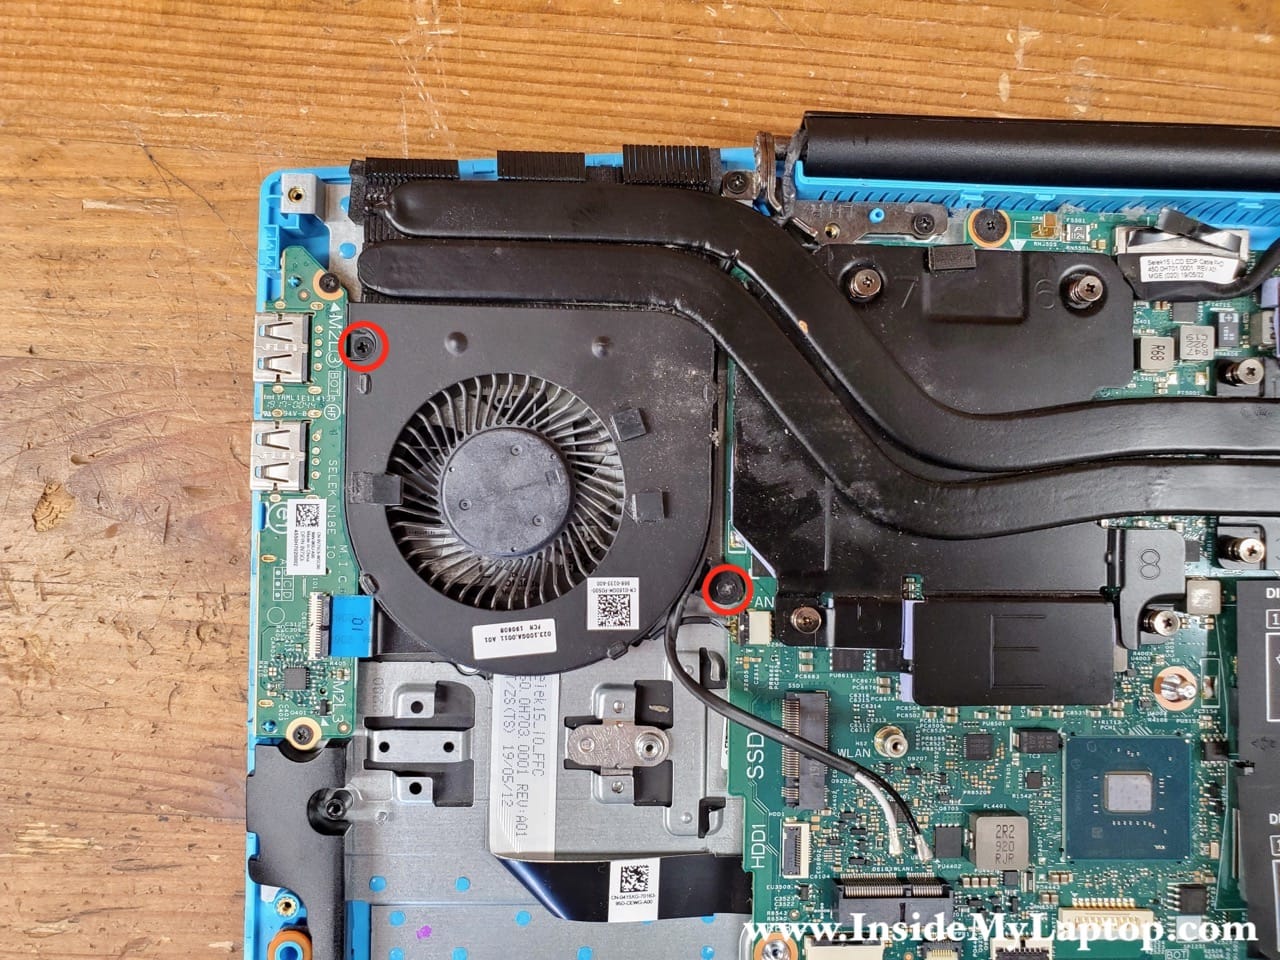
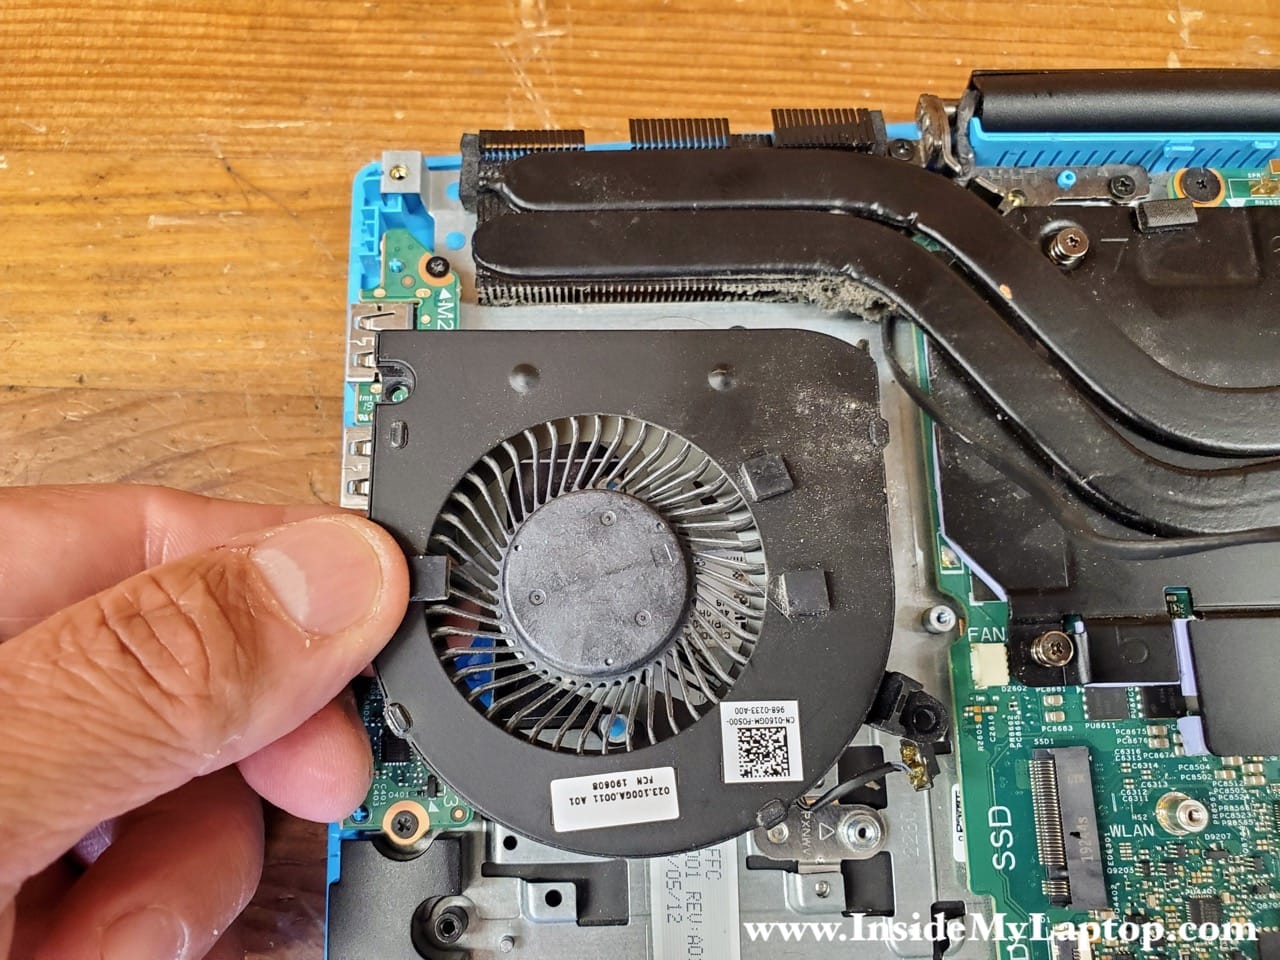
Cooling fans removal and replacement
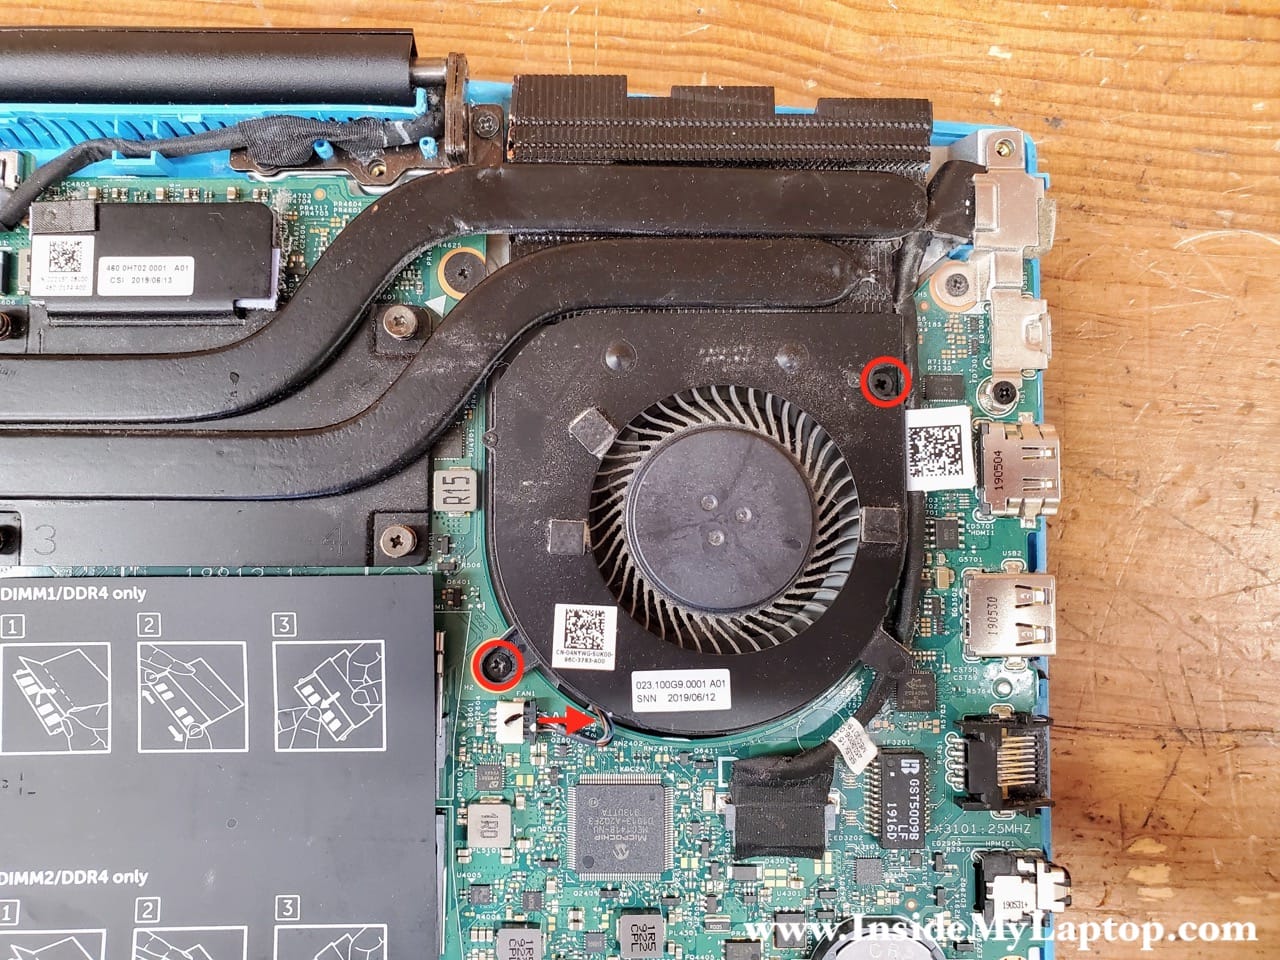
This laptop has two cooling fans. Let’s remove the right fan first.
Remove two screws attaching the fan.
Carefully unplug the fan cable from the motherboard.
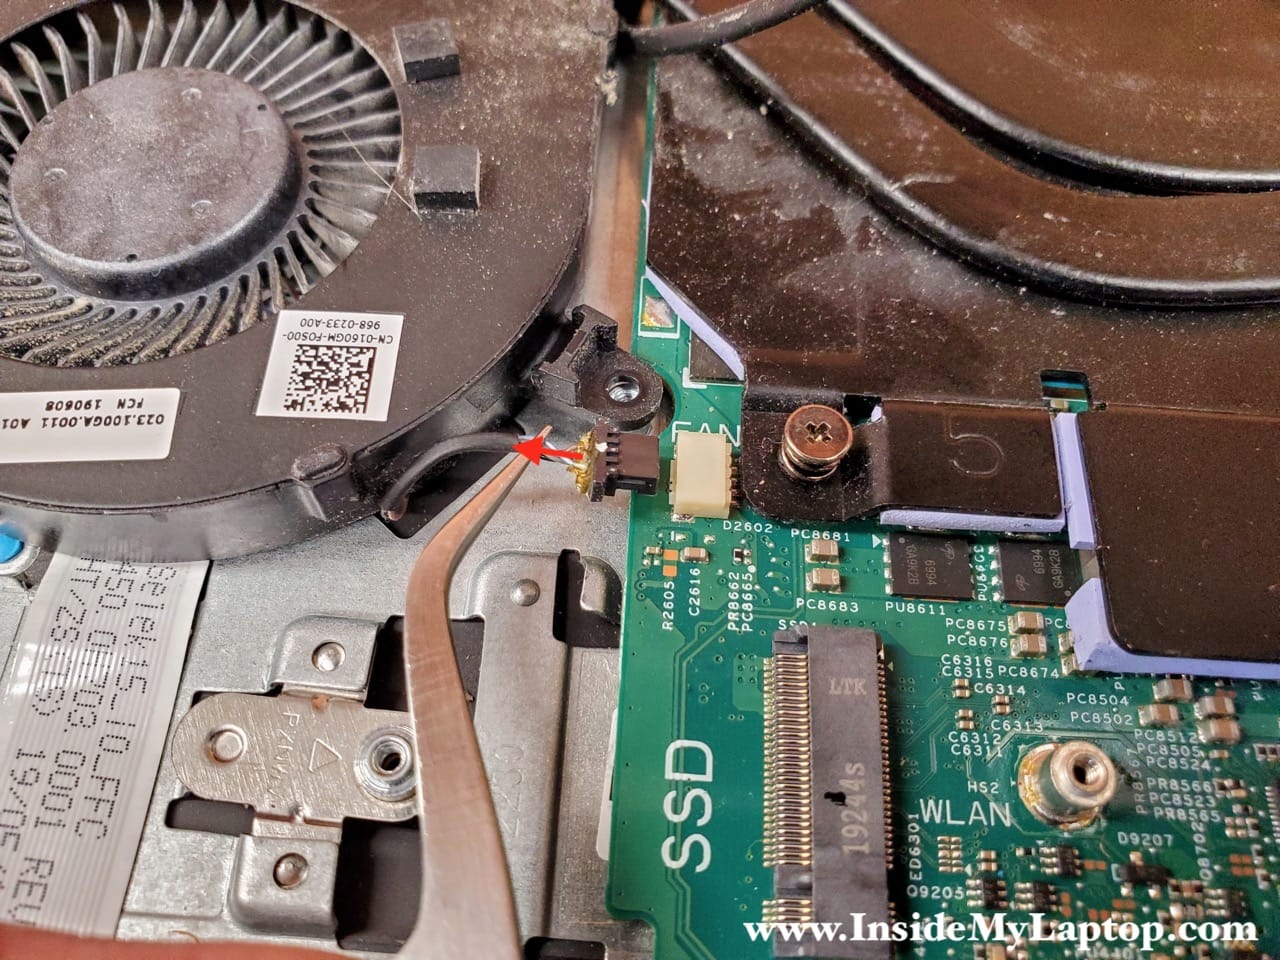
Remove the right fan.
Dell part number for the right fan is 0160GM.
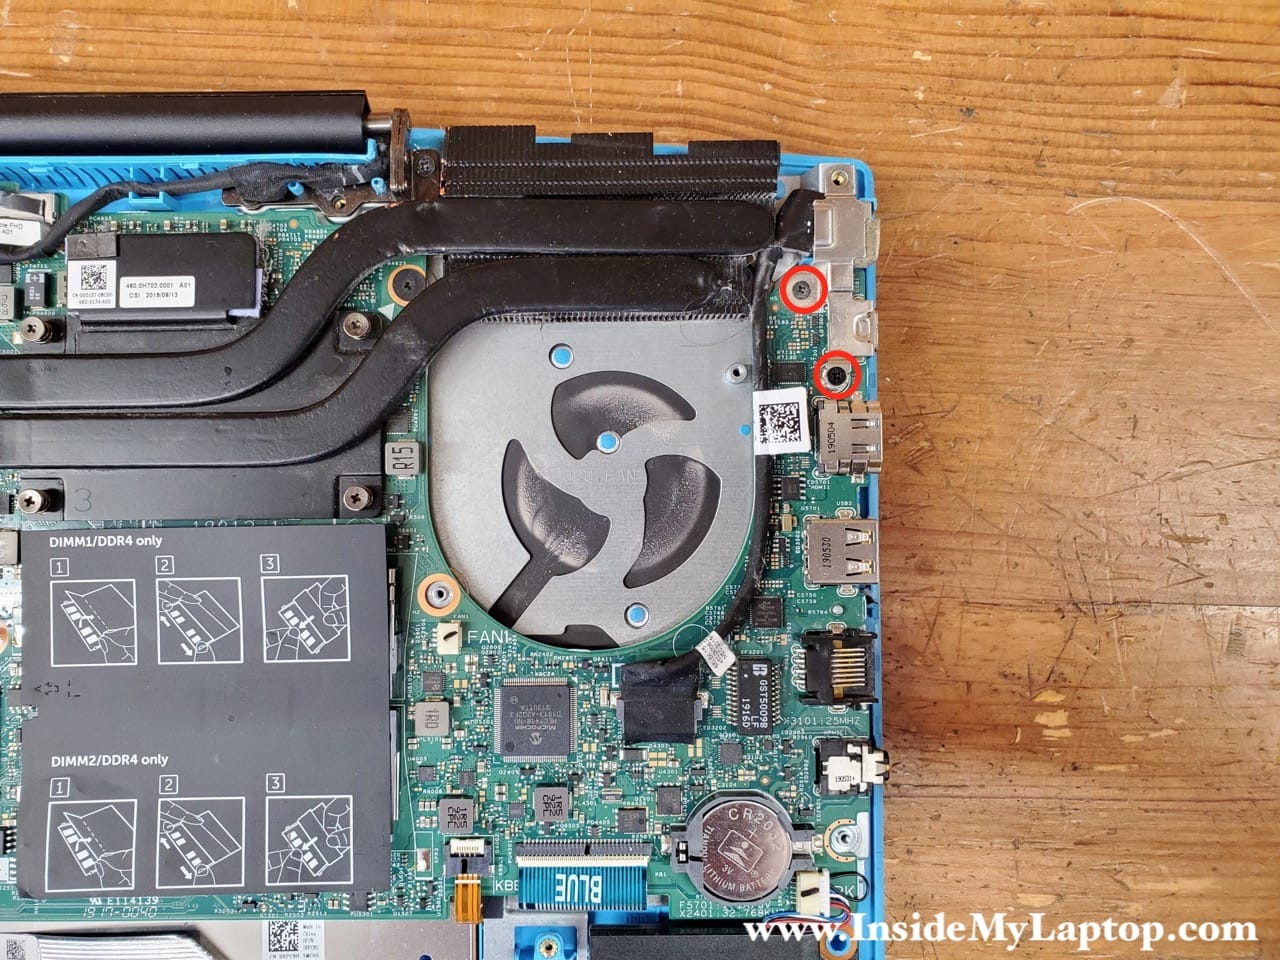
Remove two screws from the left fan and disconnect the cable.
Remove and replace the left fan if necessary.
Dell part number for the left fan is 04NYWG.

DC jack removal and replacement
Remove two screws attaching the DC jack bracket.
Lift up and remove the bracket.

Disconnect the DC jack cable from the motherboard.

Remove the DC jack harness and replace it with a new one if necessary.
Dell part number for this DC jack harness is 0C2RDV.

I’m not going to remove the motherboard but it shouldn’t be difficult at this point.
By the way, the keyboard in Dell G3 15 3590 (model P89F) laptop is permanently attached to the top case assembly. Keyboard removal is not easy but possible.