
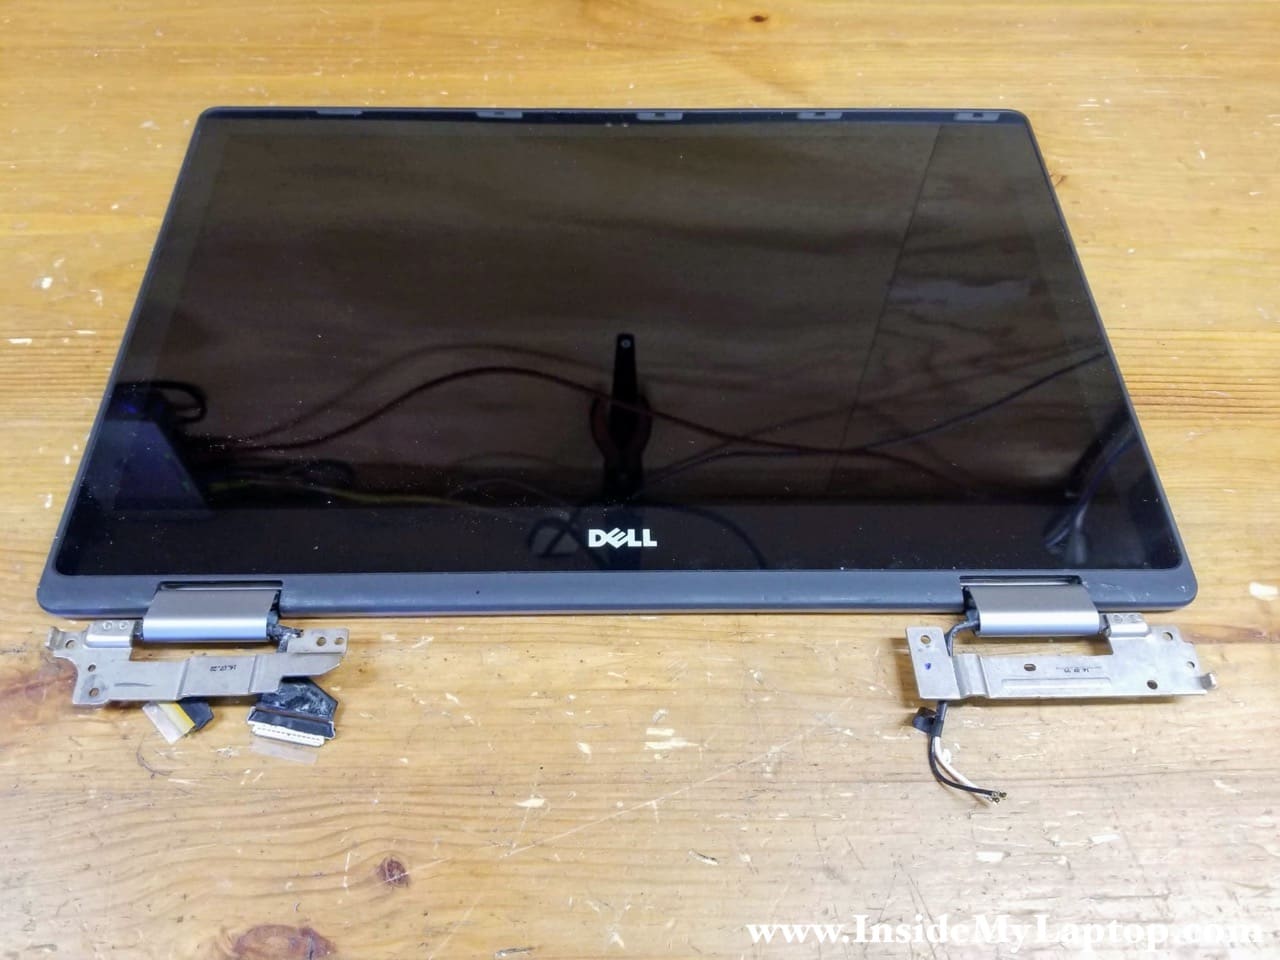
In this tutorial I explain how to remove and replace the touchscreen on a Dell Inspiron 15 5000 series or 15 7000 series 2-in-1 laptops (model P58F).
These disassembly guide can be used for the following models with the P58F body style:
– Dell Inspiron 15 5568
– Dell Inspiron 15 5578
– Dell Inspiron 15 5579
– Dell Inspiron 15 7569
– Dell Inspiron 15 7579
It’s is much easier to take apart the display panel and replace the touchscreen when the display is removed from the laptop and that’s the proper way. Though it’s possible to replace the screen with the display still mounted, as I did in my previous guide on a Dell Inspiron 13 7000 series.

How to remove the display panel
Here are very quick instructions for removing the display panel. If you need more detailed instructions, you can find them in the full Dell Inspiron 15 7569 7579 P58F disassembly guide.
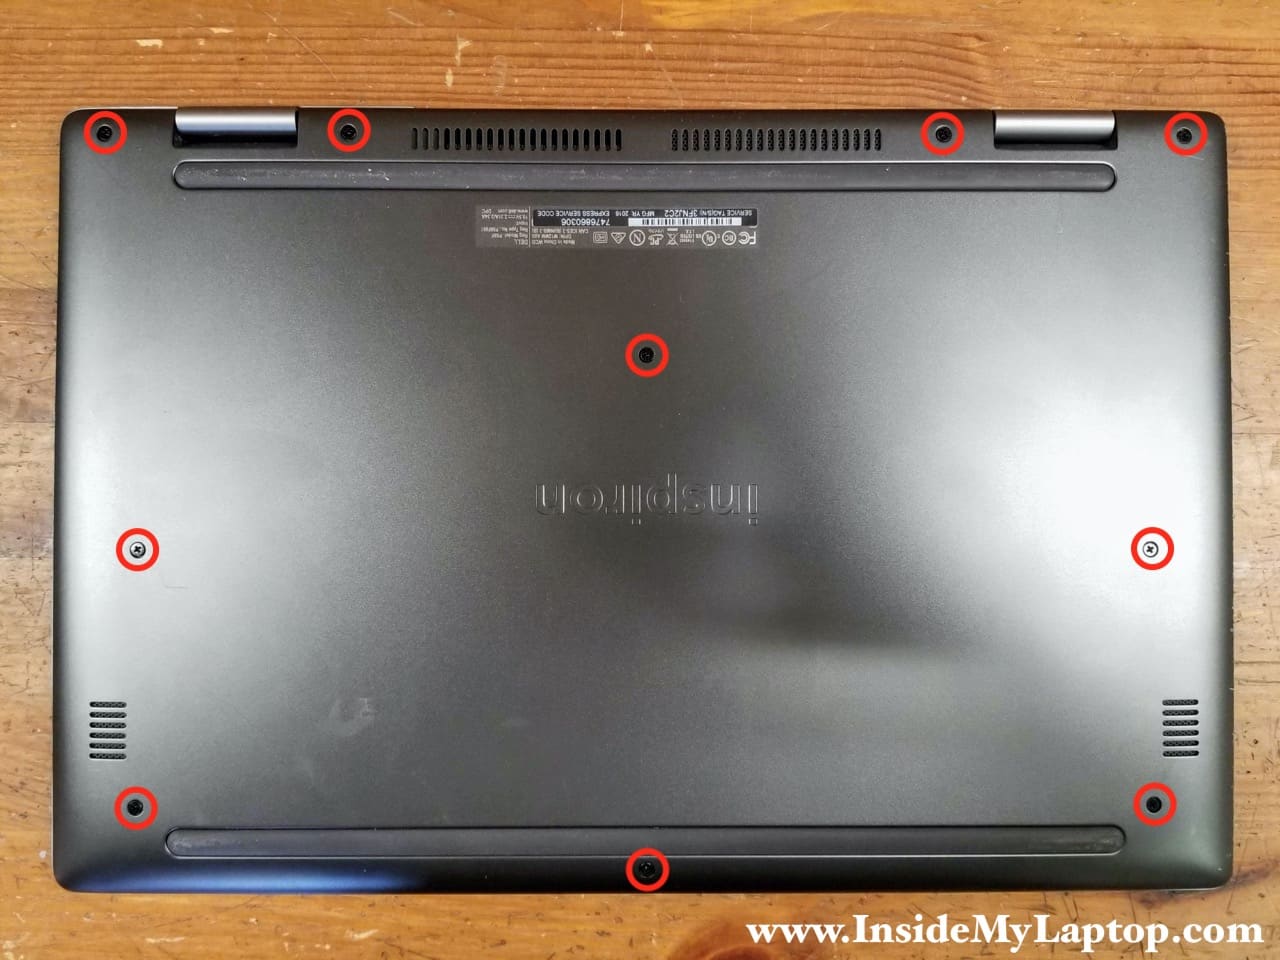
First of all, remove all screws securing the base cover. Pry up the base cover and separate it from the top case. Remove the base cover from the laptop.
Open the display panel 180 degrees and place the laptop on the desk as shown on the following picture. In order to separate the display panel from the base it is necessary:
– Disconnect two antenna cables from the wireless card (yellow).
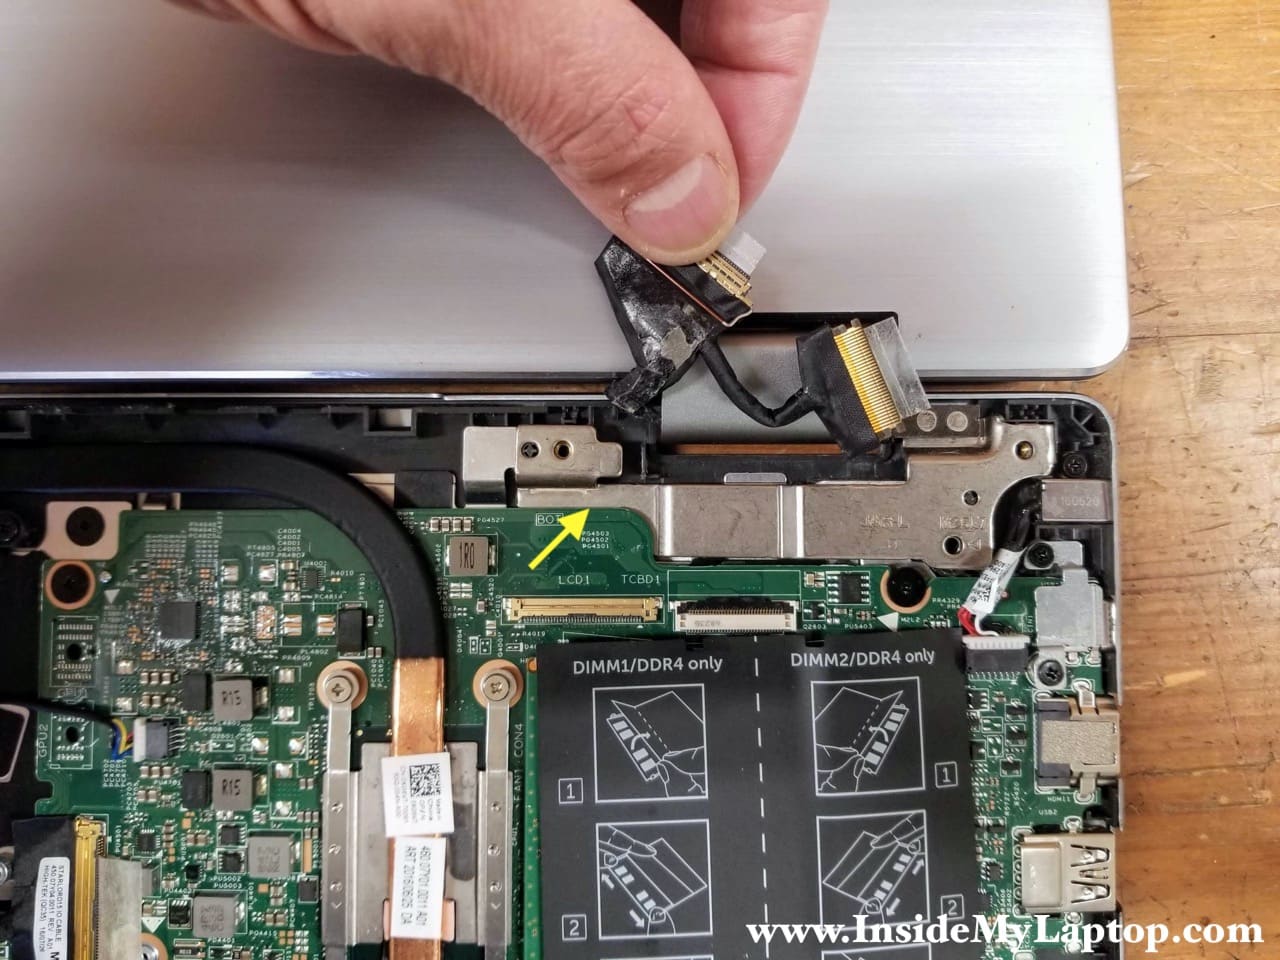
– Disconnect two display cables from the motherboard (green).
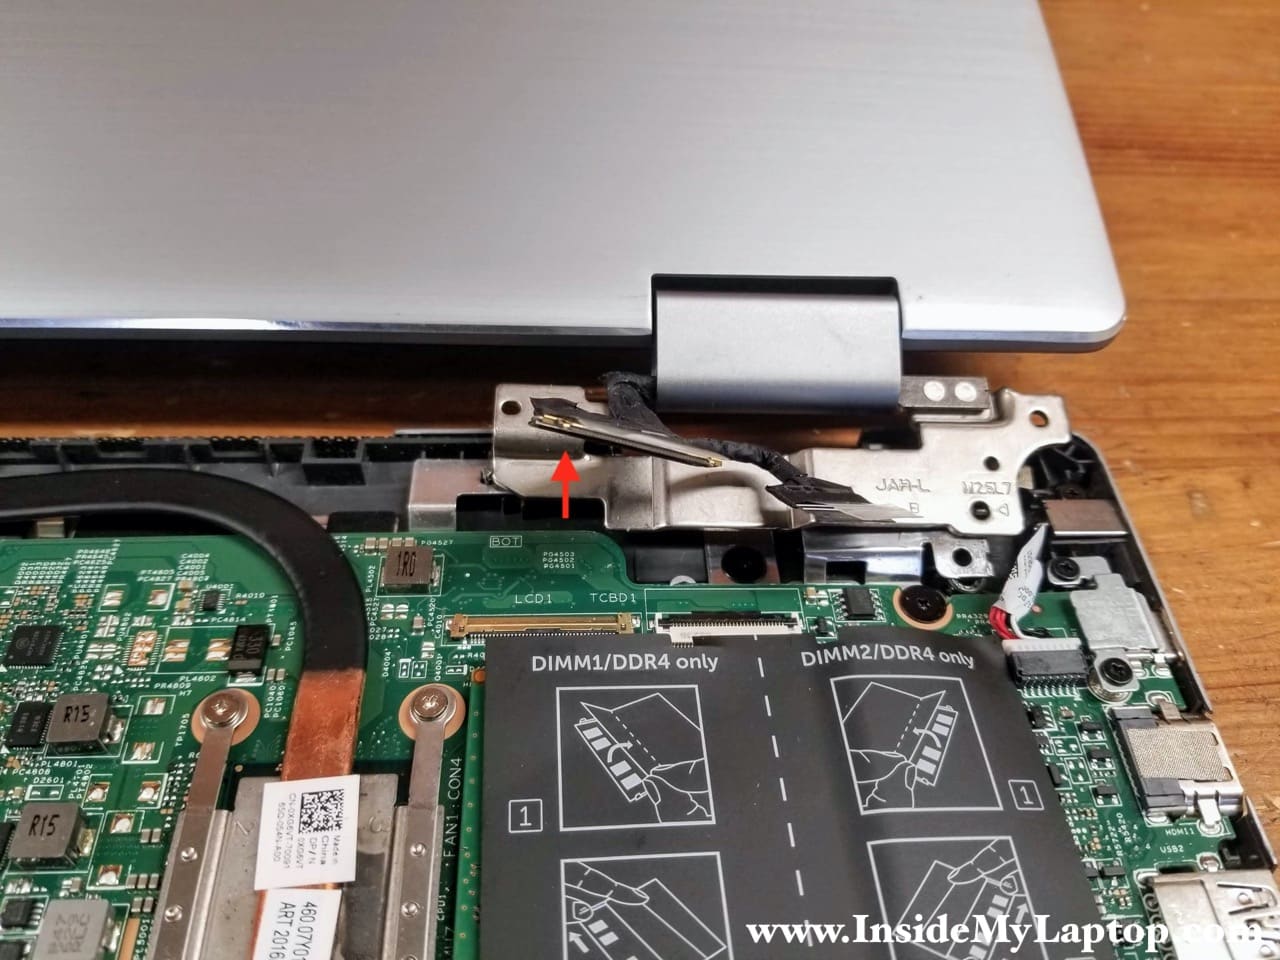
– Remove two screws securing the display hinges (red).
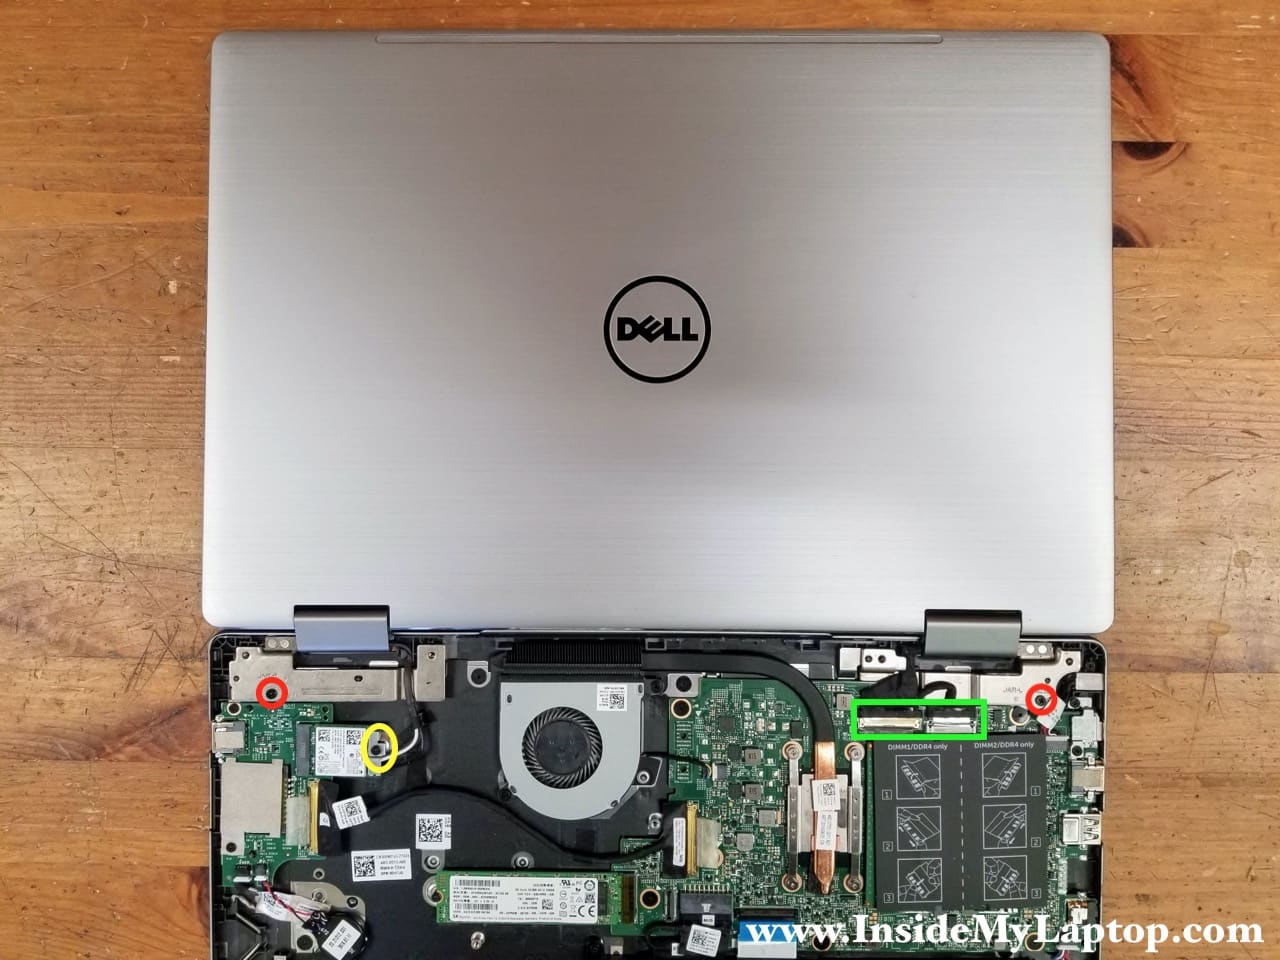
A small part of the left display hinge is located under the motherboard. According to the official Dell service manual it is necessary to remove the motherboard before removing the display panel.
I found that it’s possible to remove the display without removing the motherboard. There is enough space to pull the display hinge from under the motherboard. If you want to be on a safe side, remove the motherboard first as suggested by the Dell service manual.
Now, when the display panel is removed, it’s ready to be disassembled for the screen replacement.
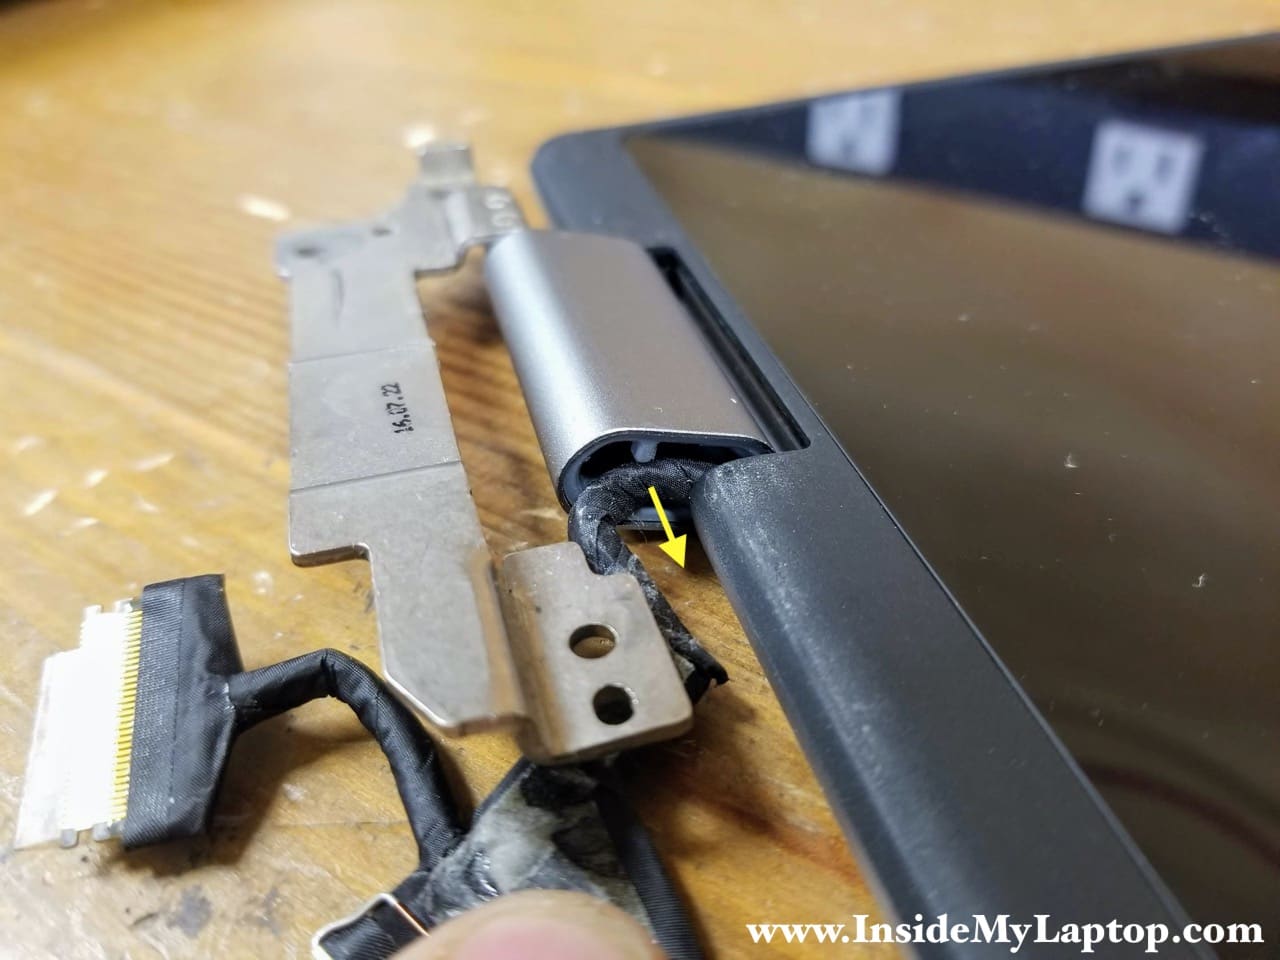
The wireless antenna cables are routed inside the hinge cover but can be easily removed if necessary.
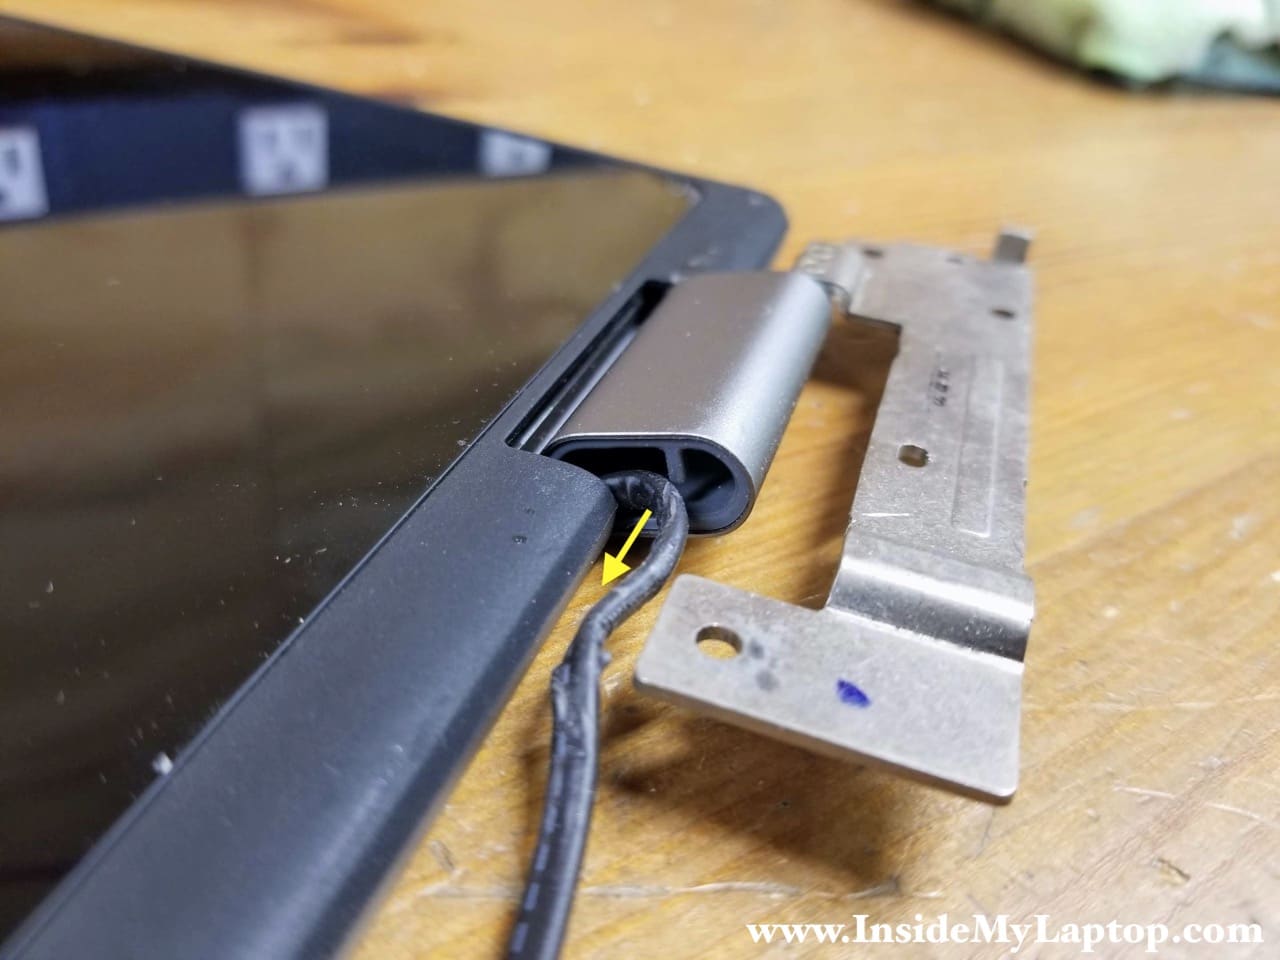
Same with the display video cable.
Touchscreen removal steps
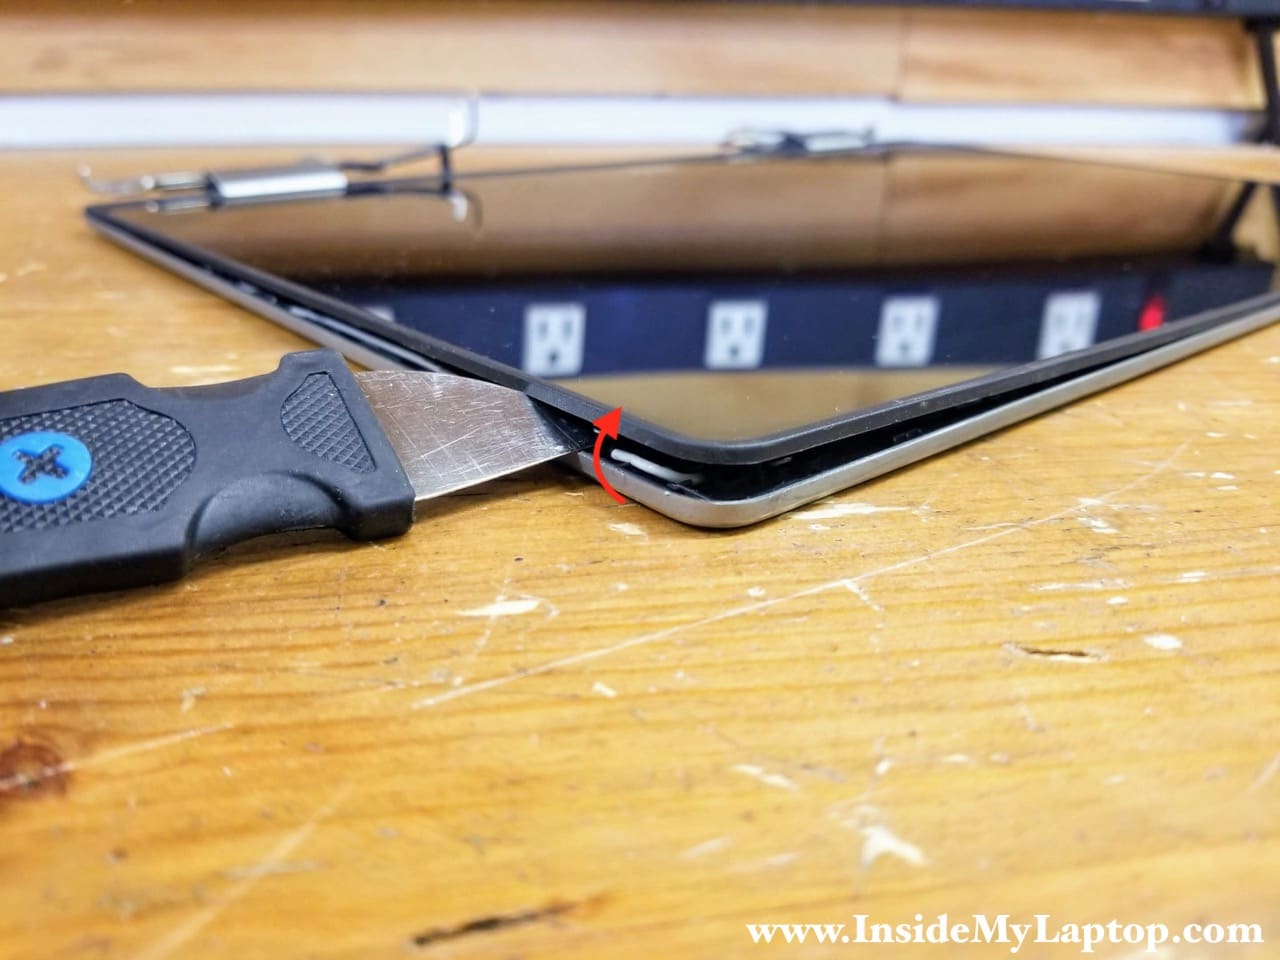
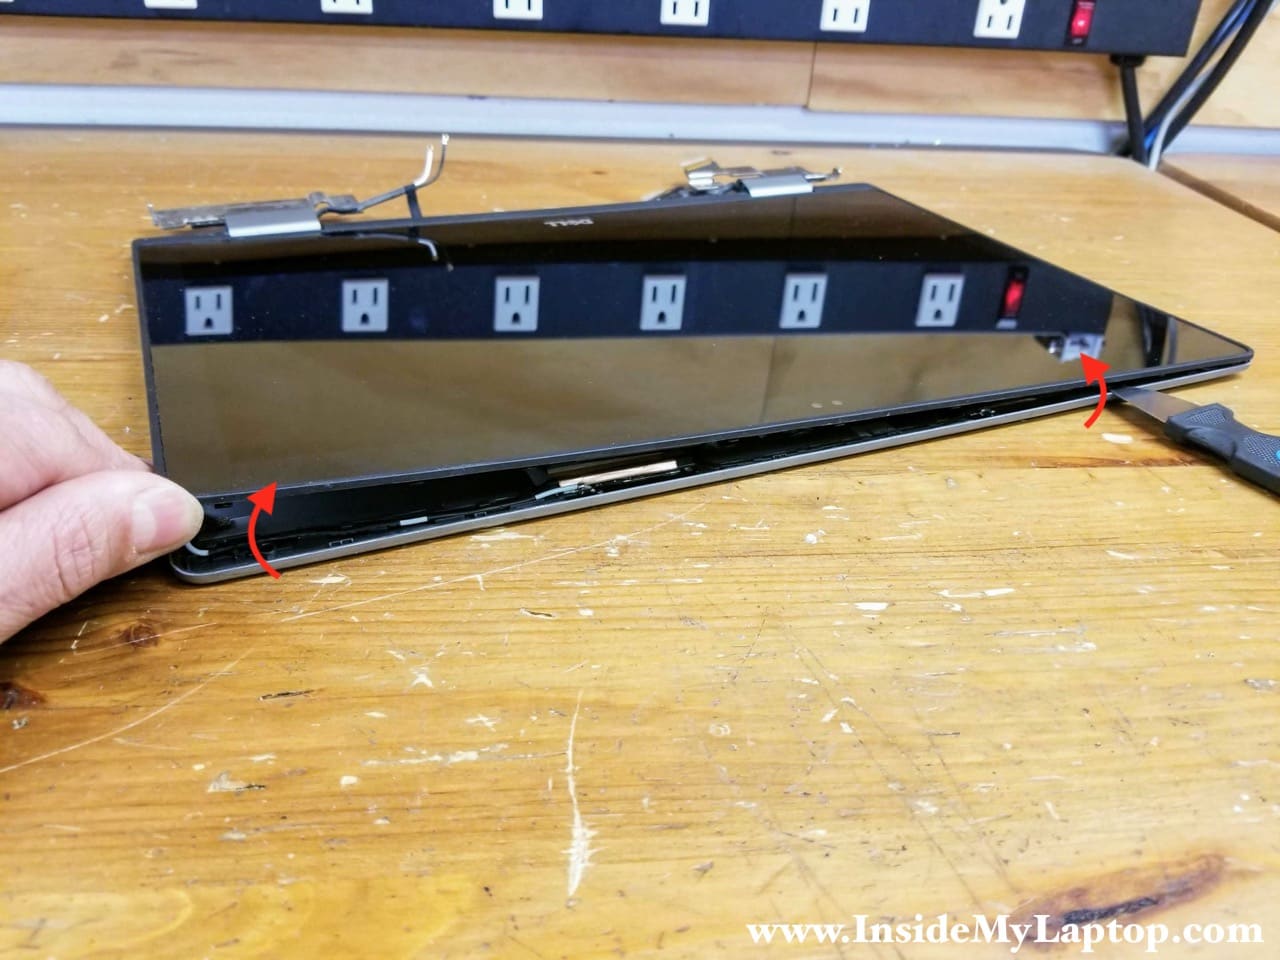
STEP 1.
Start separating the touchscreen assembly from the display back cover using a thin case opener tool. Pry up the touchscreen to release all hidden latches securing it to the back cover.
STEP 2.
Continue removing the touchscreen with your fingers while helping yourself with the case opener tool.
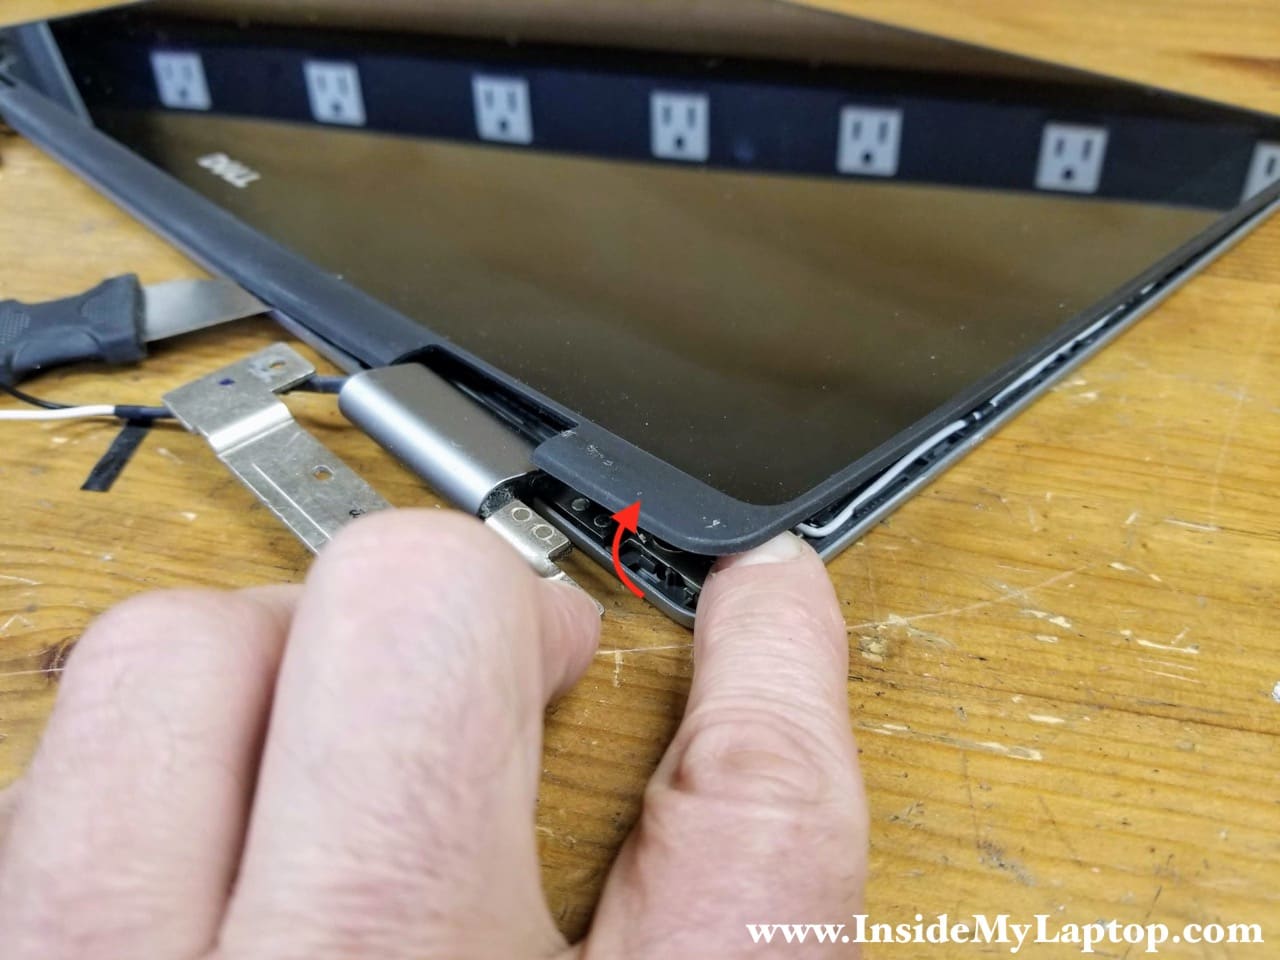
STEP 3.
After the touchscreen is separated from the cover on the upper side of the display panel, move to the hinge area.
STEP 4.
Continue removing the touchscreen.
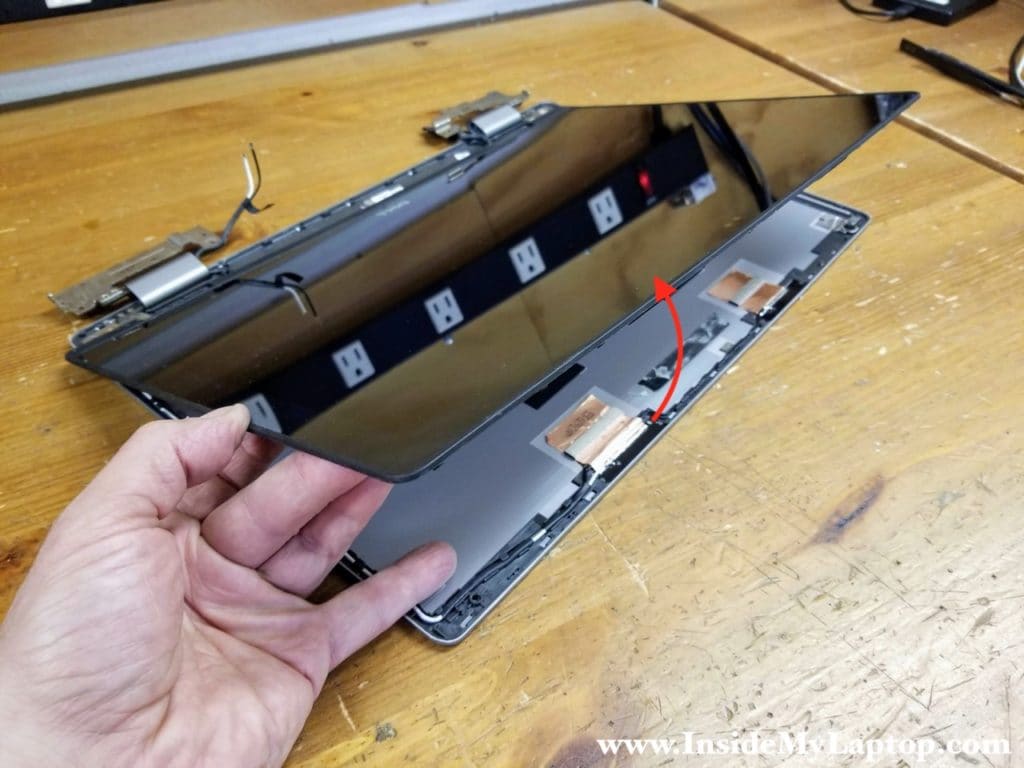
STEP 5.
When all hidden latches are released, you can lift up the touchscreen and separate it from the back cover.

Here’s the display back cover with the screen removed. Now you can access and replace the display hinges if necessary. The wireless card antennas also attached to the back cover.

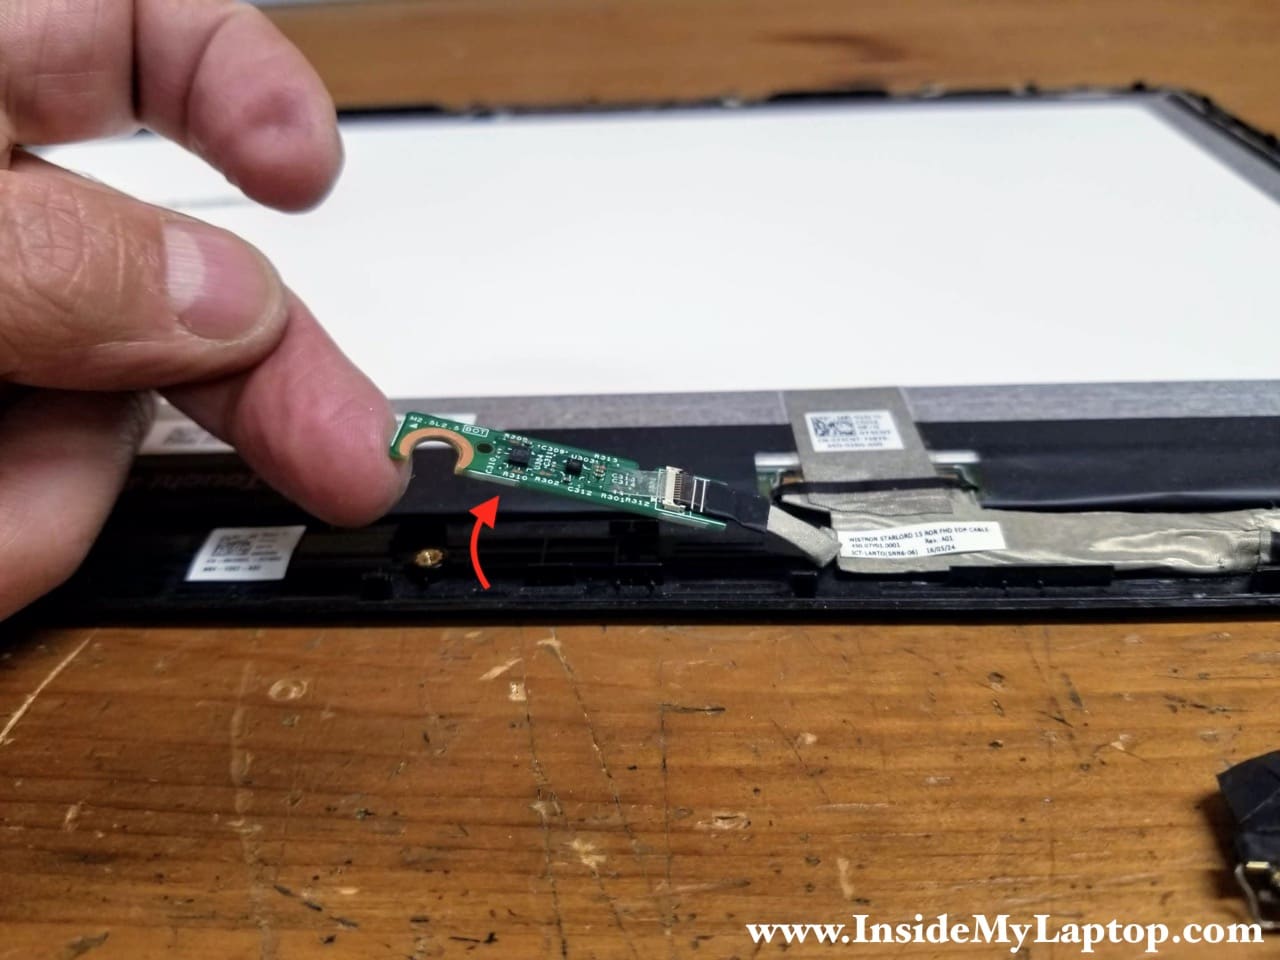
STEP 6.
Remove one screw securing the Windows home button.
STEP 7.
Lift up and separate the Windows home button from the display bezel. There is a cable plugged in into the right side of the board. You don’t have to disconnect this cable unless you are replacing the home button.
STEP 8.
Peel off the sticky tape securing the display video cable connector.
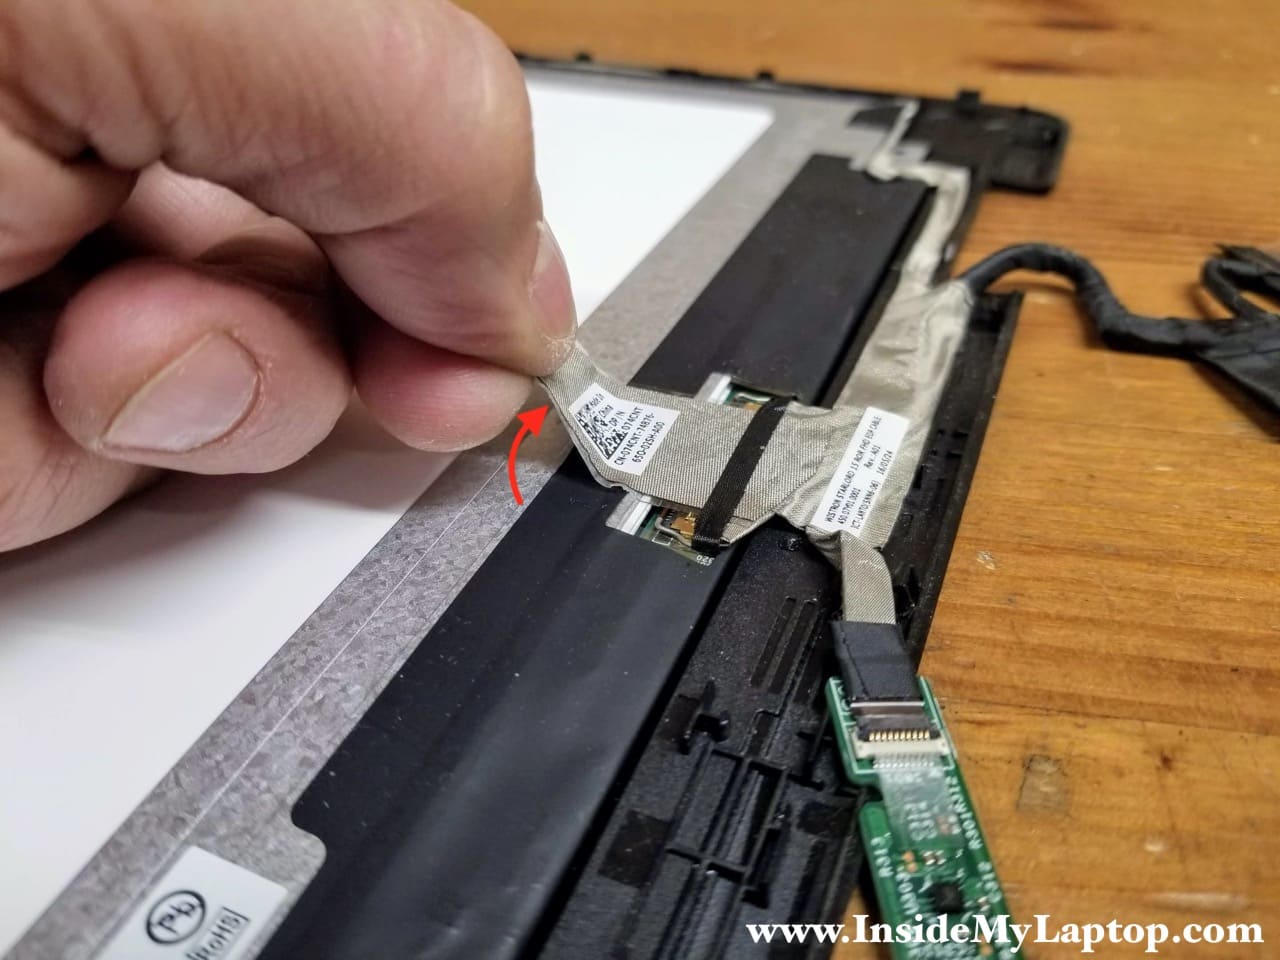
The connector has to be unlocked before removing the cable.
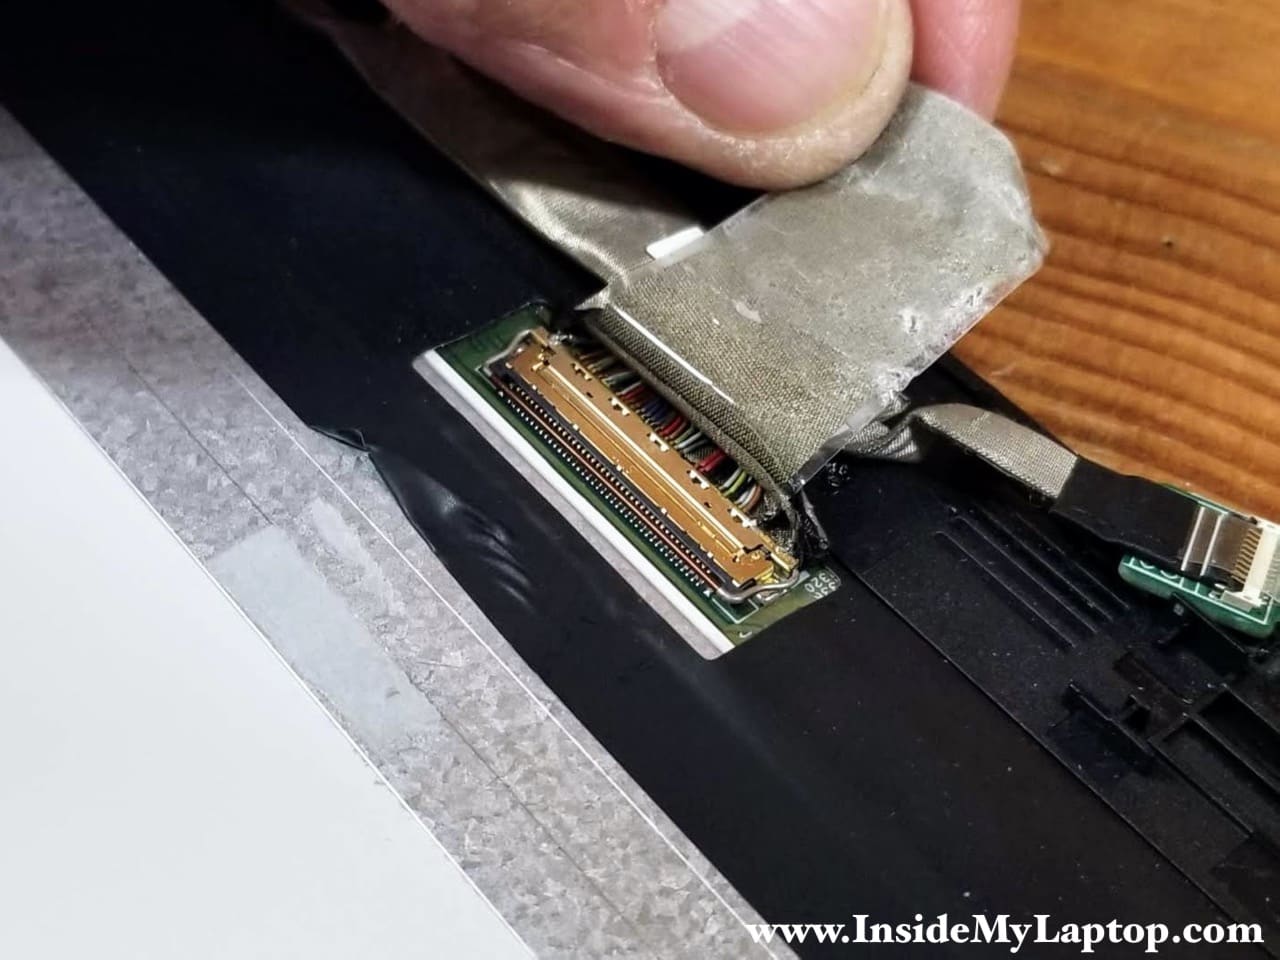
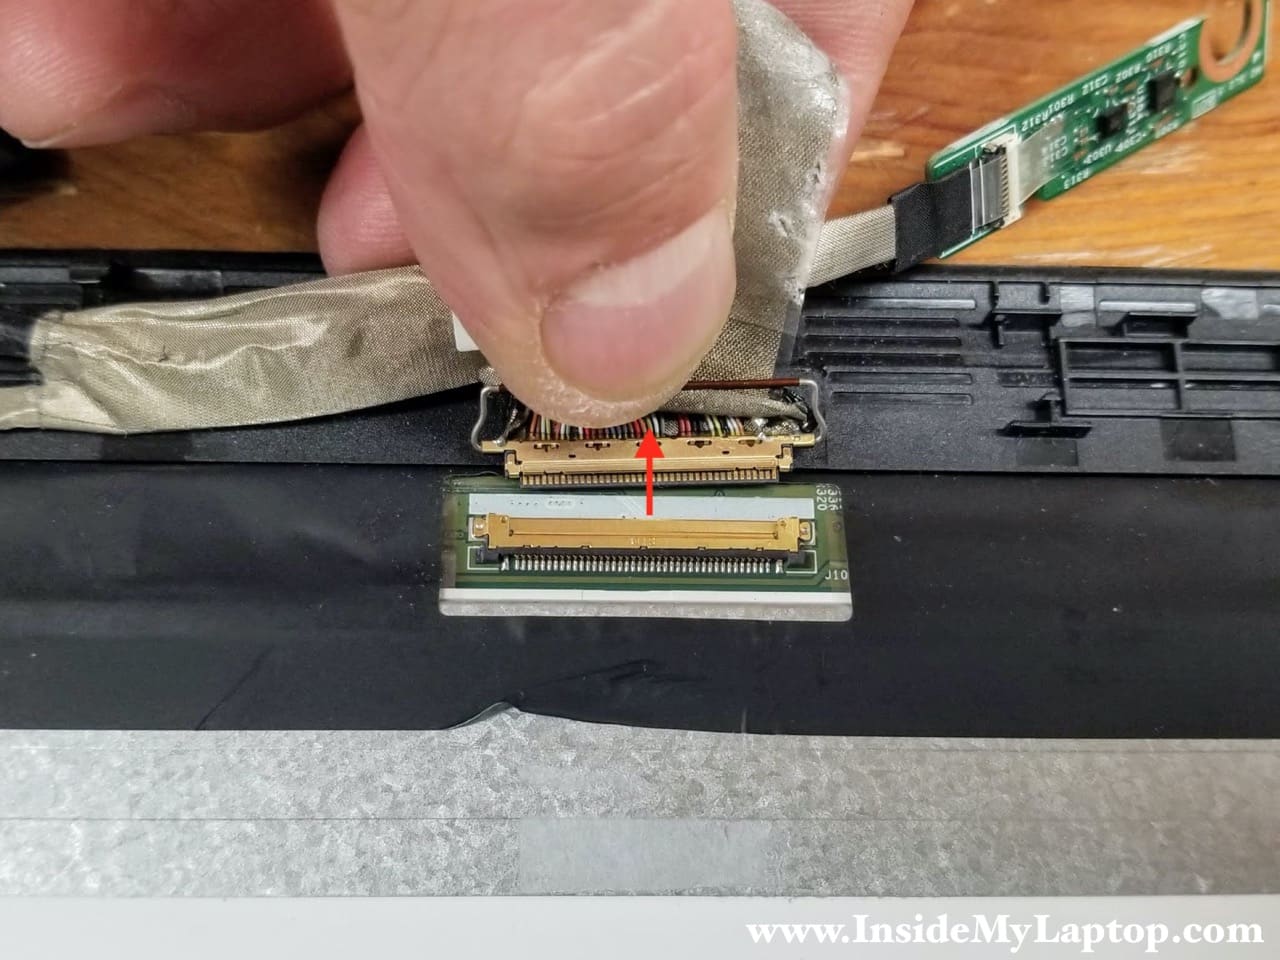
STEP 9.
Lift up the metal bracket to unlock the display cable connector.
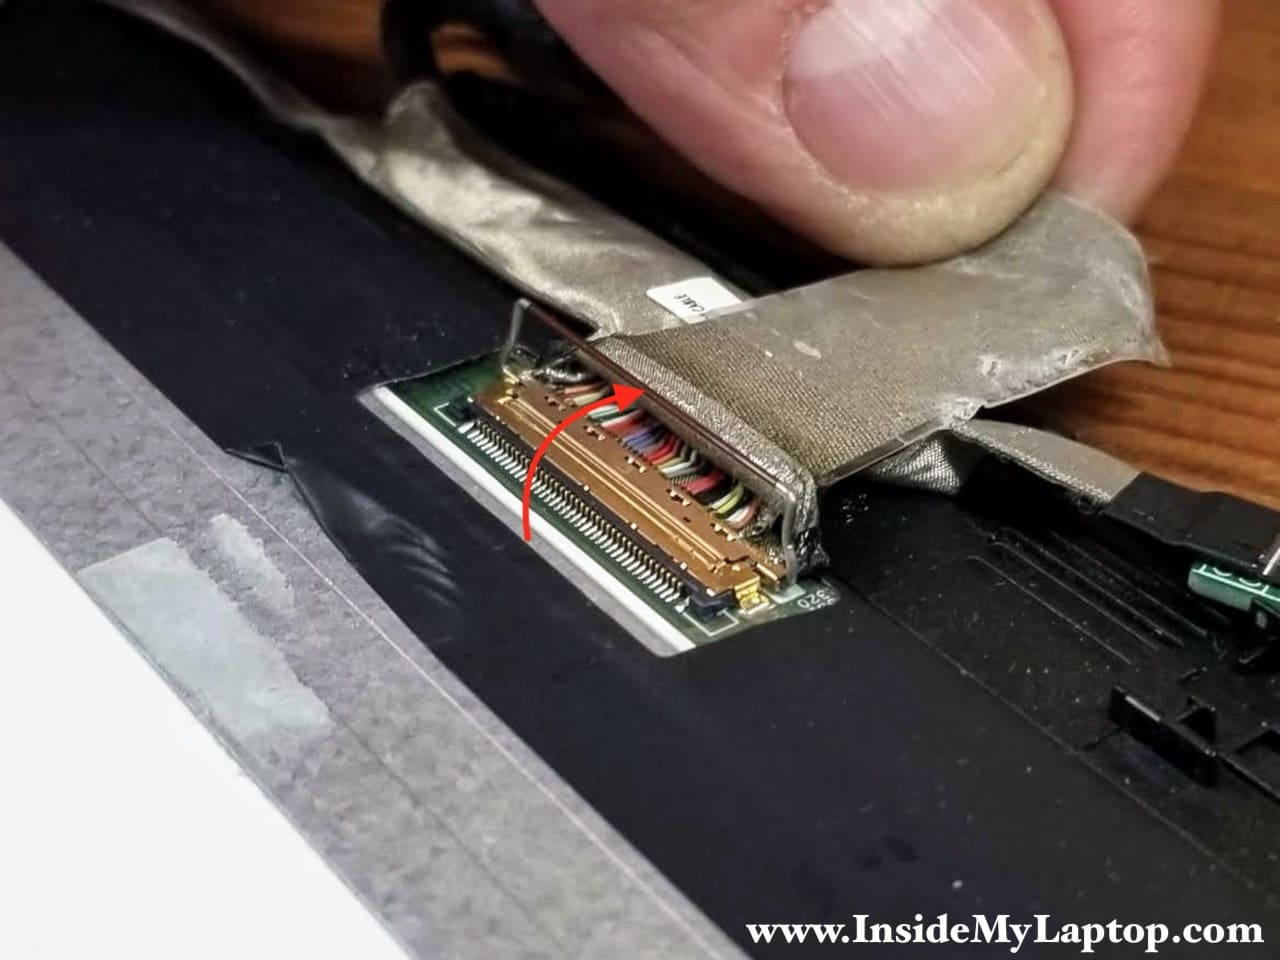
STEP 10.
Disconnect the display cable from the LCD screen.
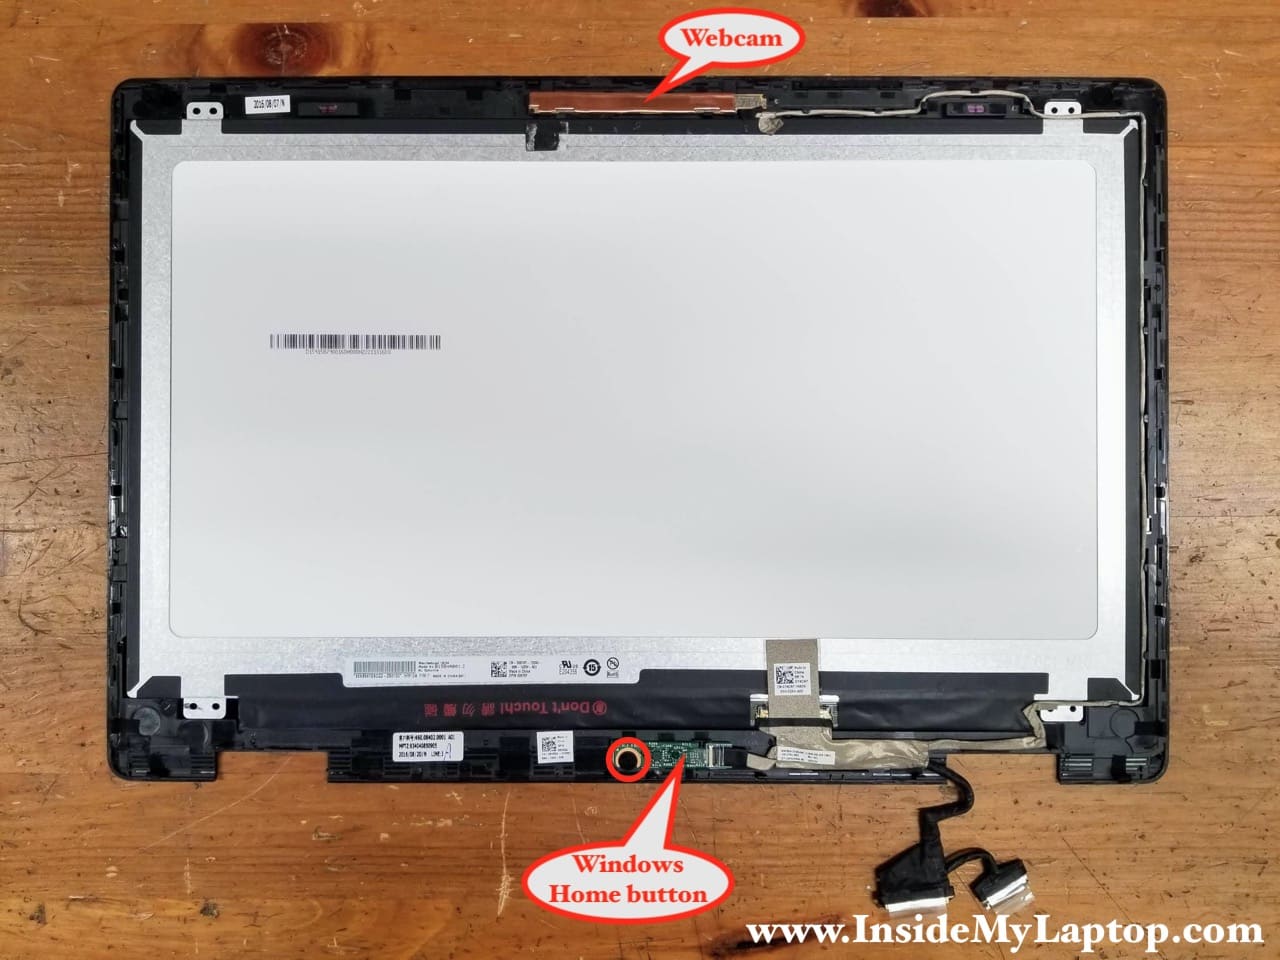
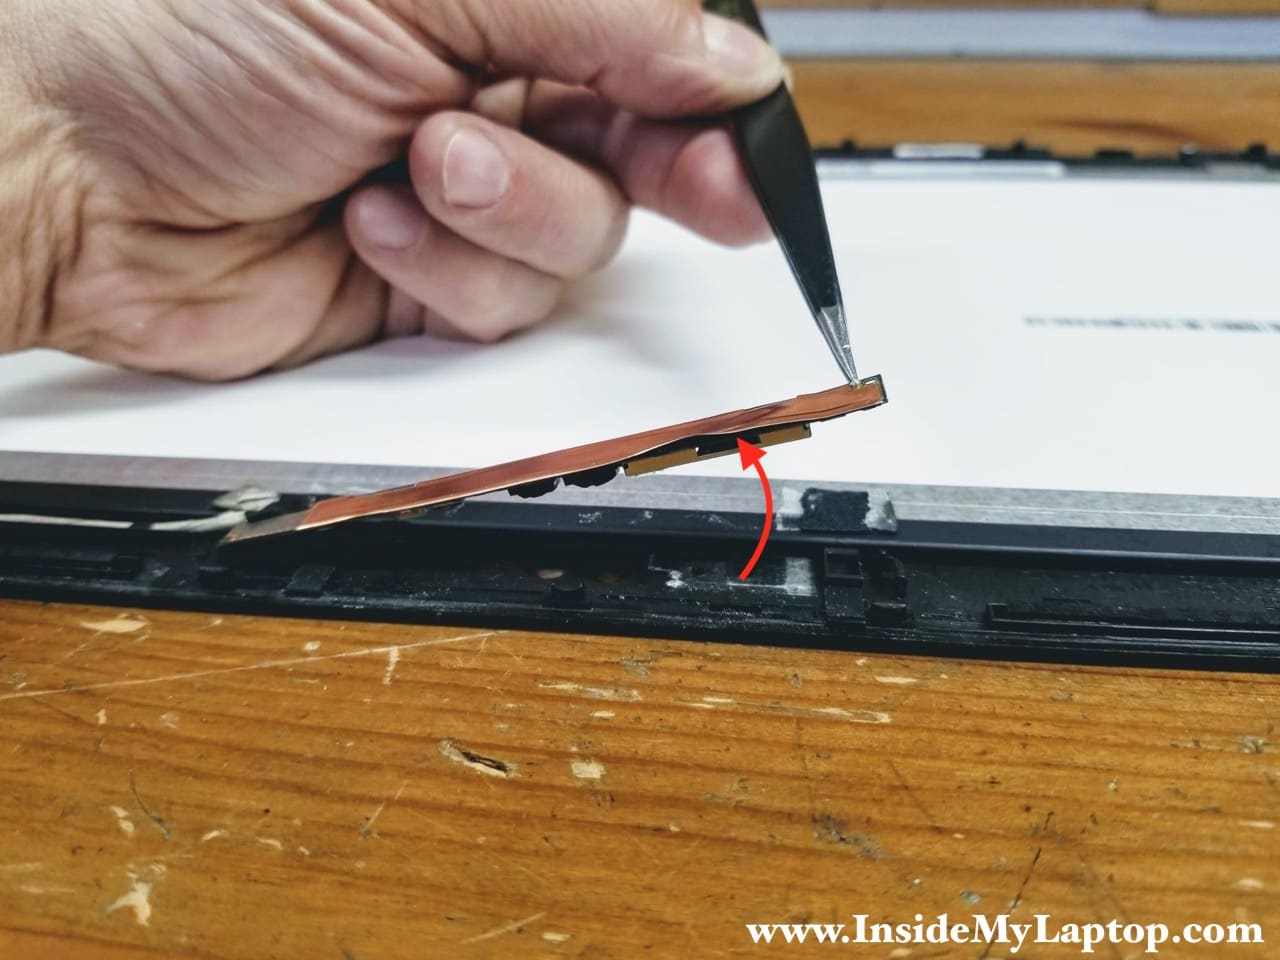
Now we’ll move to the top side of the display and remove the webcam. The webcam is secured by a latch on the side.

STEP 11.
Release the latch and separate the webcam board from the display bezel. Do not disconnect the webcam from the cable unless you are replacing the webcam.
STEP 12.
Un-route the webcam cable from the guided path on the left side of the touchscreen assembly.
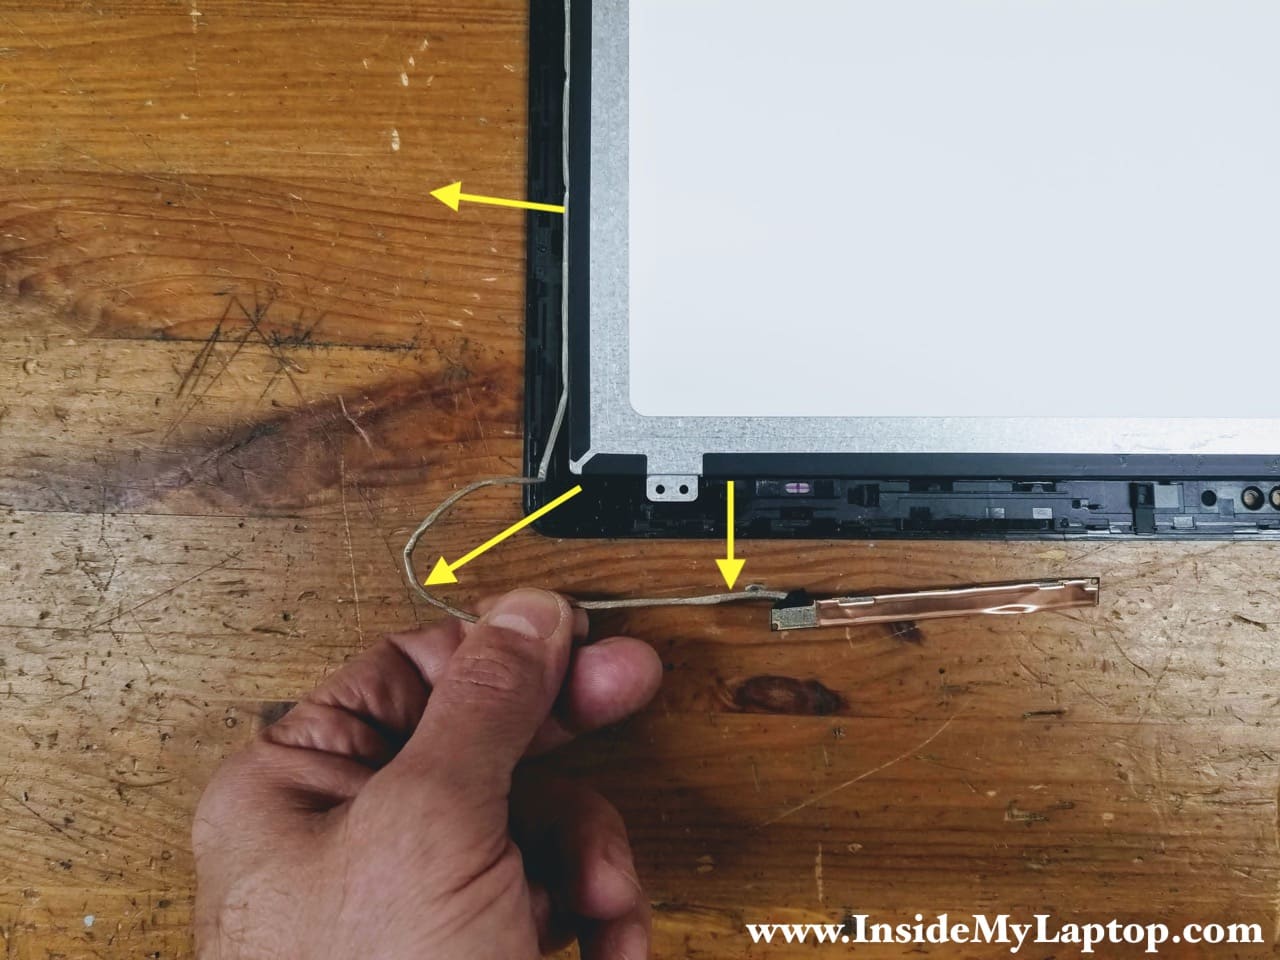
STEP 13.
Remove the webcam/video hardness with the Windows home button board and webcam board attached. We’ll be transferring the entire harness to the new touchscreen assembly.
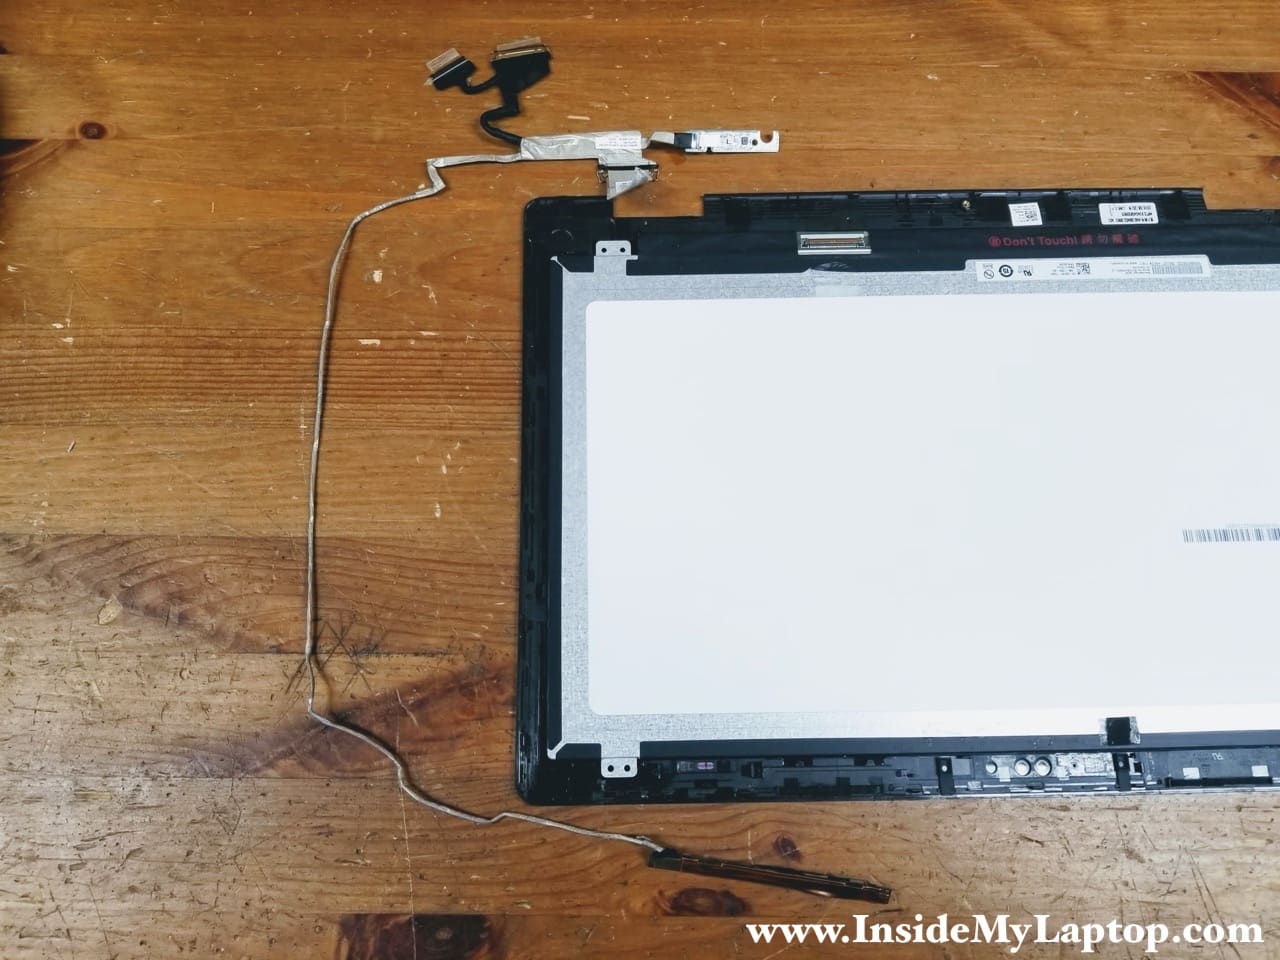
The touchscreen has been removed and ready to be replaced. The LCD screen is permanently glued to the front glass so it cannot be replaced separately. If you cracked the glass or the LCD failed, you’ll need to replace the entire touchscreen assembly.
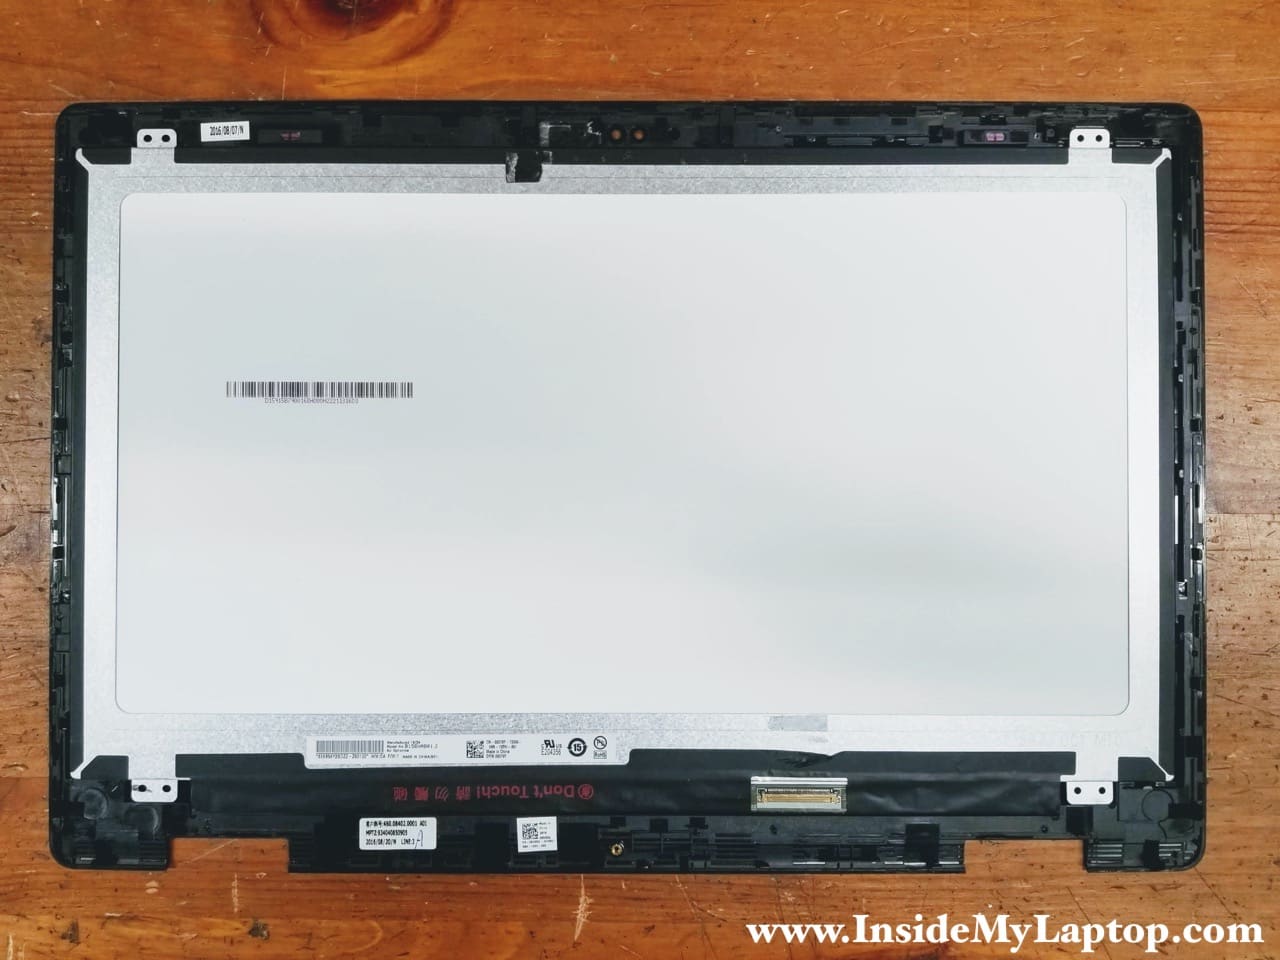
You can use a replacement touchscreen if you search by the Dell part number printed on the original part.

Assemble the display panel following all disassembly steps in the reverse order.
Dell Inspiron 15 5568 5578 5579 touchscreen part number: 00079Y.
Dell Inspiron 15 7569 7579 touchscreen part number: 06V05G.
codehopper
Your photos and commentary are excellent and I thank you for this useful guide.
You and others who either create websites like this one or create youtube videos “never” mention the details related to the handling, disassembly (opening of connectors), and reconnection of the extremely fragile and more often than not irreplaceable wiring harness/connectors that are used in miniaturized devices such as laptops.
IML Tech
I explain how to open connectors in the “Tips for beginners”. It just doesn’t make sense to explain it in each disassembly guid over and over again.