
In this guide I’m taking apart a Lenovo ideapad FLEX 4 laptop.
You can use these instructions for one of the following Lenovo ideapad FLEX 4 models:
Ideapad FLEX 4-1570 | ideapad FLEX 4-1580
Ideapad FLEX 4-1470 | Ideapad FLEX 4-1480 | Ideapad FLEX 4-1435
All these models are almost identical except for one screw location on the base cover.
For this disassembly you will need only basic repair tools: Phillips screwdriver #1 or #0, case opening tool and tweezers. For your convenience at the end of this guide I will attach a link to the official hardware maintenance guide.
Removing base cover and battery
STEP 1.
Remove all screws from the base cover. Two screws color-coded in yellow are longer than other nine screws.

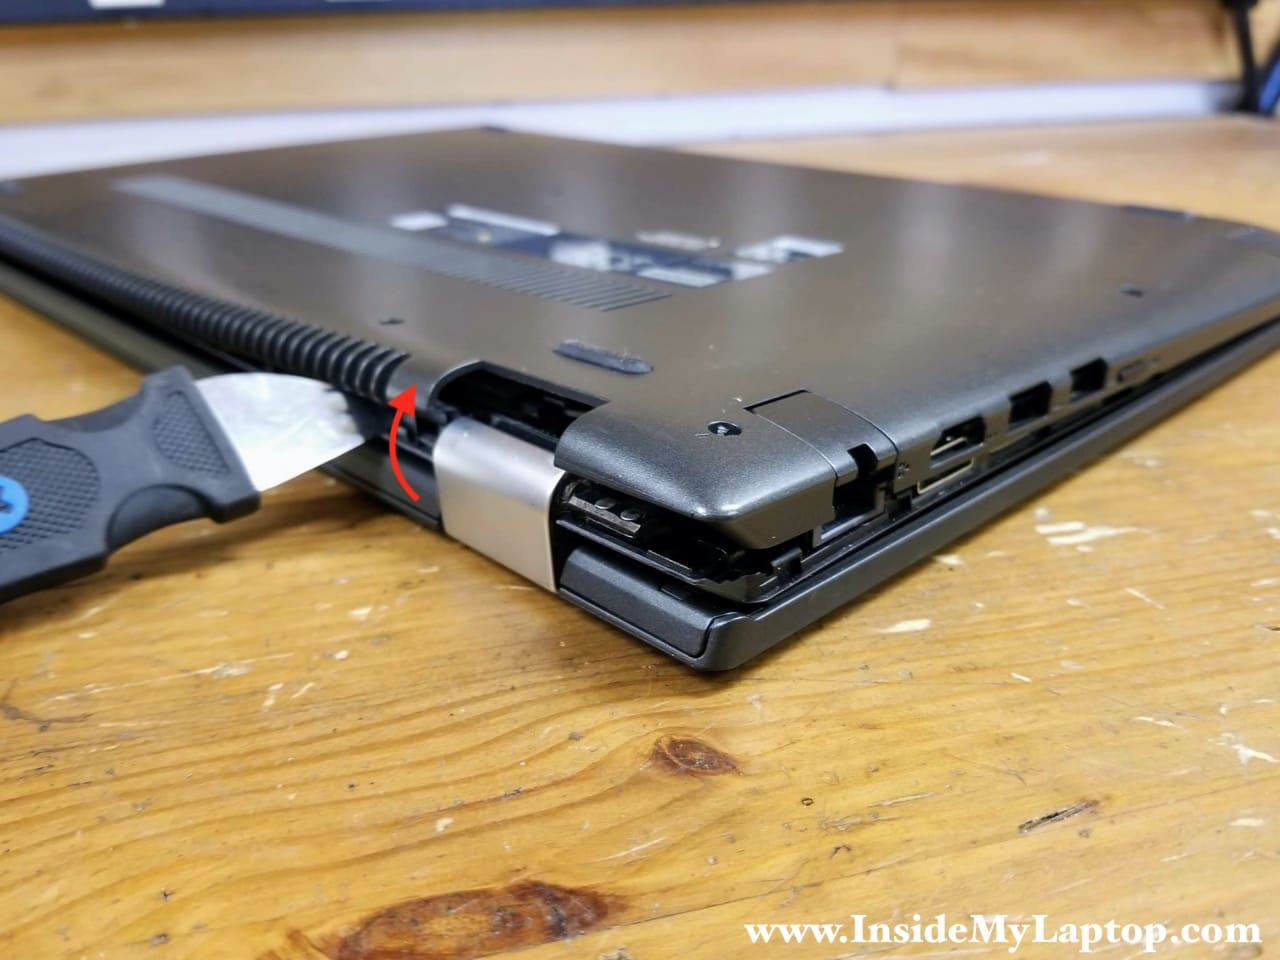
STEP 2.
Start separating the base cover from the top case. I started removing the base cover around the hinge area. You can start from the front side of the laptop if you wish.
There are many hidden latches securing the base cover. It’s necessary to use some reasonable force to separate two parts.
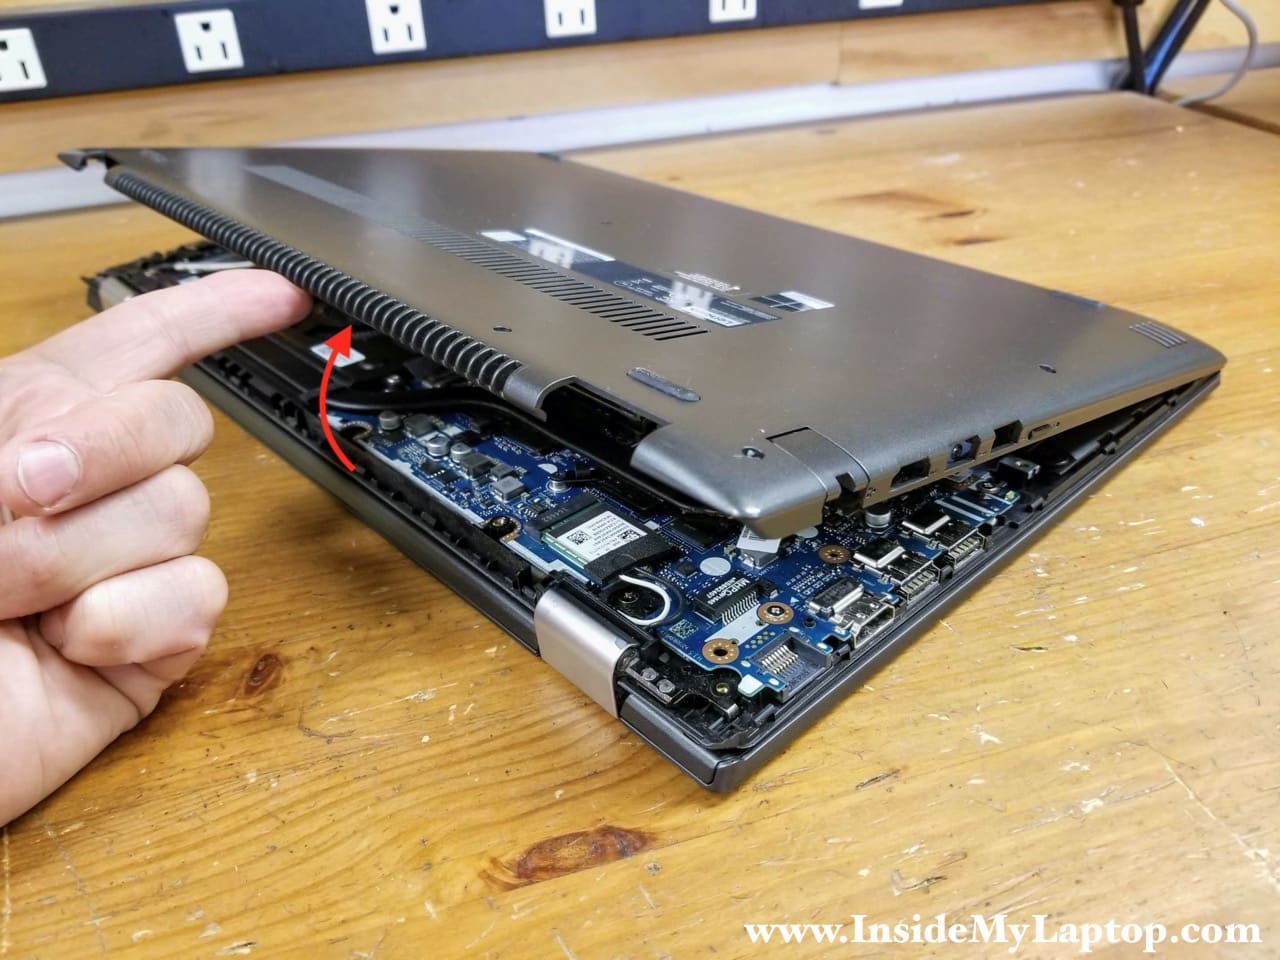
STEP 3.
Remove the base cover.
STEP 4.
Remove three screws attaching the battery to the top case.
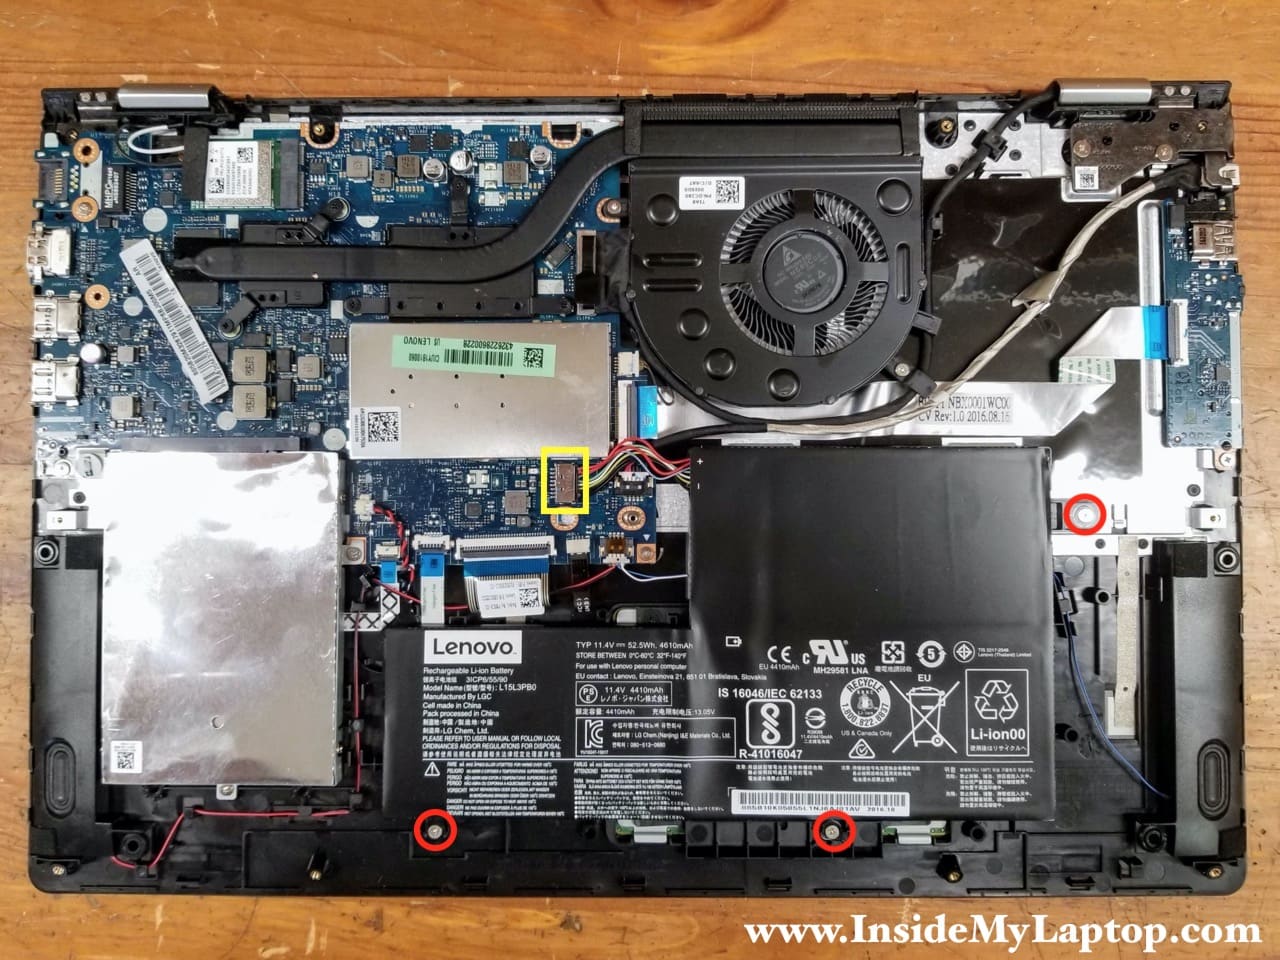
STEP 5.
Lift up the battery from the case and disconnect the battery cable from the motherboard. Remove the battery (Model Name: L15L3PB0).

Removing hard drive and memory
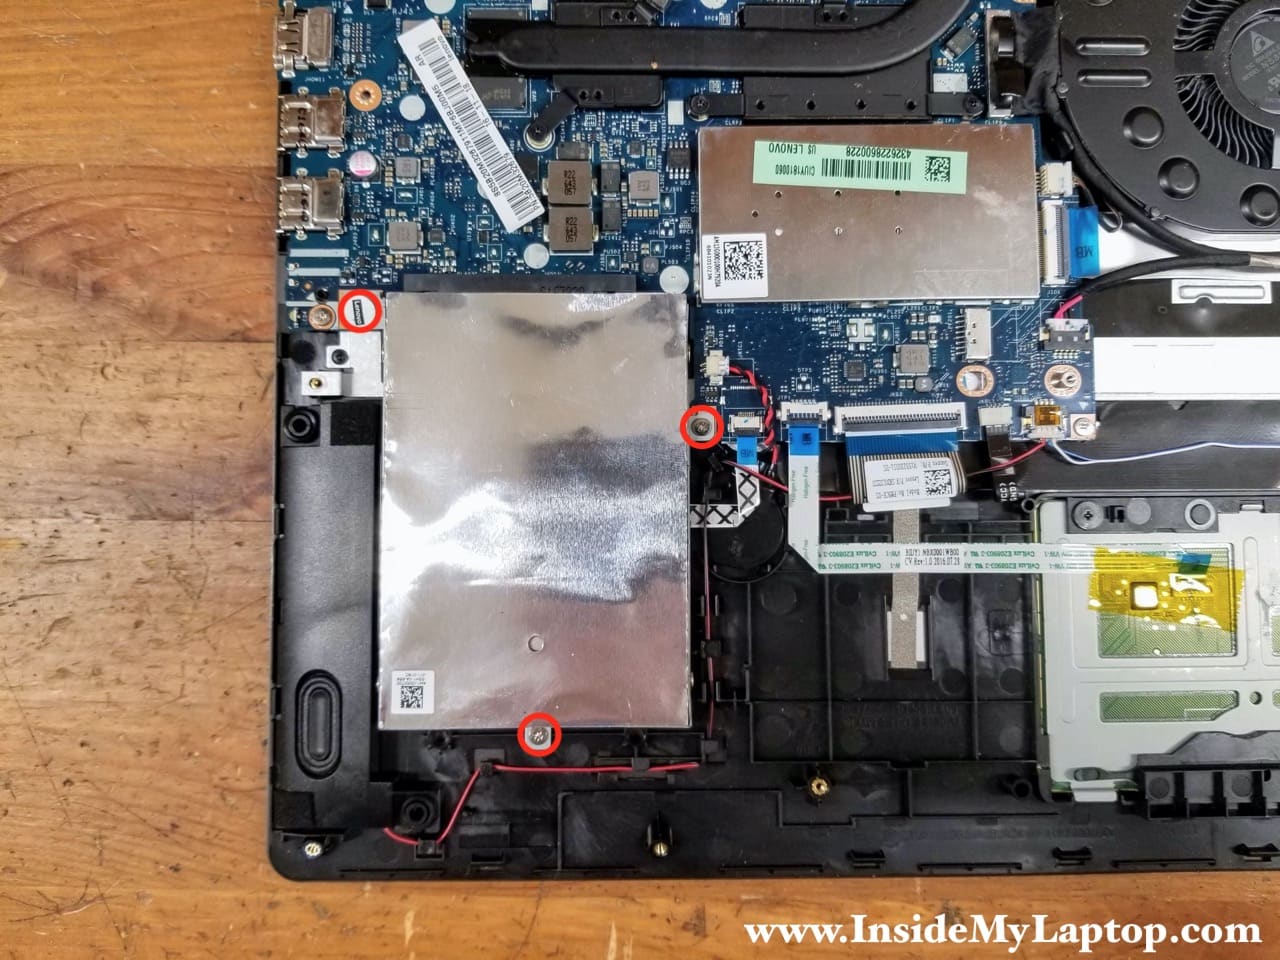
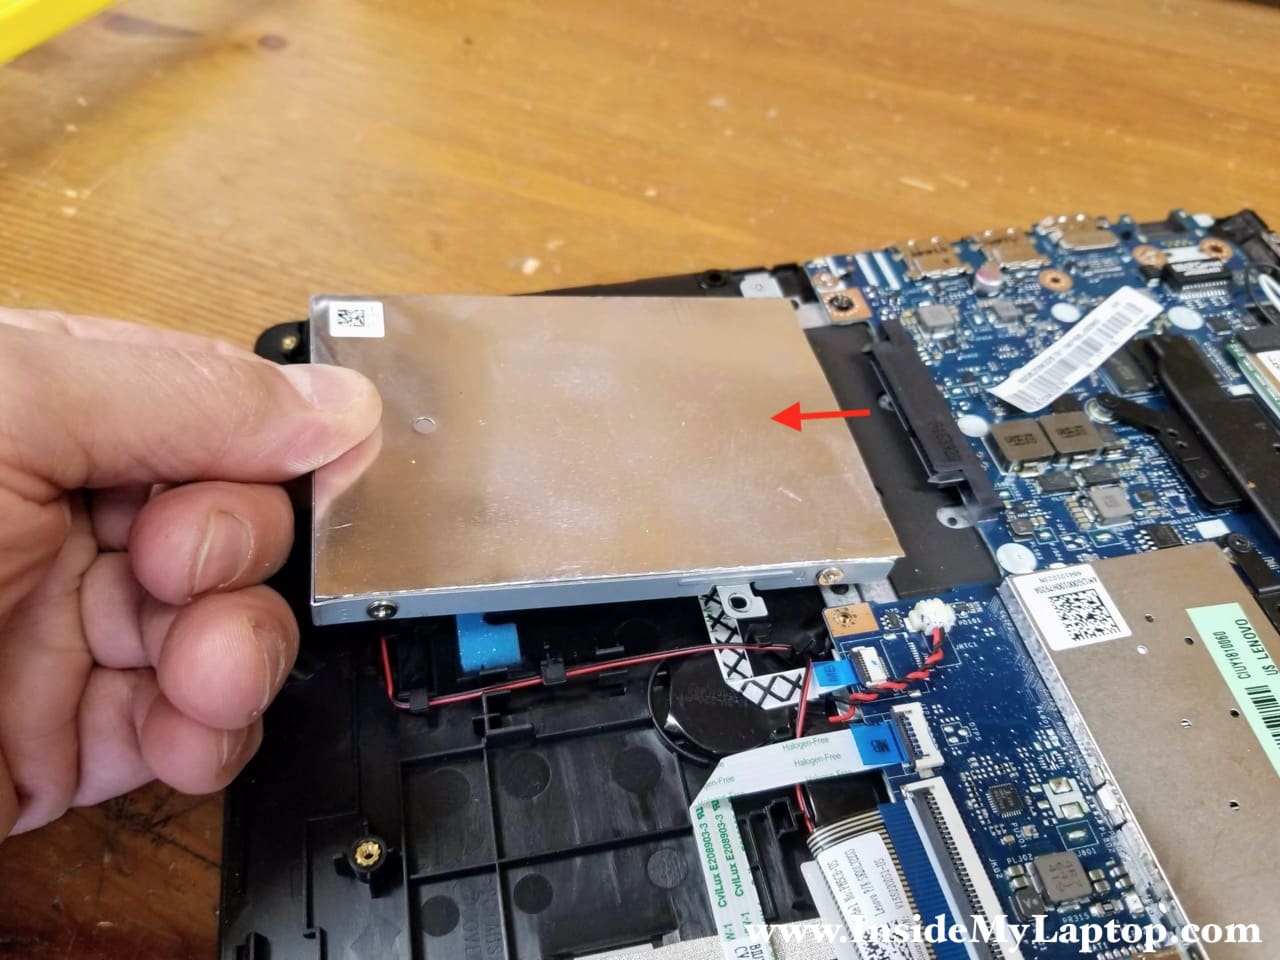
STEP 6.
Remove three screws securing the 2.5″ hard drive caddy.
STEP 7.
Lift up the rear side of the hard drive and pull it out of the SATA slot. The hard drive has tin foil wrapped around it. Upgrading this laptop with a 2.5″ solid state drive will make it much faster.
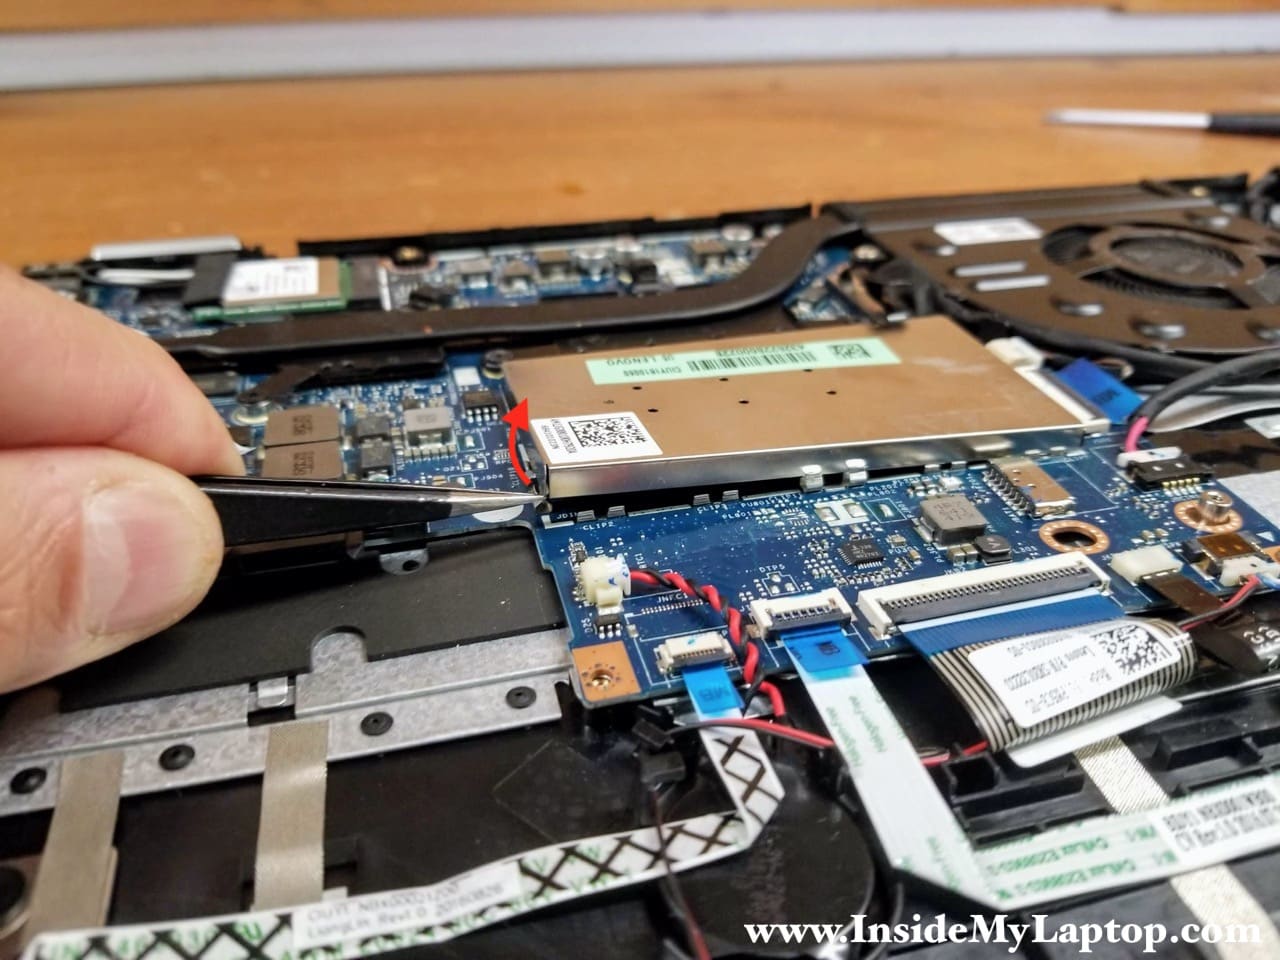
Lenovo ideapad FLEX 4 laptop has the memory module hidden under the metal cover shown on the following picture.
STEP 8.
Carefully separate the memory cover from the motherboard. There are a few clamps securing the cover.
STEP 9.
Lift up and remove the memory cover.
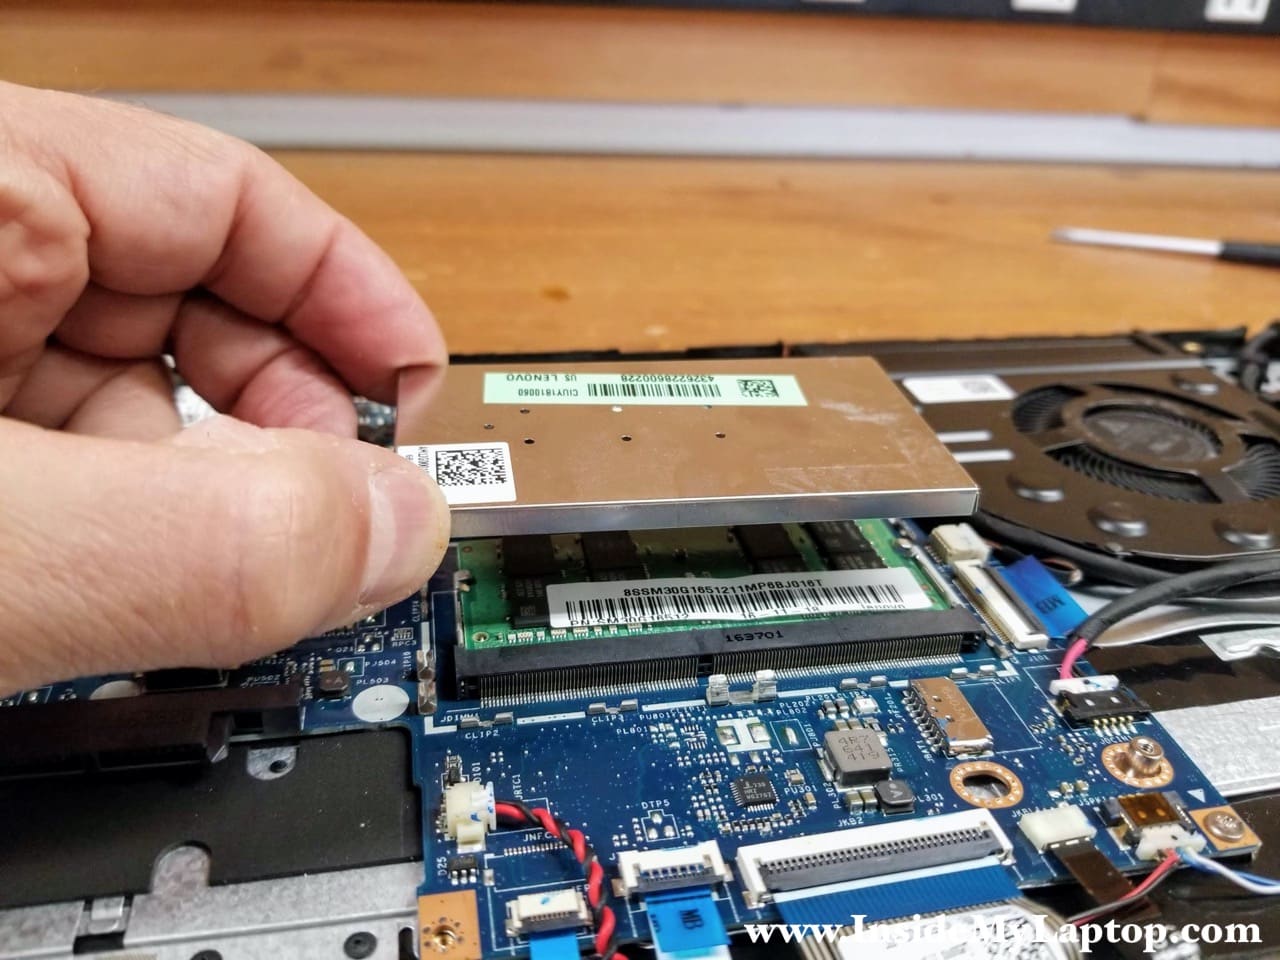
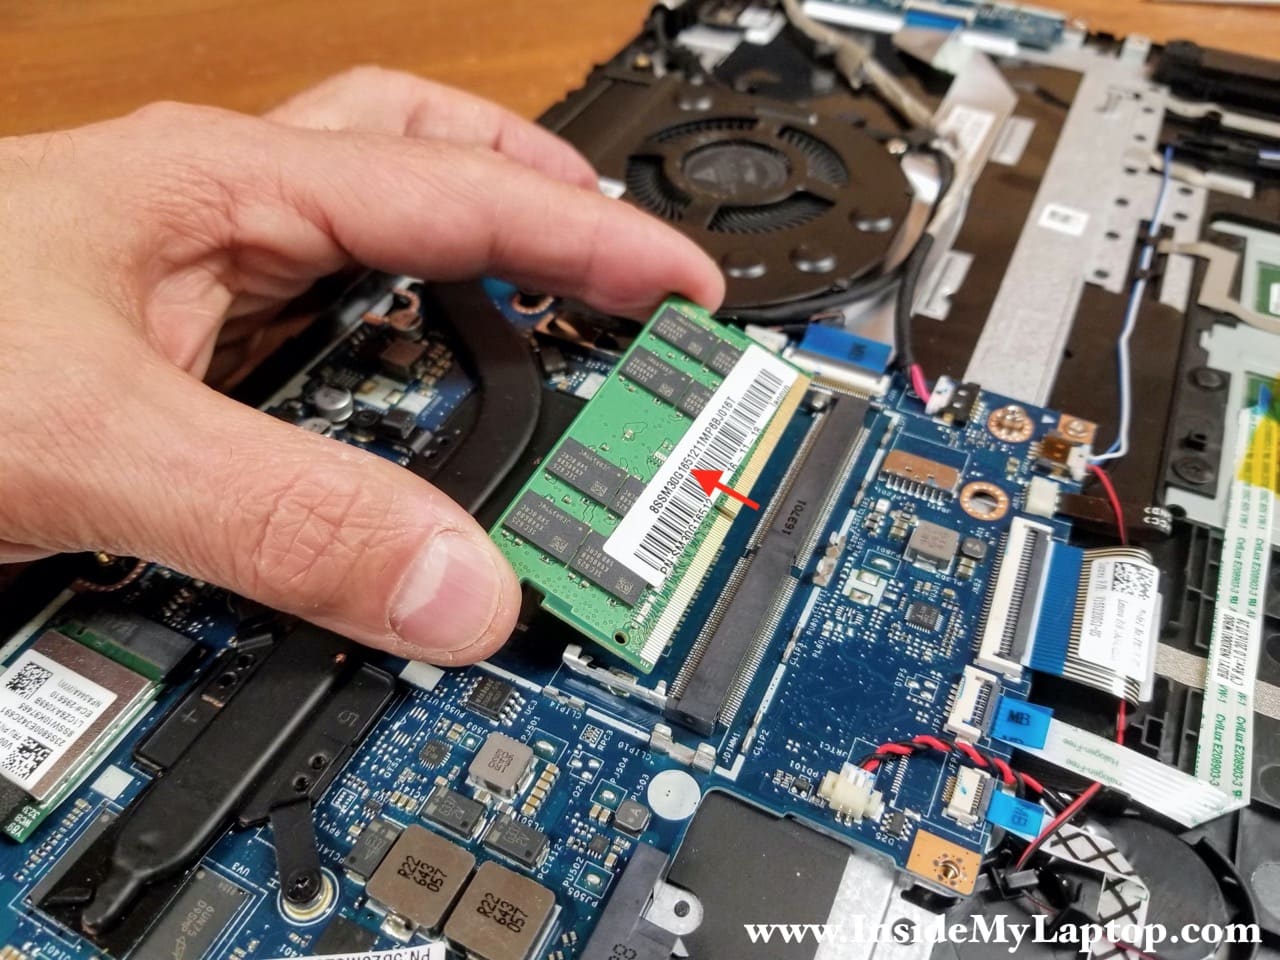
STEP 10.
Now you can access and remove and upgrade the memory module if necessary. This model has only one memory slot.
Removing cooling fan and DC jack
STEP 11.
Remove two screws from the cooling fan.
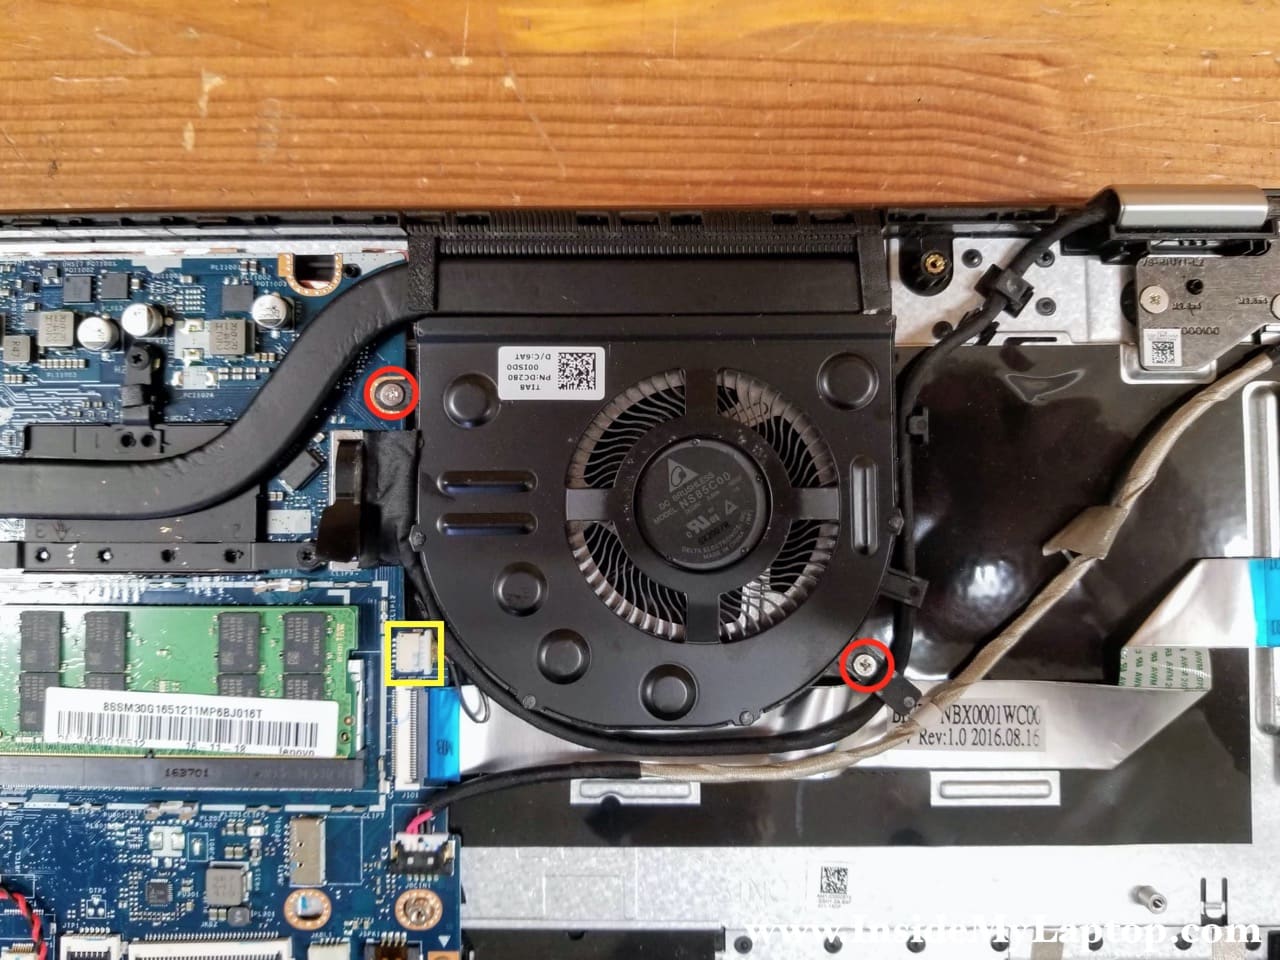
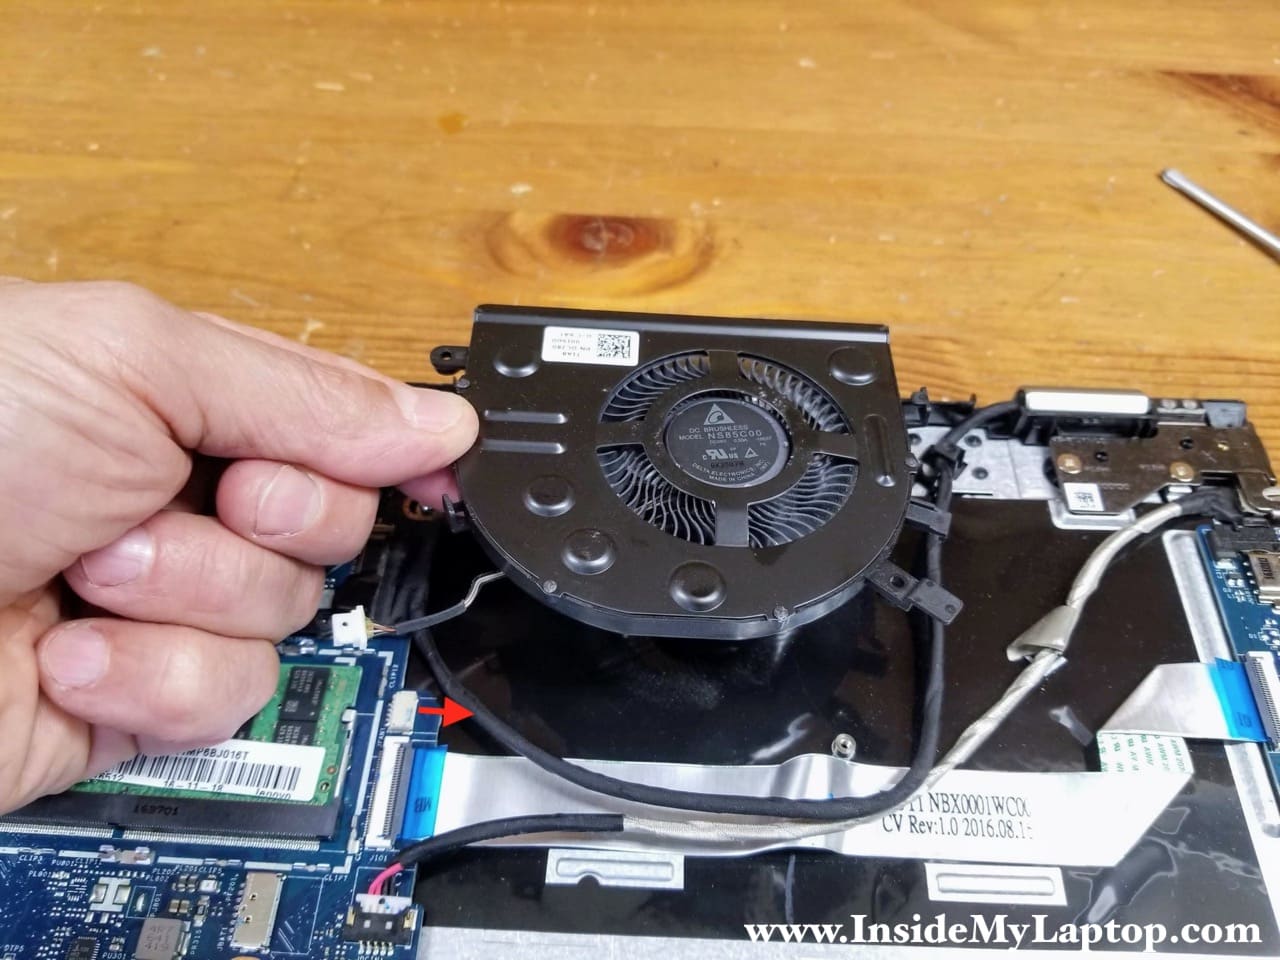
STEP 12.
Lift up the cooling fan and disconnect the fan cable from the motherboard. It’s necessary to separate the display cable fro the fan. It’s routed in the guided path on the side.
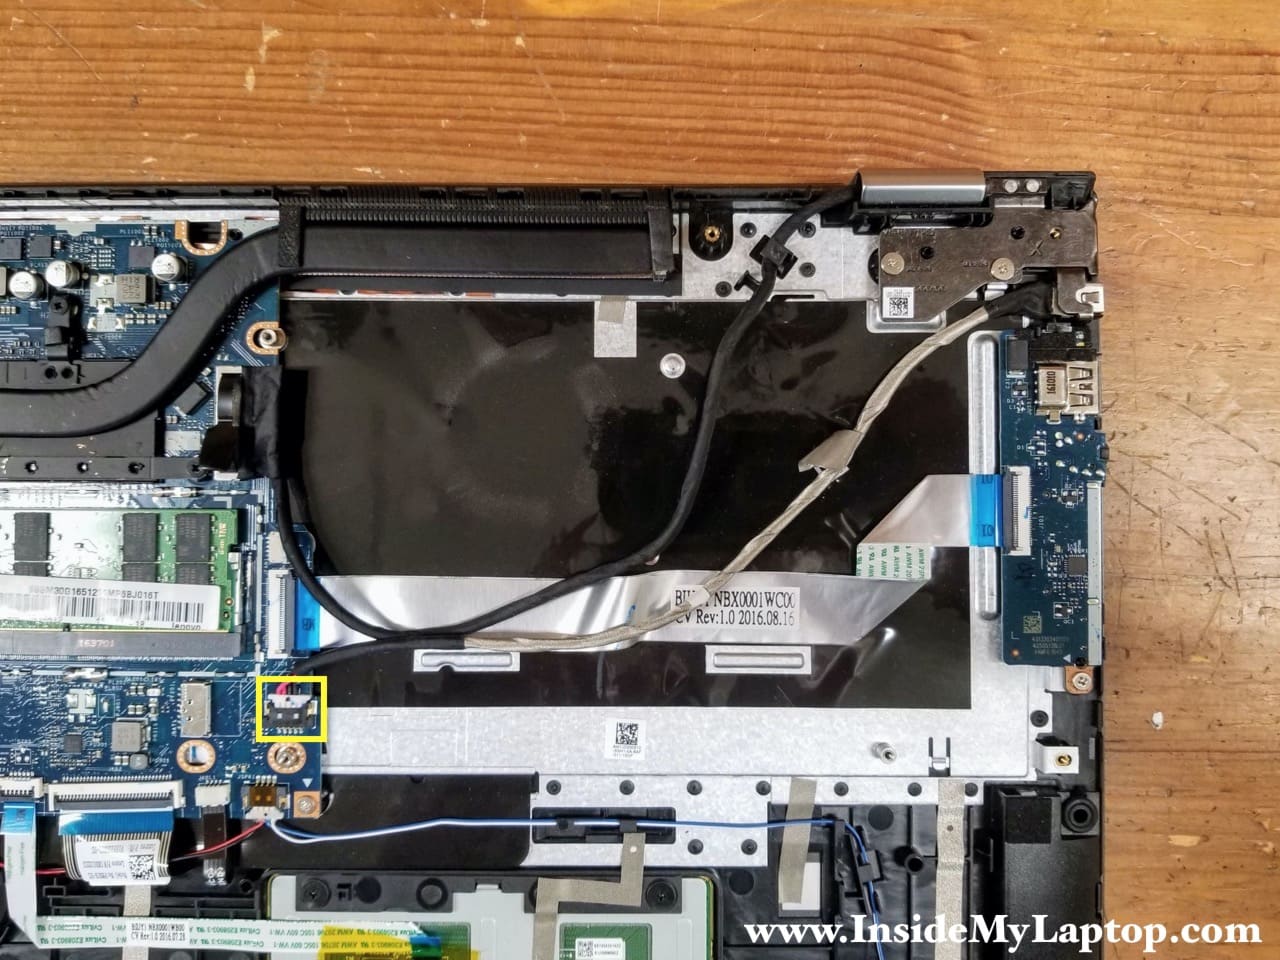
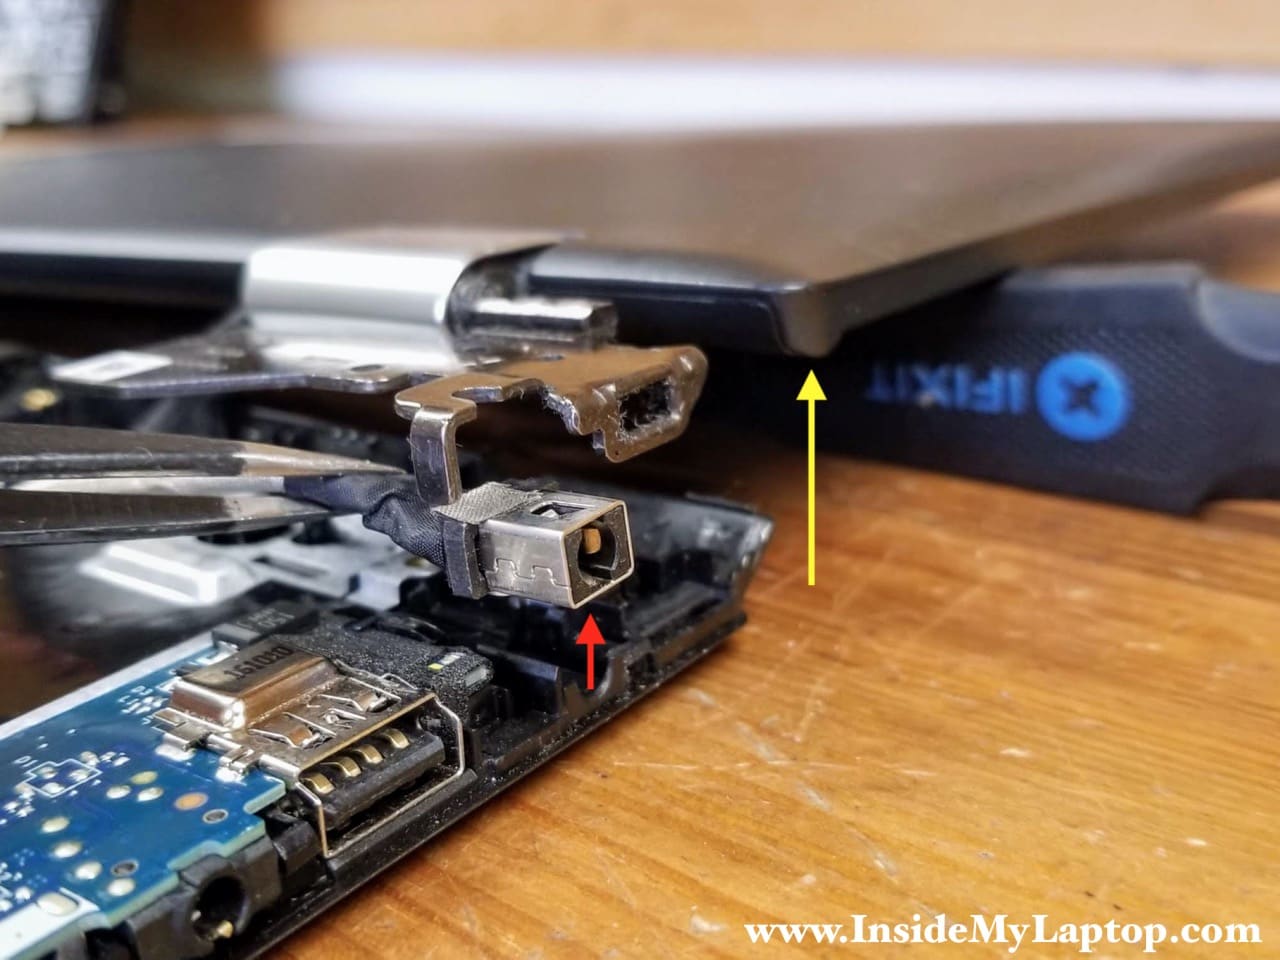
STEP 13.
Disconnect the DC jack cable from the motherboard. The DC power jack is mounted under the left display hinge.
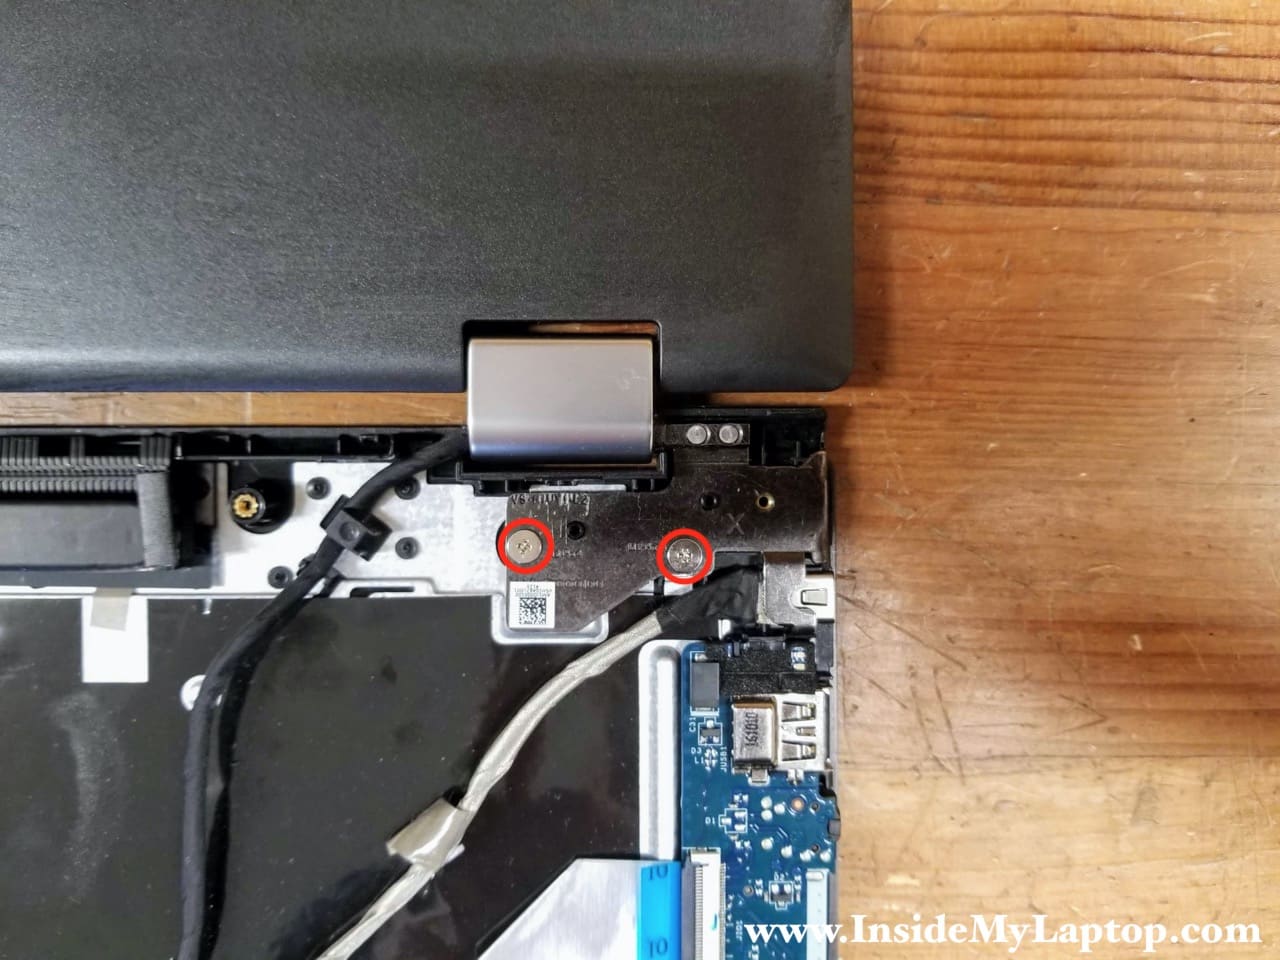
STEP 14.
Open the display 180 degrees and place the laptop on the desk as shown on the following picture. Remove two screws securing the left display hinge.
STEP 15.
Lift up the display panel (yellow arrow) just enough to access the DC jack. Lift up the DC jack from the case and remove it.
Removing motherboard and display panel
In Lenovo ideapad FLEX 4 laptop the display panel can be remove only after the motherboard is removed. The right display hinge is mounted right under the motherboard.

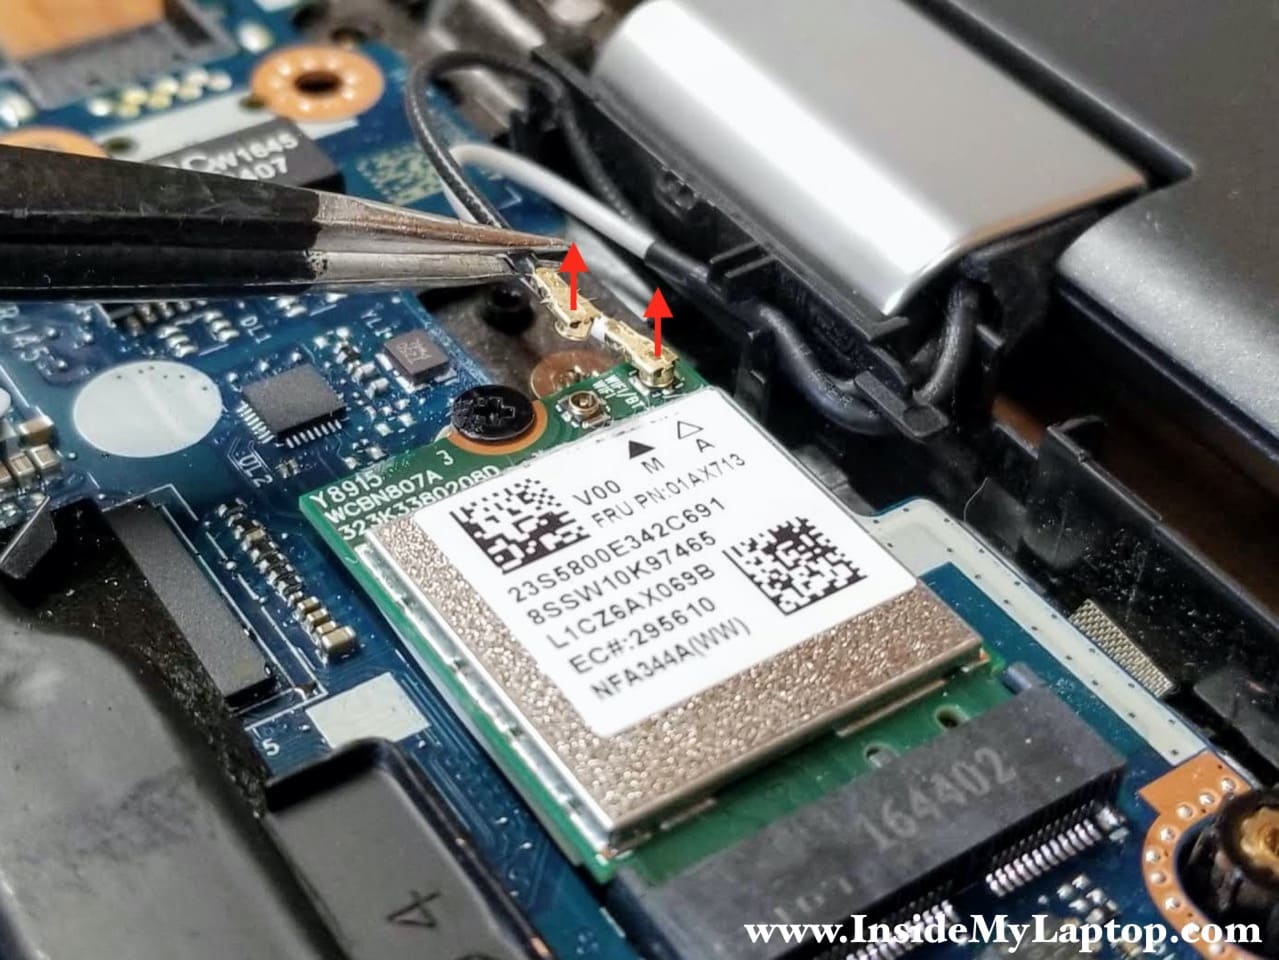
STEP 16.
Disconnect two antenna cables from the wireless card.
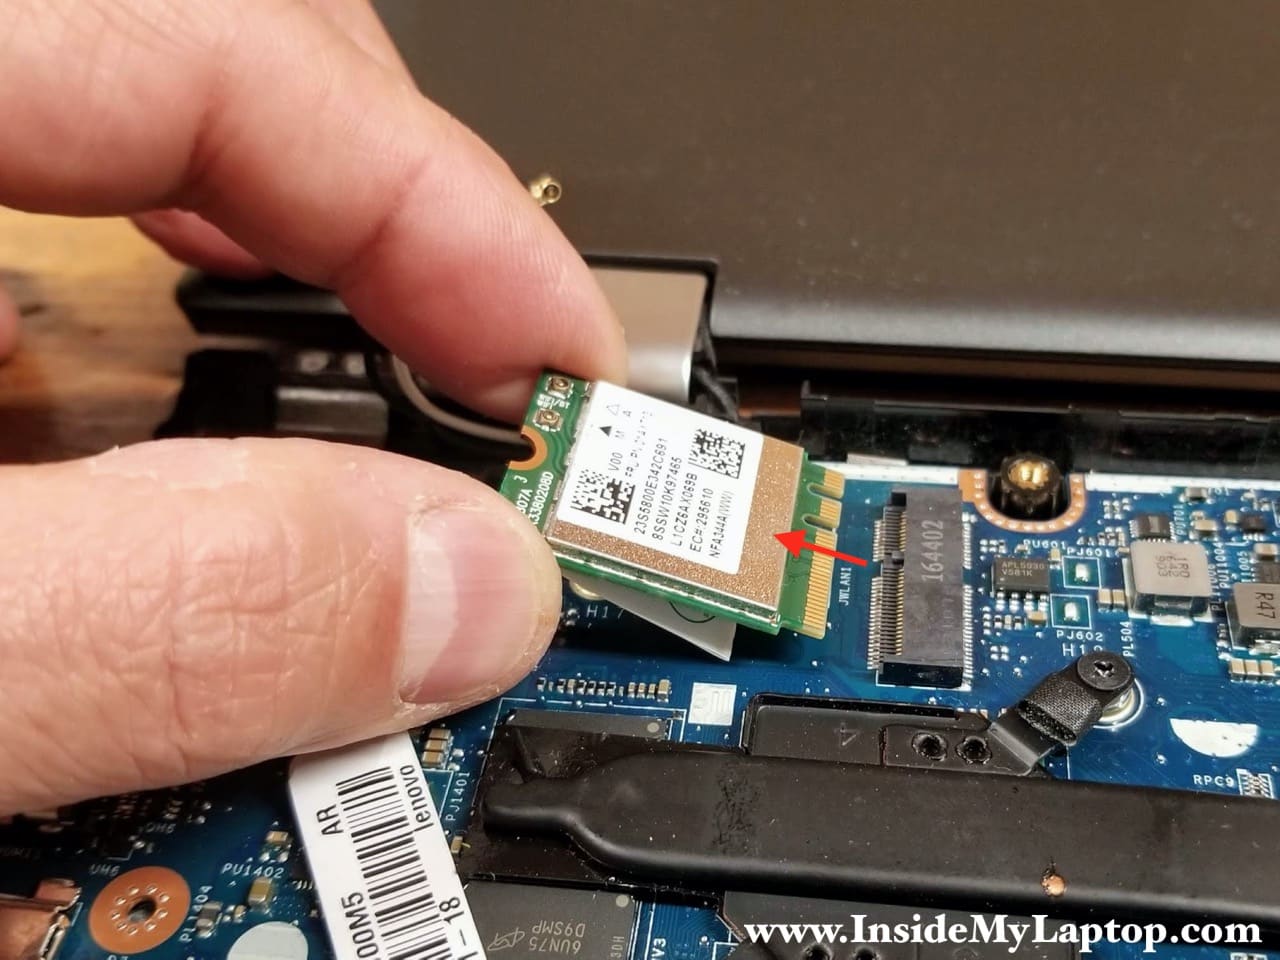
STEP 17.
Remove one screw securing the wireless card and pull it out.
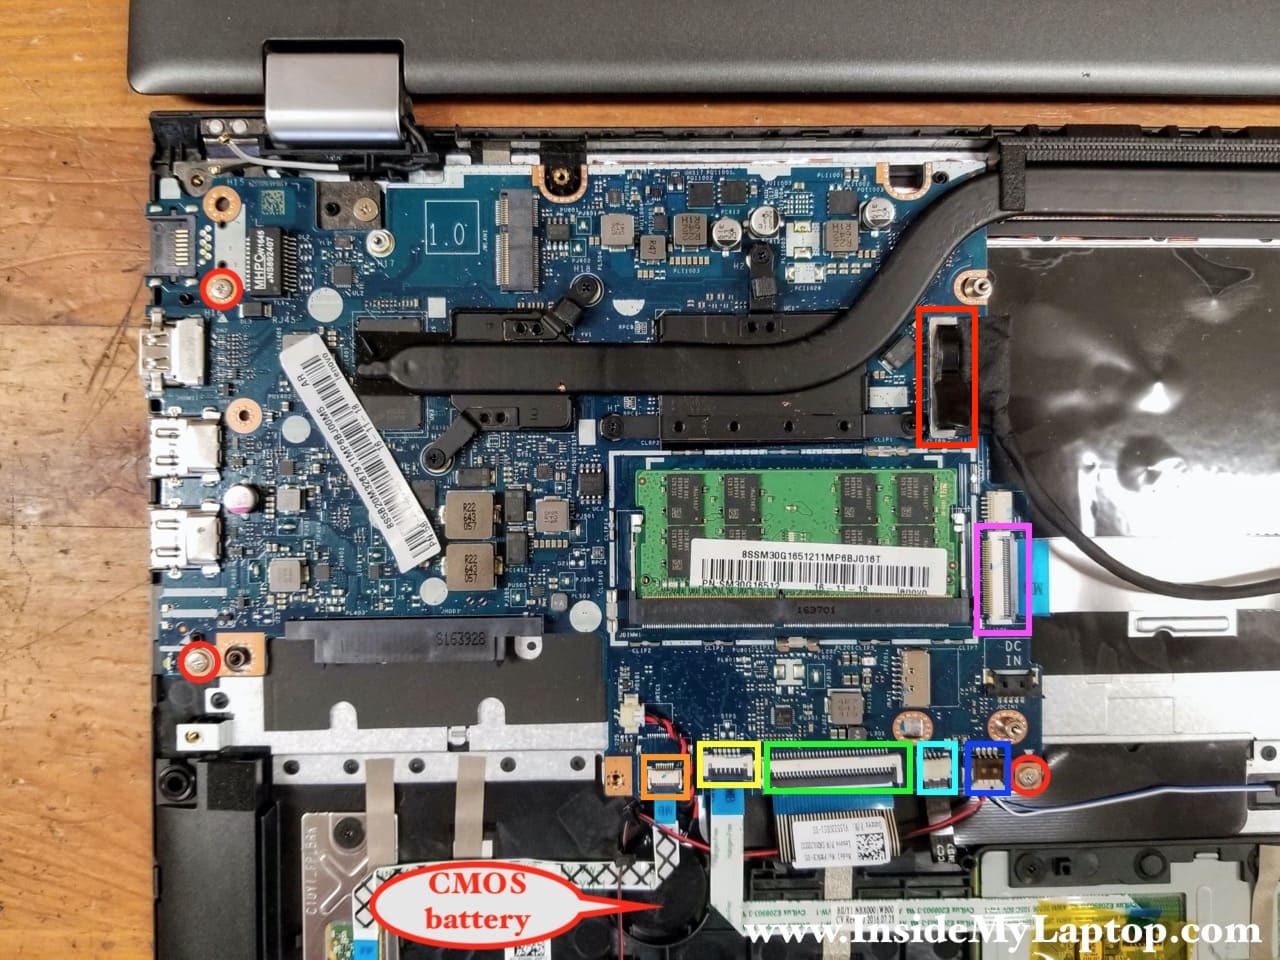
STEP 18.
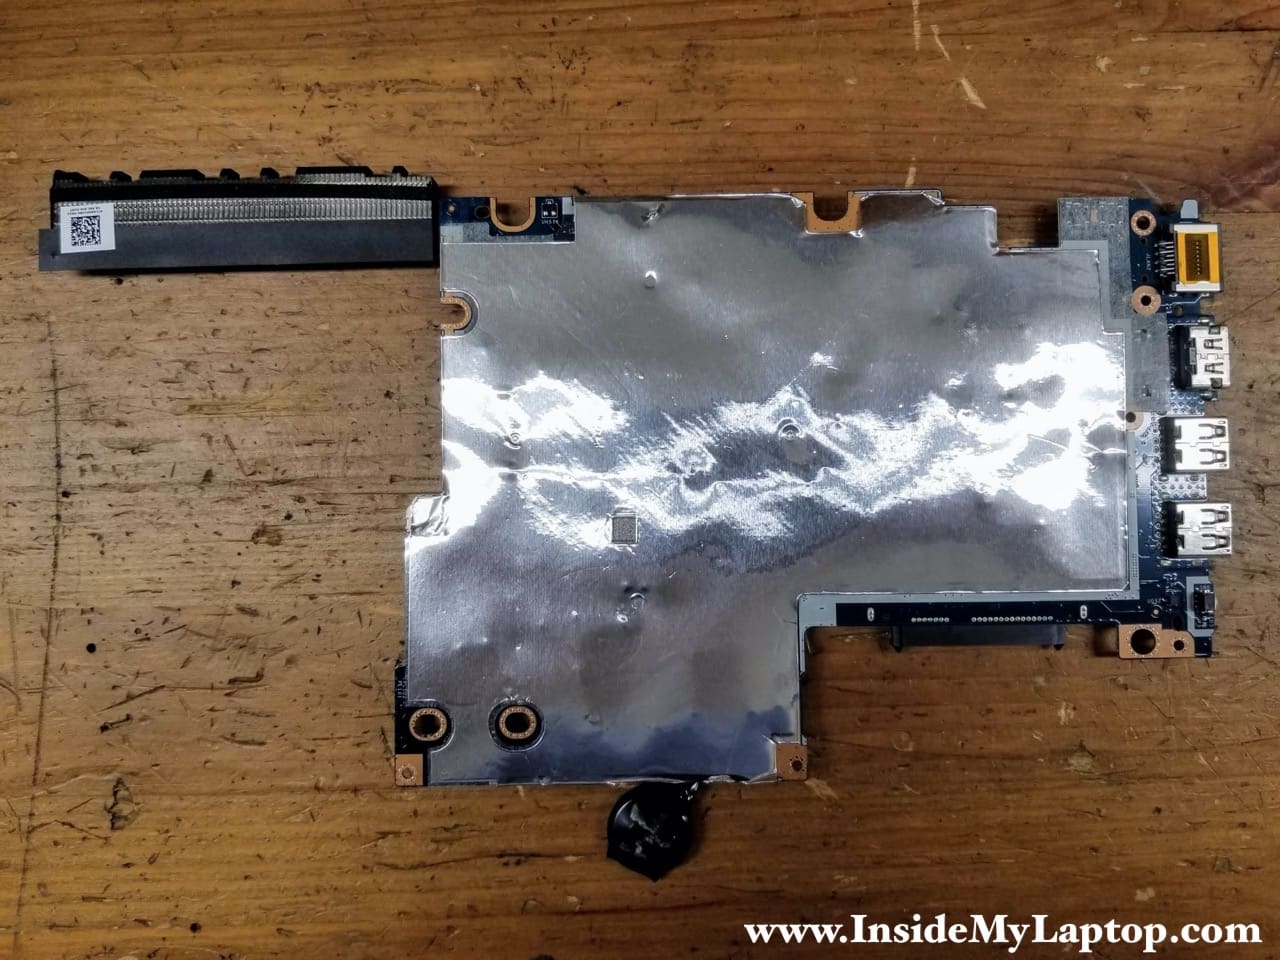
Remove three screws securing the motherboard and disconnect the following color-coded cables:
– Fingerprint scanner cable (orange).
– Touchpad cable (yellow).
– Keyboard cable (green).
– Keyboard backlight cable (blue).
– Speaker cable (dark blue).
– USB/audio/media card reader board cable (pink).
– Display cable (red).
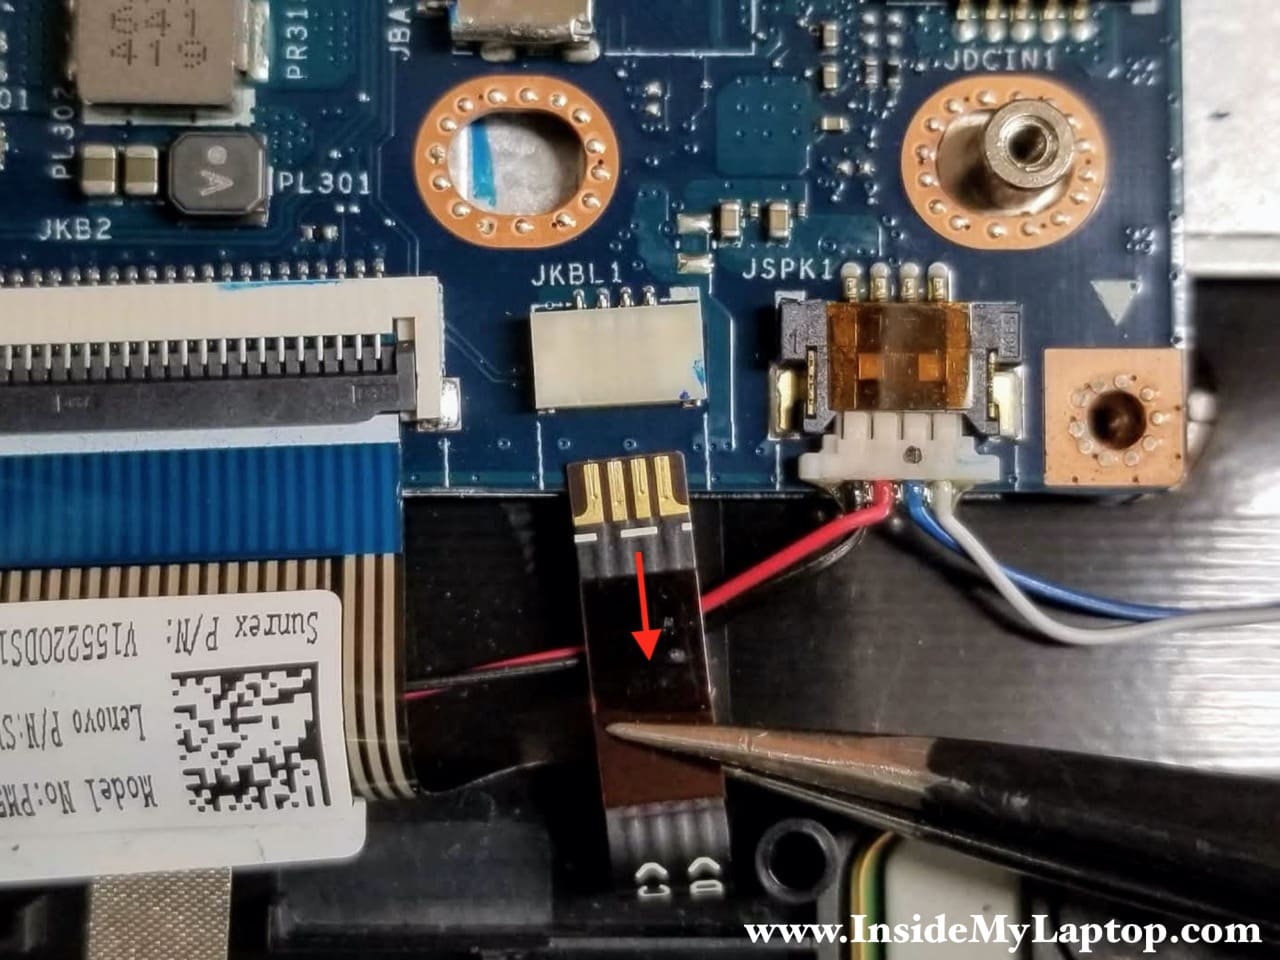
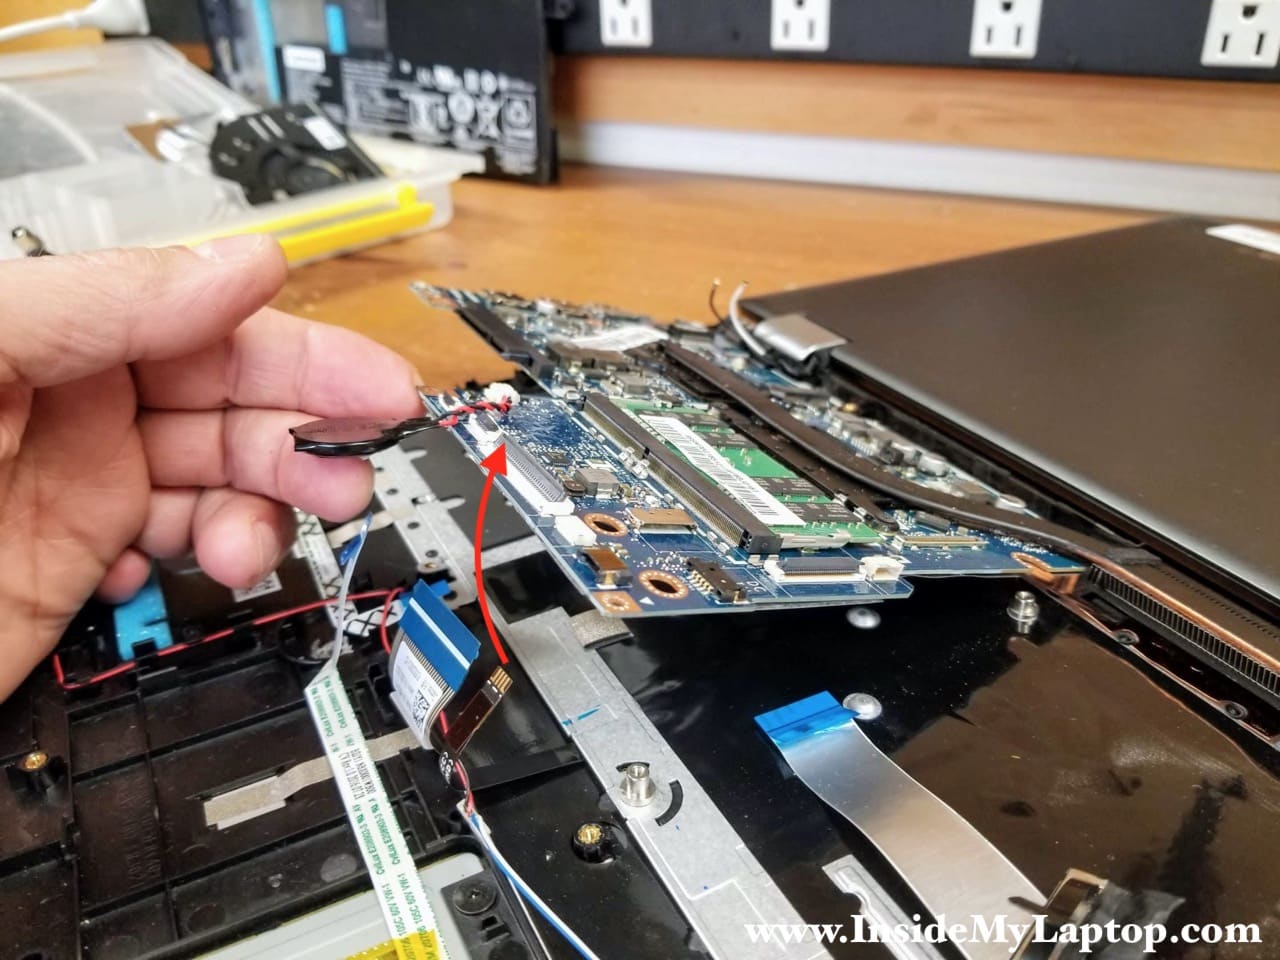
You can disconnect the CMOS battery too but I’ll leave it connected in order to keep the BIOS settings unchanged.
Here’s how to disconnect all flat cables.
Lift up the locking tab to unlock the connector (red arrow) and pull the cable out.
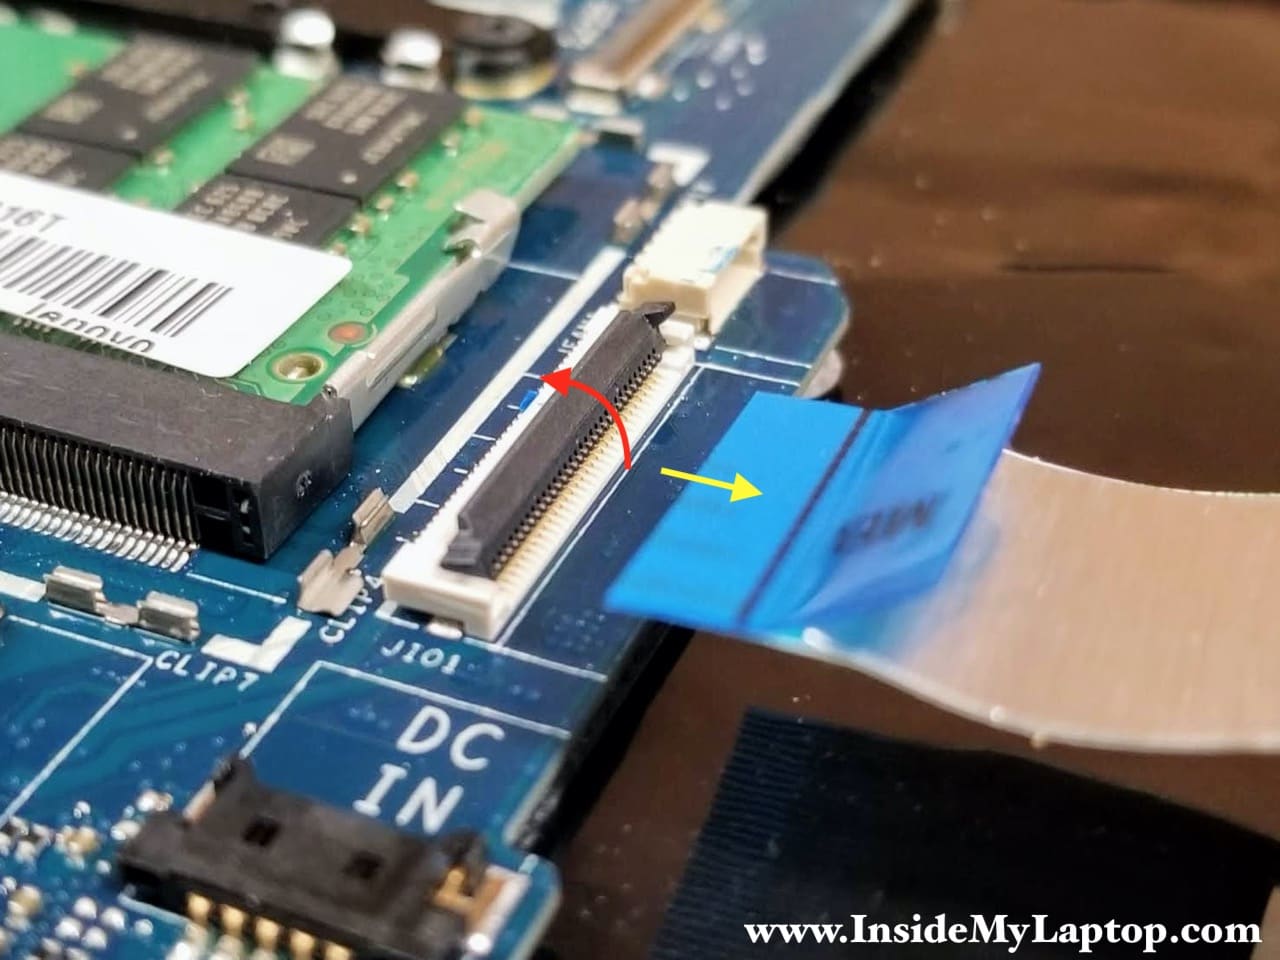
The display cable has a black tab on top. Pull the display cable up to unplug it from the motherboard.
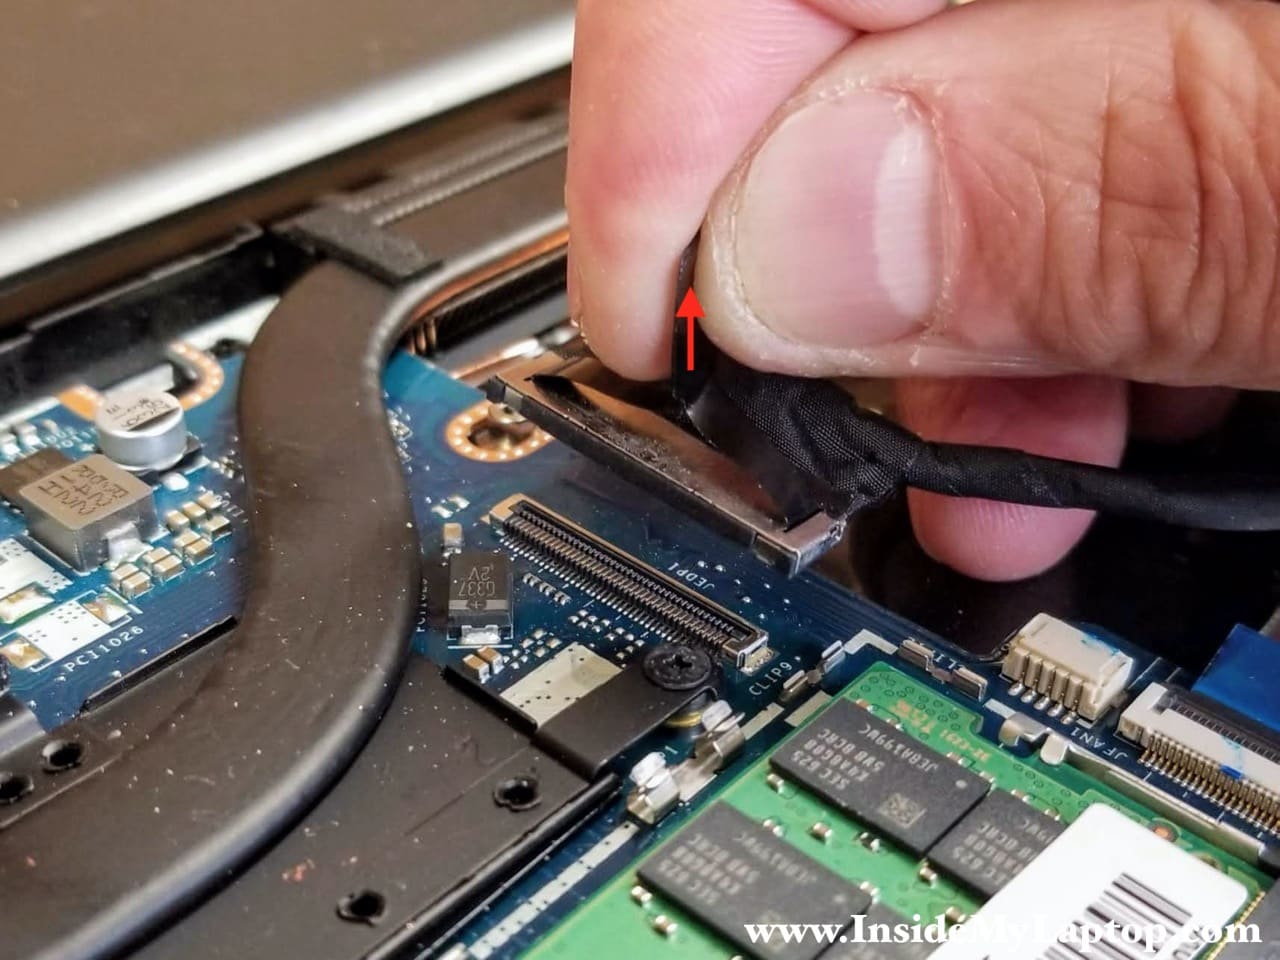
The keyboard backlight cable doesn’t have a lock. Simply pull the cable out using tweezers.
STEP 19.
Separate the motherboard from the top case and remove it.
Here’s the other side of the motherboard.
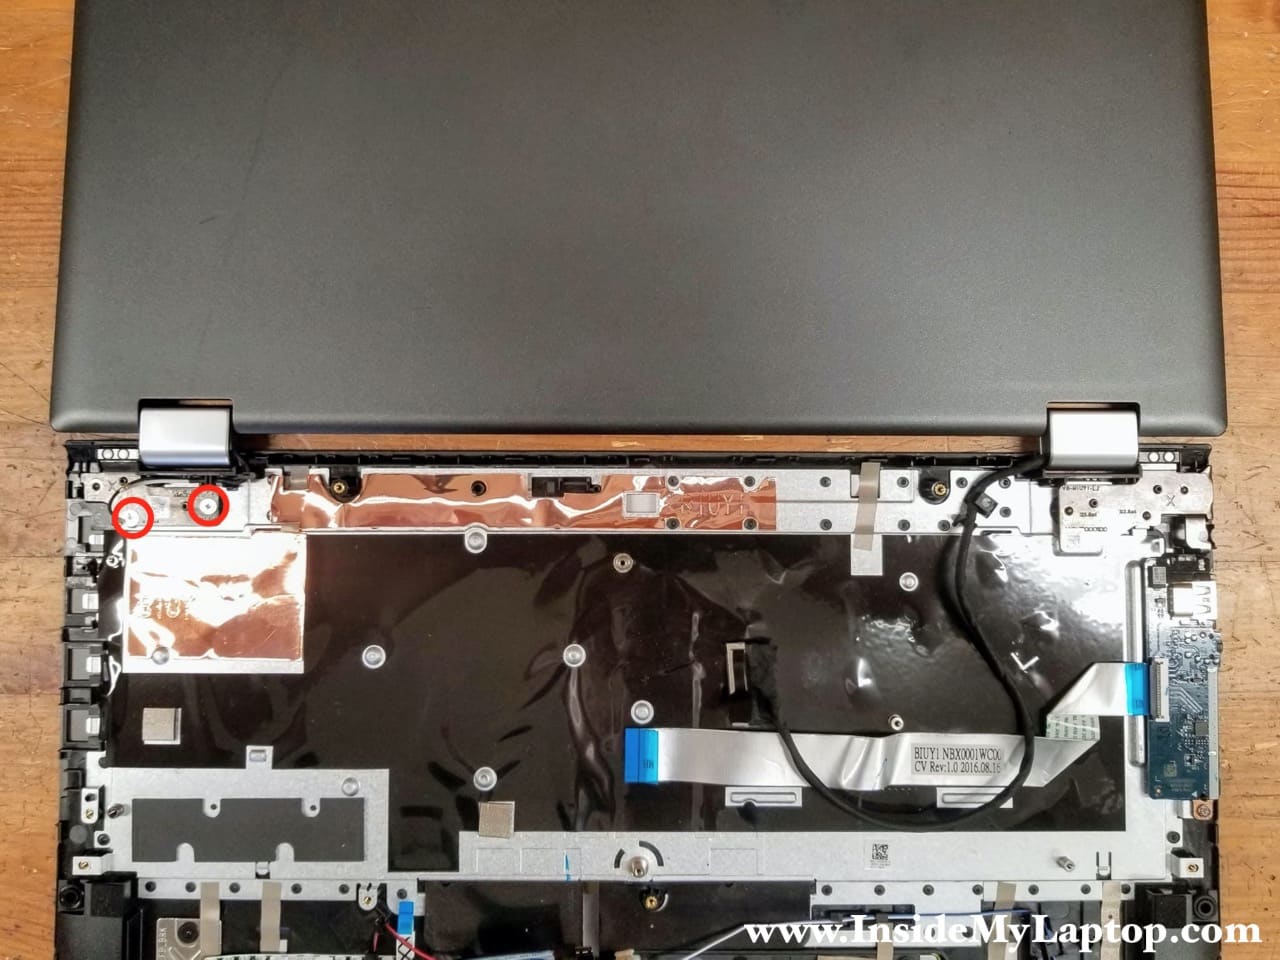
STEP 20.
Remove two screws securing the right display hinge. Un-route wireless card antennas from the guided path on the top case.
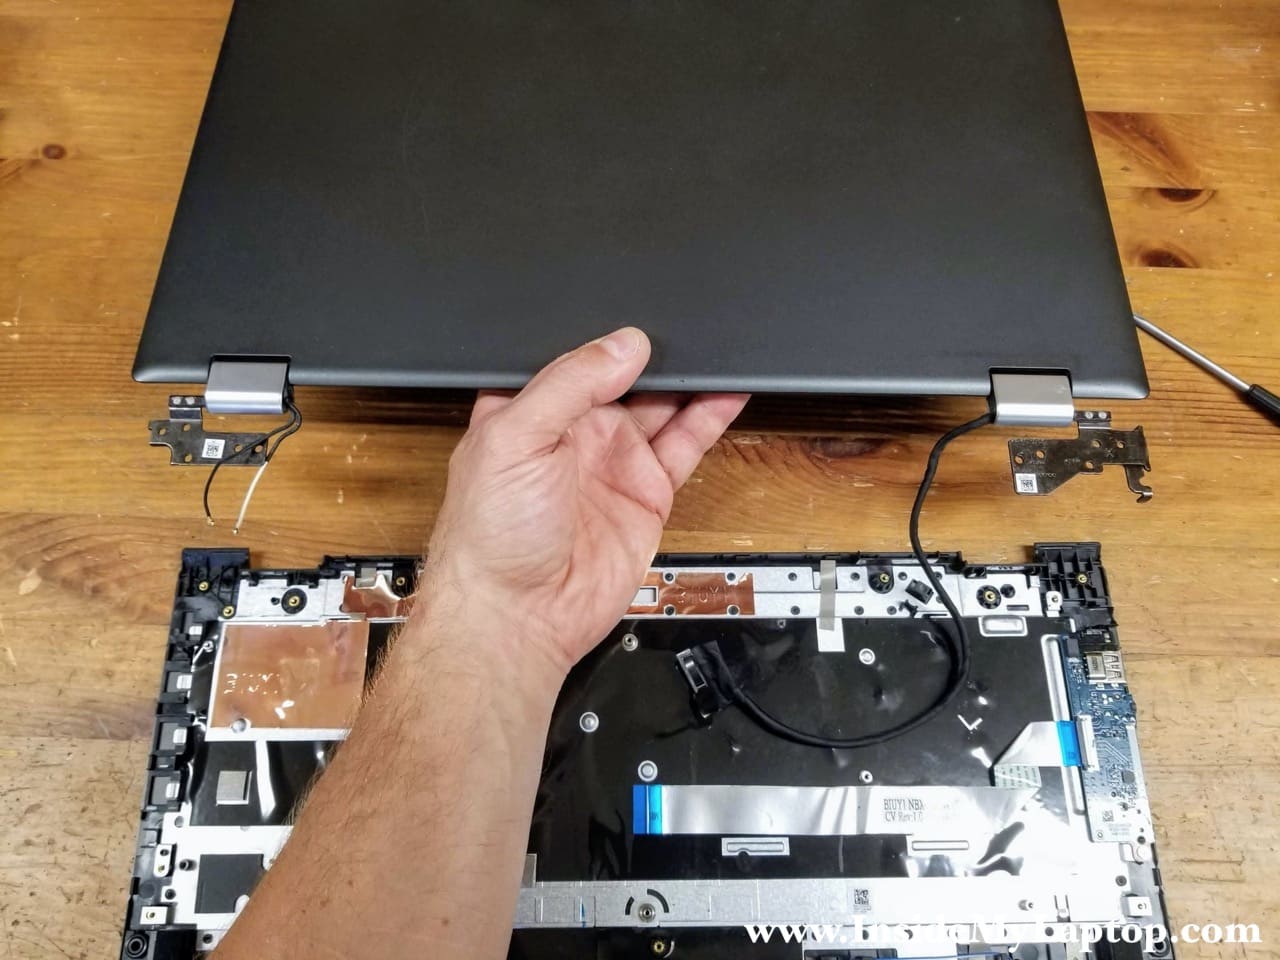
STEP 22.
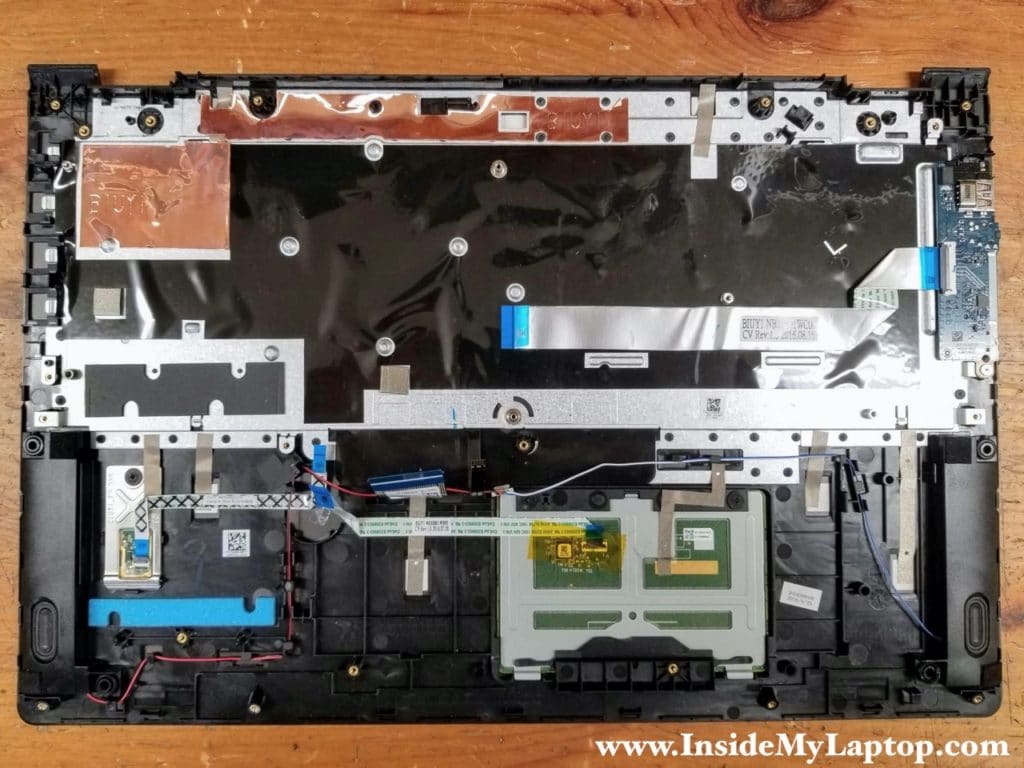
Separate the display panel from the top case.
Lenovo ideapad FLEX 4 has the keyboard permanently attached to the top case. If the keyboard fails, it’s necessary to replace the top case unless you are willing to try this keyboard replacement hack.
The fingerprint board, touchapd and I/O board (USB/audio/media reader) can be easily removed.
In one of the following posts I will explain how to disassemble the display panel and remove the touch screen assembly.

William
Awesome tear down.
I wish to replace the keyboard. How is that accomplished? Is there a video for that?
Thanks for your help.
IML Tech
The keyboard is permanently attached to the top case assembly (as shown in the step 22). In order to replace the keyboard you have to replace the entire top case assembly.
William
Thank you for your graceish response. Reviewing the tairdown I must have skipped over step 22. Thanks again for your help.