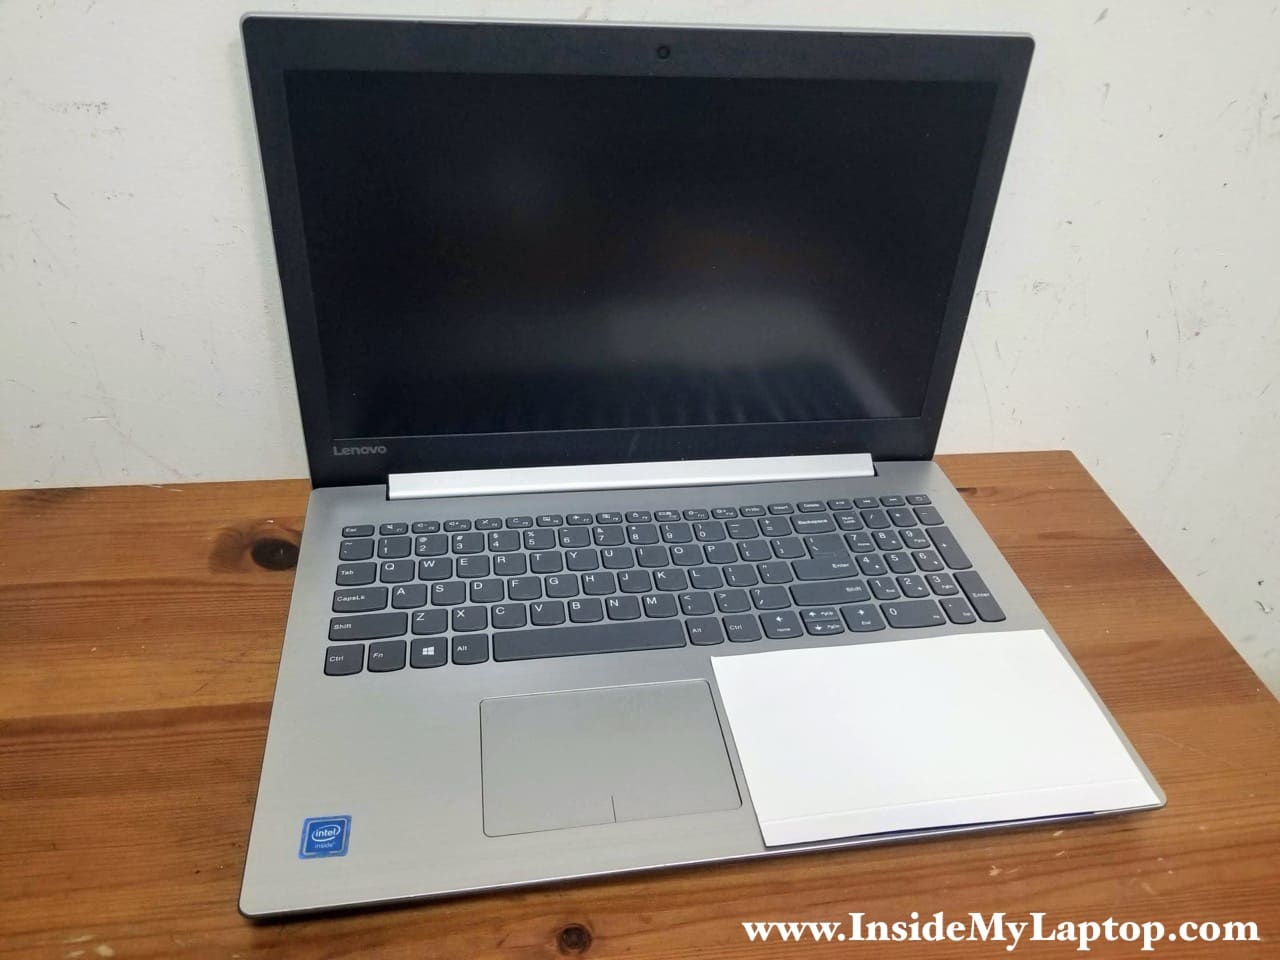
Today I explain how to disassemble a Lenovo Ideapad 320 laptop. In this particular guide I’m taking apart an Ideapad 320-15IAP (type 80XR) – the low end model but it will be very similar for all the following 15″ and 14″ models:
Ideapad 320-15IAP/Ideapad 320-15AST/
Ideapad 320-15ABR/Ideapad 320-15ABR Touch
Ideapad 320-15IKB (with cooling fan)
Ideapad 320-14IAP/Ideapad 320-14AST/
I will link to the service manual pdf at the end of this guide.
This laptop has limited options for RAM upgrade as it has only one memory slot. It will support either 8GB or 16GB depending on the model. The best option to speed up the laptop would be upgrading the standard 2.5″ hard drive with a 2.5″ solid state drive.
For this disassembly you will need only basic tools such as a Phillips screwdriver and case opener tool (or something similar).
Taking apart Lenovo Ideapad 320 base assembly
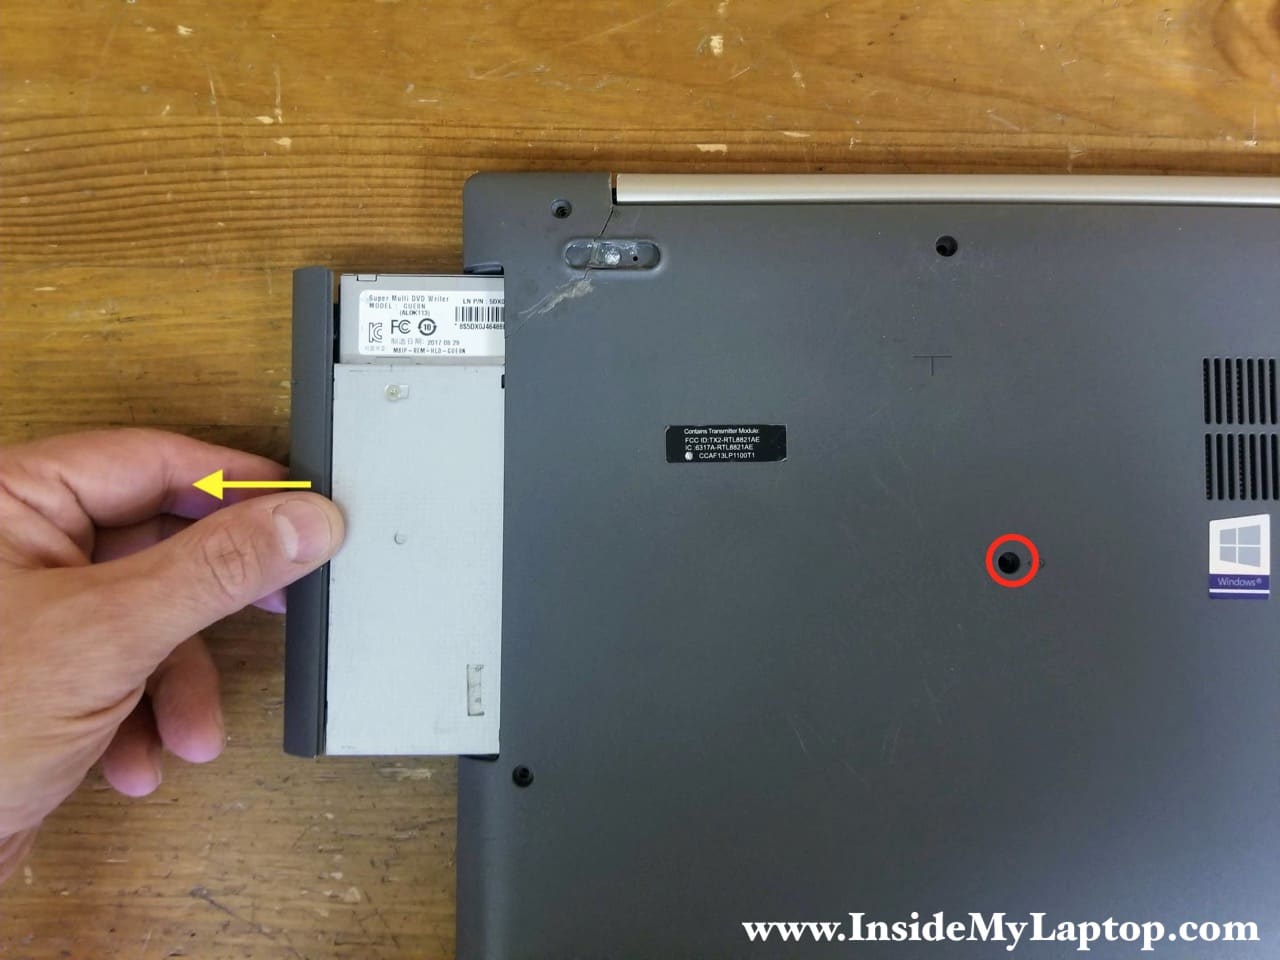
STEP 1.
Remove one screw securing the optical drive and pull the drive out.
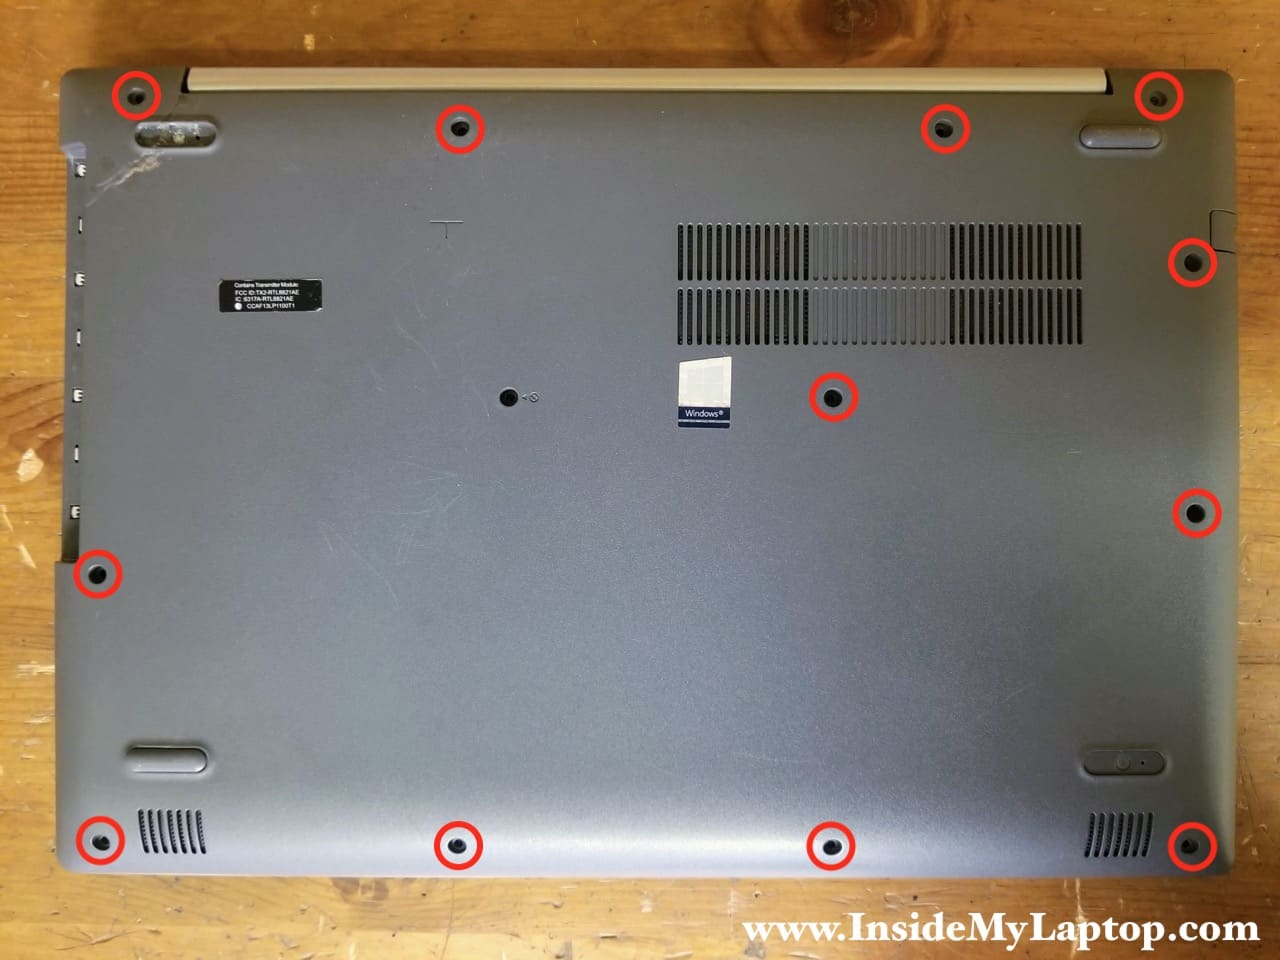
STEP 2.
Remove all screws securing the base cover.
STEP 3.
Start separating the top case from the base cover using a thin case opener tool. Move the case opener along the side and pry up the top case. Ideapad 320-15IAP doesn’t even have the cooling fan.

STEP 4.
Turn the laptop upside down and continue removing the base cover with your fingers. You’ll have to apply some reasonable force to separate two parts from each other. If it’s getting suck, use the case opener.
Lift up the base cover from the optical drive bay area.
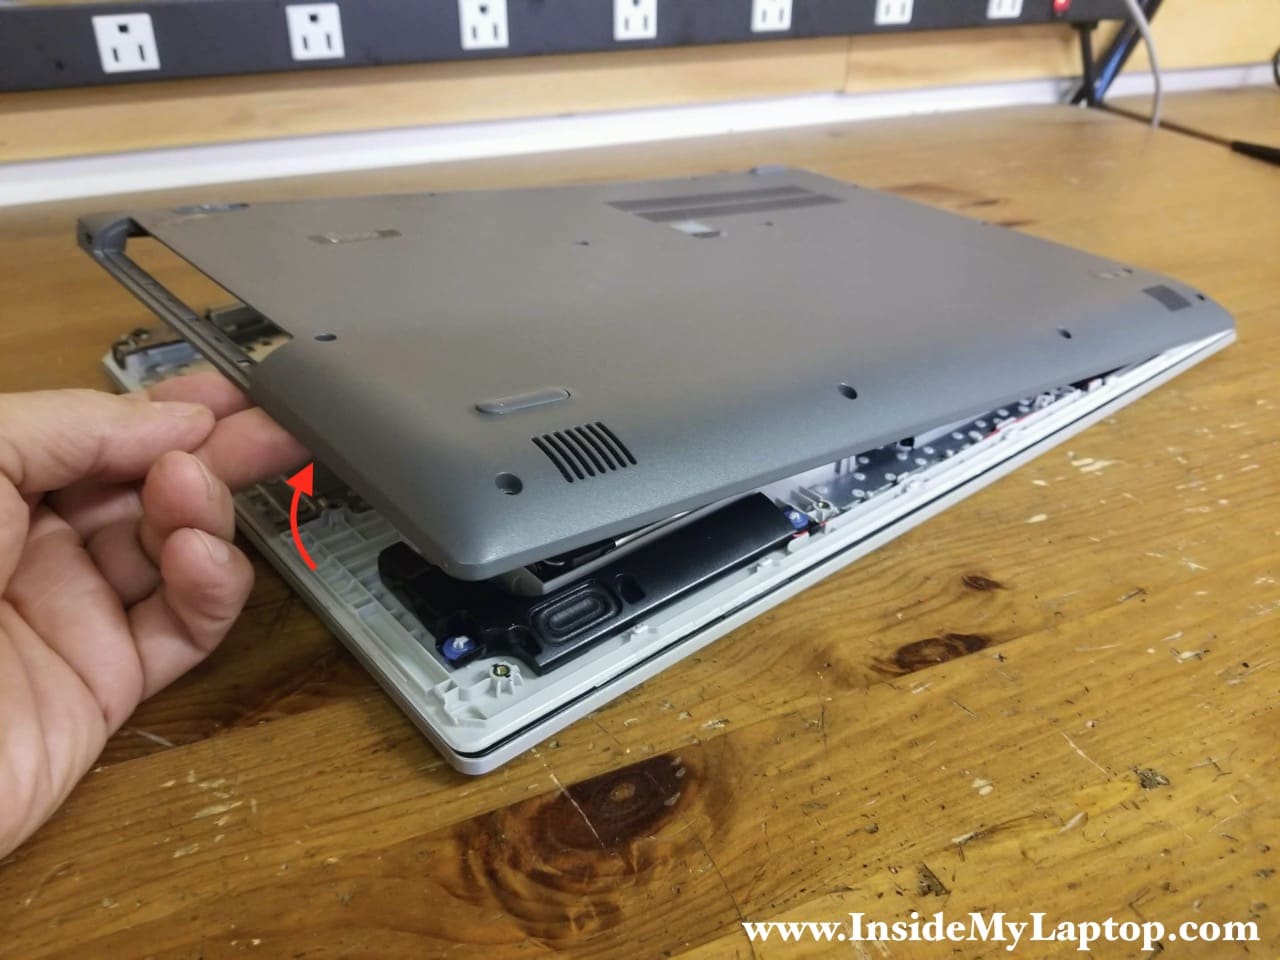
When the base cover removed, you can get an easy access to the battery, hard drive, memory module and other internal components. Ideapad 320-15IAP doesn’t even have the cooling fan.
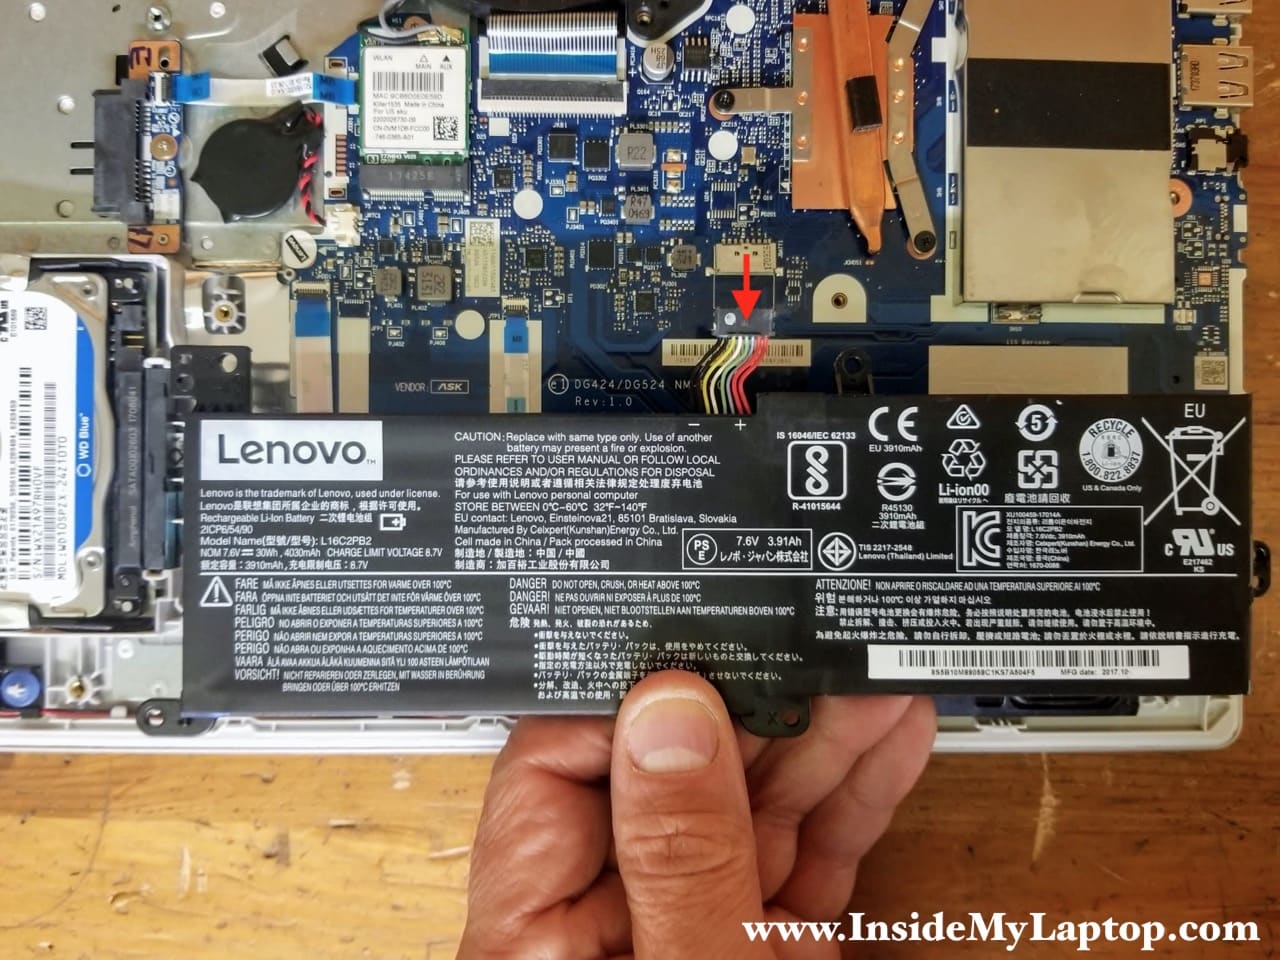
STEP 5.
Remove four screws securing the battery.

STEP 6.
Lift up the battery and disconnect the cable from the motherboard.
Lenovo ideapad 320 battery model: L16C2PB2
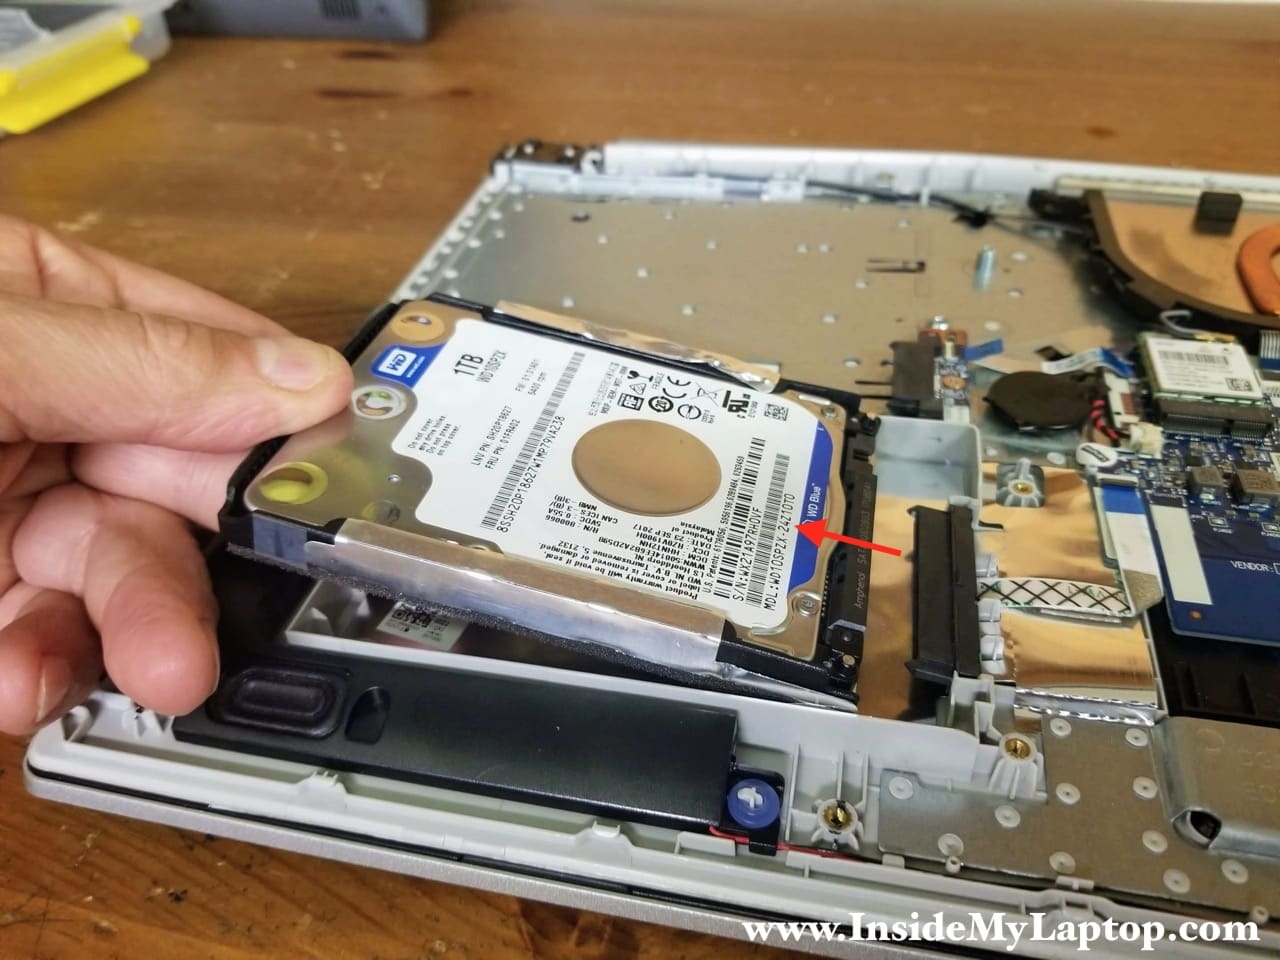
STEP 7.
Lift up the hard drive and disconnect it from the SATA connector. If you are upgrading to a SSD, it’s necessary to transfer the mounting bracket to the new drive.
Replacing this regular spinning drive with a 2.5″ solid state drive will improve laptop performance significantly.
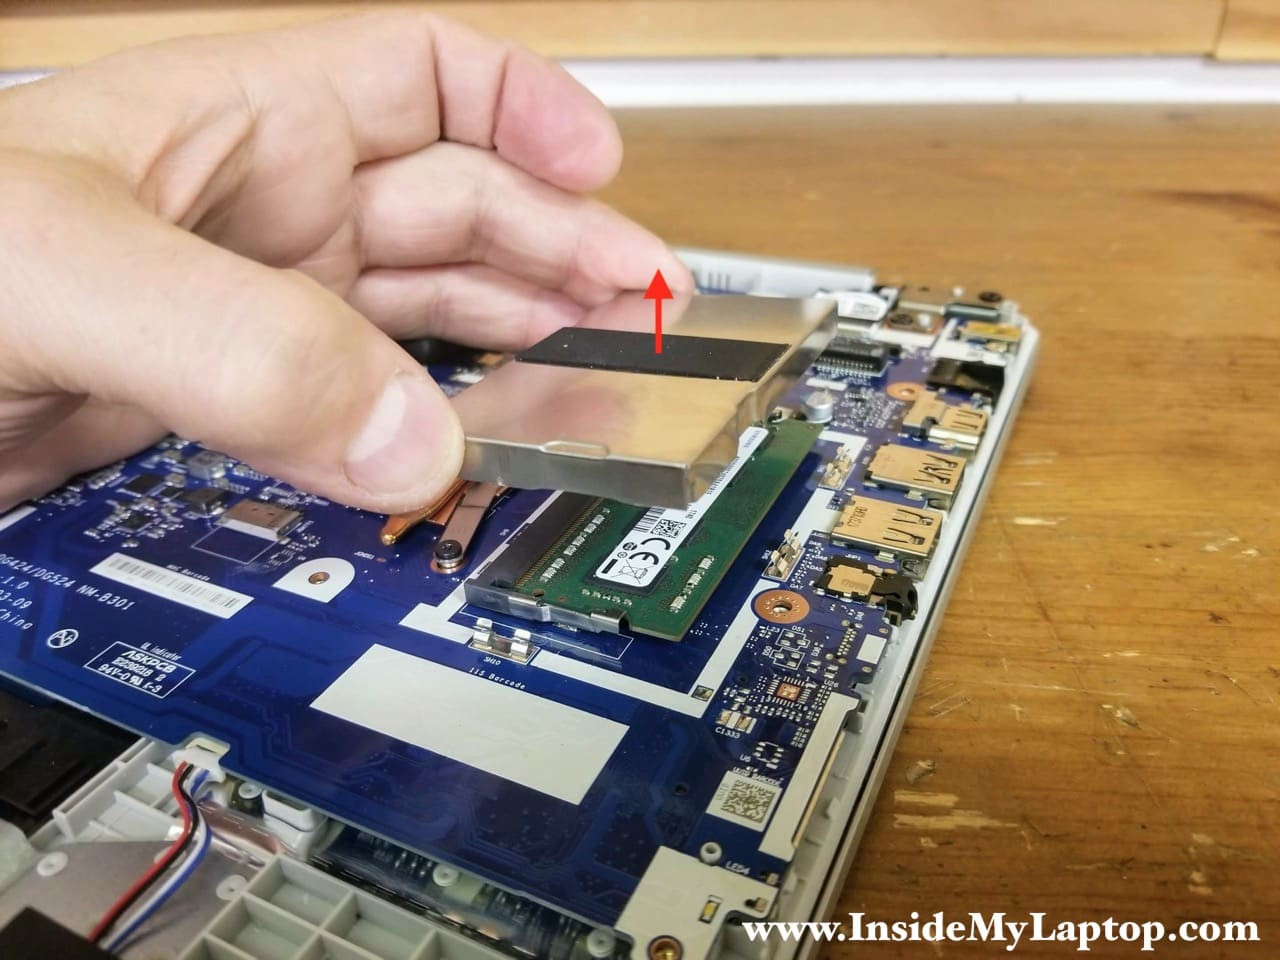
STEP 8.
The memory module hidden under the metal cover. Lift up the memory cover to disconnect it from the securing clamps on the motherboard.
This laptop will can handle up to 16GB (2x8GB) DDR3-2600 SODIMM RAM.
STEP 9.
Disconnect both antenna cables from the wireless card.
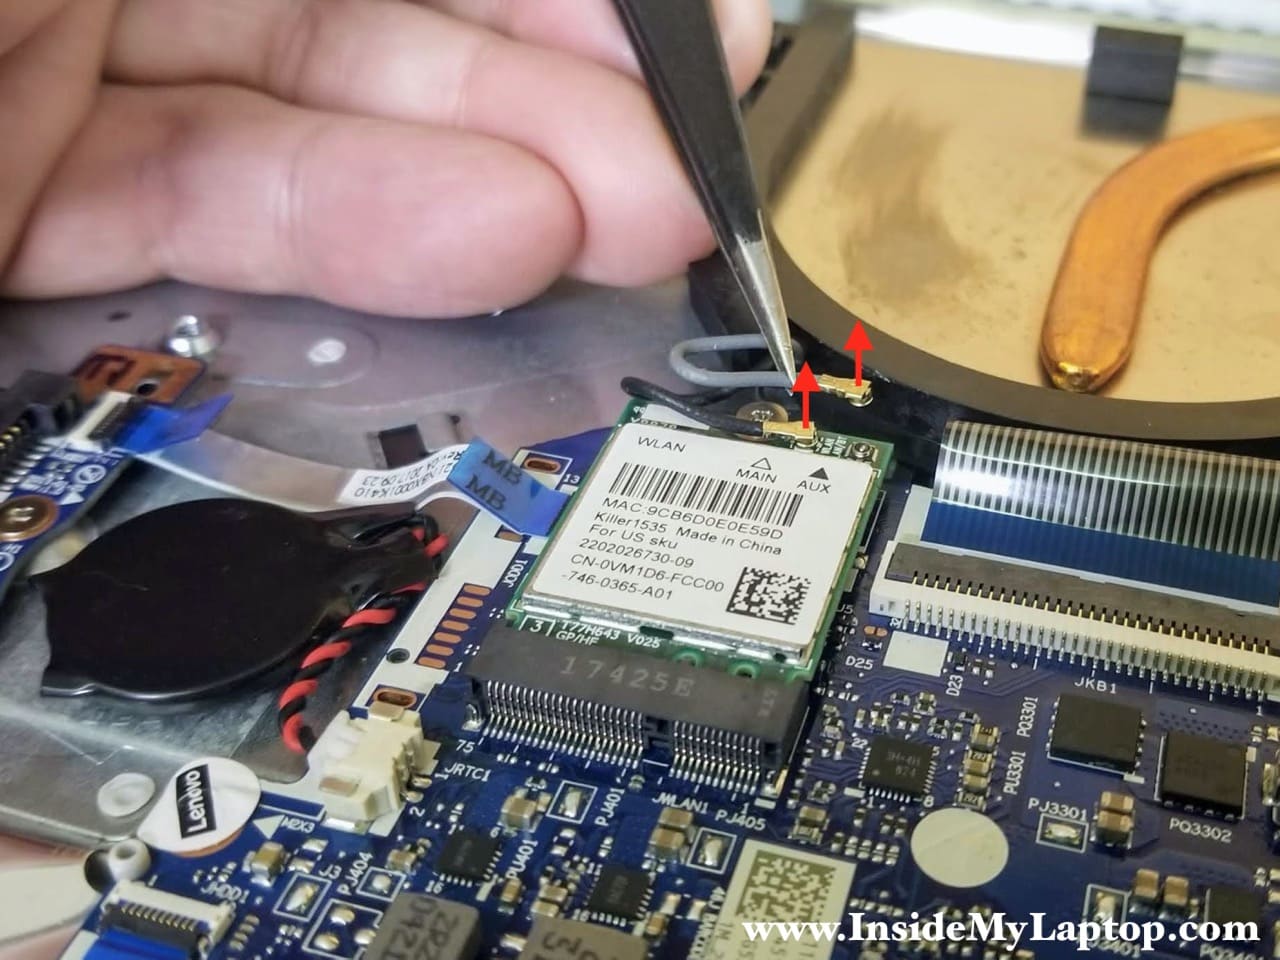
STEP 10.
Remove one screw securing the wireless card and pull it out.
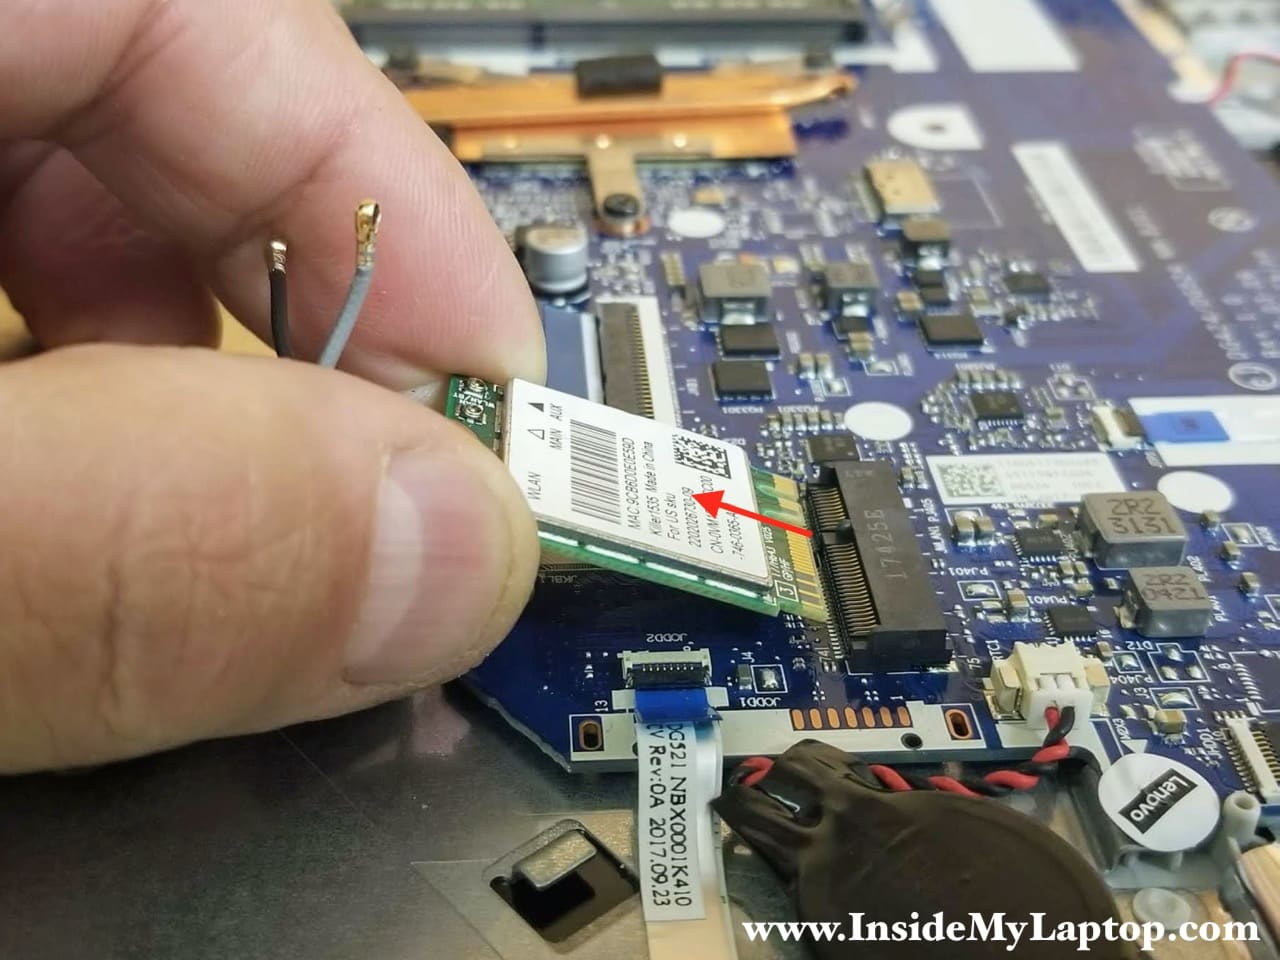
STEP 11.
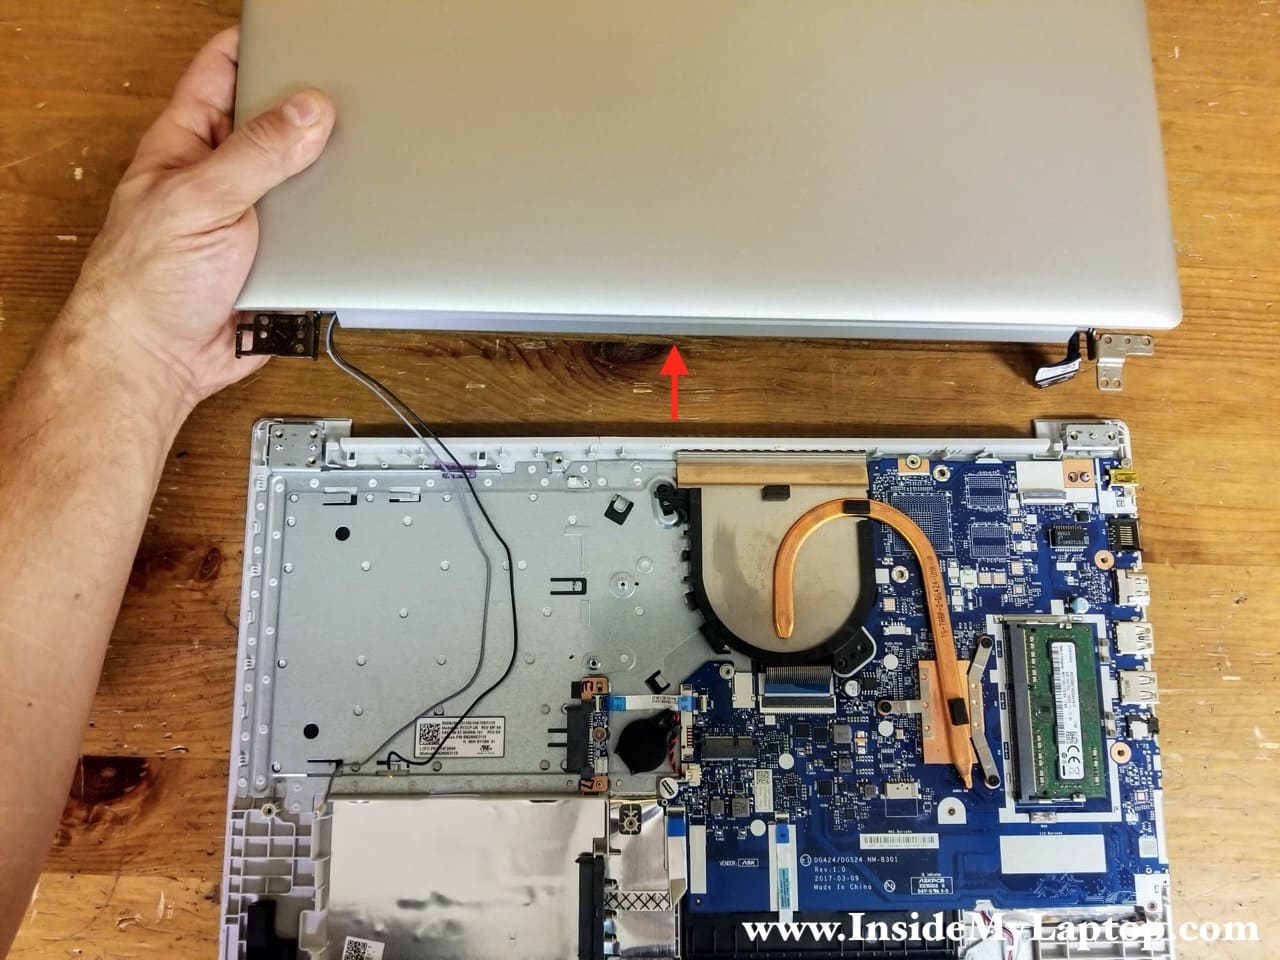
Un-route both Wi-Fi antenna cables from the guided path on the side of the heatsink bracket. Disconnect the display cable from the motherboard.
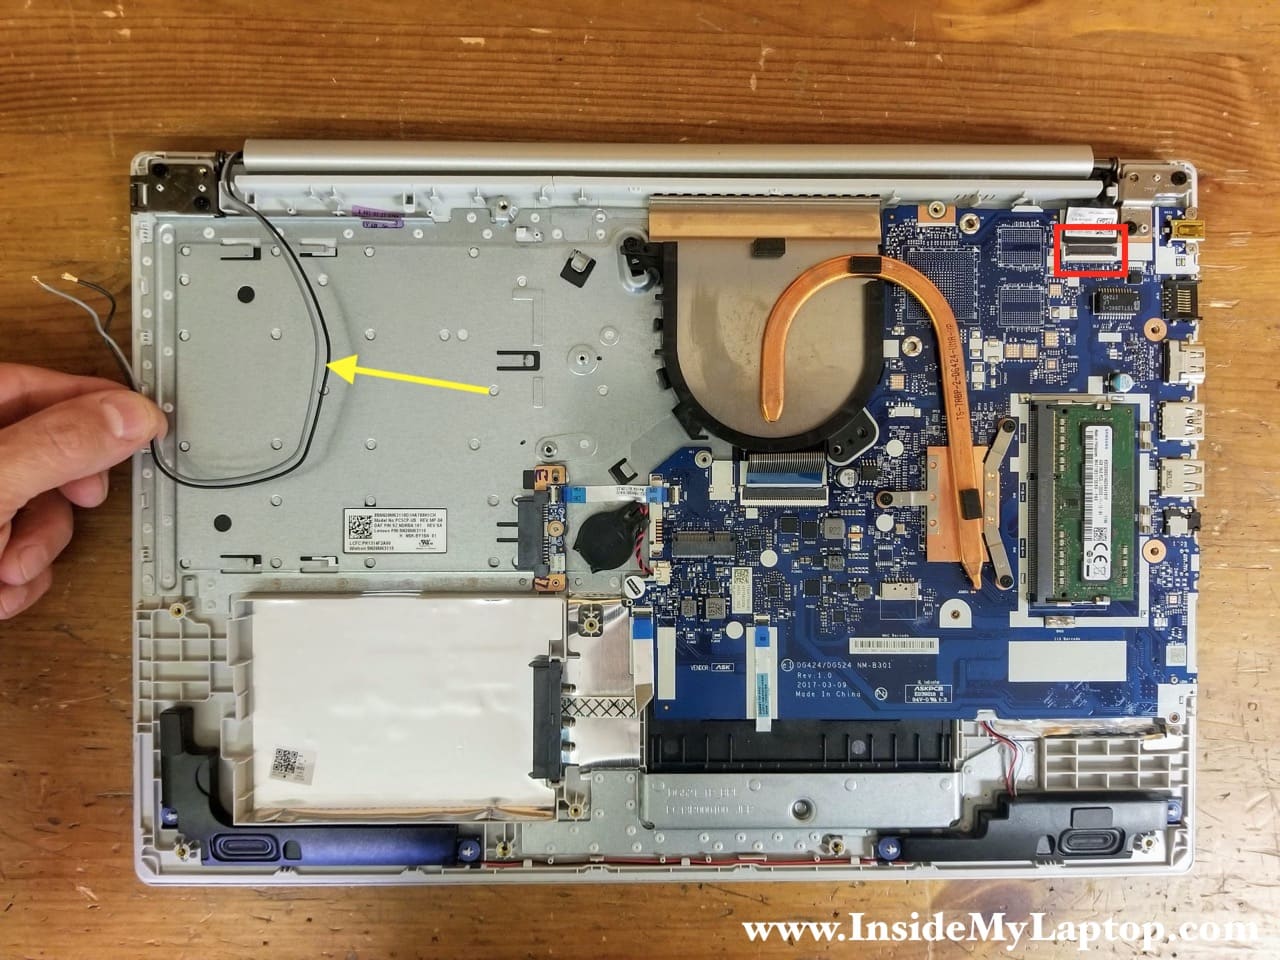
Here’s how to disconnect the display cable. Lift up the locking tab at a 90 degree angle (red arrow). Lift up and pull the display cable out (yellow arrow).

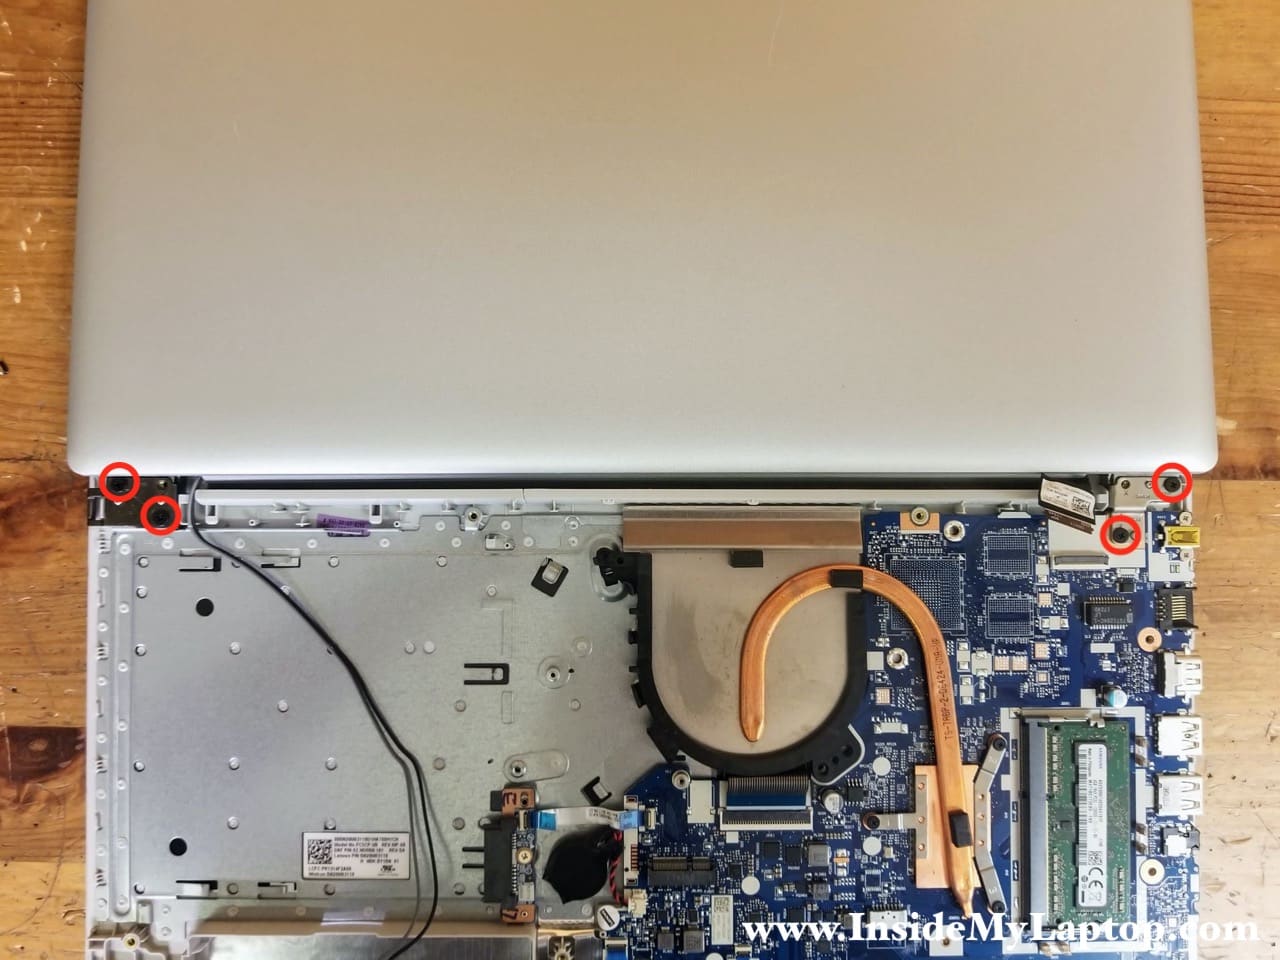
STEP 12.
Open the display panel 180 degrees. Remove four screws securing the display panel hinges.
STEP 13.
Separate the display panel from the top case assembly.
In the next guide I will explain how to remove and replace the LCD screen. It’s necessary to remove the display panel in order to remove the screen.
STEP 14.
Remove four screws securing the motherboard. One screw on the heatsink is larger than three other screws.
Disconnect the following color-coded cables:
– Keyboard cable (yellow).
– Optical drive connector board cable (orange).
– SATA connector cable (green).
– Touchpad cable (glue).
– Speaker cable (pink).
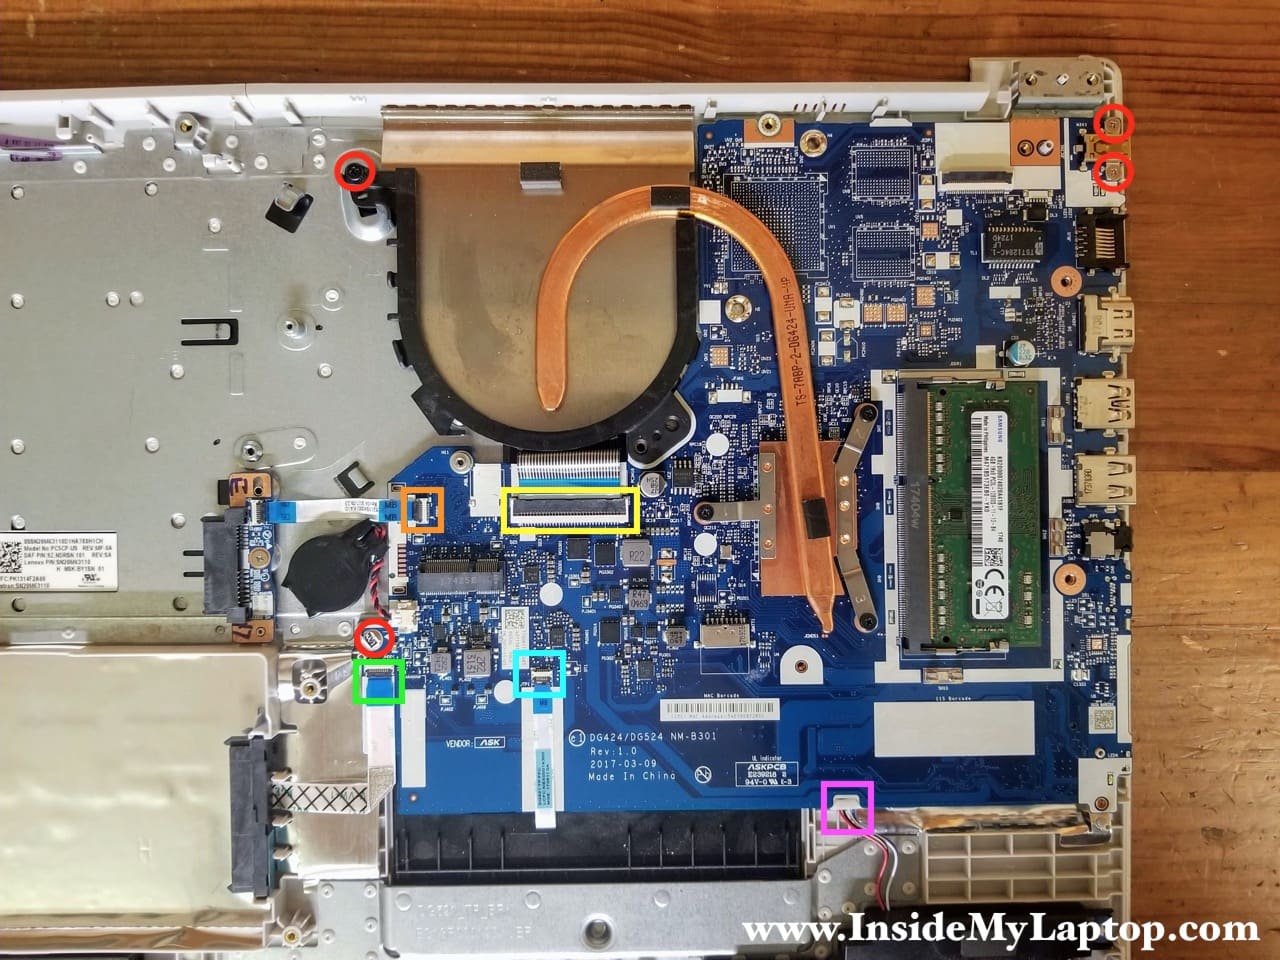
In order to disconnect the keyboard cable it is necessary to unlock the connector first.
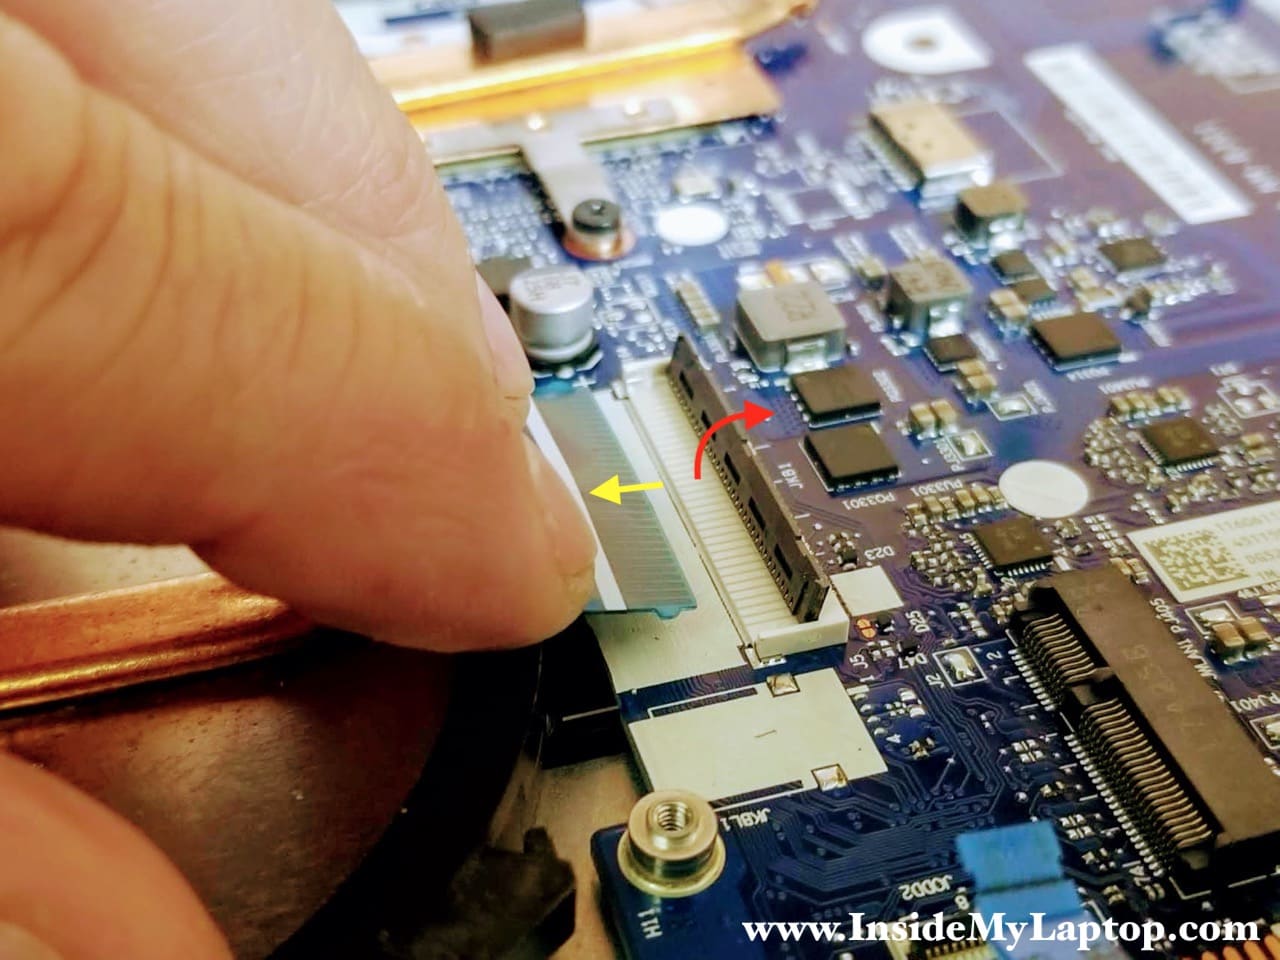
All other cables can be disconnected using the same technique.

STEP 15.
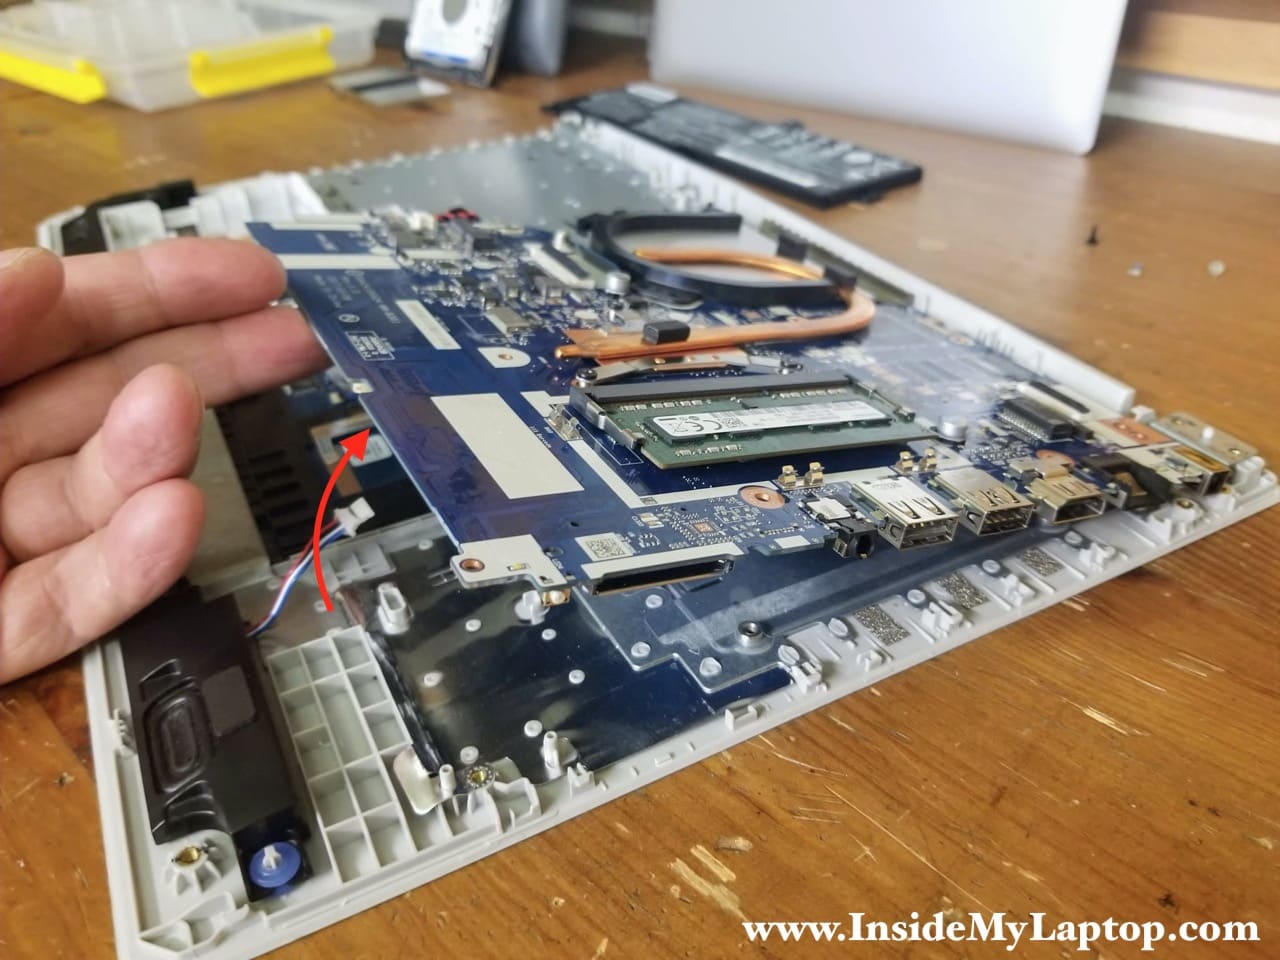
Lift up the motherboard and separate it from the top case.
I left the RTC battery connected to the motherboard in order to preserve the BIOS settings.
By the way, disconnecting the RTC battery from the motherboard will not clear the BIOS password. I tried that and it didn’t work for me.
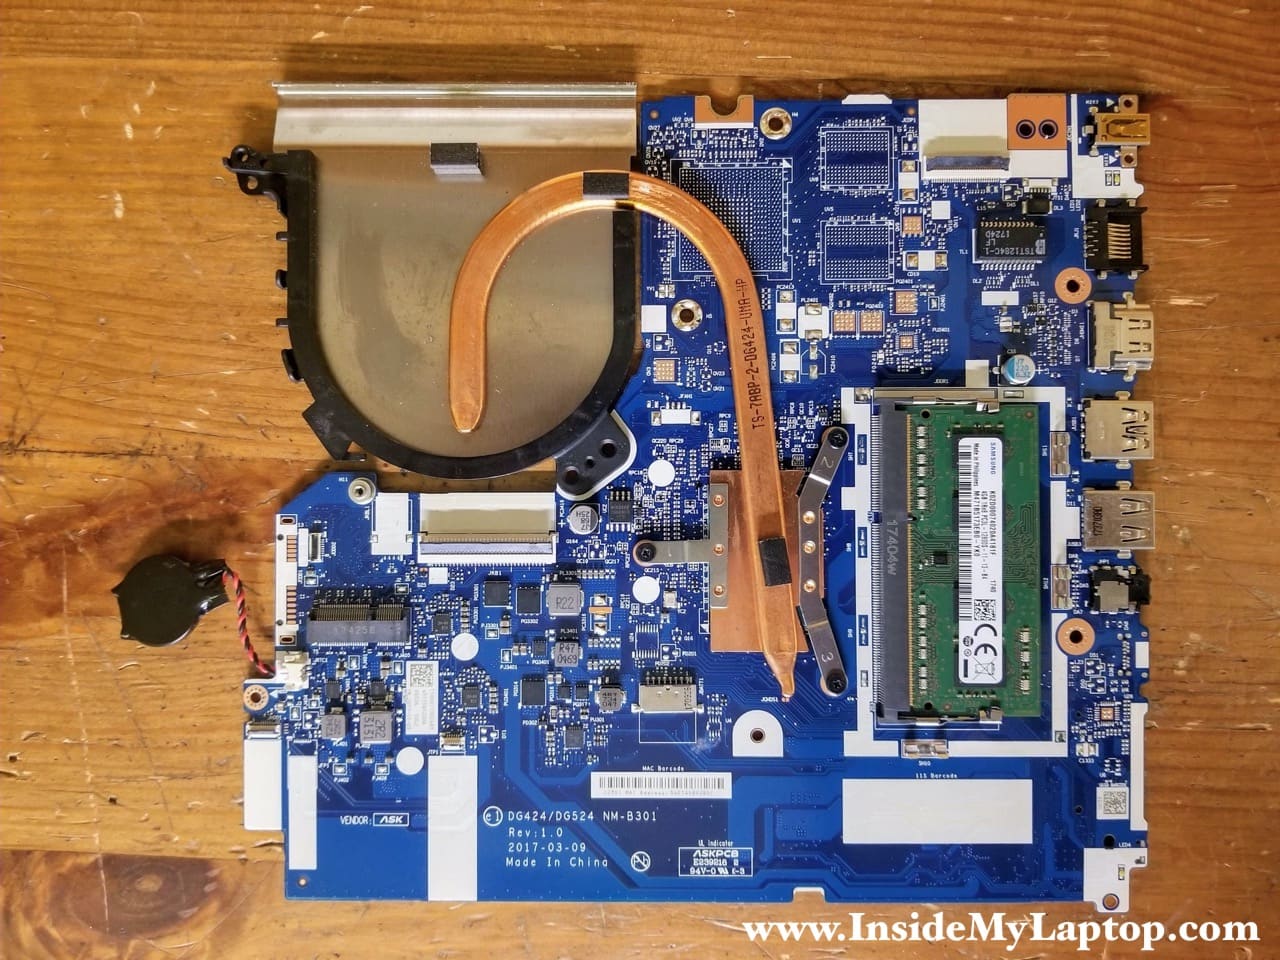
Here’s the other side of the motherboard.
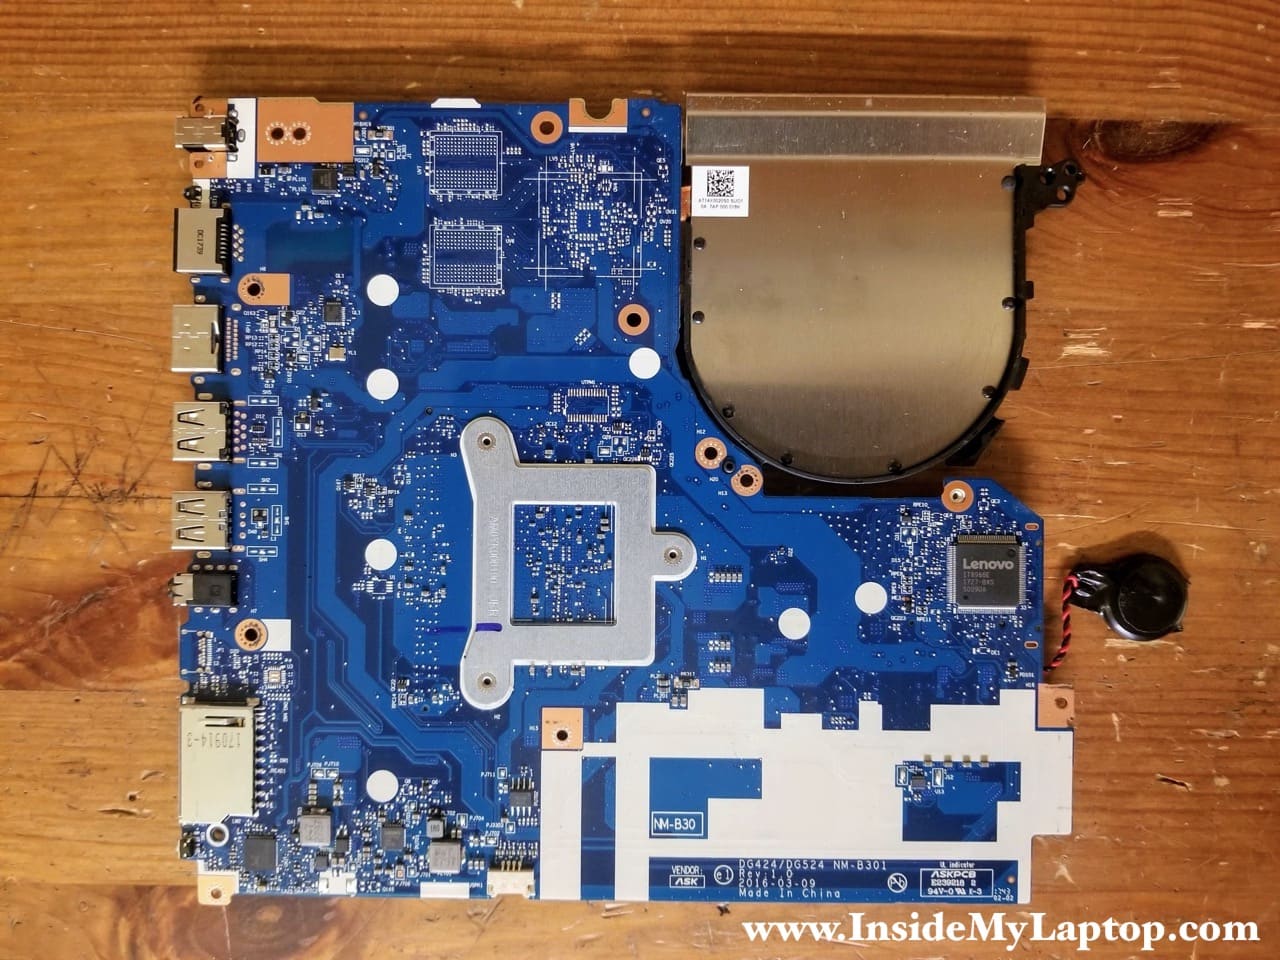
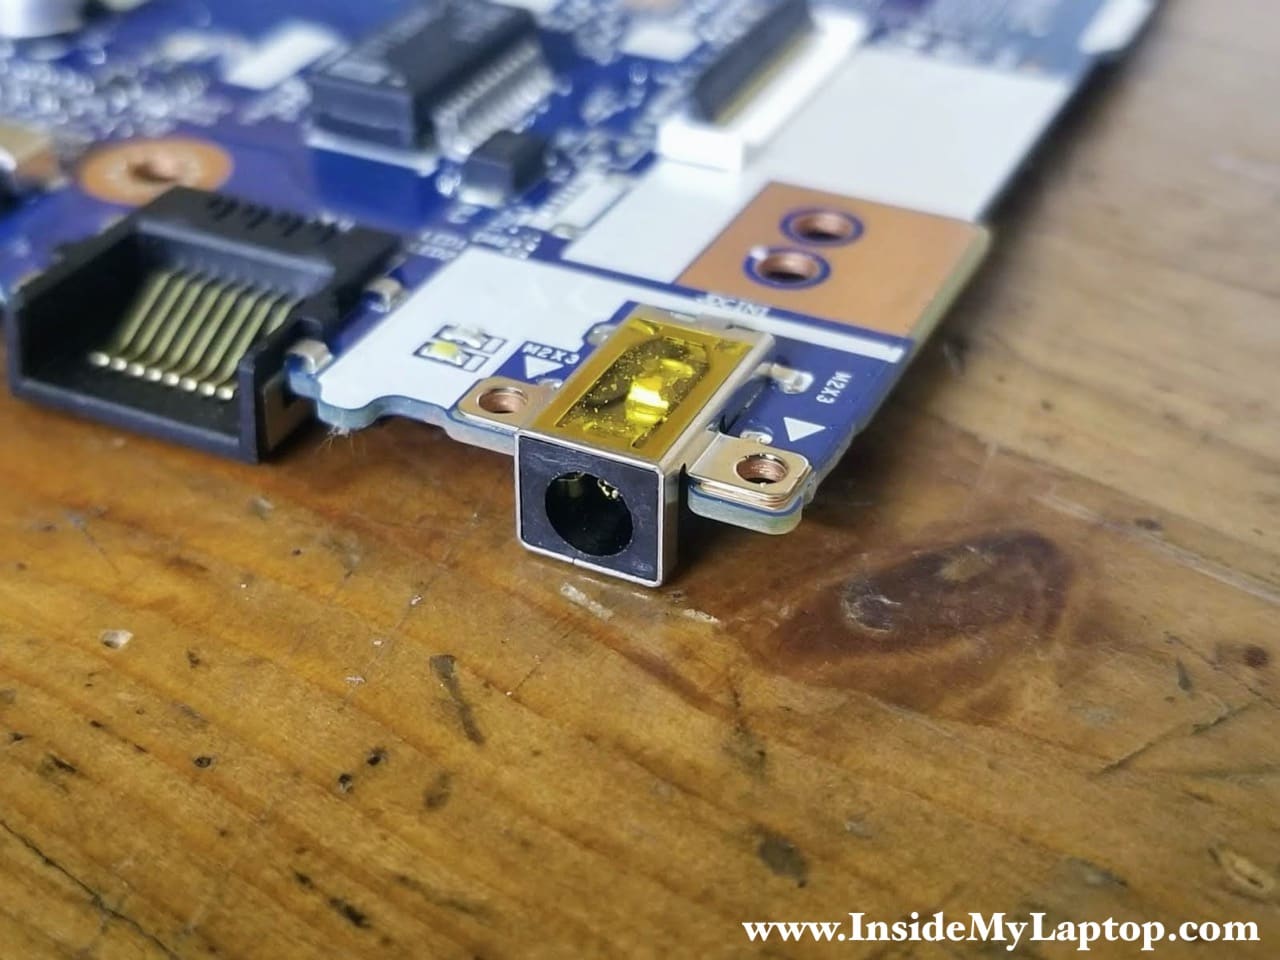
The DC power jack is soldered to the motherboard.
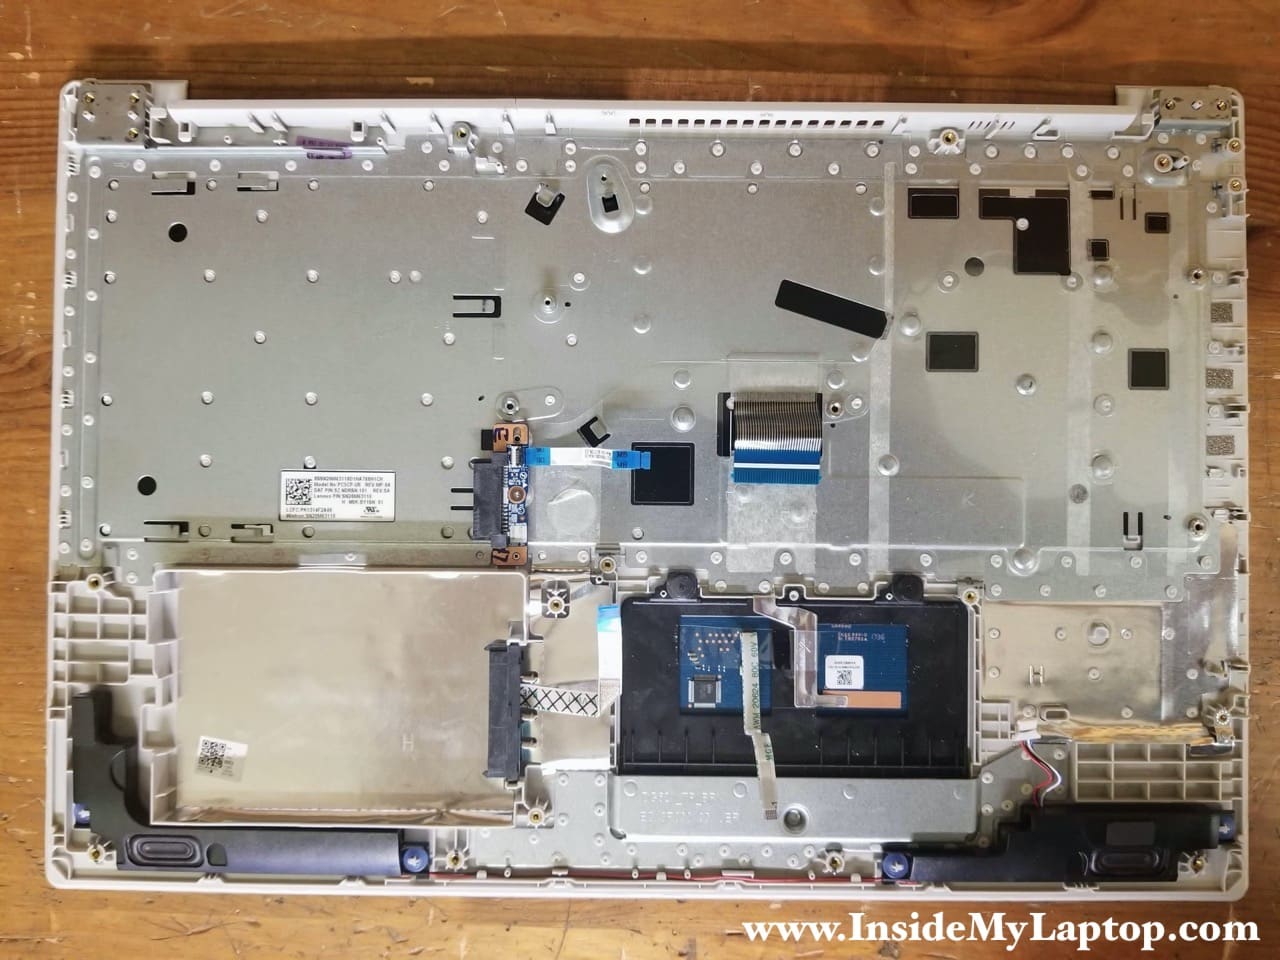
Here’s the top case with the motherboard removed.
Lenovo Ideapad 320 keyboard is permanently attached to the top case and cannot be easily removed even though it’s still possible to replace just the keyboard. The touchpad, on the other hand, is removable.