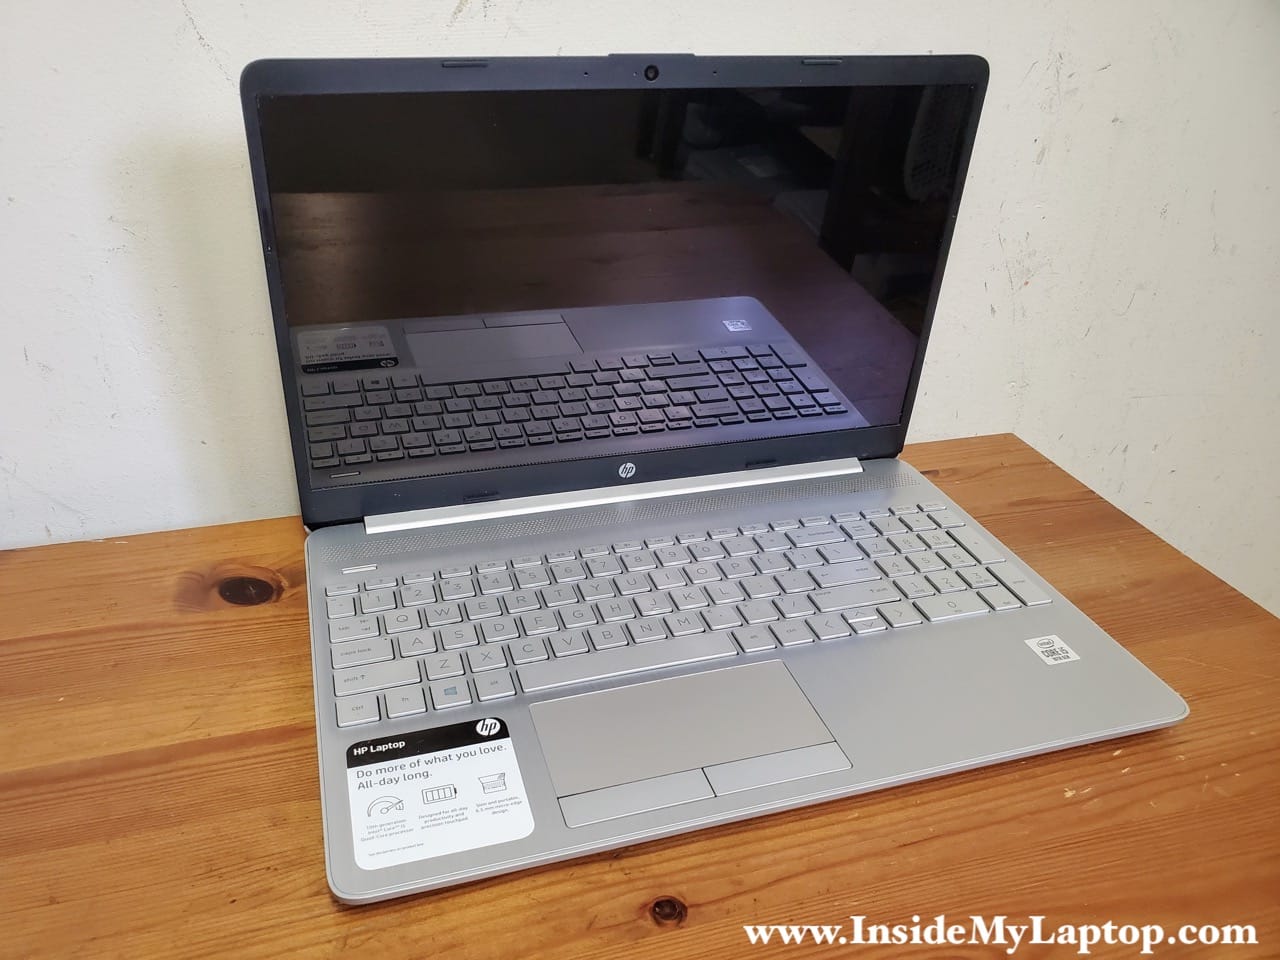
Today I show how to disassemble an HP 15-dw series laptop. In this particular case I am taking apart an HP model 15-dw2025cl.
The same instructions cab be applied to the following models:
HP 15-dw0081wm, 15-dw0083wm, 15dw-0037wm, 15dw-0038wm, 15-dw0043dx
HP 15-dw1033dx, 15-dw1083wm, 15-dw1081wm, 15-dw1001wm, 15dw-1032nr, 15-dw1032nr, 15-dw1033dx
HP 15-dw2048nr, 15-dw2063st, 15-dw2025od, 15-dw2076cl, 15-dw2065st, 15-dw2658cl, 15-dw2057cl
HP 15-dw3033dx, 15-dw3058cl, 15-dw3053dx, 15-dw3225od, 15-dw3035cl, 15-dw3365st, 15-dw3045cl, 15-dw3363st
and some other models in HP-15dw series laptops.
For this disassembly you will need a PH1/PH0 Phillips screwdriver, case opener and fine twitters – main tools in my toolbox.
Bottom cover removal
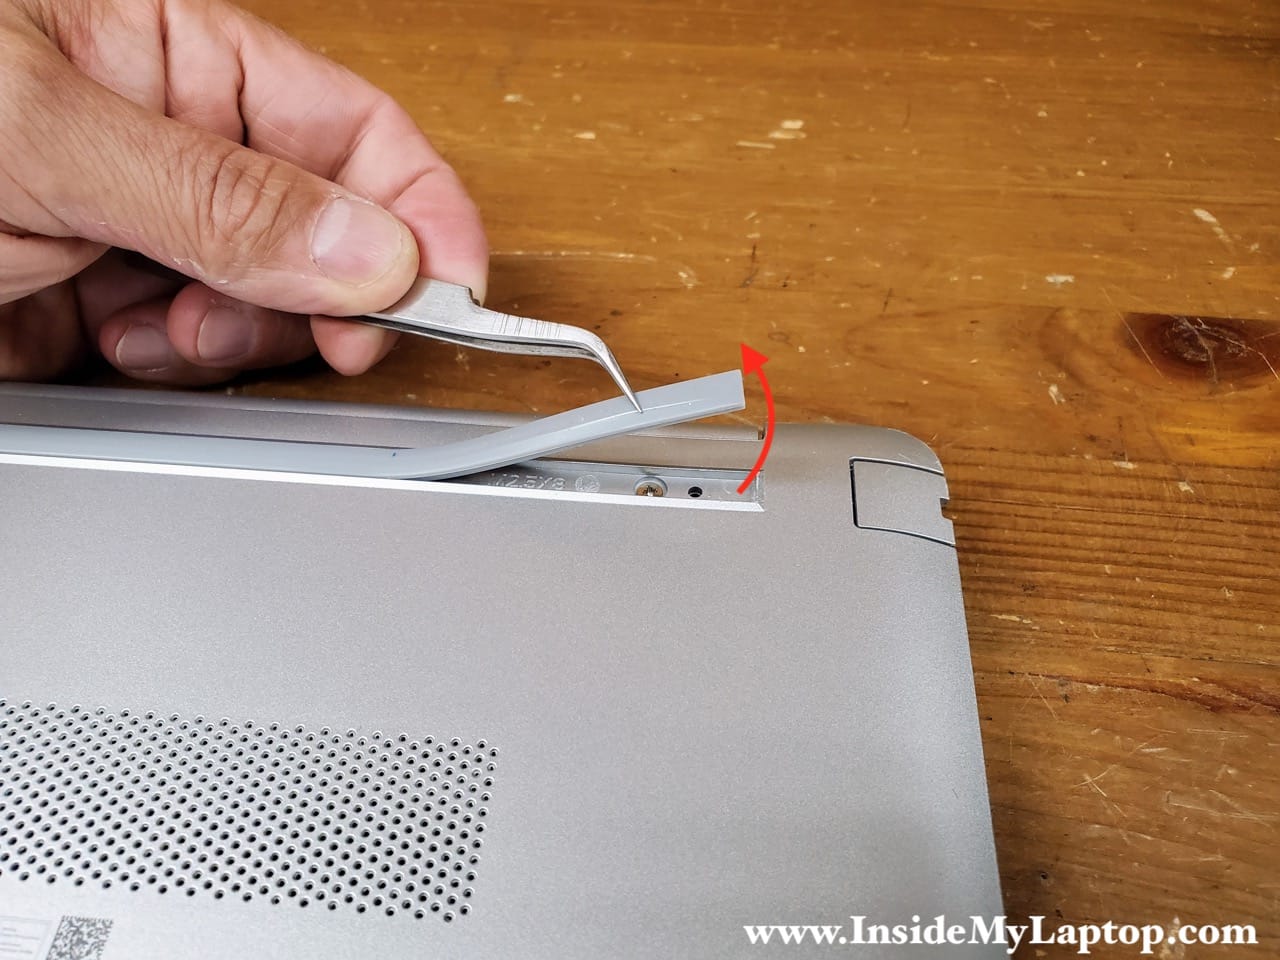
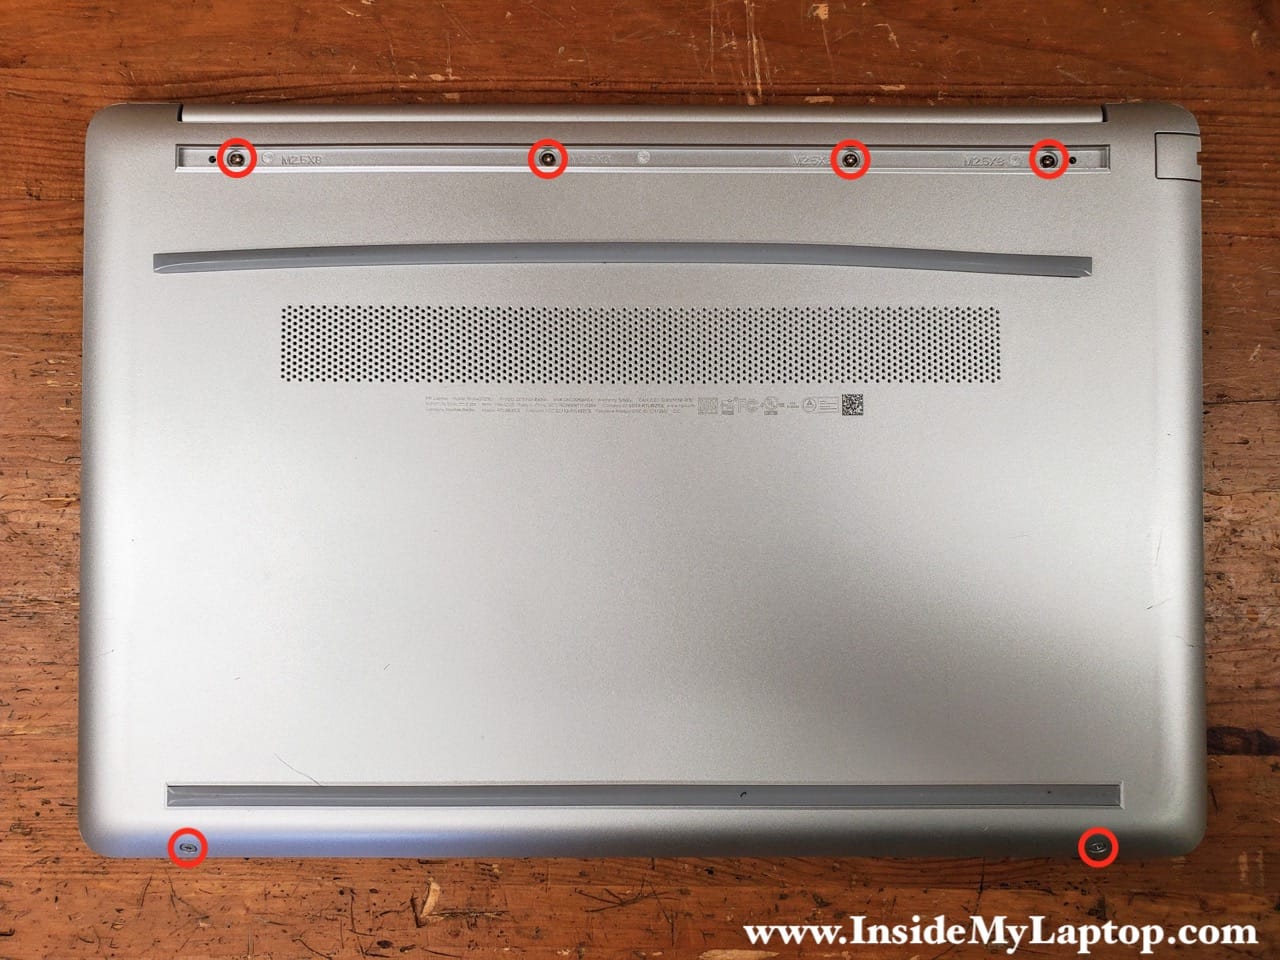
The bottom cover is secured by six Phillips screws. Four of the screws are hidden under the upper rubber foot.

The upper rubber foot is secured in place by adhesive tape. Lift up the foot to separate it from the bottom cover. Remove the foot.
Remove all six screws securing the bottom cover.
Insert a case opener tool between the top case and the bottom cover. Move the case opener along the side of the laptop and start separating the bottom cover from the top case.
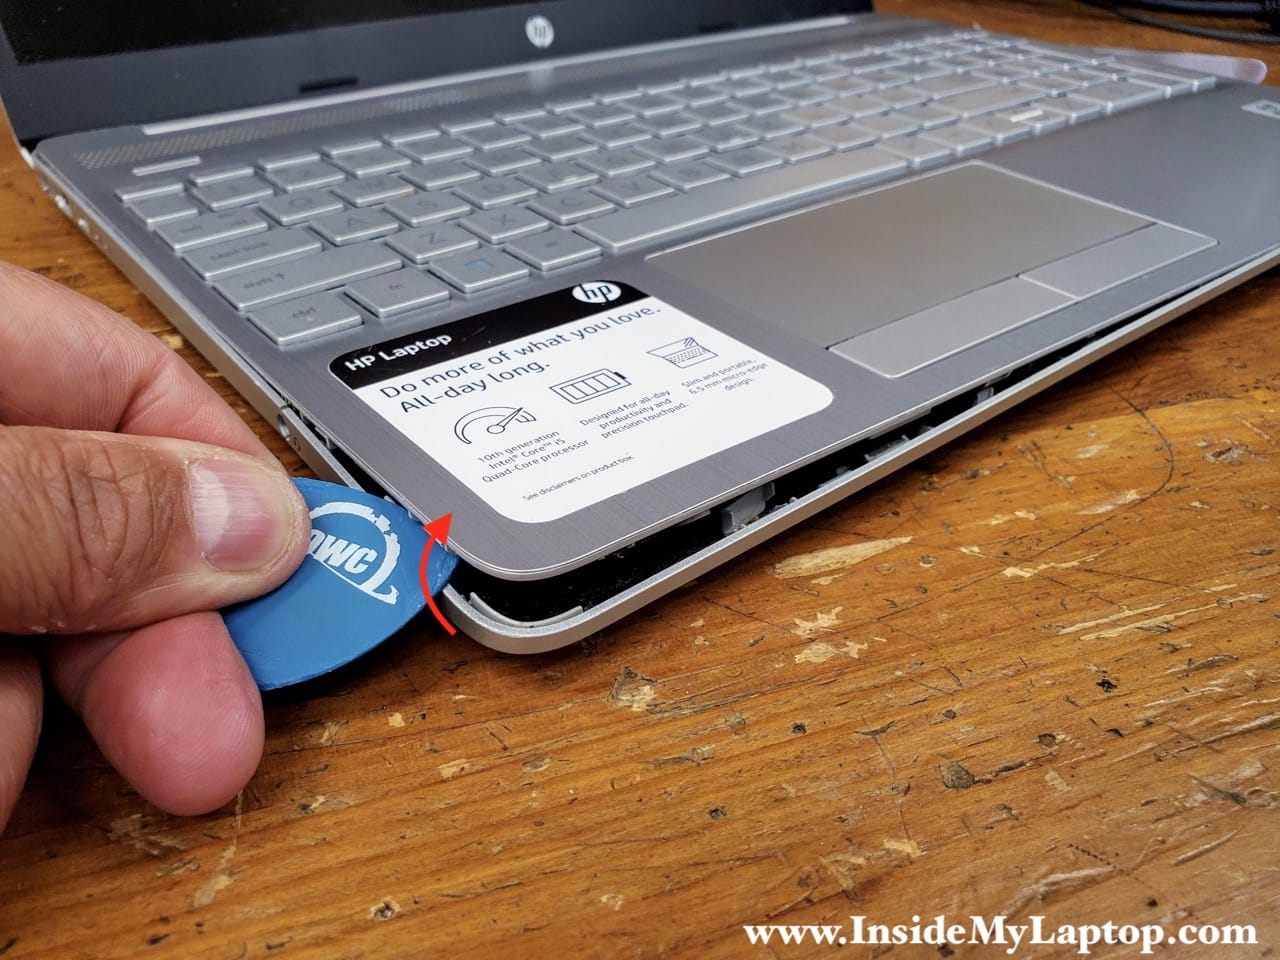
Remove the bottom cover.
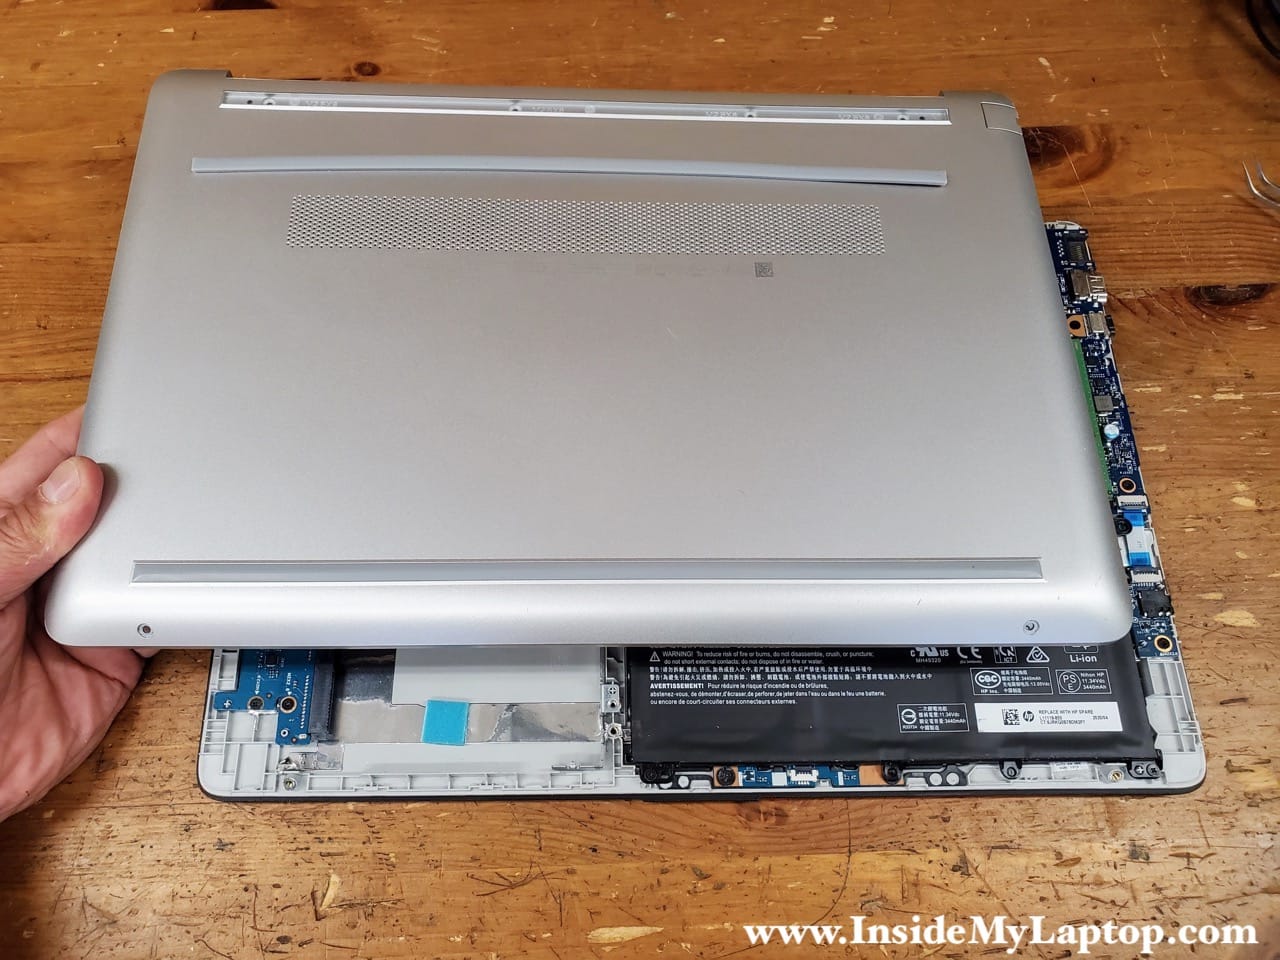
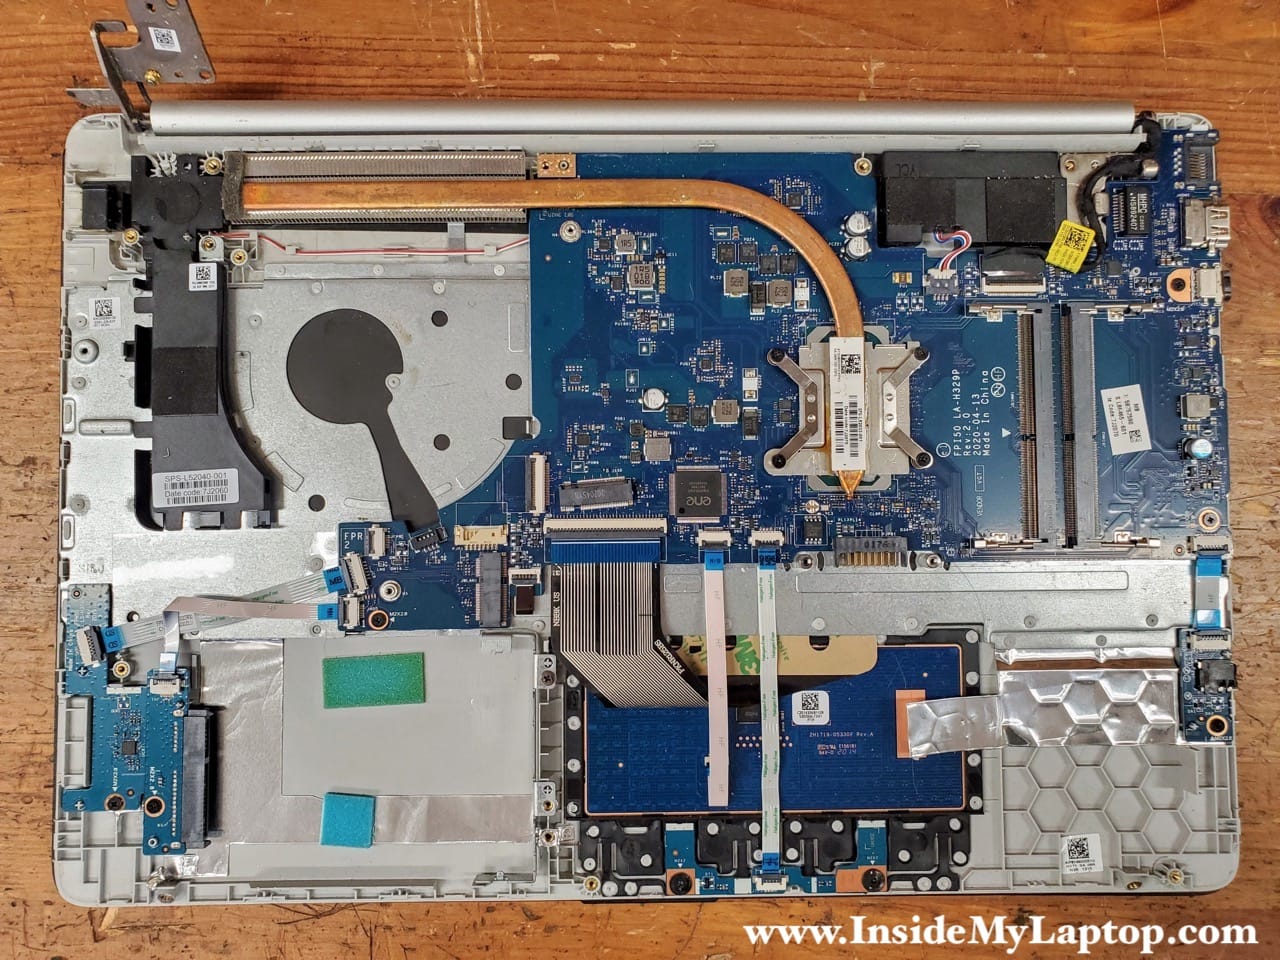
With the bottom cover removed you can access all main internal components of the laptop. Let’s remove them one by one.
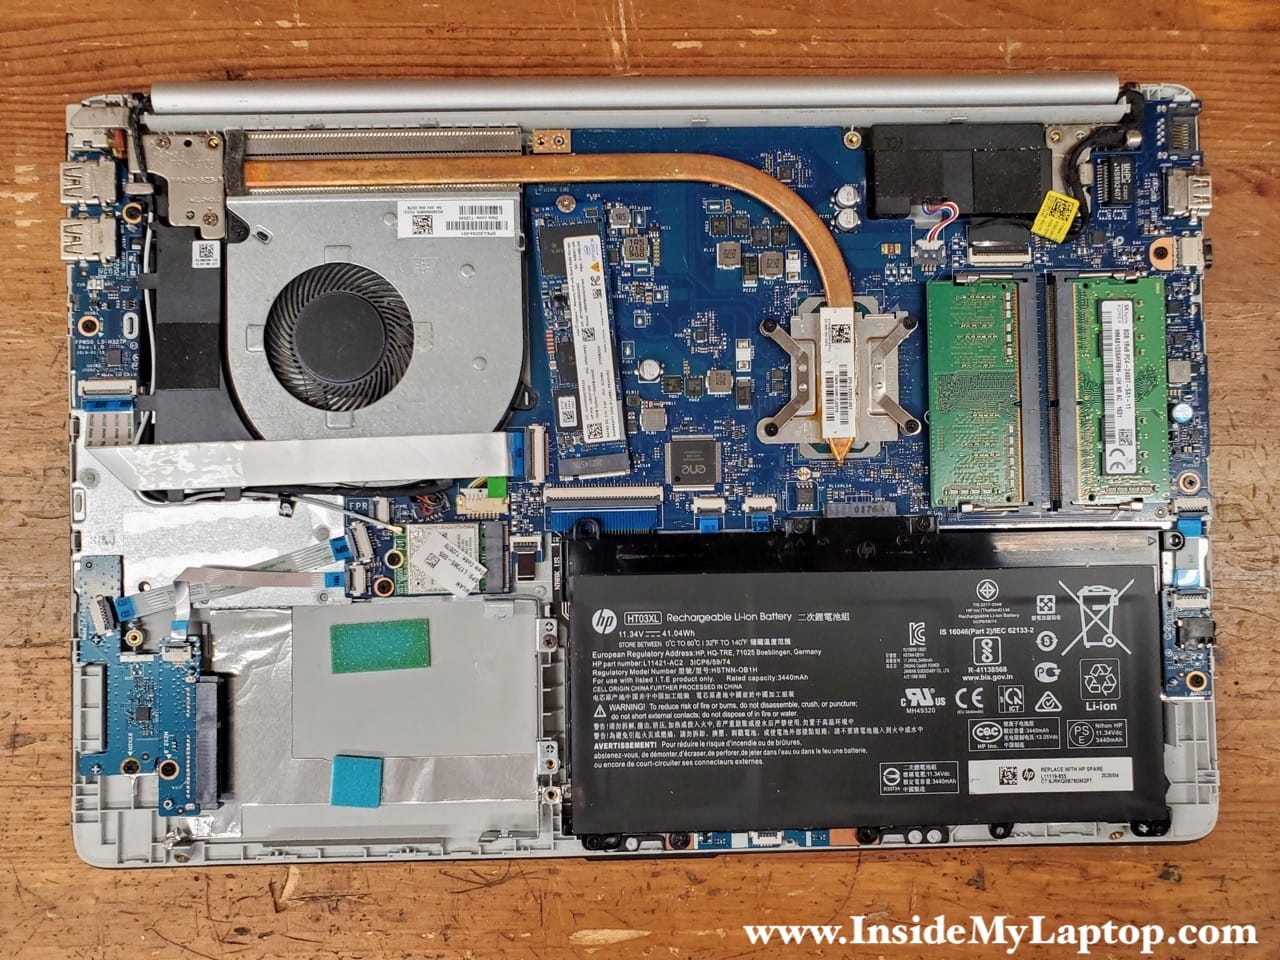
Battery removal and replacement
Remove four screws securing the battery.

Lift up the battery to disconnect it from the motherboard.
If you need to replace the battery, you can find a new one using the model number HT03XL.

Memory (RAM) removal and replacement
HP 15-dw series laptop has two memory slots. Maximum memory that this laptop can handle is 32GB (2x16GB modules).
If you need to replace or upgrade RAM, you can use DDR4-2400, DDR4-2666 or DDR4-3200 RAM modules. Just make that both RAM modules are identical size and speed so it operates in dual channel mode.
This is the preferred way to install memory as it runs at a better performing rate than when it is in single channel mode.

Spread two metal latches securing the RAM module. Pull the memory module out of the slot.

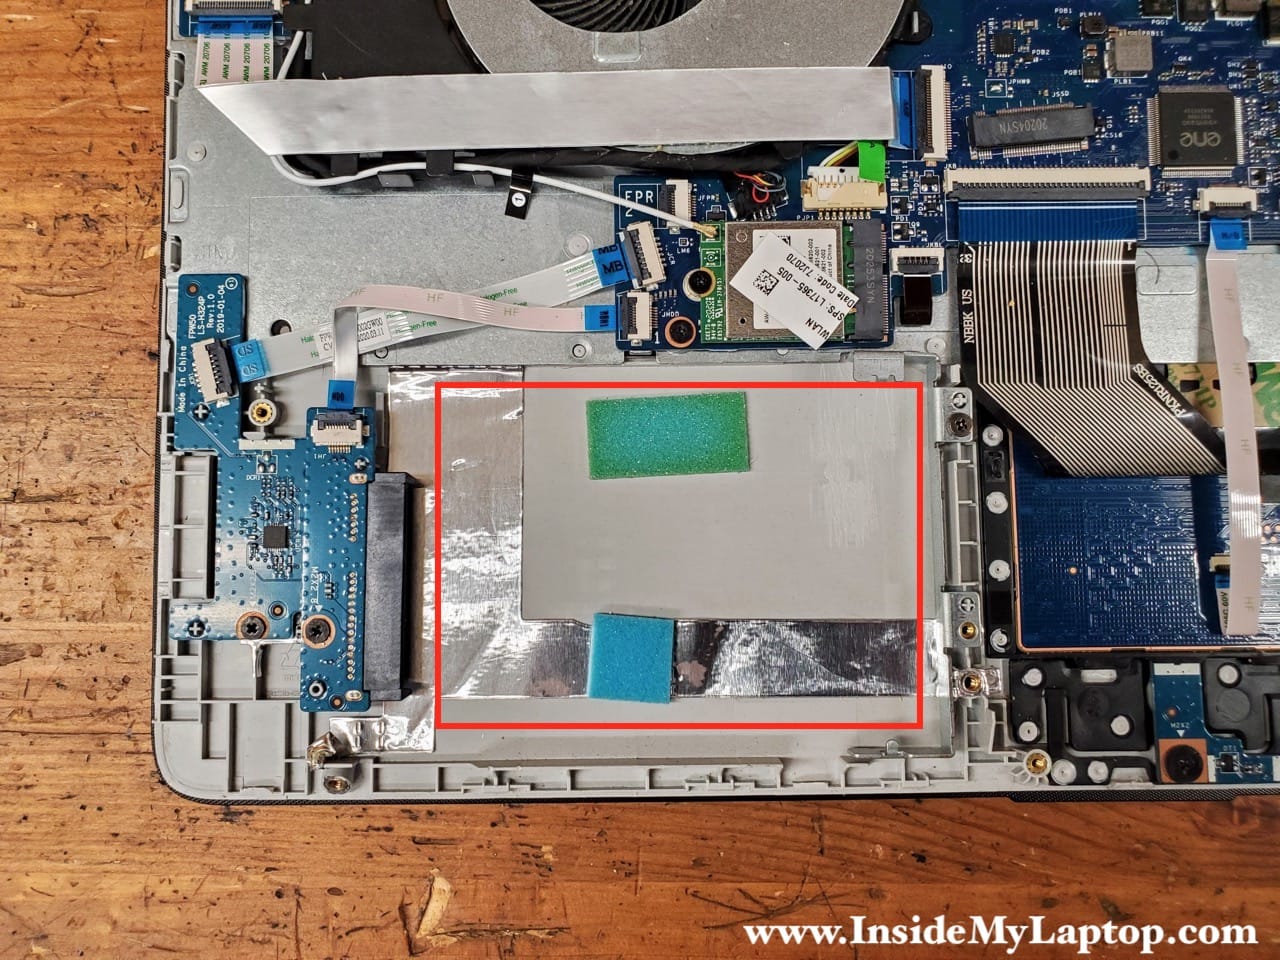
SSD/HDD removal and replacement
This laptop has one PCIe slot for а NVMe solid state drive. The SSD is secured by one screw.
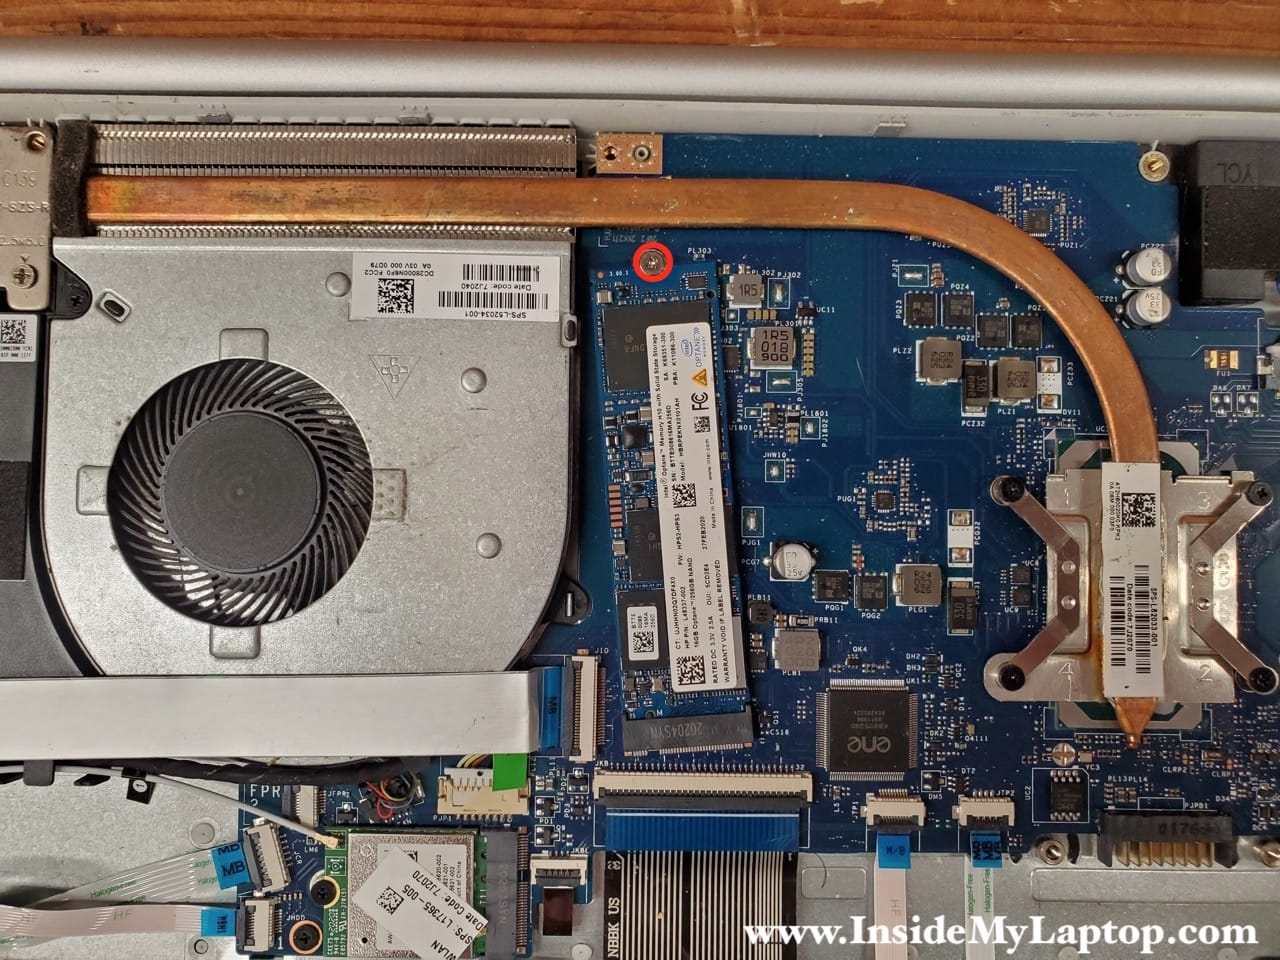
After you remove the screen, you can pull the SSD out.
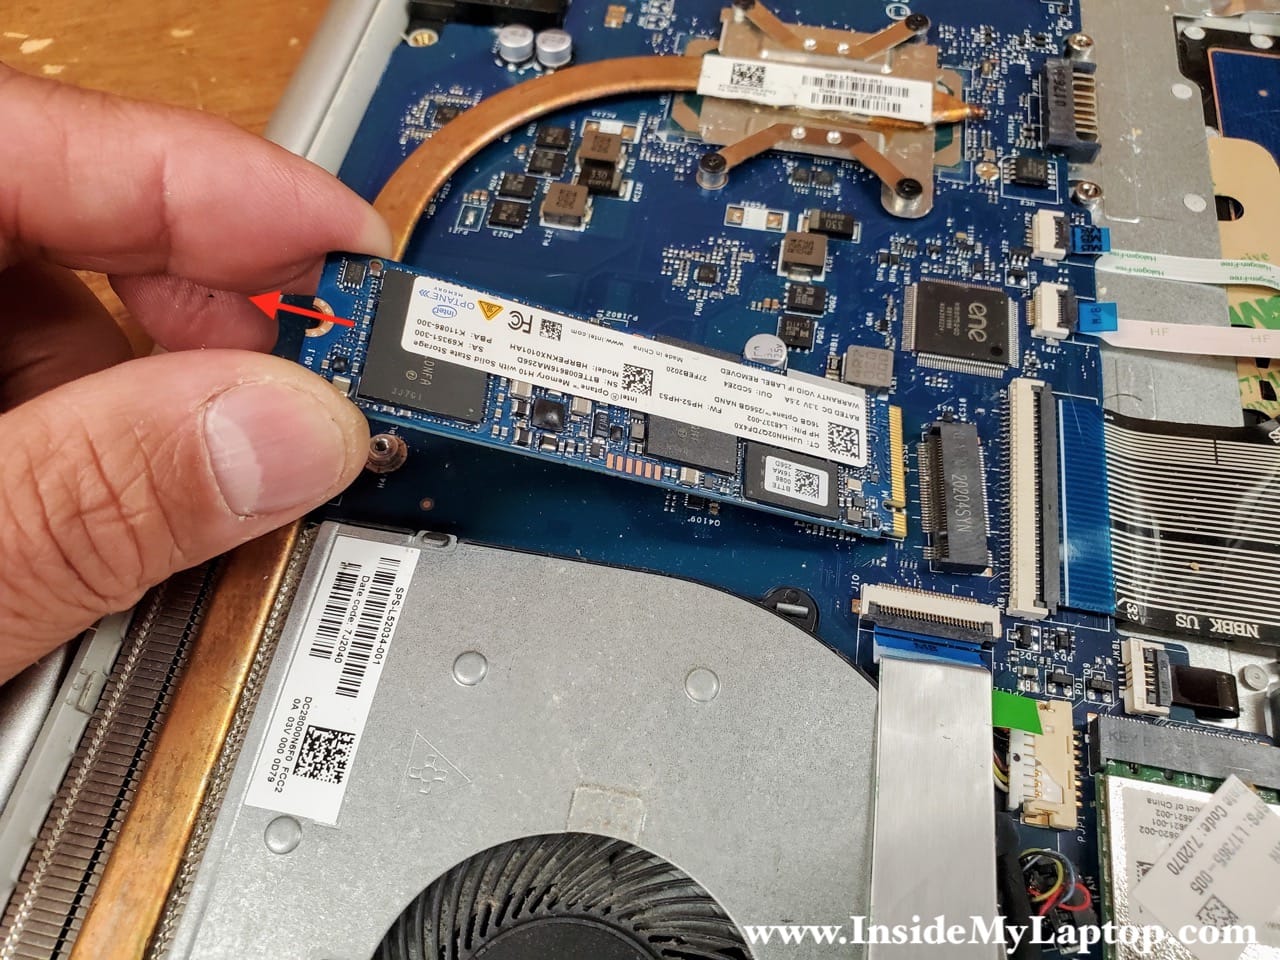
Some HP 15-dw models might be configured with a regular 2.5″ SATA hard drive instead of PCIe NVMe SSD.
If you have a regular 2.5″ SATA HDD installed, I strongly advise upgrading to NVMe SSD.
NVMe SSD is much faster, silent and energy efficient (improved battery life). Any third party NVMe SSD like Samsung, Western Digital or Crucial should work with no problem.
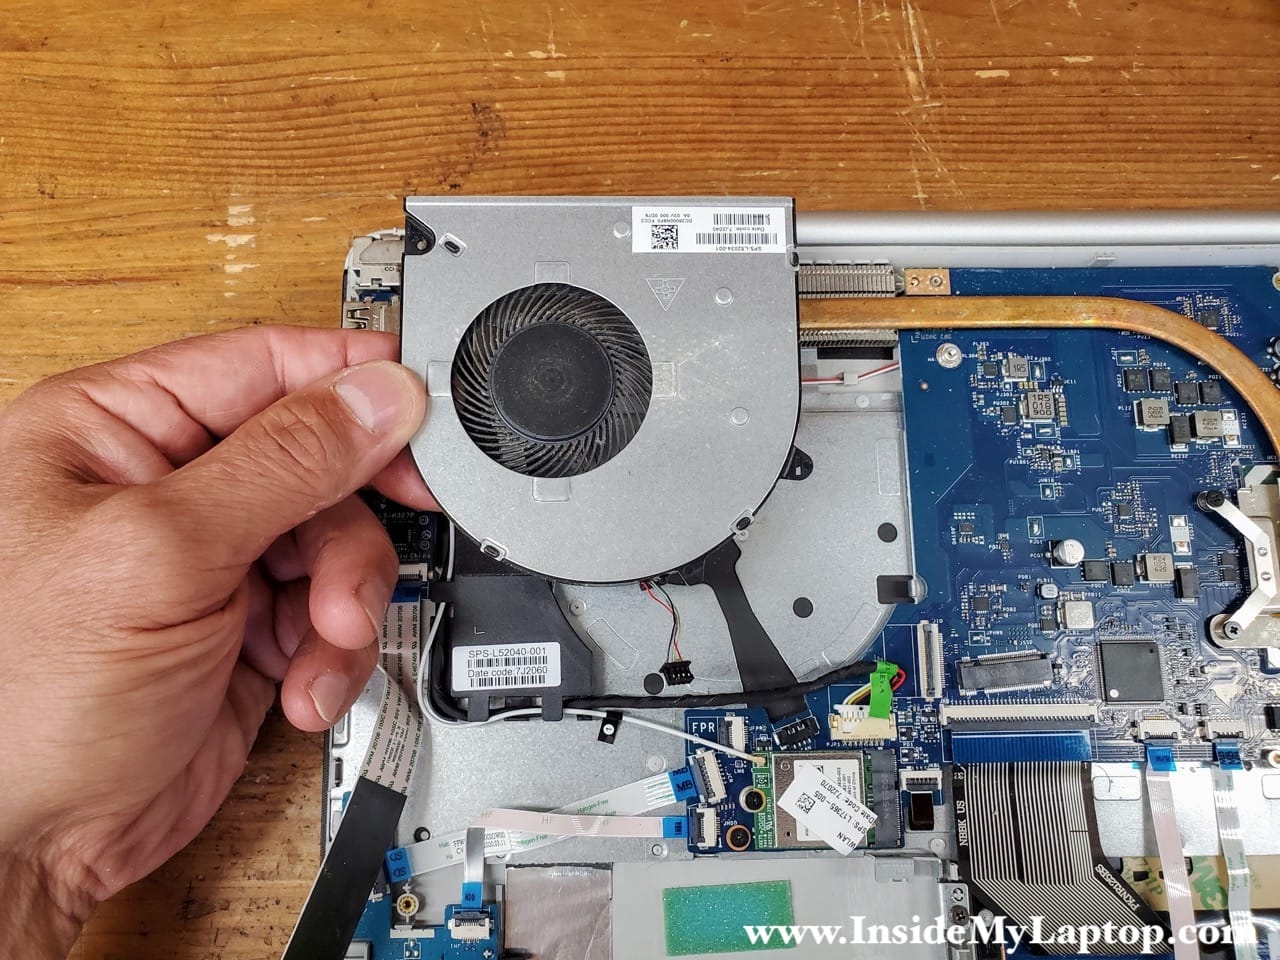
Cooling fan removal and replacement
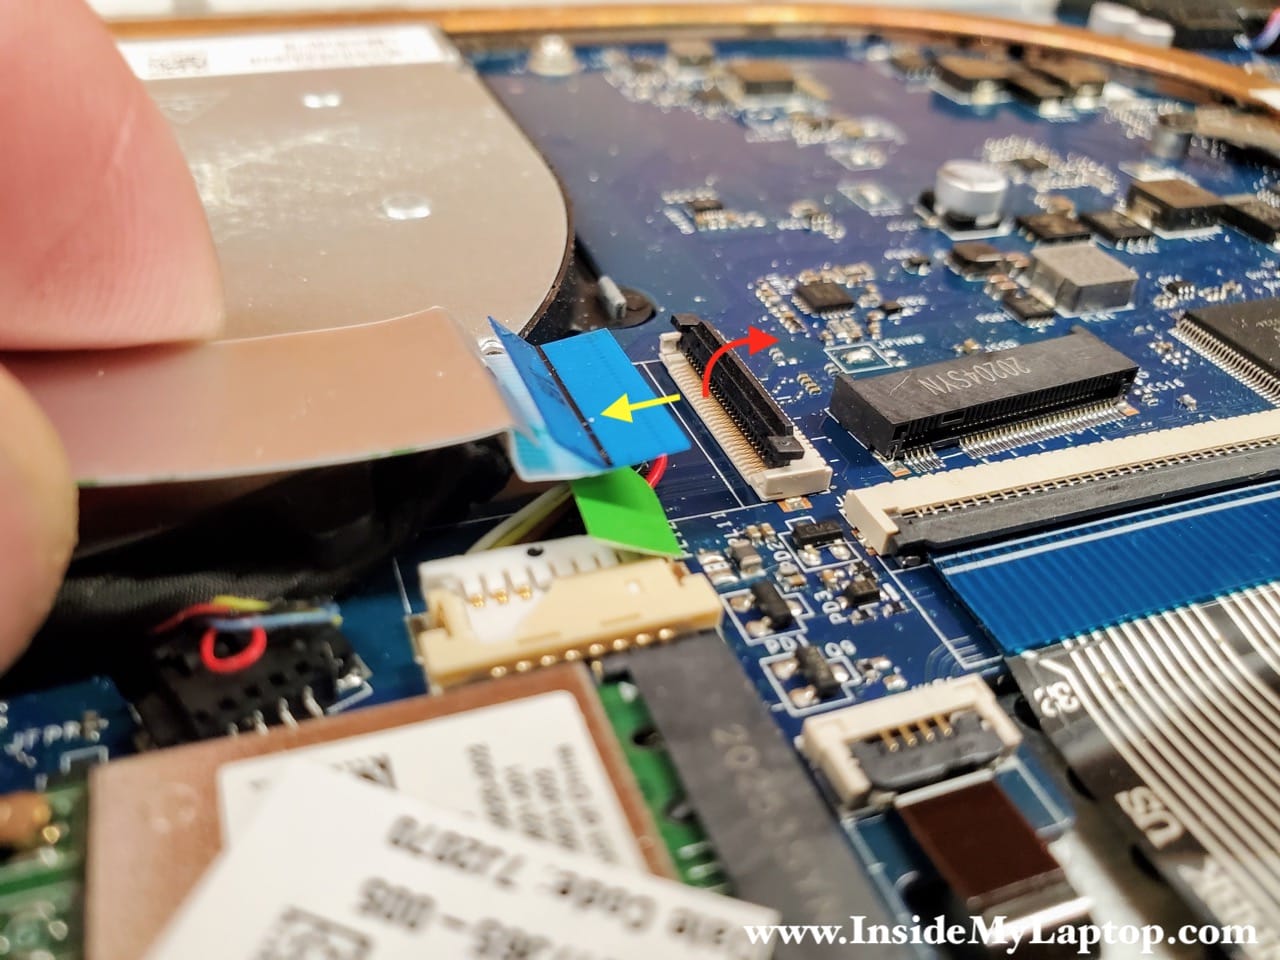
The cooling fan is mounted under the USB board cable. In order to remove the cooling fan it is necessary to disconnect this cable from the motherboard.
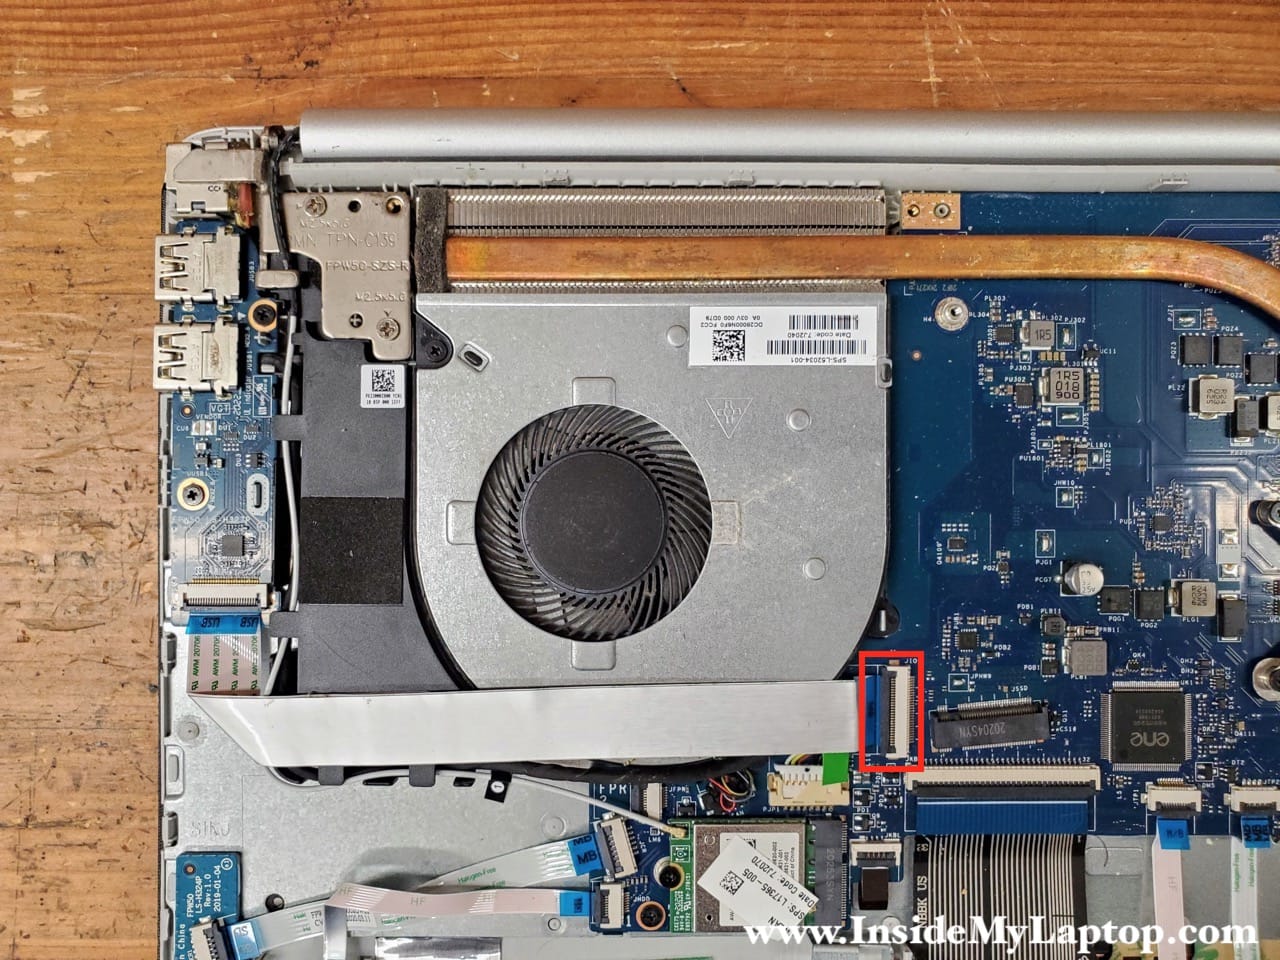
Carefully lift up the connector locking tab (red arrow). The locking tab will open up and a 90-degree angle.
Now you can pull the USB board cable from the connector (yellow arrow).
Move the USB board cable aside and remove one screw securing the fan.

Lift up the fan and disconnect the fan cable from the motherboard.
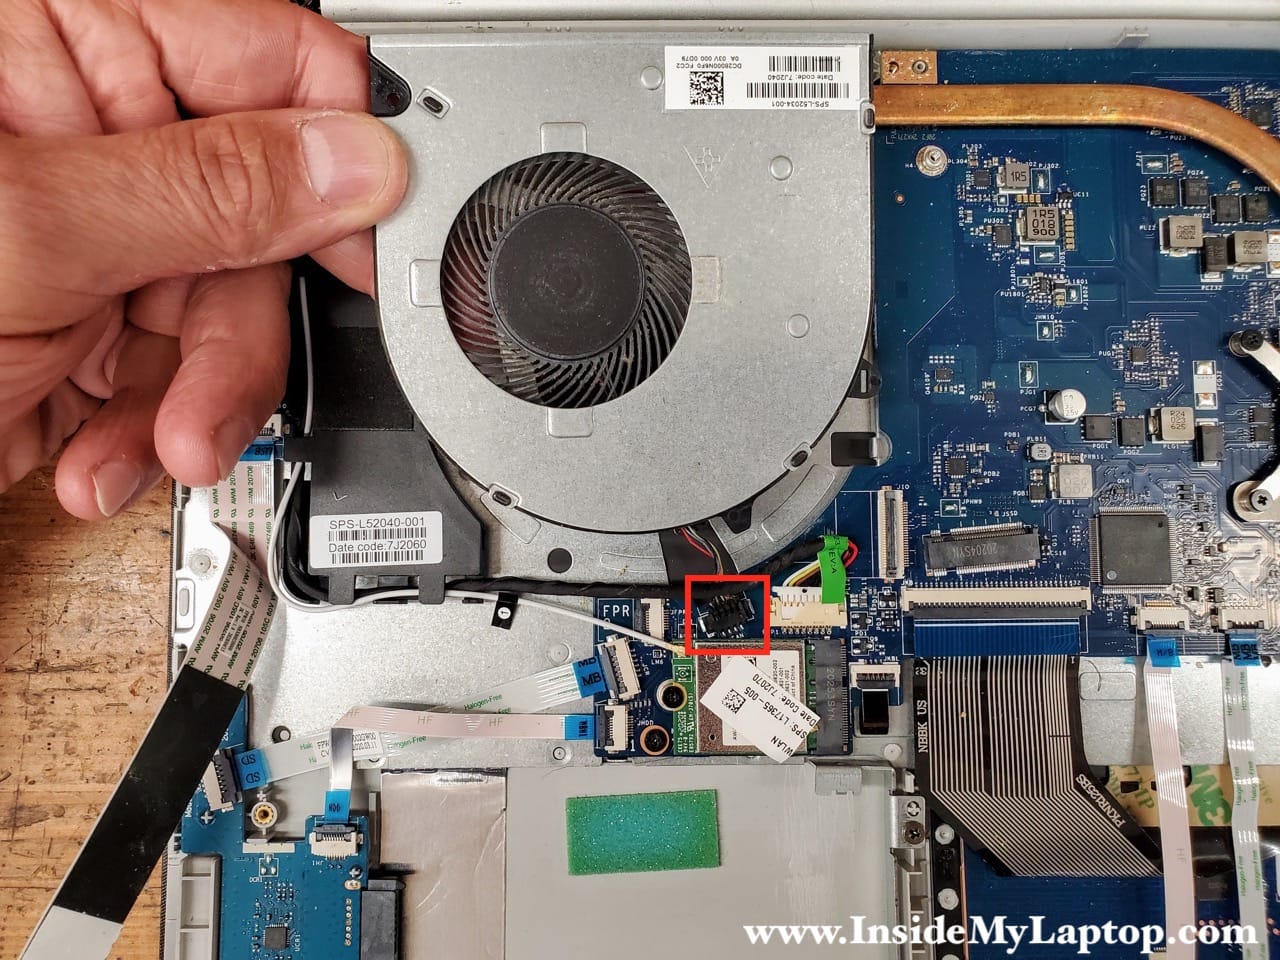
Now you can remove the cooling fan and replace it with a new one if necessary.
You can search for a new fan using the part number from the original one: L52034-001
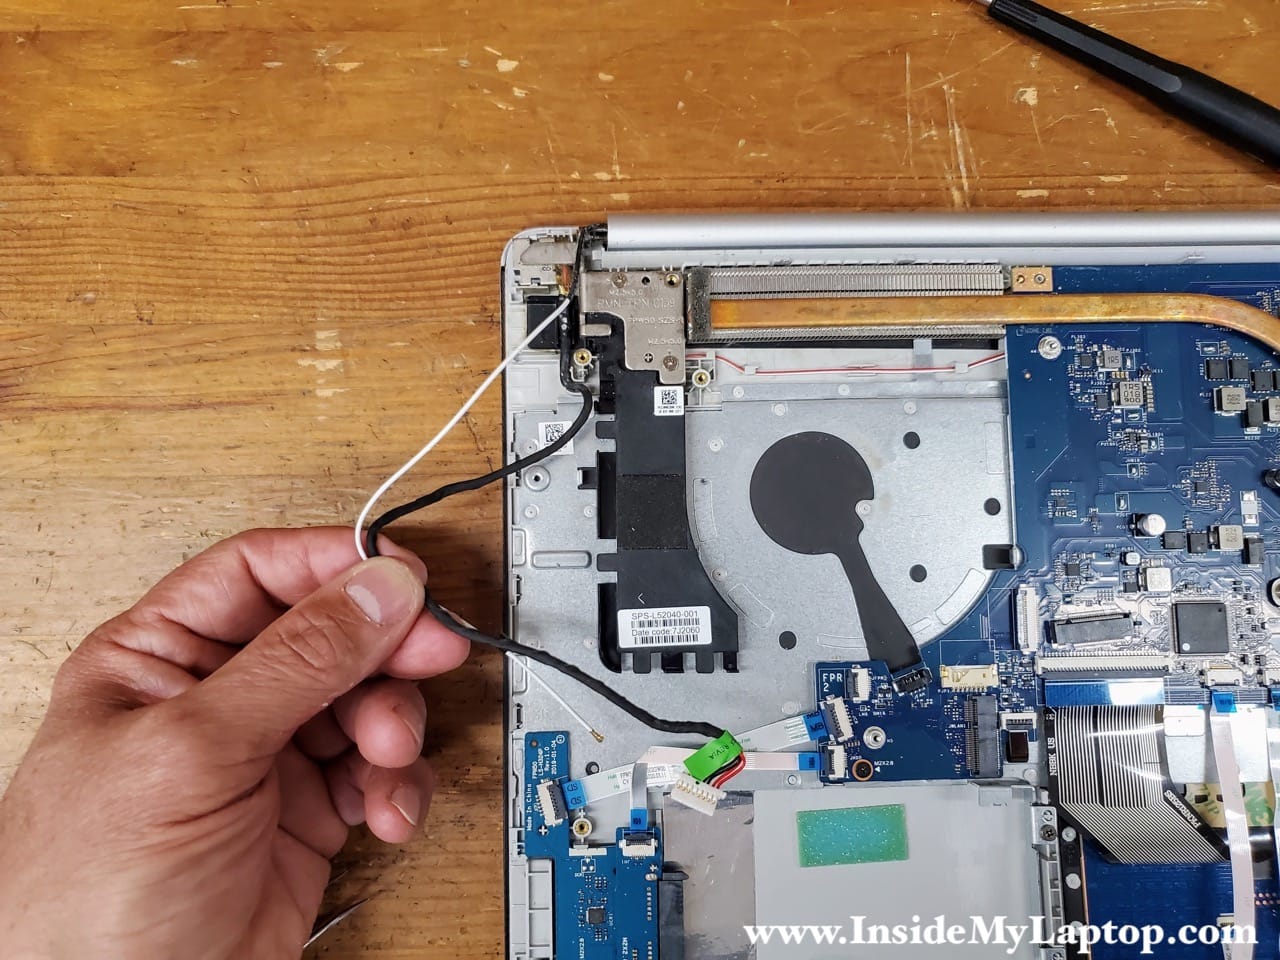
Wireless card removal and replacement
Disconnect one antenna cable from the wireless card. In order to detach the cable from the wireless card you need to lift up the golden connector. It will unsnap from the card. Remove one screw securing the card.

Now you can pull the wireless card out of the slot.
You can find a new replacement wireless card using this part number: L17365-005

DC power jack removal and replacement
The DC jack cable is routed under the USB board so it has to be removed first.
Remove two screws securing the USB board.

Remove the USB board.

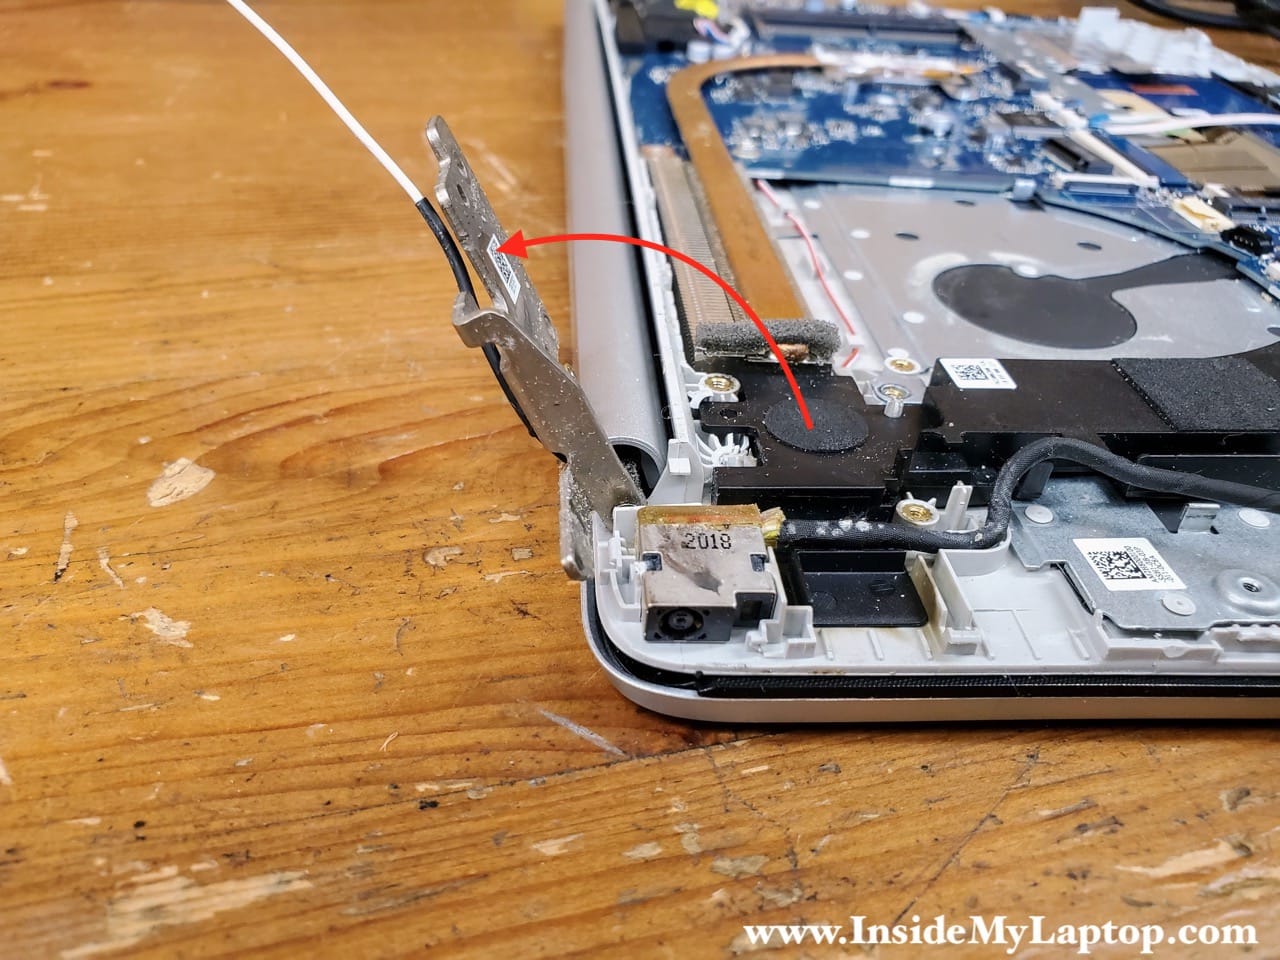
Un-route the DC jack cable and the wireless antenna cable from the guide path on the side of the speaker.
Remove two screws securing the display hinge.

Open up the display hinge as it shown on the following picture.
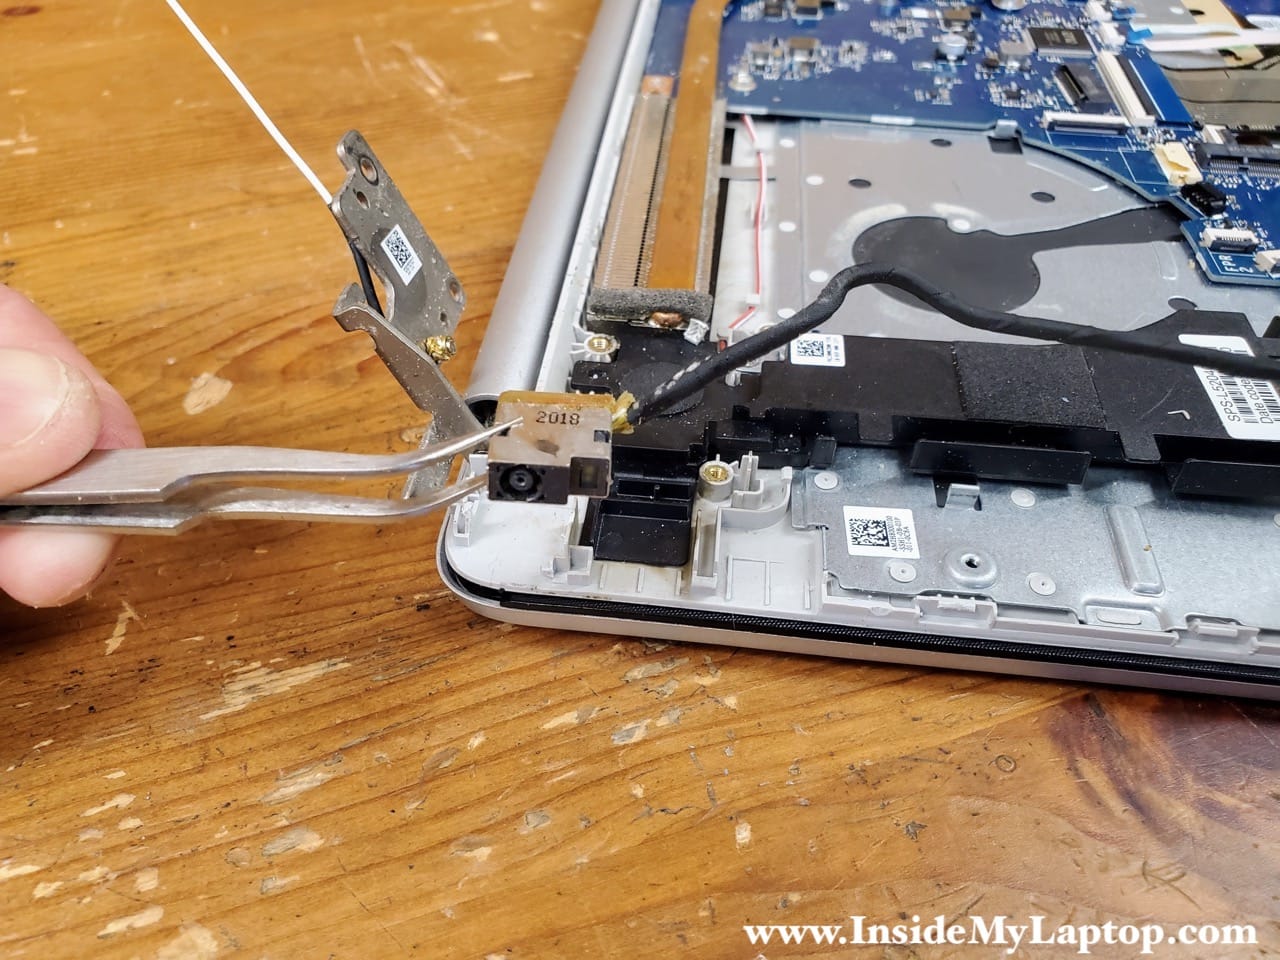
Separate the DC jack from the top case. Now you can remove the DC jack harness and replace it if necessary.
DC jack part number: L51995-001
The touchpad and the keyboard in HP 15-dw series laptop are permanently riveted to the top case.
Here’s how to replace the keyboard when it’s riveted to the top case.
Andrei
Hi, my hp laptop says fan not working when it starts. Can I remove this error? Thanks.
IML Tech
Hi Andrei, most likely you have failed fan. You’ll have to replace the fan.
Mcclane
Do you know how to apply the speaker array? I am having audio issues, the speakers sound like they are blown out. Maybe they got wet? Strangely enough it sounds the same with headphones in
IML Tech
If you hear distortion through the speakers AND headphones, the problem is NOT related to the speakers. I guess this could be driver related issue but it’s hard to tell without testing. Try removing the sound driver from the device manager and let it reinstall automatically.
Erik
Excellent post, I found it very useful, just I have one question: Do you have the part number of the heat sink?.
Thanks in advance
IML Tech
I searched ebay and probably part numbers are L52034-001 L52033-001
Kayye
My laptop was fully charged and wouldn’t power up the following day on battery.
It came on when plugged in socket with cmos 601 and then bios 501 and then powered up to windows and it worked perfectly.
BIOS update was prompted and I installed “Windows10, 64bit” instead of “Windows11, 64bit 21H2” which I didnt know was placed in windows11 side because my system has not been updated to windows11.
This made screen not to come on at all but I can only press the power button to on only on electricity. It displays the power on light on the side on pressing but nothing else happens. I also press the power button to put it off.
What can I do please? And I can’t find the cmos battery. It’s 15 series
IML Tech
Try disconnecting the battery from the motherboard. Keep the battery disconnected for a while. Try turning on the laptop without battery connected. Sometimes disconnecting/reconnecting the battery does the trick.
kayye
Please, how can one reset the bios or cmos of these models after dismantling. It is true they use system battery and not a button cmos? Thank you.
MojoM
Hello, I wanted to thank you for the good quality of your tutorial and ask you if I buy this NVMe model “Samsung 980 PRO MZ-V8P1T0BW”* will it be compatible with my HP laptop”HP LAPTOP 15 DW2025CL”.
Thanks in advance
IML Tech
Yeah, this SSD should work.
Gary
Hi,
Would you know where the CPU is located on this model?
Thank you, Gary
IML Tech
The CPU? Right under the heatsink. It soldered to the motherboard and cannot be removed/replaced.
Sid
There is a screw that was missed when removing bottom case. It is is under the rubber foot at front of laptop and under the touch pad area
IML Tech
Strange. I would had noticed that during the disassembly. Unfortunately, I don’t have this laptop anymore and cannot confirm that.
Also, it’s possible that your model is a little bit different even though it looks similar.
Bob Boyd
Great details. Thanks. I have the NVMe SDD. Can a 2nd SDD be added?
IML Tech
Yes, you can add a 2.5″ SSD as a secondary drive.
Bob Boyd
I opened it up, and while I have space for 2nd SSD, I don’t seem to have the SATA connection on the motherboard. Can it be addes? Can I send you a pic?
IML Tech
You can tell me the model number, for example HP 15-dw1081wm. I’ll do some research. Sorry, I don’t work on this site actively anymore and do not check comments every day. So it might take a while for me to respond.
By the way, take a closer look inside the laptop. The 2.5″ drive connector is not located on the motherboard, it’s located on a separate board. Look at the last picture in this guide. The board with the SATA connector located in the lower left corner of the laptop.
Bob Boyd
Thanks. I think I’ll give it a go
Bob Boyd
You’ve been generous with your replies. One more question.
The screw holder for the lower left screw (see your 4th pic above) is broken off.
I know it’s not repairable, but is that base replaceable so that I can secure it better?
Dominique Marcelle
Hi, so I’m not sure if I should jus toss the laptop at this point but I’m hoping to save the child. After updating the screen just turned black so naturally I did a force shutdown hoping it was an error. Since then the laptop has not turned on at all. Another weird thing is that the led the shows it’s on will be on yet the fan will start and stop after 2-5 seconds and the screen is still dark.
IML Tech
Here’s what you cat try.
1. Try removing RAM modules one by one and try turning it on with just one RAM module installed. It’s possible one of them failed.
2. Disconnect the display cable from the motherboard. After that test the laptop with an external monitor connected to HDMI port. If external monitor works, it’s possible the laptop screen failed.
Tarek
Hello Sir, I do have the HP 15-dw3073nx; it came with nvme pcie gen3 WD blue. The question is: can I install nvme-pcie-gen4? It will perform as Gen4 or Gen3? Thanks for your amazing job.
otman
hello , does the HP Laptop 15-dw3xxx has the SATA connection on the motherboard? i hope you will answer me as soon as possible. Thanks
IML Tech
What is the exact model of the laptop? HP Laptop 15-dw3???
Josalynn Smith
Where is the hard drive on this computer I’m getting a hard drive error it says it’s failing. I opened it up to see about replacing and it’s no where to be seen. To me anyway. Appreciate the help thank you.
IML Tech
This laptop doesn’t have regular 2.5″ hard drive. It has NVMe SSD. I explained how to remove it in the post.