Today I will disassemble a Toshiba Satellite Radius P55W laptop.
I will show how to access and remove the battery, hard drive, memory, cooling fan, DC jack, keyboard and other internal components.
There are a few different models but the teardown process should be the same or very similar for the following Toshiba Satellite Radius configurations:
- P55W-B5112 (shown in this guide)
- P55W-B5162SM
- P55W-B5181SM
- P55W-B5201SL
- P55W-B5220
- P55W-B5224
- P55W-B5260SM
- P55W-B5318
- P55W-B5318D
- P55W-B5380SM
For Satellite P55W-C series check out this P55W-C5316 disassembly guide.
Be organized and keep track of screws. We’ll be removing many of them.

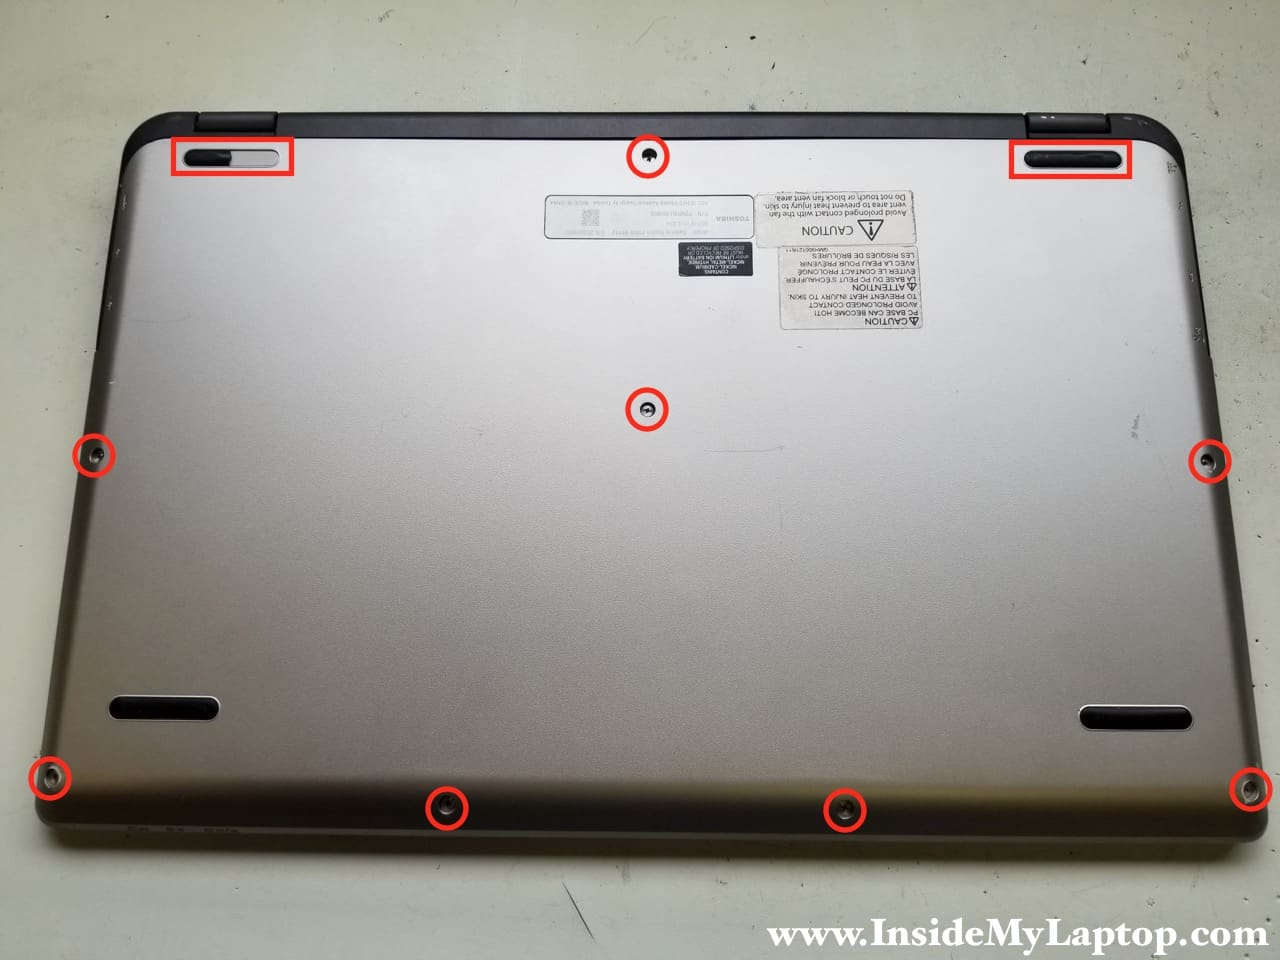
STEP 1.
Remove all screws from the bottom cover.
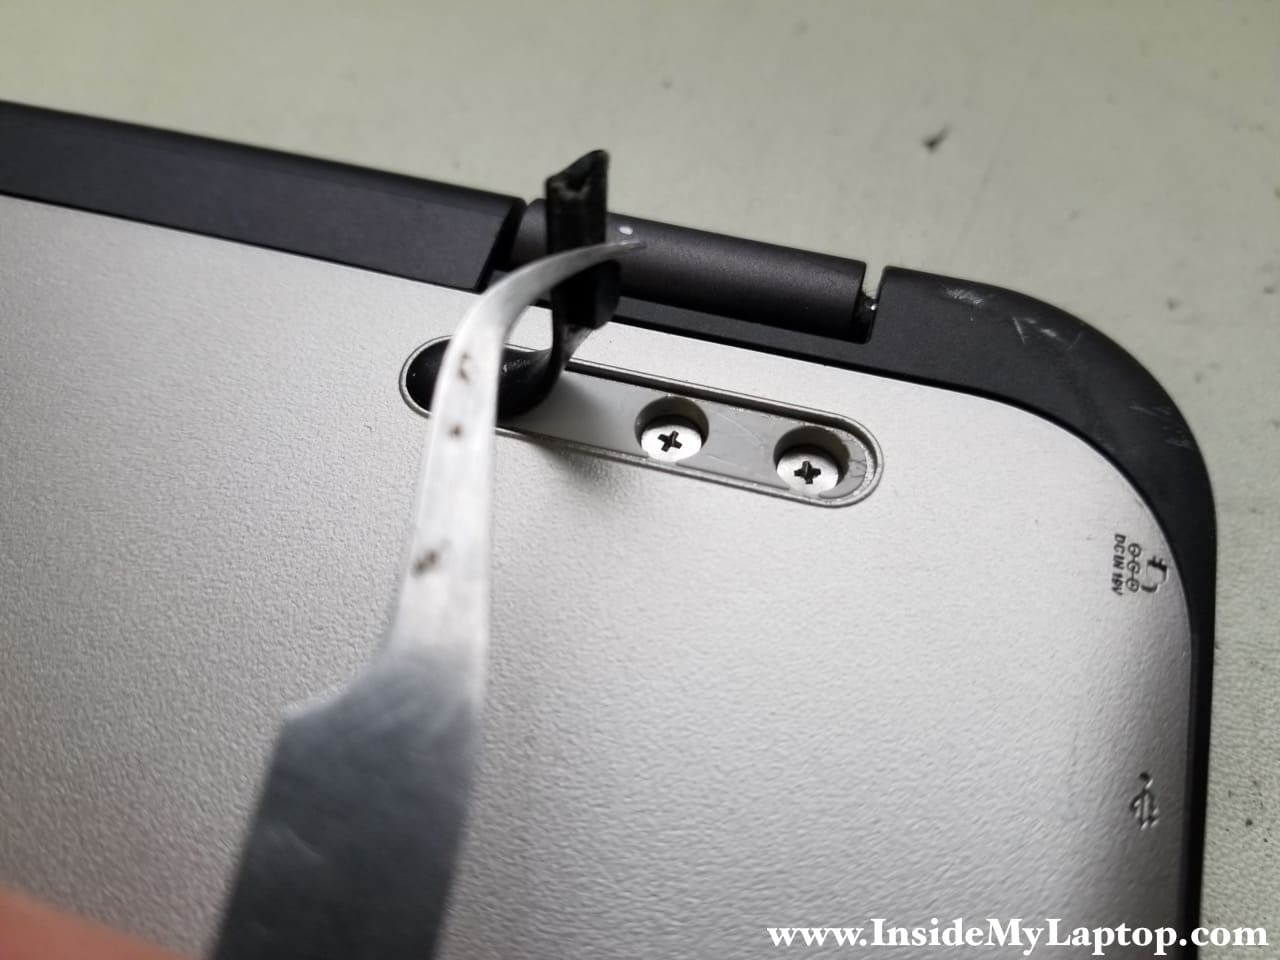
There are four screws hidden under two rubber feet.
Carefully separate the rubber foot from the case using needle nose tweezers. Work slowly, it’s easy to break the foot.
Remove hidden screws from both sides.
STEP 2.
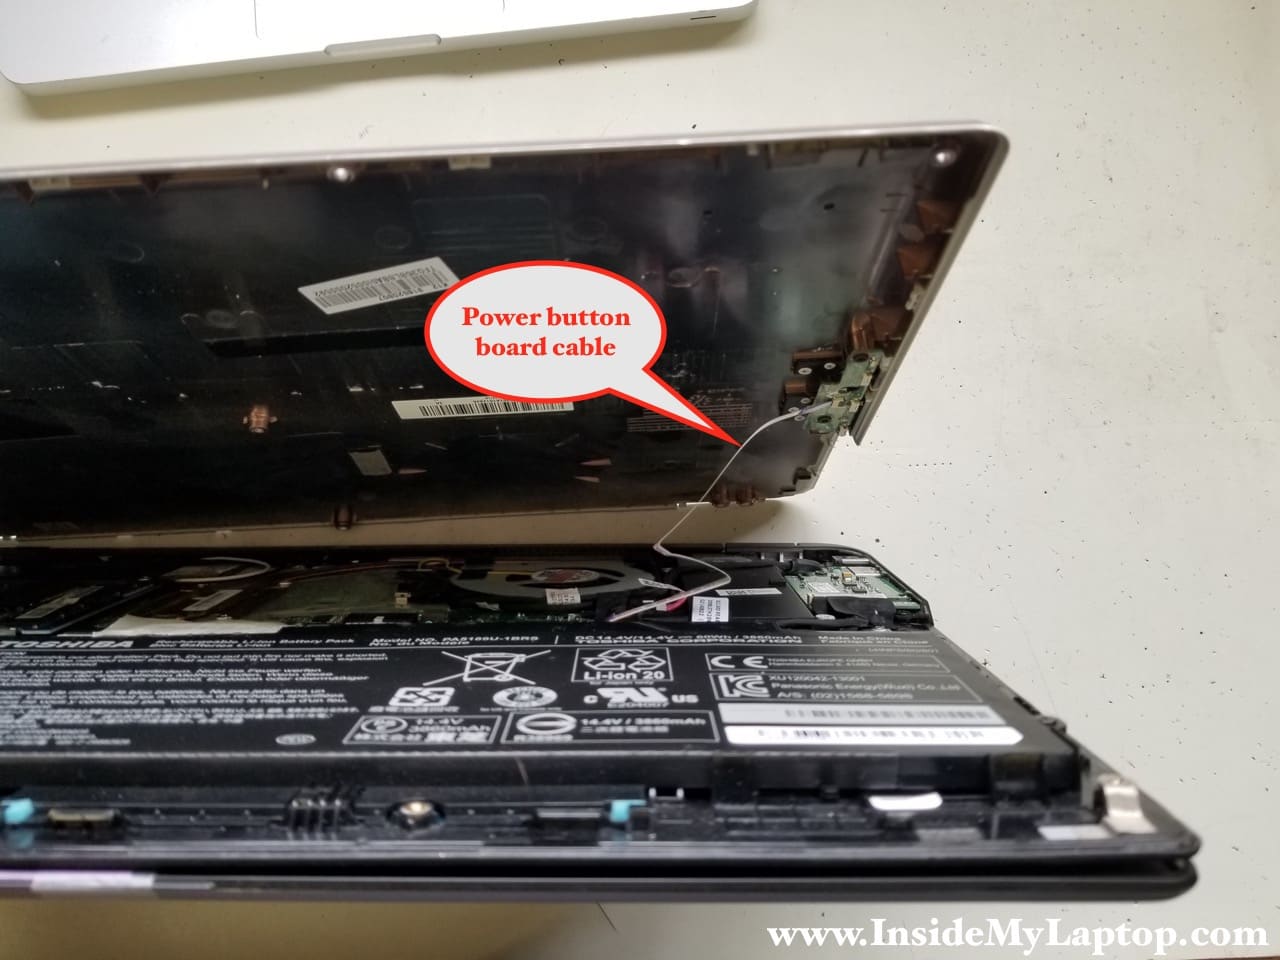
Separate the bottom cover from the palmrest assembly.
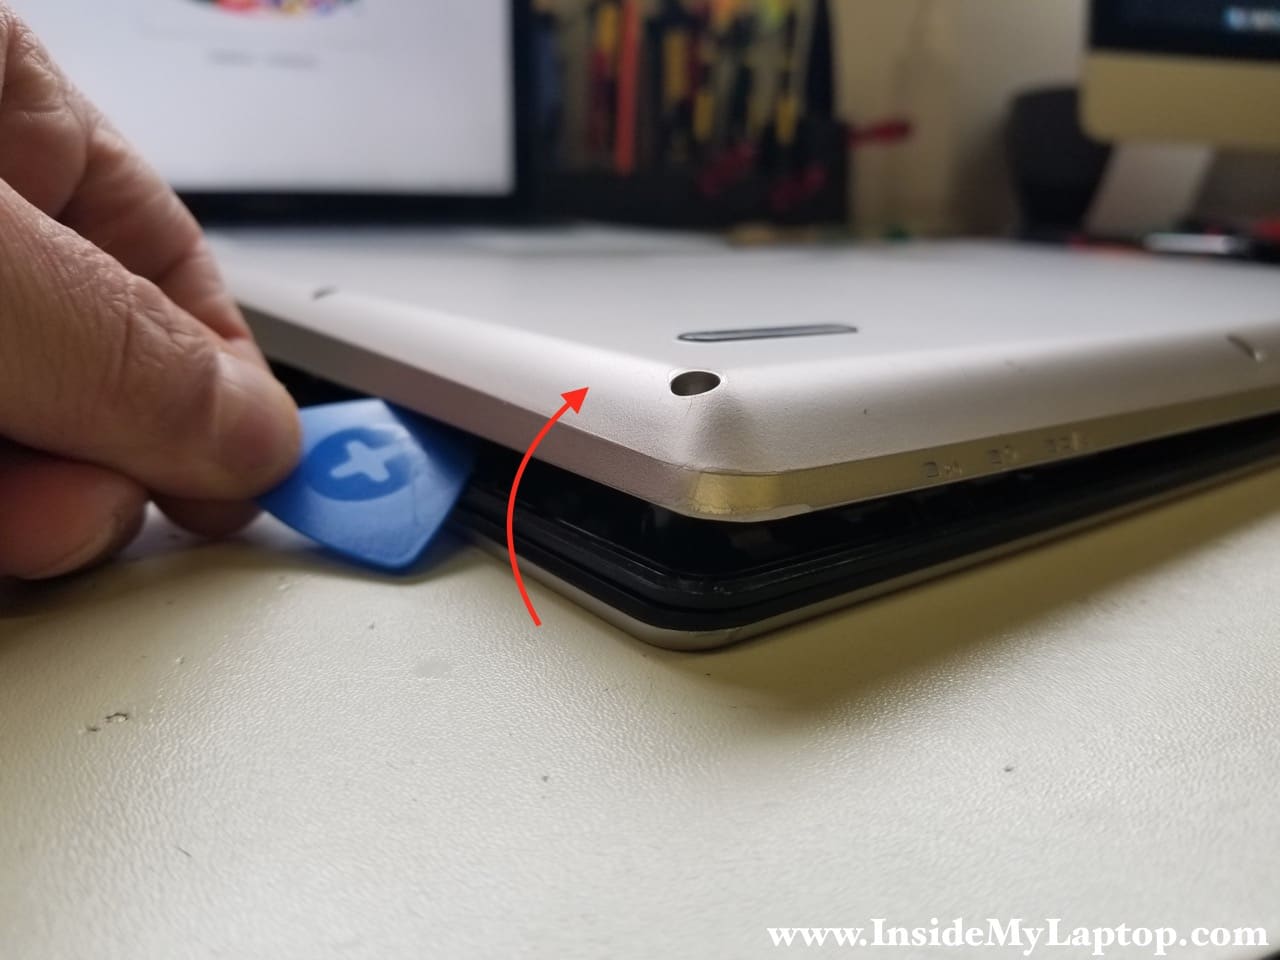
While lifting up the bottom cover pay attention to the power button cable. The cable is still attached to the motherboard.
STEP 3.
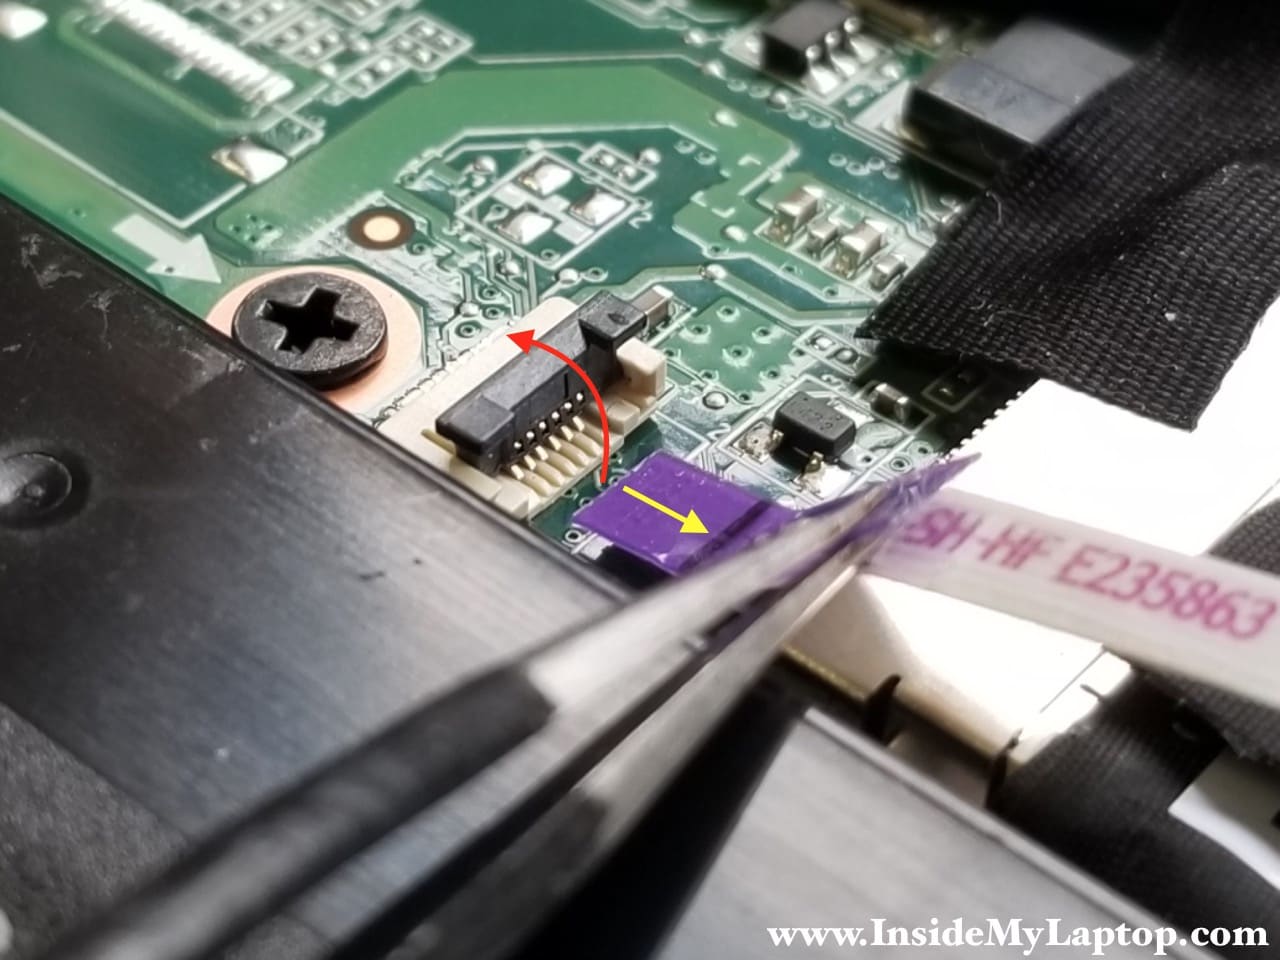
Turn on the bottom case upside down so you can access the cable connector.
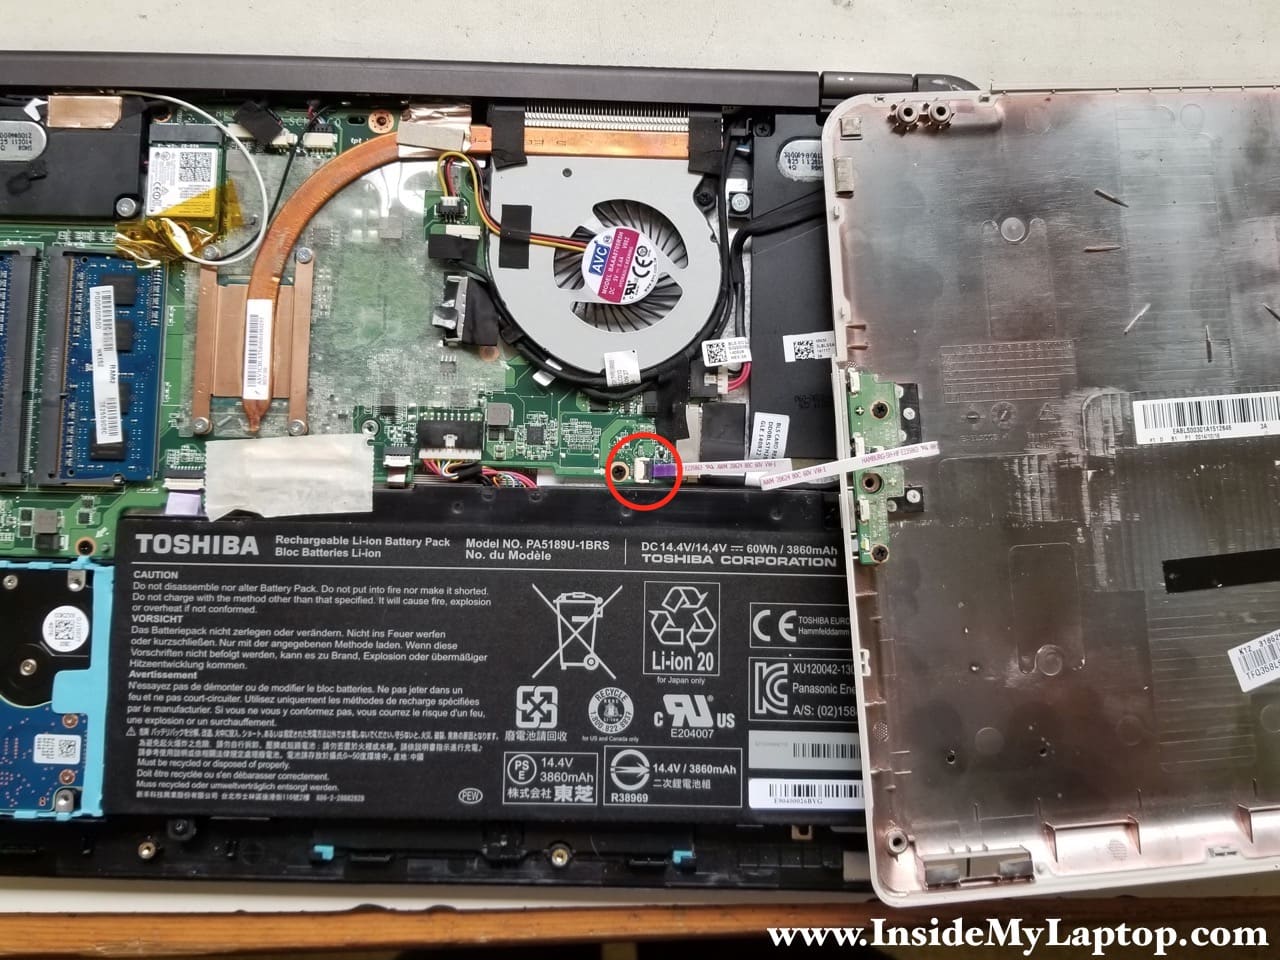
Unlock the connector by lifting up the locking tab. It will open up at a 90 degree angle. Pull the power button cable out.
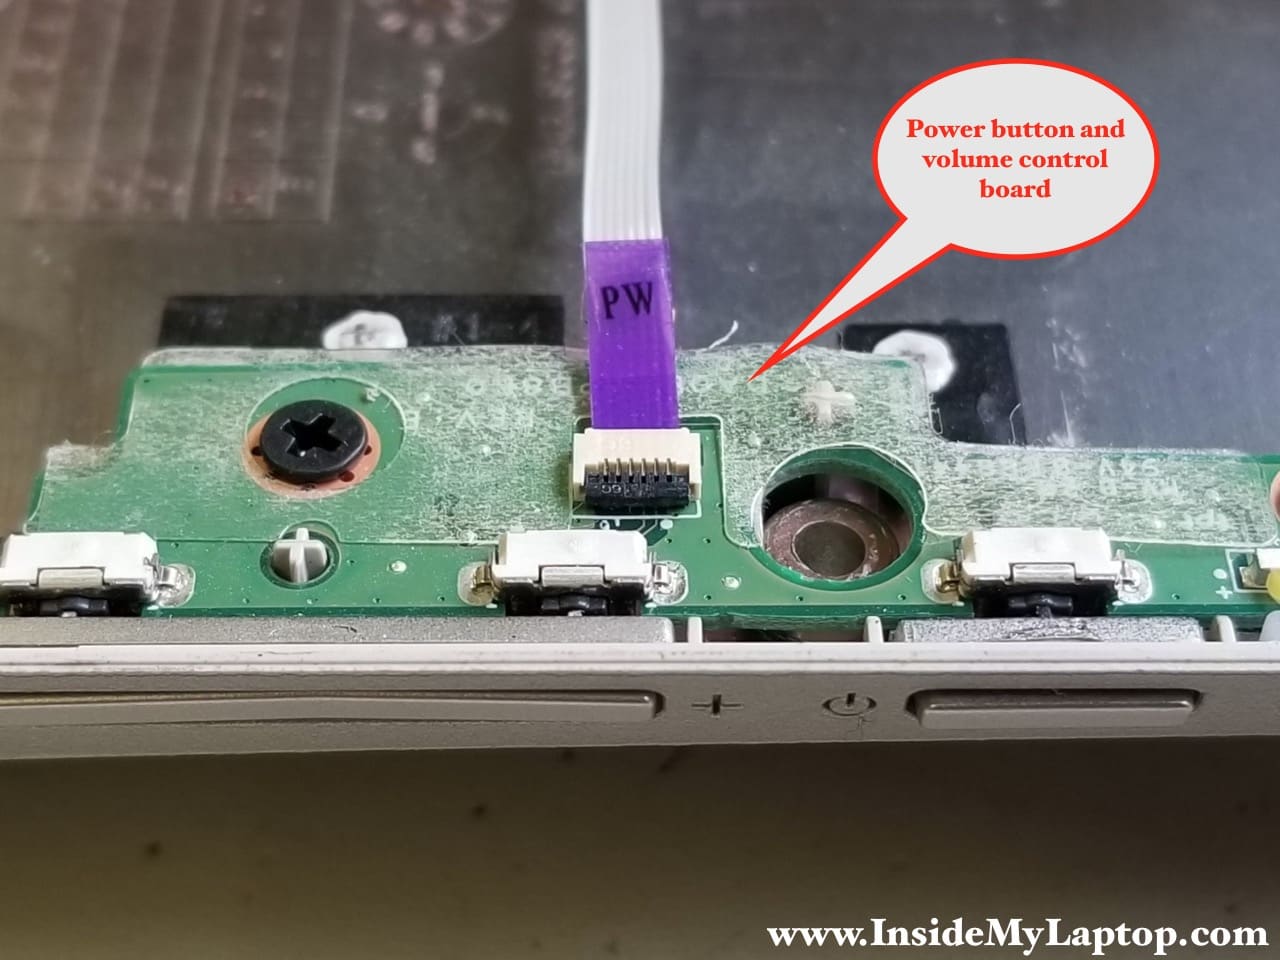
The power button and volume control board is attached to the bottom cover. It can be easily removed and replaced if necessary.
Replacement power button board available here: https://ebay.to/2uJ9XLA
STEP 4.
Remove four screws securing the battery.

STEP 5.
Lift up the battery and disconnect the cable. Remove the battery.
Replacement battery model PA5189U-1BRS.
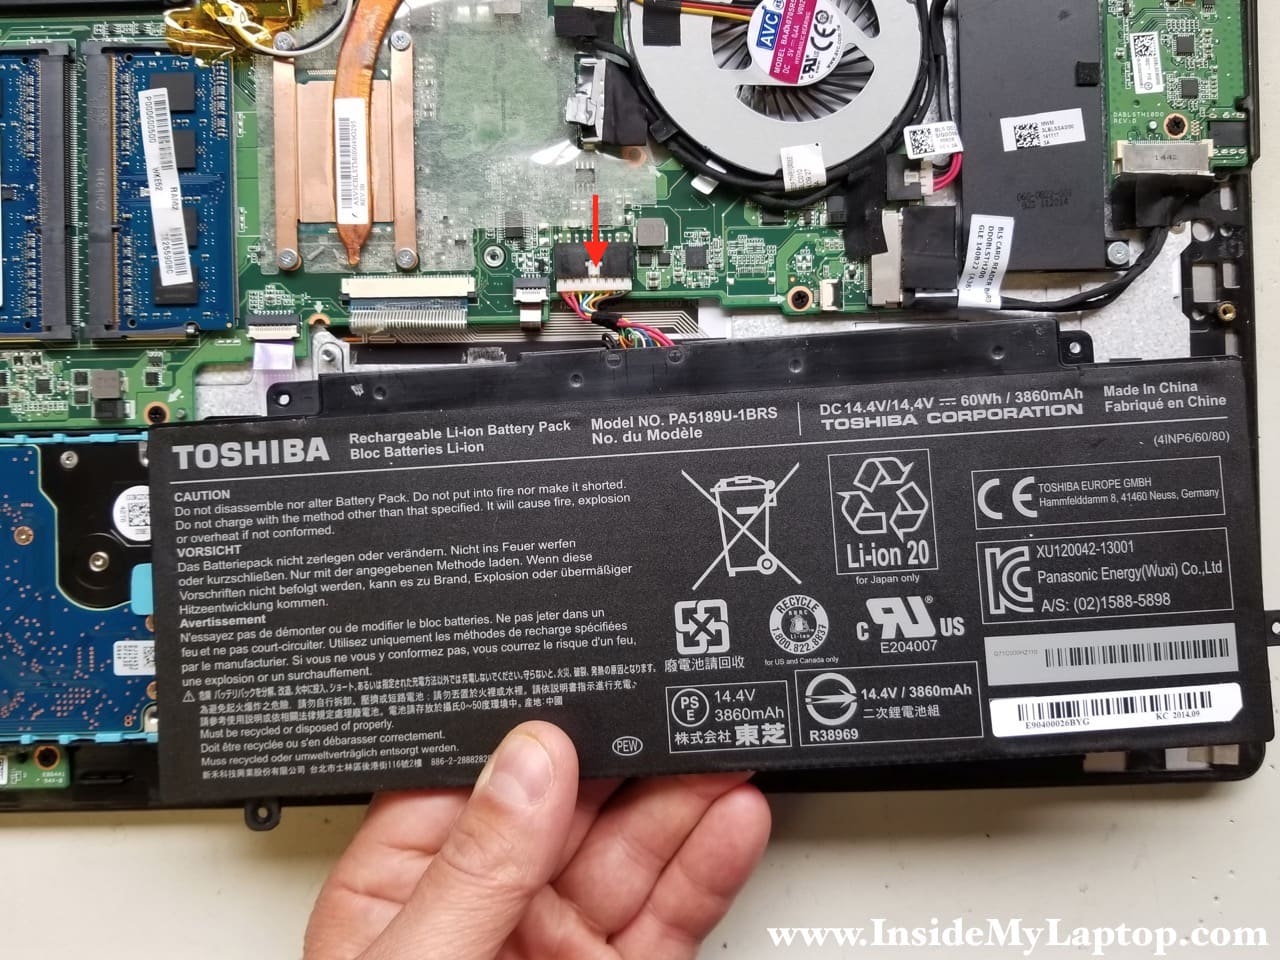
STEP 6.
Disconnect the hard drive SATA cable from the motherboard.
STEP 7.
Remove the hard drive assembly.
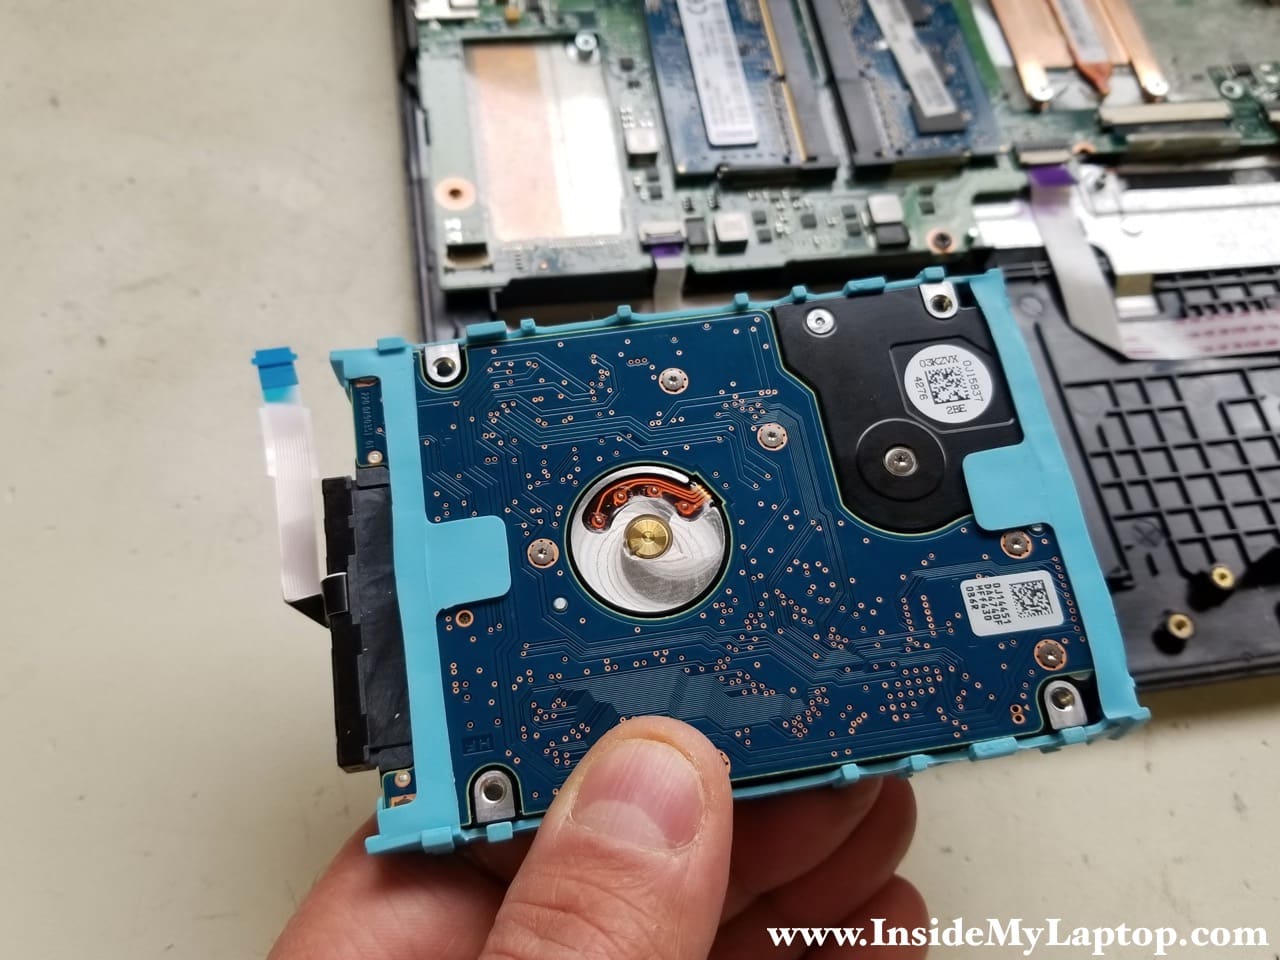
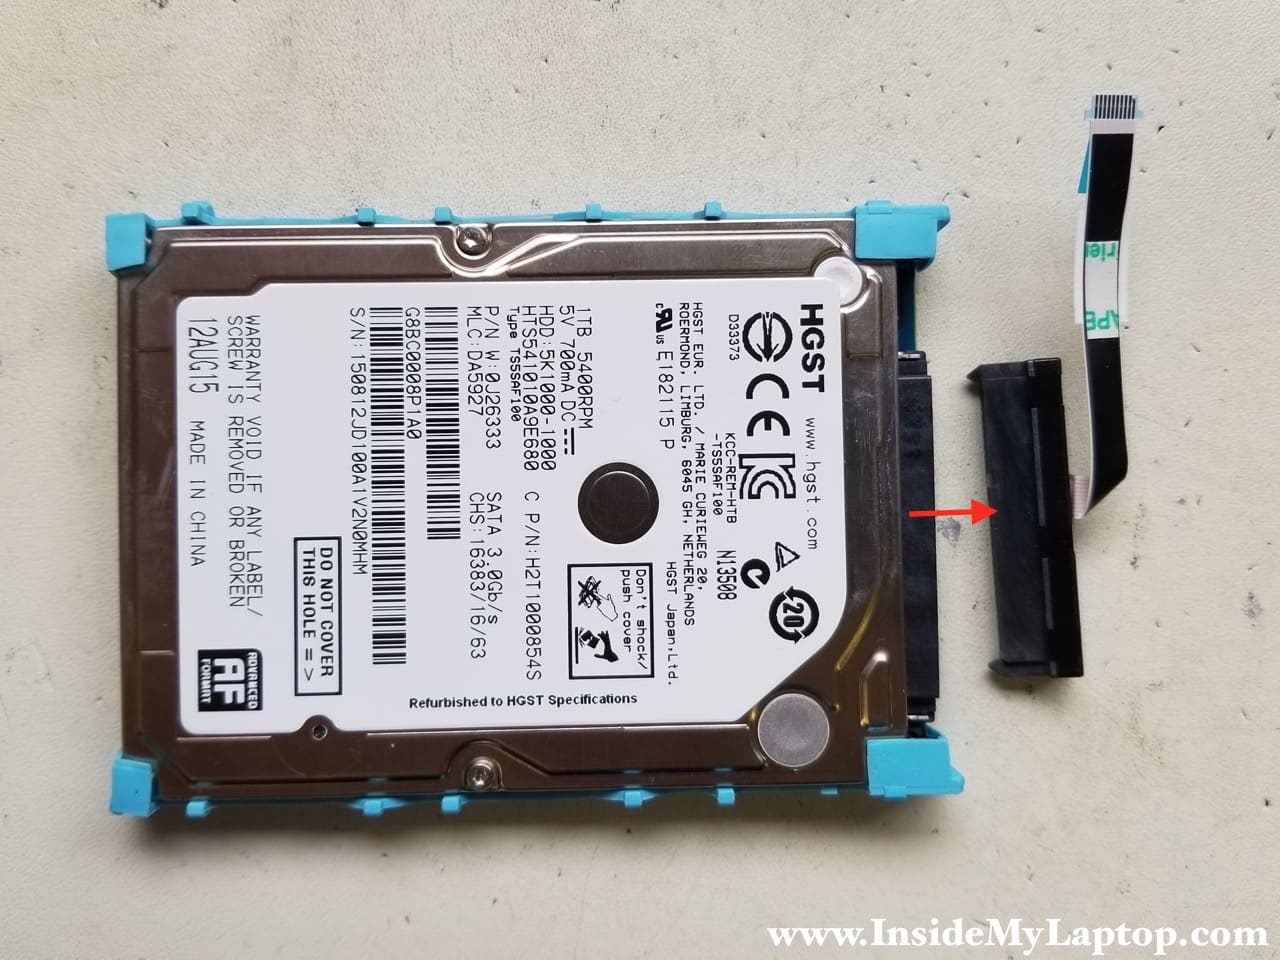
If you are replacing the hard drive or upgrading it to a solid state drive, you’ll have to transfer the SATA cable and rubber caddy to the new HDD/SSD.
Upgrading this regular 2.5″ hard drive to 2.5″ SATA solid state drive will improve laptop performance significantly.
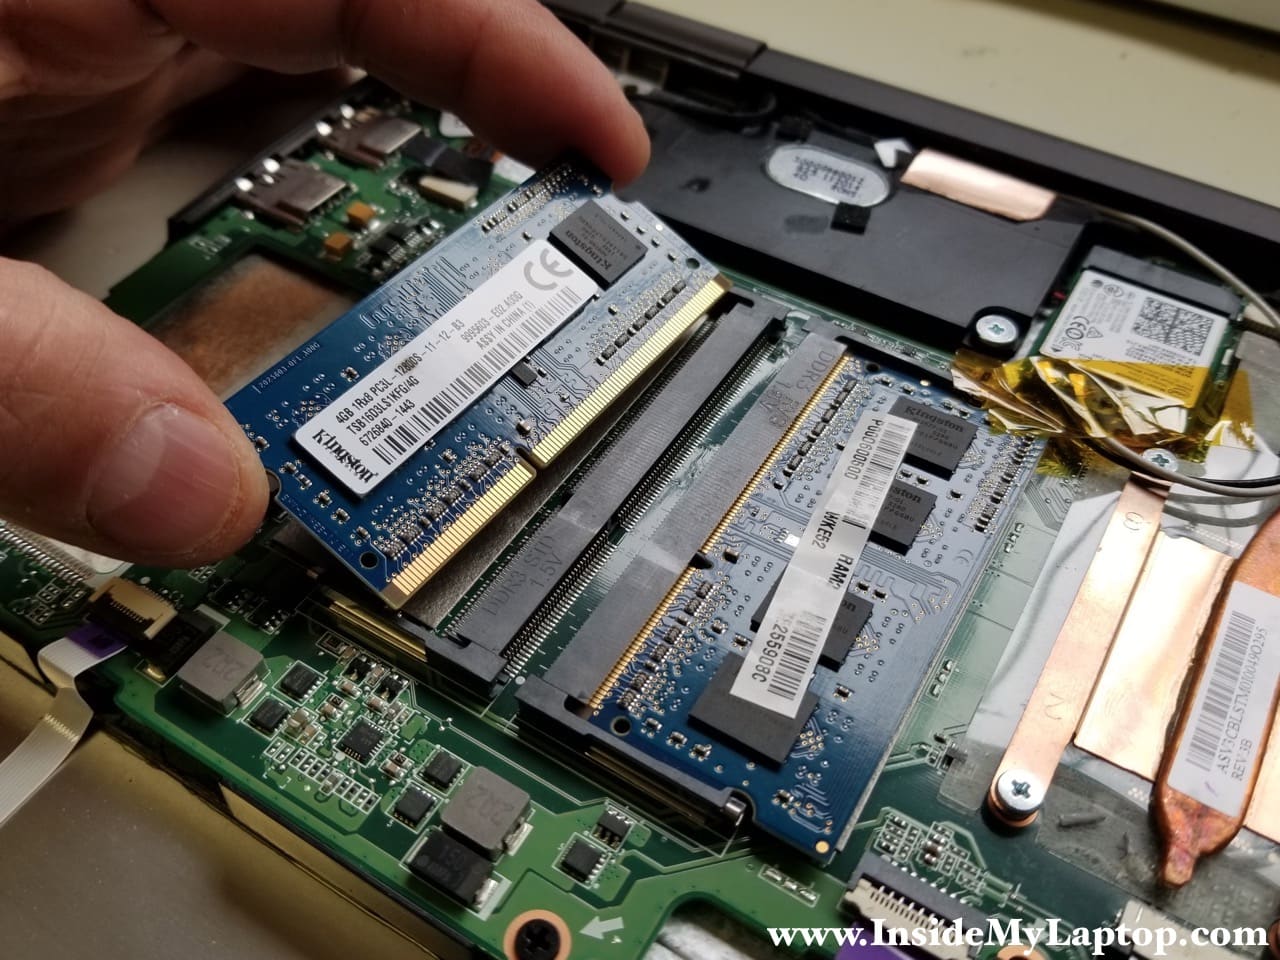
STEP 8.
There are two memory slots on the motherboard.
Standard memory is 8GB (2x4GB) but you can upgrade it to 16GB (2x8GB).  This laptop uses DDR3-12800 1600MHz RAM modules.
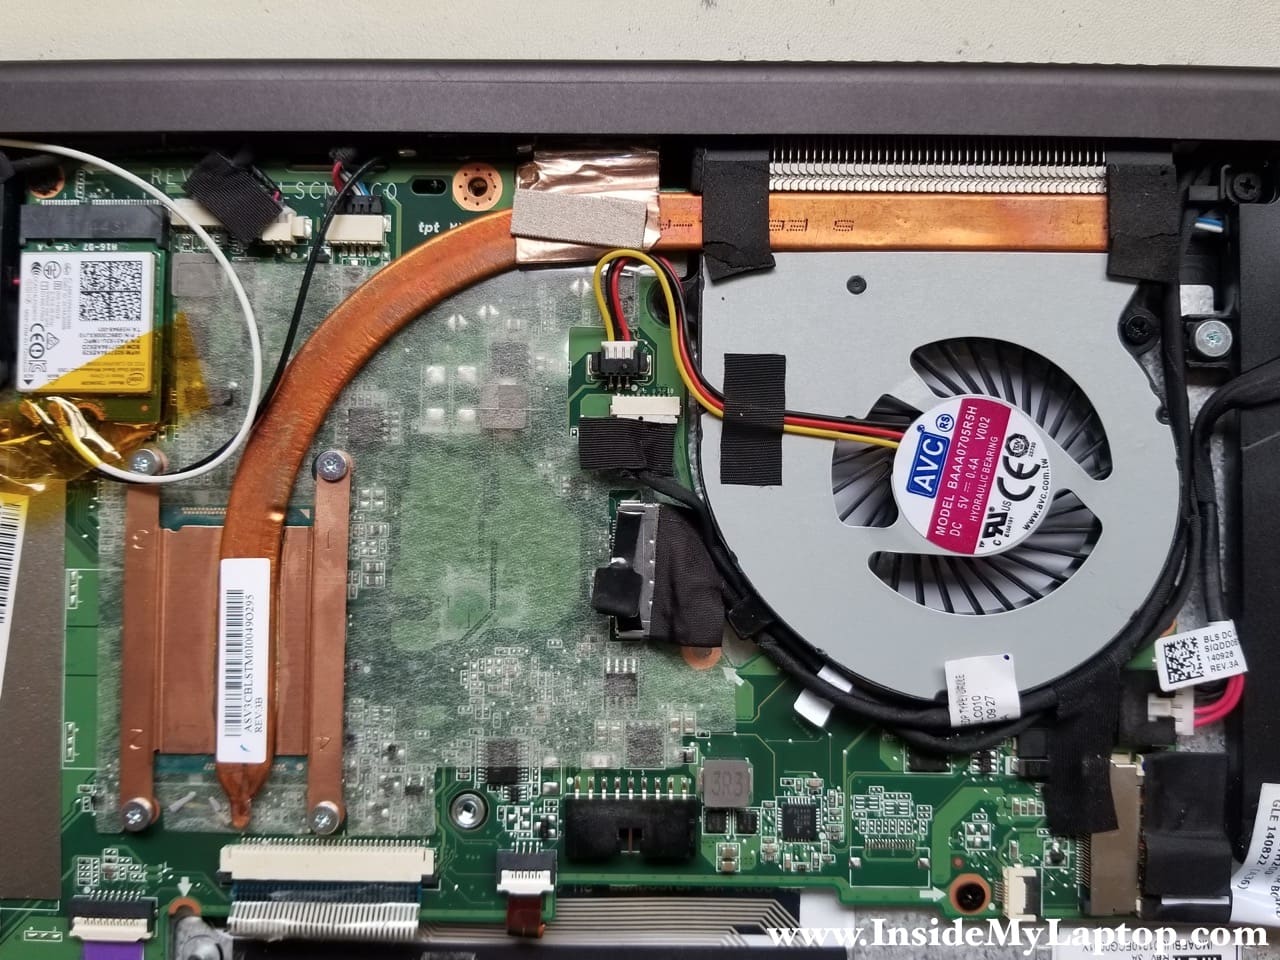
Now we are going to disconnect and remove the cooling module.
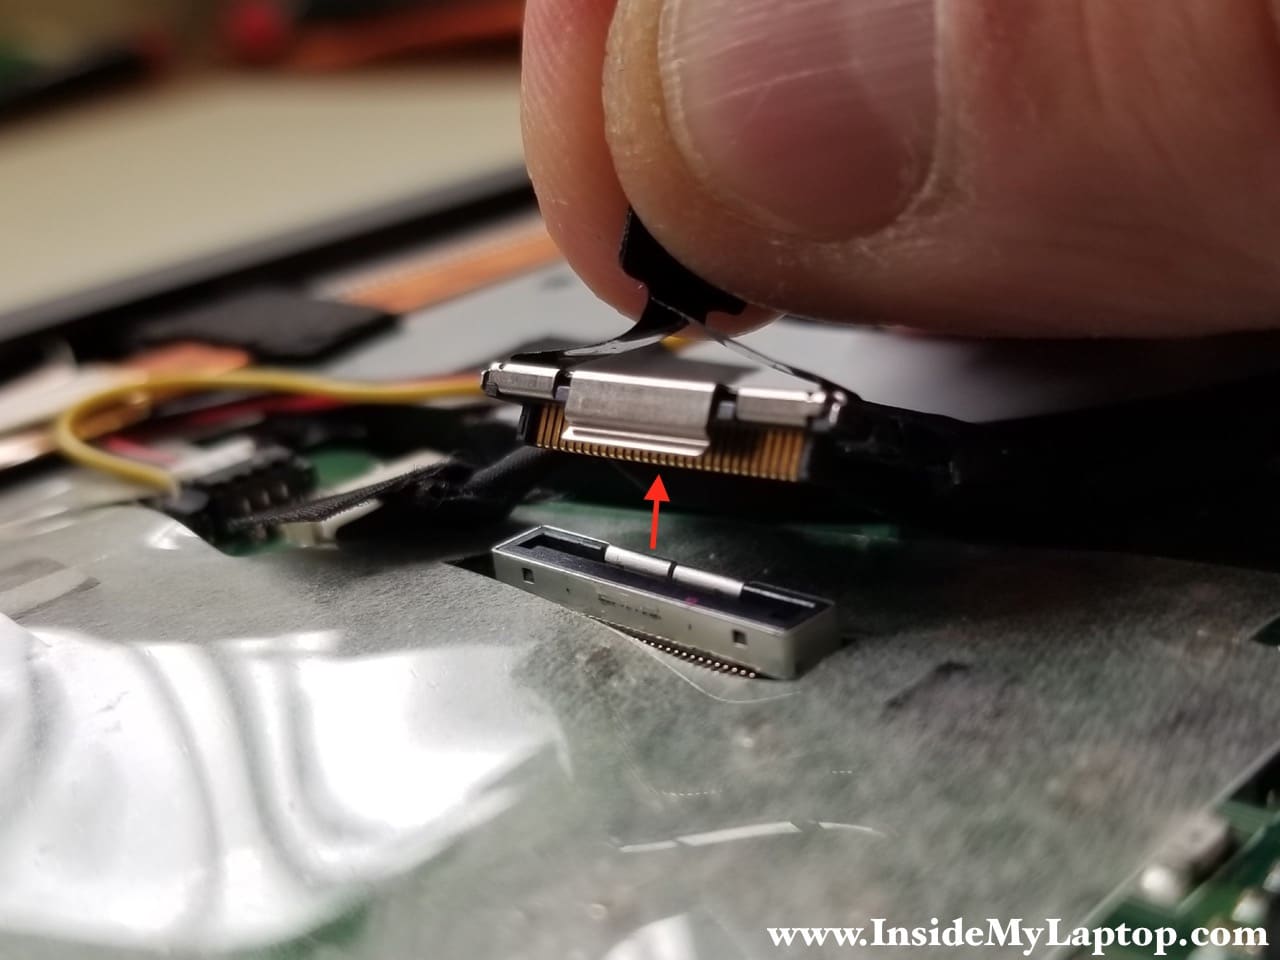
STEP 9.
Disconnect the video cable. Lift it up by the black tab on the connector.
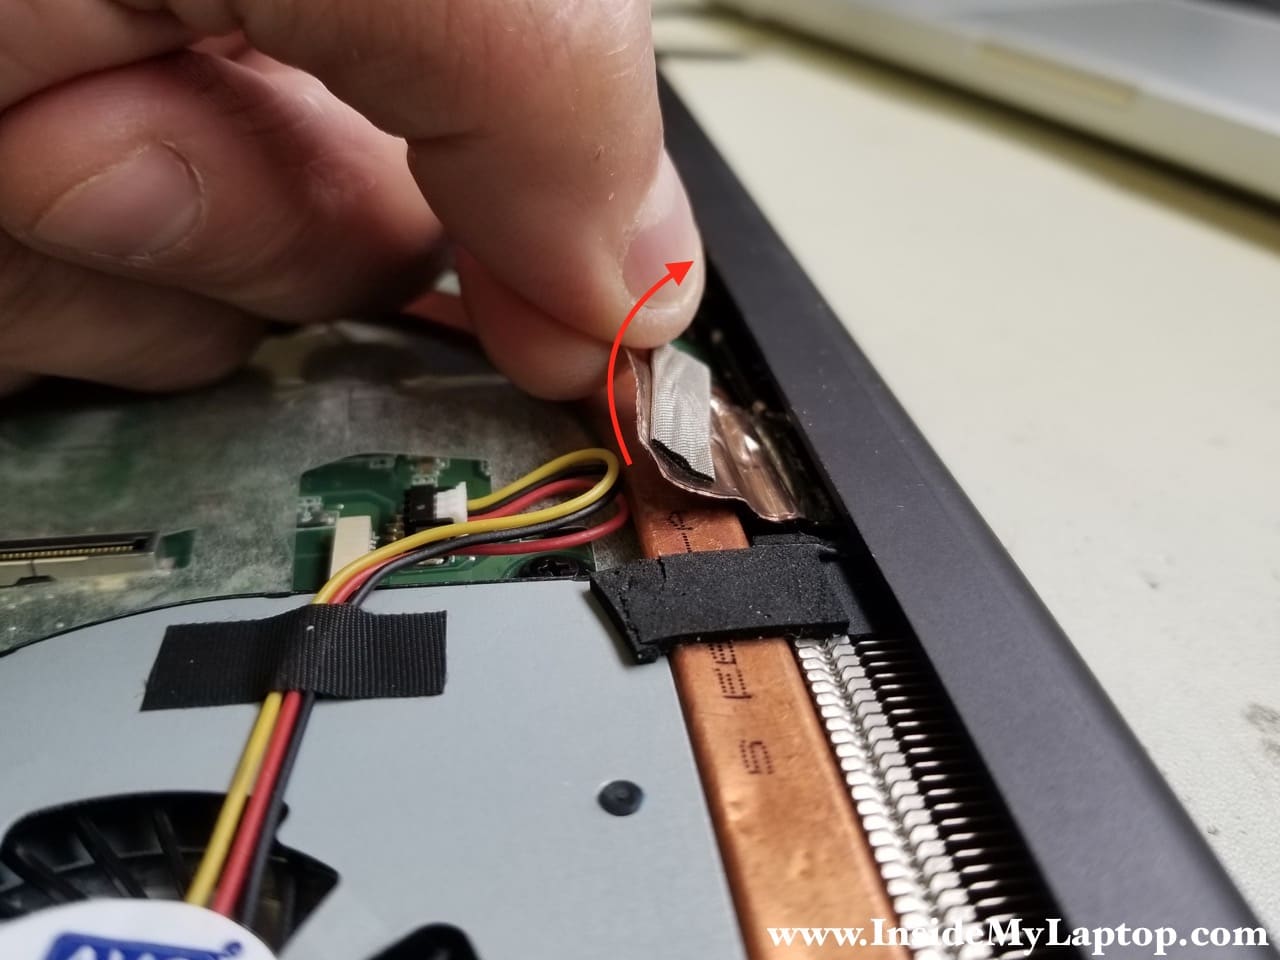
STEP 10.
The video cable routed in the guided path on the side of the cooling fan. Unroute the cable.

STEP 11.
Disconnect the second display cable and unroute it too.

STEP 12.
Separate the golden foil from the heatsink. Be careful, this foil is attached to the Wi-Fi antenna cable.
STEP 13.
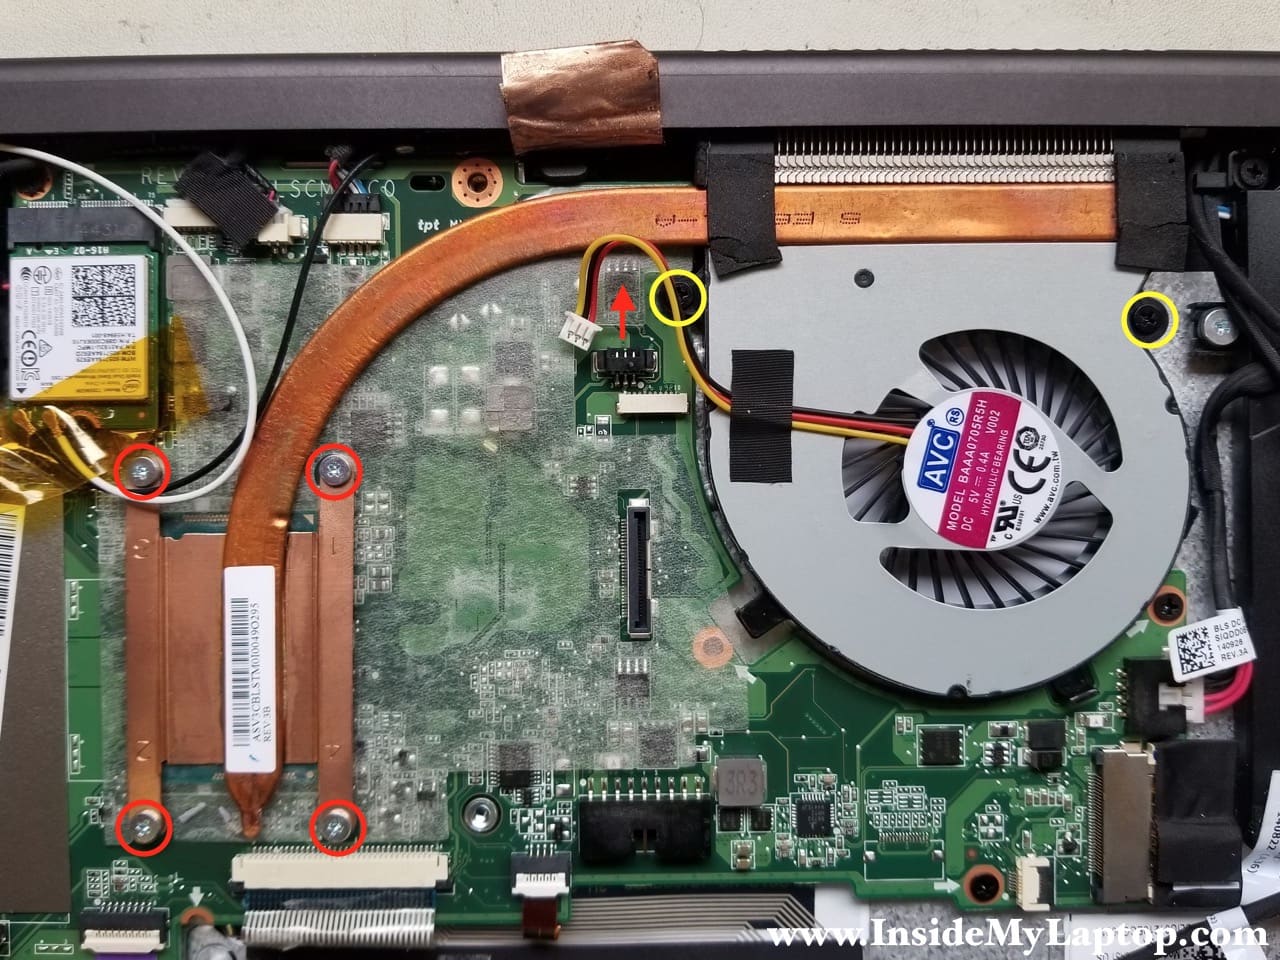
Remove two screws securing the cooling fan (yellow circles).
Loosen four screws securing the heatsink (red circles).
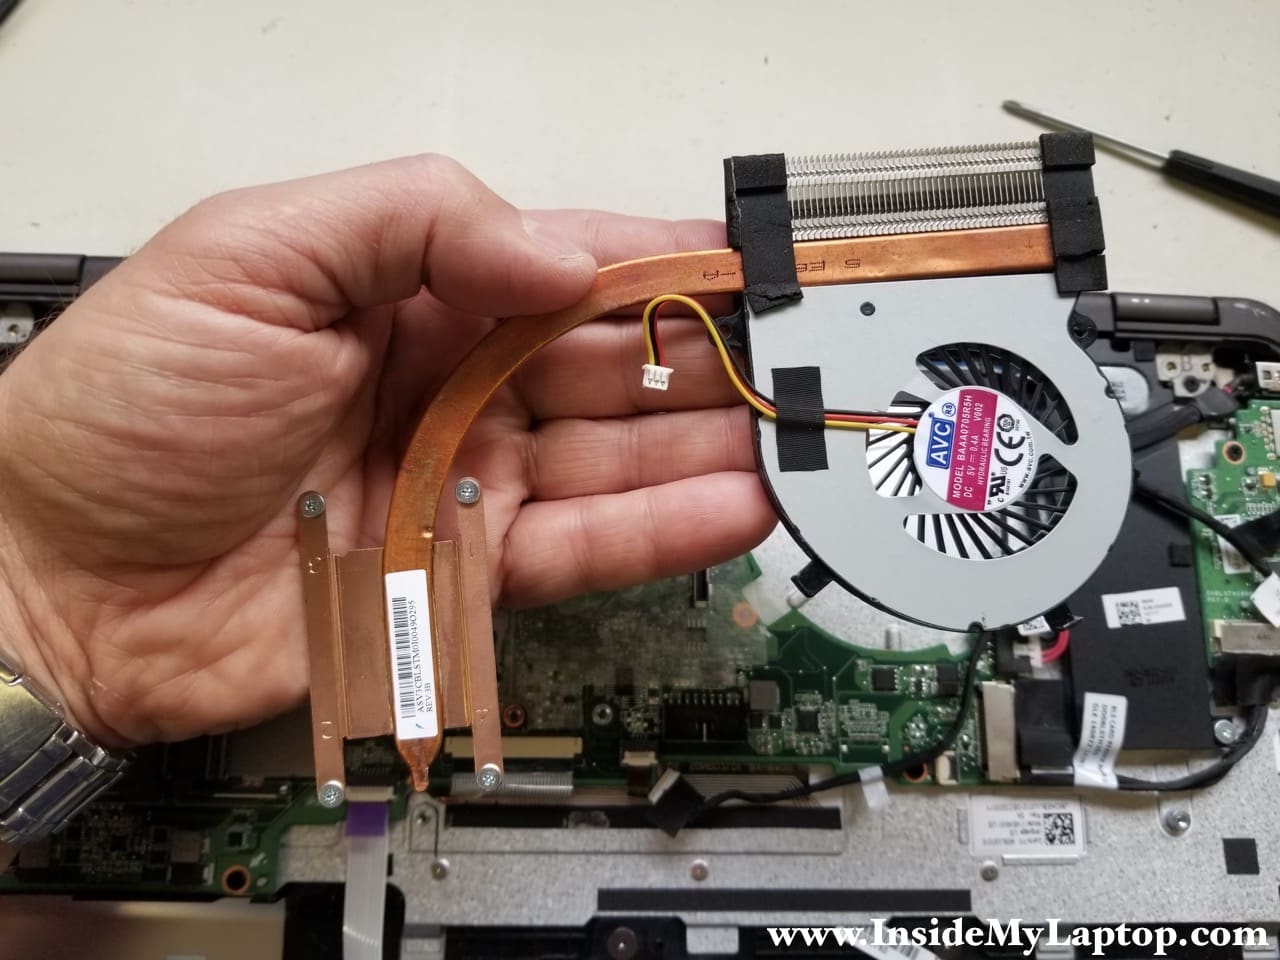
STEP 14.
Remove the cooling module from the laptop.
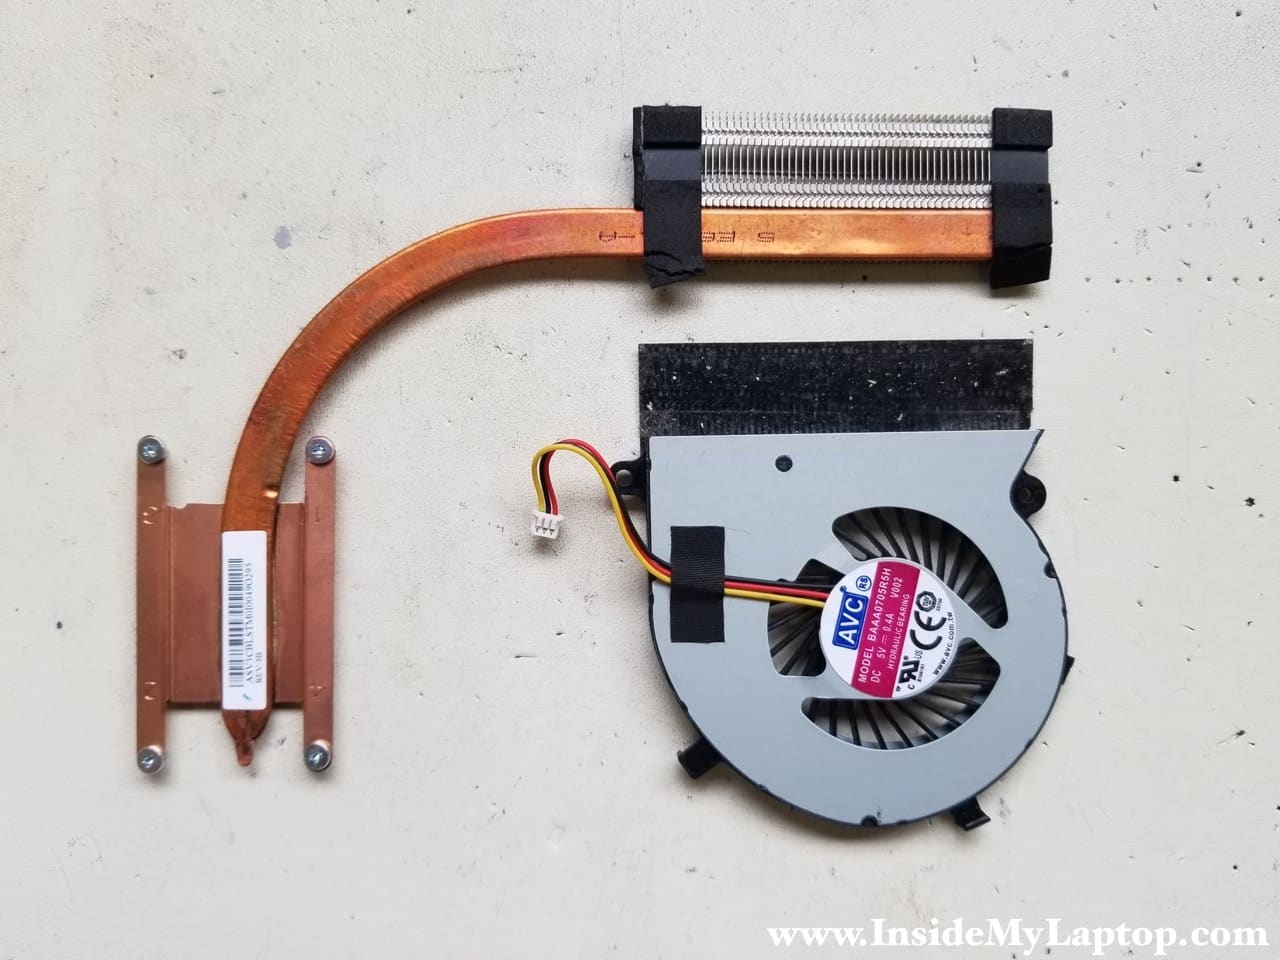
STEP 15.
Now you can separate the cooling fan from the heatsink and replace it if necessary.
If thermal grease on the heatsink looks dry, you’ll have to apply new thermal grease.
STEP 16.
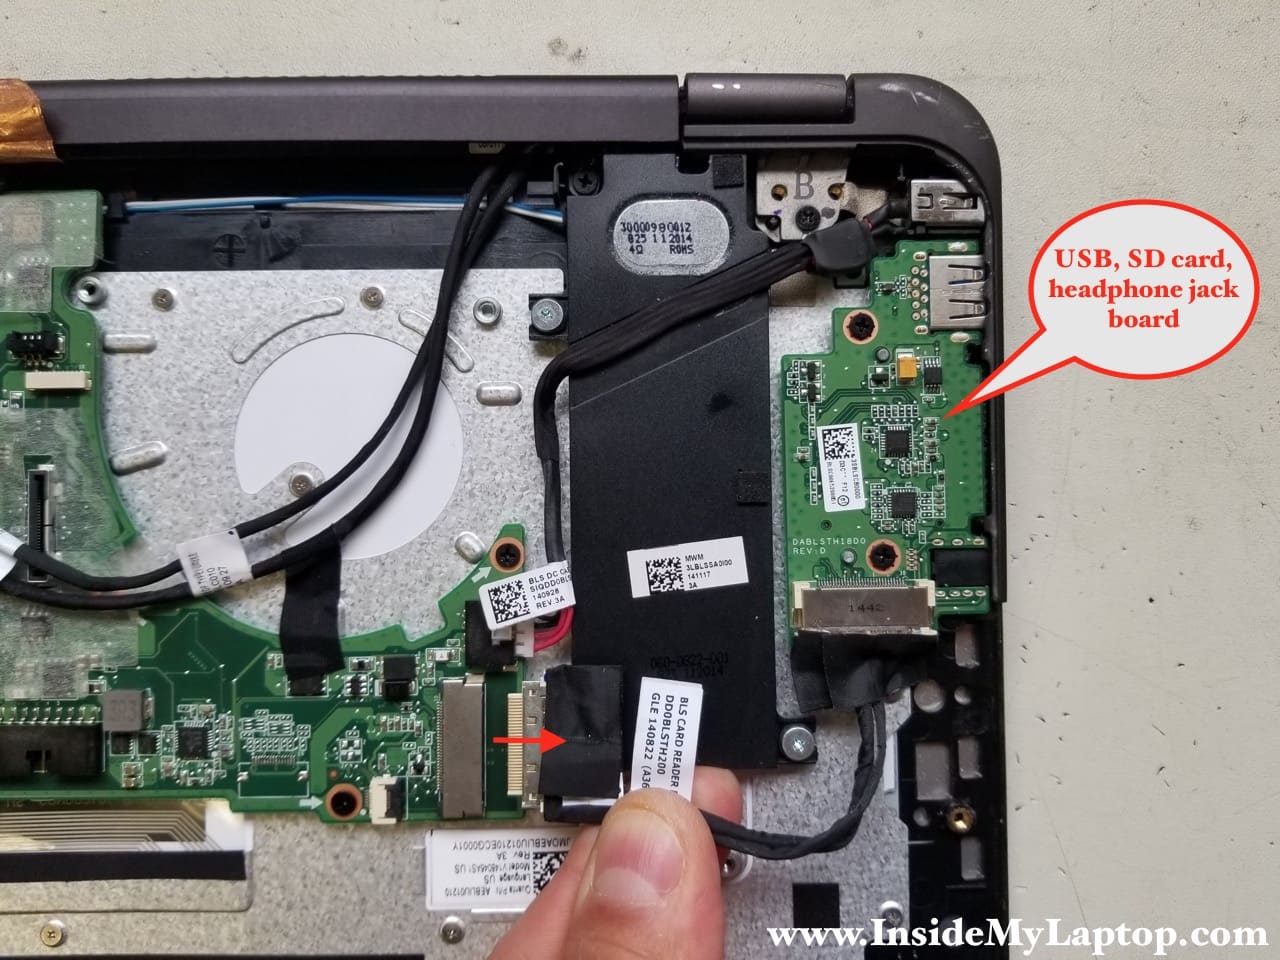
In the next five steps I will show how to access and remove the DC power jack.
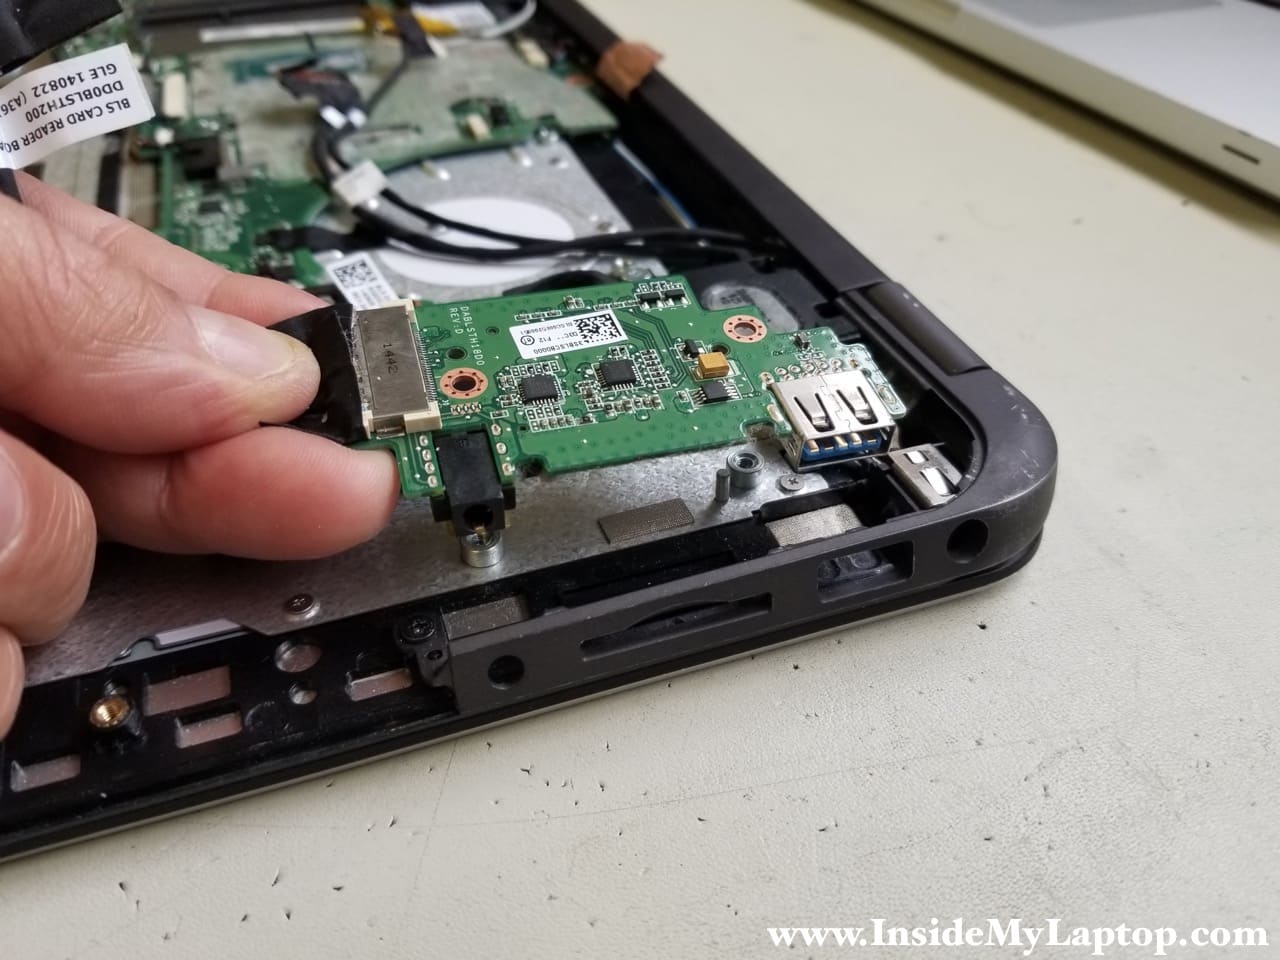
Disconnect the USB, SD card, headphone board cable from the motherboard.
Remove two screws securing the board.
STEP 17.
Lift up and remove the USB, SD card, headphone jack board.
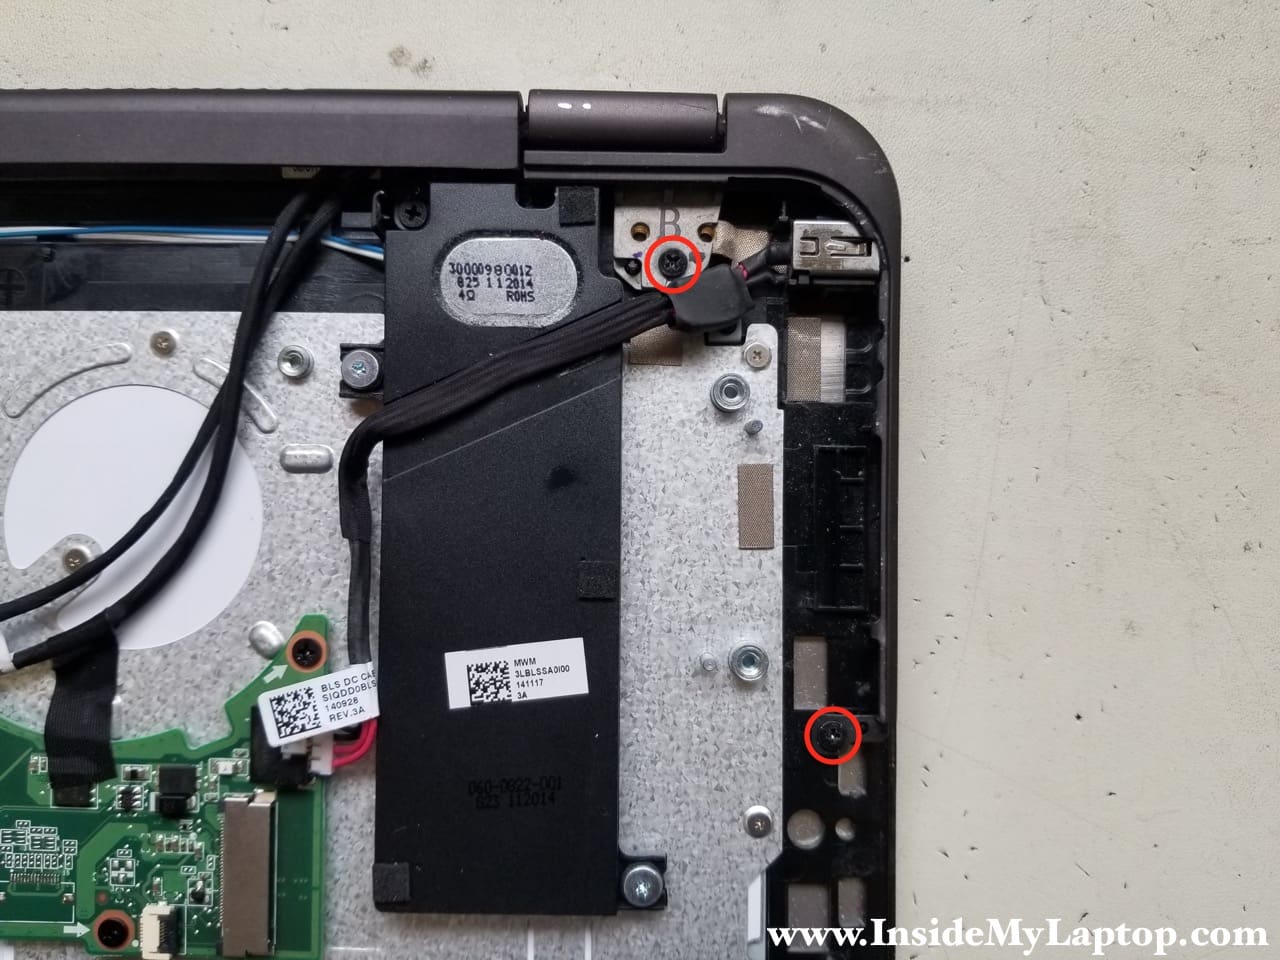
STEP 18.
Remove two screws securing the left hinge bracket.
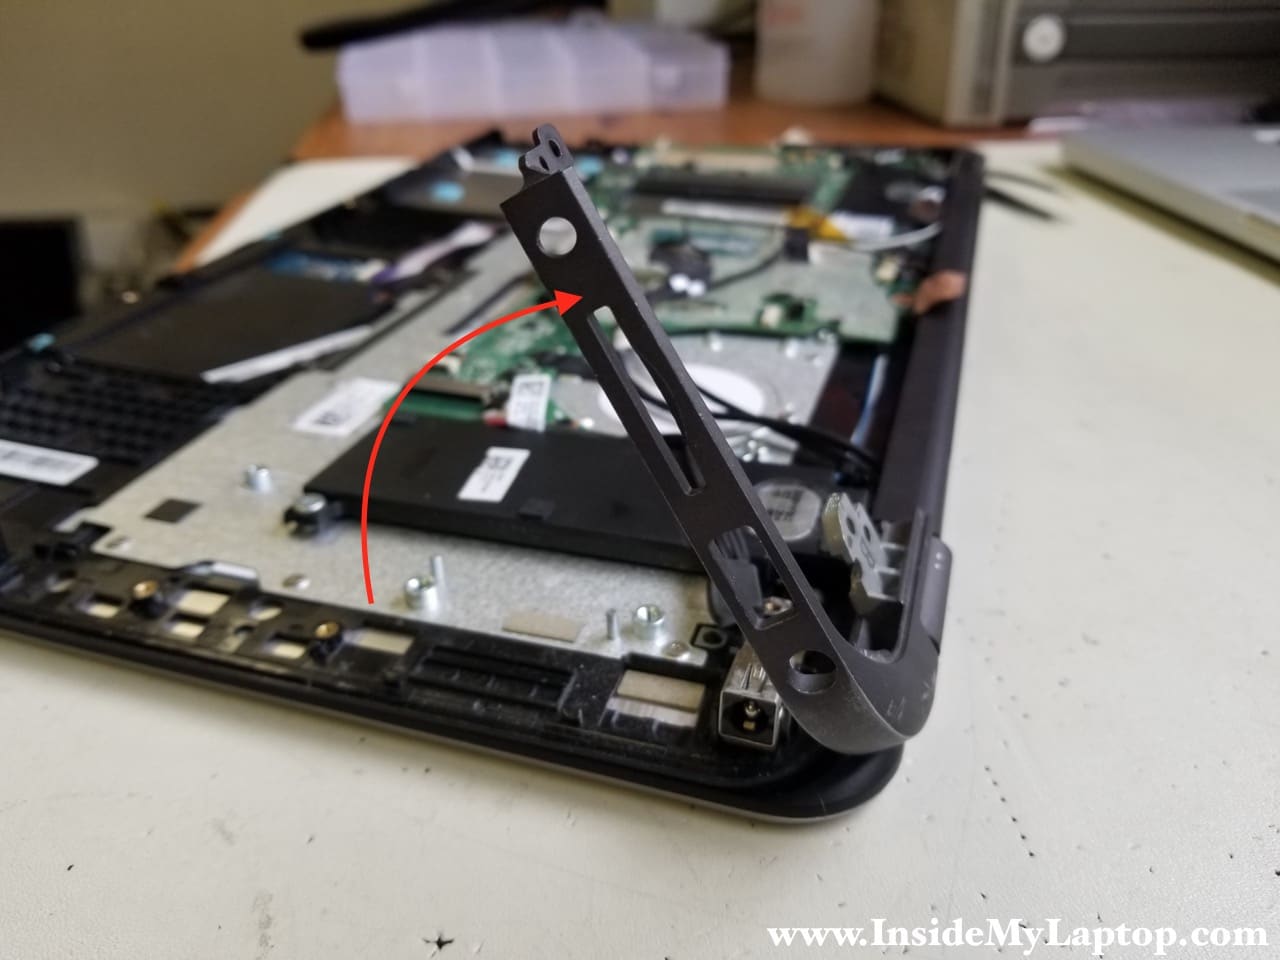
STEP 19.
Lift up the left bracket side so it opens up at a 60 degree angle.
STEP 20.
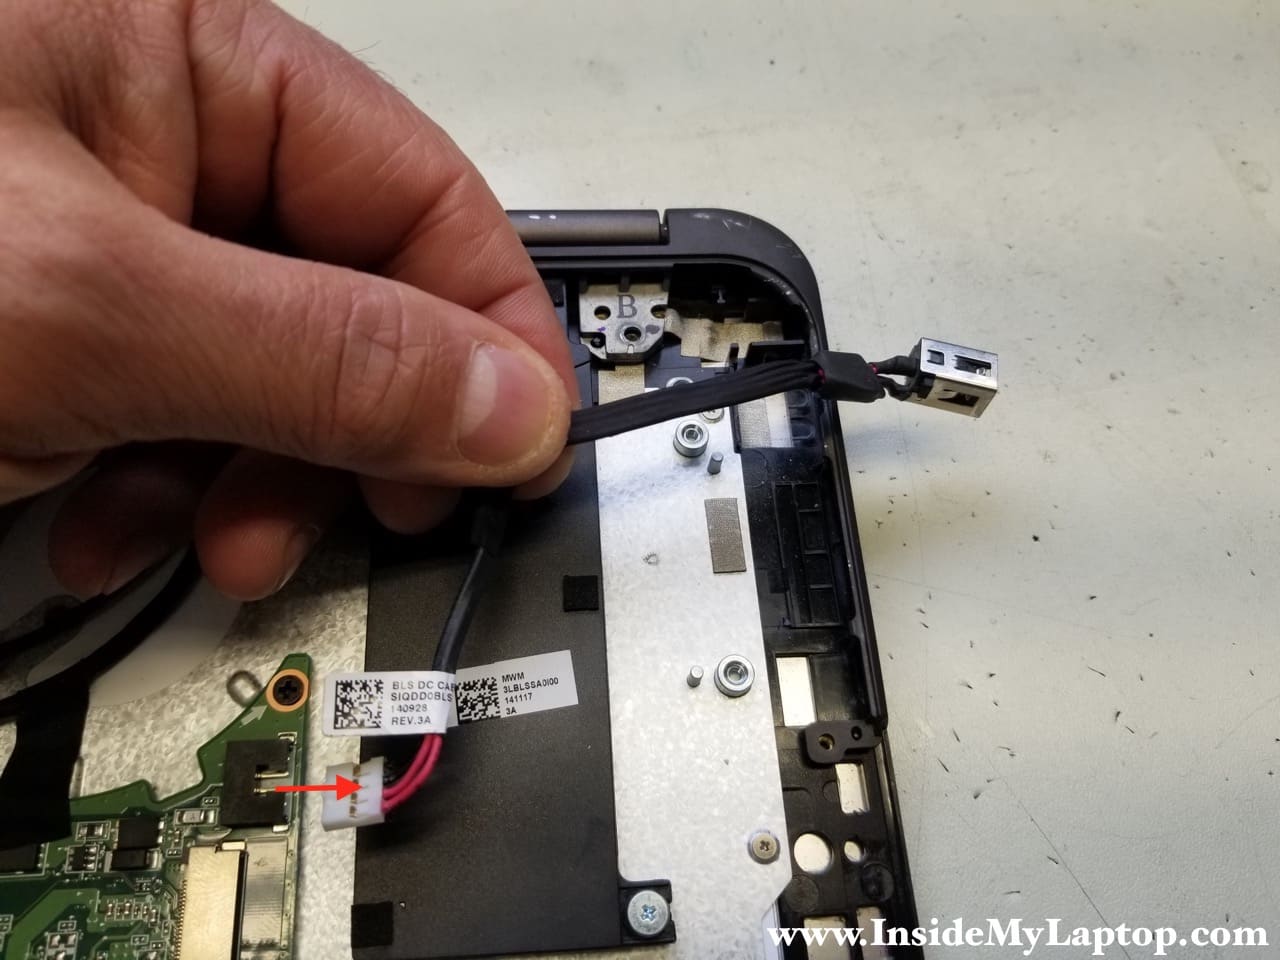
Lift up the DC power jack from the case.
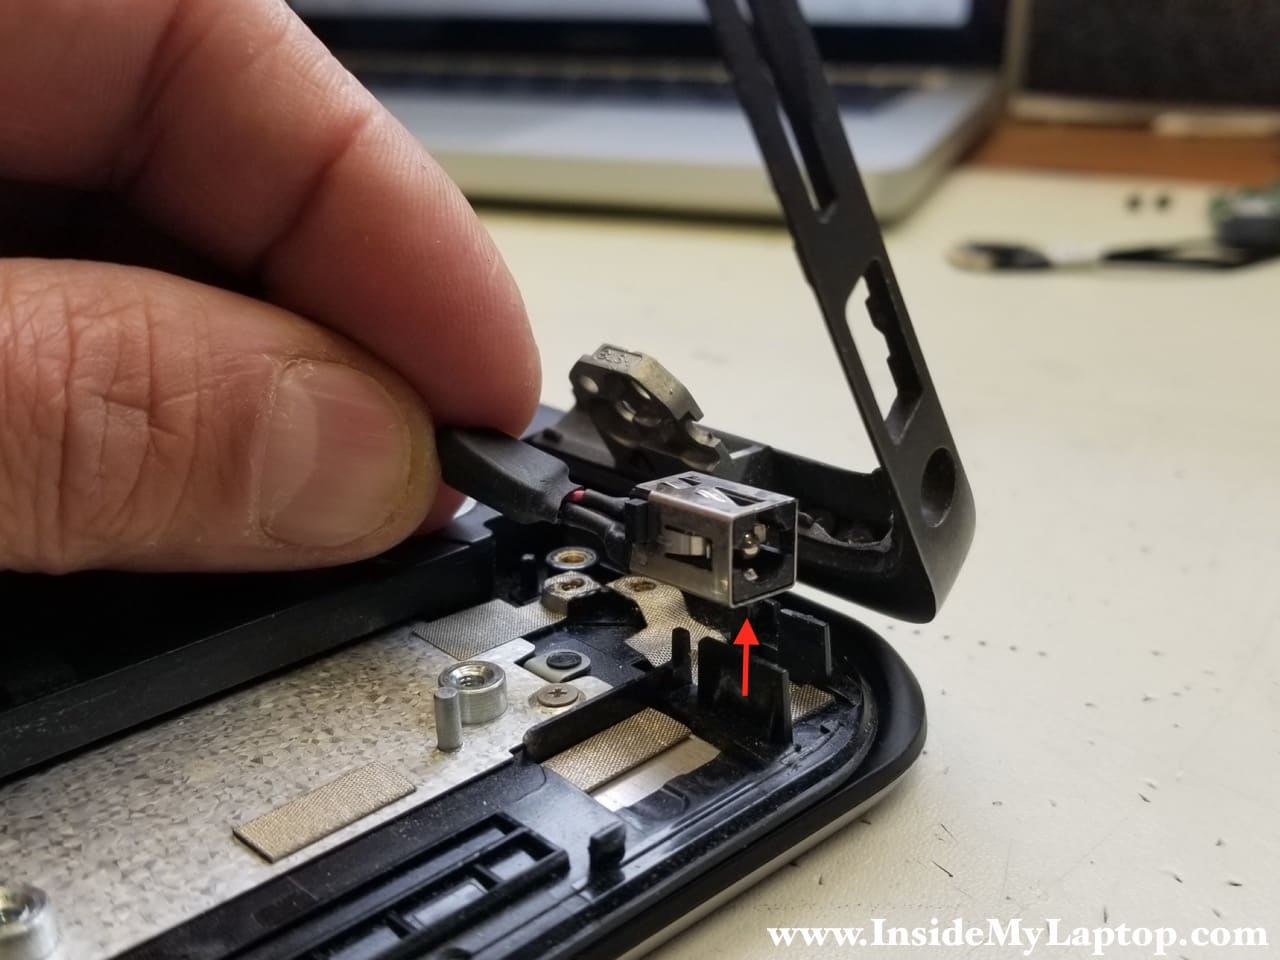
STEP 21.
Now you can disconnect the DC jack harness from the motherboard and replace it if necessary.
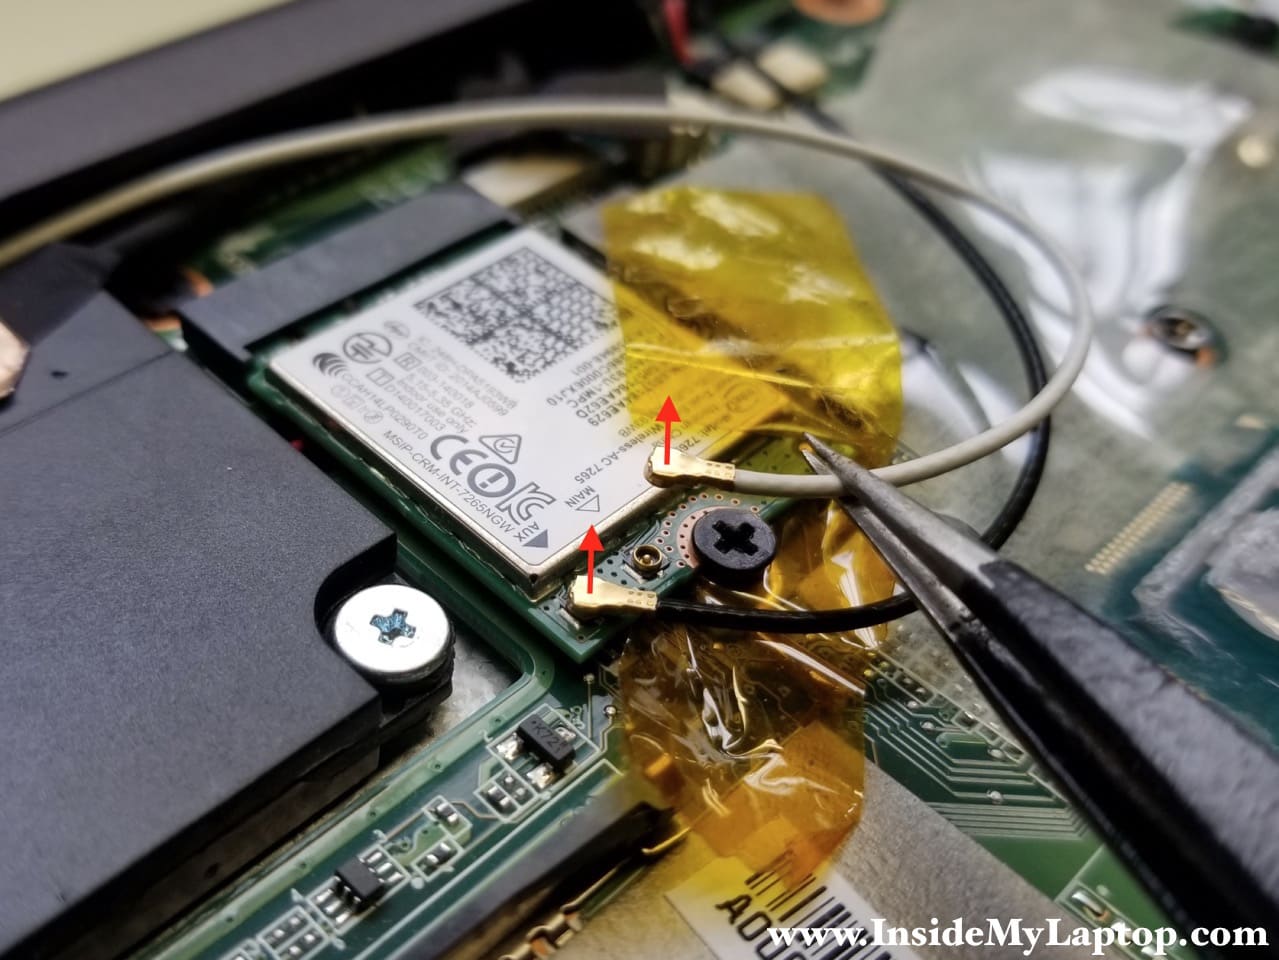
STEP 22.
Disconnect both Wi-Fi antenna cables from the wireless card.
STEP 23.
Remove five screws securing the logic board.
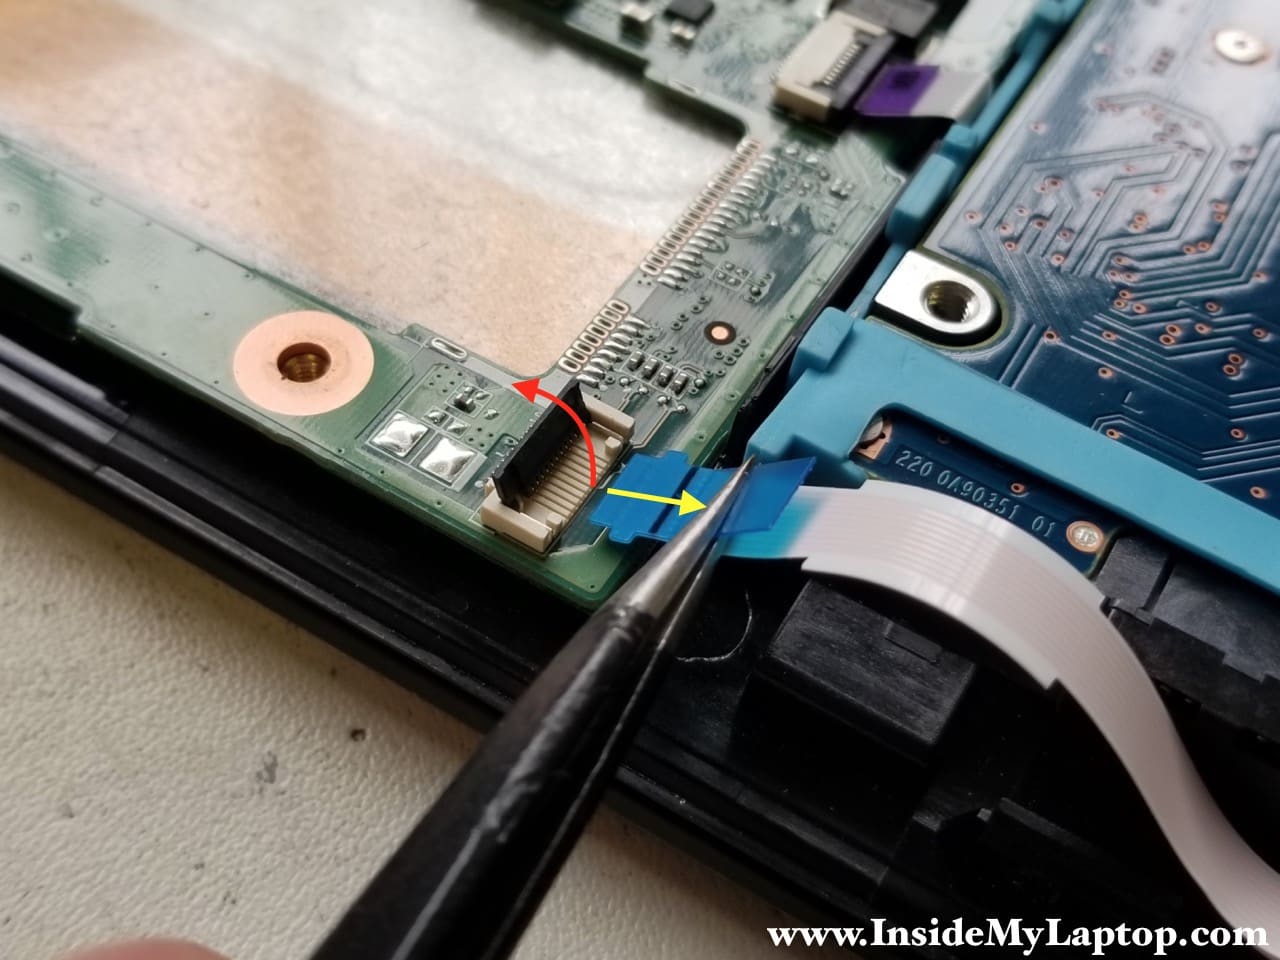
Disconnect all cables.

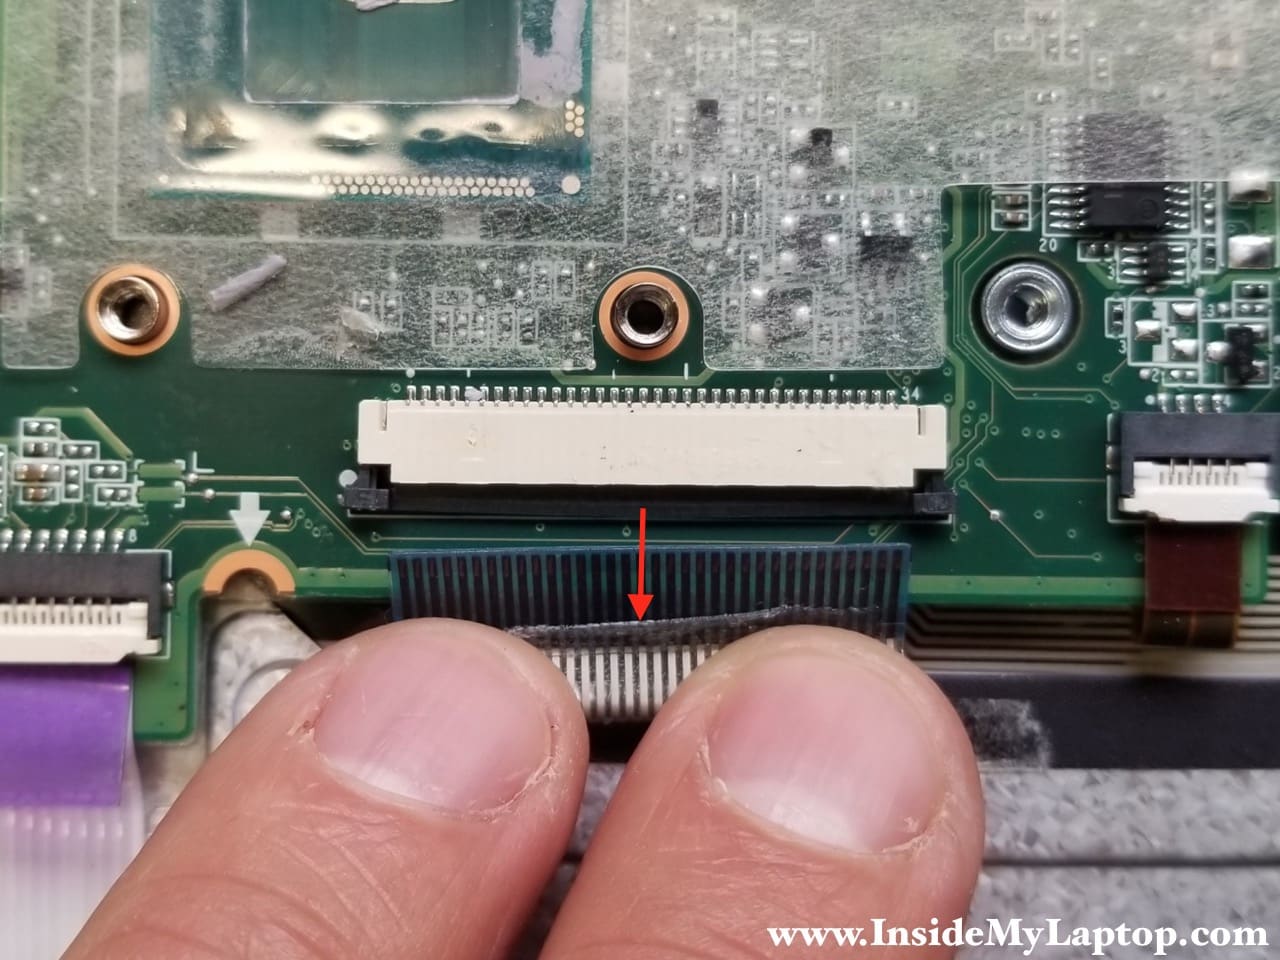
Here’s a closer look at the keyboard cable. On this picture the connector shown in the locked position.
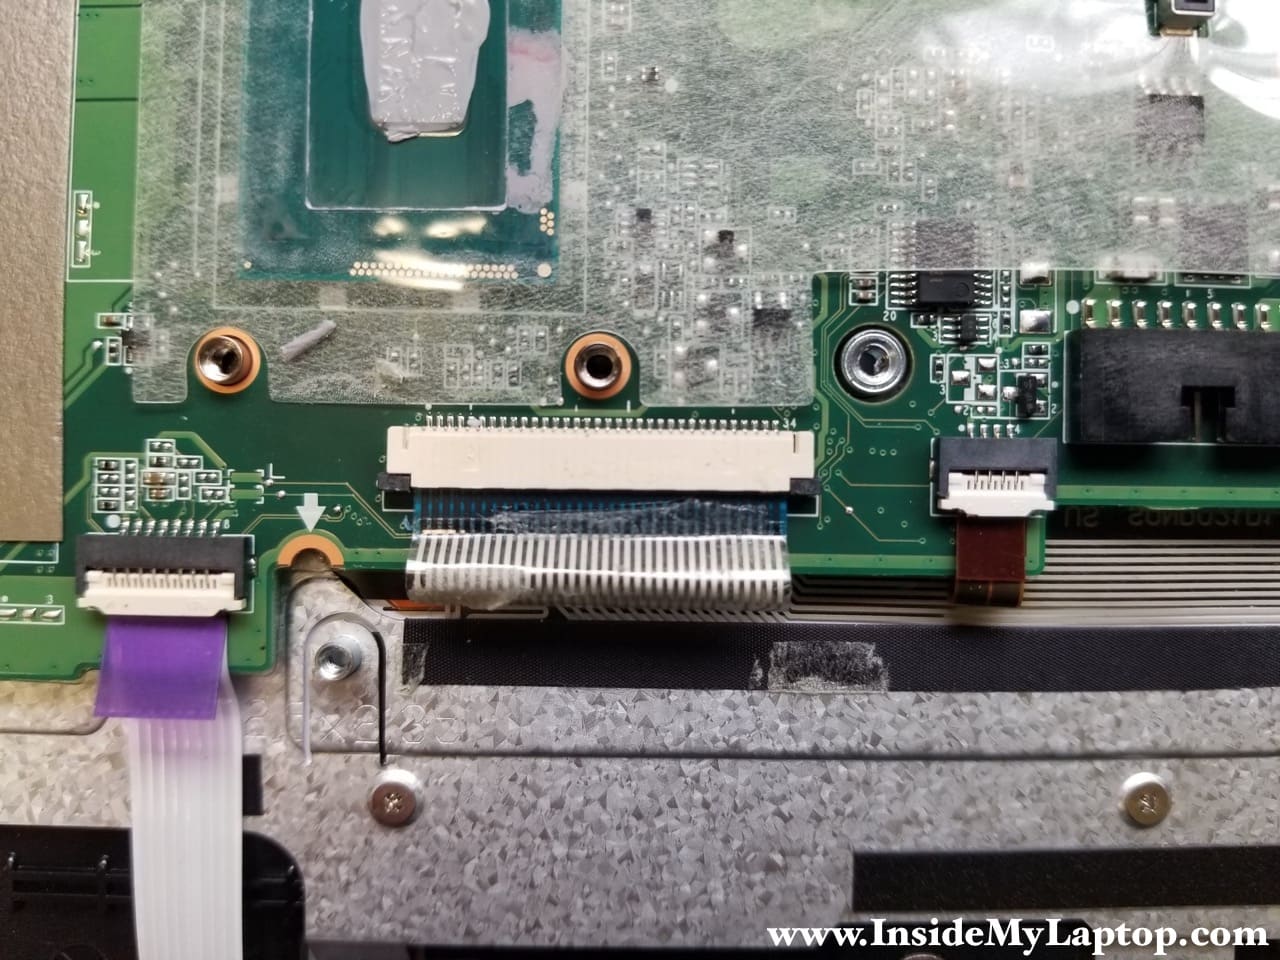
In order to unlock the keyboard connector, slide the locking tab about 2 millimeters to the shown direction.
Do not apply much pressure. The tab must stay attached to the connector base.
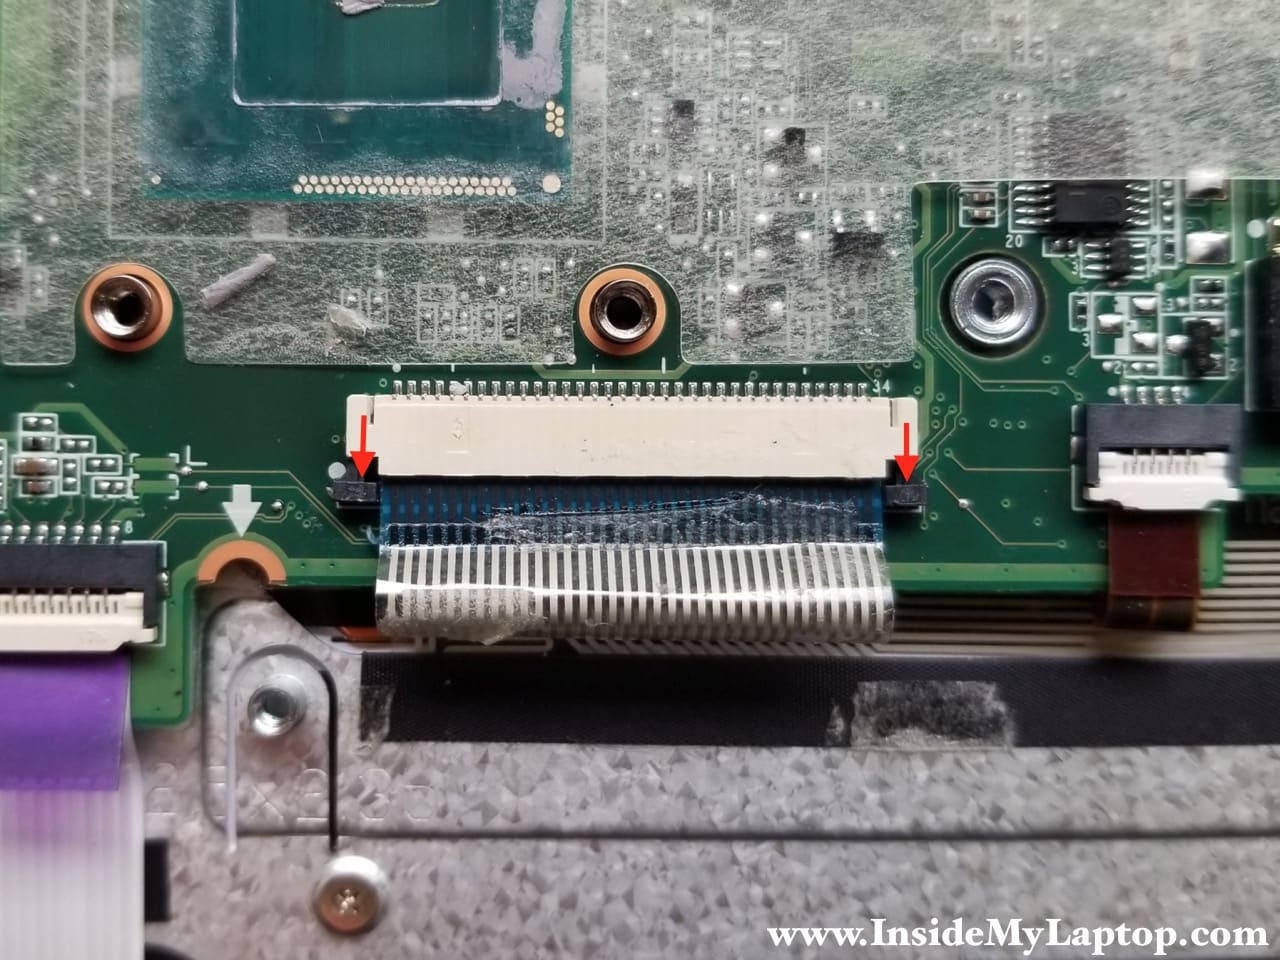
On this picture the keyboard connector shown in the unlocked position.
Now you can pull the cable out.
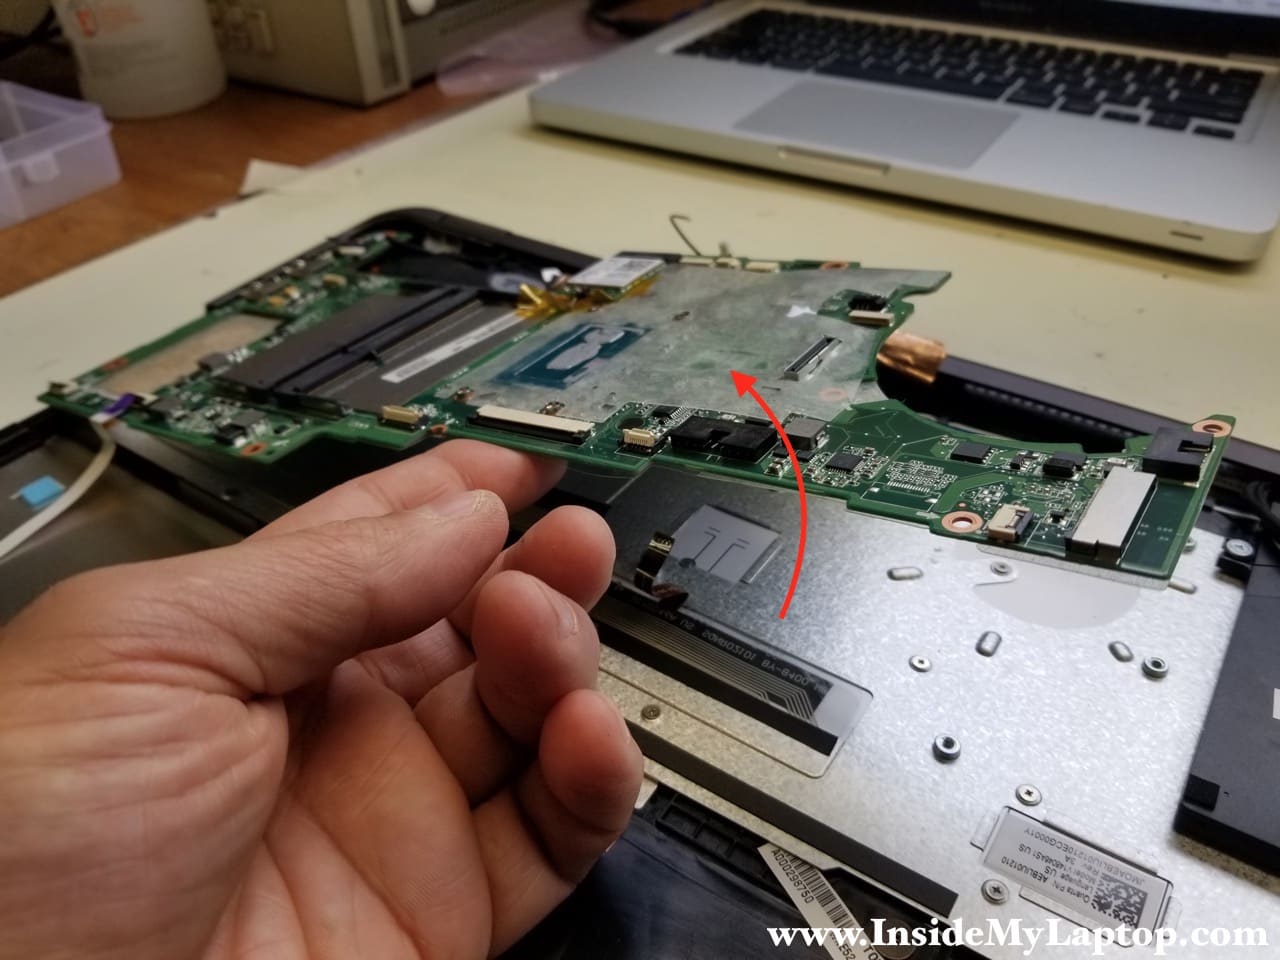
STEP 24.
Carefully separate the motherboard from the palmrest assembly.
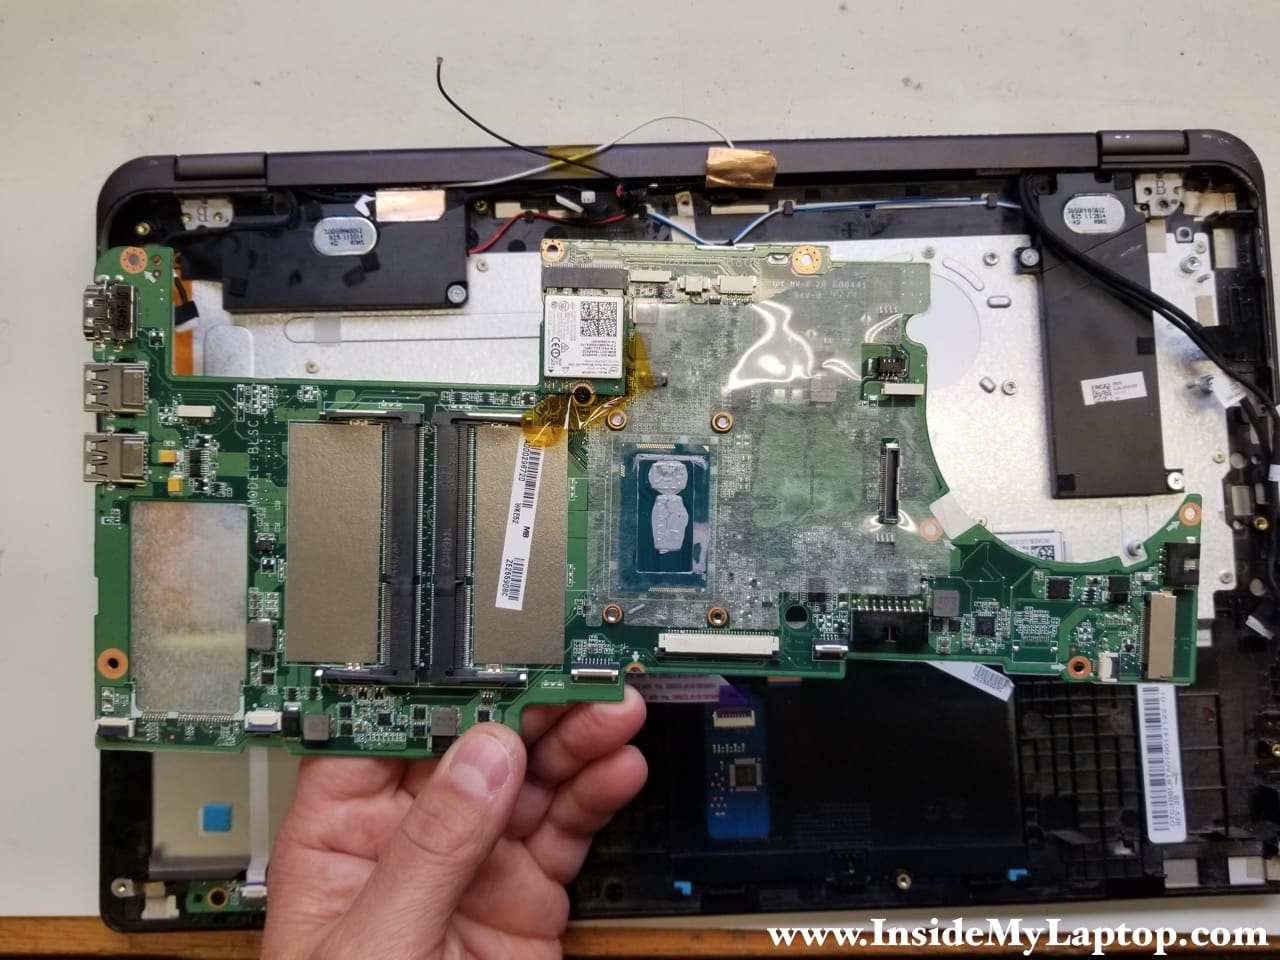
STEP 25.
Remove the motherboard.
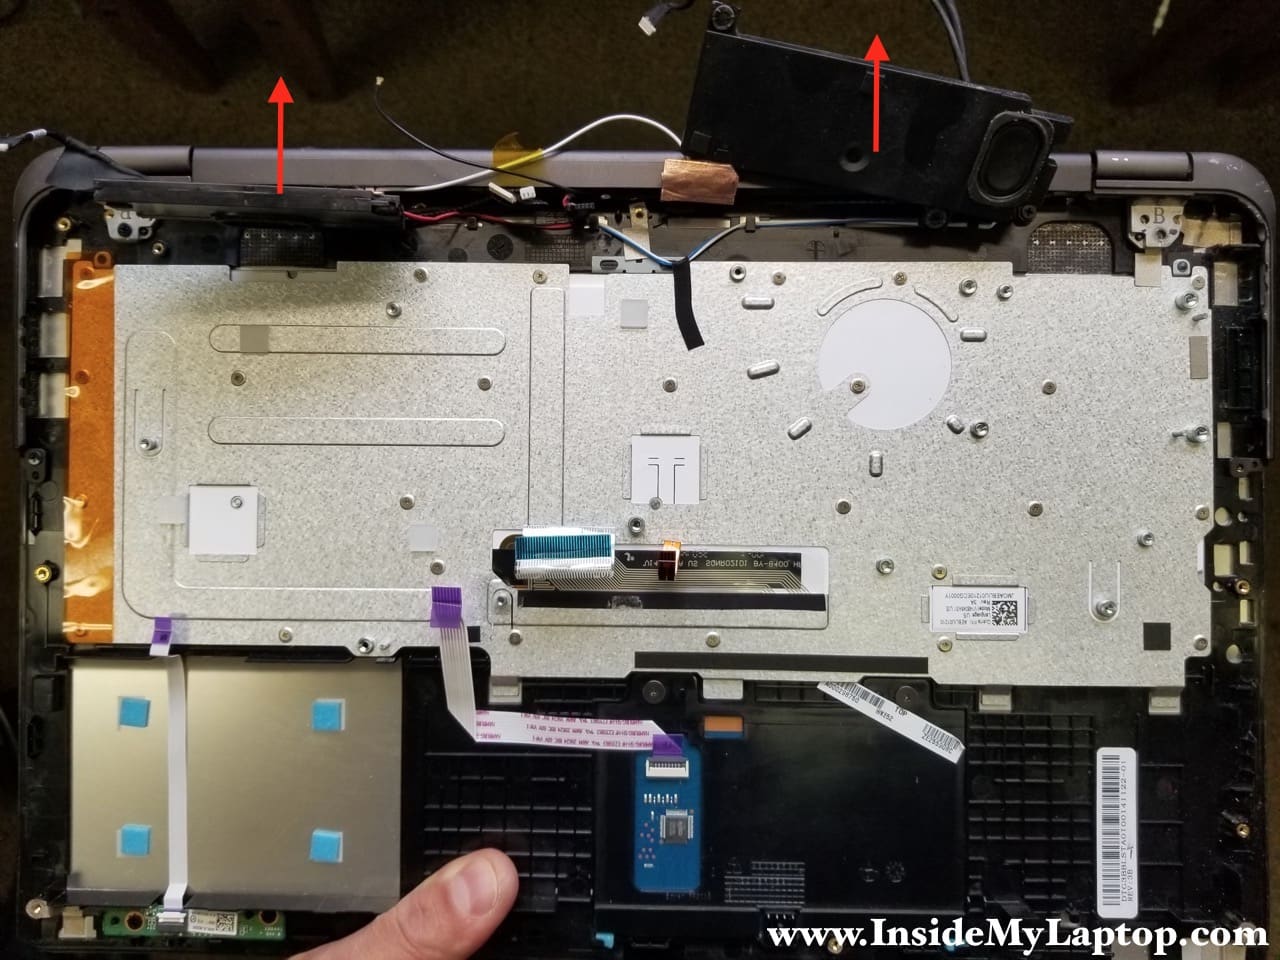
STEP 26.
Remove four screws securing the speakers.

STEP 27.
Move both speakers away from the keyboard.
In Toshiba Satellite Radius P55W laptop the keyboard cannot be replaced without going through all above mentioned teardown steps.
In order to replace the keyboard you’ll have to remove multiple screws securing it to palmrest assembly.
I’m not showing the keyboard replacement but it should be pretty easy if you get to this point.
For the display panel disassembly instructions please follow this Toshiba Satellite Radius P55W LCD screen replacement guide.
Chris
Can I replace failed fan without removing the heatsink?
IML Tech
Chris, I would suggest removing the heatsink because the fan has an adhesive tape which is glued to the heatsink on the bottom. It will be much easier to replace the fan when the heatsink is removed.
Joseph
This explanation is awesome, thank you. Would you also have an exploded parts list? I am looking for the DC jack harness that is shown in step 21. Thank you
IML Tech
@ Joseph,
Go to eBay and type: Satellite Radius P55W DC jack. You will find it. The jack is $7 with free shipping.
Michael
I’m in the process of trying this and the screw in the middle will simply not budge. Did you also run into this? All the other ones came out fairly easily, this one however will not and I’m not able to continue without it coming out. Thanks!
janson
i want to buy only speaker part , please help me how can i buy online that spare part
can it replace without separate motherboard screw , also suggest for me which one speaker is the best for high definition sound, i am waiting for you for your response
IML Tech
@ janson,
You can find spare speakers on eBay. Just search for “Satellite P55W speakers”. You will see them listed for sale for about $10.
In order to replace speakers you will have to remove the motherboard because the speaker cable is routed under the motherboard.
All speakers for Satellite P55W are similar. There are no special high definition speakers.
luis felipe torres
Buenas tardes, voy a reemplar el display touch de mi toshiba p55w b5318, pero tengo duda, al quitar la cargar, lleva un marco negro con una mica transparente.
¿se requiere quitar la mica platastica transparente del marco negro? , o la dejo sobre el display nuevo. Nota: este plastico transparente tiene mucho pegamento encima.
basil
hi . my laptop Toshiba Satellite Radius P55W doesnot work well when i press power boutton and when i click shut down or sleeping usually the windows shutdown but my keyboard and other things still work , so please i shoud do to fix it
IML Tech
Here’s what you can try.
Remove the hard drive and try turning the laptop on and off.
If the laptop still works after you turn it off, there could be a problem with the motherboard.
If the laptop turning on and off properly with the hard drive removed, probably this is software related issue. In this case reinstalling Windows OS might help.
Douglas
I have the P55w-c5316 toshiba laptop, I had a issue with the on off button. It seems that there was a bad contact while turning on, and eventually the button seems to of broke rendering the laptop unable to turn on. I can not seem to completely understand how the laptop on off function works. Do you have any availed pics up close of the button, inside coponements and part associated with this function.
IML Tech
Douglas, I don’t have other pictures for this unit except for those published in the guide.
It looks like the power button on P55W-C5316 is located on the right side, by the HDMI port. The power button is soldered to the motherboard. You’ll have to remove the bottom cover to investigate the problem. It’s either failed power button or the plastic part that pushes on the button worn off.
Either way, you can find a replacement motherboard here if needed: https://ebay.to/2SHefLv
The disassembly instructions for your laptop are here: https://www.insidemylaptop.com/taking-apart-toshiba-satellite-p55w-c5316/