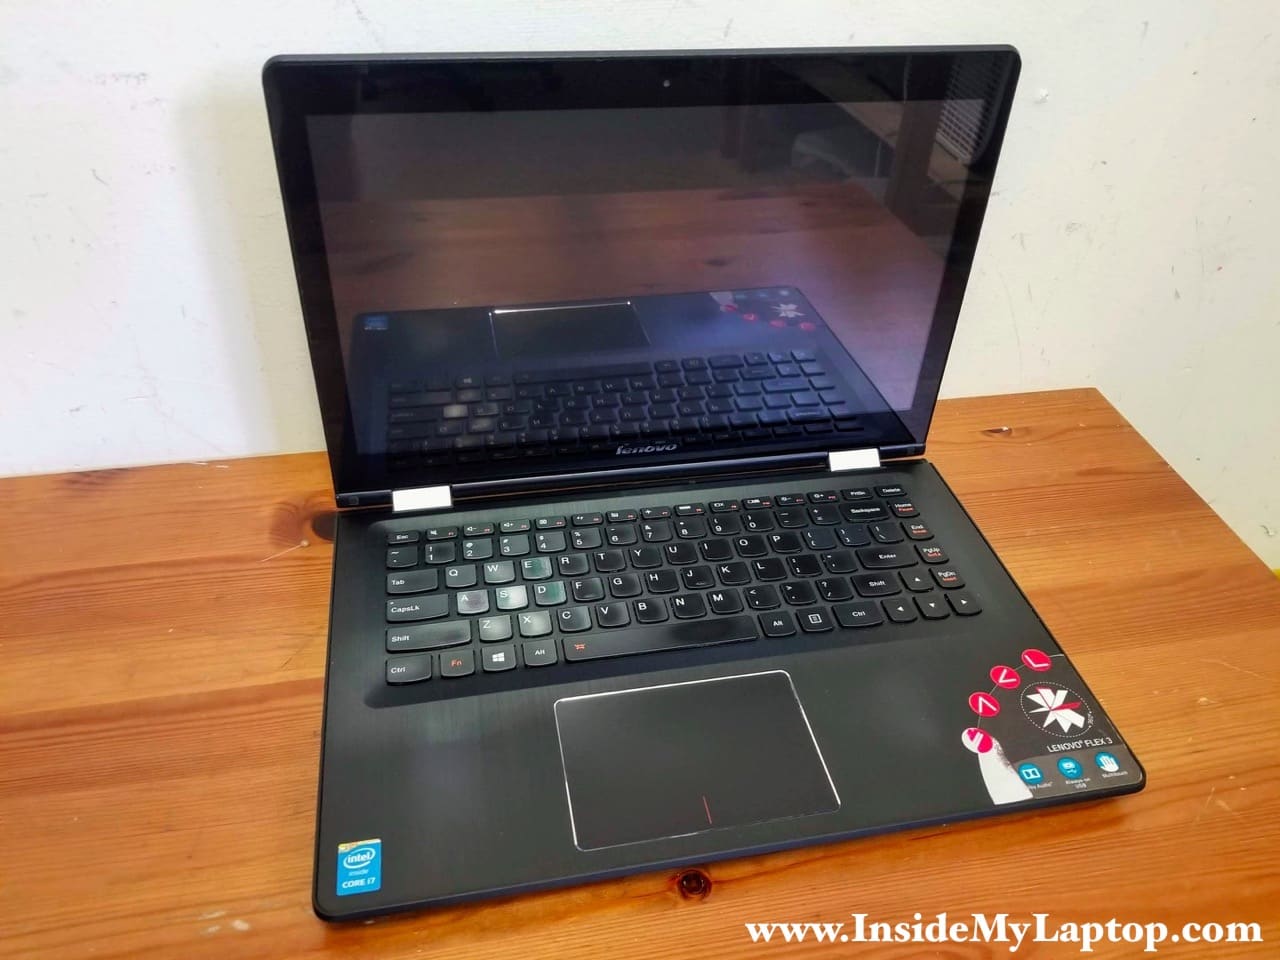
In this disassembly guide I’m taking apart a 14″ Lenovo Flex 3-1470 laptop (model 80JK).
I’ll be removing all main internal components and the display assembly.
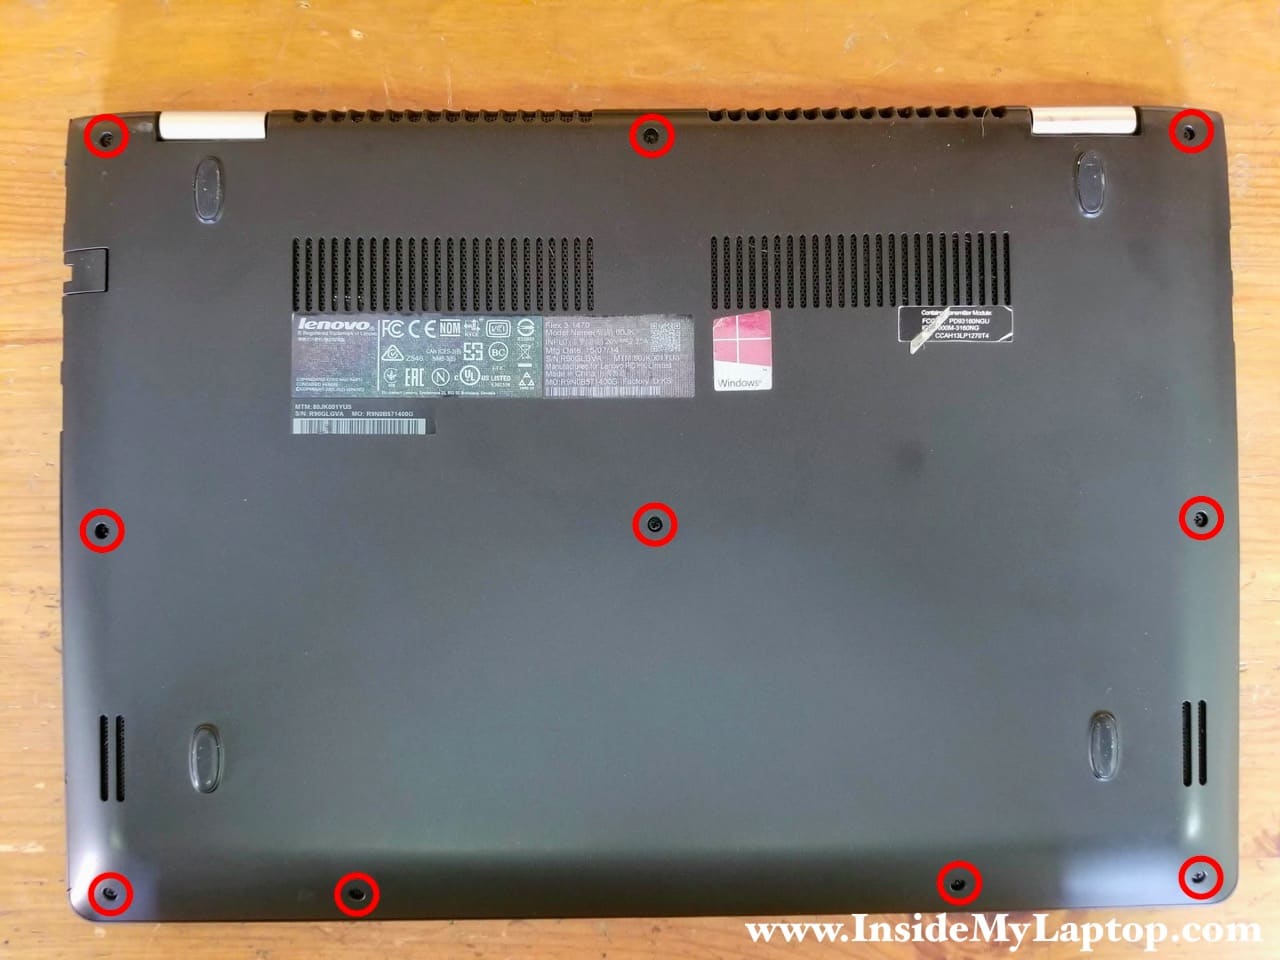
STEP 1.
Remove ten screw securing the base cover.
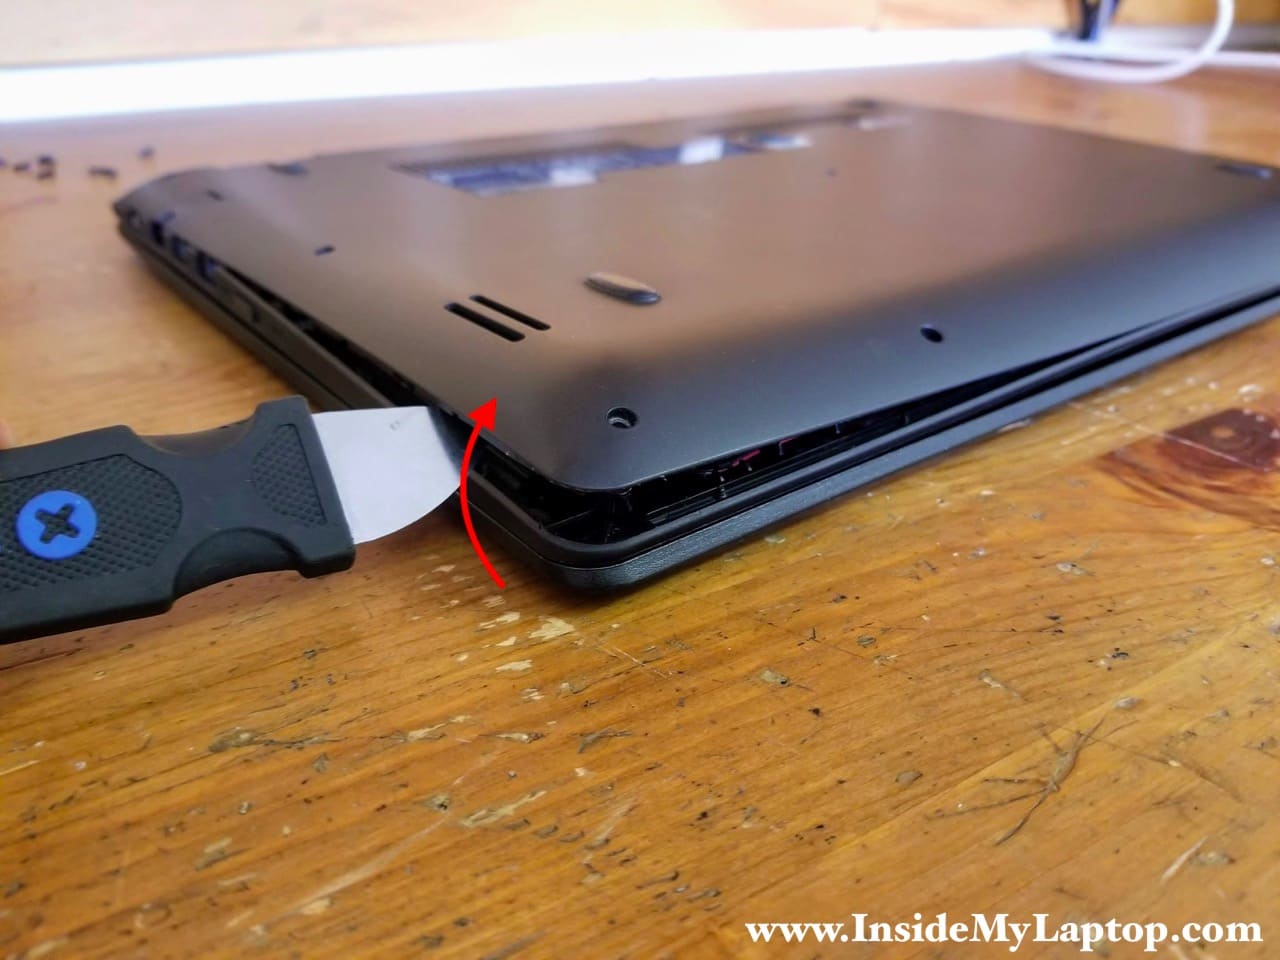
STEP 2.
Remove the base cover.
Insert a thin case opener tool between the base cover and palmrest assembly and pry it up. You’ll have to release hidden latches attaching the base cover to the palmrest.
STEP 3.
In order to remove the battery it’s necessary to remove the I/O USB/Audio/Volume control board cable.
Disconnect the I/O cable on both sides.
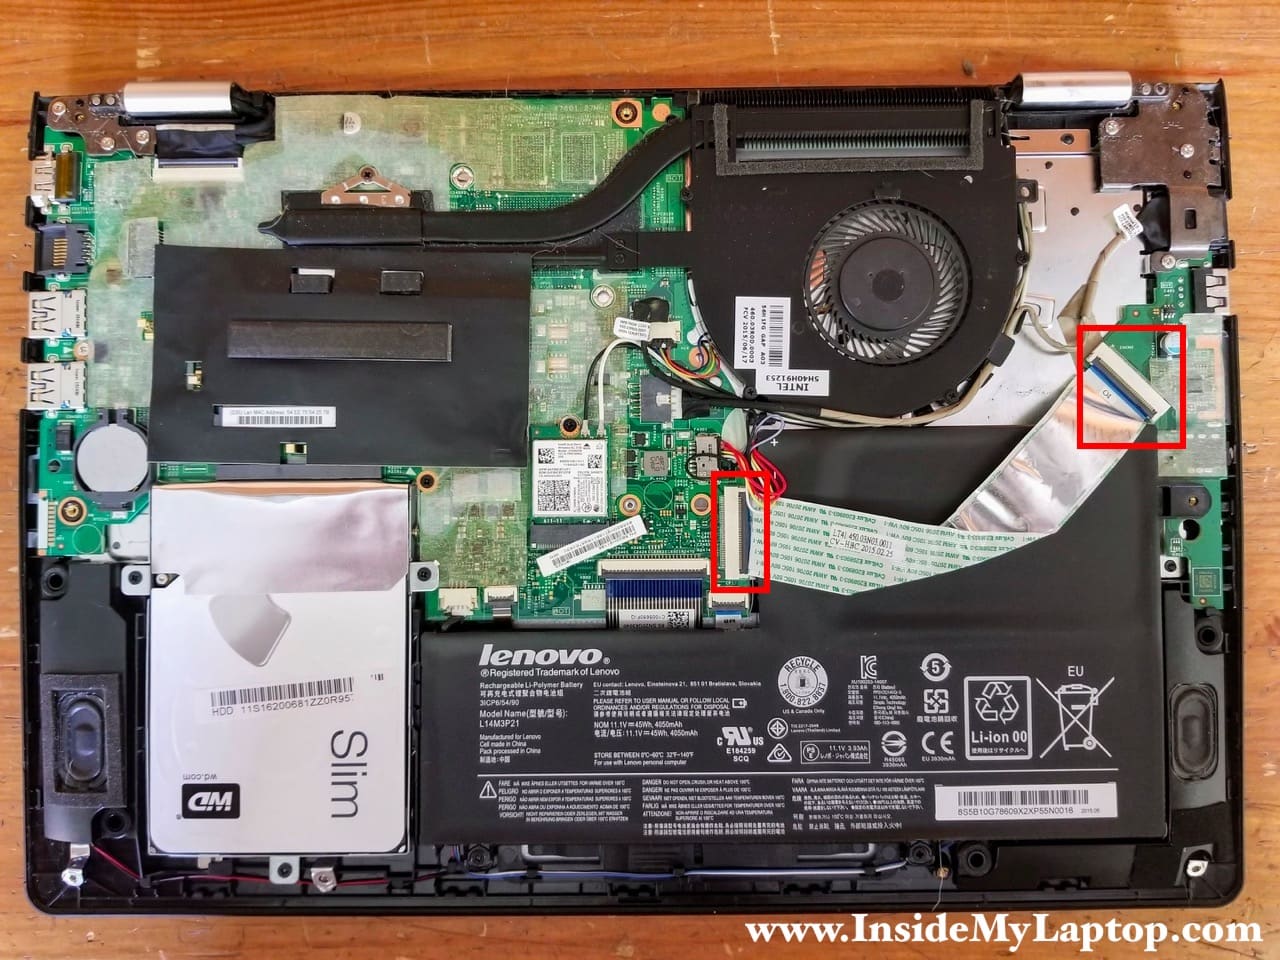
In order to pull the cable out it’s necessary to unlock the connector.
Unlock the connector by lifting up the locking tab (red arrow). After that you can pull the cable out (yellow arrow).
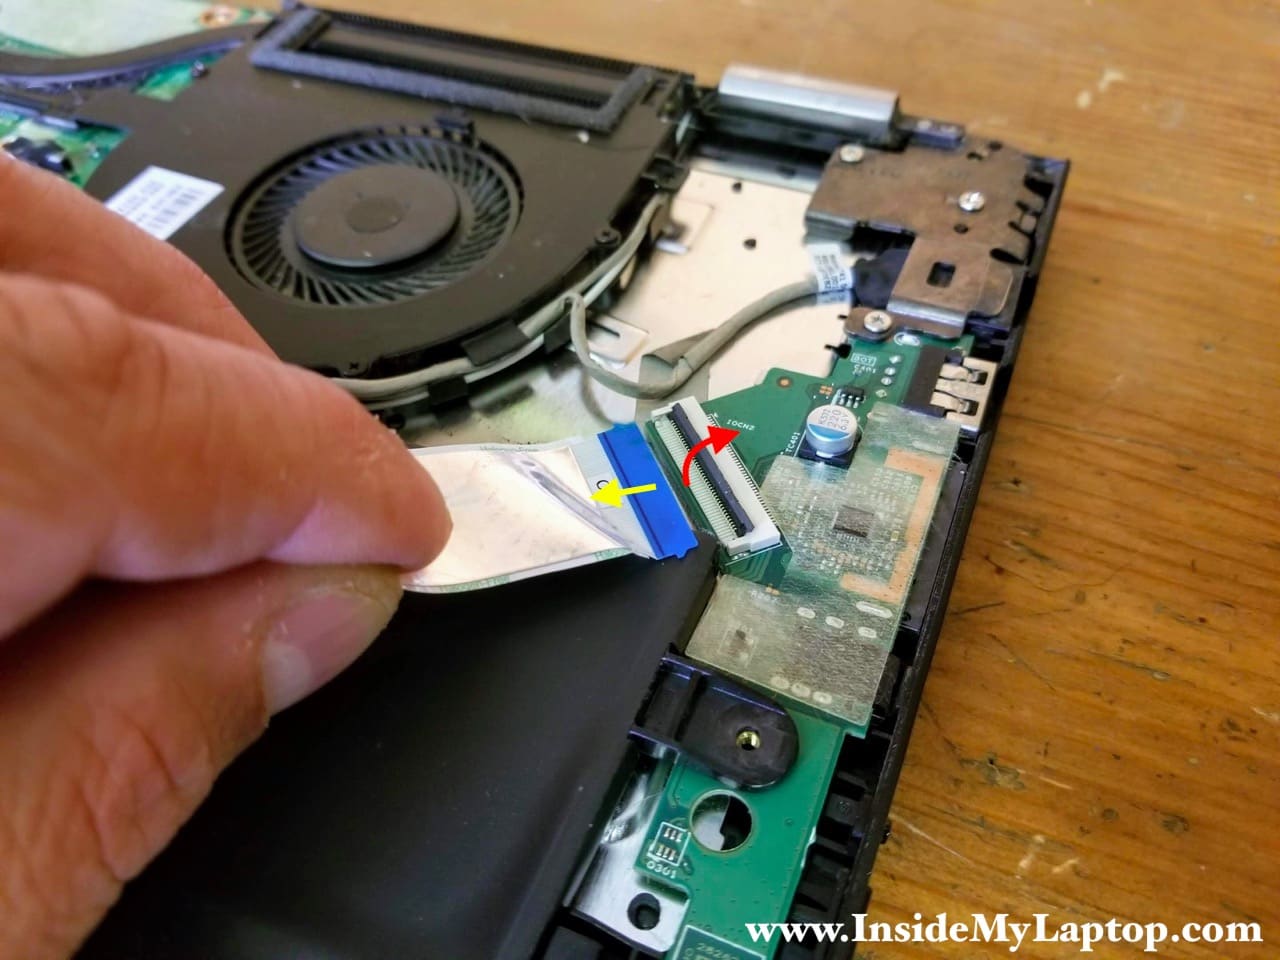
STEP 4.
Remove the I/O board cable.

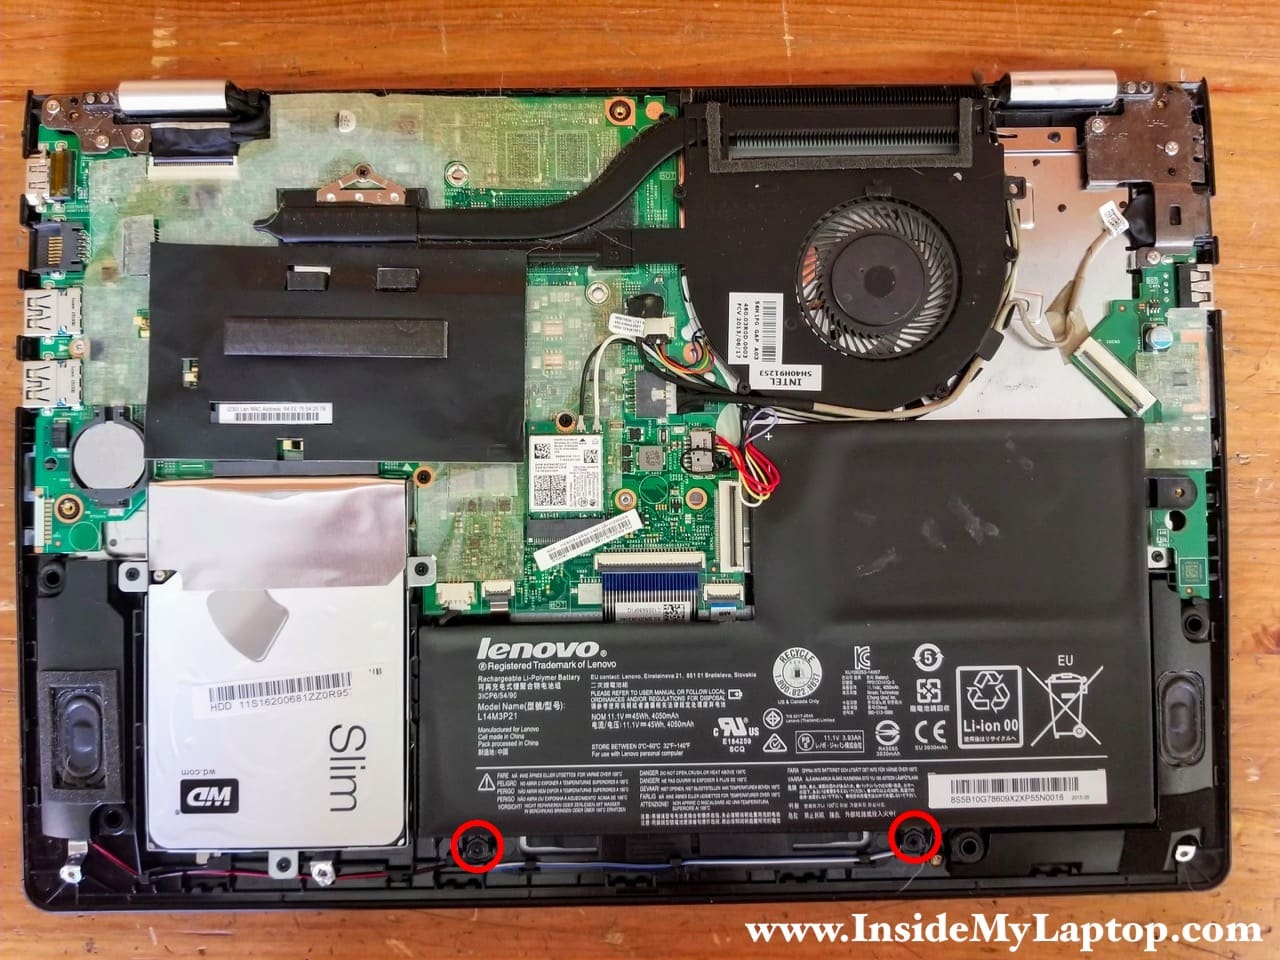
STEP 5.
Remove two screw securing the main laptop battery.
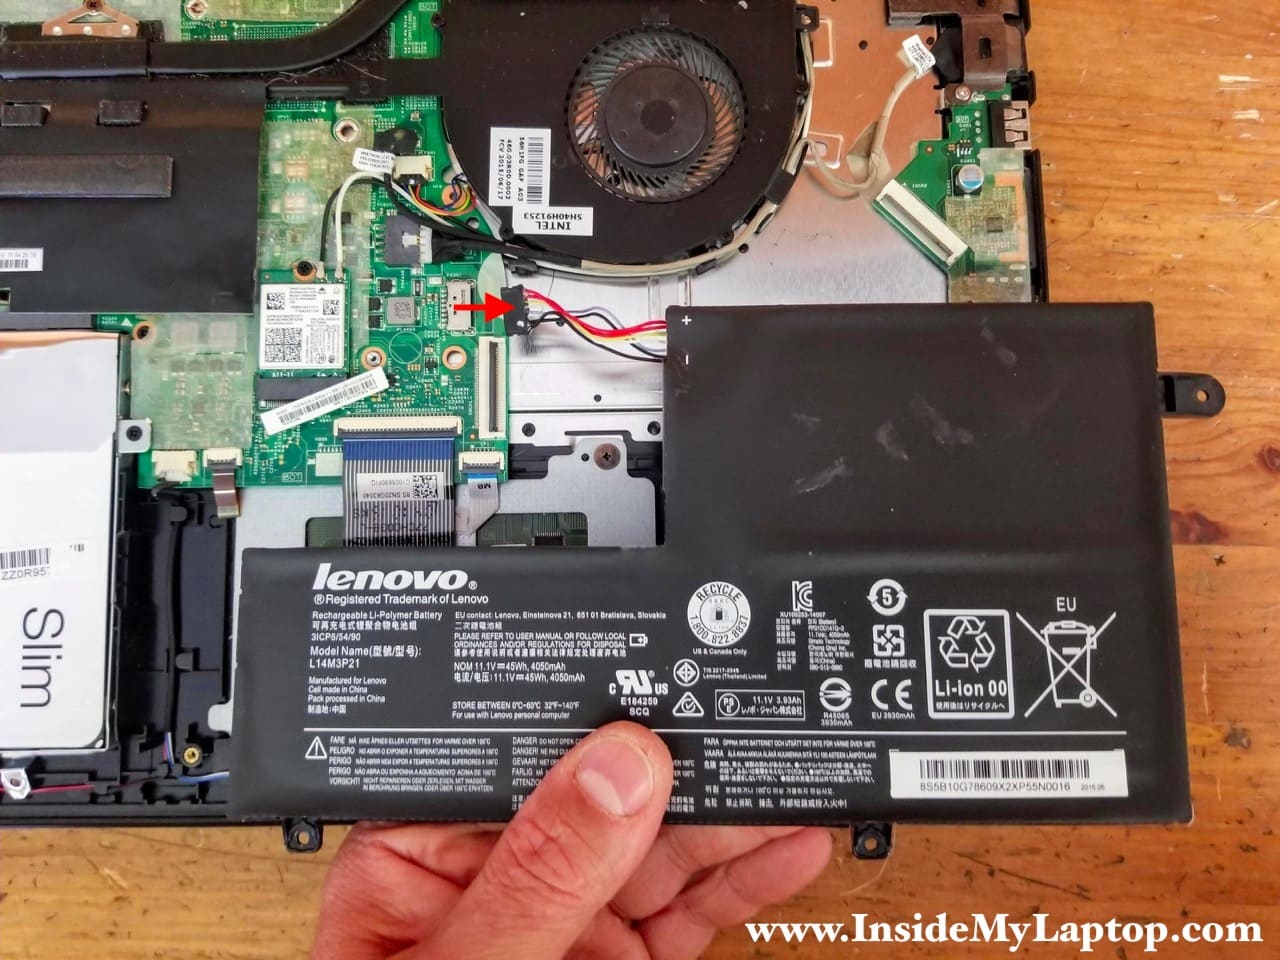
STEP 6.
Lift up the battery and unplug the battery cable from the motherboard.
Lenovo Flex 3-1470 laptop battery model: L14M3P21.
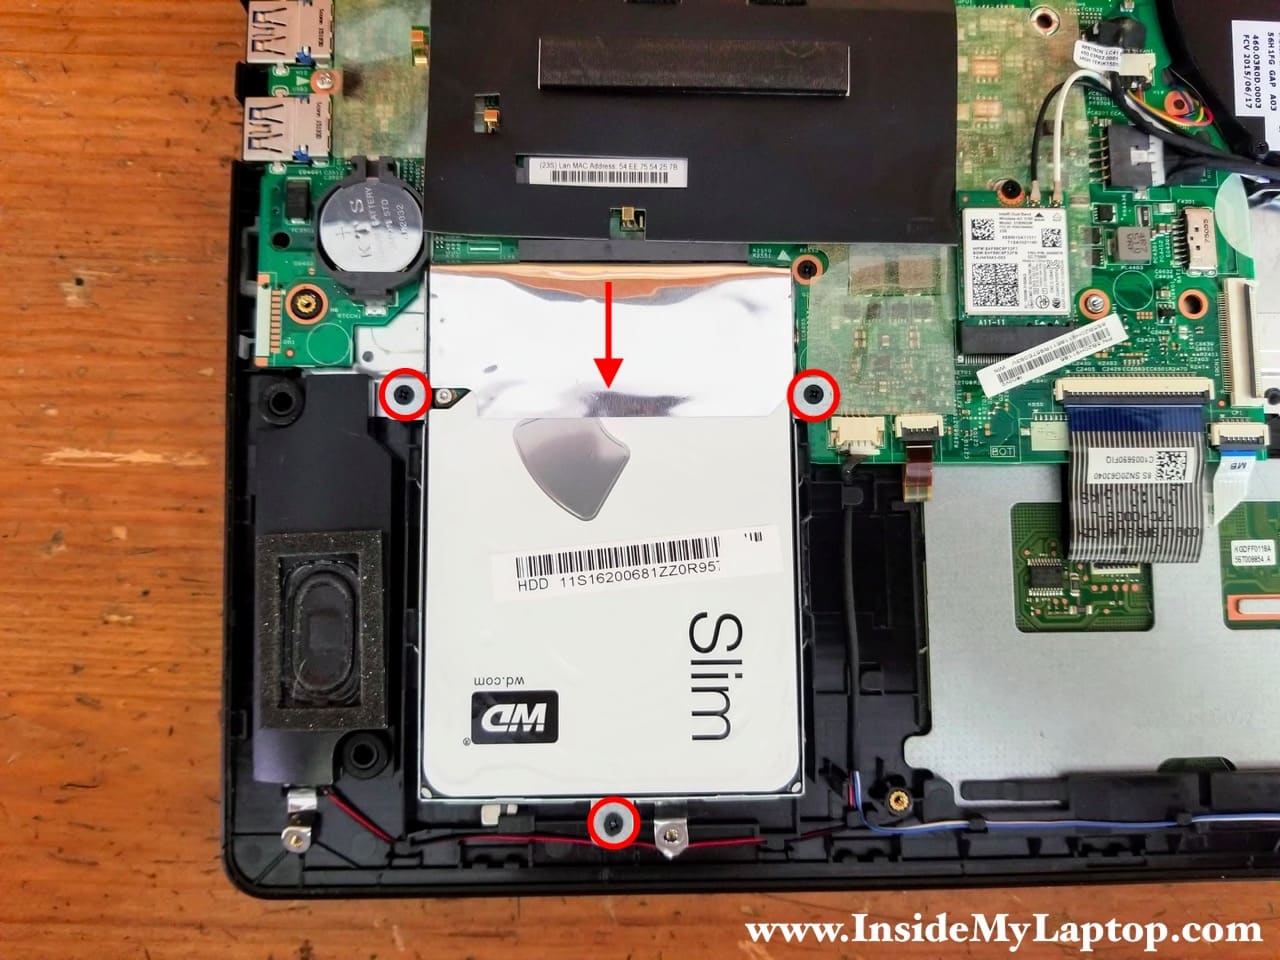
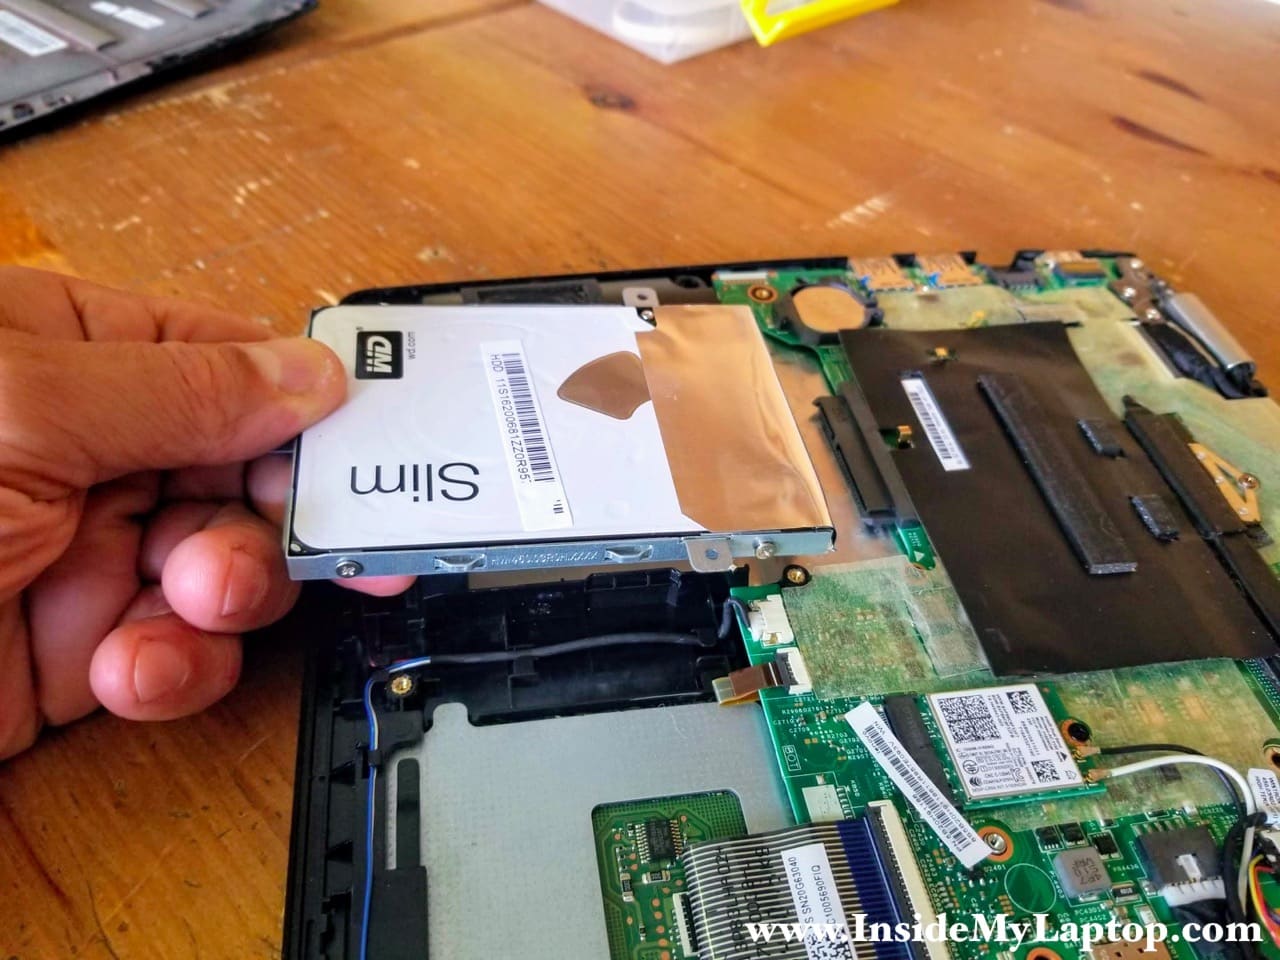
STEP 7.
Remove three screws attaching the hard drive mounting bracket to the palmrest.
Slide the hard drive assemble to the shown direction (red arrow) to disconnect it from the SATE port.
STEP 8.
Remove the hard drive assembly. You can speed up your laptop by upgrading this drive to a 2.5 solid state drive.
STEP 9.
If you need to access the memory module, you will find it under the black mylar cover. The cover is attached to the motherboard by adhesive tape.
Lenovo Flex 3-1470 motherboard has only one removable memory module. You can install up to 8GB DDR3-12800 SODIMM RAM module in this slot.
By the way, the CMOS battery also can be easily accesses and replaced if necessary.

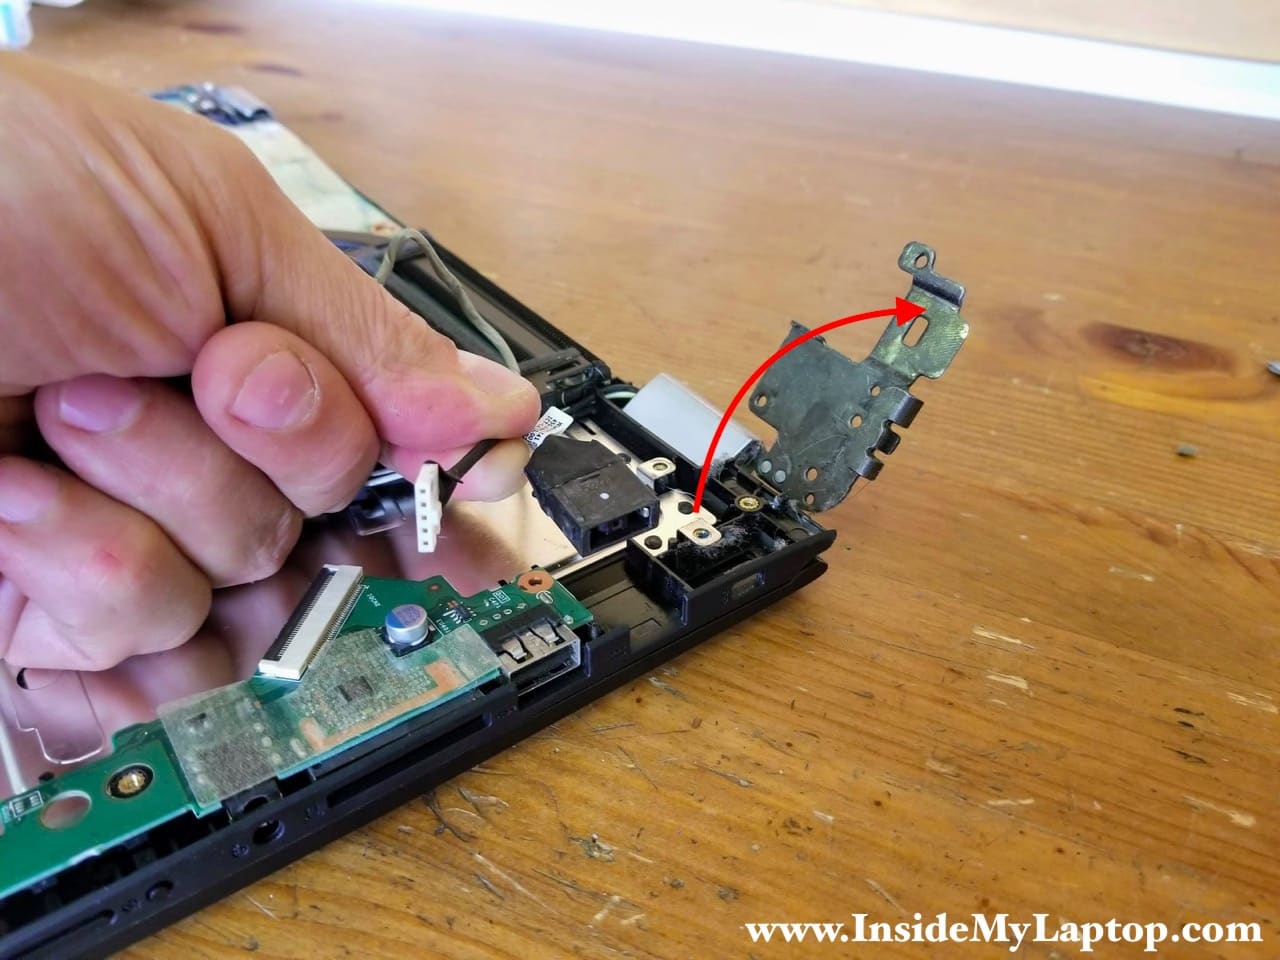
STEP 10.
Remove three screws from the left display hinge.
Unplug the DC jack power cable from the motherboard.
STEP 11.
The DC power jack mounted under the left display hinge. In order to access the DC jack it’s necessary to open the hinge as it shown on the following picture.
Now you can remove the DC power jack harness.
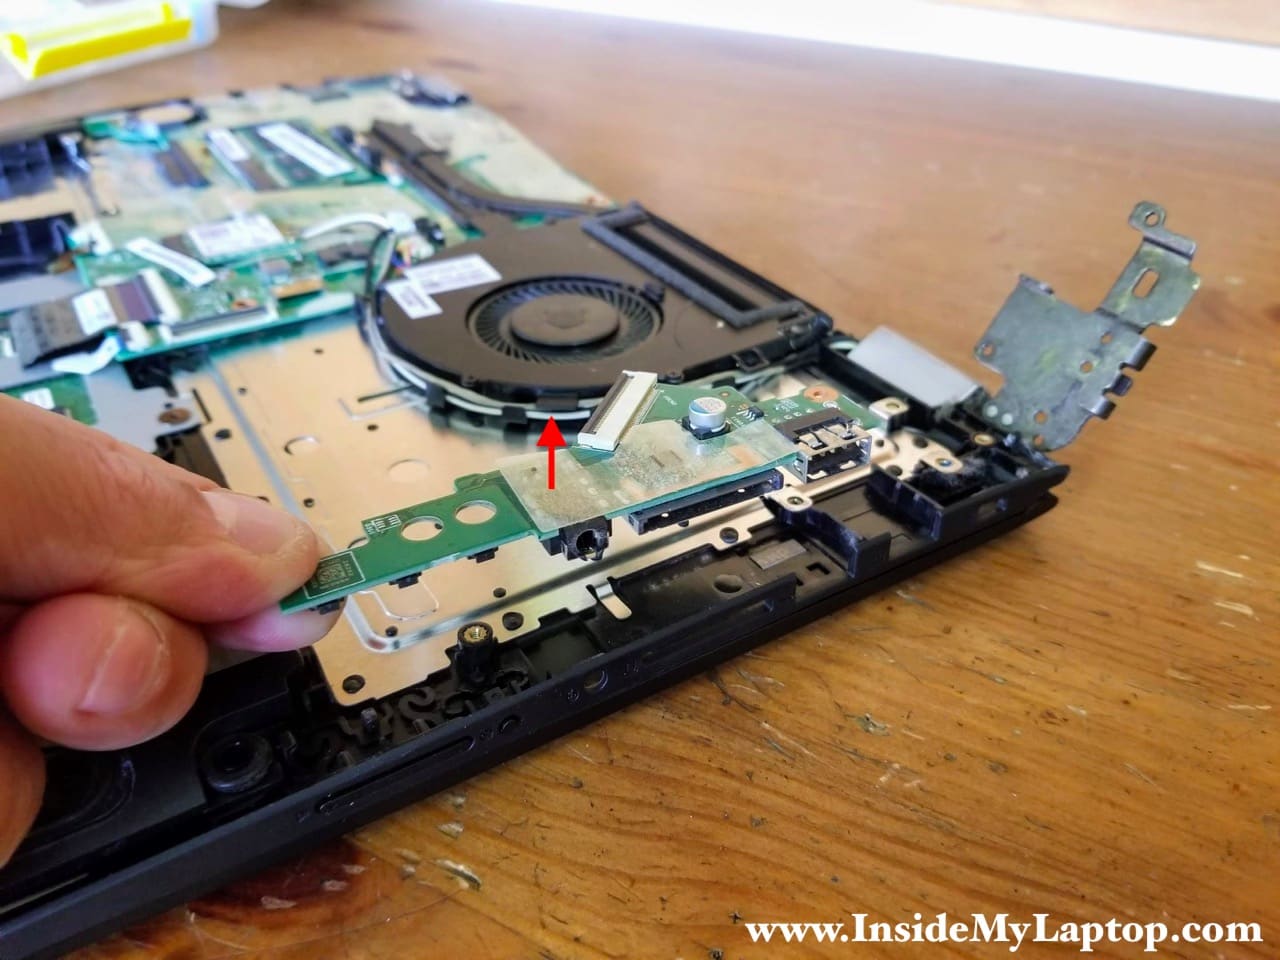
STEP 12.
Remove the USB/Audio/Volume control board.
STEP 13.
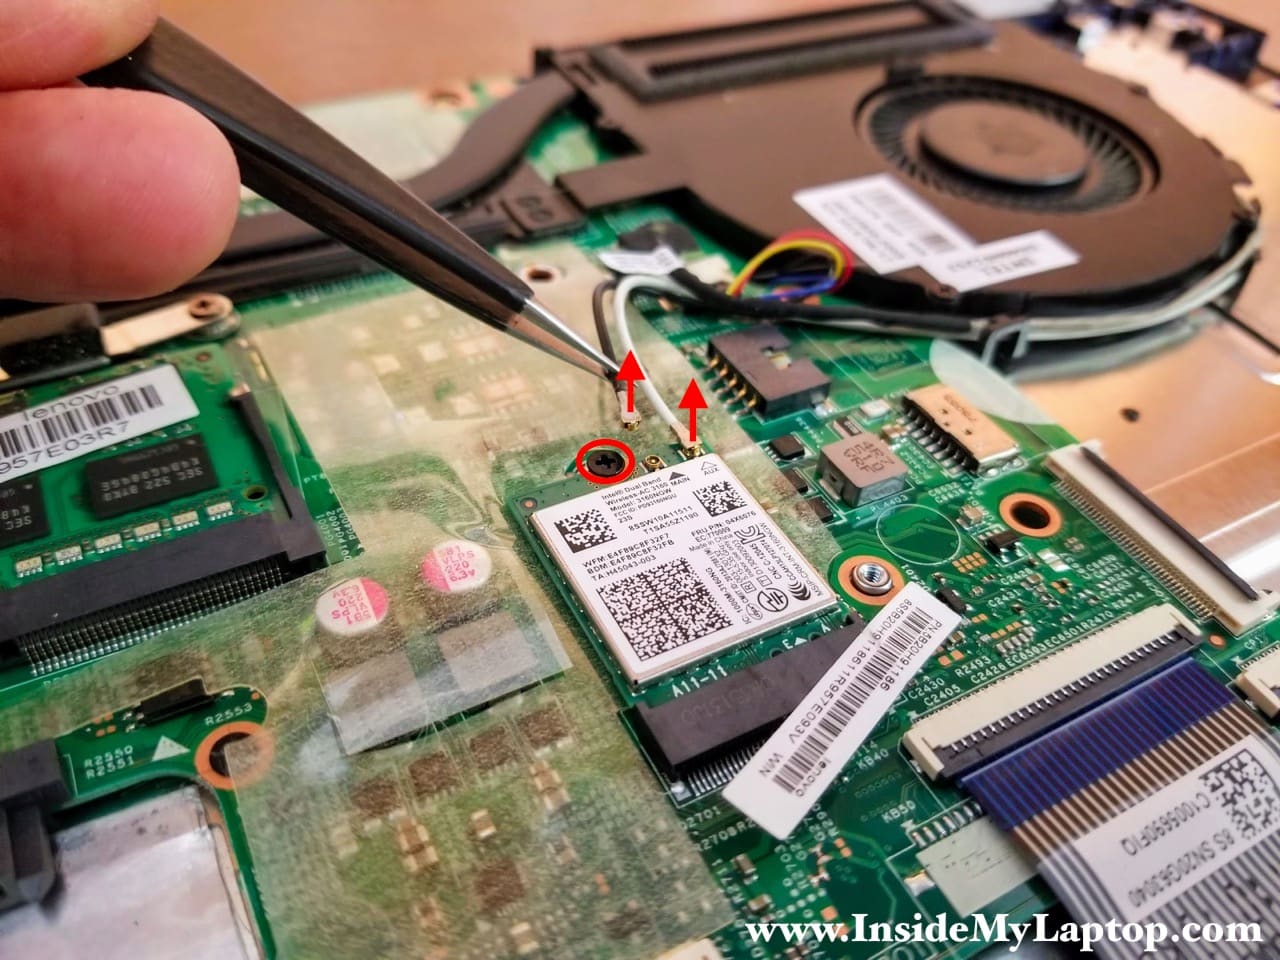
Disconnect two antenna cables from the wireless card.
Remove one screw securing the wireless card.
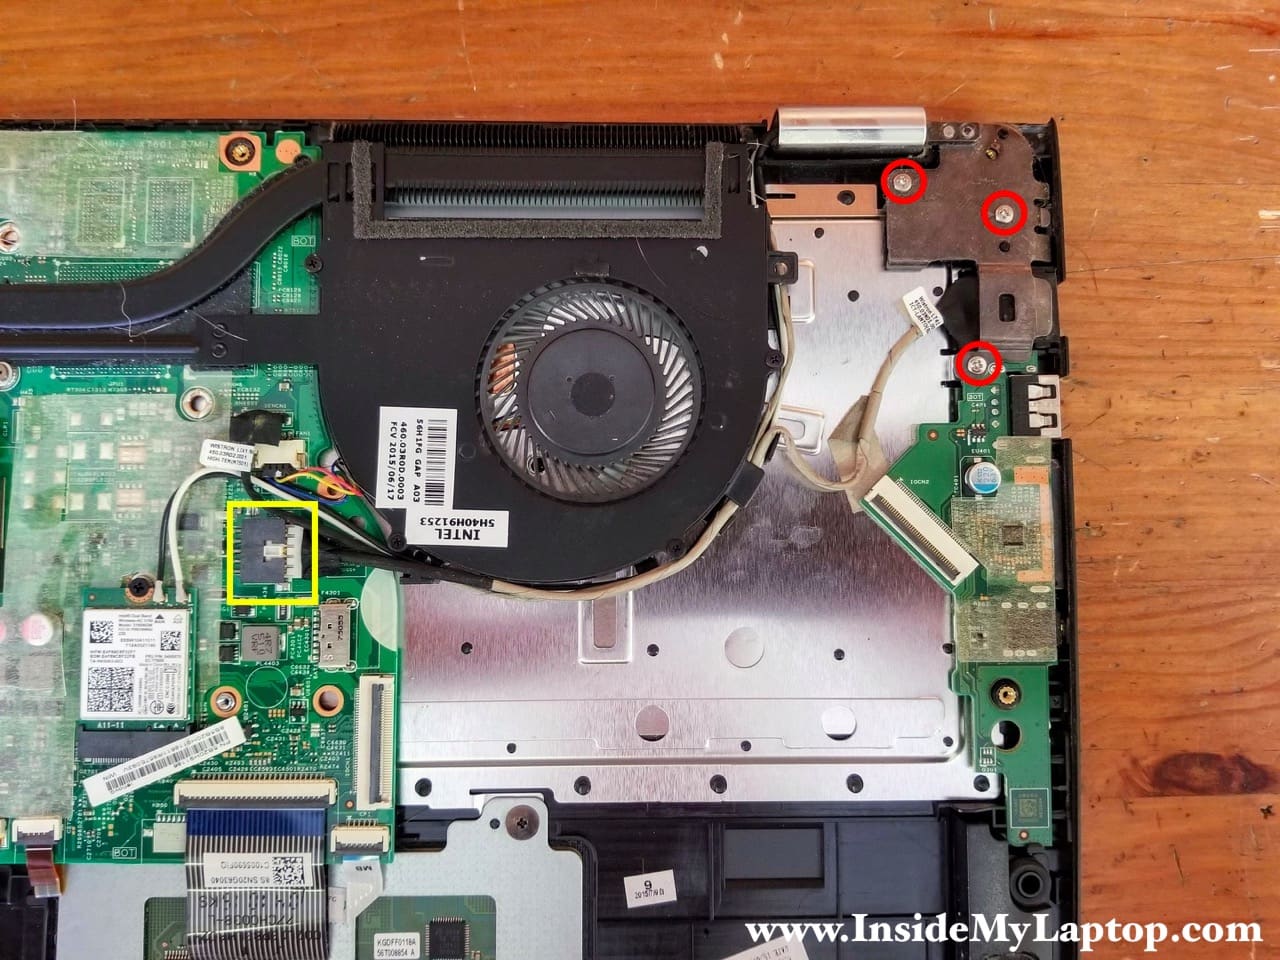
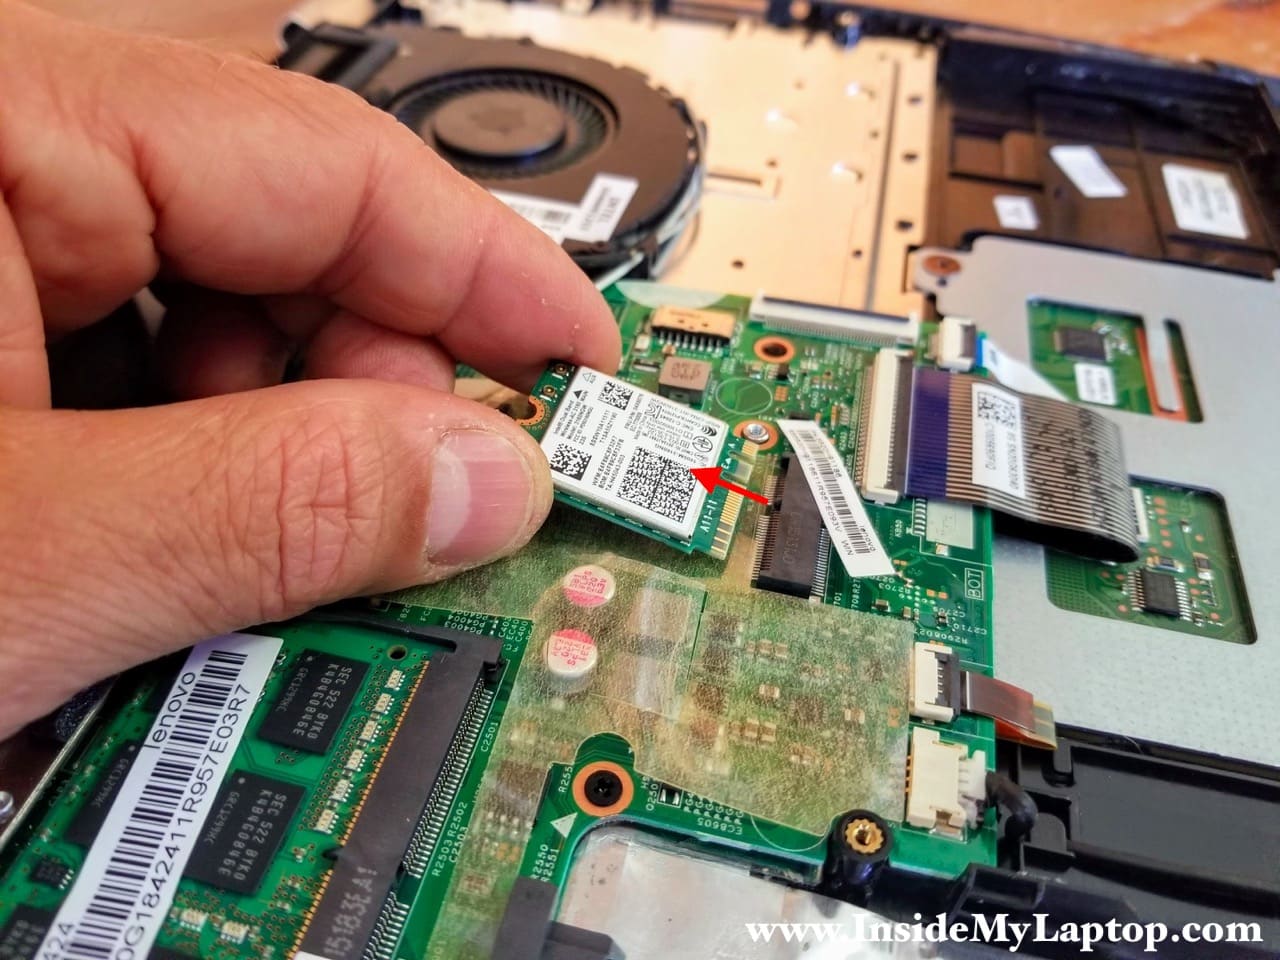
STEP 14.
Remove the wireless card.
STEP 15.
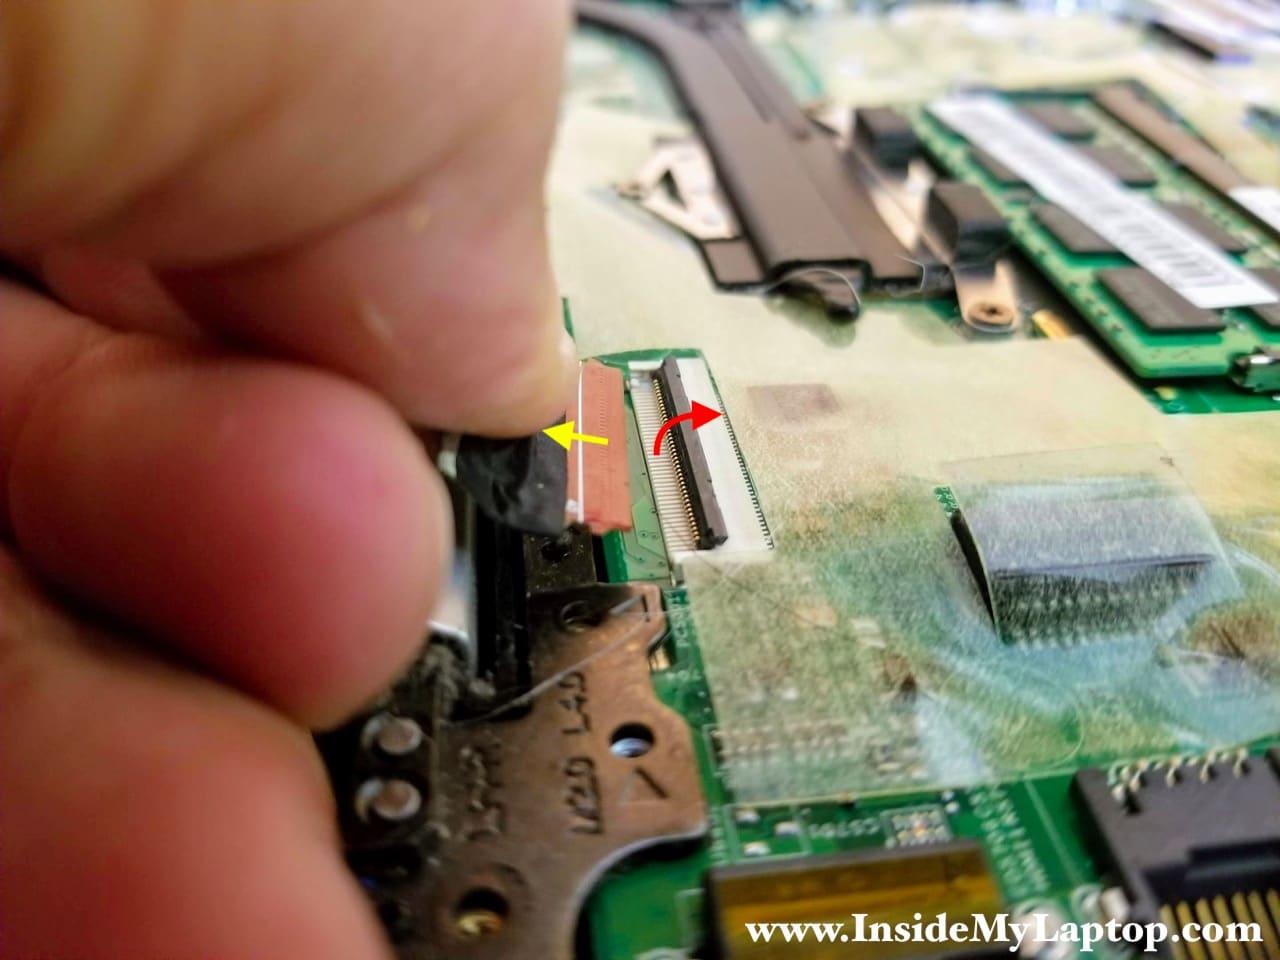
Remove three screws from the right display hinge and disconnect the display video cable from the motherboard.
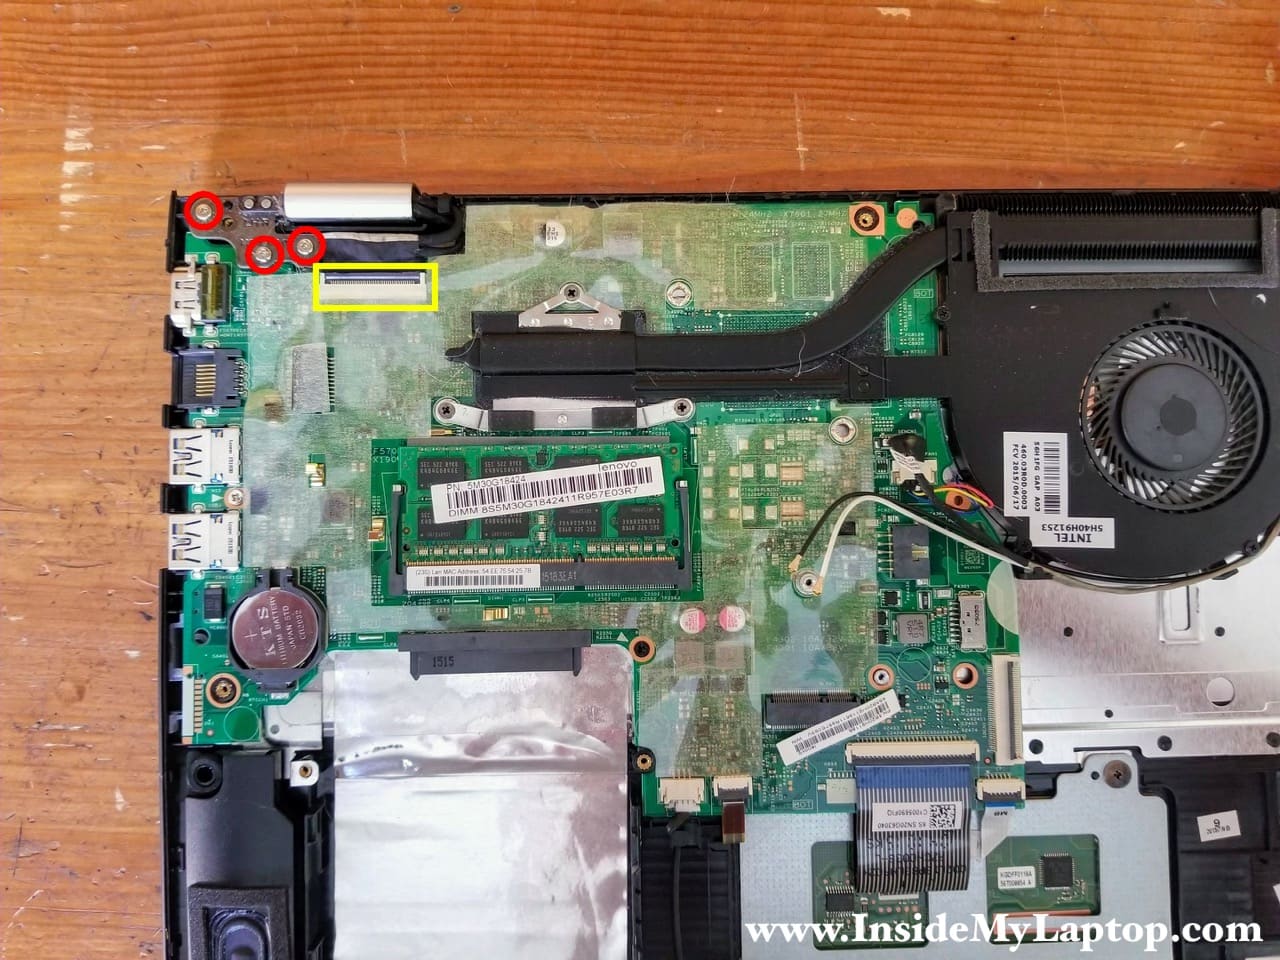
Unlock the display connector first (red arrow) and pull the video cable out (yellow arrow).
STEP 16.
Open the right display hinge.

STEP 17.
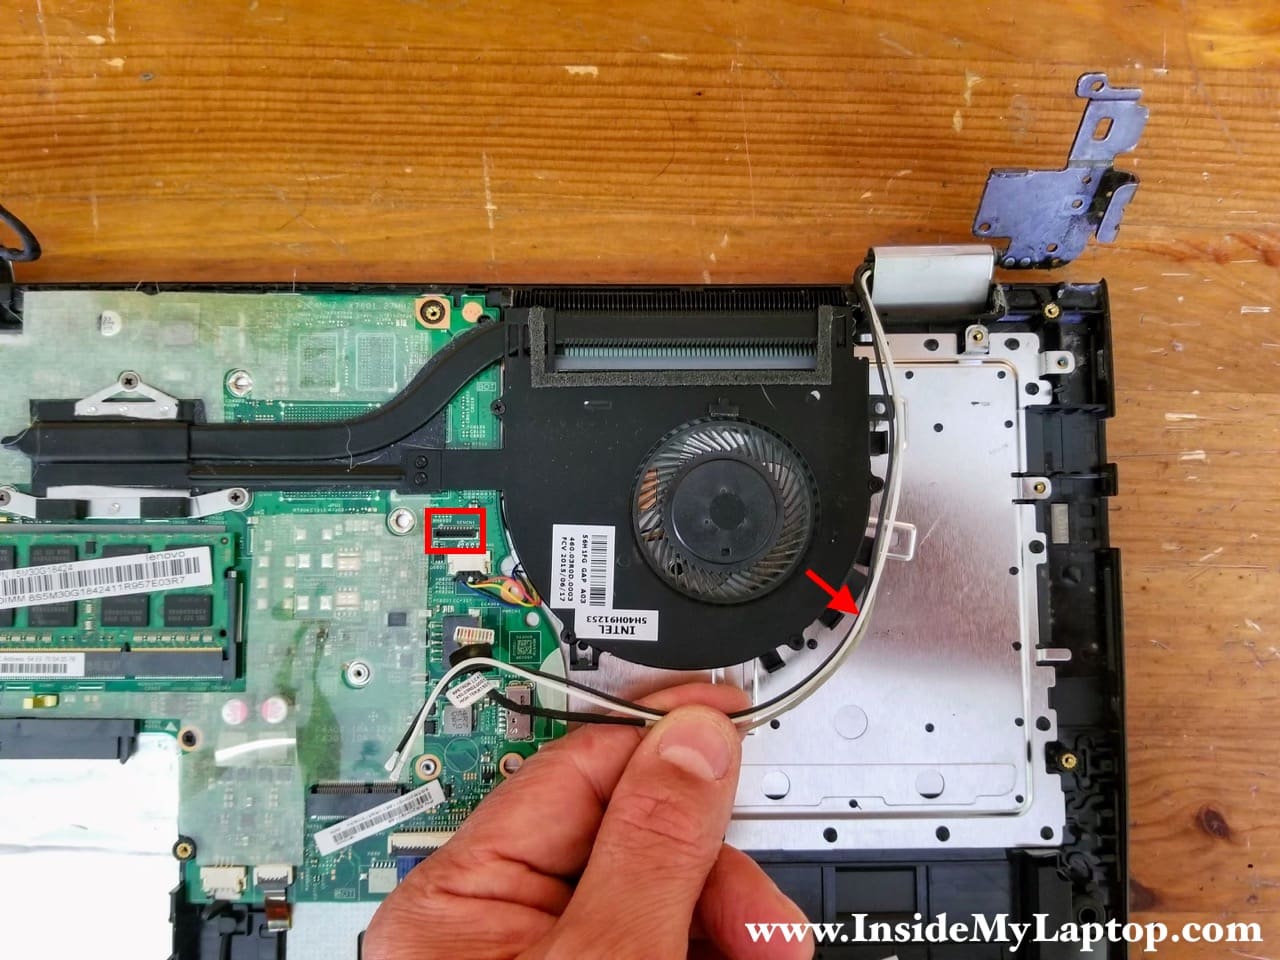
Unplug the webcam cable from the motherboard.
Unroute all cables from the guided path on the side of the cooling fan.
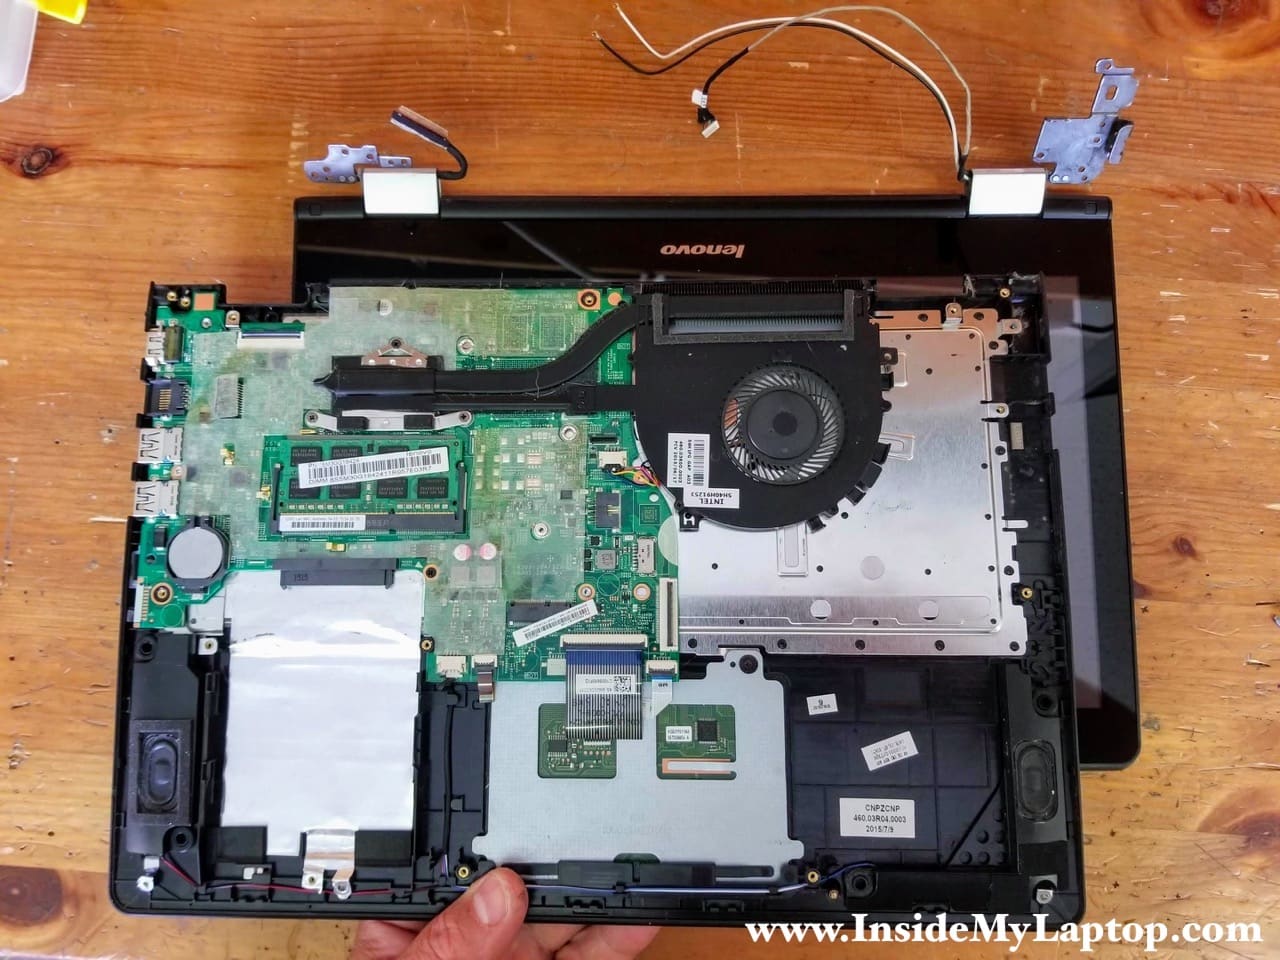
STEP 18.
After both display hinges opened up and cables disconnected and unrouted, you can separate the palmrest assembly from the display.
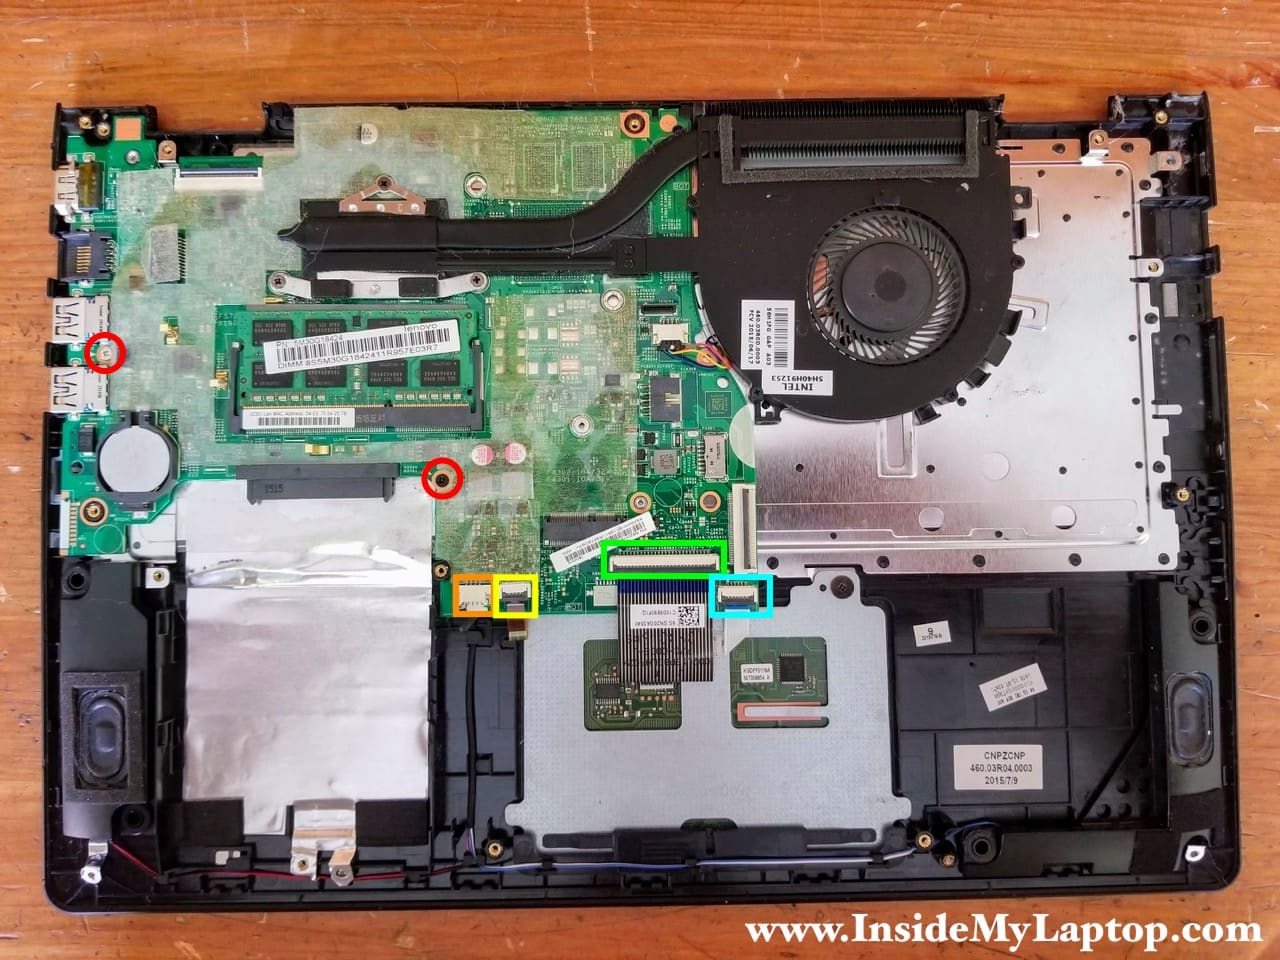
STEP 19.
Remove two screws attaching the motherboard to the palmrest.
Notice that these screws are different.
Disconnect the following color-coded cables from the motherboard:
– Speaker cable (orange).
– Keyboard backlight cable (yellow).
– Keyboard cable (green).
– Touchpad cable (light blue).
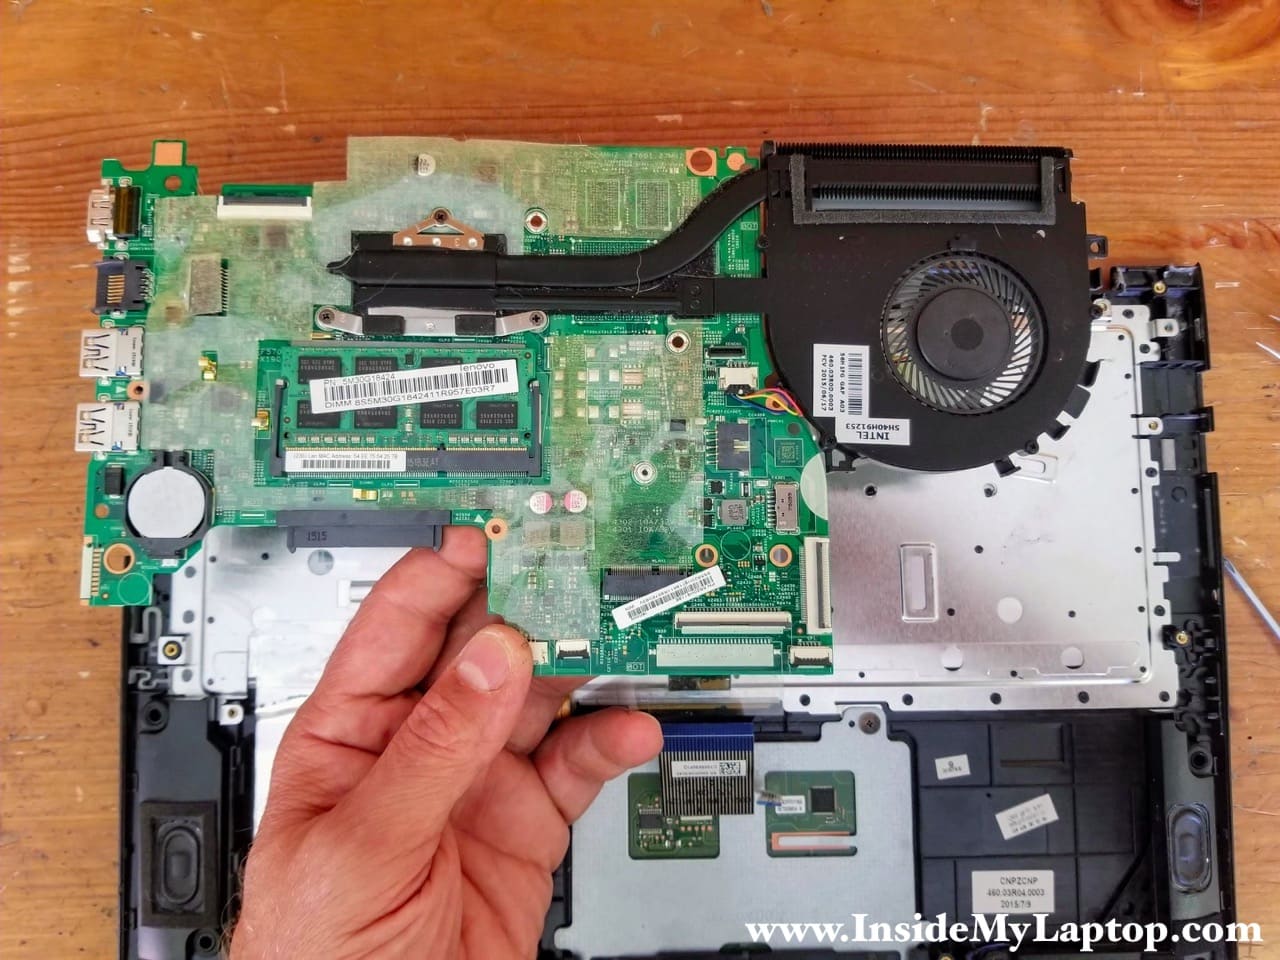
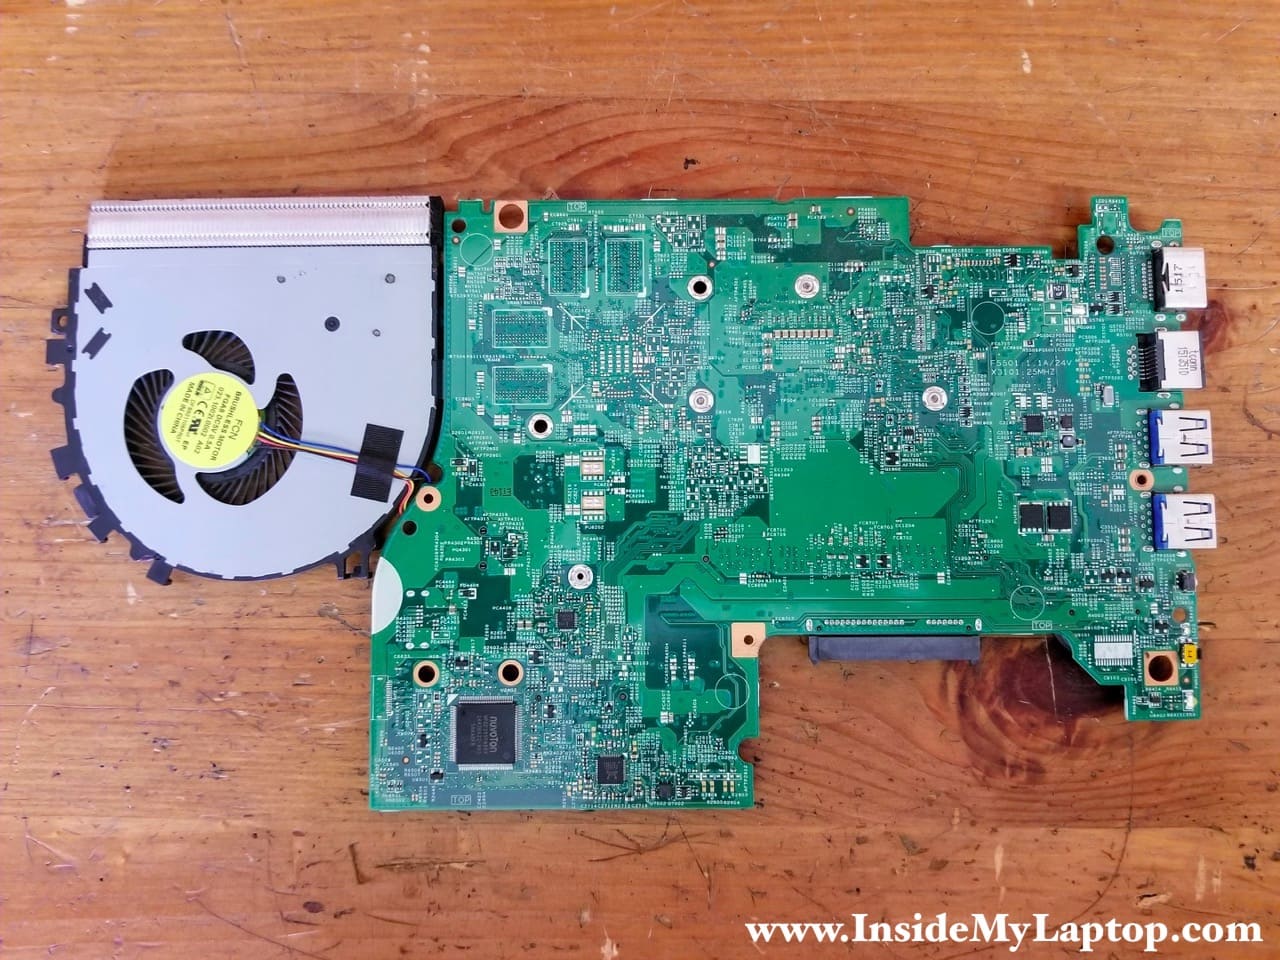
STEP 20.
Remove the motherboard.
Here’s a picture of the other side just in case you need it.
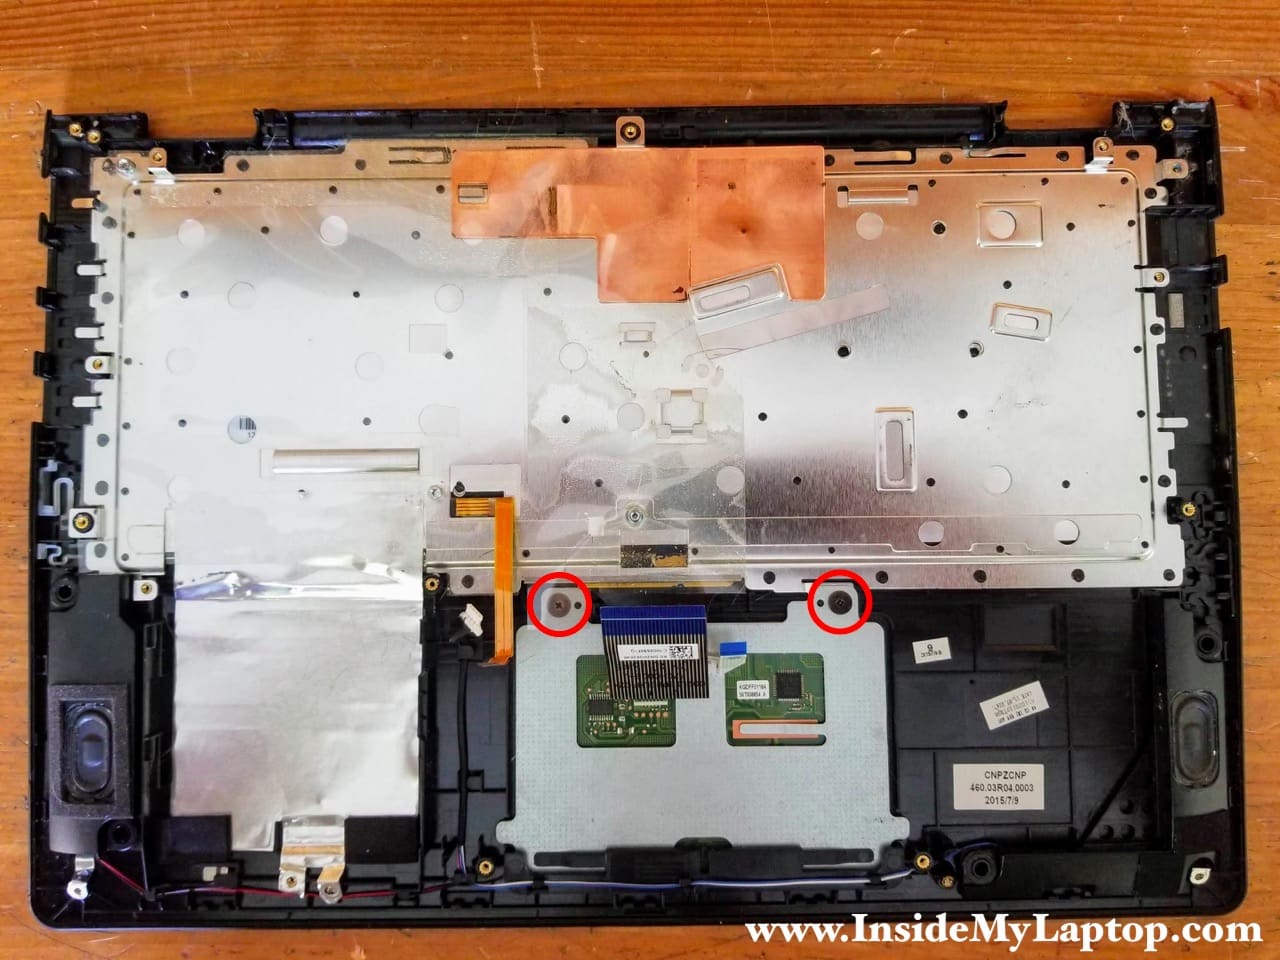
In Lenovo Flex 3-1470 laptop the keyboard is permanently riveted to the palmrest and cannot be easily removed and replaced.
The touchpad secured to the palmrest by two screws and it is removable.
Related post: How to disassemble Lenovo ideapad Flex 5-1470 laptop.
Dheeraj kumar
Lenovo flex, it is not restart only shut down very slowly. Please guide me to solve this issue.
IML Tech
Dheeraj, it’s hard to tell what’s going on without running diagnostics.
If your laptop takes a very long to start up or shut down, I would take a look at the hard drive. This could be hard drive related issue.
null
The keyboard ribbon won’t properly re-set itself into the connector even with the white shim and being taped down solidly… worked fine before it was disconnected too. Some of the keys may work sometimes but overall it’s a dud now and I can’t figure out how I borked it as I’m rather careful with the stuff and RTFM first too. What a piece of garbage this thing’s casing and exterior is compared to a Thinkpad for real. Thanks for the visuals. ^_^