The following guide explains how to remove and replace damaged or failed LCD screen on an Asus U56E laptop.
As you see, in my case the LCD was cracked.
Before you start, make sure the computer is turned off.
STEP 1.
Unlock and remove the battery.

STEP 2.
Remove six screw covers located on the display bezel.
There are four square screw covers on the upper side of the display and two more round covers on the lower part.

You can remove the screw cover with a sharp object.
After the screw covers removed, glue it somewhere on the bezel so you don’t loose it during the disassembly process. The cover has sticky tape on the bottom.

STEP 3.
Remove all screws found under those covers.

STEP 4.
Insert your fingers under the bezel and start separating the bezel from the display back cover.
There are hidden plastic latches securing the bezel. You’ll have to wiggle the bezel in order to unlock hidden latches.

STEP 5.
After you separated the bezel from the display back cover on the upper side of the display assembly, move the lower part.

STEP 6.
Remove the bezel.

STEP 7.
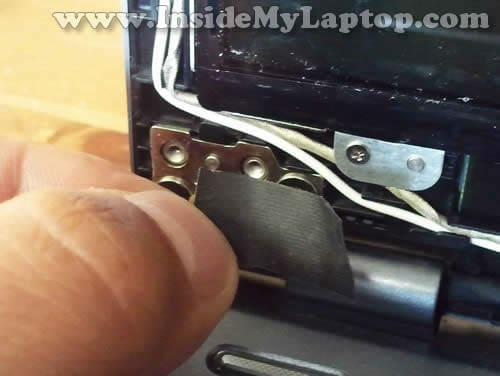
Remove black tape from the left display hinge.
I’m not sure about the purpose of this tape but it was blocking one of the screws. I guess it’s securing display cables somehow.

STEP 8.
Remove black tape from the right hinge.

STEP 9.
Remove four screws securing the LCD assembly to the display back cover.

STEP 10.
Now you should be able to separate the LCD from the display back cover.
Place the LCD face down on the palmrest/keyboard assembly.

STEP 11.
Now you can access the video cable and disconnect it from the LCD.

STEP 12.
Unglue clear tape securing the video cable connector.

STEP 13.
Unplug the video cable connector from the LCD.

STEP 14.
Remove the damaged/failed LCD and replace it with a new one.
Assemble the laptop following all disassembly steps in the reverse direction.

Asus U56E has a LED backlit LCD screen installed.
The LCD model number is located  on the back side of the screen. In my laptop I had the following LCD installed: N156BGE-L41 Rev.C1.

In the next post I will explain how to disassemble the laptop case.
paul
my asus u56e keyboard has stopped functioning properly and 8 or 9 keys do not work or display the wrong letter or number. is there any easy way of accessing the keyboard and ribbon or will i have to unscrew the back of the laptop?. At moment i have to use a usb or onscreen keyboard.
many thanks
IML Tech
@ paul,
If some keyboard keys stopped working, most likely you will have to replace the keyboard. Unfortunately, it’s not easy. The keyboard is part of the palmrest assembly.
Take a look at this picture of the palmrest assembly (back side) for Asus U56E.
There is no easy way to access the cable, you’ll have to disassemble the laptop for that. This video tutorial explains how to remove the palmrest assembly. You will see how to disconnect the cable at 3:30.
After the palmrest assembly removed you will have to separate the keyboard and replace it with a new one. New keyboards available in ebay for about $20-30.
Hope it helps.
Richard Stone
This video sure is the best info for replacing the cracked screen!!! location of the hidden screws was very helpful. These screws sure are very small and my old fingers struggled. I was careful to order the same screen after getting the numbers from the old one. Ebay was my choice for replacement order. Same day free shipping. Thank you for your informing video!!