In this guide I show how to disassemble Lenovo ideapad 110-15ISK (model 80UD) manufactured in the year 2017.
In the first part of the guide I will show how disassemble the laptop base and in the second part I will take apart the display panel and remove the LCD screen.
Both parts are independent form each other and if you need to replace the screen, you can jump to the second part.
By the way, if your Lenovo ideapad 110 series laptop looks different than one shown in this guide, take a look at my previous guide for model 80T7 manufactured in 2016.
Lenovo ideapad 110-15ISK base disassembly.
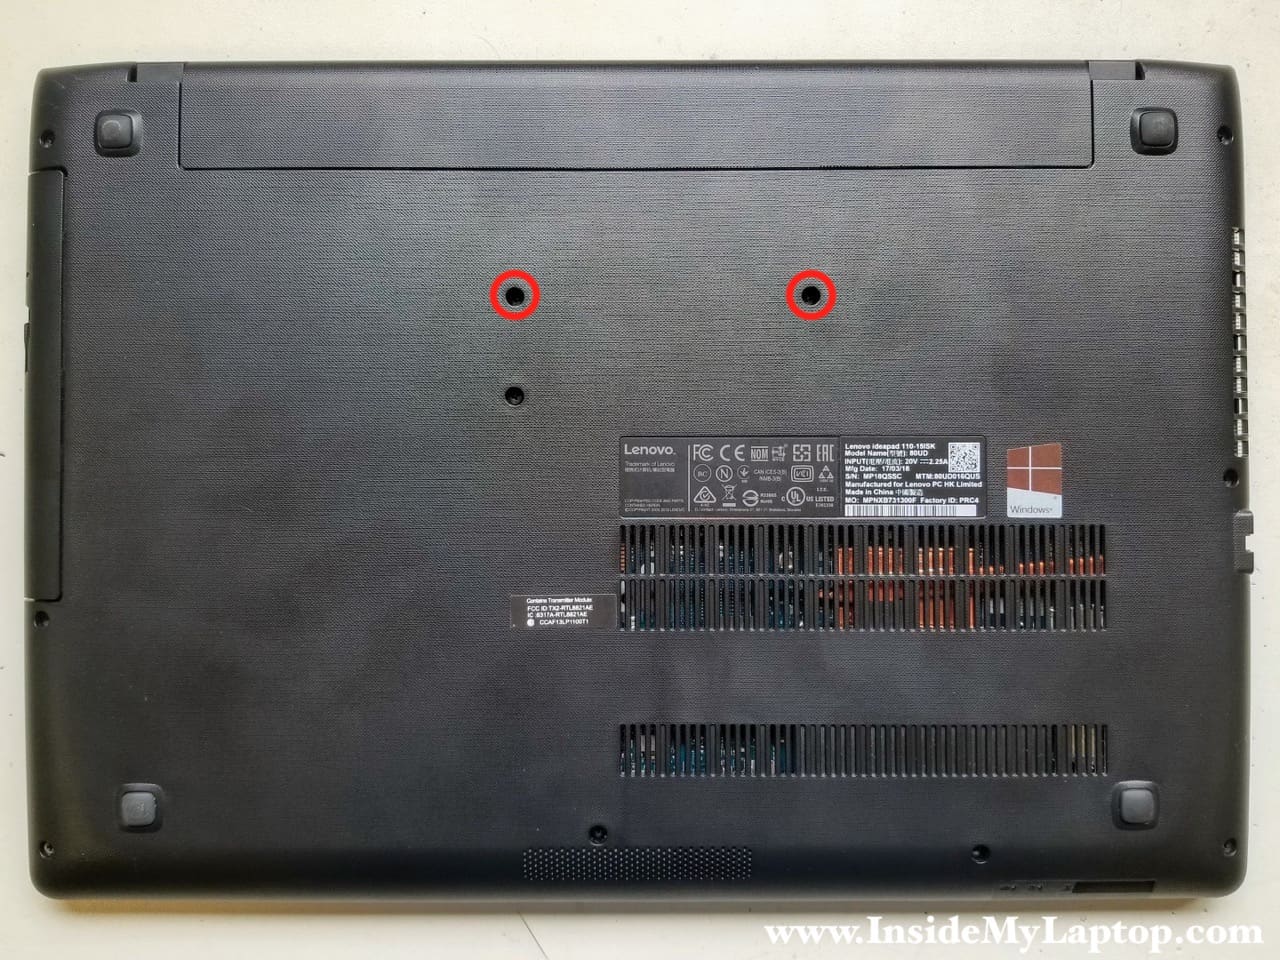
STEP 1.
Remove two screws from the bottom. These two screws securing the keyboard.
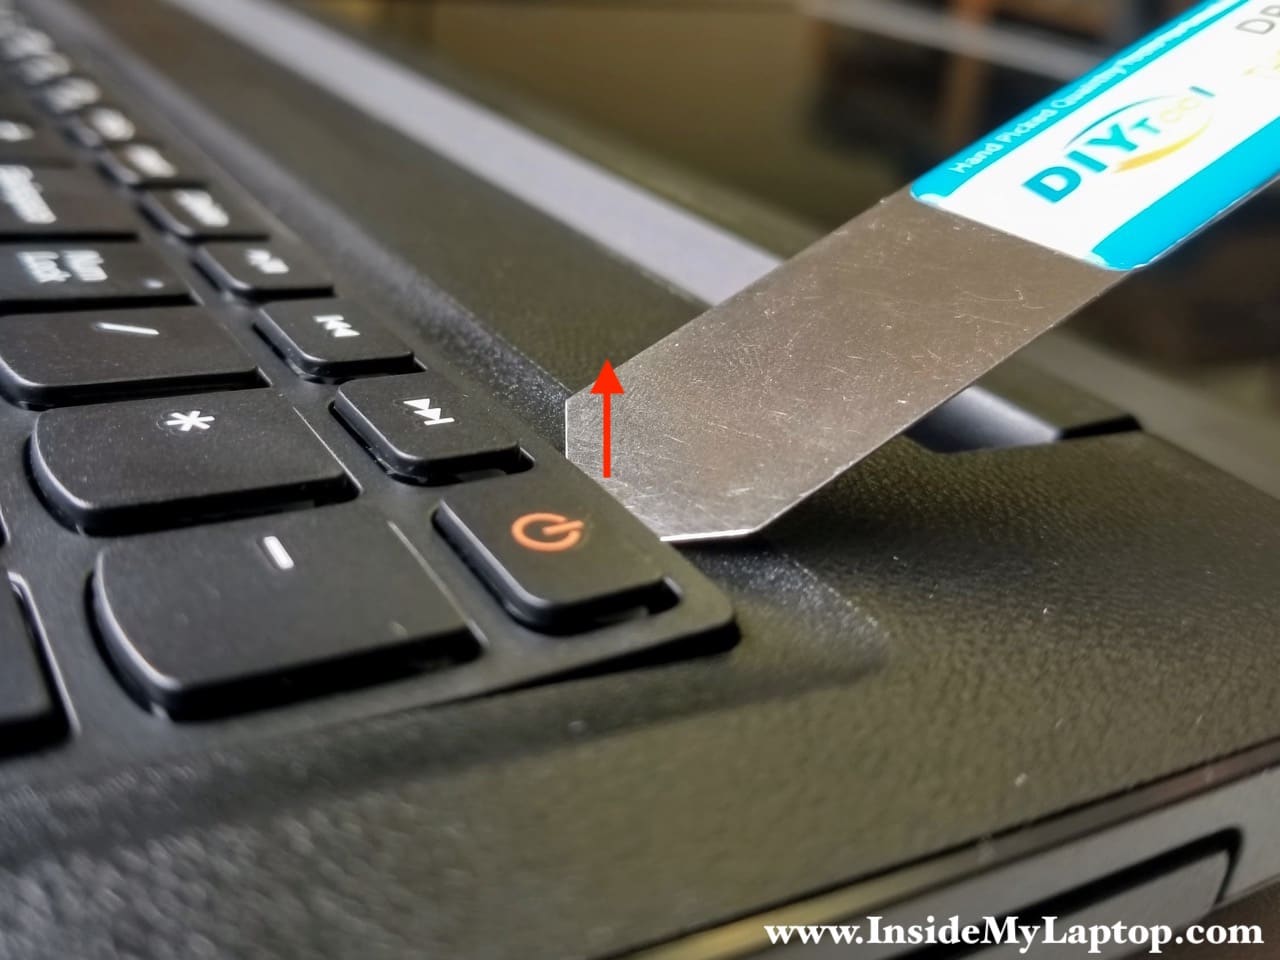
STEP 2.
There are many hidden latches fastening the keyboard to the top case assembly.
You will need a thin case opening tool to separate the keyboard from the top case.
Insert the opening tool in the gap just above the keyboard somewhere close to the power button.

STEP 3.
Pry the keyboard up.
STEP 4.
Keep moving the opener tool along top side of the keyboard and continue separating it from the top case.

STEP 5.
Remove the keyboard from the top case and move it towards the display assembly.

STEP 6.
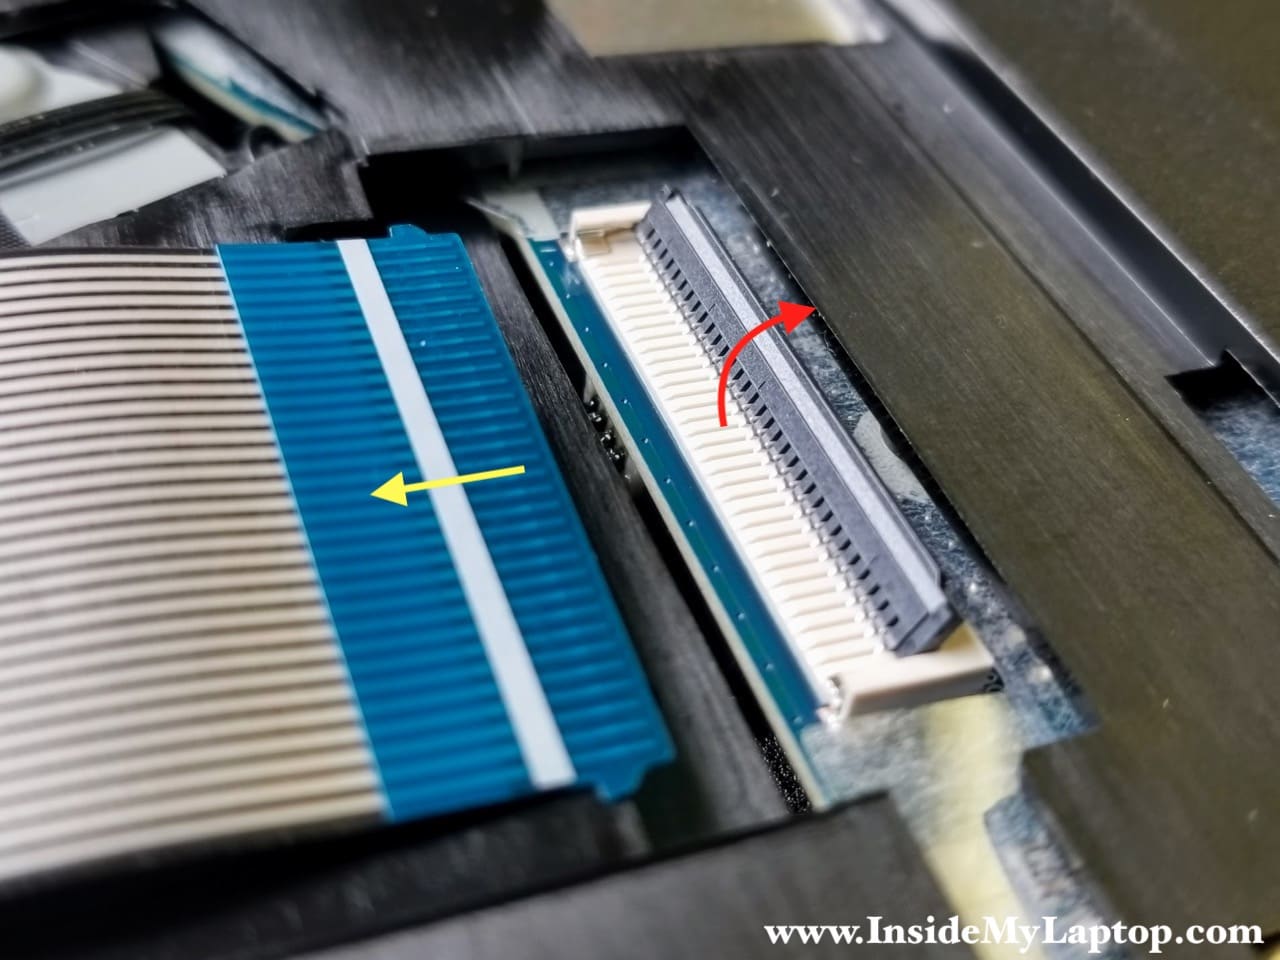
Now you can access the keyboard cable connector and unlock it.
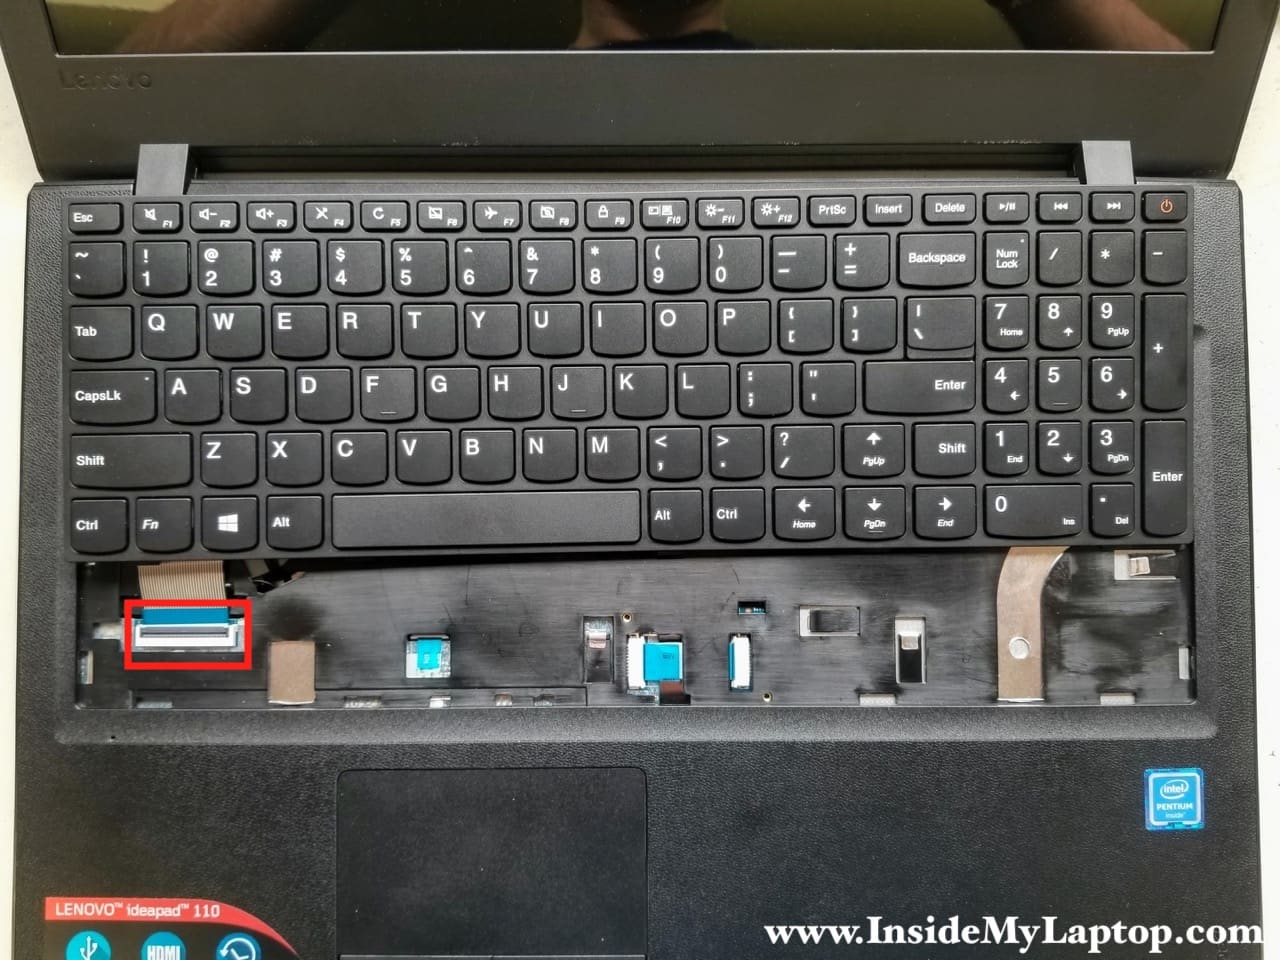
Here’s how to release the cable:
- Unlock the connector by lifting up the locking tab (red arrow).
- Pull the cable out of the connector.
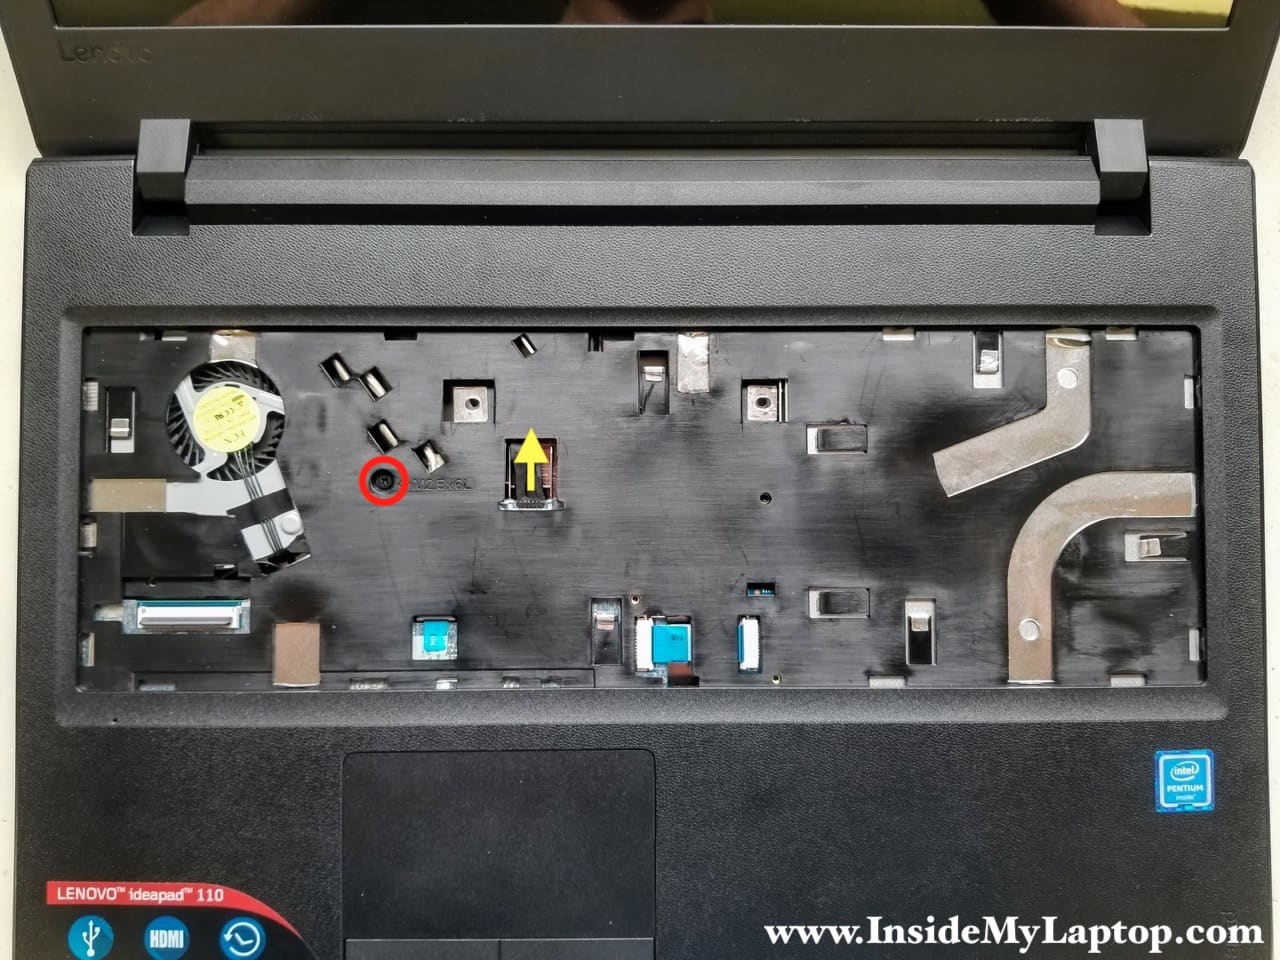
STEP 7.
Disconnect the battery cable (yellow arrow).
Remove one screw securing the top case assembly to the bottom case.
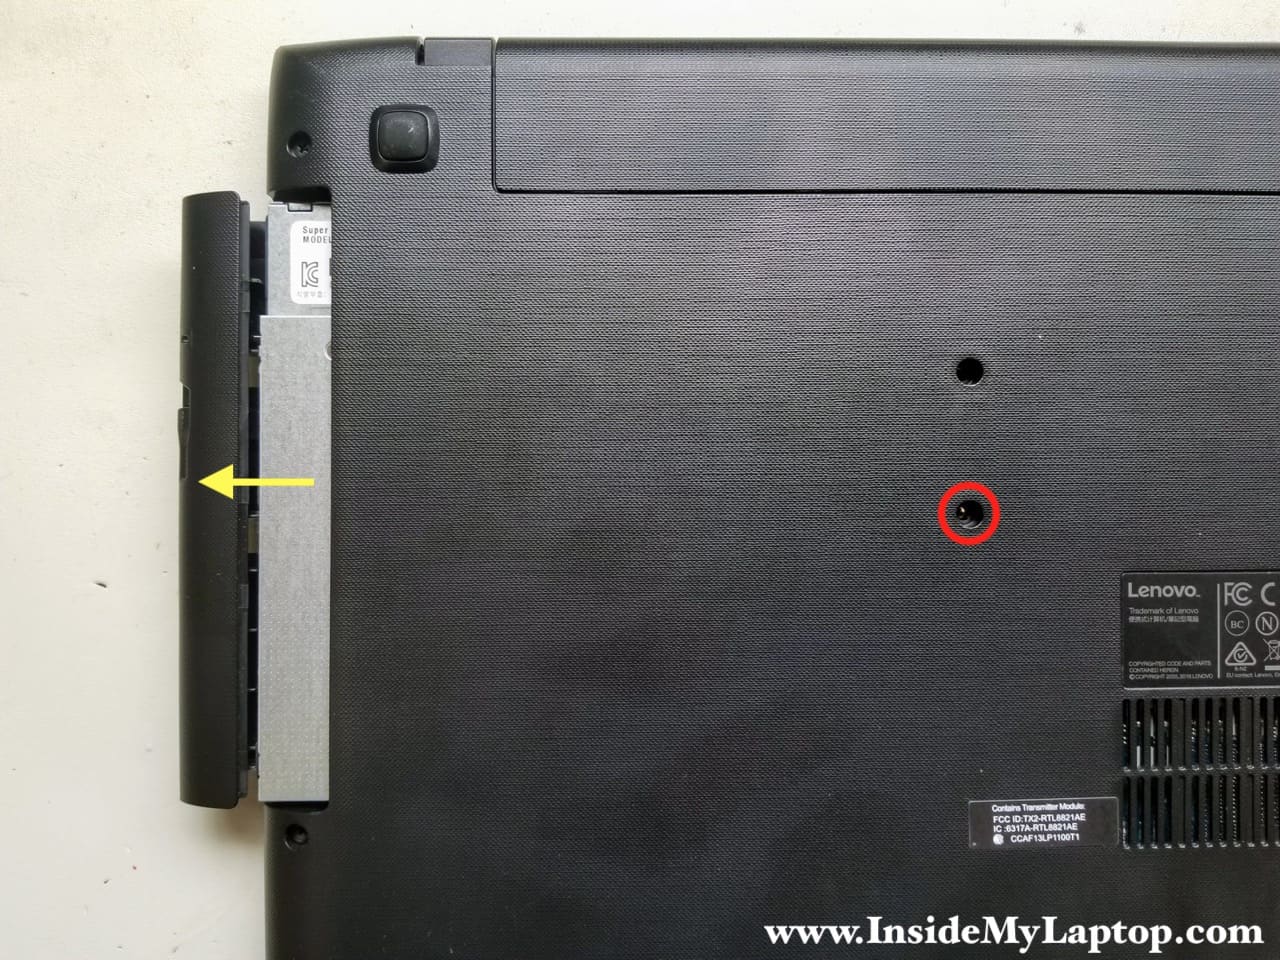
STEP 8.
Remove one screw securing the optical CD DVD drive and pull the drive out.
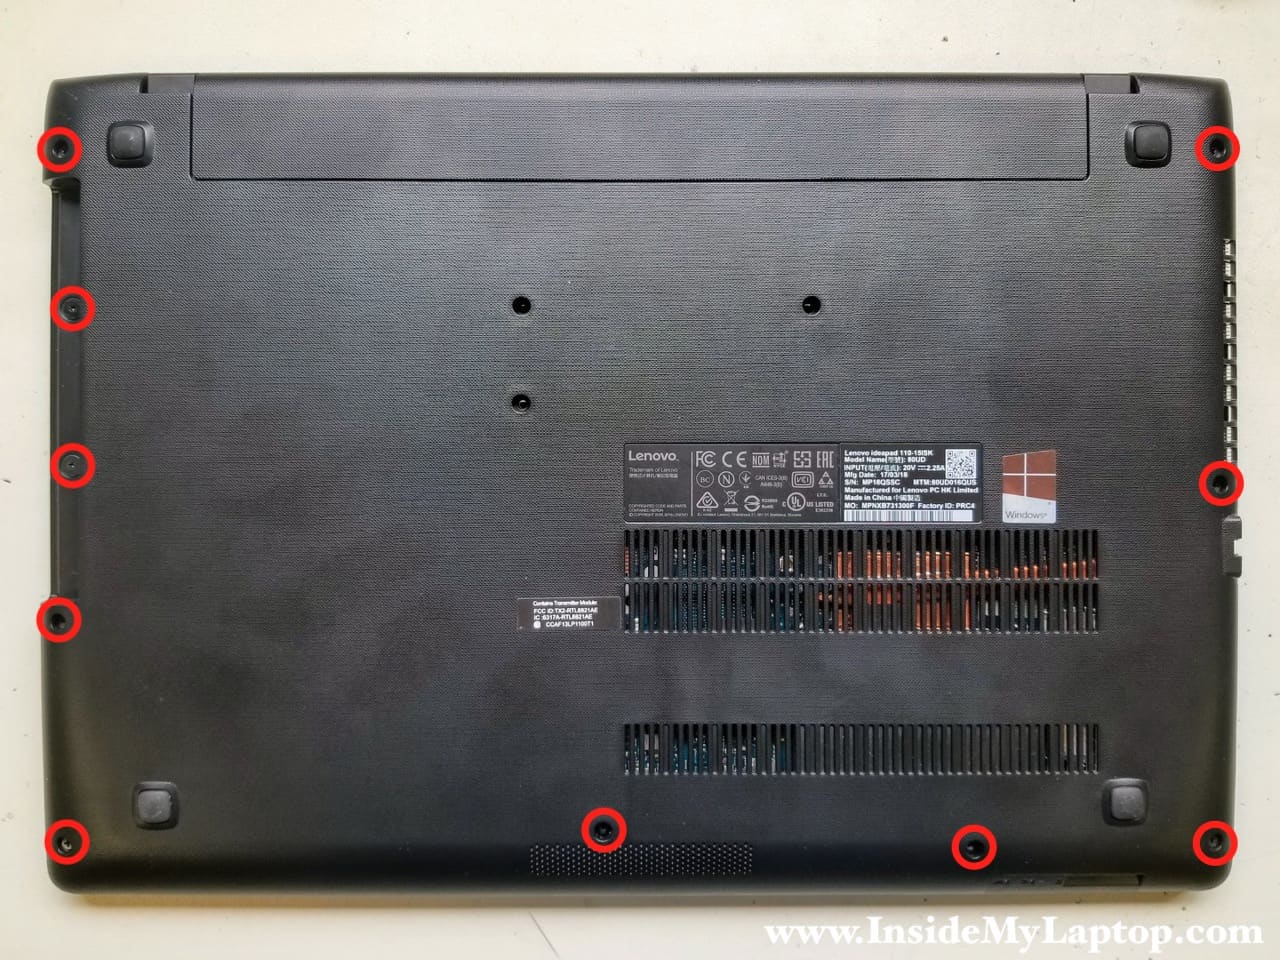
STEP 9.
Remove all remaining screws from the bottom case.
STEP 10.
Start separating the top case from the bottom case using a plastic case opening tool.
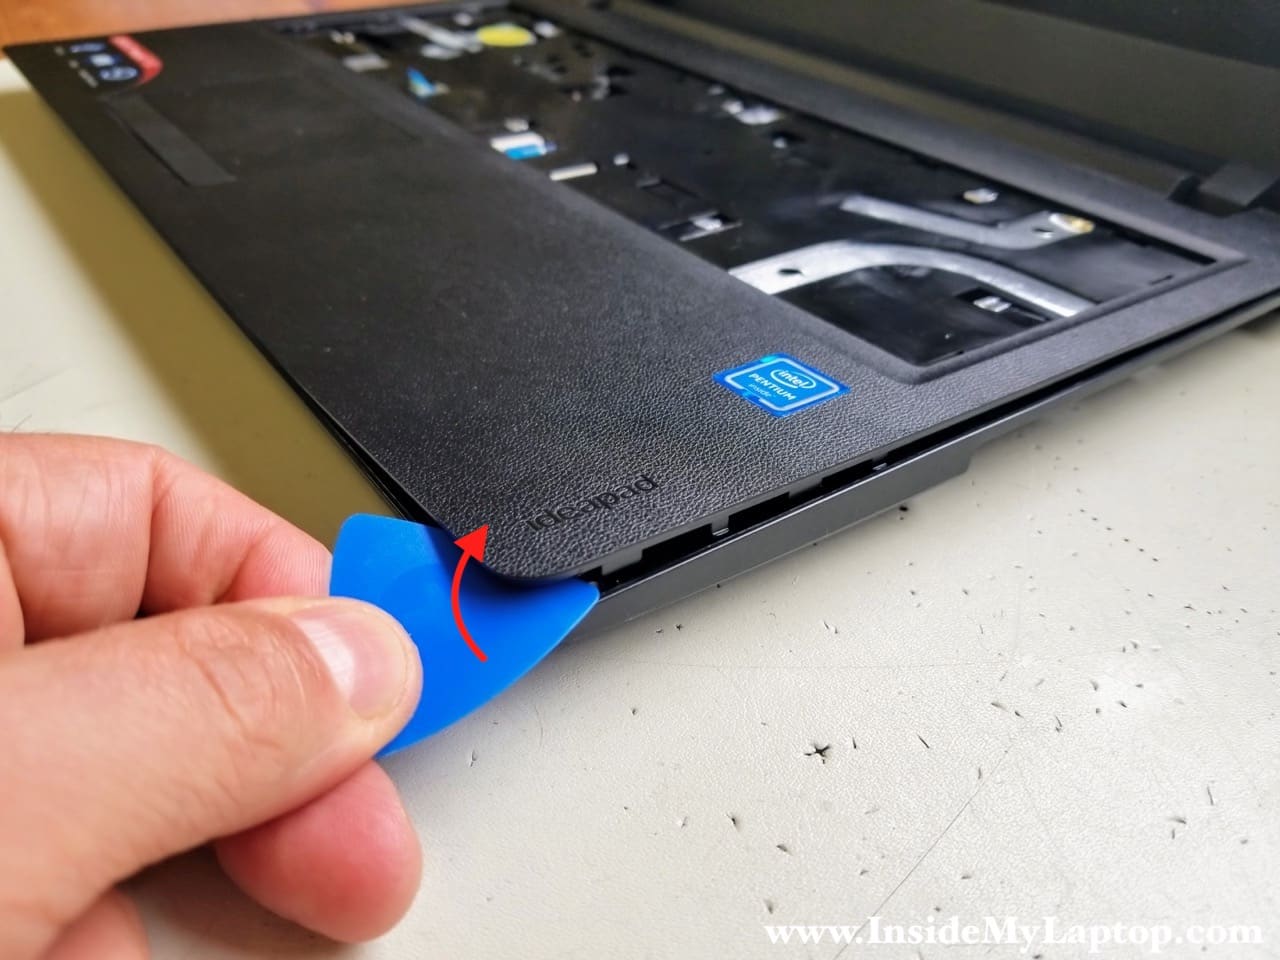
STEP 11.
Turn the laptop upside down and remove the bottom case cover.

STEP 12.
Lenovo ideapad 110-15ISK laptop has the battery attached to the bottom case cover.
In order to remove and replace (if necessary) the battery you’ll have to remove two screws.

STEP 13.
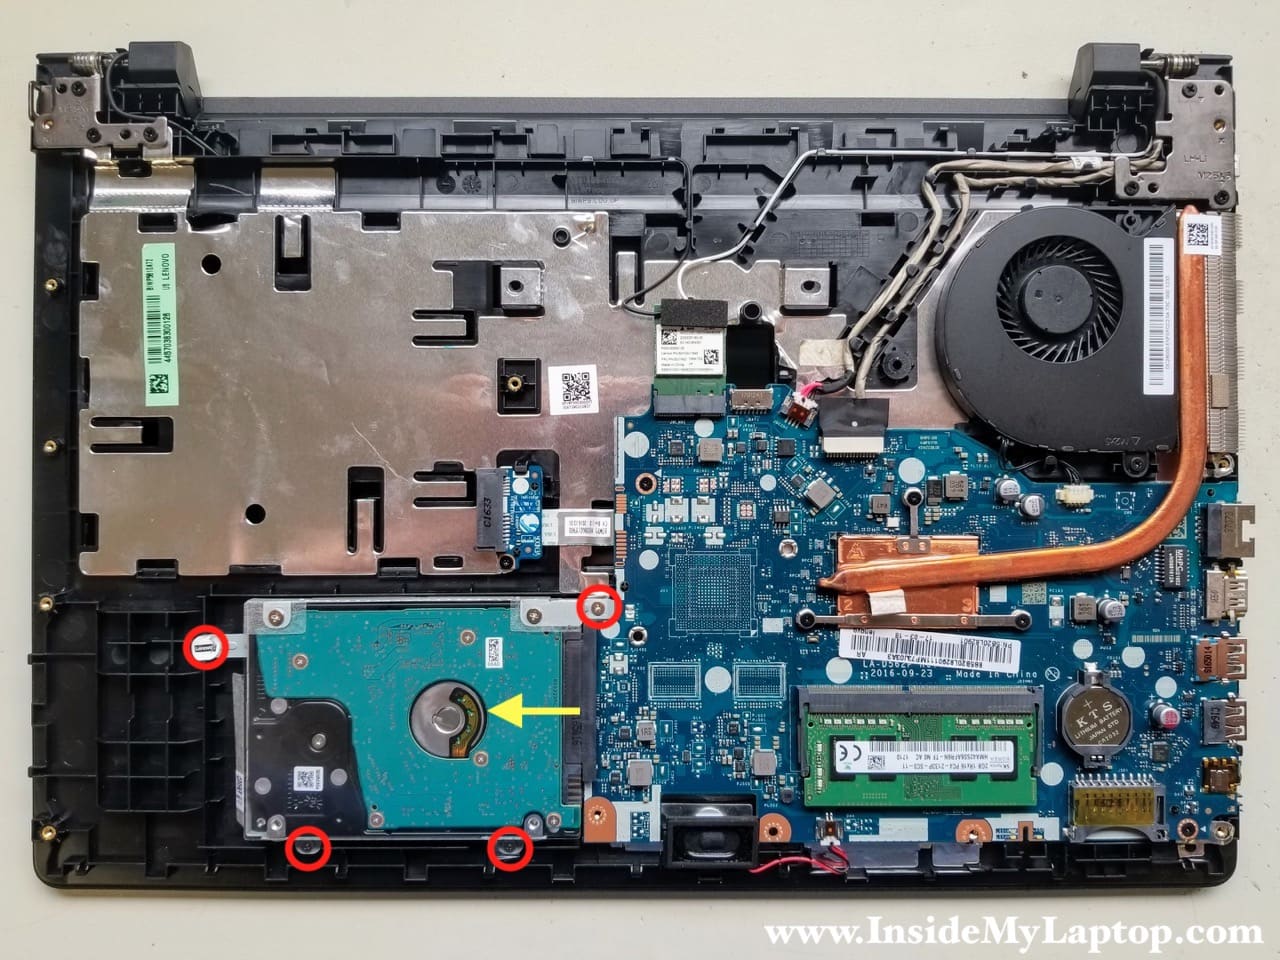
Remove four screws attaching the hard drive caddy to the top case.
Slide the hard drive assembly to the left to disconnect it from the motherboard.
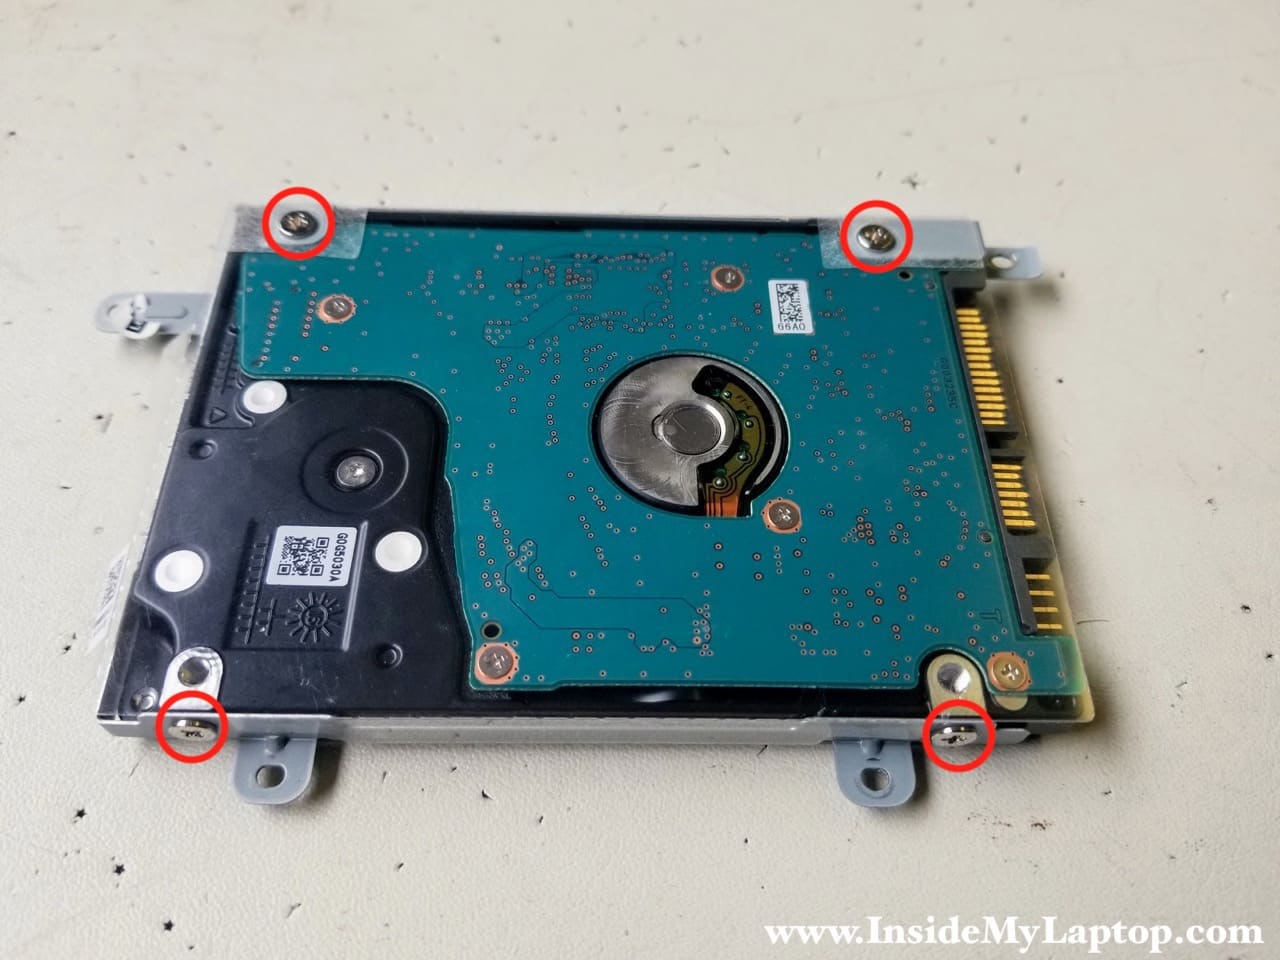
If you are replacing or upgrading the hard drive, you will have to transfer the caddy to the new one.
The caddy is attached to the drive by four screws.
Upgrading this regular hard drive to a 2.5″ SATA solid state drive will improve laptop performance significantly.
STEP 14.
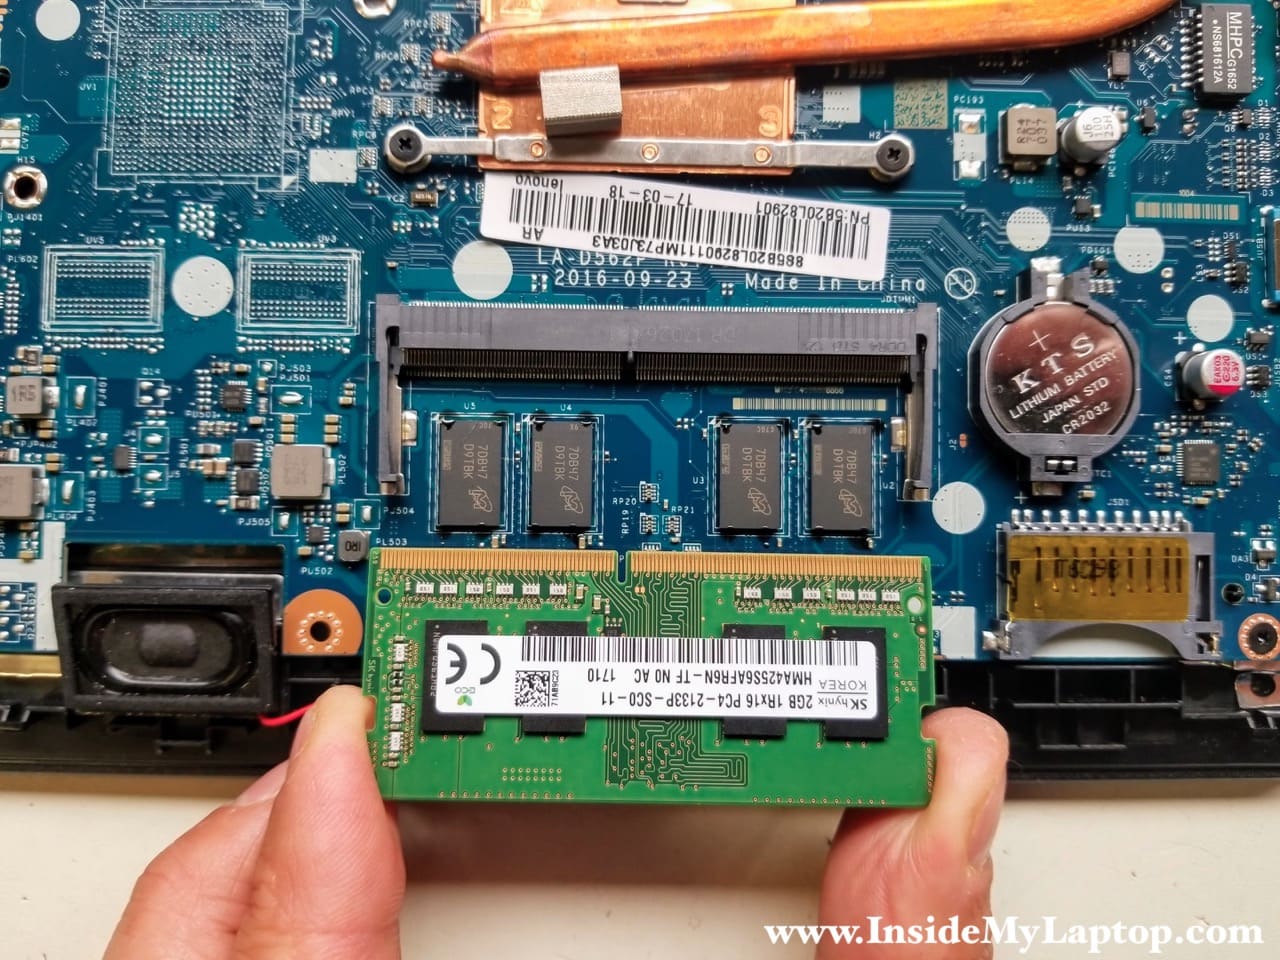
Lenovo ideapad 110-15ISK laptop has only one removable RAM module. It has 4GB RAM integrated into the logic board (four chips by the RAM slot).
You can install up to 16GB DDR4 2400/2666/3200 SODIMM RAM module into this slot. Maximum memory for this model is 20GB (4GB on-board and 16GB in the slot).
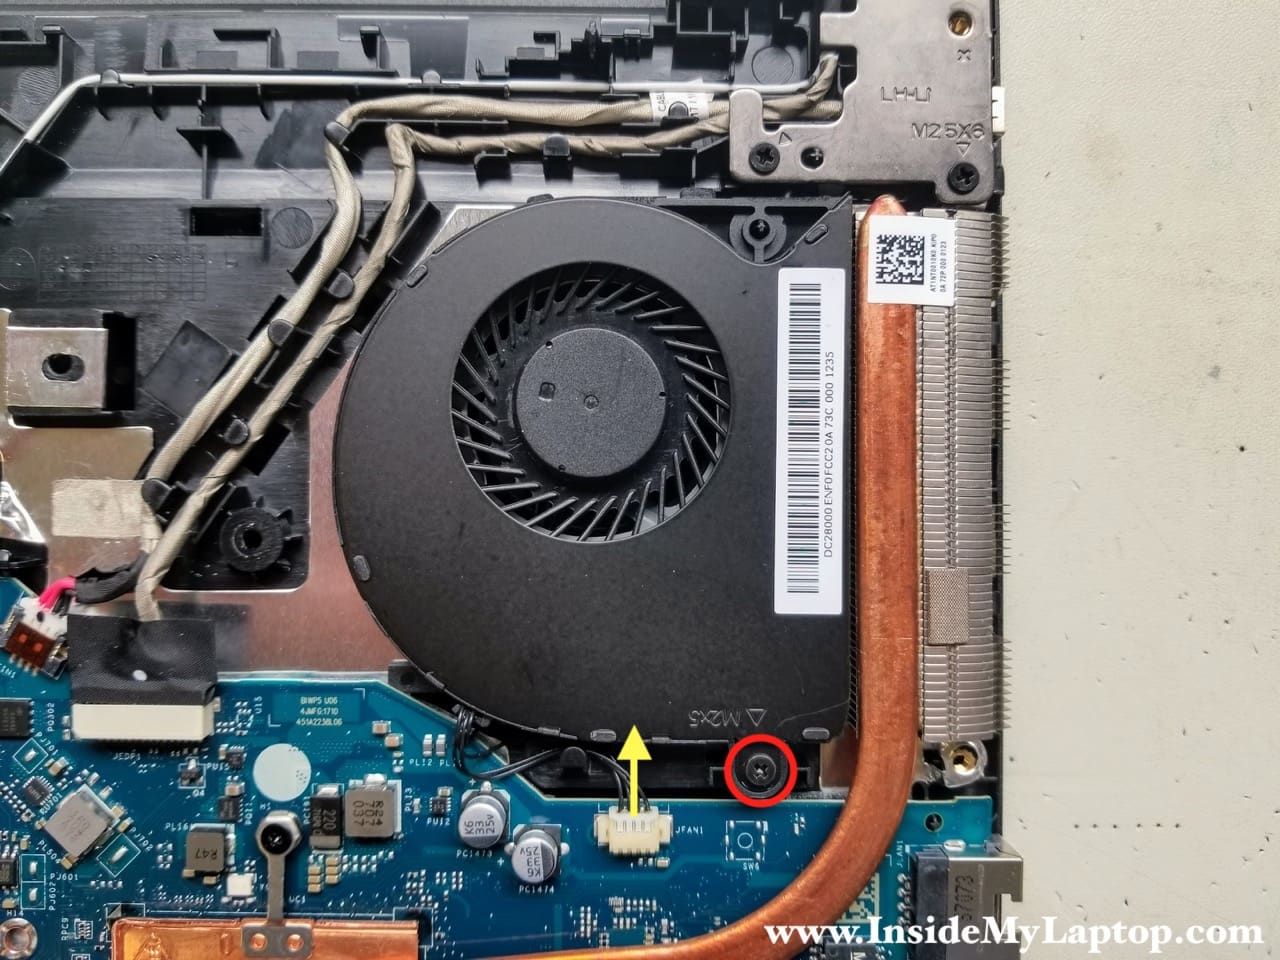
STEP 15.
Disconnect the cooling fan cable from the motherboard and remove one screw securing the fan.
Remove the fan.
STEP 16.
Remove the black pillow securing the wireless card antenna cables.

STEP 17.
Disconnect both antenna cables from the wireless card.

STEP 18.
Remove one screw securing the wireless card and pull it out.

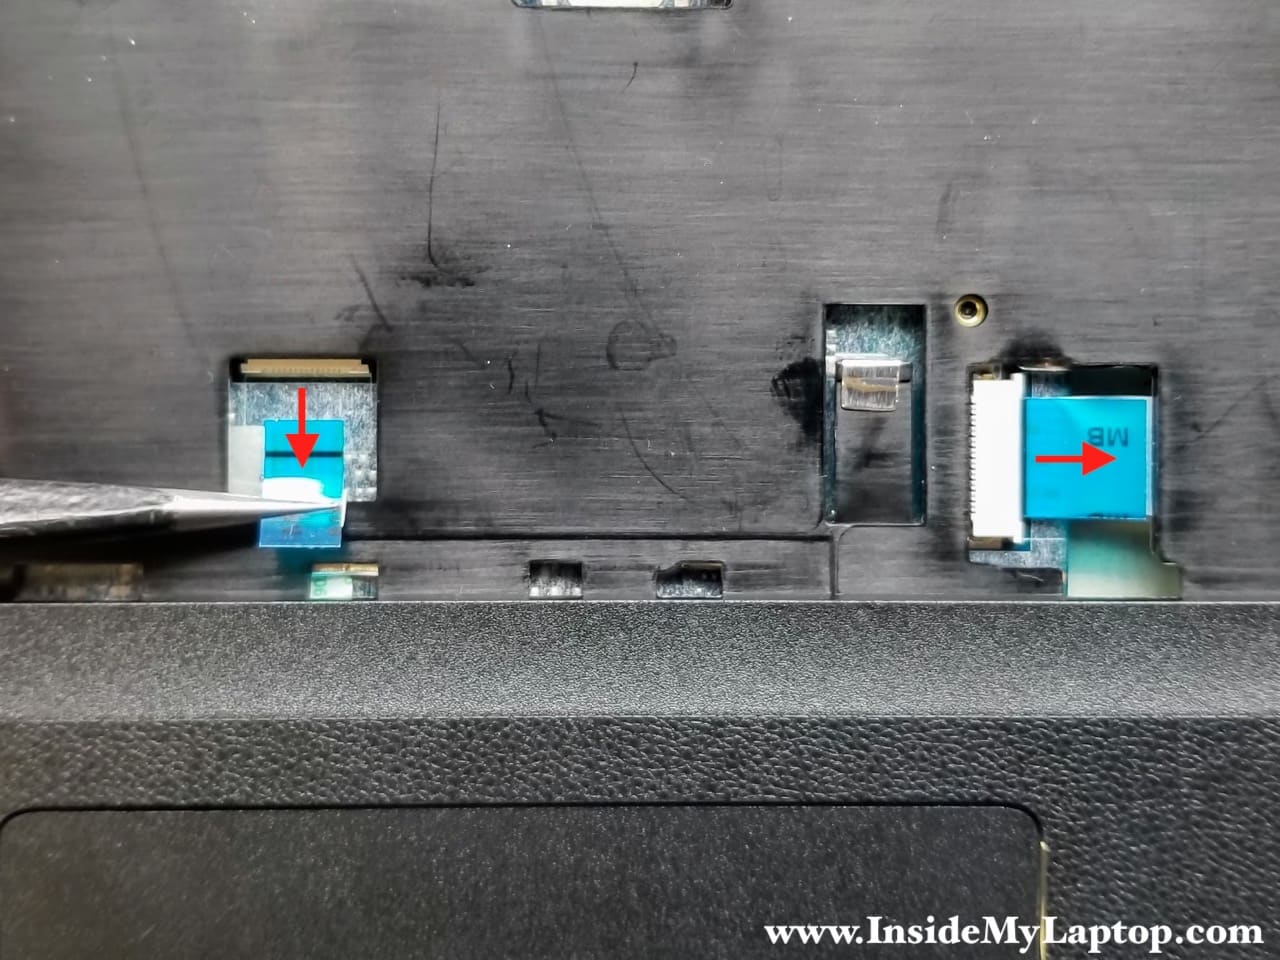
STEP 19.
Disconnect the touchpad cable and the optical drive cable from the motherboard.
Simply unplug both cables using the pull tab.
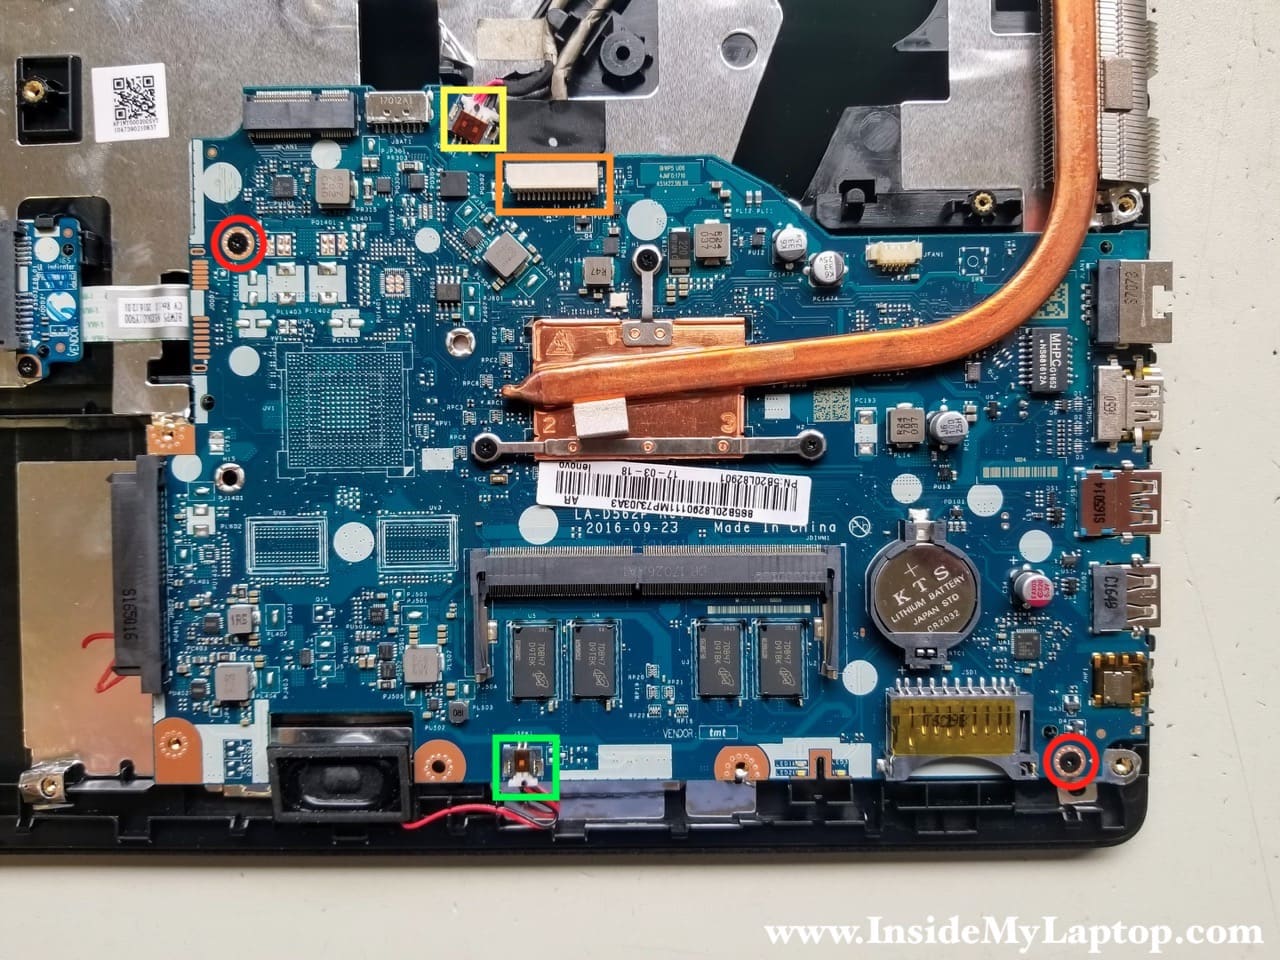
STEP 20.
Disconnect the following cables from the motherboard:
- DC-IN power jack cable (yellow square)
- Display video cable (orange rectangle)
- Speaker cable (green square)
Remove two screws securing the motherboard.
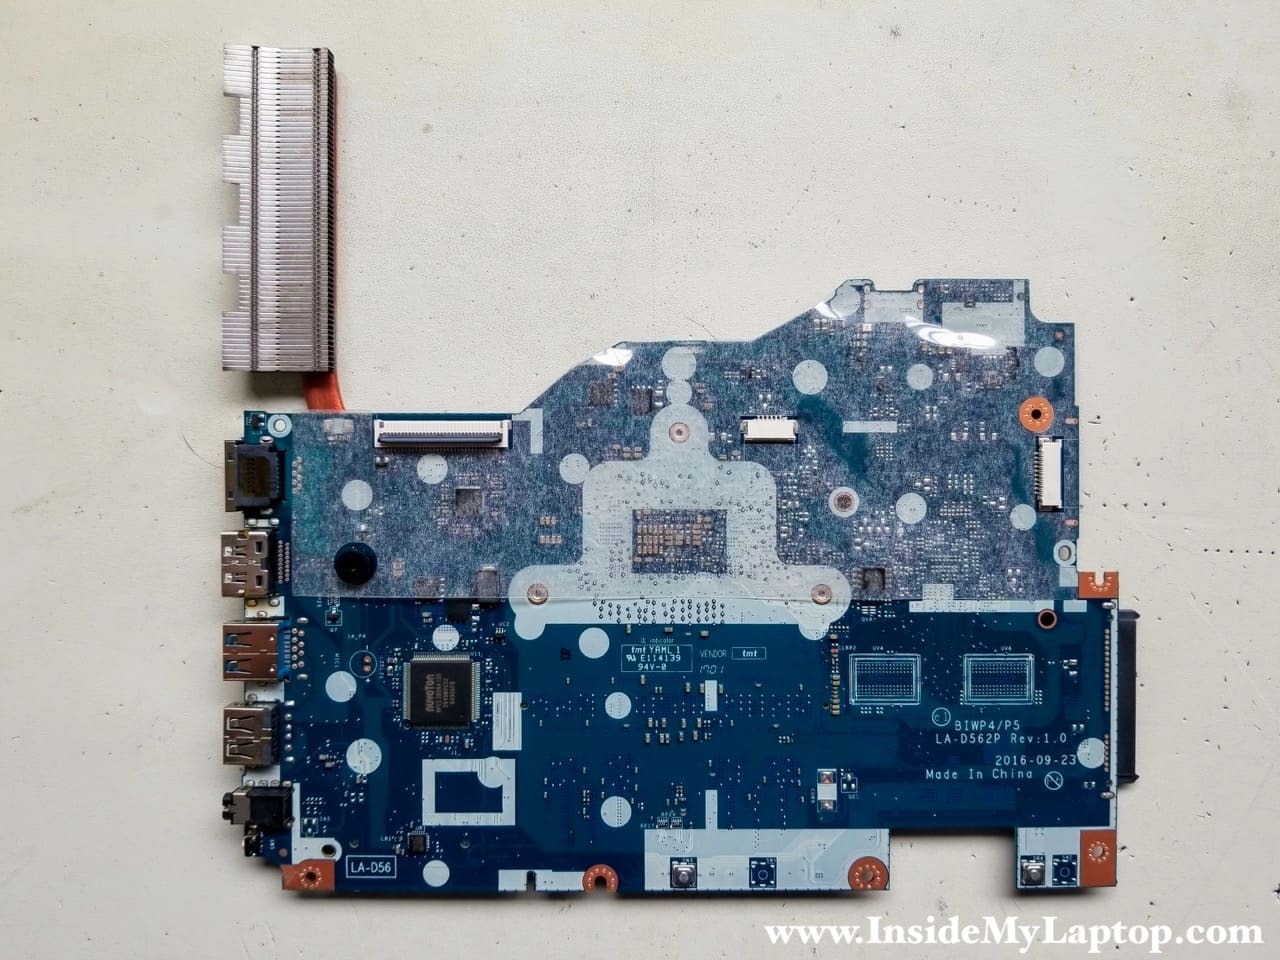
STEP 21.
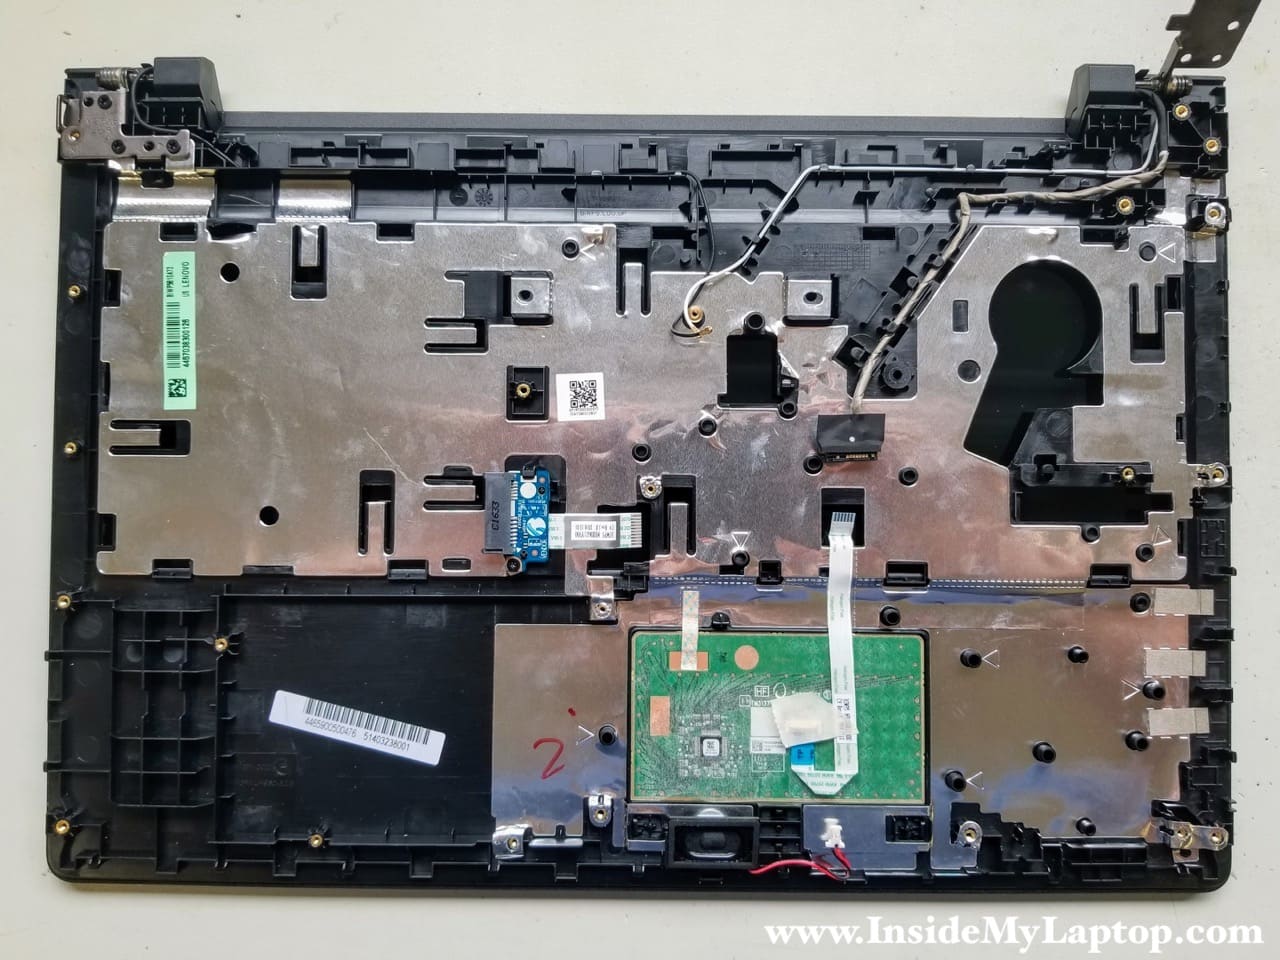
Separate the motherboard from the top case and remove it.

Here’s a picture of the other side.
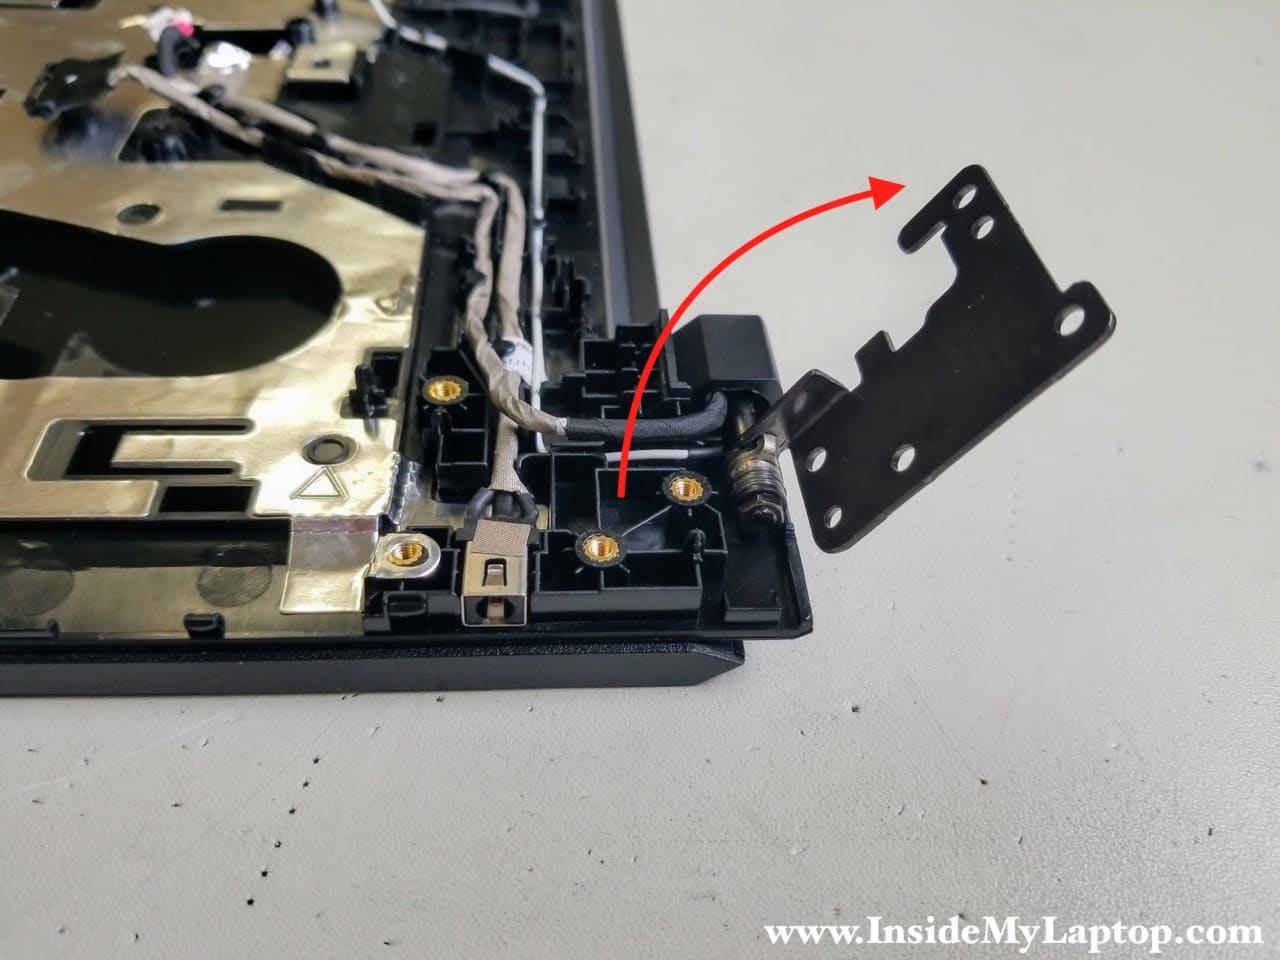
STEP 22.
The DC-IN power jack is mounted under the hinge.
Remove three screws securing the hinge.

STEP 23.
Open up the hinge so you can access the DC-IN power jack.
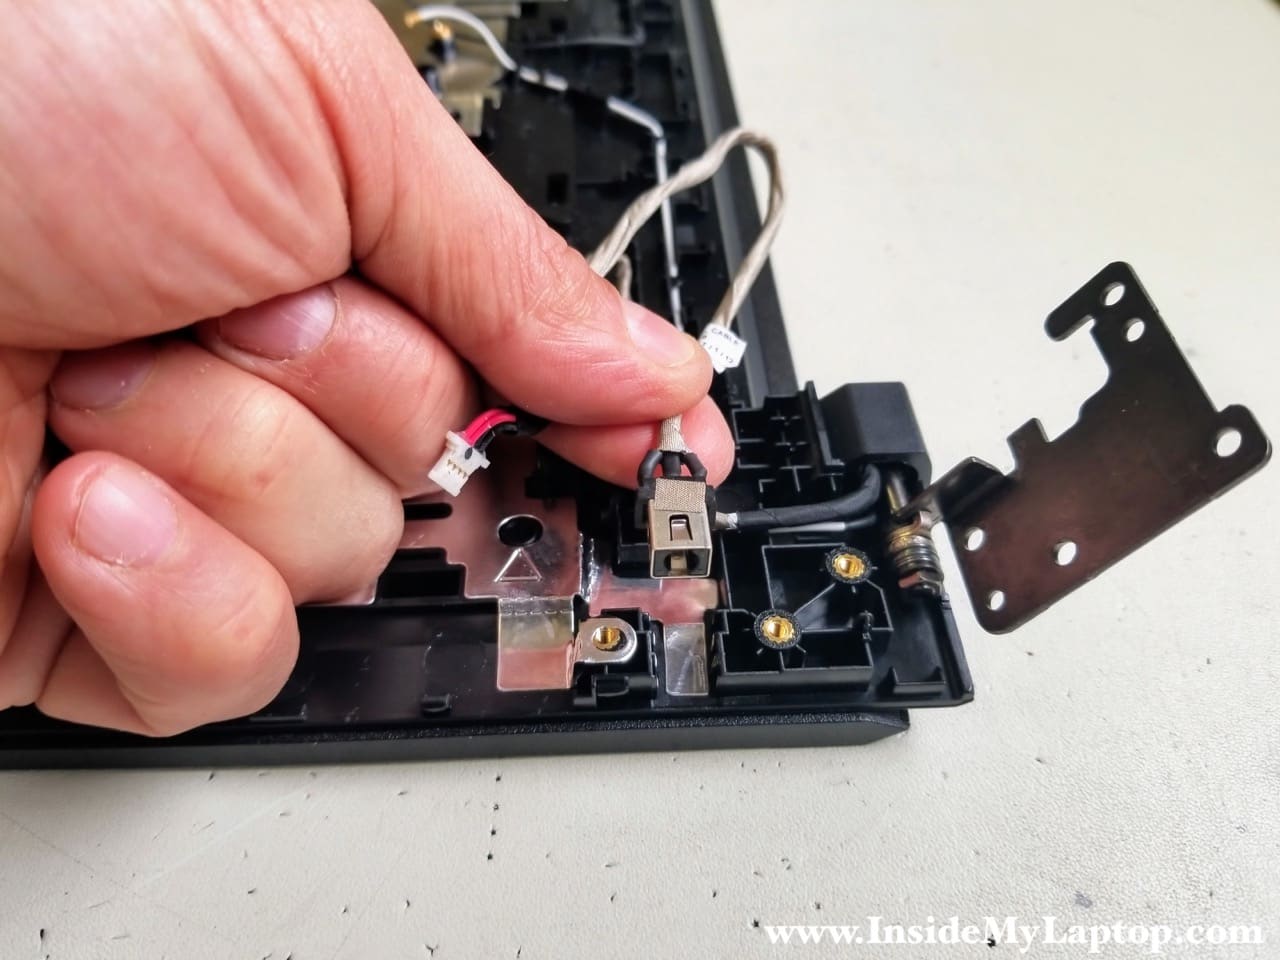
STEP 24.
Un-route the harness from the top case and remove the DC-IN power jack. The jack is attached to the housing with adhesive tape underneath.
The trackpad is glued to the top case.
Lenovo ideapad 110-15ISK screen removal.
The LCD screen removal can be done while the laptop base is still assembled.
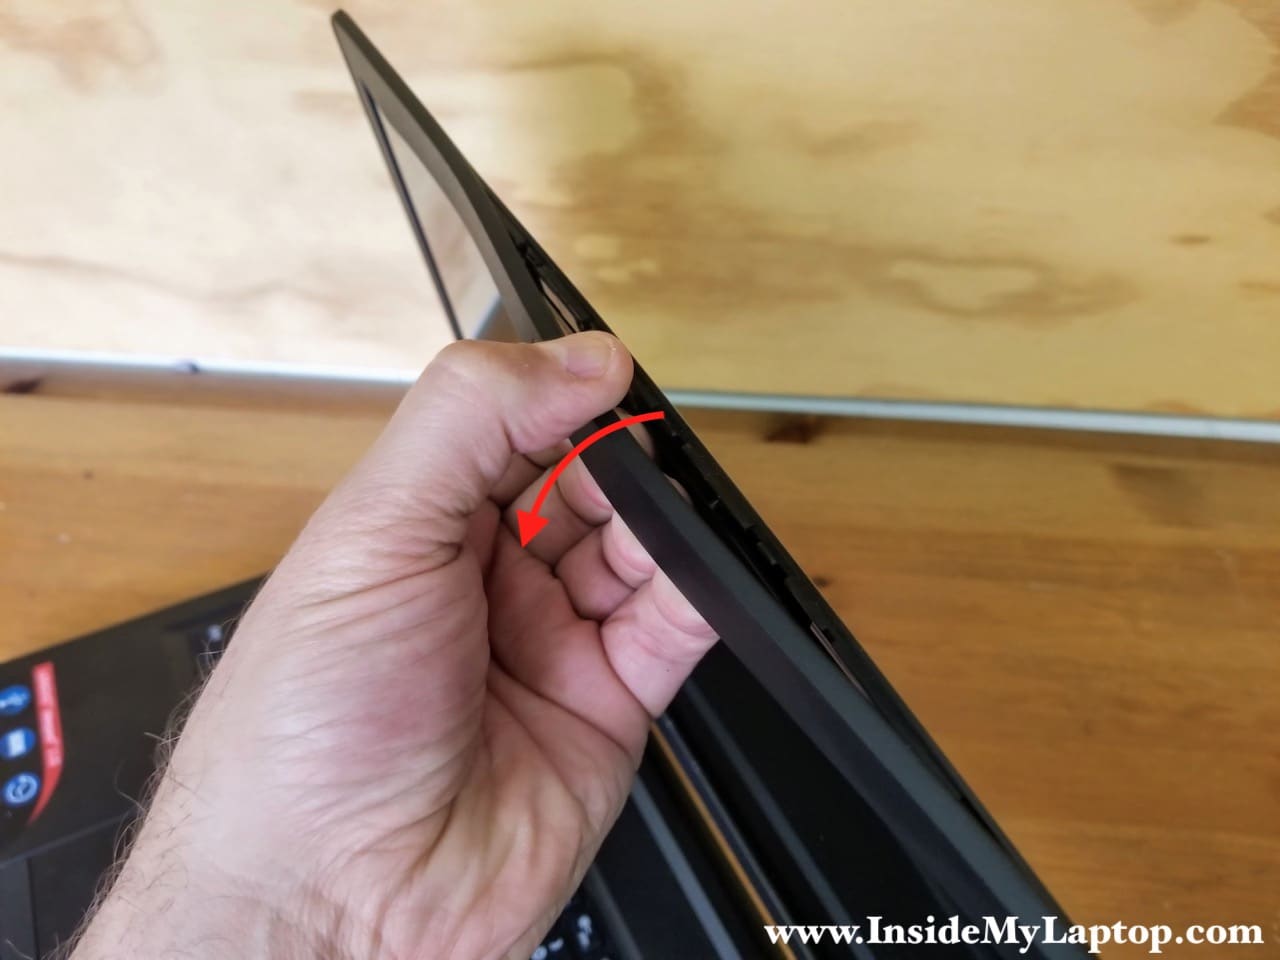
STEP 1.
Start separating the screen bezel from the display back cover on the top. Insert your fingers between the bezel and the screen.
Wiggle the bezel to unfasten it from the back cover.
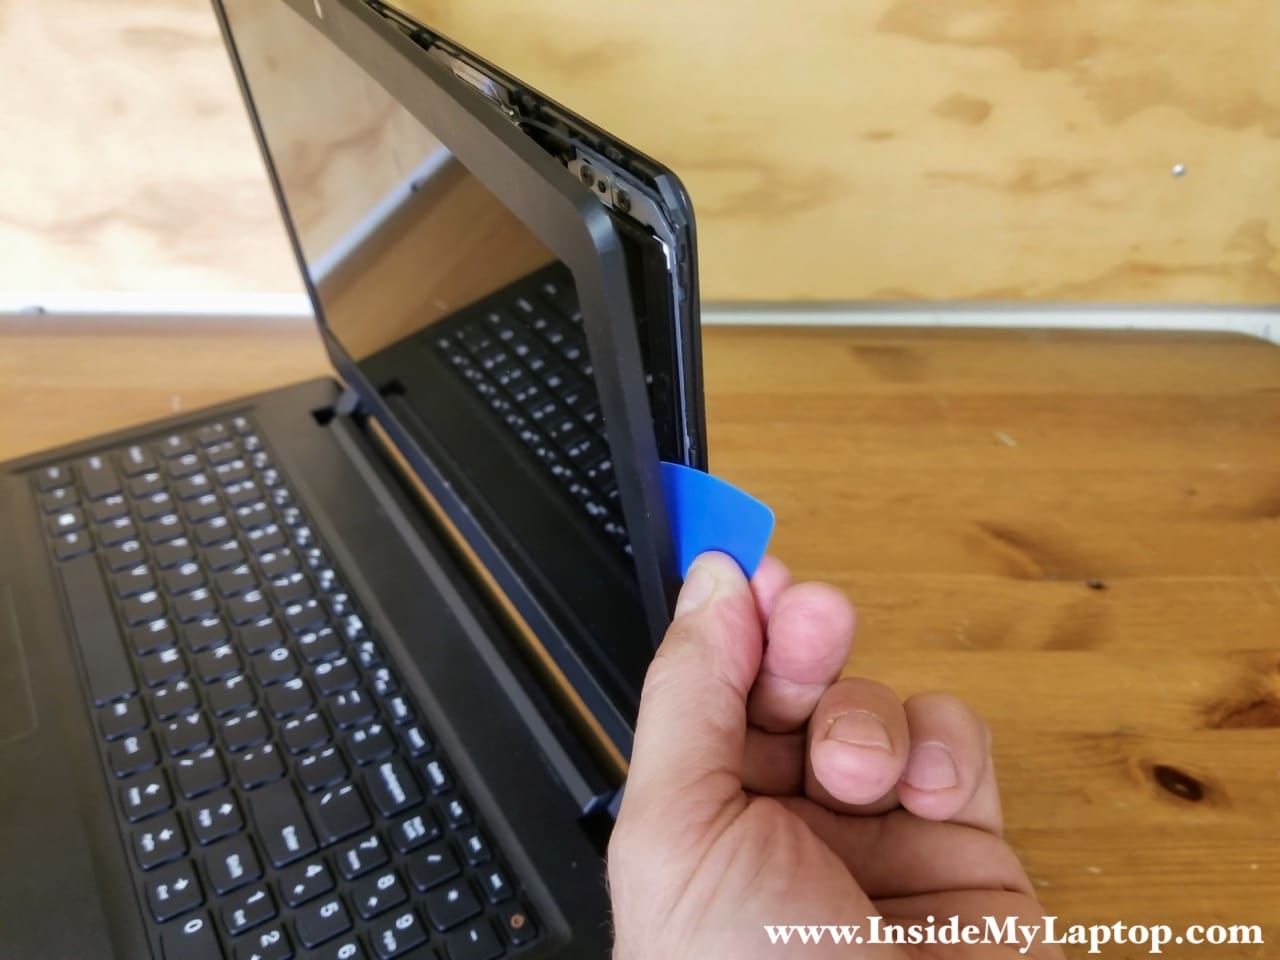
STEP 2.
It’s easier to remove the bezel with a plastic case opening tool.
Continue separating the bezel on both sides of the display.
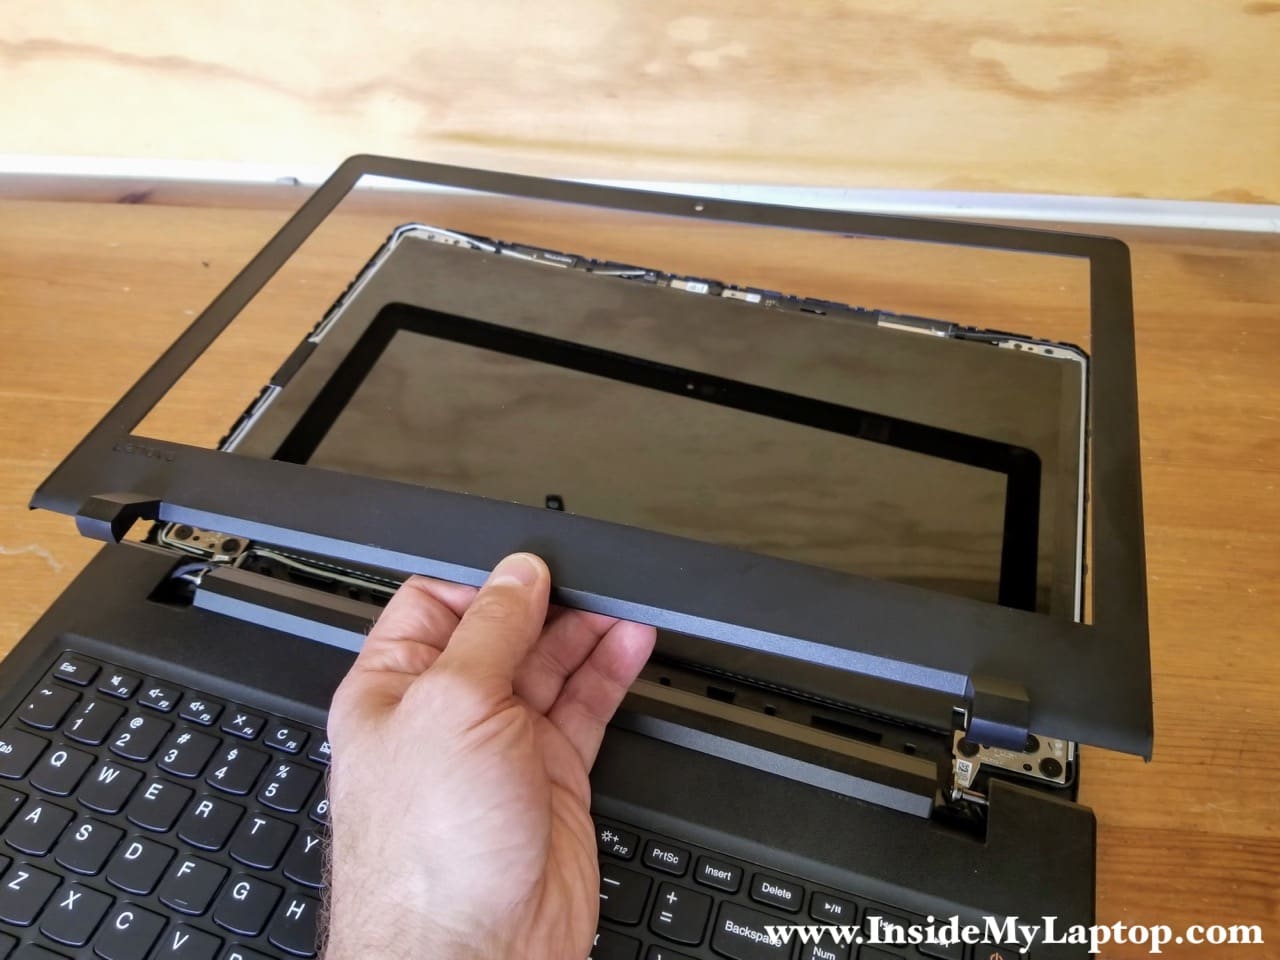
STEP 3.
Remove the bezel.
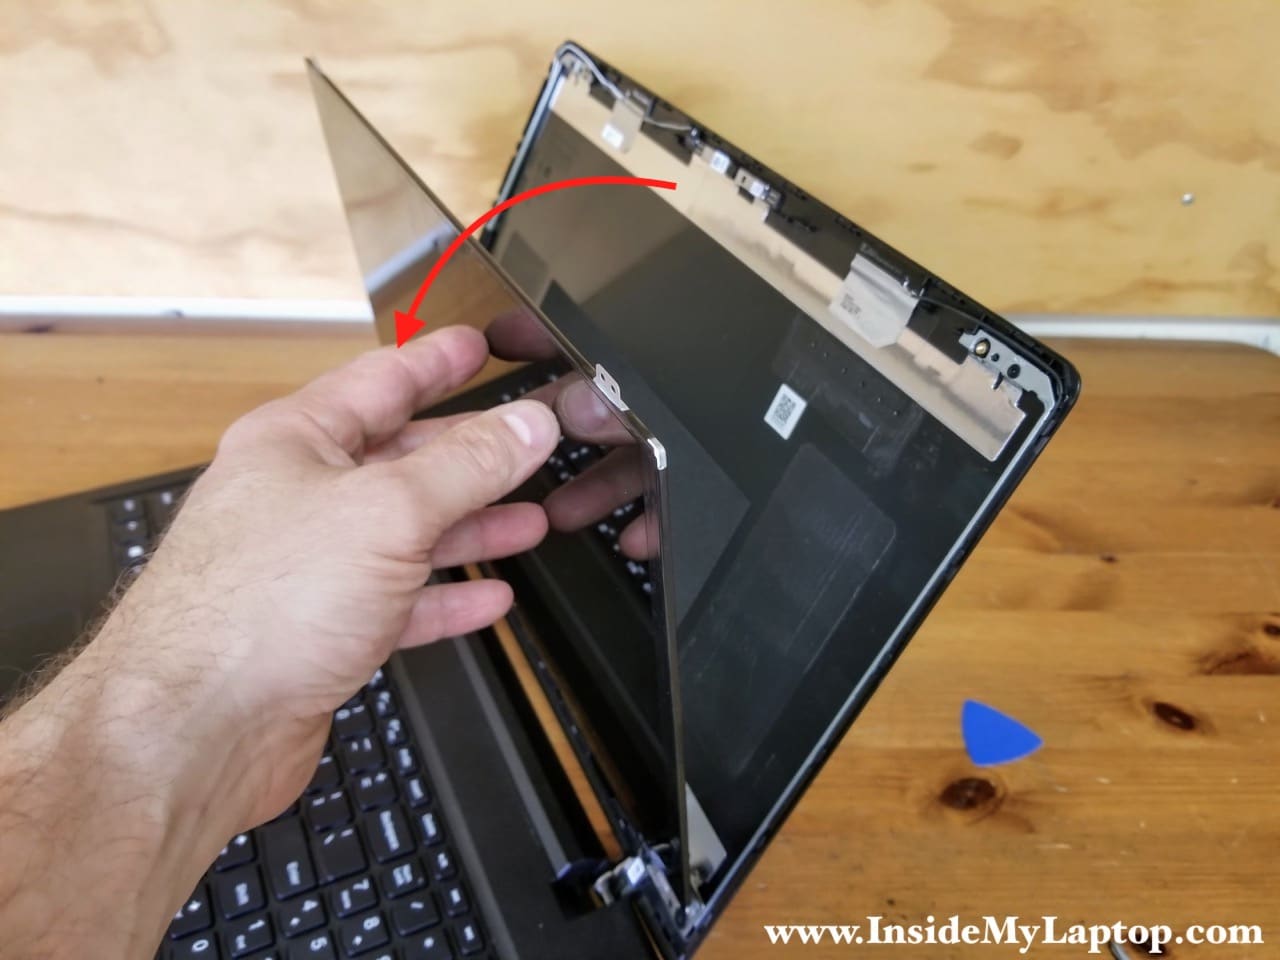
STEP 4.
Remove four screws attaching the LCD screen to the display back cover.

STEP 5.
Separate the screen from the back cover and place it the front side down on the keyboard.
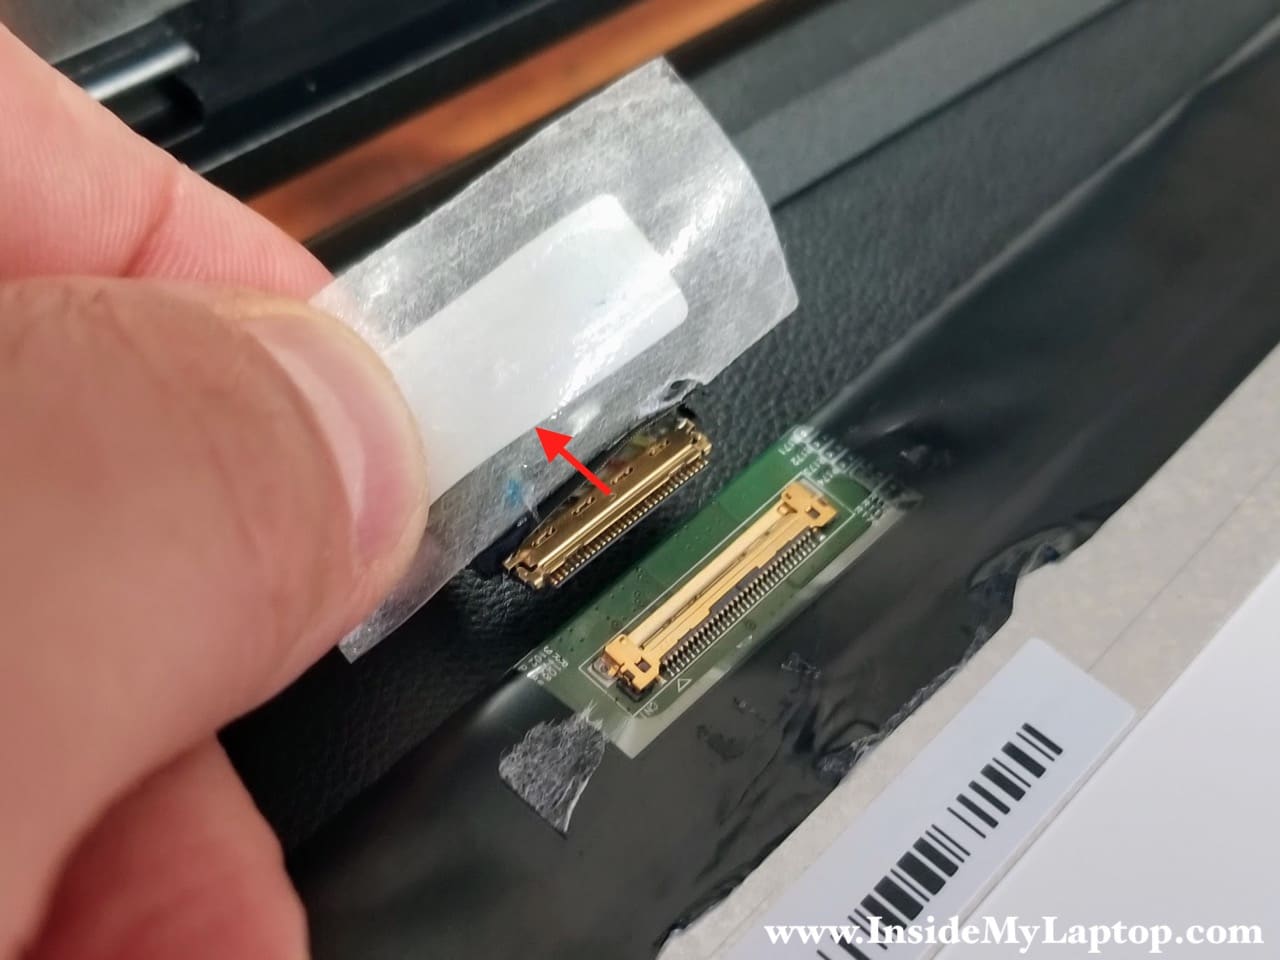
STEP 6.
Now you can access and disconnect the video cable from the back side of the screen.
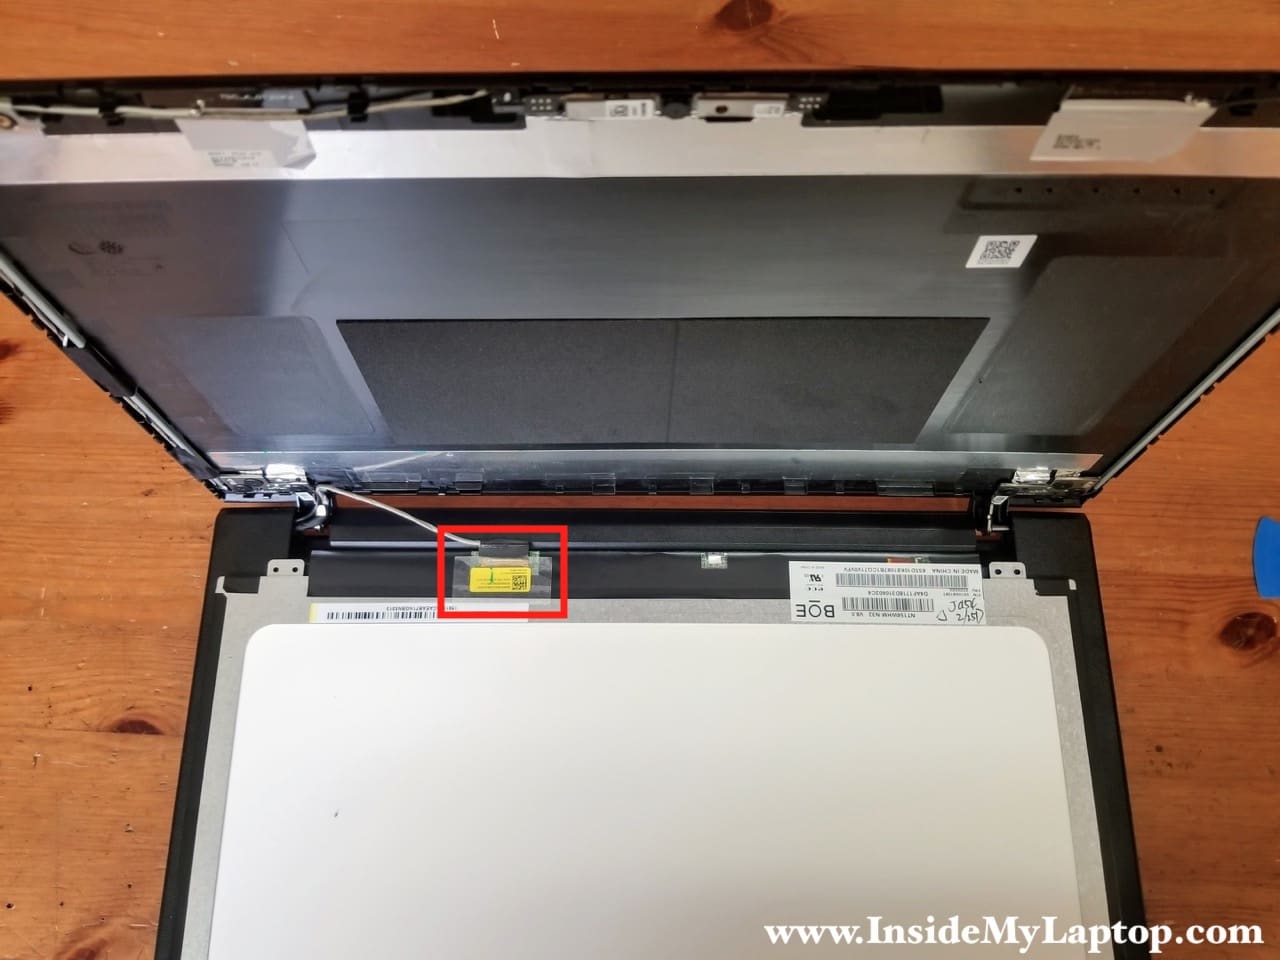
Peel off sticky tape securing the connection and unplug the display cable from the screen.
STEP 7.
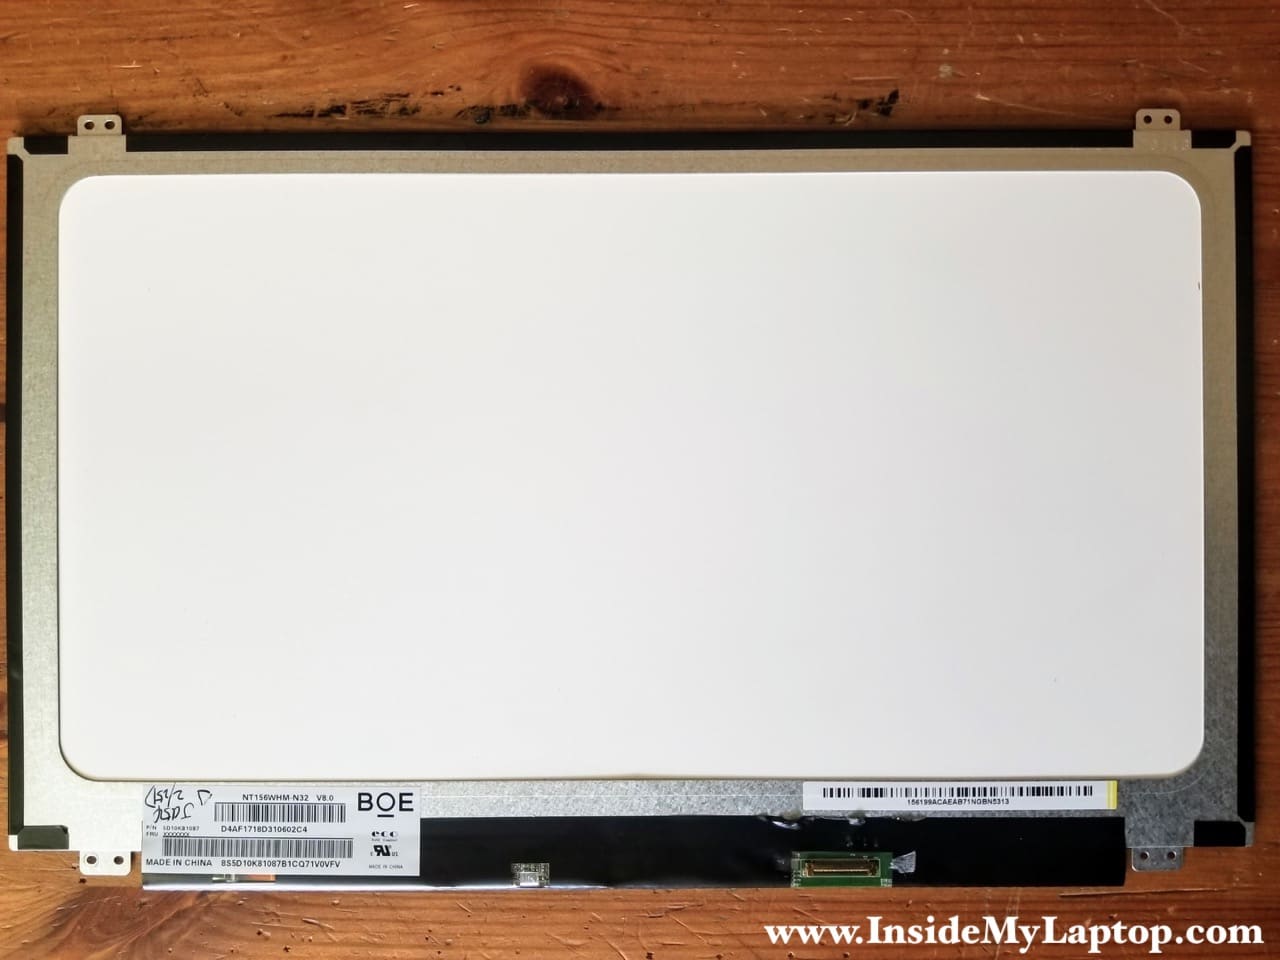
Now you can replace the LCD screen if necessary.
You can find a new replacement using the screen model number (in my case NT 156WHM-N32 V8.0) printed on the back.
prazal
steps 7 how to remove battery cable
???
using force hmm
Abdulla
Thanks a lot. Really.
I wanted to release some flea power from my laptop and that’s how I came here.
I was confused about how to remove the power cable too, as it was my first time. But alhamdulillah i found a youtube vid which showed it, abd the issue was settled. Thanks again.
P.Star7
Thank you very much:)
Julie
It is very useful for my customers to remove their old battery. Usually, we need the old battery to double-check if their orders are correct as some of the people always make mistake on the battery L15S4A02 for Ideapad 110-15ISK, but some of the customers told us they don’t know how to open the laptop.
Thanks for your post, it helps us so much.
Julie
Thank you very much:)
Boldizsár Ottó
Thank you very much for the helpful, correct and professional description! Without it I couldn’t have disassembled it
safely. I got stuck especially at the screw under the keyboard.
Thanks, Ottó Boldizsár from Hungary
IML Tech
You are very welcome. I’m glad to help.
Djass
Hi i wonder where is the other 4GB of ram is it solidated with motherboard ? And where are the other slots of ram task manager talks about ? Thnx
IML Tech
The other 4GB RAM module integrated into the logic board. You can see 4 chips under the removable module in the step 4. That’s built-in memory.
Djass
thank you
Tarek
Excellent!
Very detailed and in the right sequence.
Thank you soo much !
Was very helpful to open my laptop and fix my video flicker issue which was due to the cable strained where it goes along the home to the screen.
again thank you a lot!
Nobert
Hi am kiplangat I had my Lenovo laptop ideapad 110_15a that’s power on and after some seconds it’s goes off and no display in screen
IML Tech
Nobert, test the AC adapter. Make sure the AC adapter outputs correct voltage. It’s possible the AC adapter is dead and the laptop battery doesn’t have enough charge to turn the laptop on.
Also, you can try removing the memory module and see if the laptop turns on this way.
Hanz Reario
Can we install an NVME on it?
IML Tech
No, you cannot. The motherboard doesn’t have m.2 slot.
The only option is upgrading to a 2.5″ SATA SSD (SATA 3 – 6Gb/s).
Robert.
There developed a crack at the bottom left of my Lenovo pc and it is becoming hard to flip open as there is some resistance at that bottom part. I wonder what could be the problem.
I decided to disassemble and; that is how I landed in this page.
I could use your assistance
IML Tech
Robert, I think your problem could be related to the display hinge. The hinge is either broken or separated from the base cover. It’s necessary to open up the laptop and take a closer look to determine what is causing the problem. You problem could be similar to this one:
https://www.insidemylaptop.com/fixing-left-hinge-separation-on-dell-inspiron-15-7000/
Robert
Thank you for timely response. This is very reliable!!
John Herrera
My ideapad is this exact model but it doesn’t include the DVD drive, it’s literally empty space, you think it’s possible to install a Solid State Drive in that space?
IML Tech
John, I think so. You can install an SSD into a DVD SSD caddy. It should work. I’m not sure if you can get full 6GB/s speed through the optical drive connector but it should work.
Here’s the DVD SSD caddy example: https://amzn.to/2uK9jxj
William Pitcher
Thanks for this. My laptop completely died while plugged in and using complete with no power lights. Wasn’t able to fix it — even tried taking out the memory and unplugging the battery. Ah well. At least, your instructions let me know it wasn’t something simple.
You should consider adding a tip link or a generic Amazon affiliate link so people can support you more for all the help you provide.
Mark
What is DC-IN power jack wiring diagram
IML Tech
I don’t have this jack in front of me but most likely the center pin is “+”.