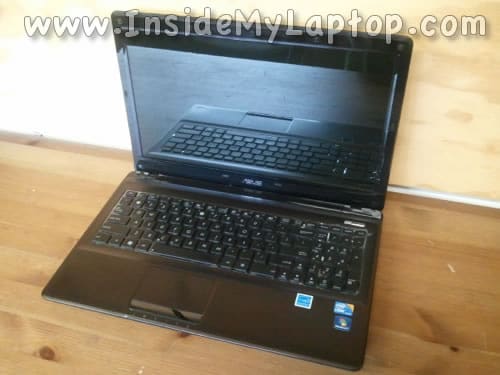
In this guide I’ll be taking apart an Asus K52F laptop.
I will go though the following disassembly steps:
STEP 1-4: Removing the bottom cover and accessing main internal components.
STEP 5-11: Remove the optical drive, hard drive and fan.
STEP 12-19: Disconnecting and removing the keyboard.
Before you start, make sure the computer is turned off.
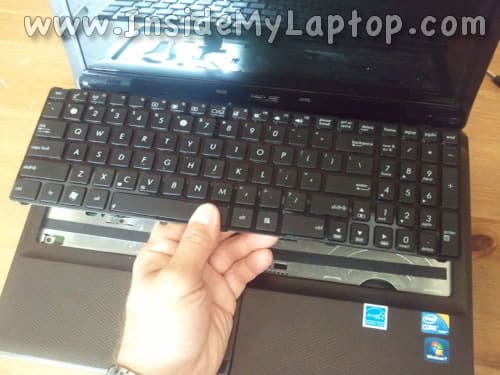
STEP 1.
Unlock and remove the keyboard.

STEP 2.
Remove five screws securing the cover on the bottom.
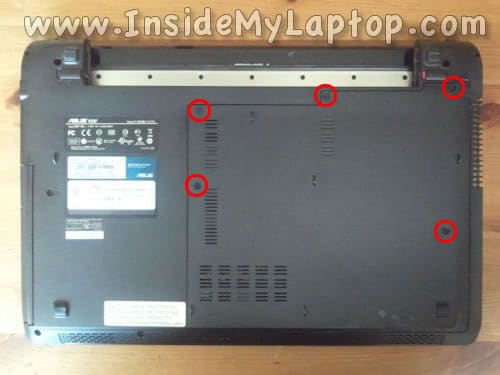
STEP 3.
Lift up and remove the bottom cover.

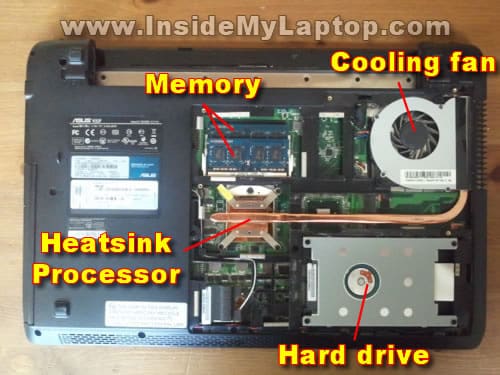
STEP 4.
Under the cover you’ll be able access the following components:
– Both memory modules.
– CPU cooling fan and heatsink.
– Hard drive.
– Optical drive.
This laptop can handle 8GB (2x4GB) DDR3-12800 SODIMM memory modules.
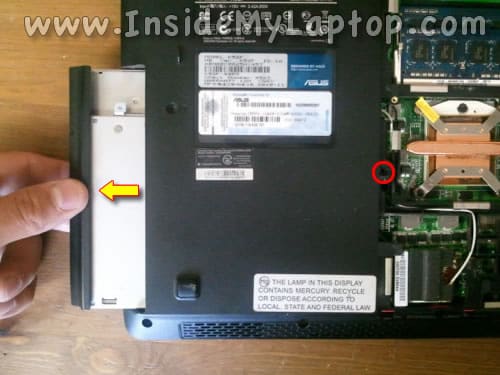
STEP 5.
Remove one screw securing the optical drive.
Pull the drive to the left and remove it.
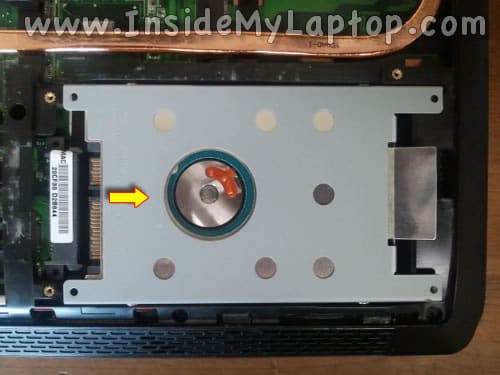
STEP 6.
Remove four screws securing the hard drive mounting bracket.

STEP 7.
Slide the entire hard drive assembly to the right to disconnect it from the motherboard.
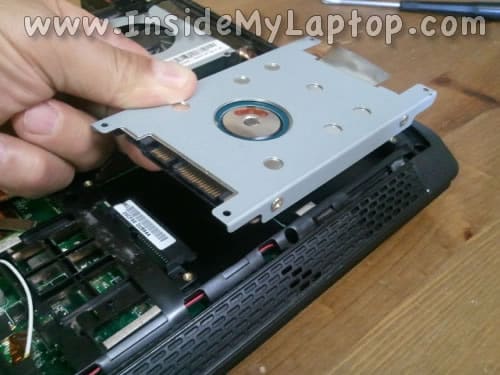
STEP 8.
Lift up and remove the hard drive assembly.
Upgrading this regular 2.5″ SATA hard drive to a 2.5″ SATA solid state drive will improve laptop performance significantly.
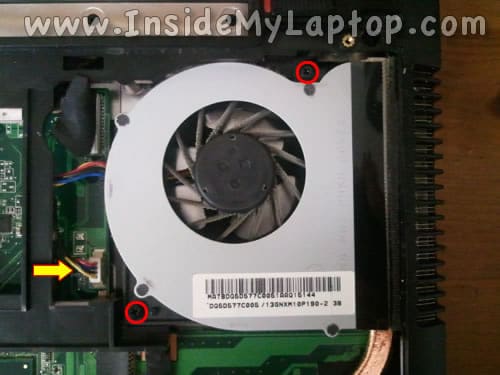
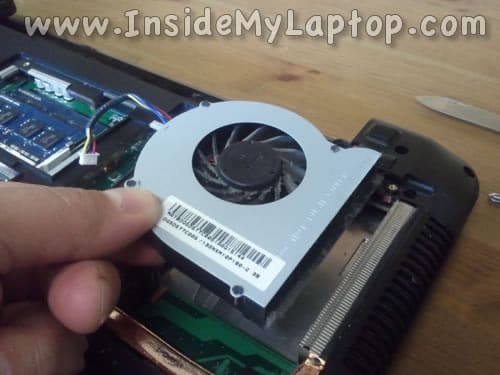
STEP 9.
Remove two screws securing the CPU cooling fan.
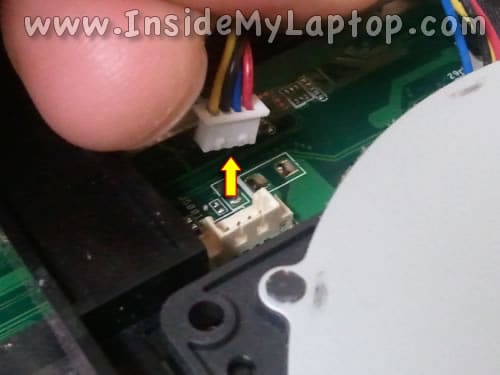
Disconnect the cooling fan cable from the motherboard.
Here’s how to disconnect the fan cable.
STEP 10.
Remove the black tape between the cooling fan and heatsink.
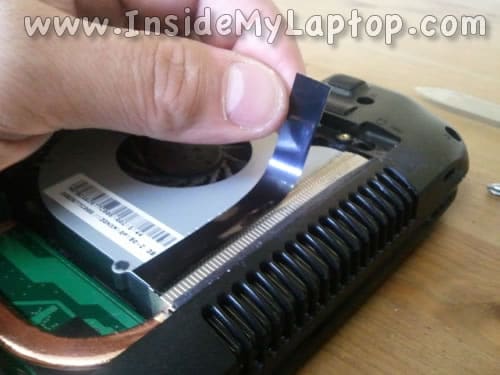
STEP 11.
Lift up and remove the CPU cooling fan.
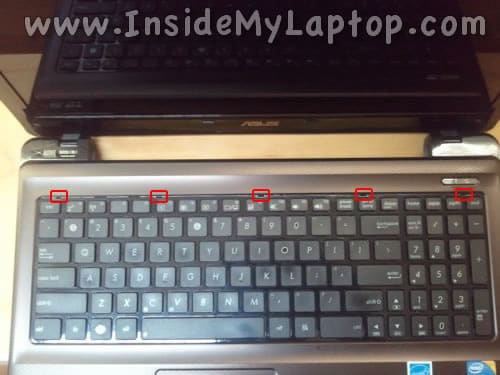
STEP 12.
Now I’ll remove the laptop keyboard.
NOTE: It’s not necessary to go though all previous disassembly steps in order to remove the keyboard.
The keyboard secured by five spring loaded latches on the top.
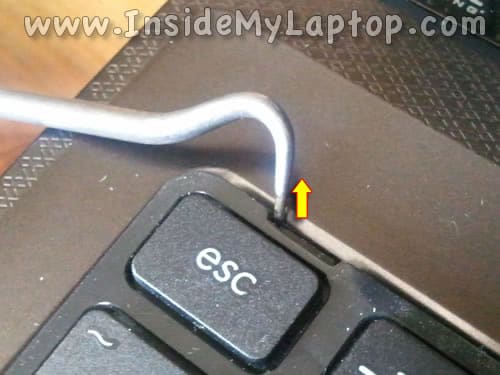
STEP 13.
Push on the first latch using a small flathead screwdriver.
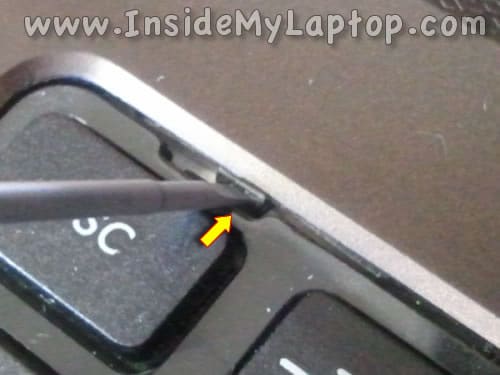
STEP 14.
While the latch pushed in, insert a sharp object between the keyboard and top case and lift up the keyboard a little bit.
When you lift up the keyboard, it will not allow the latch to lock back in place.
Unlock all other latches using the same technique.
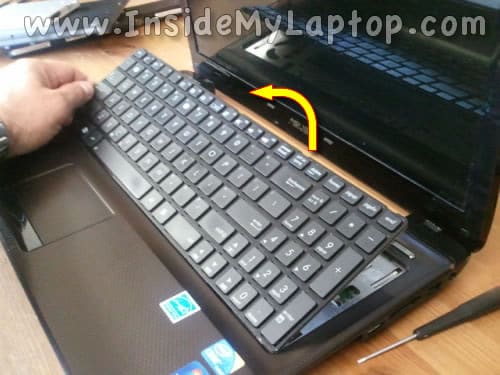
STEP 15.
After all latches unlocked you should be able to lift up the keyboard.
Turn the keyboard upside down and place it on the palmrest.
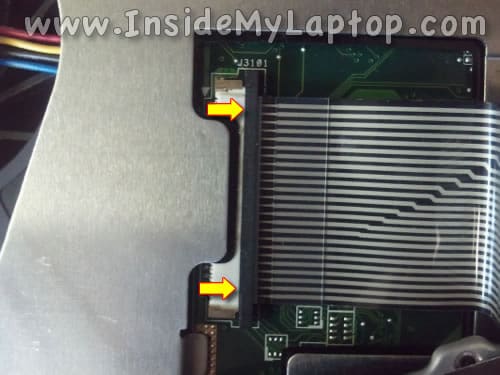
STEP 16.
Now you can access the keyboard cable connector.
Before removing the keyboard it’s necessary to unlock the connector and release the cable.

STEP 17.
The keyboard connector has two parts:
– White connector base.
– Black cable retainer (moving part).
Slide the retainer about 1-2 millimeters to the shown direction.
Do not move it any further. The retainer must remain connected to the base.
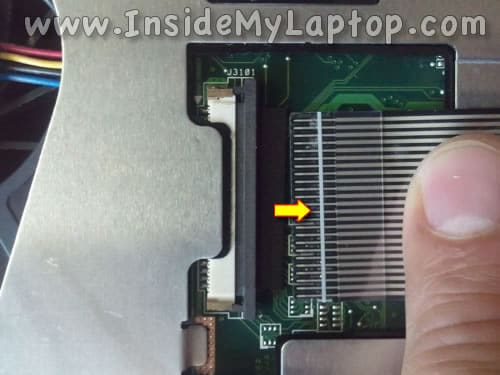
STEP 18.
On the following picture the connector shown in the unlocked position.
Now you can pull the keyboard cable and unplug it from the connector.
STEP 19.
Finally, you can remove the keyboard and replace it with a new one if needed.
viraj
Sir ,
I have asus laptop…and its DVD writer …a spring is found me inside the DVD box detached with 2 metallic bars….i dont know how to fix it to get work again …could you pleaseeee help me….how to do…..what is the actual mechanism for DVD drive..so that i can figure out from where it has been displaced ?
IML Tech
@ viraj,
All drives are different and I don’t have instructions for fixing DVD drives. Probably it will be easier to replace the whole drive.
john
I have an asus k501j series notebook my powercord is good i read voltage where the power harness plugs into the power board but my laptop is still dead can you show me where the fuses are located before i decide the mother board may be the problem any help will be apericated thaank you
Blue
Is the processor detachable / replaceable? Im planning to buy a higher processor for my k52f. Is it possible to upgrade the CPU?
Robin Dulaney
Hello….I would very much appreciate your HELP with my ASUS Notebook Model K52F. Several years ago….my right hinge broke. I took it to my local pc guy and he stated that he was unable to fix it. Since then…>I have kept it (the top cover) opened on my desk and just cover the keyboard with a black cloth to keep out the dust (from the keyboard). During a move….I was able to get the cover closed to transport it during the move. However, the other day (1 1/2 years after the move)…..a fire alarm went off in my building and I thought it was a real fire (turned out NOT to be a real fire)…and when I attempted to close the laptop/notebook….it would not bend properly….and broke off the right side plastic that connects the lcd screen near the hinge. I was able to tape the right side plastic back to the other plastic above the hinge….to be able to continue to keep it open (and cover keyboard with black cloth). Since you have spent considerable time with this website www.insidemylaptop.com/taking-apart-asus-k52F-laptop…..I AM HOPING YOU CAN OFFER ME SOME HELP??? I don’t think I saw how to change out the hinges on this website….but….I’m guessing….you have had the same hinge breaking problem….since it is a known problem with the ASUS K52F??? I have read contradictory comments on replacing the hinges on the ASUS K52F online. One place says they can NOT be replaced: HOW TO REPAIR ASUS HINGE: THERE IS NOTHING YOU CAN DO TO REPAIR THE BROKEN HINGE….REQUIRE LONG HOURS OR REQUIRE SPECIAL EQUIPMENT. I see that both Amazon.com & Ebay.com sells the replacement hinges for the ASUS K52F….but….since you have MUCH experience with this laptop…..I’m requesting your opinion….IS IT LIKELY THAT I CAN REPLACE THE HINGES ON THE ASUS K5E2F WITH LITTLE OR NOT TROUBLE? Also….I believe I read that there is some type of lubricating oil….that I could apply to the still connected hinge….that would enable it to shut successfully. DO YOU KNOW WHAT TYPE OF LUBRICATING OIL THAT WOLD ALLOW THE STILL CONNECTED HINGE TO SUCCESSFULLY CLOSE? ….so I can lubricate it to be able to keep using it…..but allow it to close properly? Thanks SO much for your help! Robin Dulaney