Today I will be taking apart a Dell Inspiron 17 5000 series laptop. This guide should work for Dell Inspirons 5759, 5758, 5755. All three models are very similar.
During the disassembly process I’ll go through the following major steps:
- Removing hard drive, RAM modules and CD/DVD drive – STEPS 1-5
- Removing keyboard and bottom case – STEPS 6-14
- Removing cooling fan, motherboard and DC power jack – STEPS 15-22
STEP 1.
Release the battery lock and remove the battery.
Replacement battery model M5Y1K.

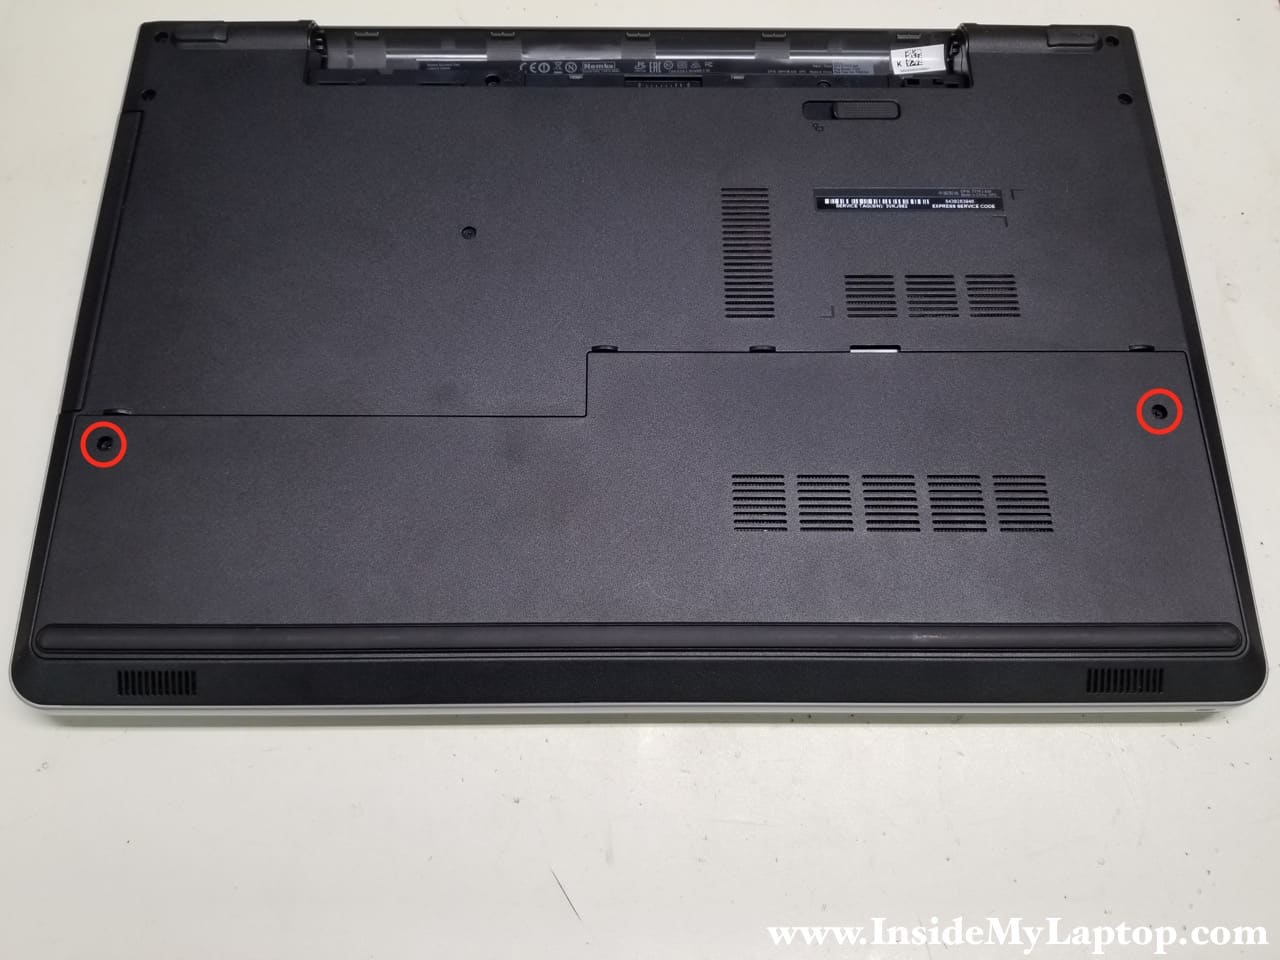
STEP 2.
Remove two screws securing the bottom cover. It might take some effort to separate the cover from the base. It has a few hidden latches.
Under this cover we get access to the hard drive, RAM slots, wireless card and CMOS battery.
STPE 3.
Remove four screws securing the hard drive bracket.
Disconnect the hard drive cable from the motherboard.
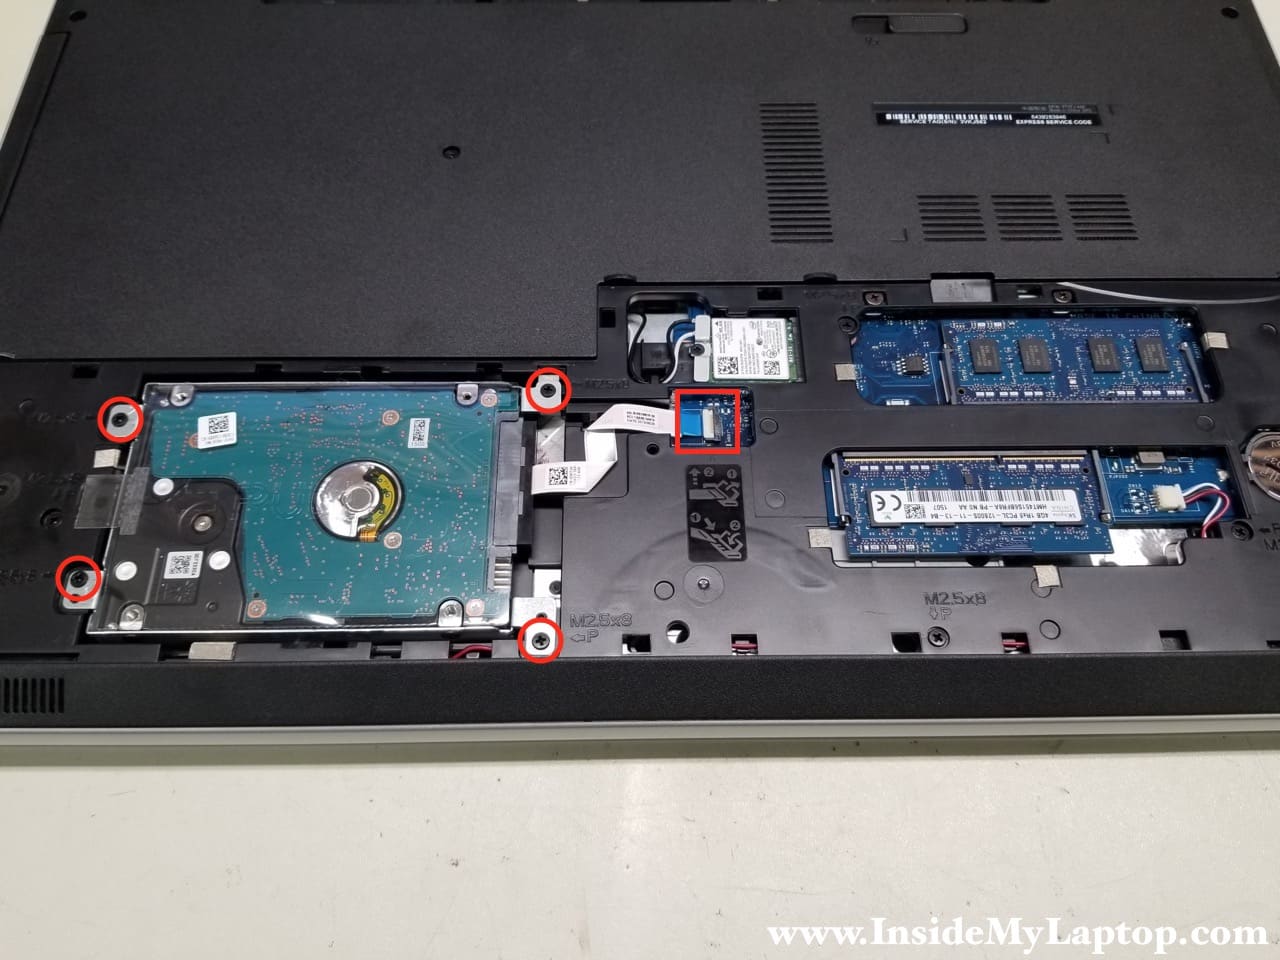
In order to release the cable you’ll have to unlock the connector first (red arrow).

If you are replacing the hard drive or upgrading it to a solid state drive you will have to transfer the cable and the bracket.
Installing a 2.5″ SATA solid state drive instead of the regular hard drive will improve laptop performance significantly.

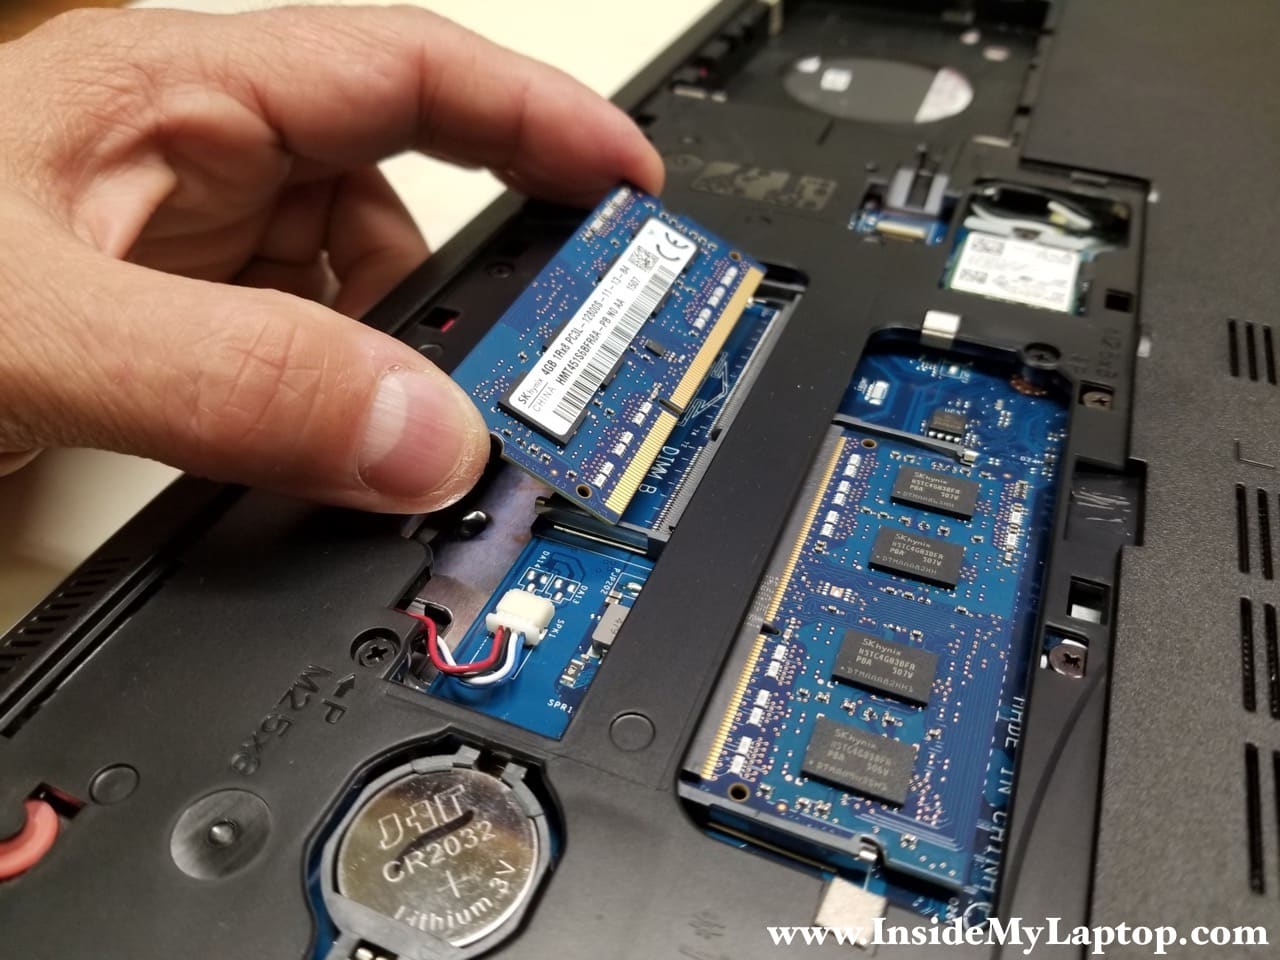
STEP 4.
Both memory slots are easily accessible and RAM modules can be removed and replaced if necessary.
This laptop can take 16GB (2x8GB) DDR3-12800 SODIMM RAM modules.
STEP 5.
Remove one screw securing the CD/DVD drive.
Pull the drive out.

STEP 6.
In Dell Inspiron 17 5000 Series 5759/5758/5755 laptops the keyboard is secured by five hidden latches.

Insert a thin case opening tool between the keyboard and top case. Push the hidden latch inside the case.
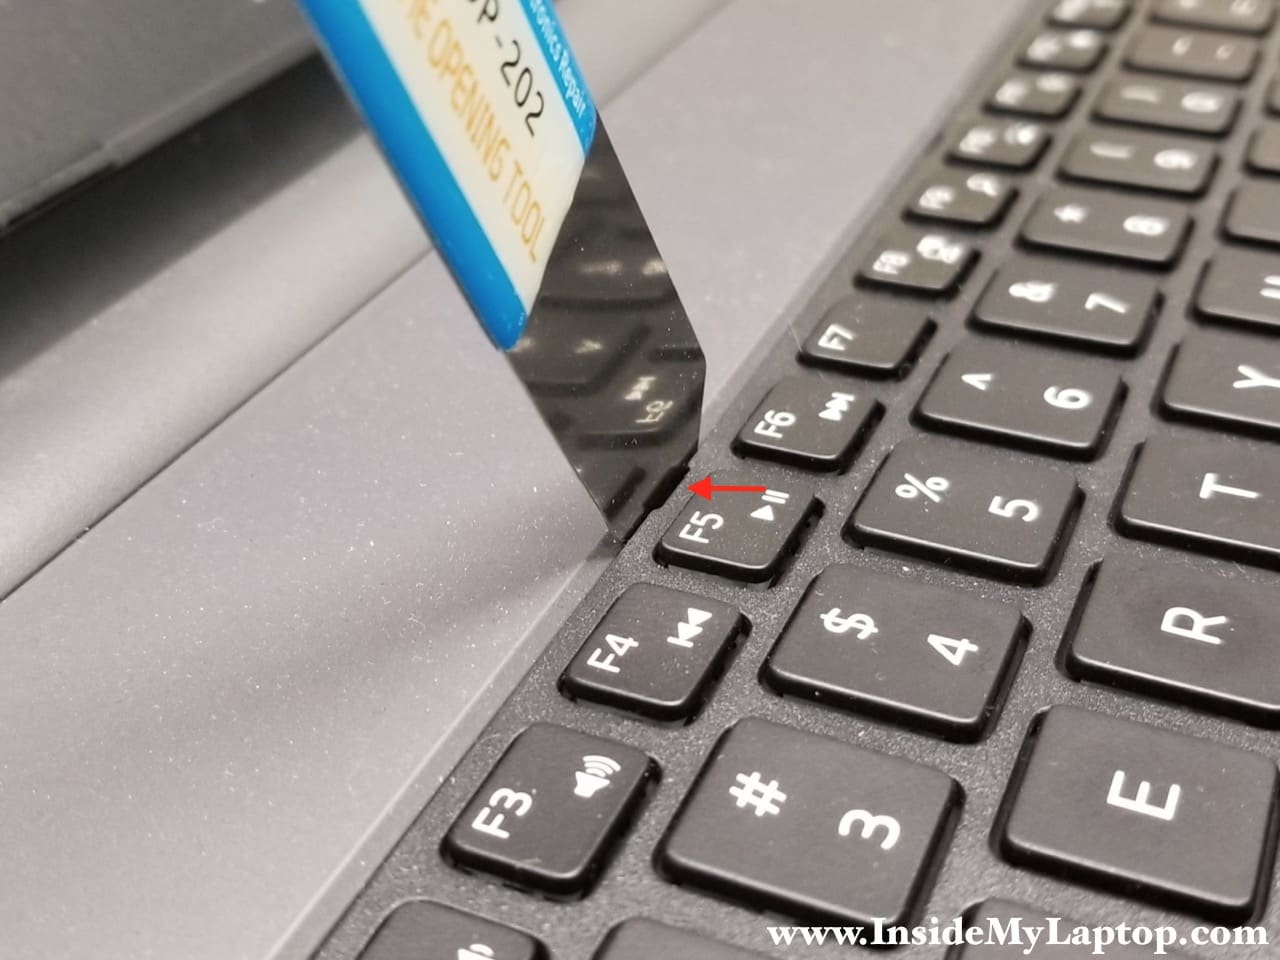
At the same time lift up the keyboard to disengage it from the latch.

STEP 7.
After you release all five latches you can lift up the keyboard and place it upside down on the palmrest.

STEP 8.
Disconnect the keyboard and backlight cable from the motherboard.

As always, unlock the connector first and pull the cable out after that.

STEP 9.
Now you can remove the keyboard and replace it if necessary.

STEP 10.
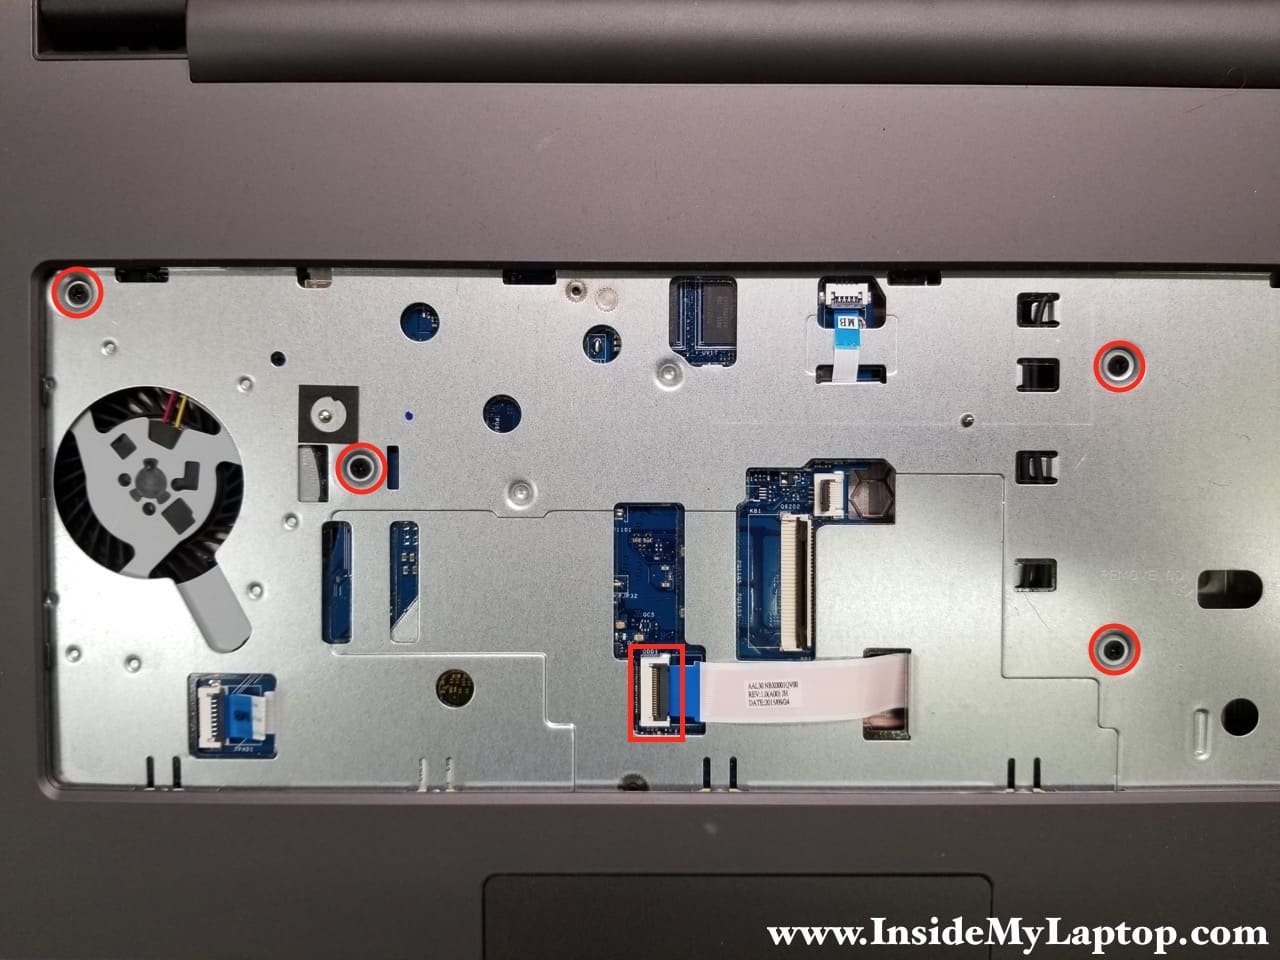
Remove four screws securing the top case.
Disconnect the CD/DVD connector board cable.
STEP 11.
The wireless card has to be removed in order to remove the bottom cover.
Remove the metal bracket secured by one screw.

Disconnect Wi-Fi antennas and remove the wireless card.

STEP 12.
Remove all screw securing the bottom case.
Disconnect the speaker cable from the motherboard.
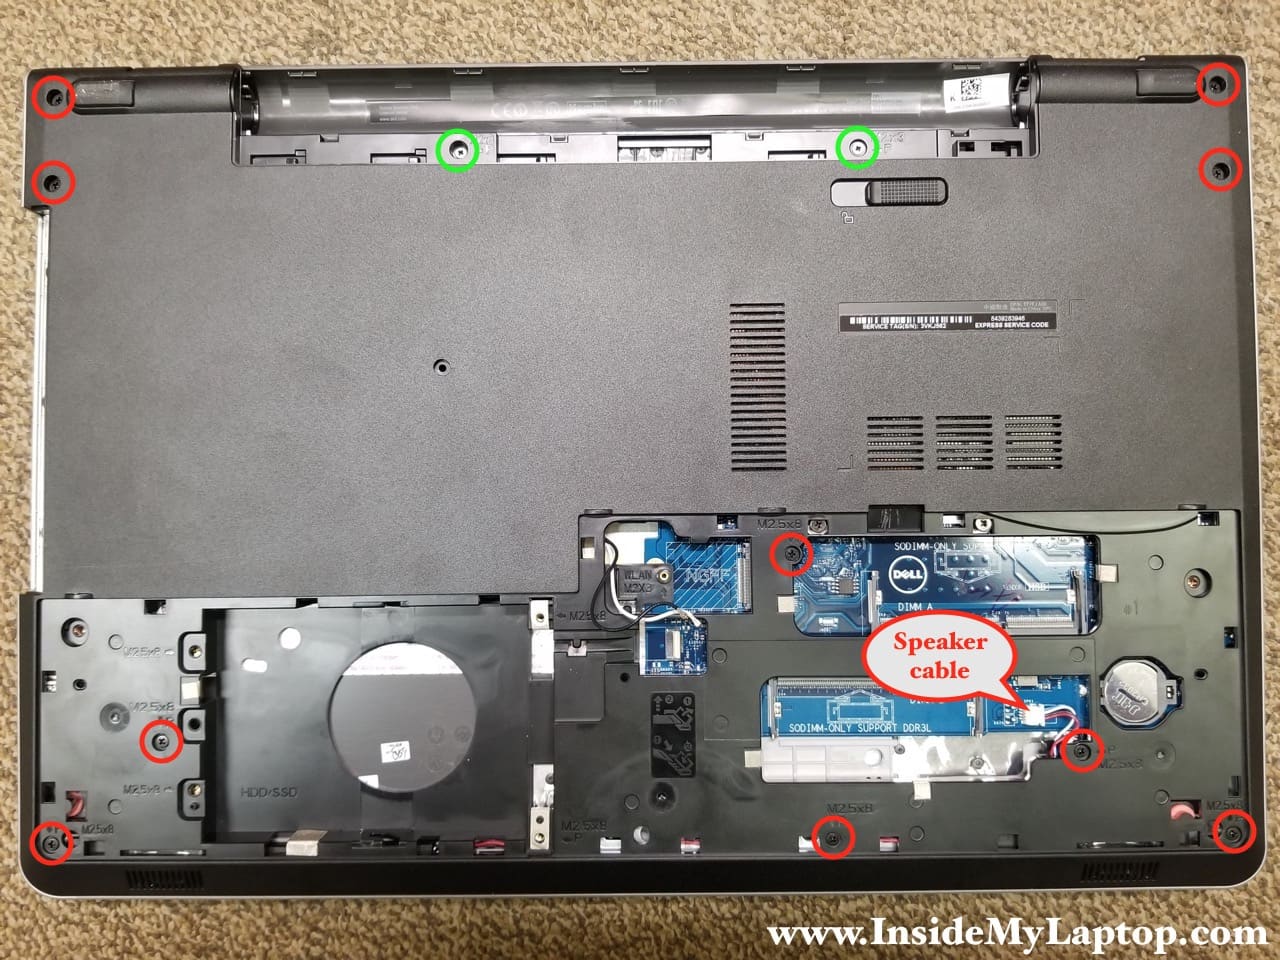
Remove three more screws from the CD/DVD drive bay.

STEP 13.
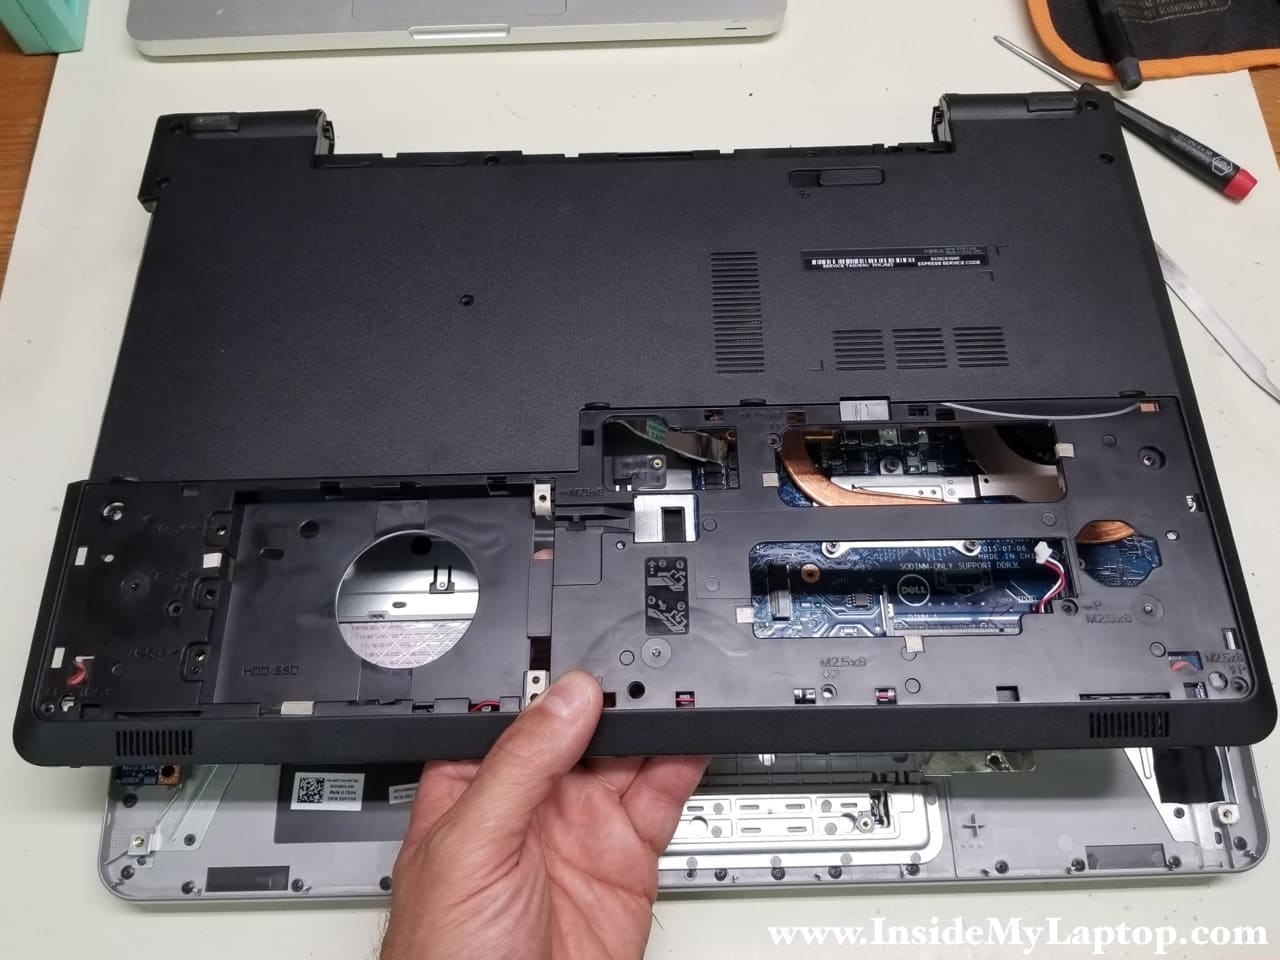
Start separating the bottom case from the top case.

While removing the bottom cover pay attention to the cables.
Continue separating the bottom case.

The bottom case might get stuck on the back. It happens because there are four latches securing it to the top case and they are located in the battery compartment.
Wiggle to bottom case to release the latches.

STEP 14.
Remove the bottom case.
Here’s the other side where you can access both speakers and CD/DVD drive connector with cable.

Now we can access all internal components in Dell Inspiron 17 5000 Series 5759/5758/5755 laptop.
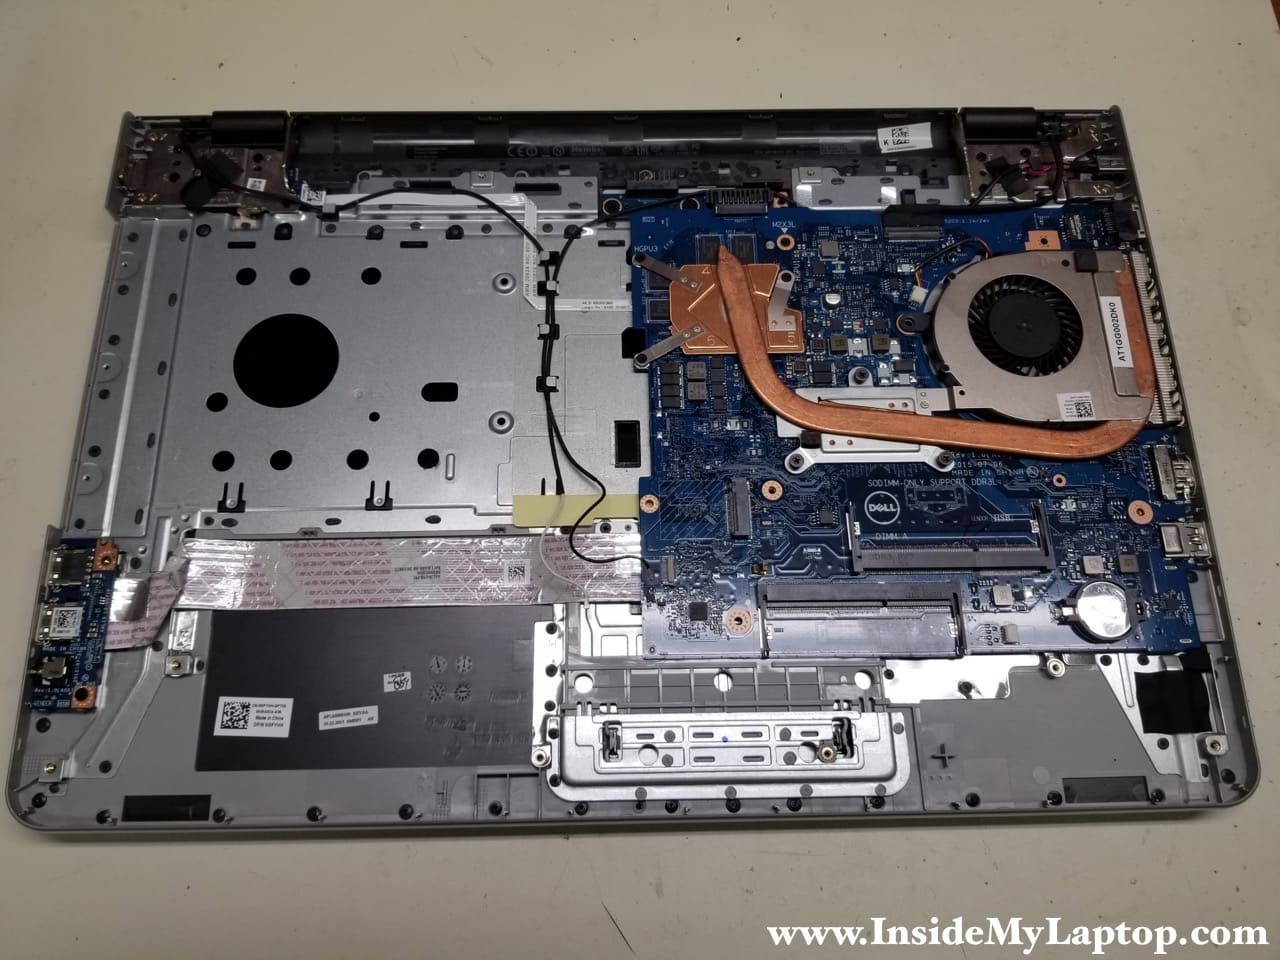
STEP 15.
Remove three screws (red circles) and loosen there more screws (green circles) securing the heatsink assembly.
Disconnect the cooling fan cable from the motherboard.

Remove the heatsink assembly from the laptop.
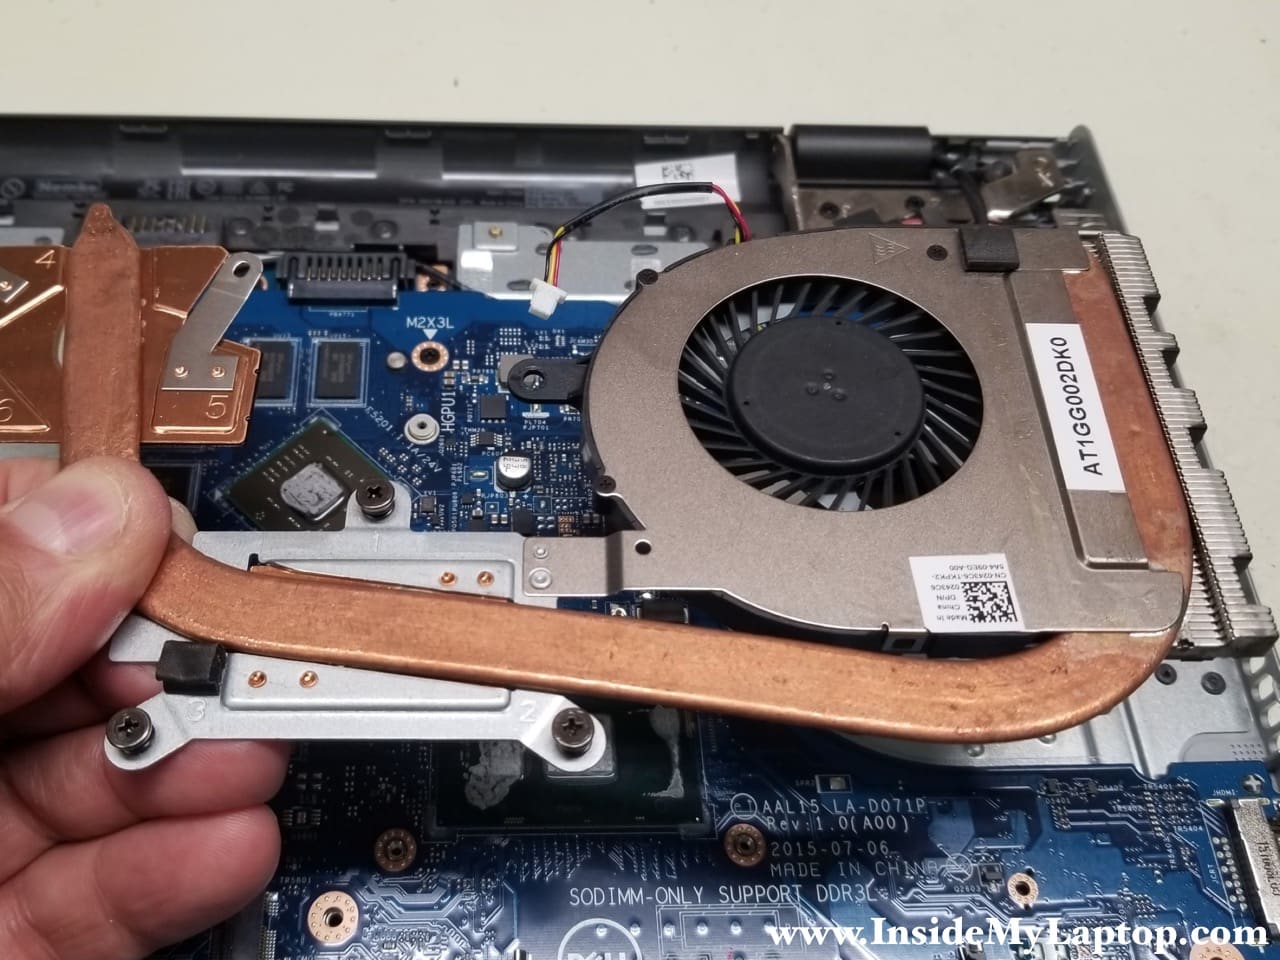
STEP 16.
Remove three screws securing the fan to the heatsink.

Now you can remove the fan and replace it if necessary.

STEP 17.
Disconnect the touchpad cable and the power button cable.
It’s necessary if you are removing the motherboard.

STEP 18.
Remove one screw securing the motherboard.
Disconnect the display video cable.
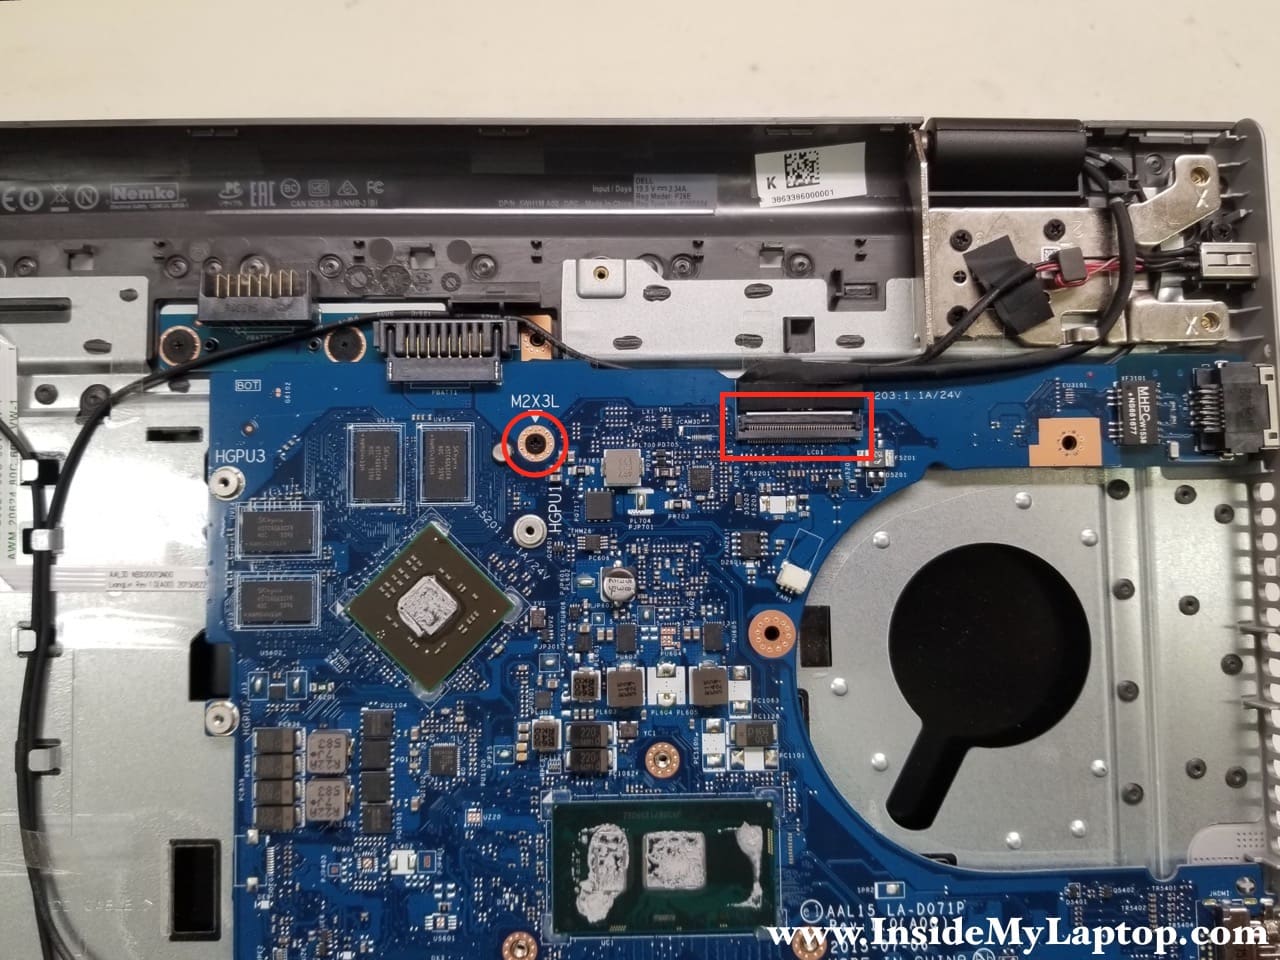
The display connector can be unlocked the same way as other connectors.
Lift up the locking tab (red arrow) and pull the cable out.

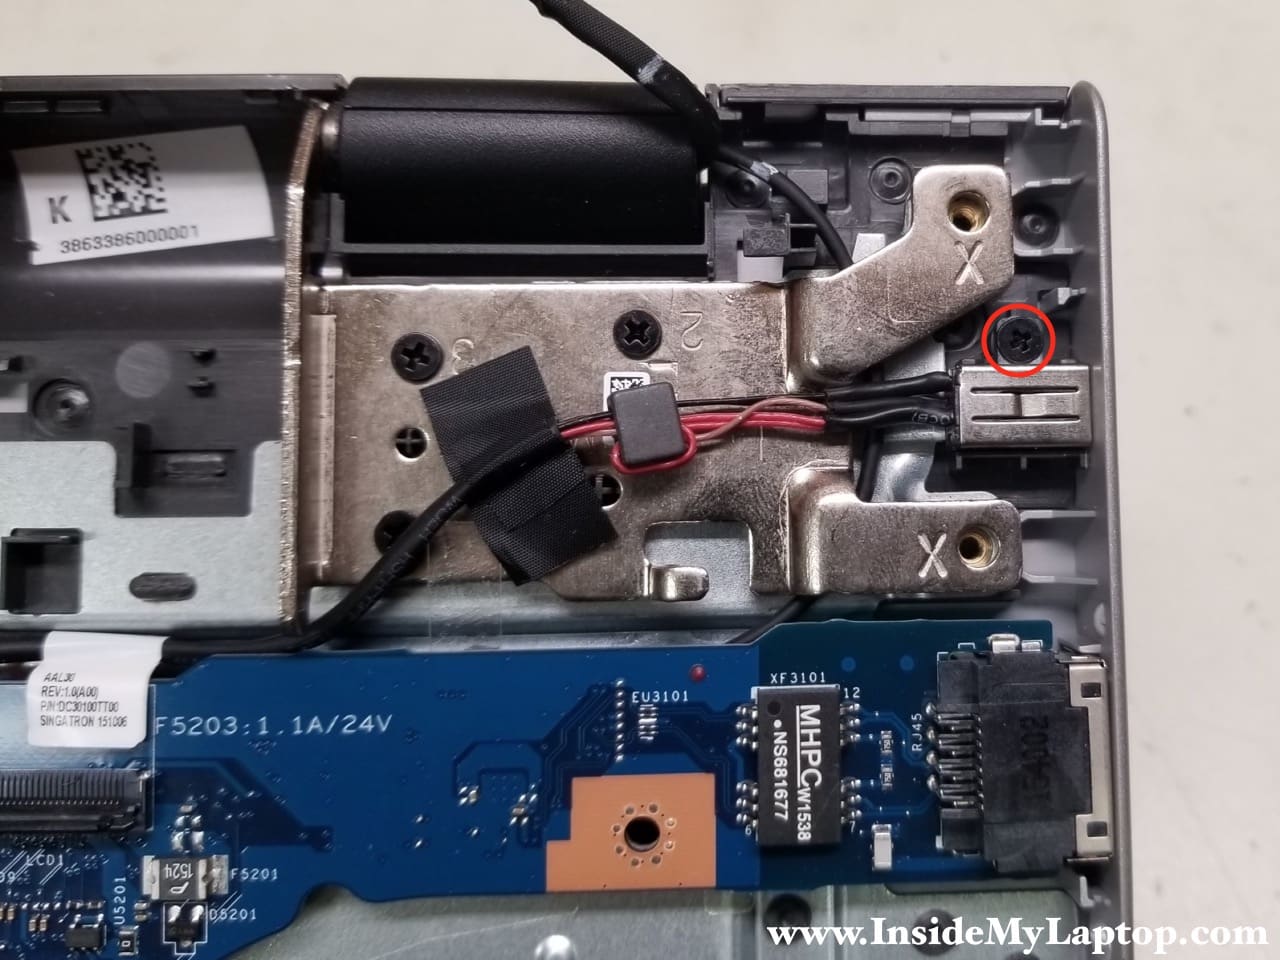
STEP 19.
Remove one screw securing the DC power jack.
In Dell Inspiron 17 5000 Series 5759/5758/5755 laptops the DC jack harness can be removed only after you remove the motherboard.
The connector for the harness is located on the bottom side.
STEP 20.
Carefully separate the motherboard from the battery connector board.

Now you can lift up the motherboard from the bottom case.
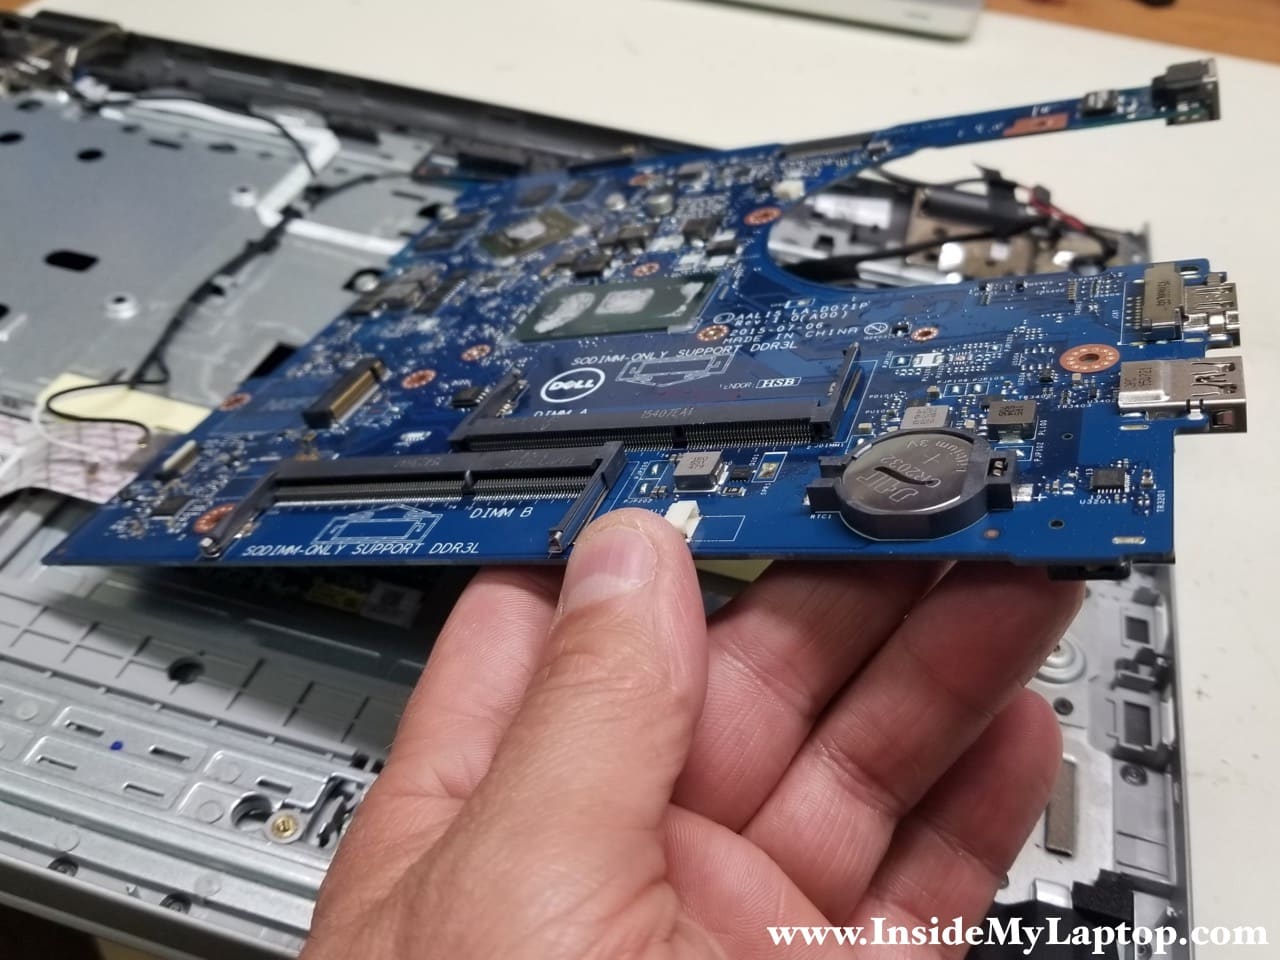
STEP 21.
Turn the motherboard upside down the disconnect the USB/Audio board cable.
Now you can remove the motherboard completely.

STEP 22.
Finally, disconnect the DC power jack cable.
Remove and replace the DC jack harness if necessary.

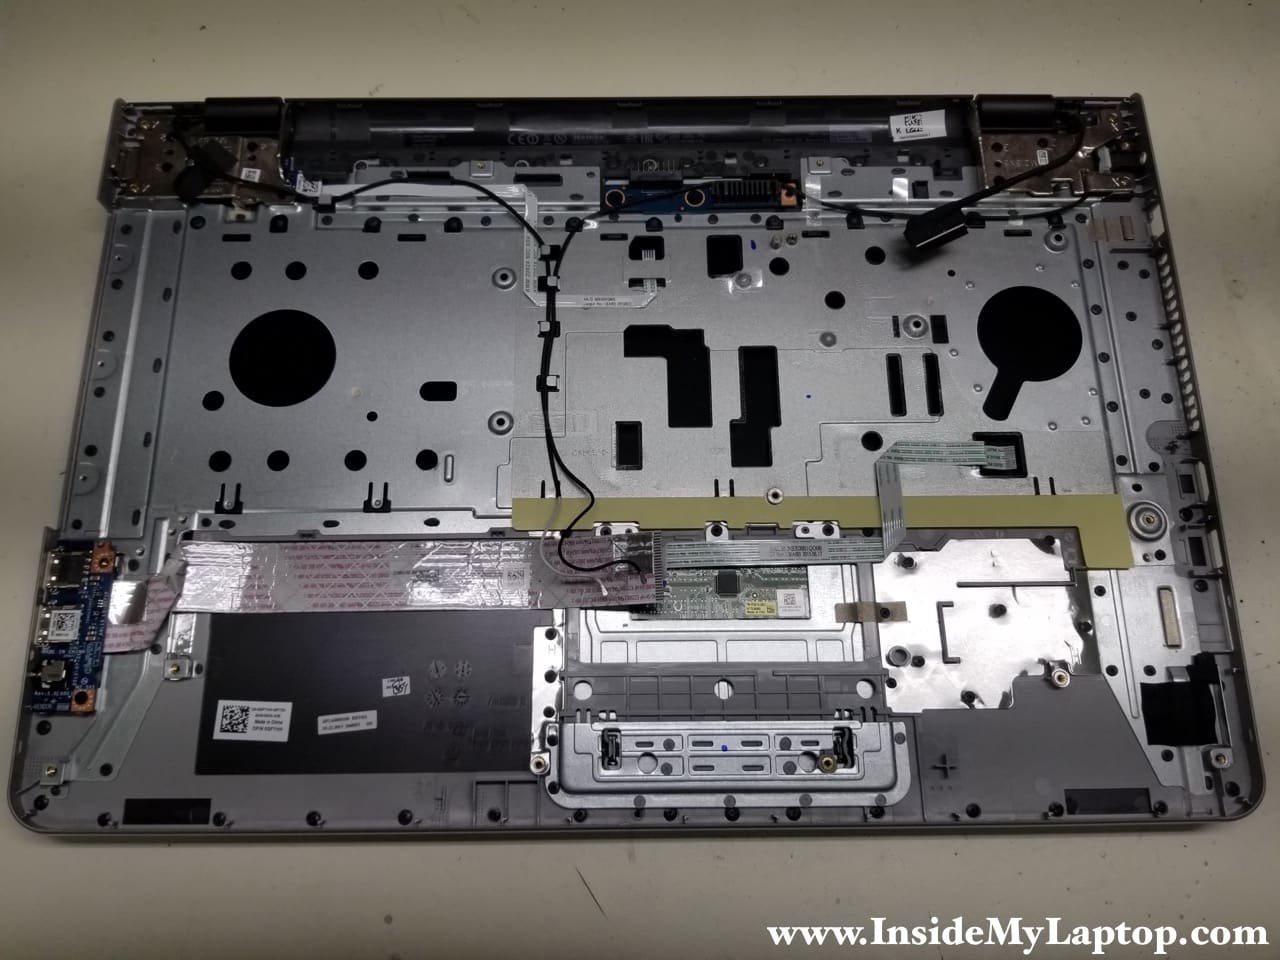
Here’s the top case (palmrest) assembly shown with the motherboard removed.
Here you can access the touchpad, USB/Audio board and power button board.
The screen removal steps will be similar for 15″ and 17″ Dell Inspiron 5000 series laptops.

For the display teardown and screen replacement instructions go to the LCD screen removal guide.