
In this tutorial I show how to replace the LCD screen on a Dell Inspiron 15 5565 5567 (model P66F) laptop. It’s likely you can use this tutorial for some other models in the Dell Inspiron 15 5000 series computer line.
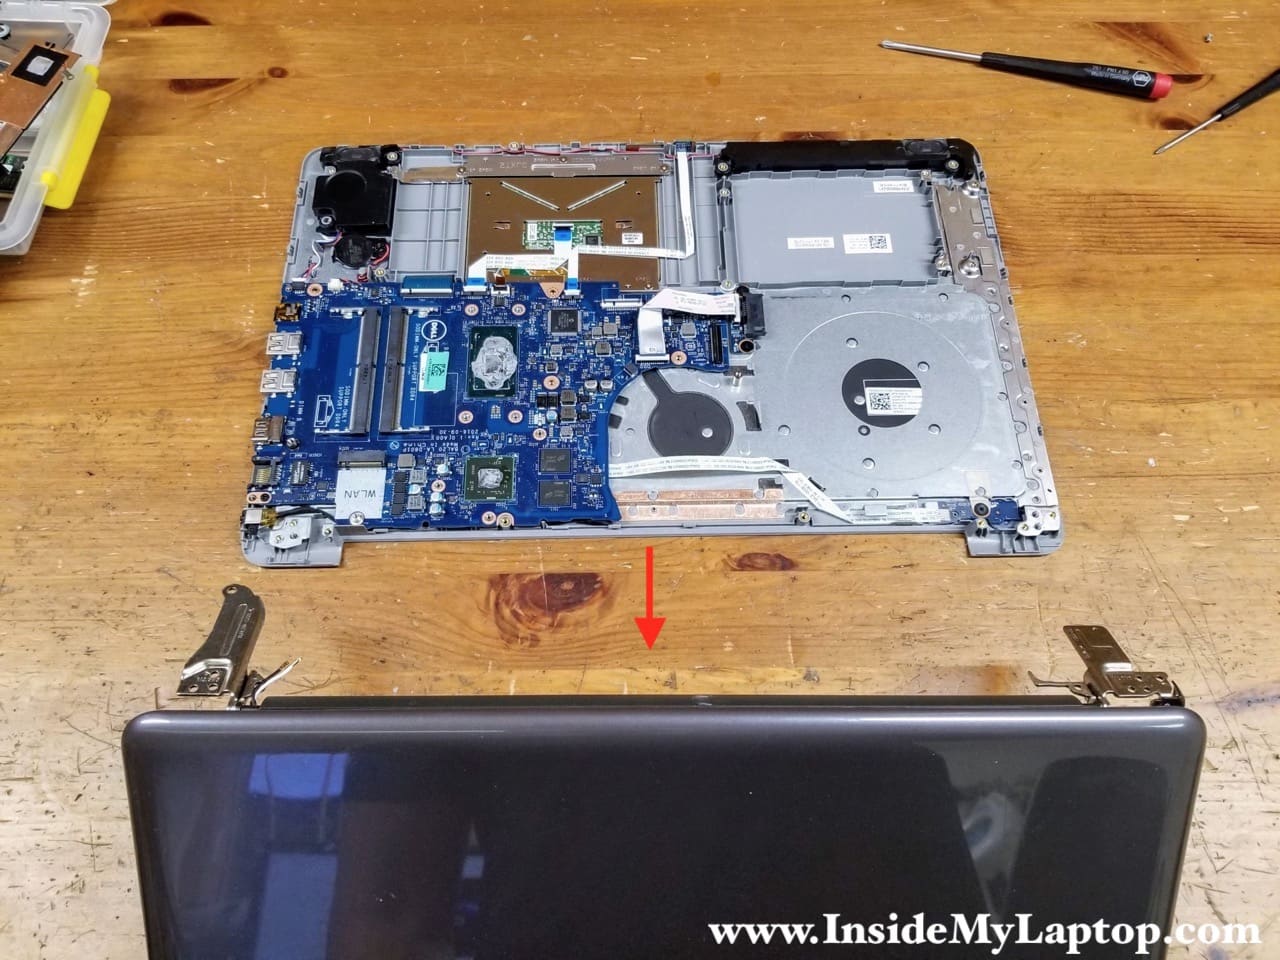
It’s much easier to remove the screen when the display panel separated from the top case as shown on the following picture. It’s hard to remove the screen bezel (though it’s possible) with the display panel still installed. In my previous tutorial I explained how to remove the display (follow steps 14-19).
For this disassembly you will need the following repair tools: Phillips #1 screwdriver and case opener tool.
LCD screen removal steps
OK, the display panel has been removed and now it’s ready for the LCD screen removal.

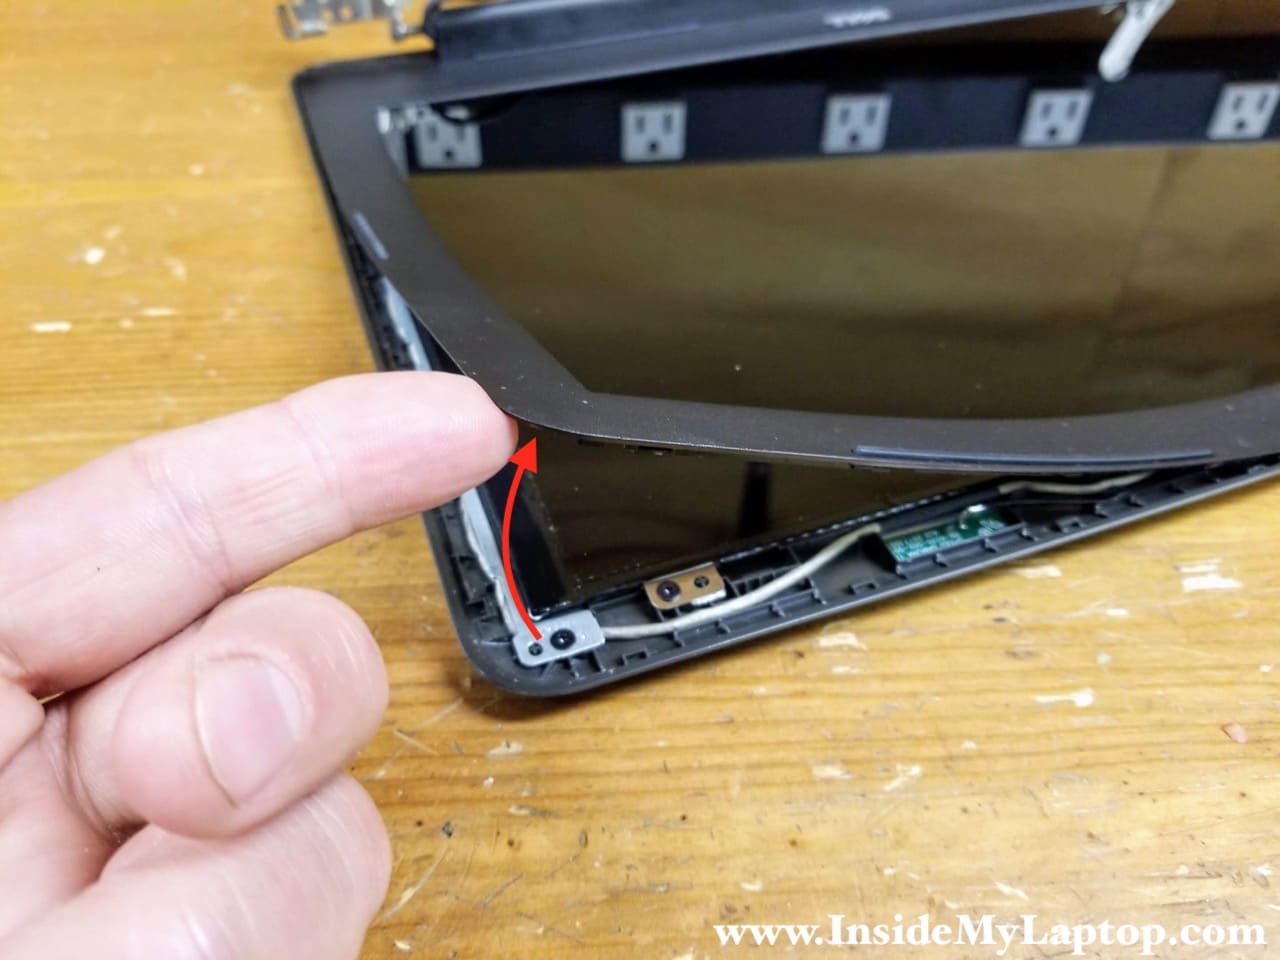
STEP 1.
Insert the case opener between the screen bezel and the display back cover. Pry up the screen bezel and start separating it from the back cover.

STEP 2.
Continue removing the screen bezel with your hands. Wiggle the bezel to release hidden latches. There is an adhesive tape securing the bezel to the screen. You’ll need to apply some force to remove it.
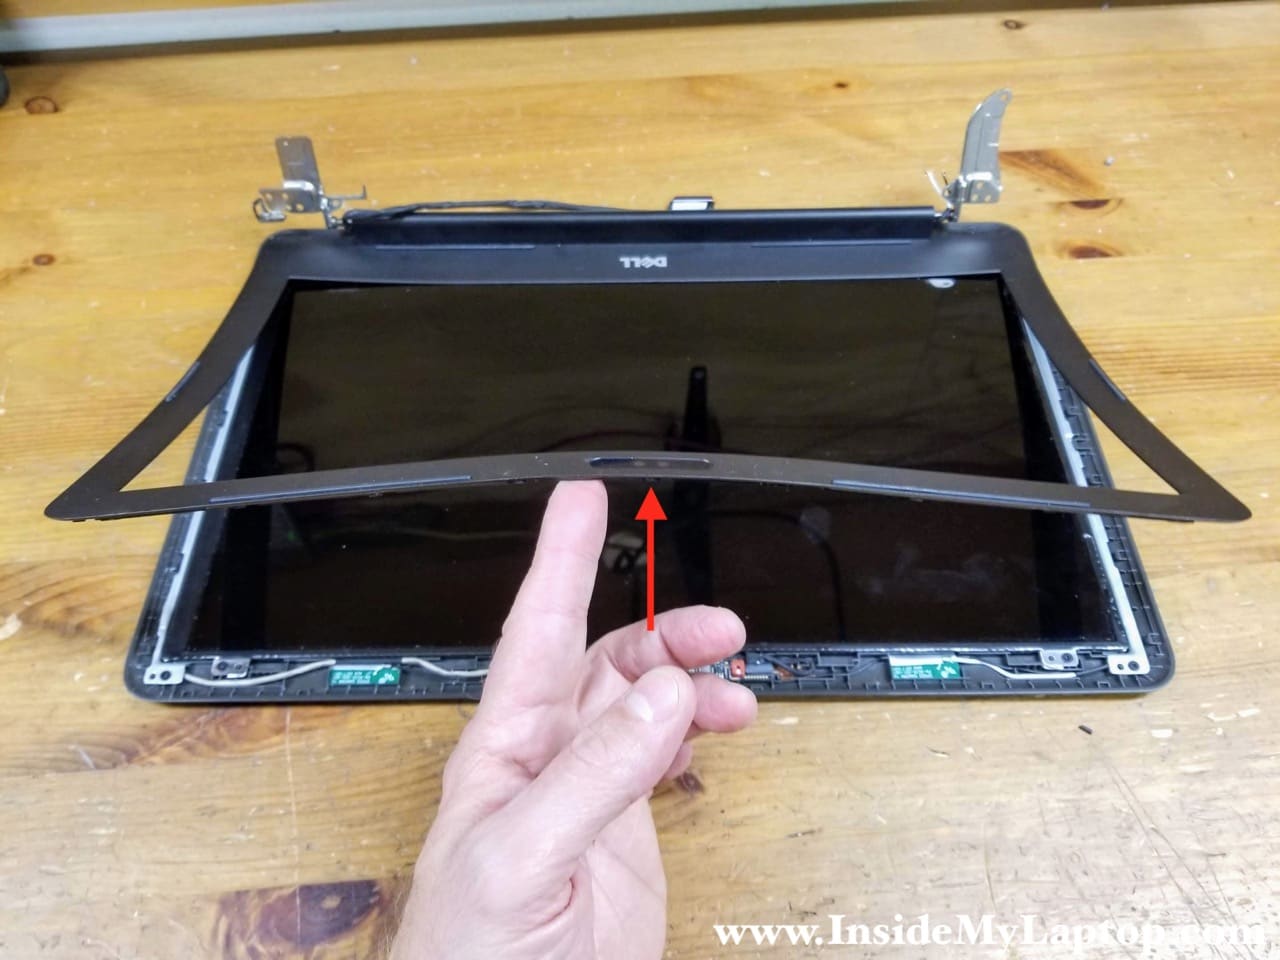
STEP 3.
After the bezel is removed on the top of the display, we can move to the bottom.
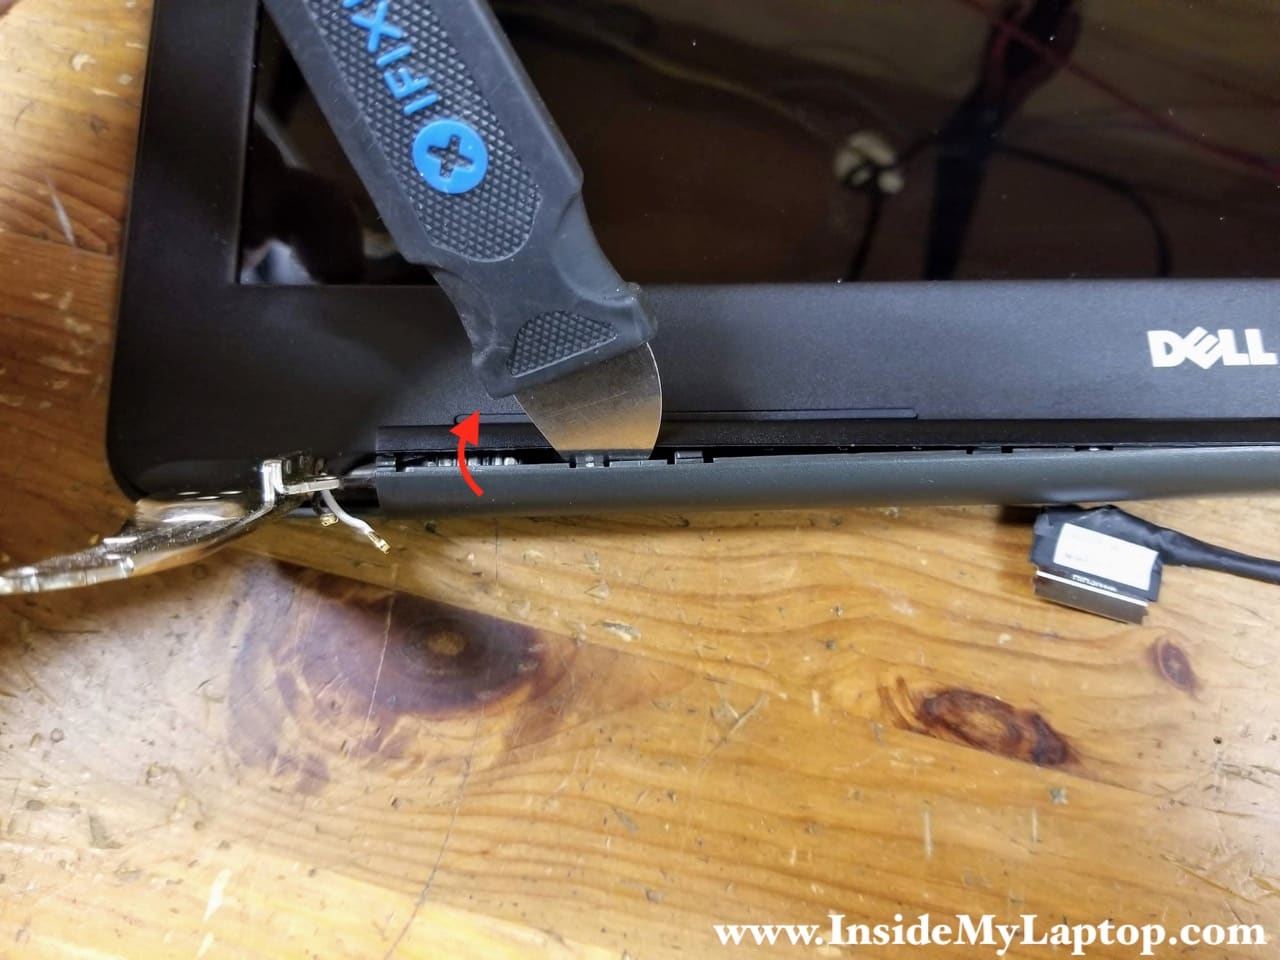
STEP 4.
Start splitting the hinge cover using the case opener.
STEP 5.
Remove the bezel from under the hinge. Yeah… try doing that with the display still installed on the laptop (as it shown on some YouTube videos).
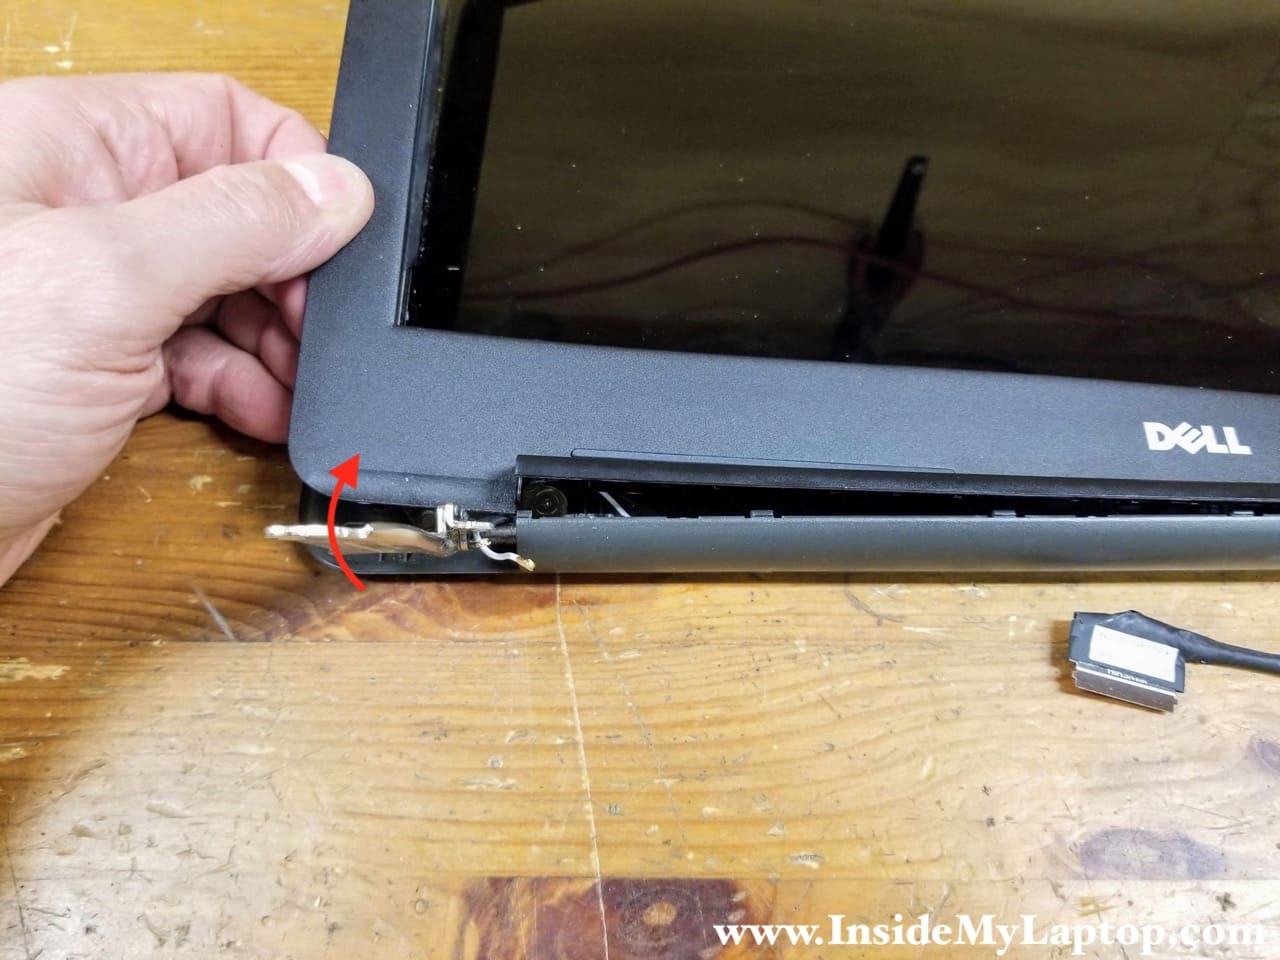
STEP 6.
Remove the screen bezel completely.
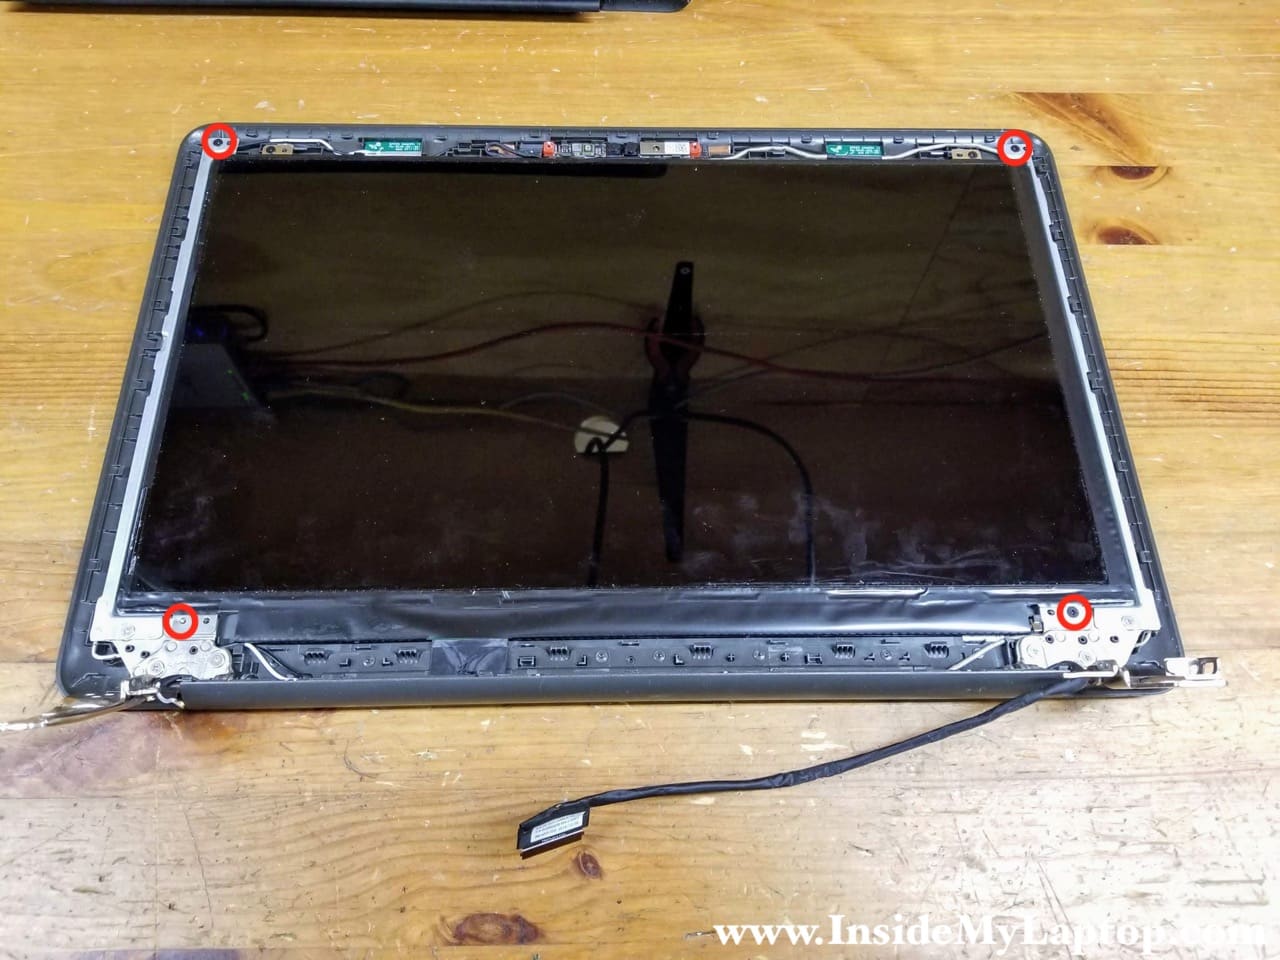
STEP 7.
Remove four screws attaching the LCD screen to the hinge brackets.
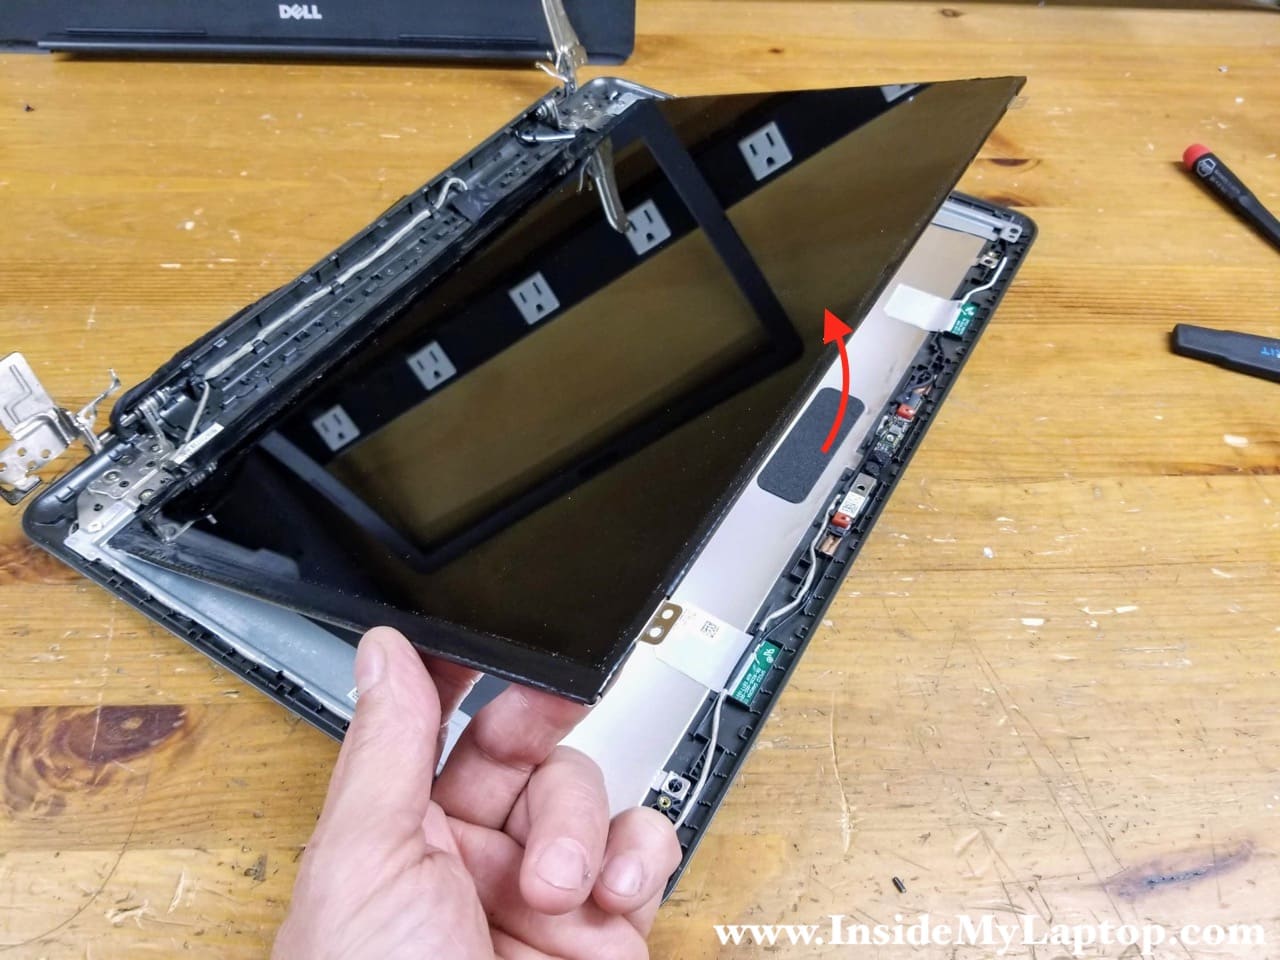
STPE 8.
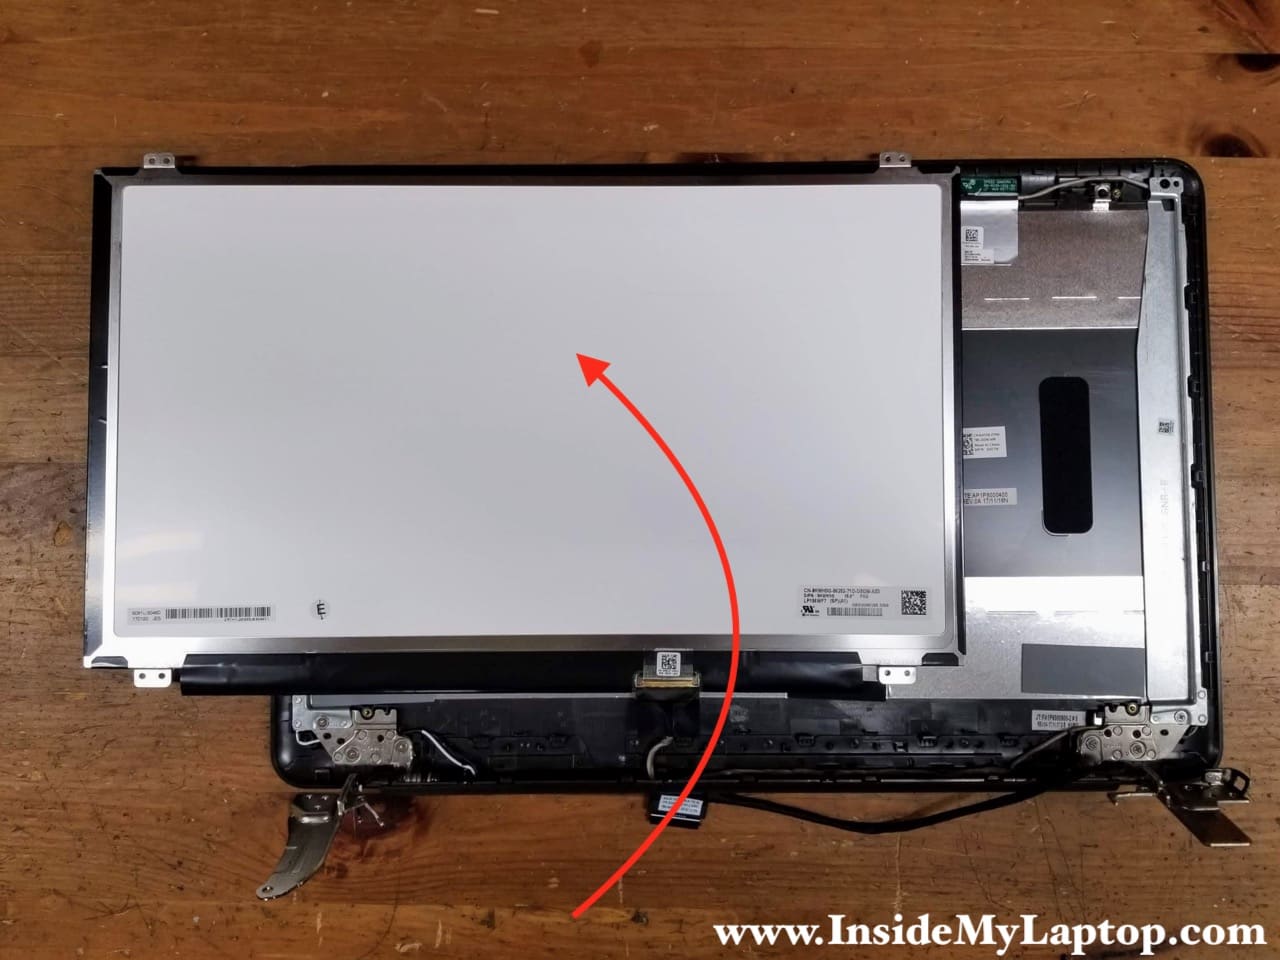
Separate the LCD screen from the back cover and turn it upside down.
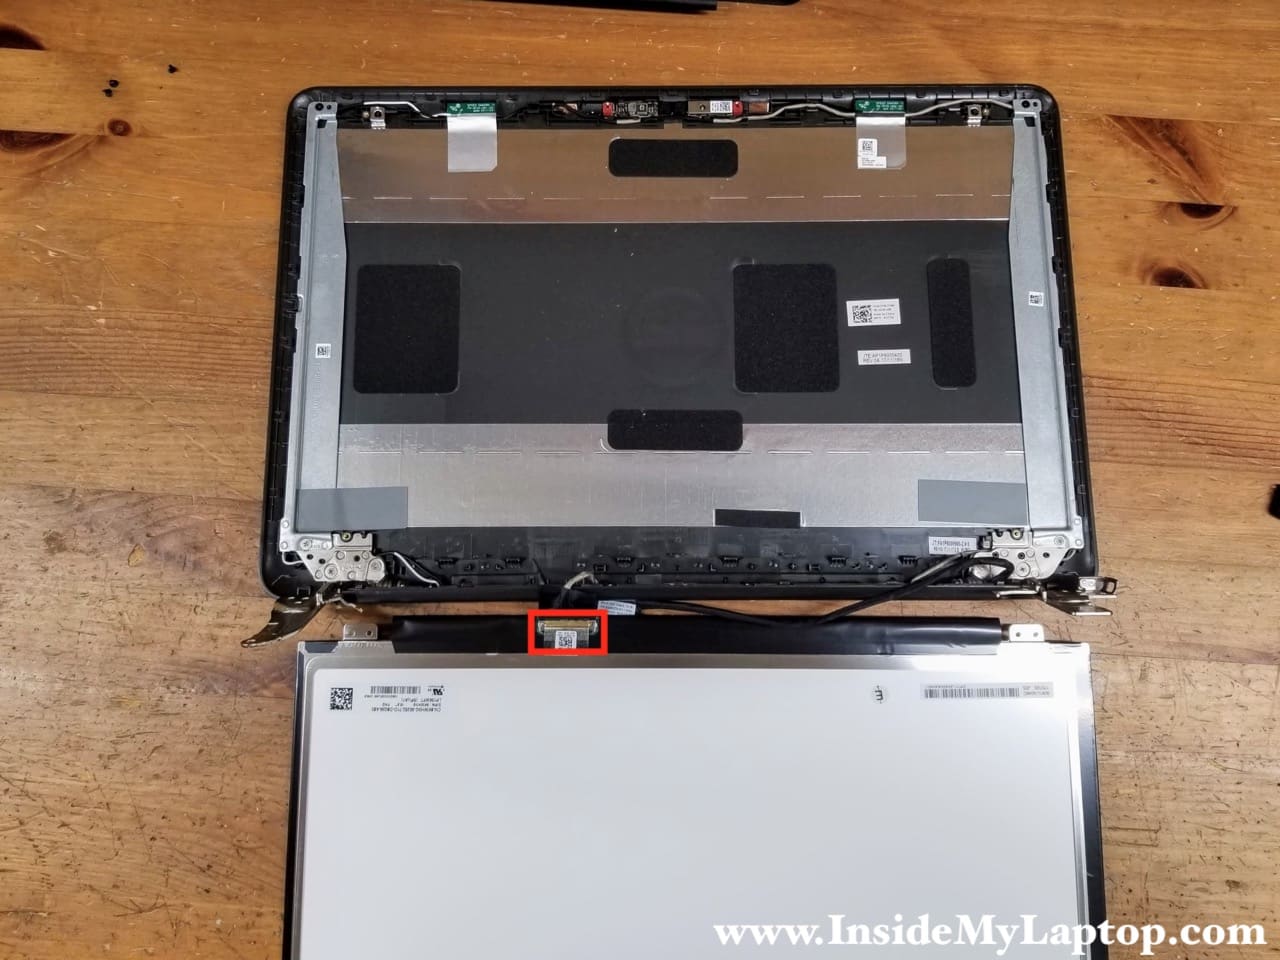
STEP 9.
Now you can access and disconnect the display video cable from the back of the screen.
It’s easier to work if you rotate the screen 180 degrees and place it on the back cover as shown on the following picture.
STEP 10.
Peel off the clear tape securing the connection.
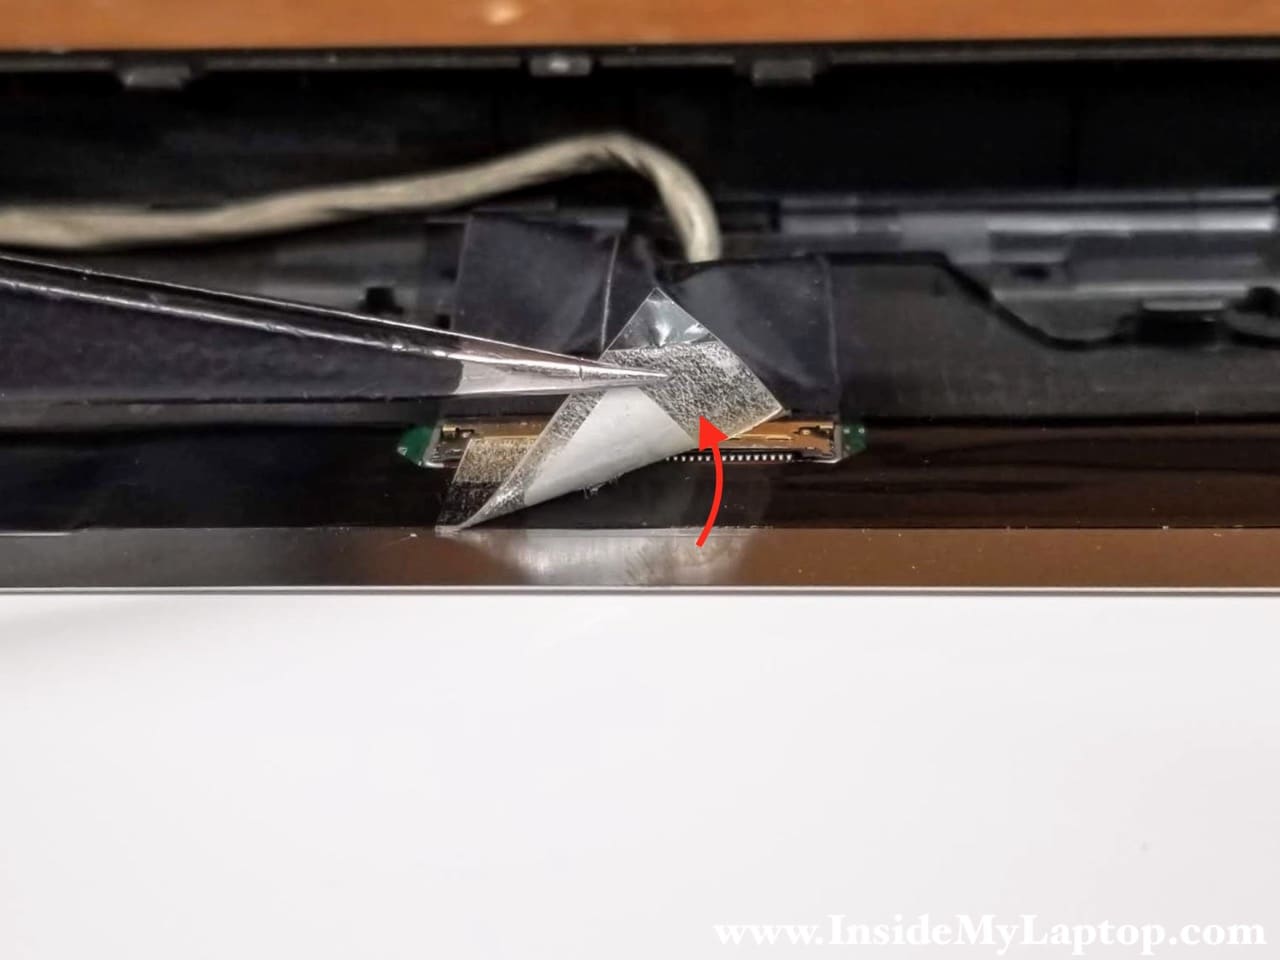
Here’s the display cable connector exposed. It must be unlocked before disconnecting the cable.
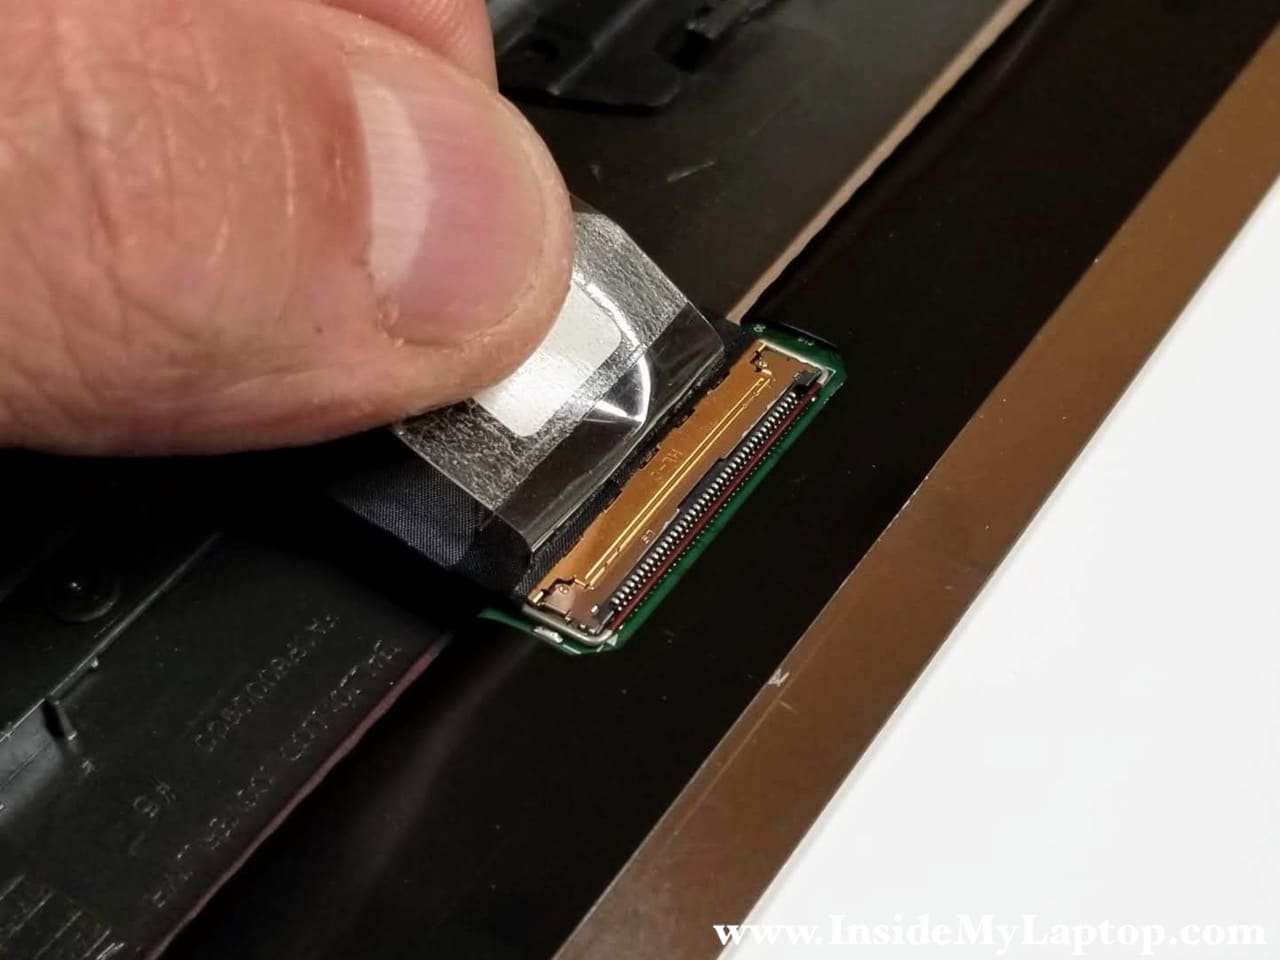
STEP 11.
Lift up the metal bracket to unlock the connector.
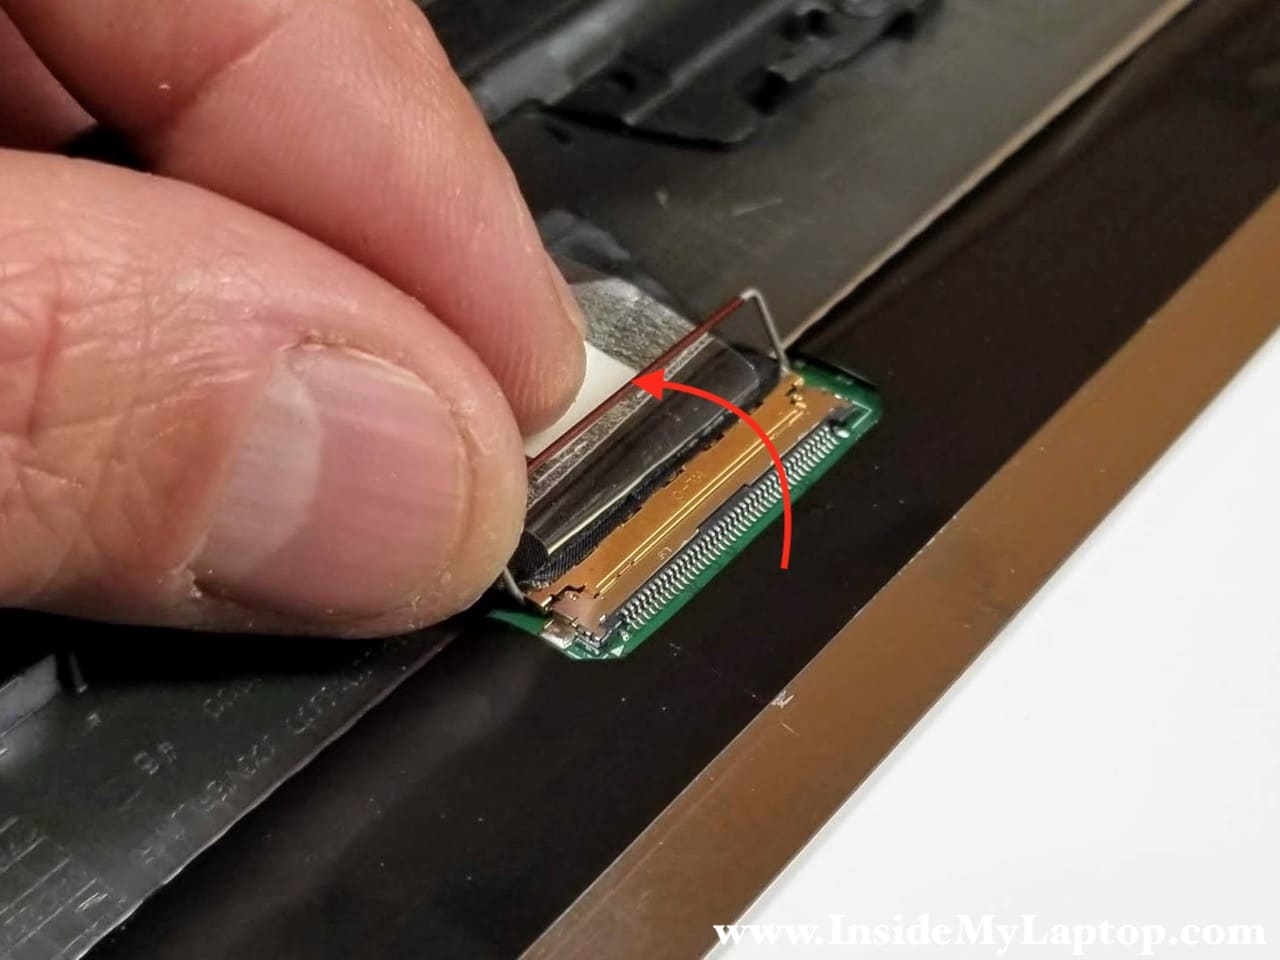
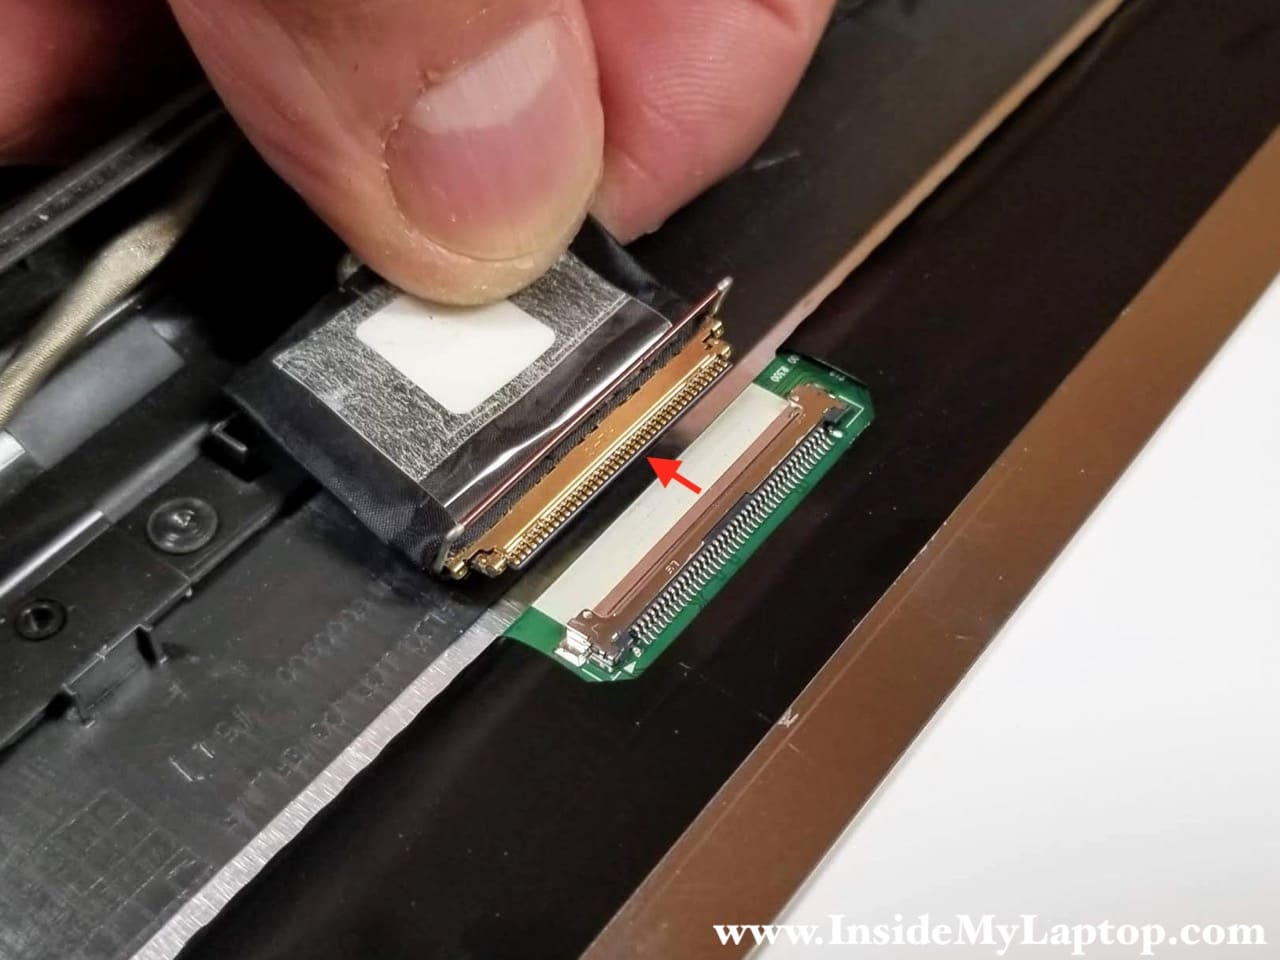
STEP 12.
Pull the display cable out of the connector on the LCD screen.
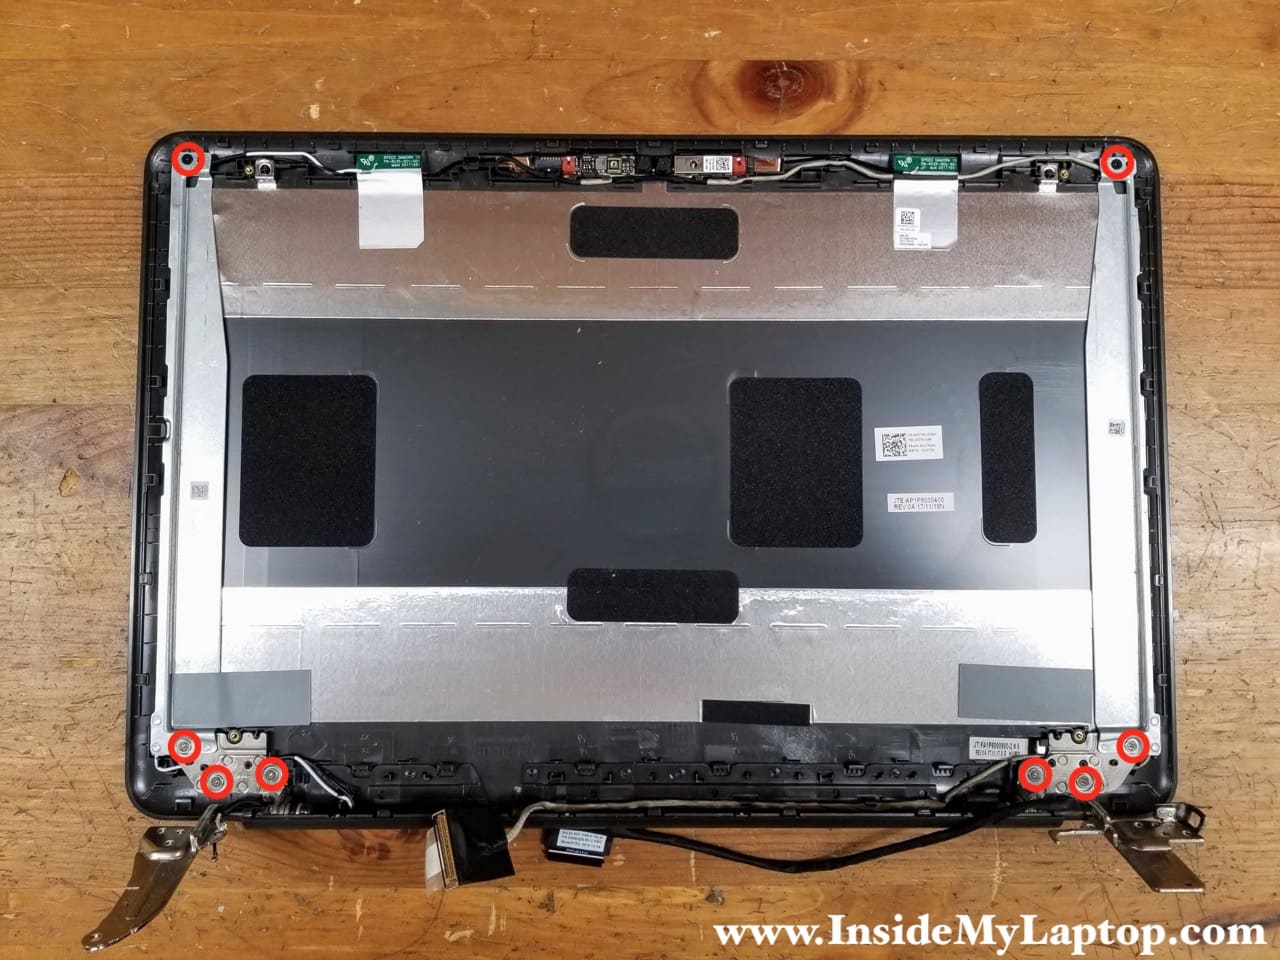
STEP 13.
Now you can remove and replace the display hinges if necessary. Simply remove all shown screws and separate the hinges from the back cover.
The LCD screen has been removed and ready to be replaced. Assemble the laptop following all steps in the reverse order.
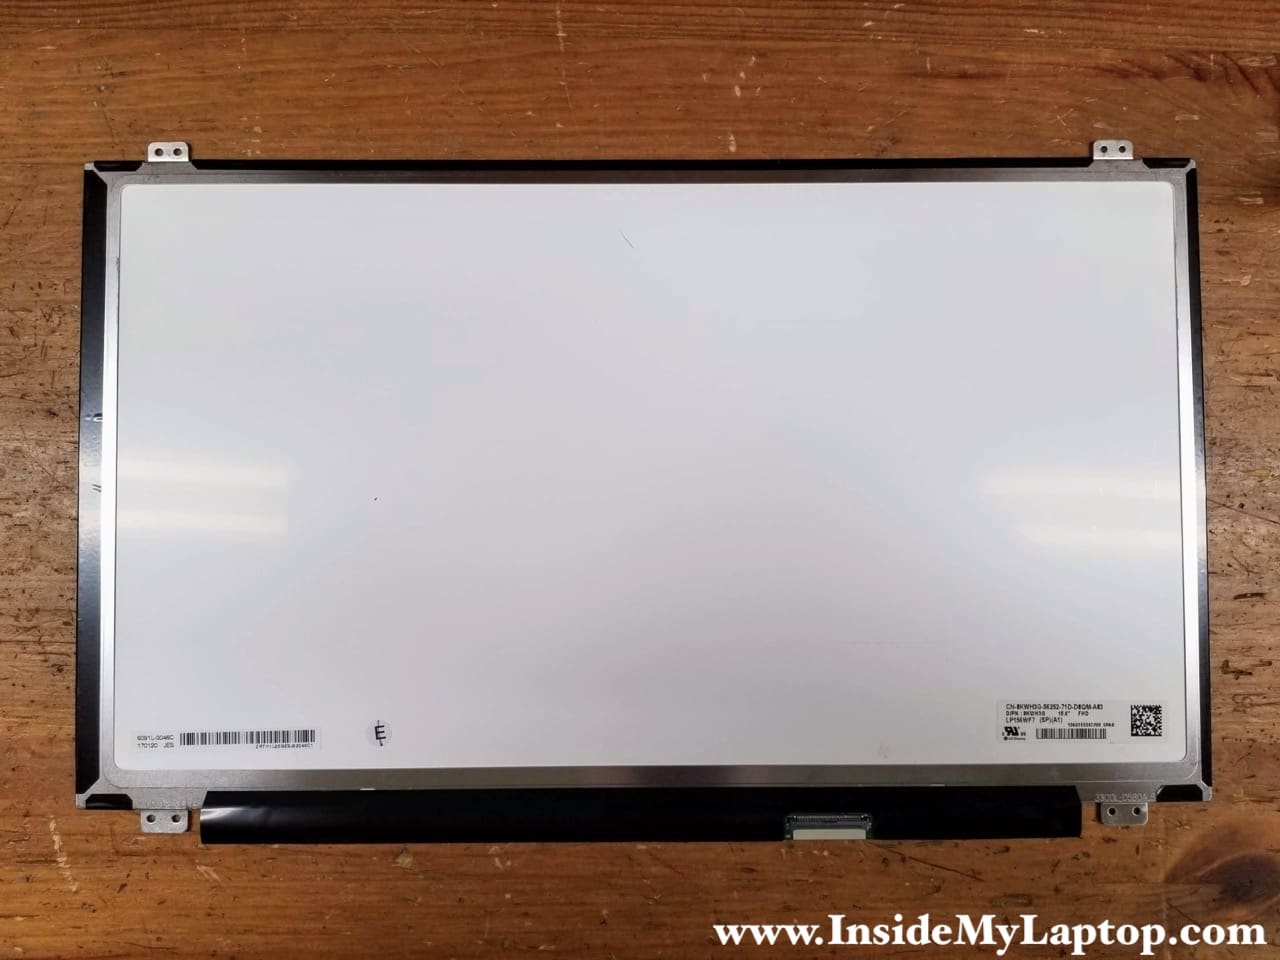
You can find a new replacement screen for your Dell Inspiron 15 5565 or 5567 if you search by the screen model LP156WF7(SP)(A1) or Dell part number 0KWH3G.
