Today I will show how to remove a stuck DVD or CD disc from a MacBook Pro laptop.
In this example I’m removing it from a 13-inch MacBook Pro (Mid 2012) but you should be able to use this guide for any other 13″, 15″ or 17″ MacBook Pro. All disassembly steps should be very similar.
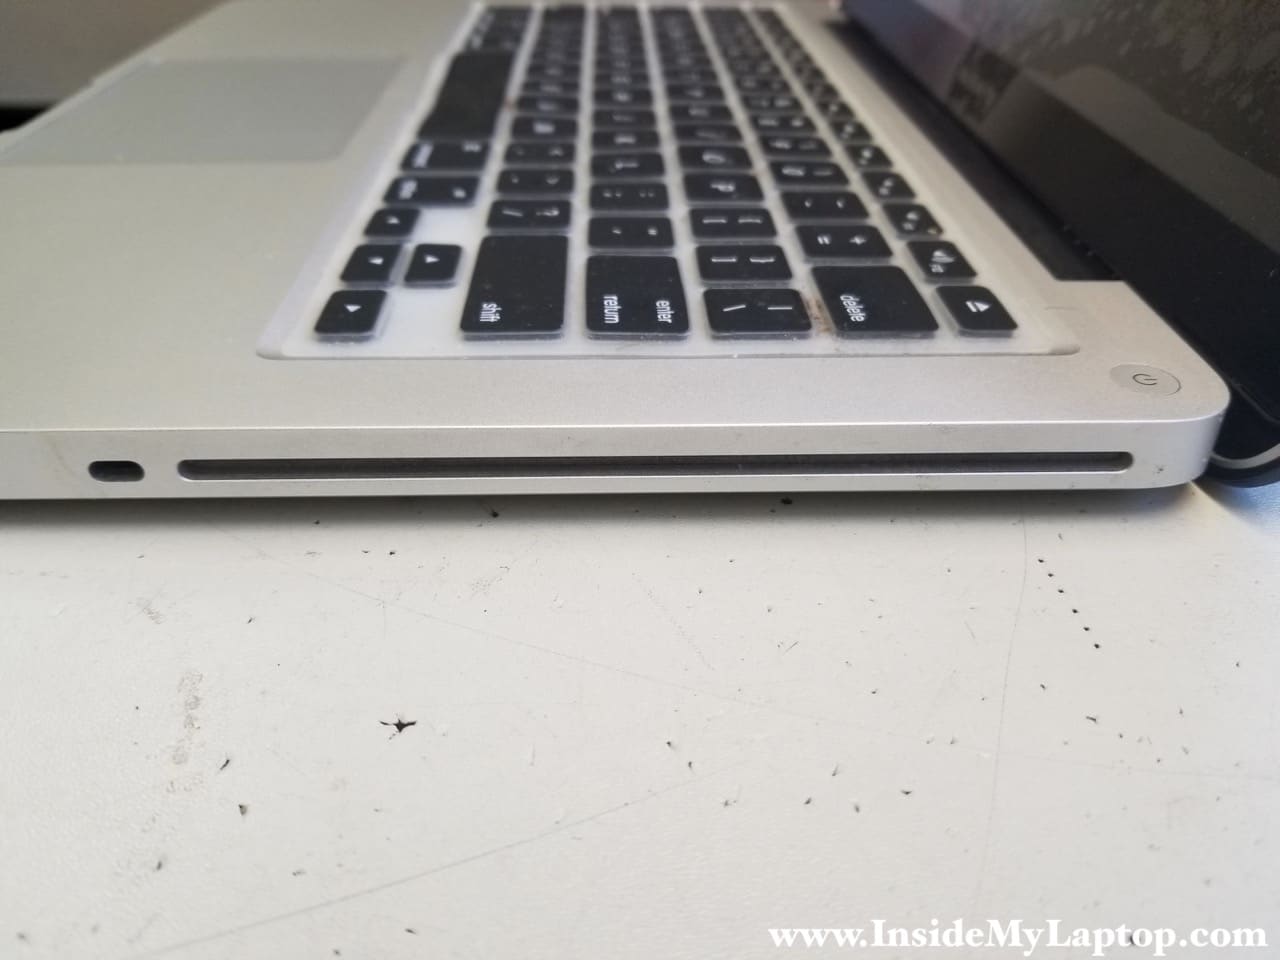
On Apple computers you will not find the eject pin hole which is present on most PC laptops. If a DVD or CD got stuck in the optical drive, you will have to open up the laptop case, remove the optical drive and take it apart (partially).
It’s not difficult. The entire procedure will not take more than 15-30 minutes depending on your technical skills.
Alternatively, you can use an external USB optical CD/DVD drive.
STEP 1.
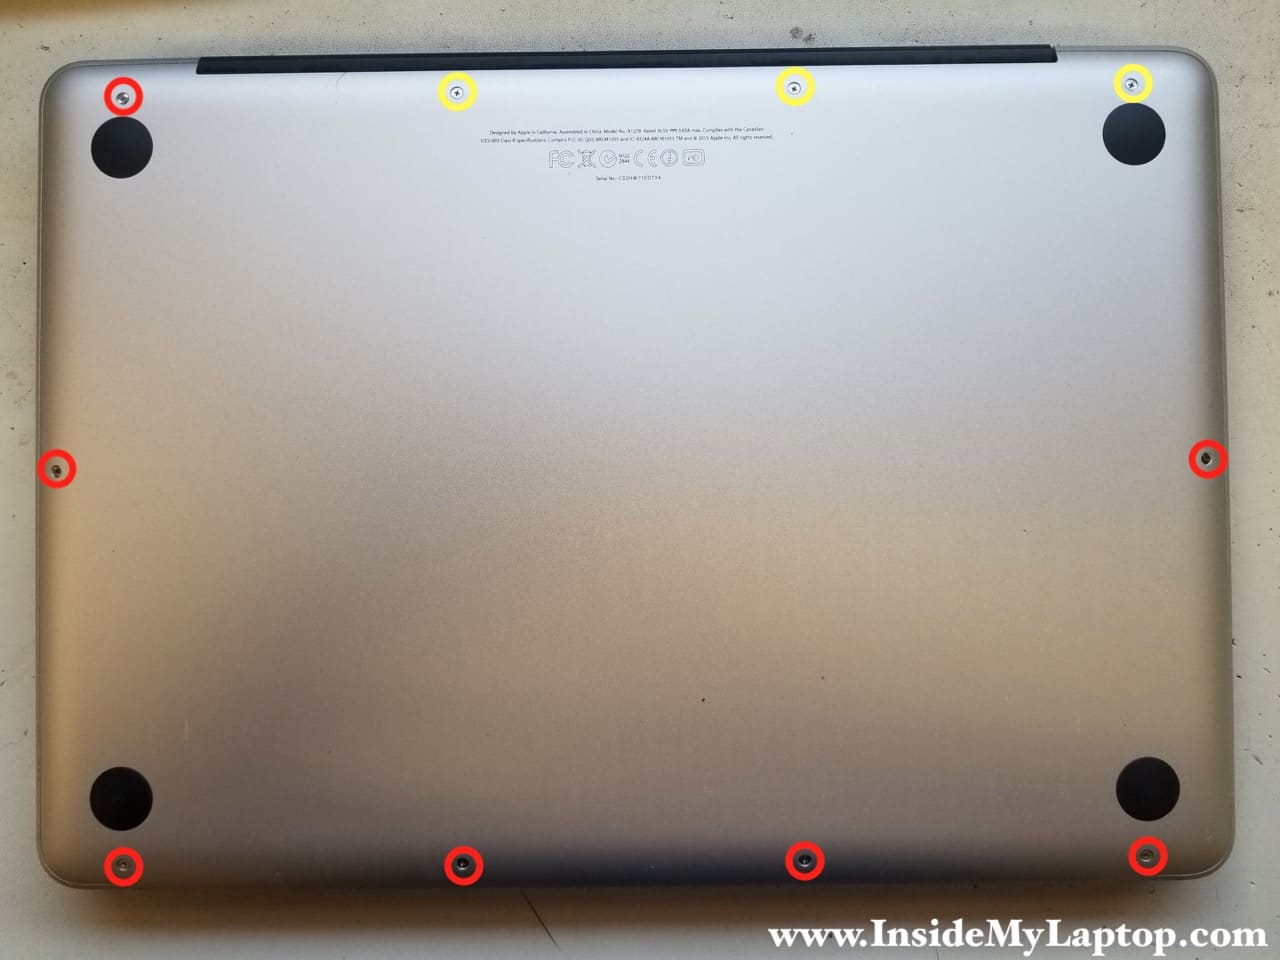
Remove ten Phillips screws securing the bottom cover. Three screws I marked with yellow circles are longer than other screws.
Remove the cover.
STEP 2.
Disconnect the battery cable from the logic board.

The optical drive is easily accessible but it’s mounted under a couple of cables.

STEP 3.
Carefully disconnect the web camera cable from the logic board.

STEP 4.
Unplug (left to right) the hard drive cable, optical drive cable and the Wi-Fi/Bluetooth cable.

STEP 5.
Remove the webcam cable from the guided path on the side of Wi-Fi card and speaker assembly.

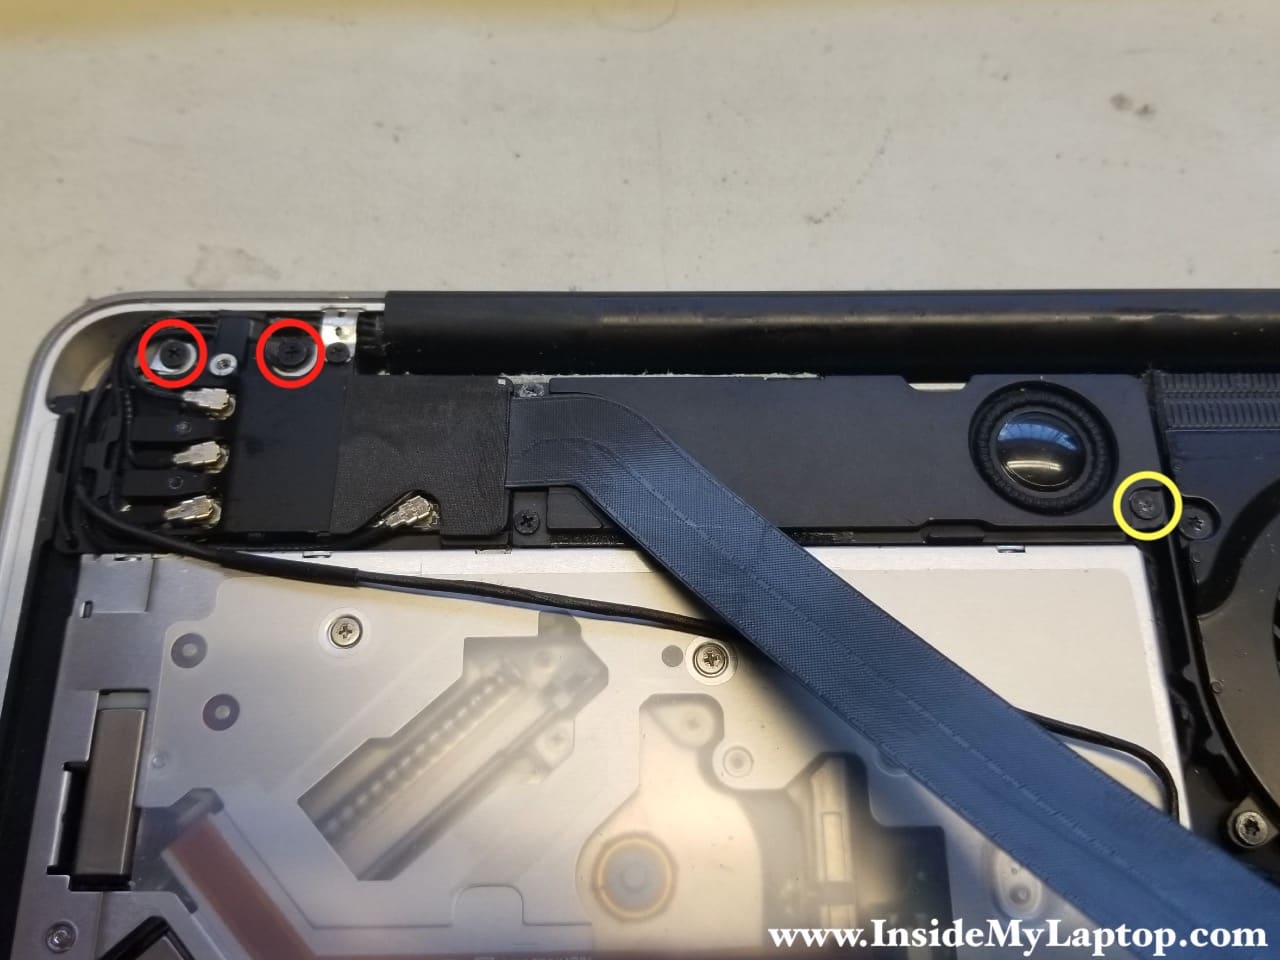
STEP 6.
Remove three screws securing the assembly.
One screw I marked with a yellow circle is shorter than two other screws.
STEP 7.
Carefully slide the Wi-Fi card and speaker assembly to the right. We don’t have to remove it completely.
We have to move it just enough to access one screw securing the optical drive.

STEP 8.
Here’s the screw we are trying to access. Remove it.

STEP 9.
Remove the second screw securing the drive in the lower left corner.

STEP 10.
Remove the last screw securing the drive to the metal bracket.

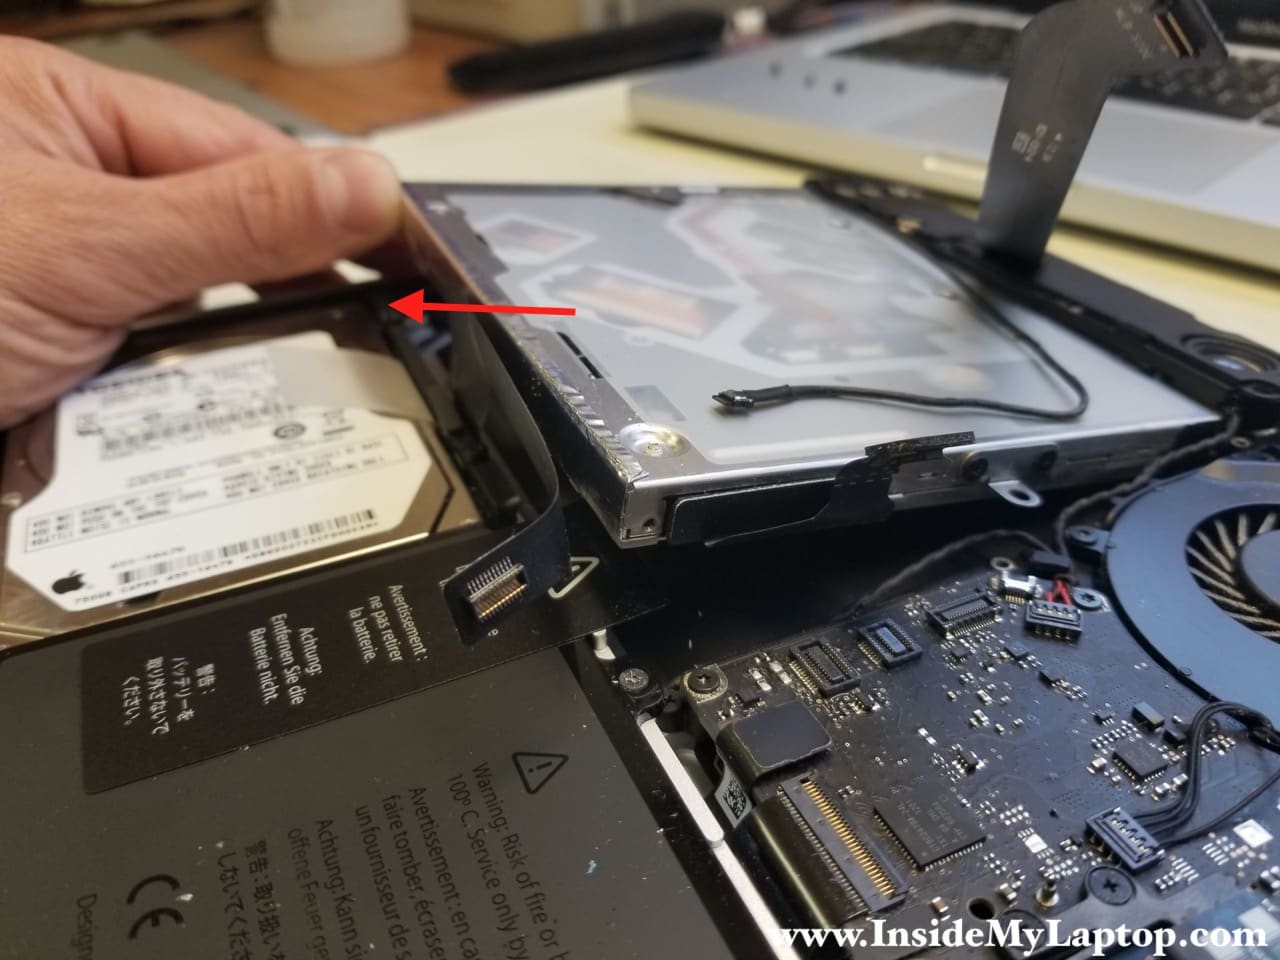
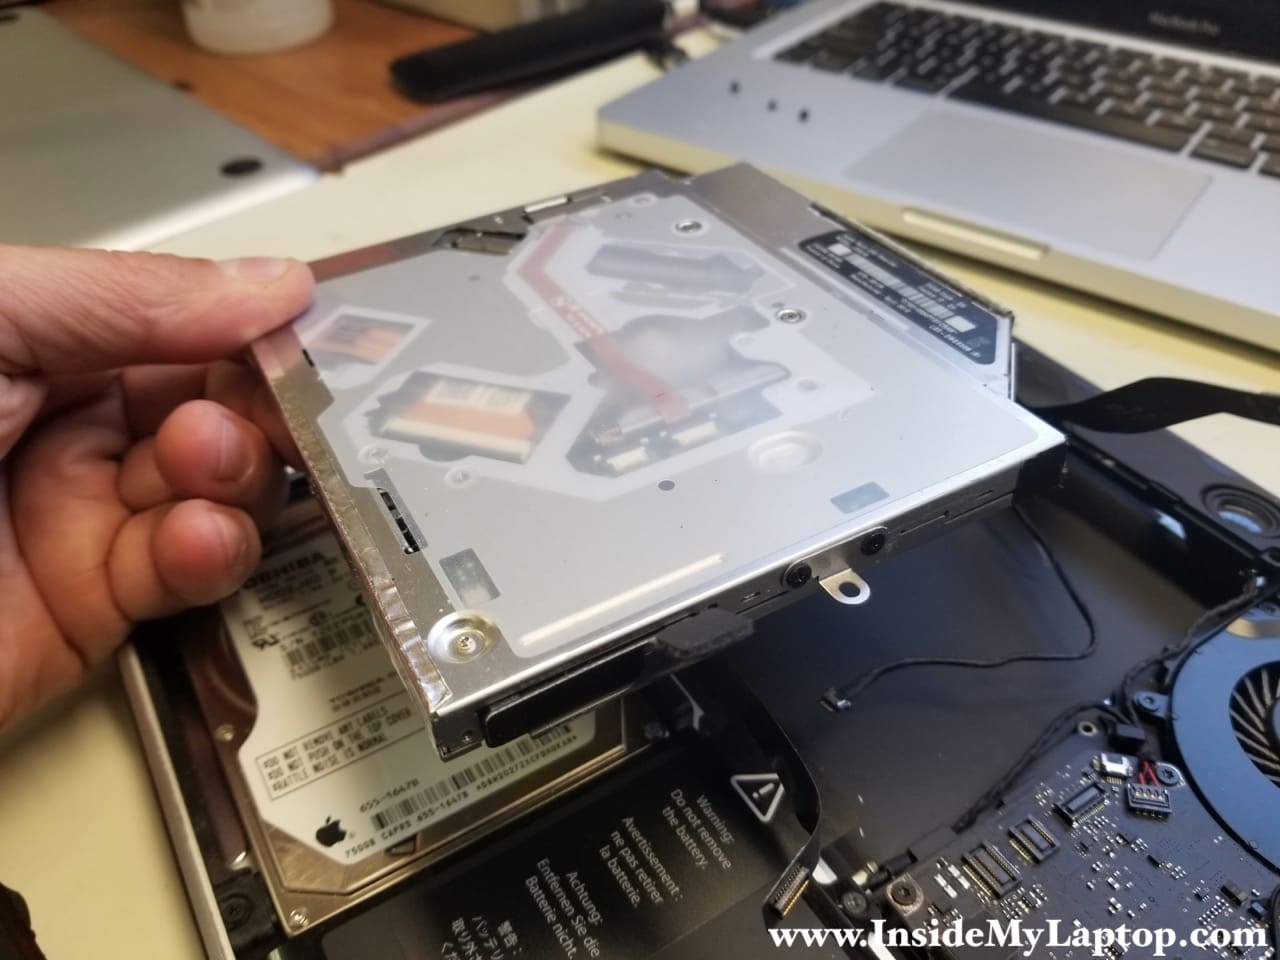
STEP 11.
Lift up and pull the optical drive out of the laptop.
Be careful with the hard drive cable because it will be on the way.
STEP 12.
Remove the optical drive.
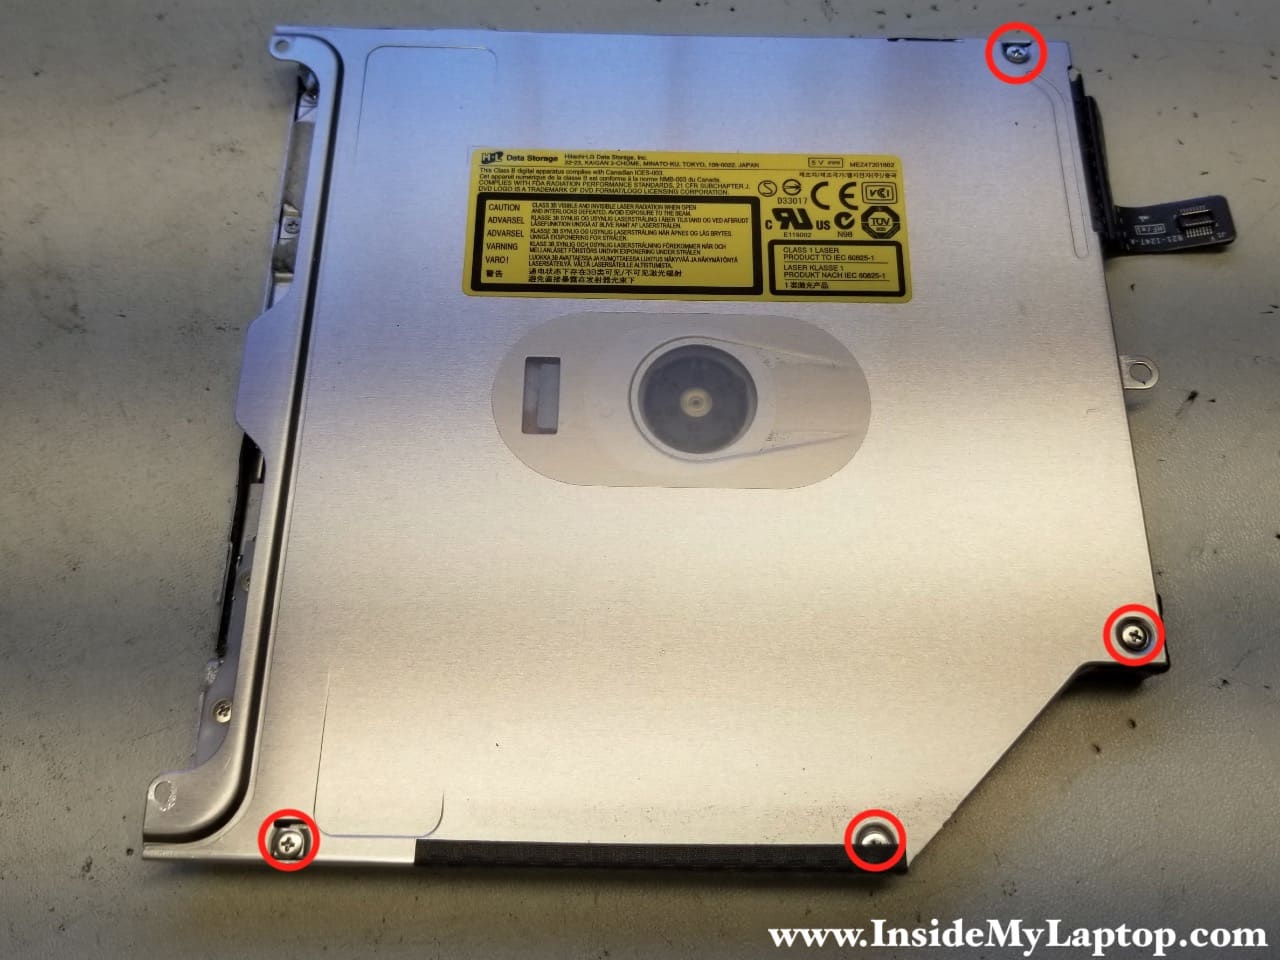
STEP 13.
Now we’ll have to remove (partially) the cover in order to rescue the stuck CD/DVD disc.
Remove four screws from the cover.
STEP 14.
Peel off the tape on the side.
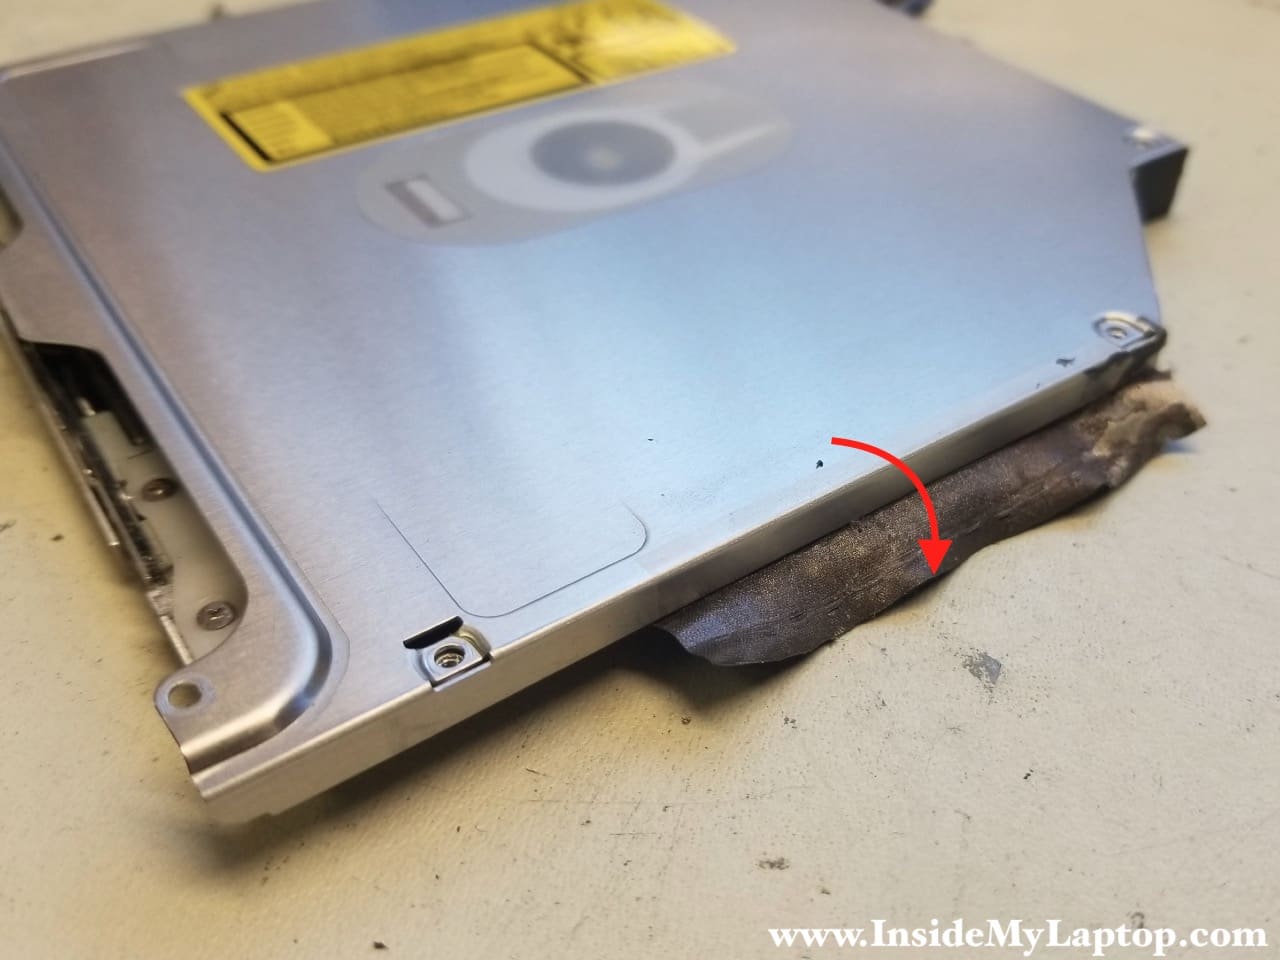
STEP 15.
Separate the cover from the drive just enough to access the disc.
Lift up the disc a little bit to unsnap it from the spindle.

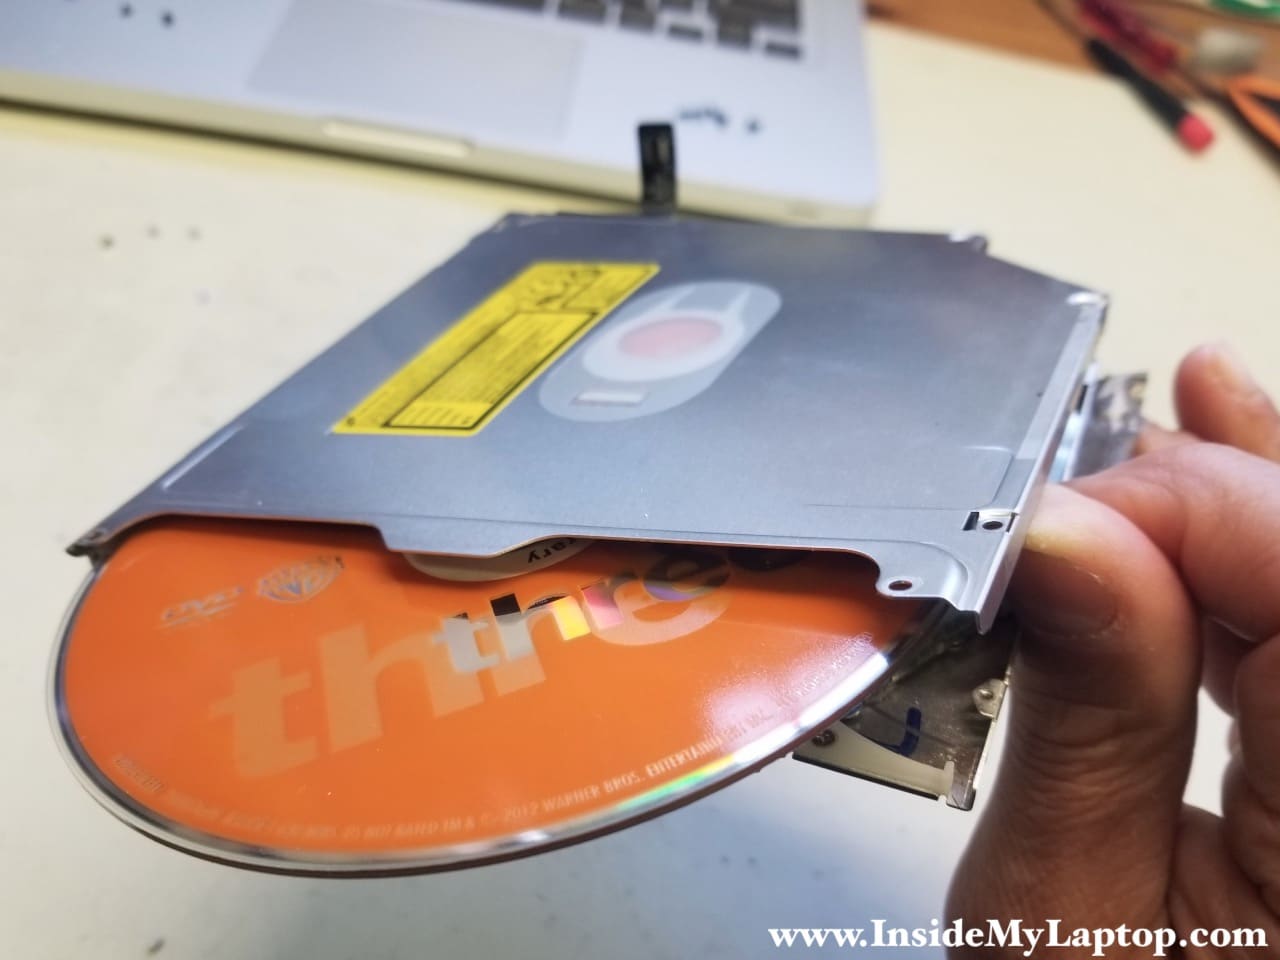
STEP 16.
Now you can remove the stuck DVD or CD disc and reassemble the laptop following all steps in the opposite direction.
Jennifer
Exactly what I’ve been looking for! Thank you for the thorough walkthrough of how to do this!!
IML Tech
You are welcome Jennifer! I’m happy to help.
Terry kellogg
This post was so helpful!! Now my MacBook was a bit different but even watching this post gave me the confidence to actually try. Needless to say, I got the Red box movie back out!!! Thank you
mlon
very kind thx for the ifo/steps mlon/puerto rico