
In the following guide I explain how to disassemble a Lenovo YOGA C930-13IKB (Model name: 81C4) laptop.
Lenovo YOGA C930-13IKB design highlights:
– The battery is glued to the top case.
– Laptop uses PCIe NVMe SSD.
– Computer memory (RAM) is permanently soldered to the motherboard.
– Wireless card can be removed and replaced.
– Both cooling fans are attached to the heatsink.
– The keyboard is riveted to the top case assembly.
For this disassembly you will need the following tools: Torx T5 screwdriver, PH0 Phillips screwdriver, case opening tool, twiizers.
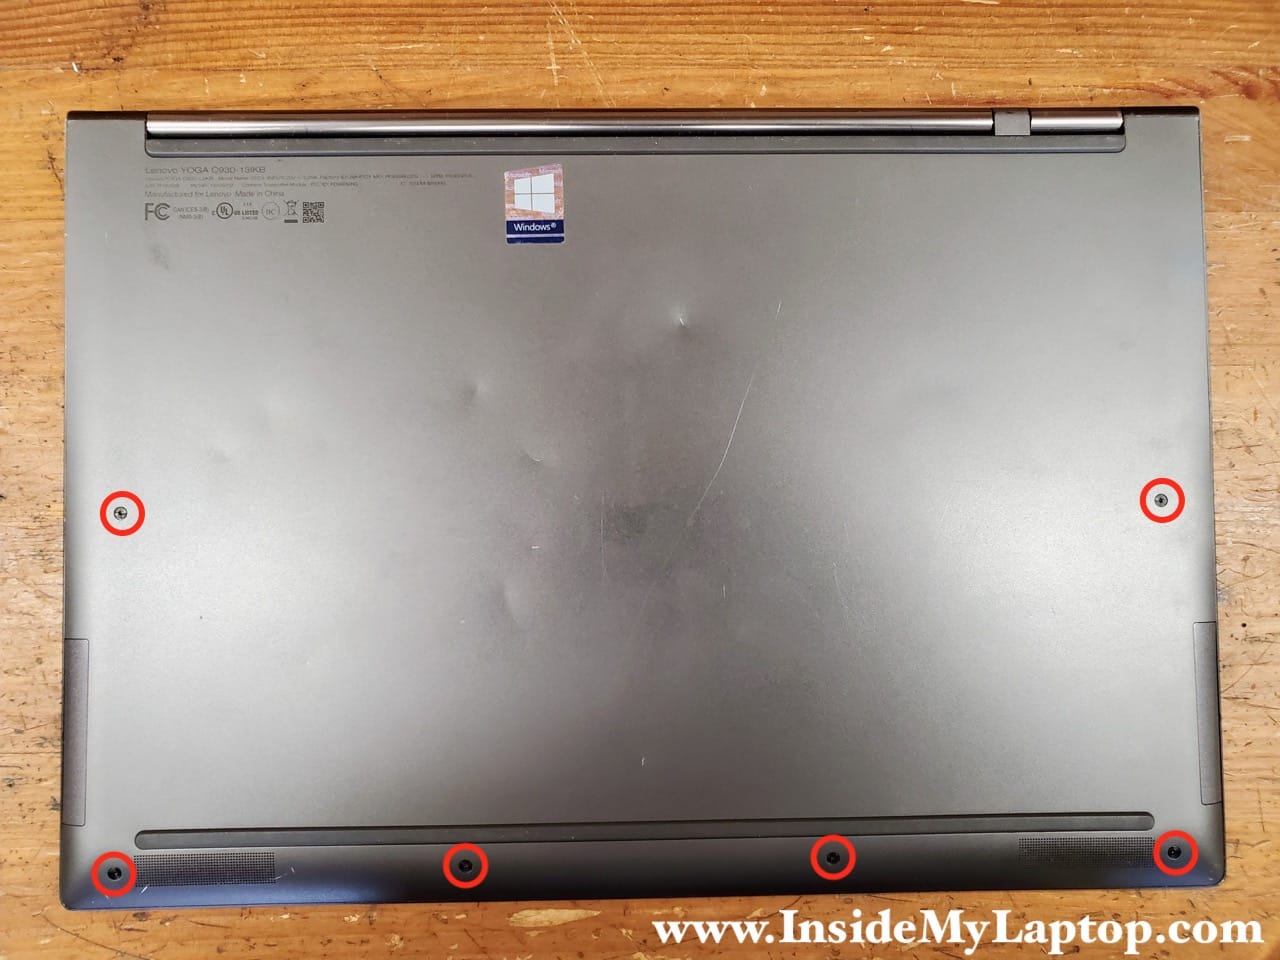
Bottom cover removal
STEP1.
There are six torx T5 screws securing the bottom cover to the main frame. Remove all the screws.
STEP 2.
Insert a thin case opening tool between the bottom cover and the laptop frame. Start removing the bottom cover on the side opposite to the display hinges. Carefully unsnap the bottom cover from the frame and remove the cover.

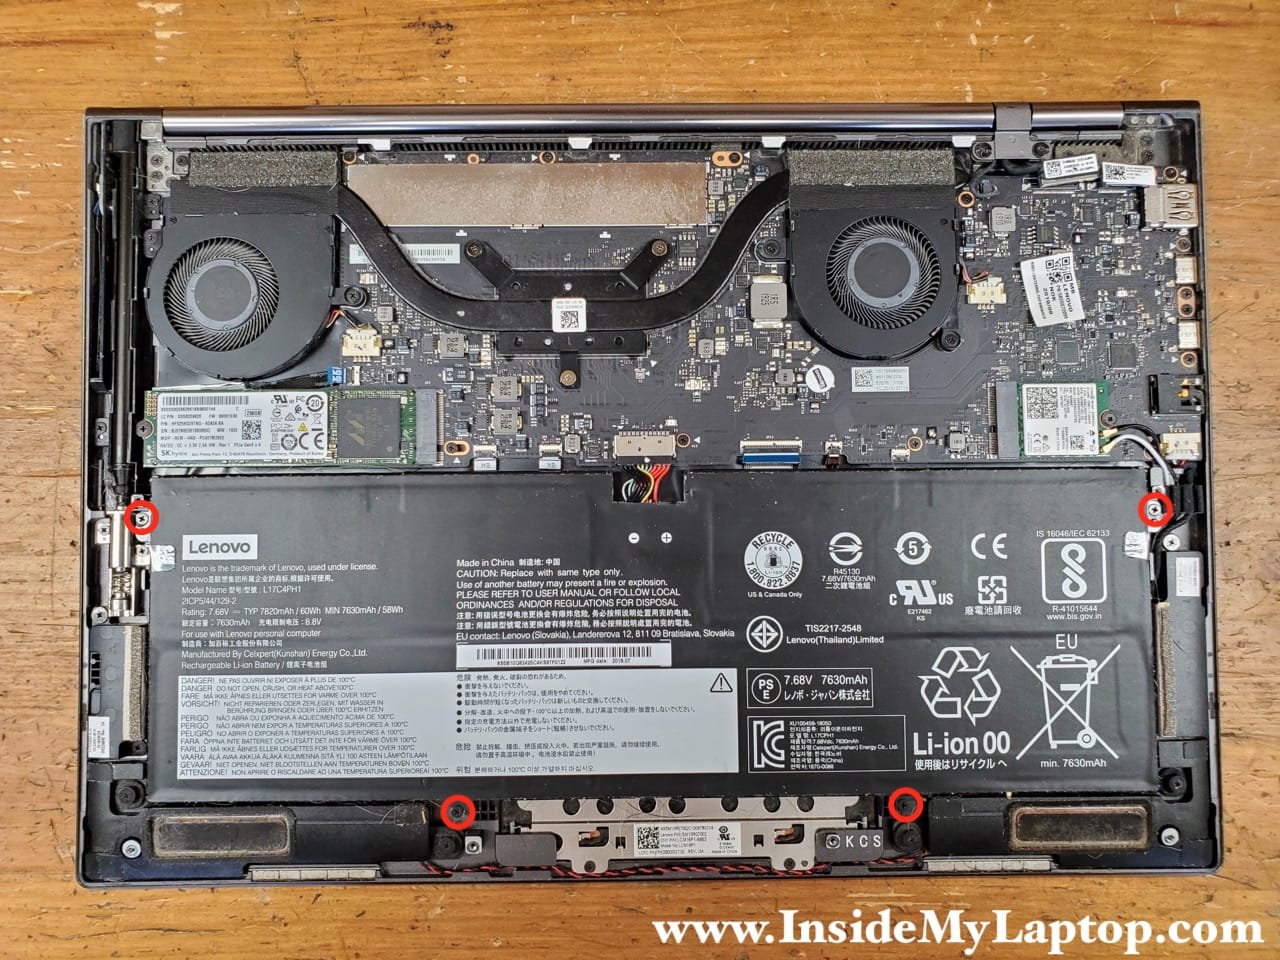
Battery removal and replacement
The battery is attached to the top case by four screws and two self-adhesive rubber strips. Before removing the battery you must remove both adhesive rubber strips.
STEP 3.
Remove four Phillips screws securing the battery.
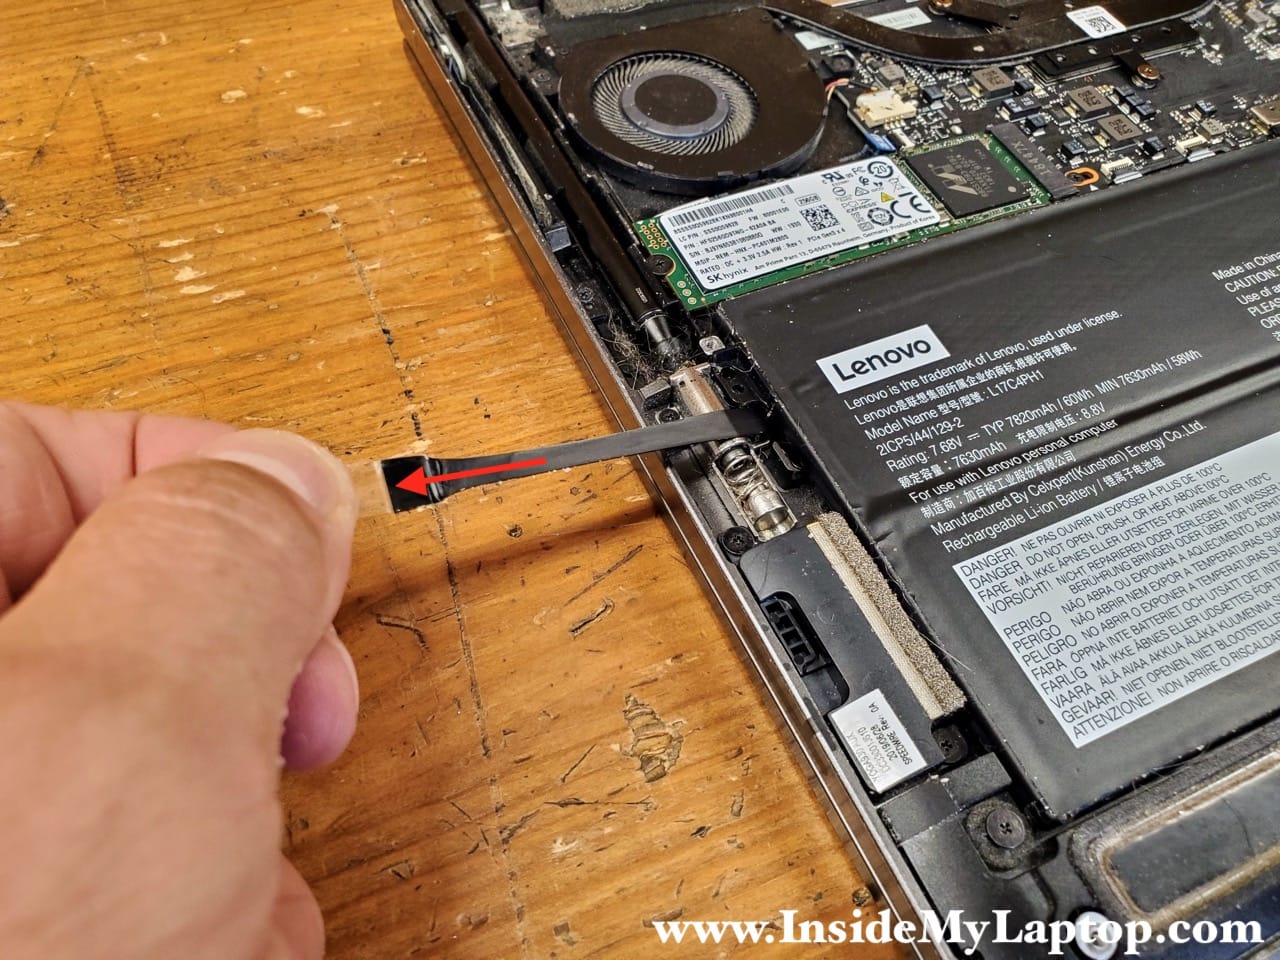
You will find two clear tabs on the left and right sides of the battery. These tabs are attached to the adhesive strips routed under the battery.
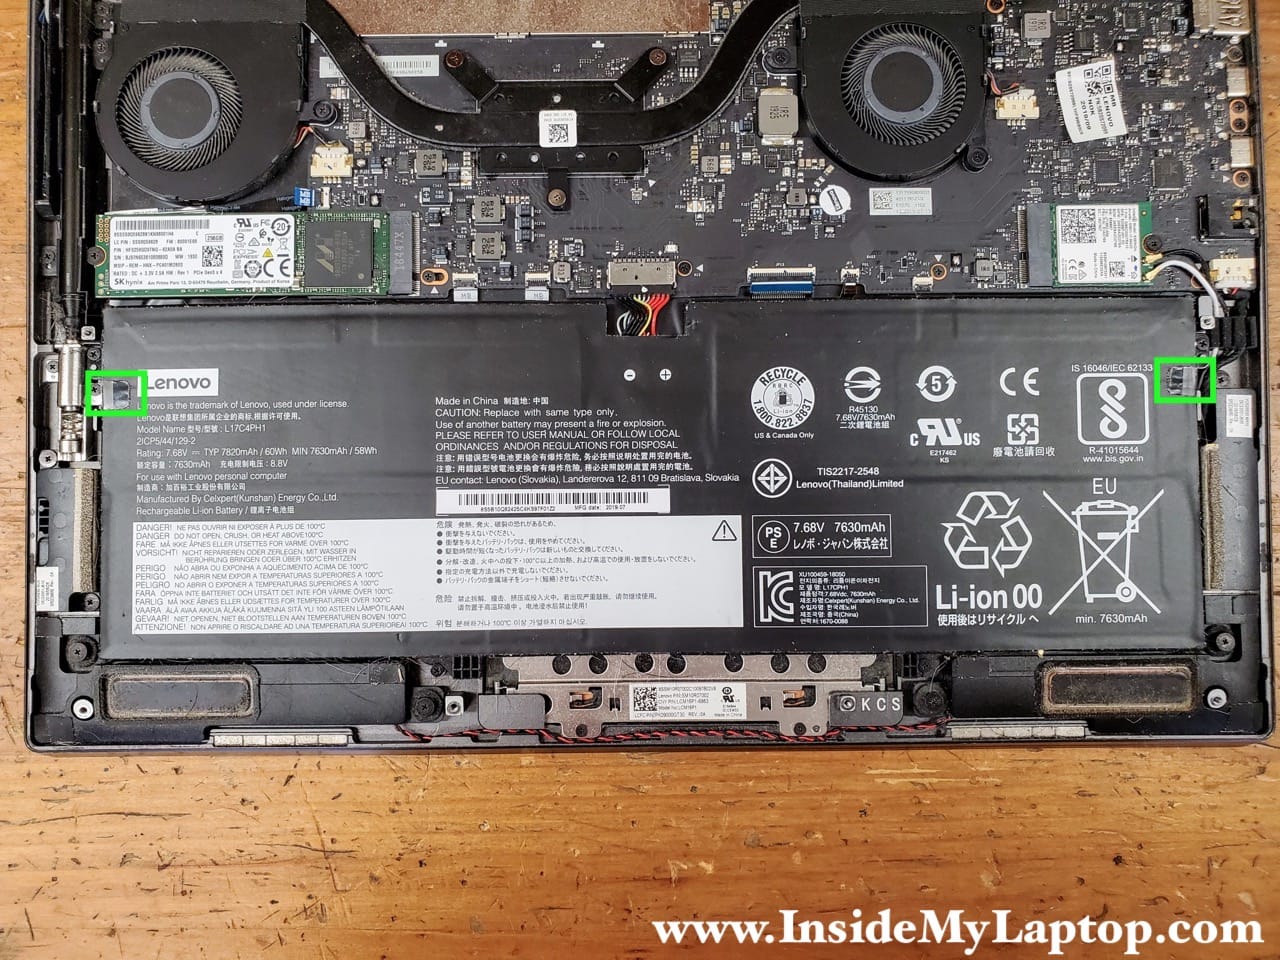
STEP 4.
Separate the tab from the battery.
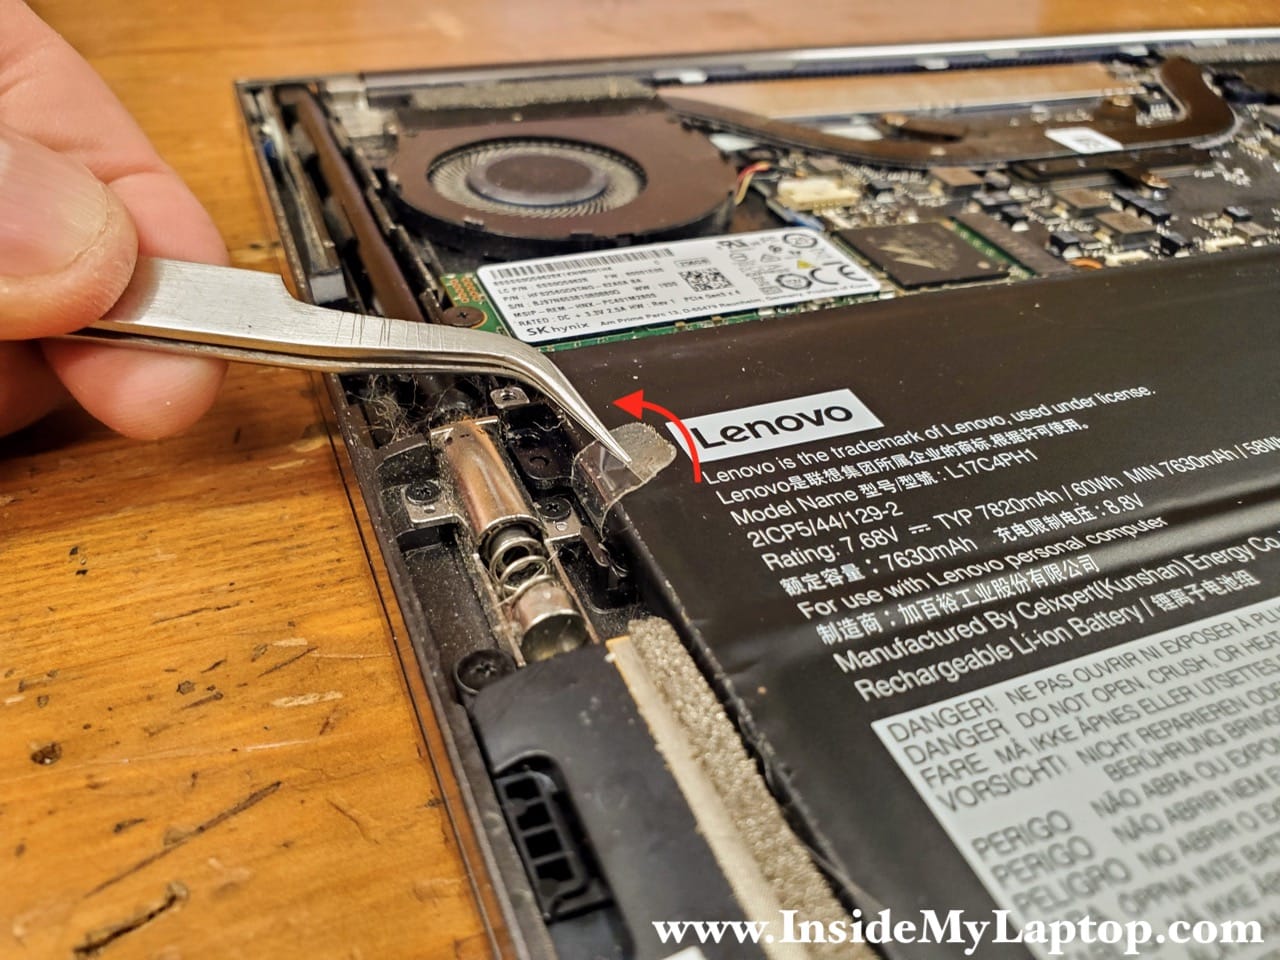
STEP 5.
Slowly pull the tab to the shown direction. The adhesive strip will start sliding from under the battery. Do not apply too much force because you don’t want to break the strip.
Here’s one of the adhesive strips removed. It’s possible to re-use the strip later to install a new battery.

STEP 6.
Remove the strip from the other side too.
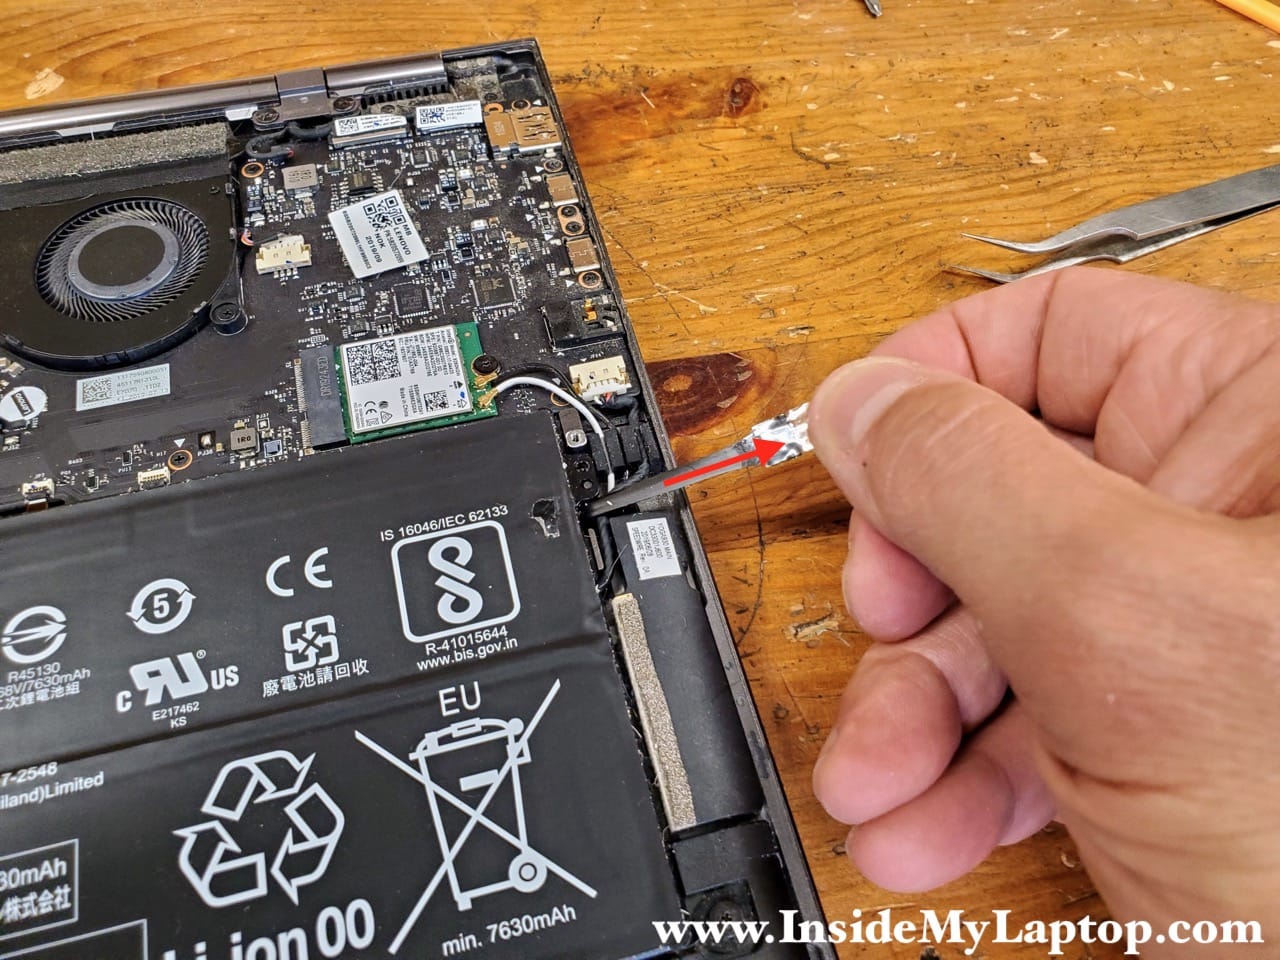
STEP 7.
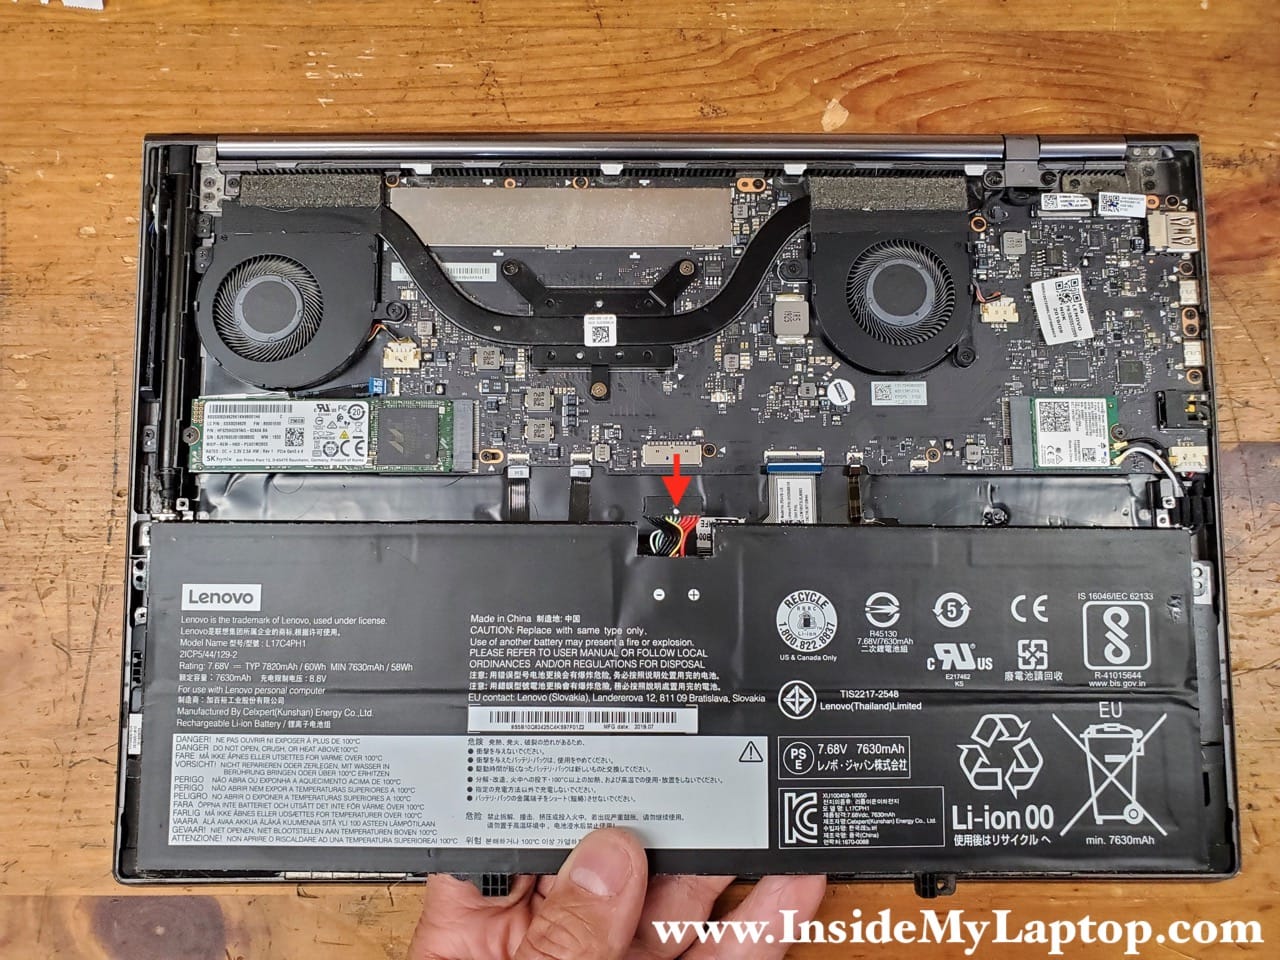
Now you can disconnect the battery and remove it.
If you need to replace the battery I recommend using genuine Lenovo battery.
Lenovo YOGA C930-13IKB laptop uses battery model: L17C4HP1.

On the following picture you can see how I applied original adhesive strips to the new replacement battery. If you accidentally broke the strips while removing them, you can use regular double sided adhesive tape to secure the battery back to the top case.

SSD removal and replacement
Lenovo YOGA C930-13IKB laptop has one PCIe slot and uses NVMe solid state drive (SSD). Any third party NVMe SSD (Samsung, Western Digital, Crucial etc…) will work just fine.
STEP 8.
Remove one Phillips screws securing the NVMe SSD to the case.
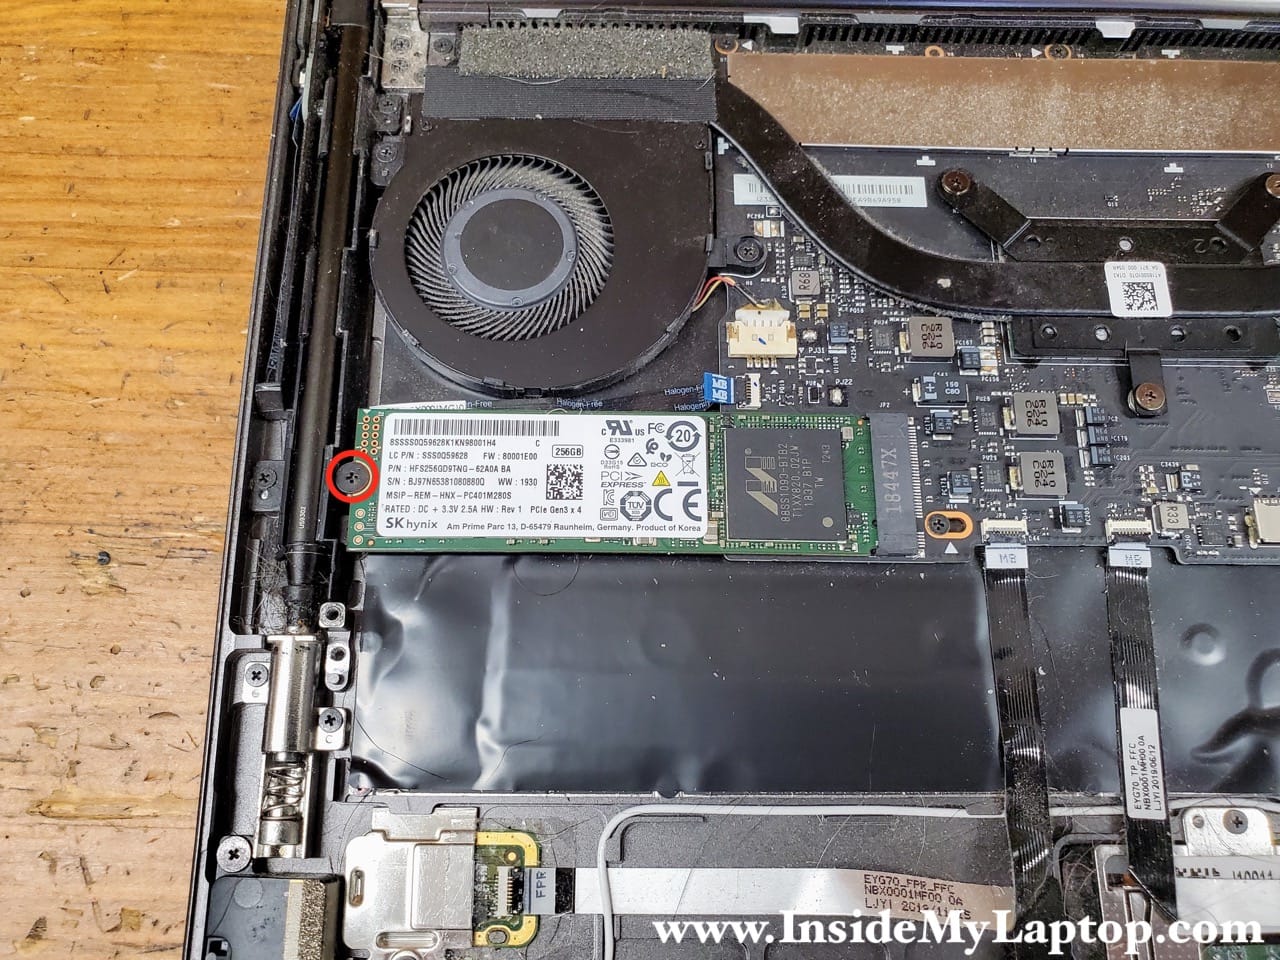
STEP 9.
Carefully lift up the left side of the SSD and pull the drive from the slot.

Wireless card removal and replacement
STEP 10.
Disconnect two antenna cables from the wireless card. Lift up the small golden connector to unsnap it from the wireless card.
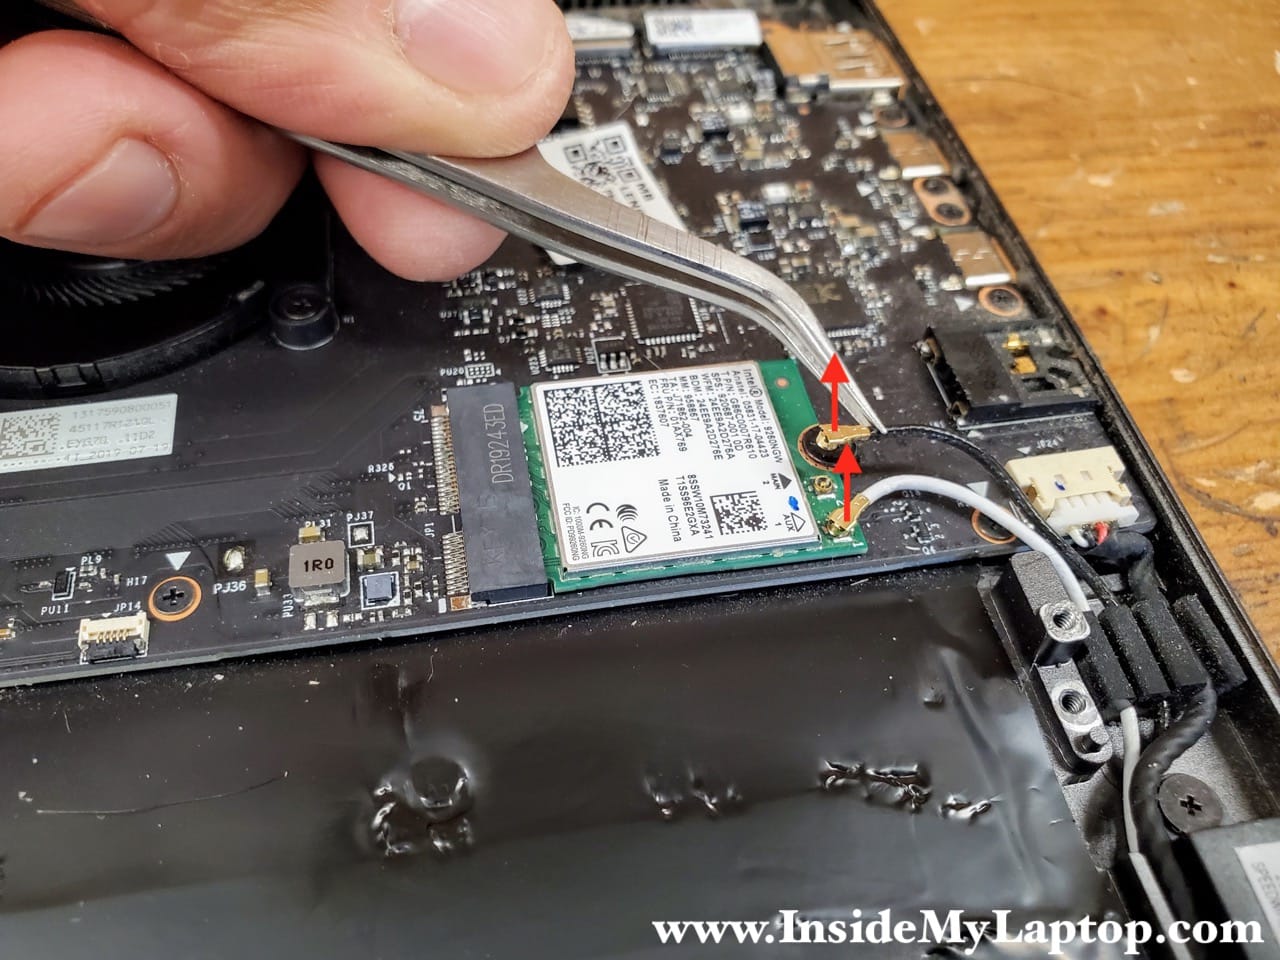
STEP 11.
Remove one Phillips screws securing the wireless card.

STEP 12.
Pull the wireless card out.
This wireless card is Intel model 9260GW. Lenovo part number: 01AX769.

Cooling fans removal and replacement
STEP 13.
Remove two screws from the left cooling fan and two more screws from the right cooling fan.
Loosen three screws (circled in yellow) securing the heatsink assembly to the processor.
Disconnect both fan cables (pointed with green squares) from the motherboard.
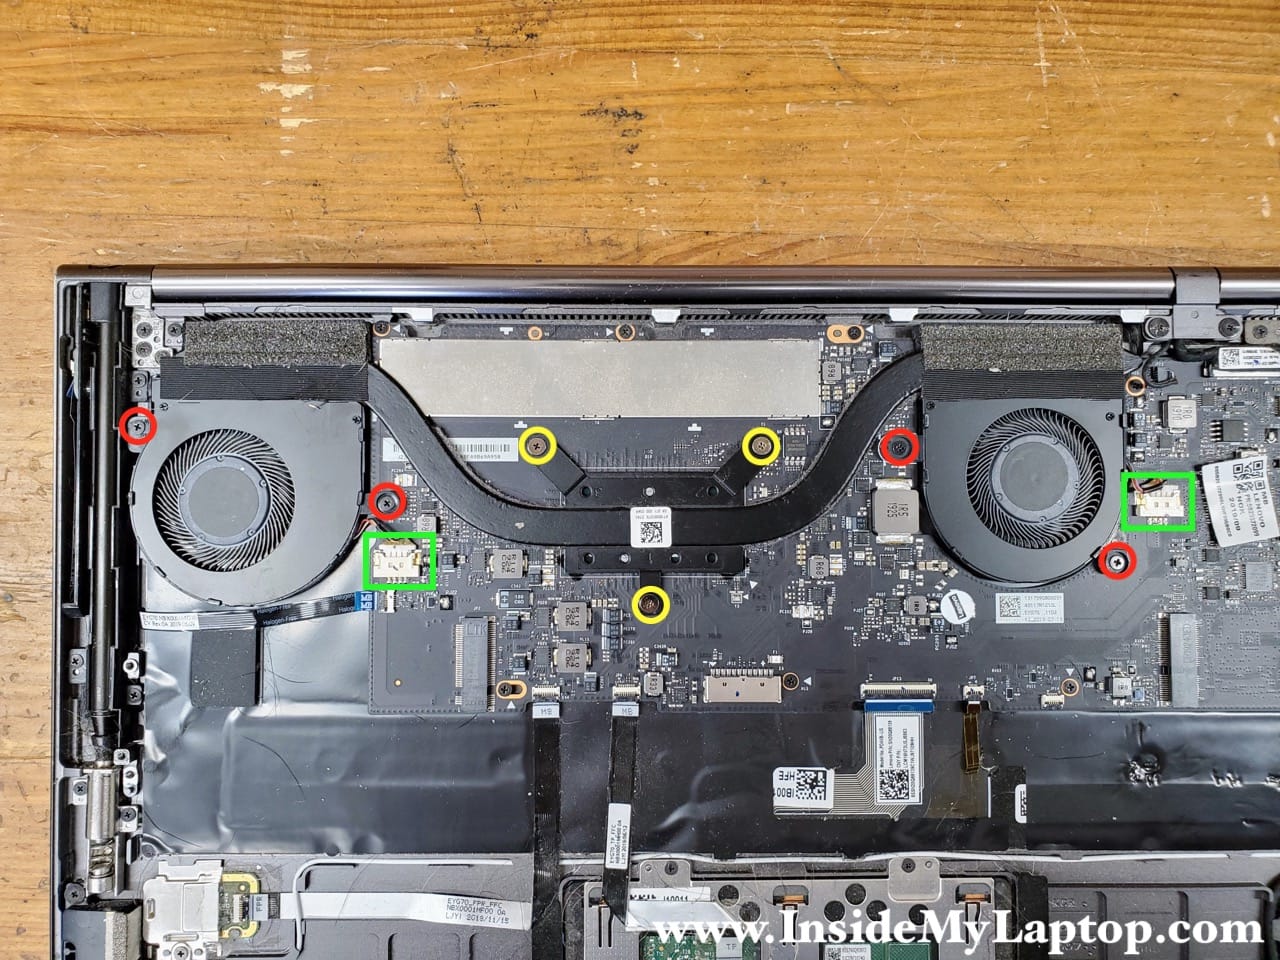
In order to disconnect the fan cable simply pull the connector out.

STEP 14.
Remove the cooling fan assembly.
Both fans are attached to the heatsink. If one of the fan failed it will be necessary to replace the entire assembly.
You can find new replacement fan assembly using the part number AT18S001DT0.

Removing motherboard
STEP 15.
Remove all screws securing the motherboard to the top case and disconnect all cables from the motherboard.
Now you can separate the motherboard from the top case and remove it.

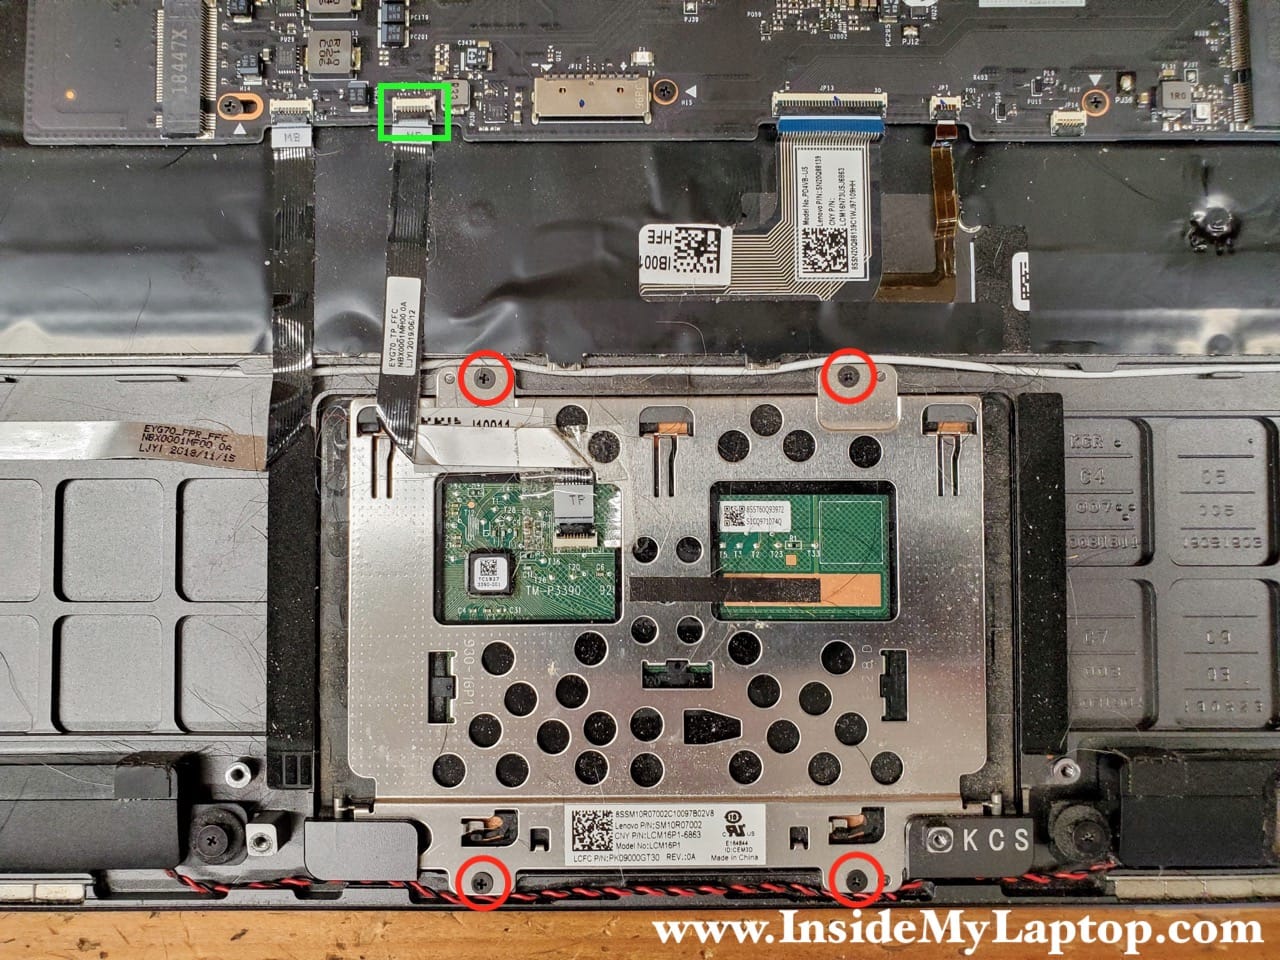
Removing touchpad
Remove four screws securing the touchpad bracket and remove the bracket.
Disconnect the touchapd cable from the motherboard.
Now you can remove the touchpad.
james
Hi there, I have three keys not typing. All other keys work fine. Do you think it’s bad keyboard?
IML Tech
Hi James, you are correct. Most likely this is keyboard failure. It some rare cases a failed motherboard can cause the same issue but it’s not very likely. Unfortunately, the keyboard is permanently attached to the top case so you will have to replace the top case assembly. Good luck!