
In this guide I explain how to disassemble a Lenovo IdeaPad FLEX-14API (model name 81SS) laptop.
Lenovo IdeaPad FLEX-14API design highlights:
– The motherboard has only one memory (RAM) slot. Some memory is built into the motherboard.
– The storage is PCIe NVMe solid state drive.
– The DC power jack attached to a harness and can be replaced without soldering.
– The keyboard is permanently attached to the palmrest assembly.
For this disassembly you will need a T5 Torx screwdriver, PH0 Phillips screwdriver, case opener tool and tweezers.
Removing bottom cover
Remove ten T5 Torx screws from the bottom cover.

Start separating the palmrest assembly from the bottom cover.

Turn the laptop upside down and remove the bottom cover.

Removing and replacing battery
Remove four Phillips screws attaching the battery to the top case.

Lift up the battery and disconnect the battery cable from the motherboard.

You can find a new replacement battery if you search the model number L18M4PF3.

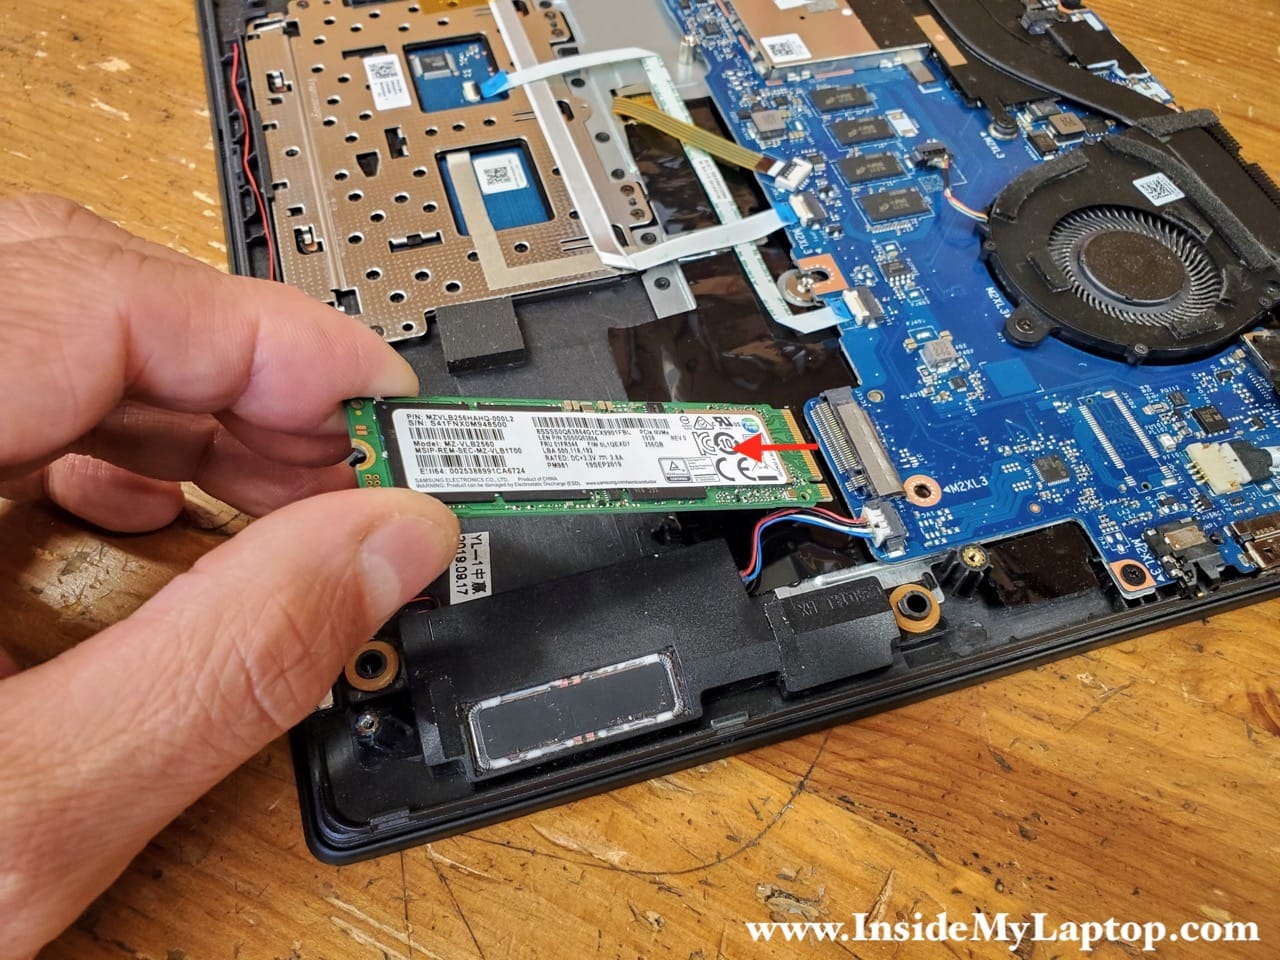
Removing and replacing SSD module
Remove one screw securing the solid state drive (SSD).

Pull the SSD out.
If you need to replace or upgrade the SSD you will have to use M.2 2280 PCIe NVMe SSD.
Removing and replacing RAM module
The removable memory (RAM) module is hidden under the metal cover.
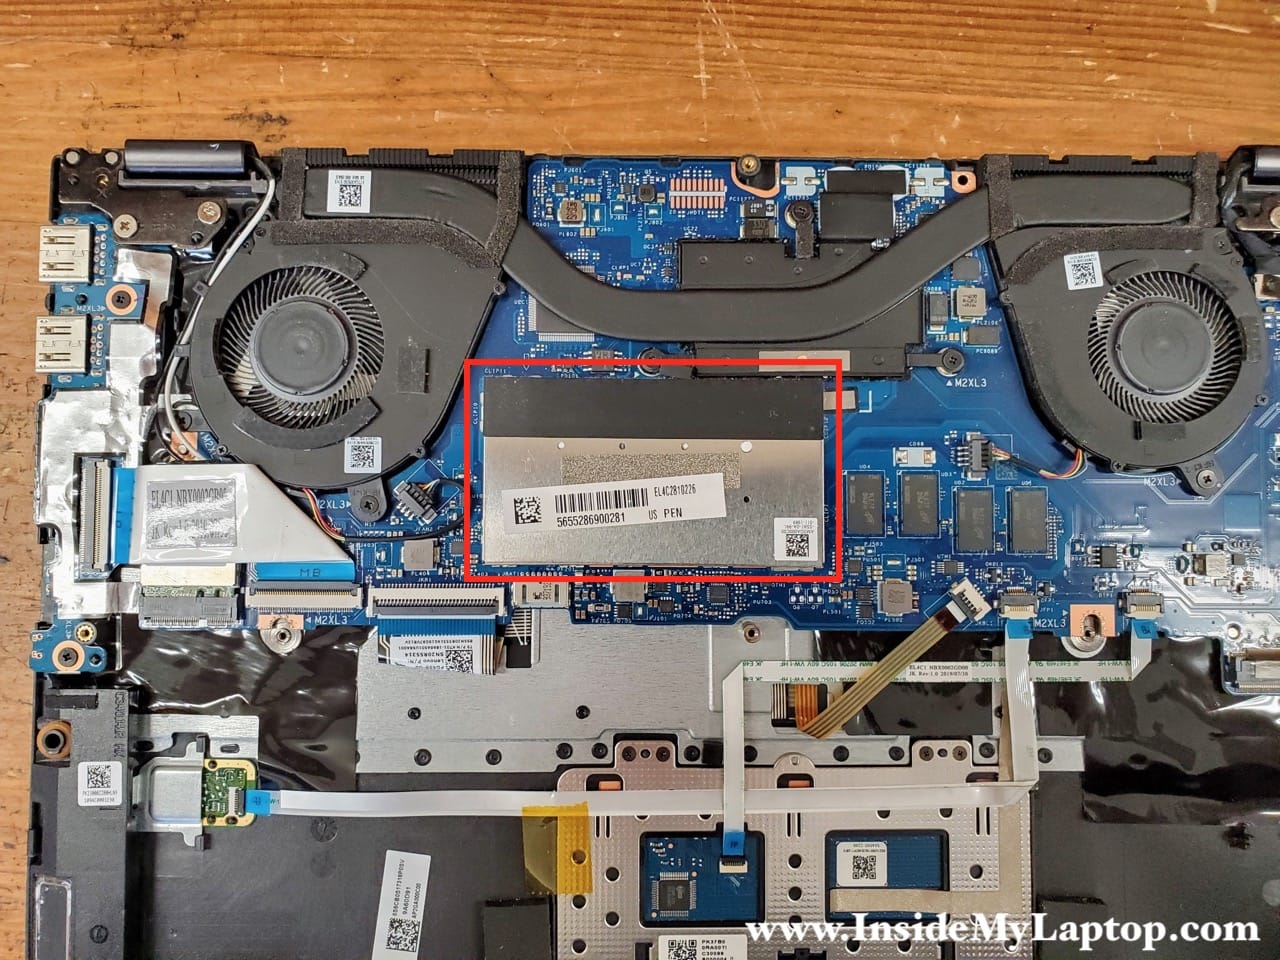
Carefully lift up the metal cover to disengage it from the retention clips on the motherboard.
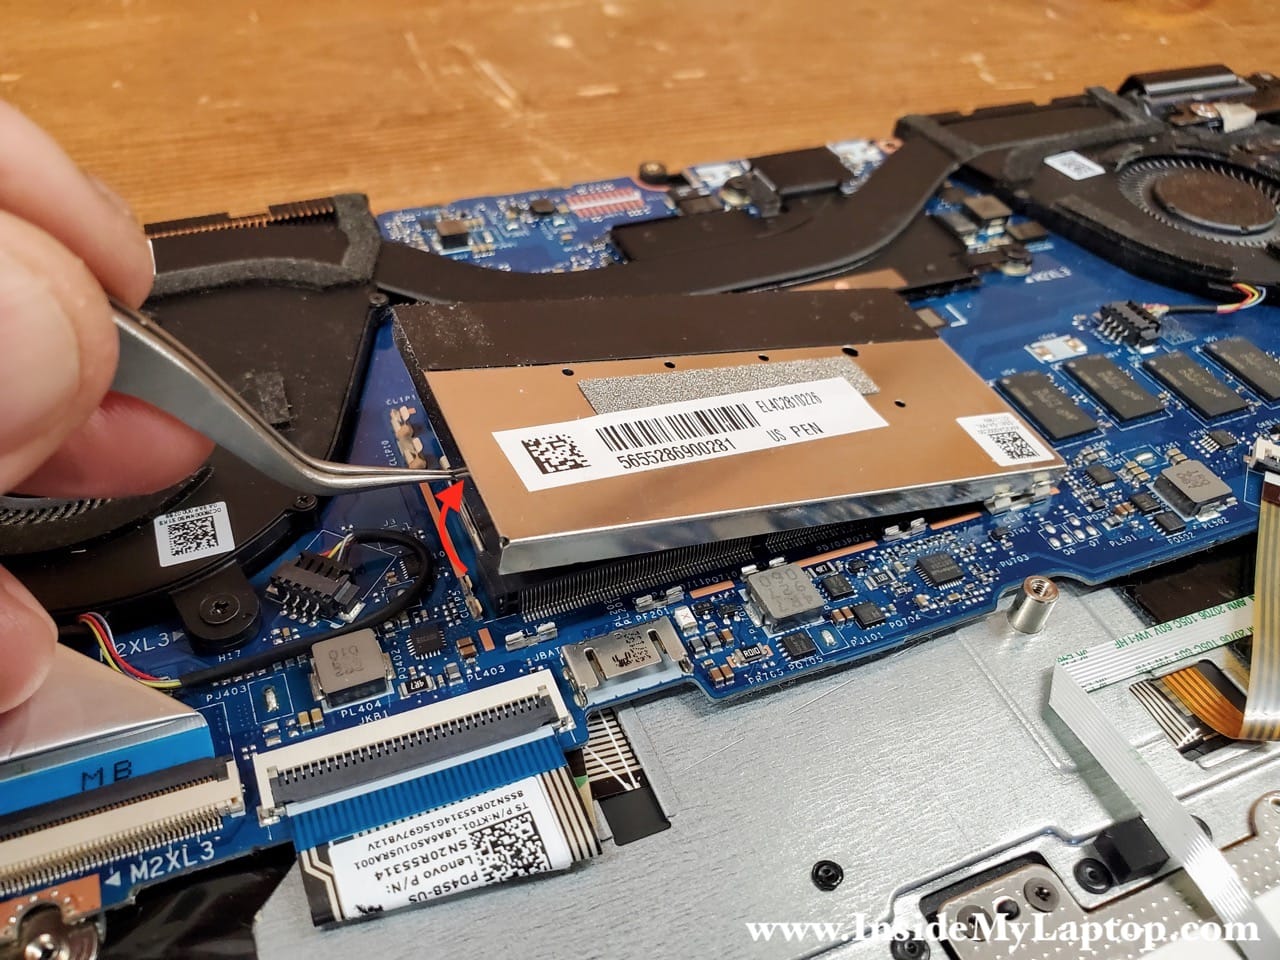
Remove the memory cover.

Spread latches securing the memory module and pull the memory module out.
Lenovo IdeaPad FLEX-14API is shipped with a DDR4-2666 RAM module. You can use DDR4-2400 (slower) or DDR4-3200 (faster) RAM modules.

Removing and replacing cooling fans
This laptop has two cooling fans. Let’s remove the left fan first.
Remove two screws securing the left fan.
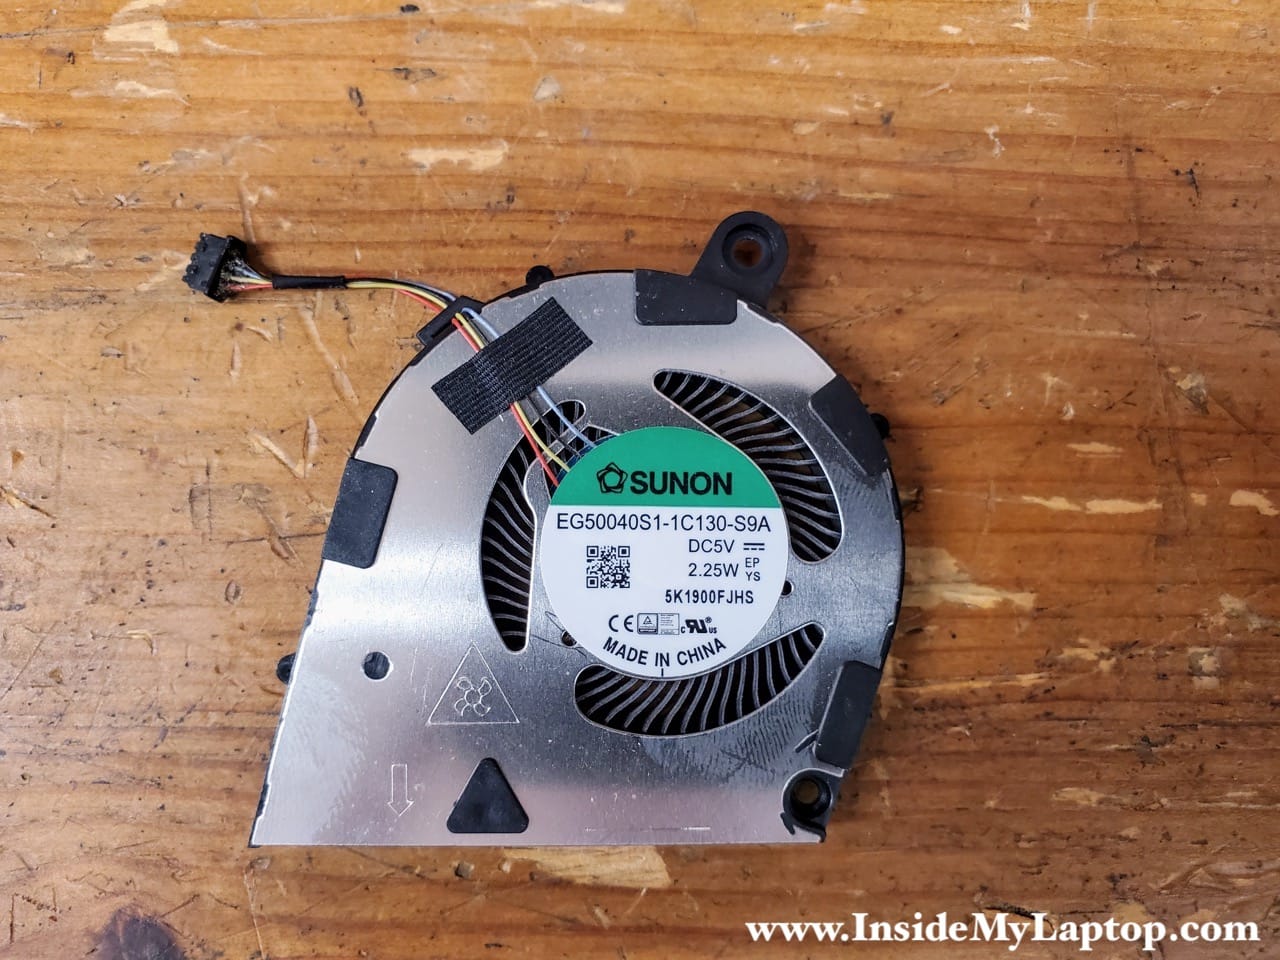
Disconnect the fan cable from the motherboard and remove the fan.

If you need to replace the left fan, here’s the model number: EG50040S1-1C130-S9A.
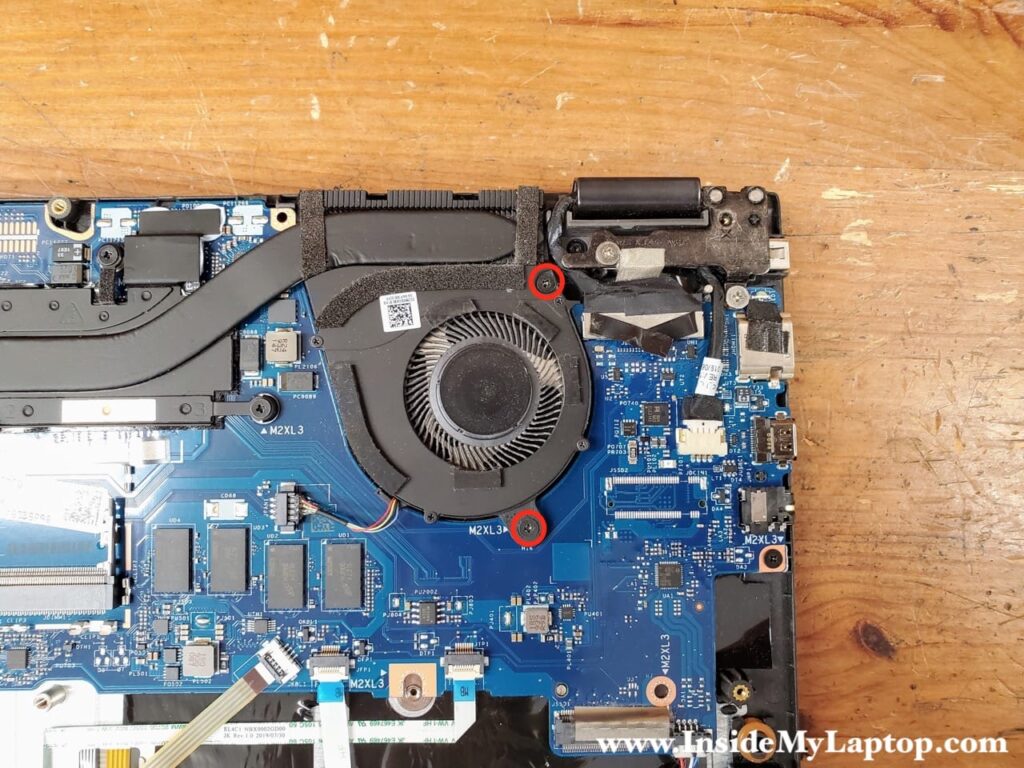
Remove three screws securing the right fan.
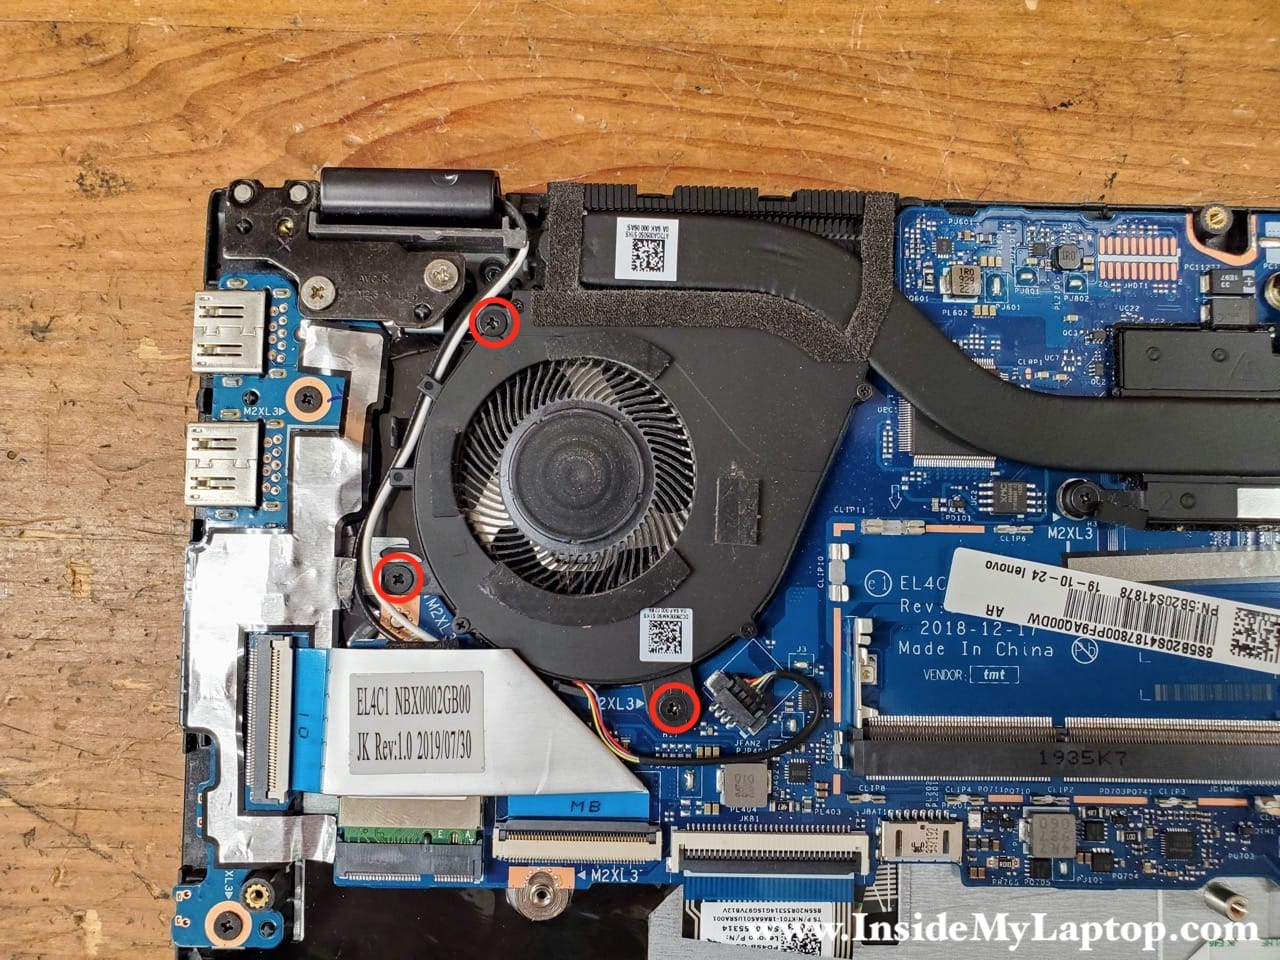
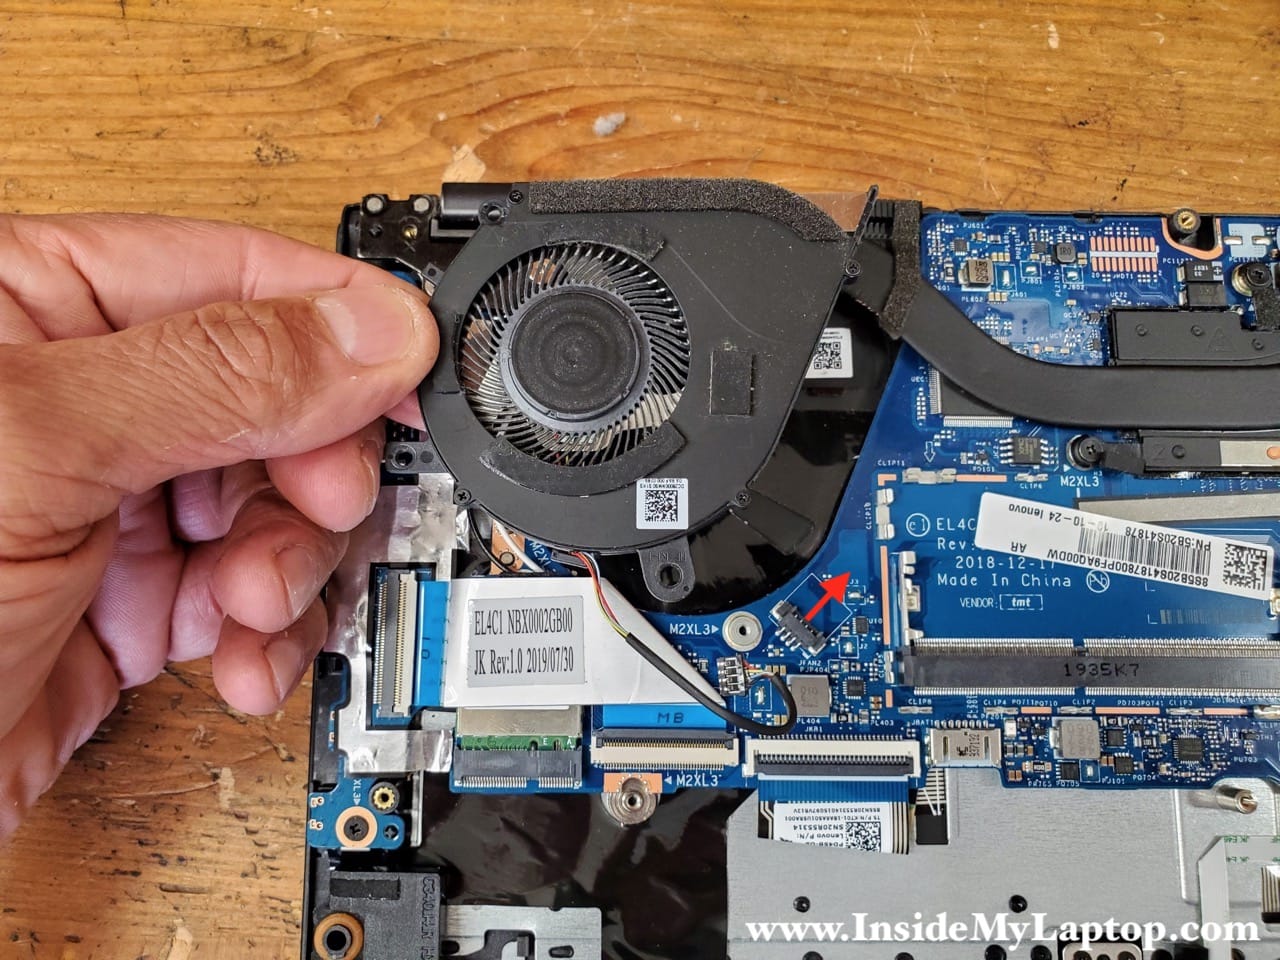
The right fan is partially covered by the heatsink. In order to remove the fan it’s necessary to lift up the heatsink as shown on the following picture.
Also, it’s necessary to separate both wireless card antenna cables from the guided path on the left side of the fan.

Disconnect the cable from the motherboard and remove the fan.
If you need to replace the right fan, here’s the model number: EG50040S1-1C180-S9A.

Removing and replacing wireless card
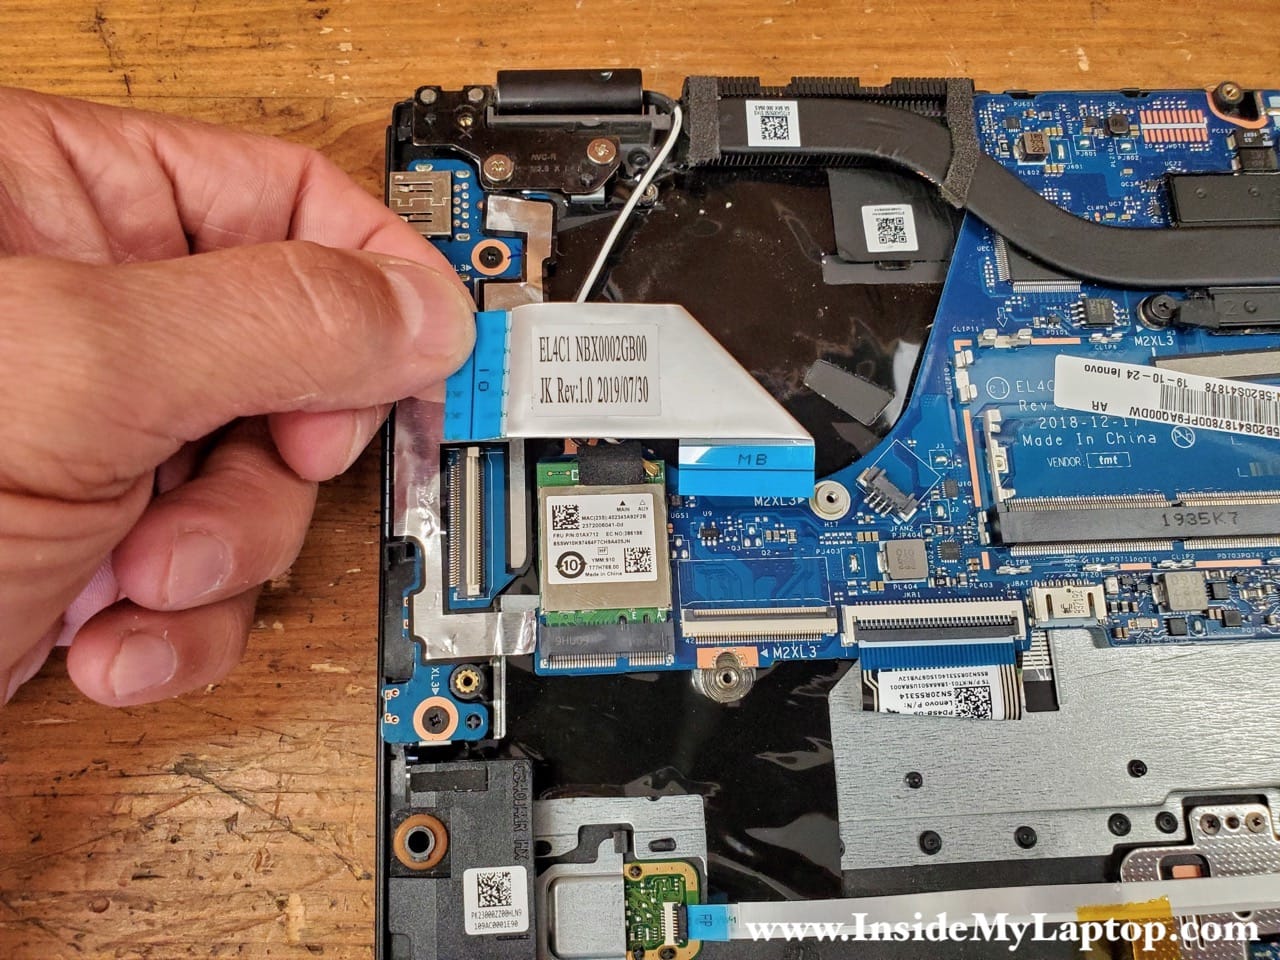
The wireless card is mounted under the I/O board cable so we’ll have to remove it first.
It’s necessary to disconnect the I/O board cable on both sides.

Here’s how to disconnect the I/O board cable. Open up the connector (red arrow) and pull the cable out (yellow arrow).

Remove the I/O board cable.
Remove black foam covering the wireless antenna connectors.

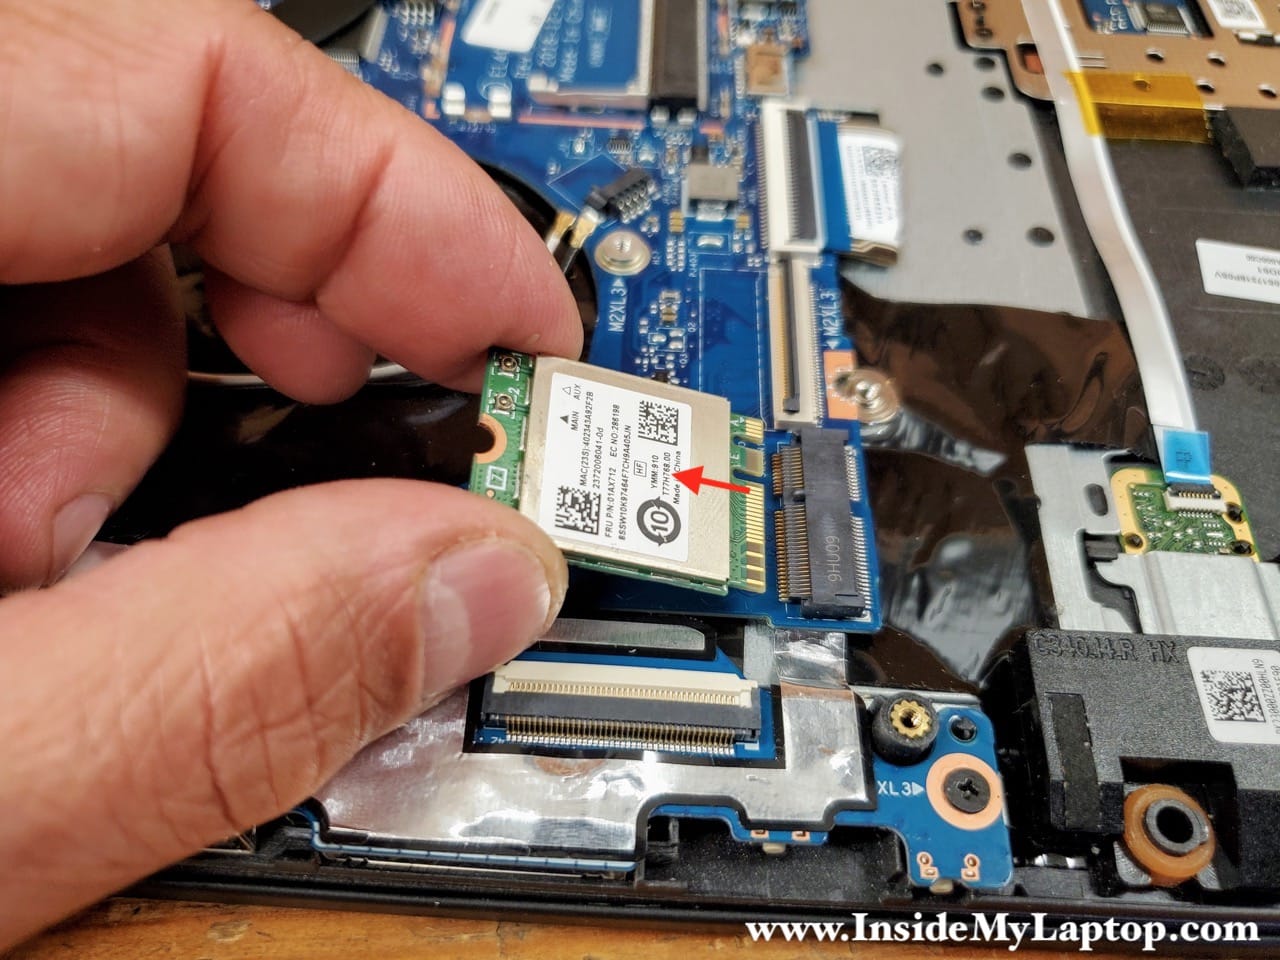
Disconnect both antenna cables from the wireless card and remove one screw fastening it to the motherboard.

Pull the wireless card out.
If you need to replace the wireless card, you can find it using this Lenovo part number: 01AX712.
Removing display panel
There is one cable attaching the display panel to the motherboard.

In order to disconnect the display cable from the motherboard, pull it up using the black belt on top.

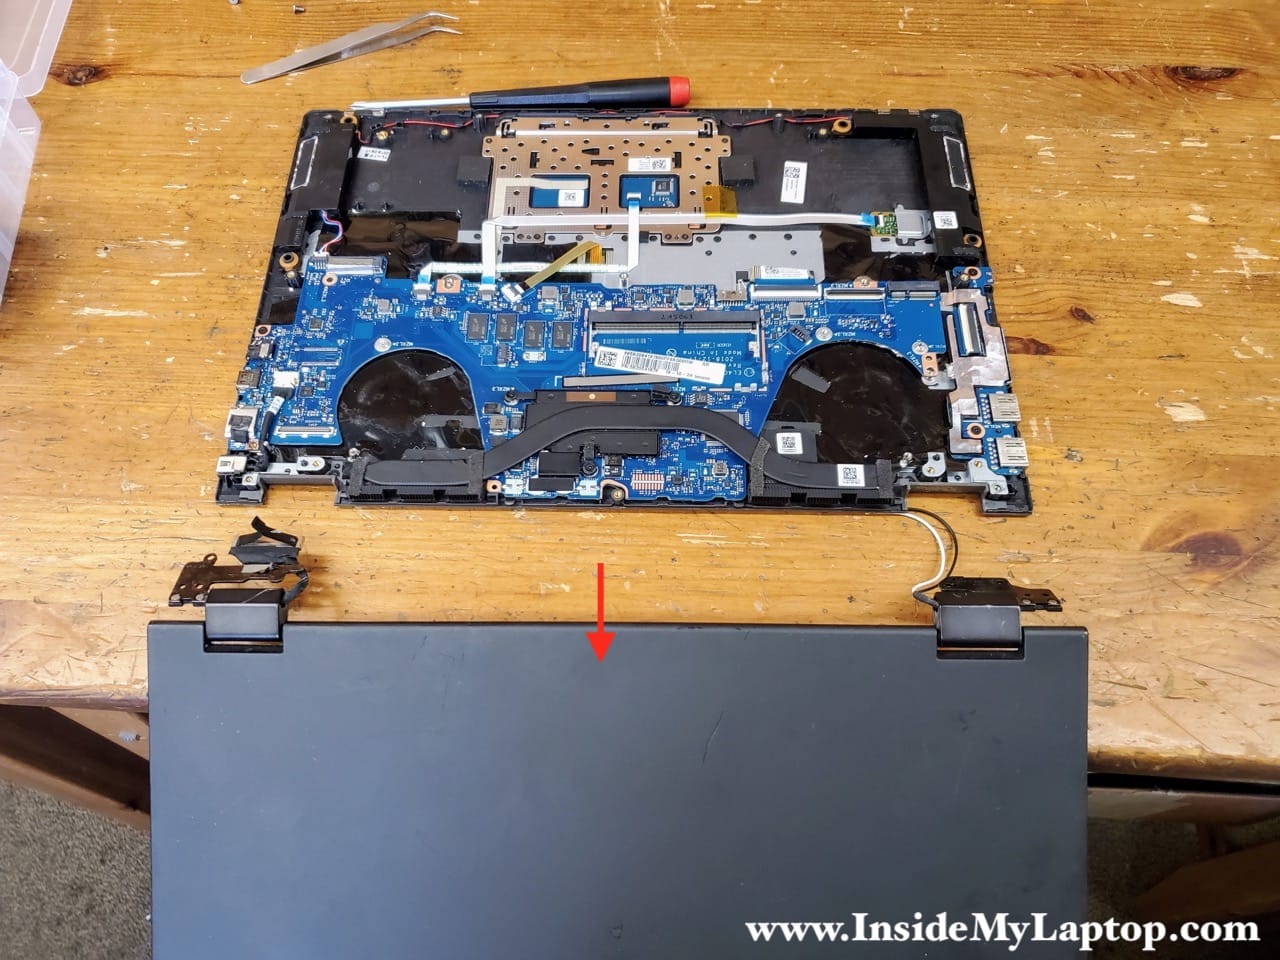
Open the display and place the laptop upside down on the desk as shown on the following picture.
Remove four screws attaching the display panel hinges to the top case assembly.
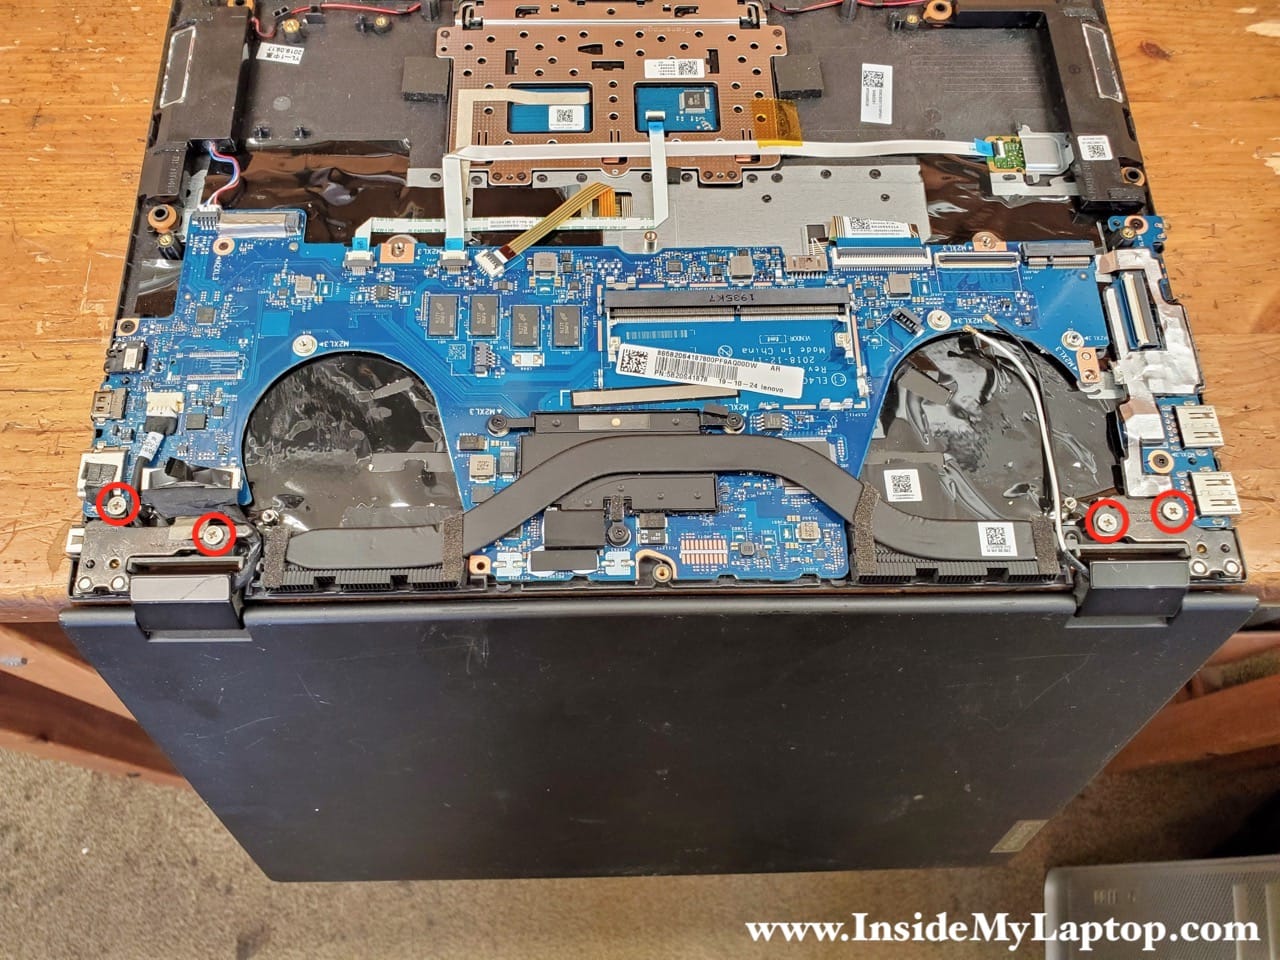
Now you can separate the display panel from the laptop and remove it.
Removing DC power jack
In Lenovo IdeaPad FLEX-14API the DC power jack is mounted under the left display hinge.
It is necessary to remove the display in order to remove the DC jack.

Disconnect the DC jack cable from the motherboard and remove it.

Removing motherboard
Remove one screw attaching the motherboard to the top case assembly.
Disconnect the following cables:
– keyboard cable (blue)
– keyboard backlight cable (red)
– finger scanner cable (orange)
– touchpad cable (yellow)
– speaker cable (green)
After that you can remove the motherboard.

In Lenovo IdeaPad FLEX-14API laptop the keyboard is permanently attached to the palmrest assembly. Here’s how you can remove and replace the keyboard.