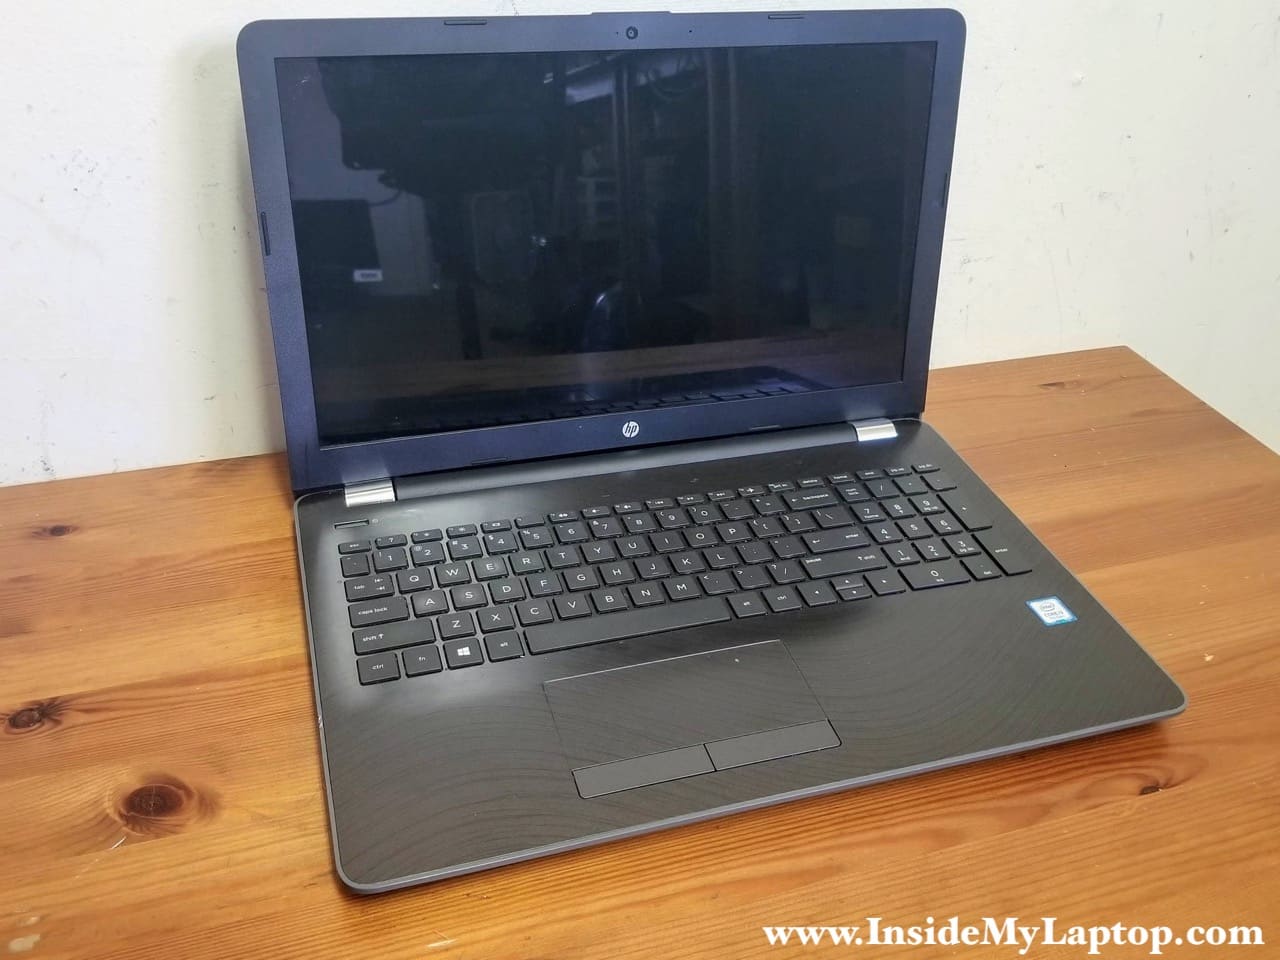
In this guide I disassemble an HP 15 Laptop PC in order to evaluate the left display hinge damage.
The display hinge can be accessed and replaced only after you remove the display panel. While removing the display I will explain how to access and remove other major laptop components.
This disassembly guide should fit these HP 15 laptop configurations: 15-bs015dx, 15-bs020wm, 15-bs031wm, 15-bs033cl, 15-bs134wm, 15-bs144wm, 15-bs212wm, 15-bs234wm, 15-bs244wm, 15-bs289wm and probably many more.
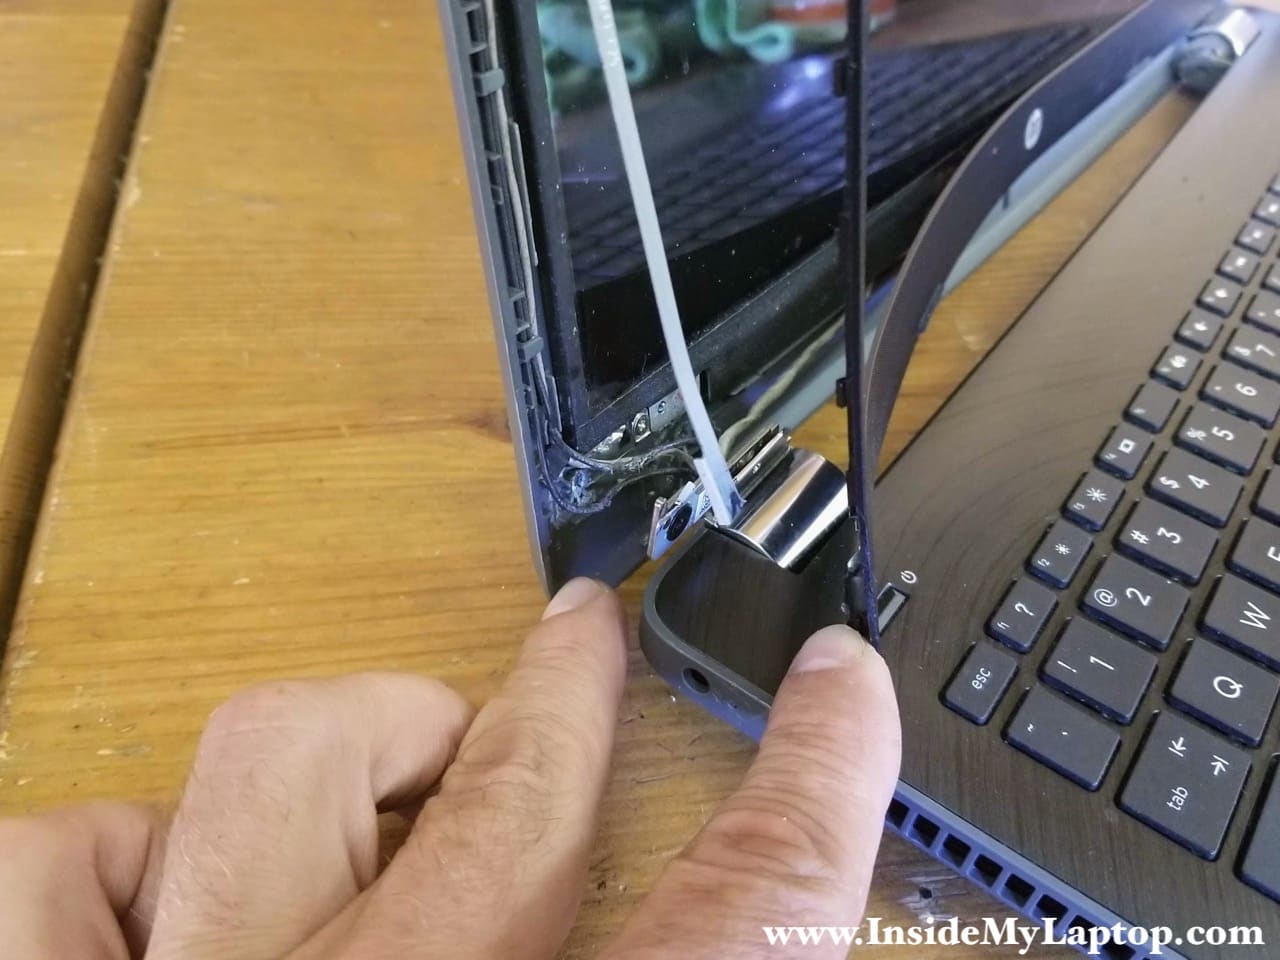
Here’s a closer look at the damaged area. The hinge broke off of the LCD back cover and the display started splitting on the left side.
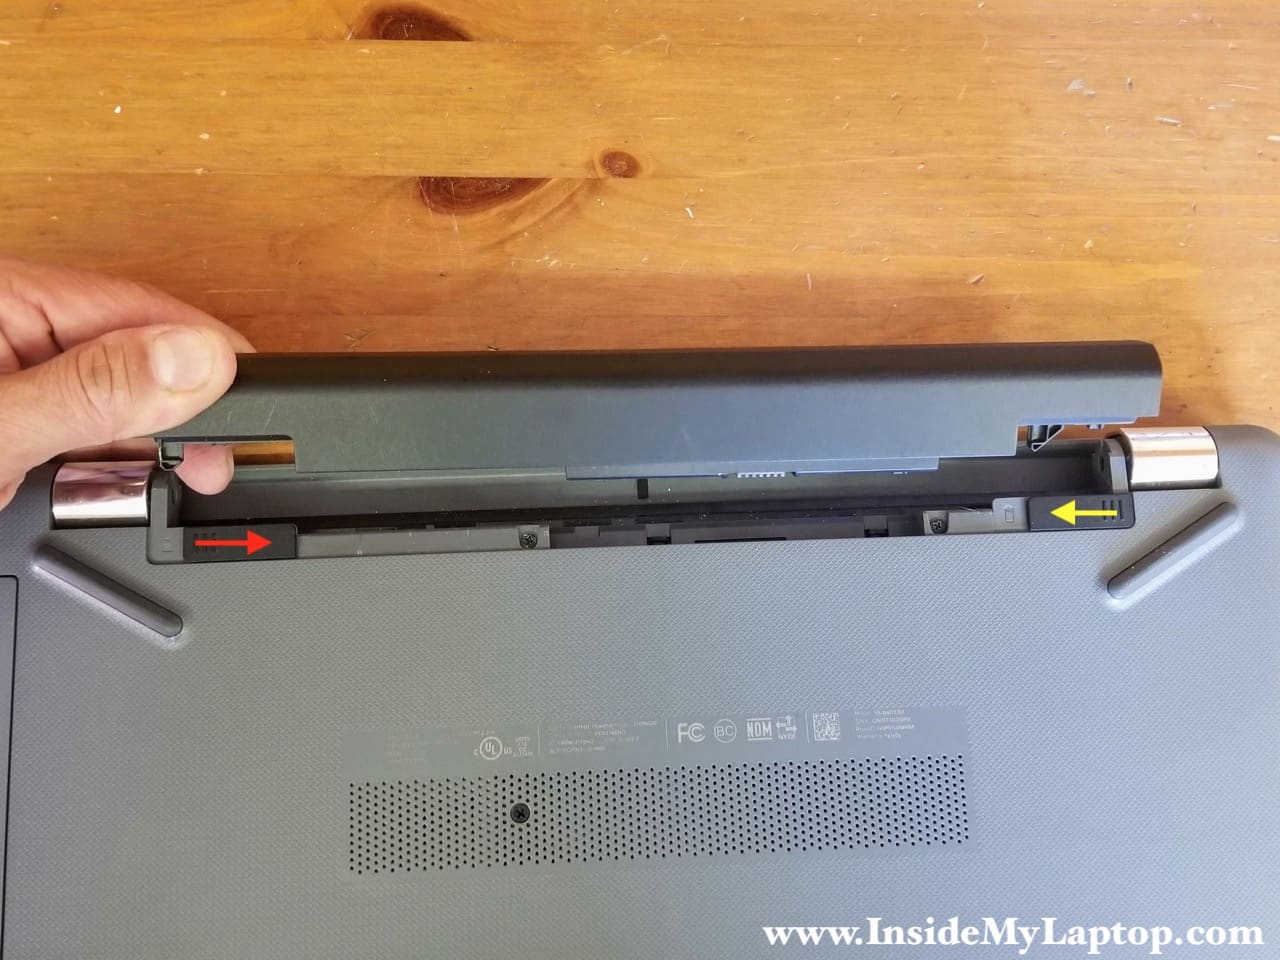
STEP 1.
Start laptop disassembly with removing the main battery. Unlock the battery by sliding the left tab to the right (red arrow) and slide the right tab to the left (yellow arrow) to remove it.
Replacement batteries model JC03 or JC04.
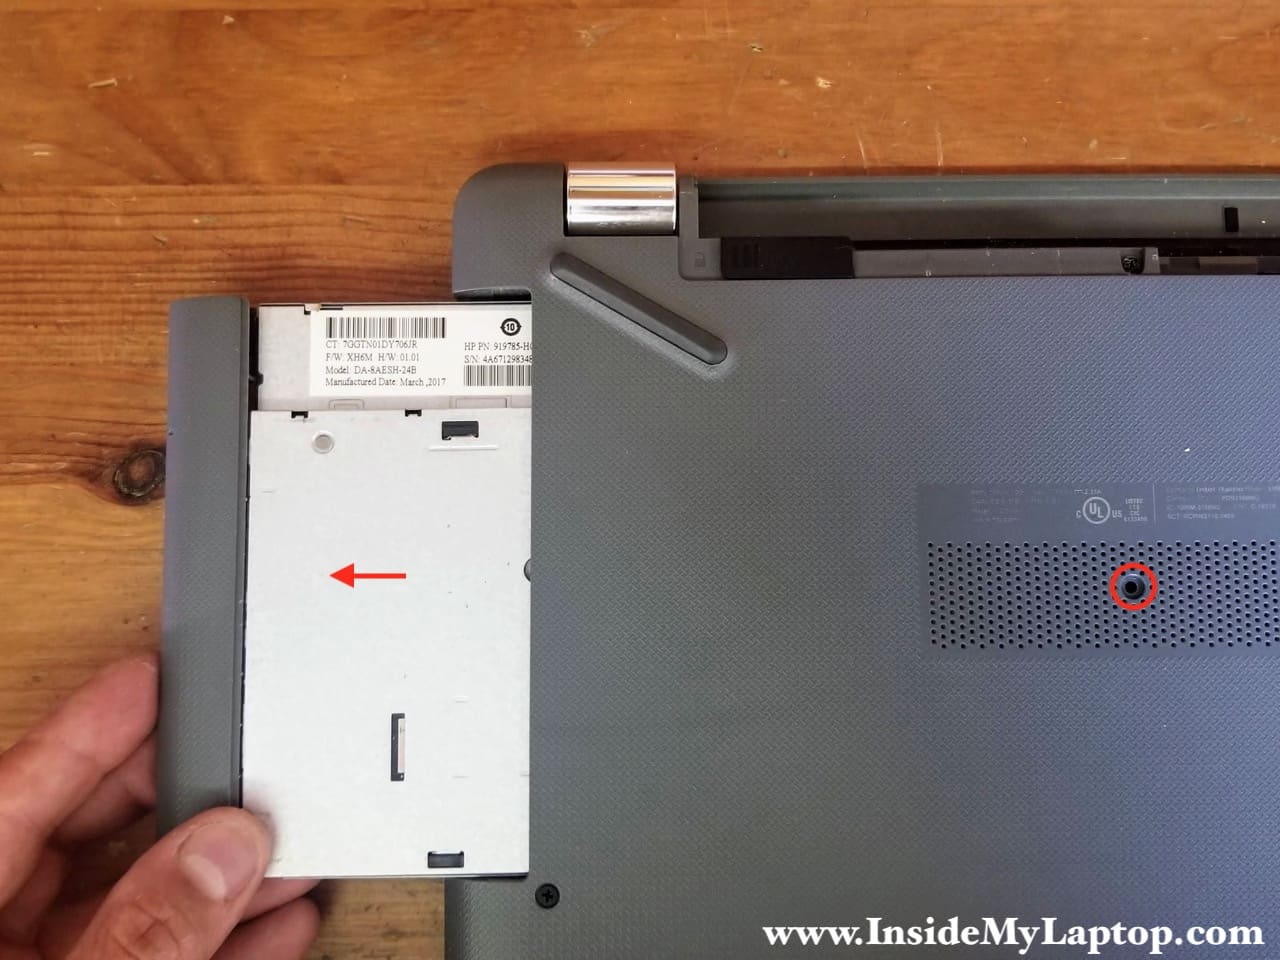
STEP 2.
Remove one screw securing the optical DVD drive. Pull the drive out.
STEP 3.
Remove all screws from the bottom cover. Some screws are hidden under rubber feet.
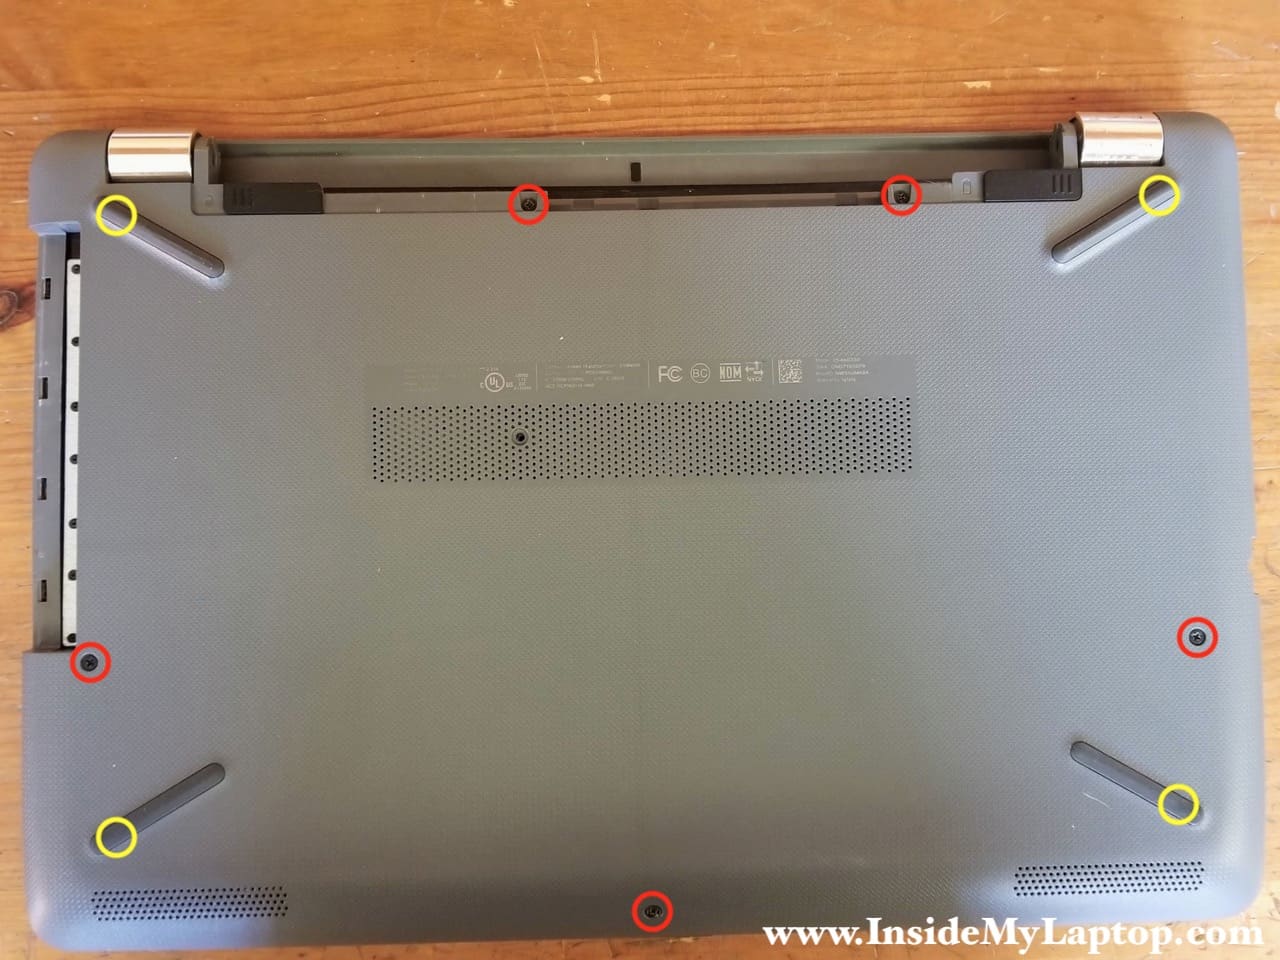
In order to access hidden screws you have to lift up the rubber foot. It’s attached to the bottom cover by adhesive tape. Don’t remove the foot completely, just lift up enough to access the screw.

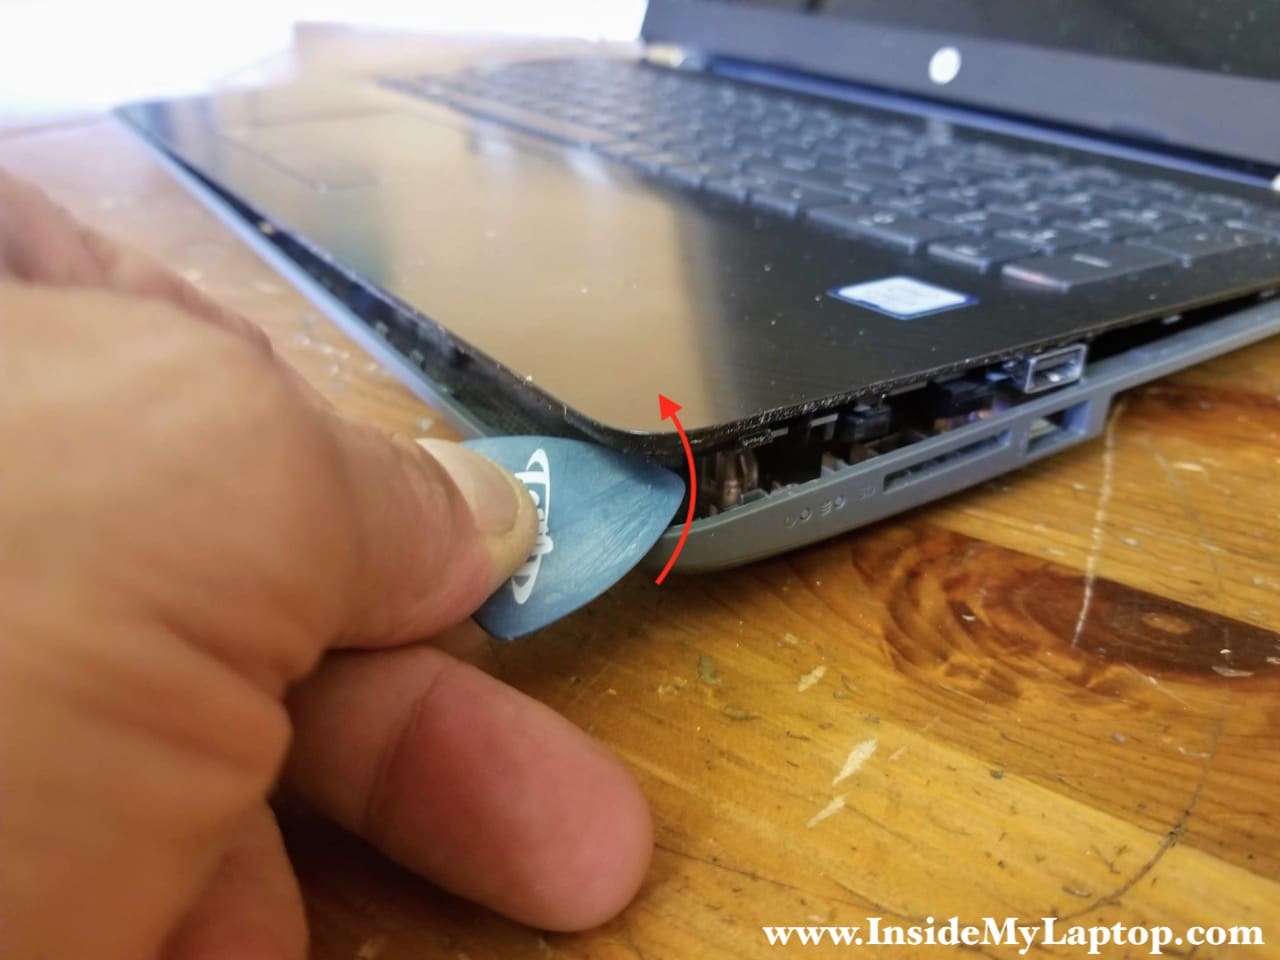
STEP 4.
Start separating the palmrest assembly from the bottom cover. I’m using a plastic case opener tool. Insert the case opener under the palmrest and slowly move along the side disengaging hidden latches.
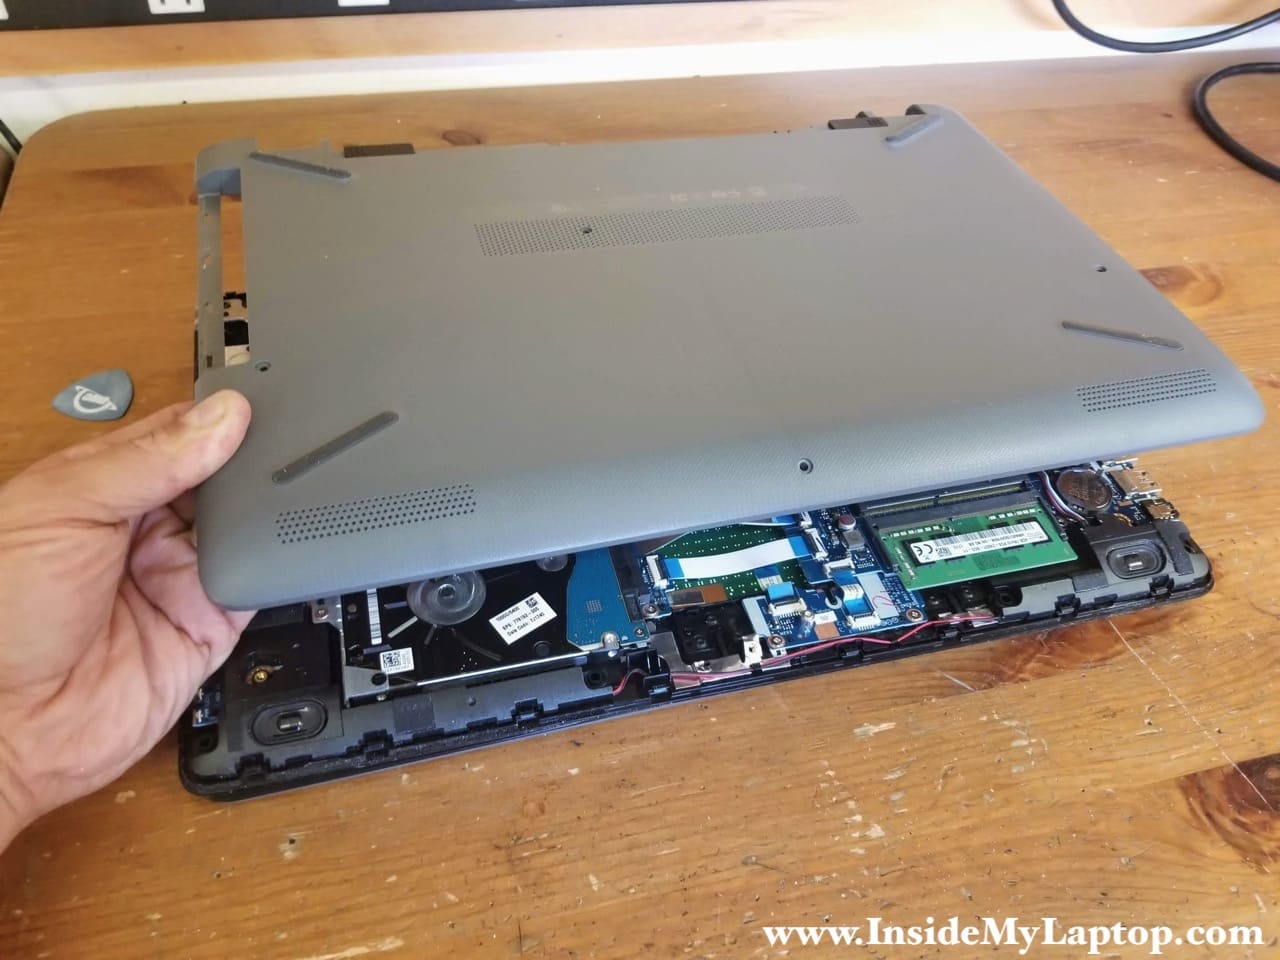
STEP 5.
Remove the bottom cover completely.
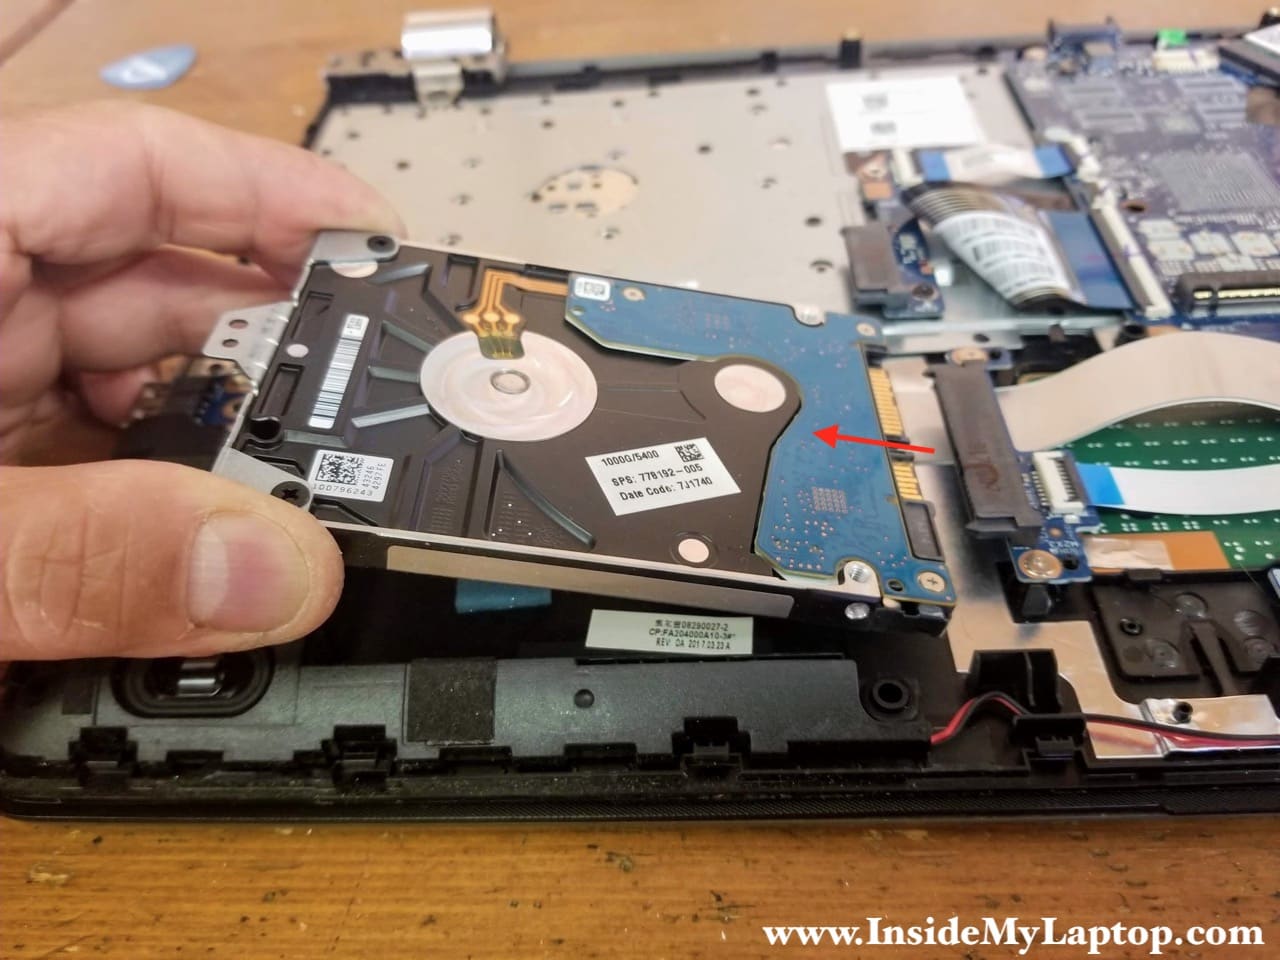
STEP 6.
Remove one screw securing the hard drive caddy.

This laptop has two memory slots. You can install up to 16GB (8GBx2) DDR4 2400/2600/3200 SODIMM modules.
STEP 7.
Pull the hard drive out. This step is not necessary for the display removal. I’m doing that in order to backup customer’s data.
Upgrading this hard drive to a solid state drive will speed up the laptop significantly.
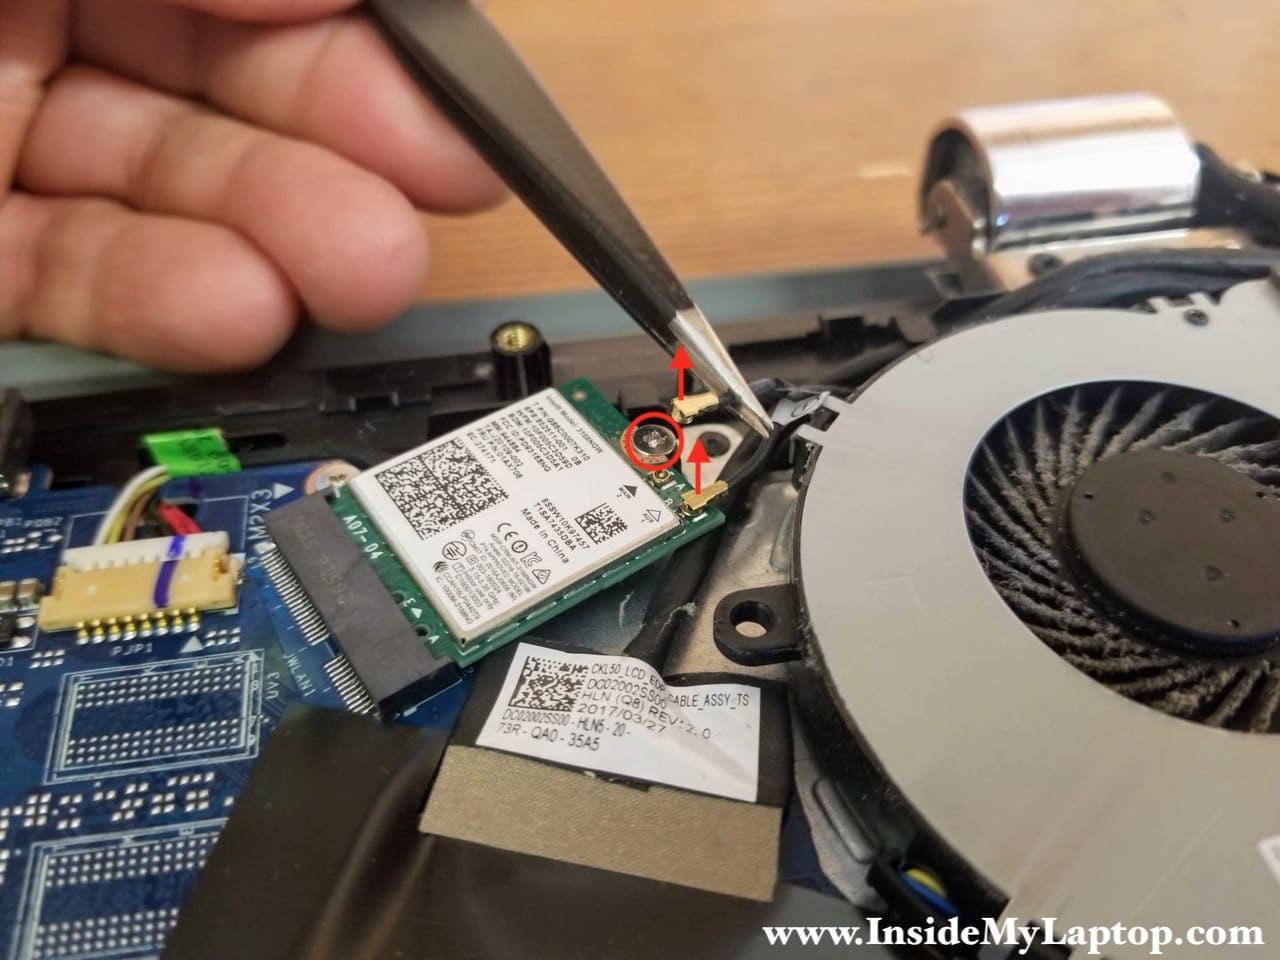
STEP 8.
Remove one screw securing the wireless card. Disconnect both antenna cables from the wireless card. These cables are labeled as 1 and 2 matching connector numbers on the wireless card. In order to disconnect the cable you simply lift up the golden antenna connector using tweezers and unsnap it from the card.
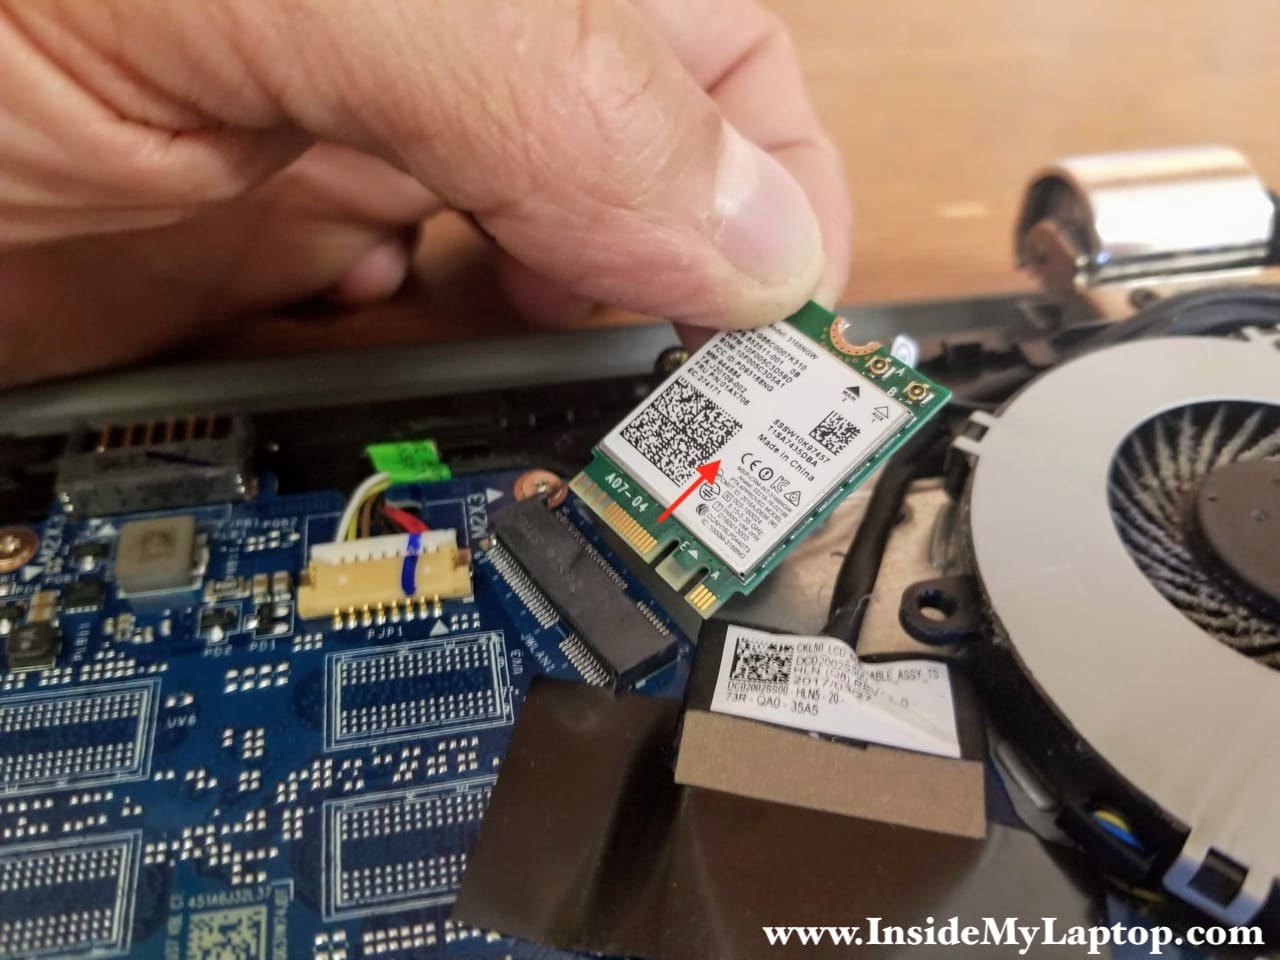
STEP 9.
Pull the wireless card out.
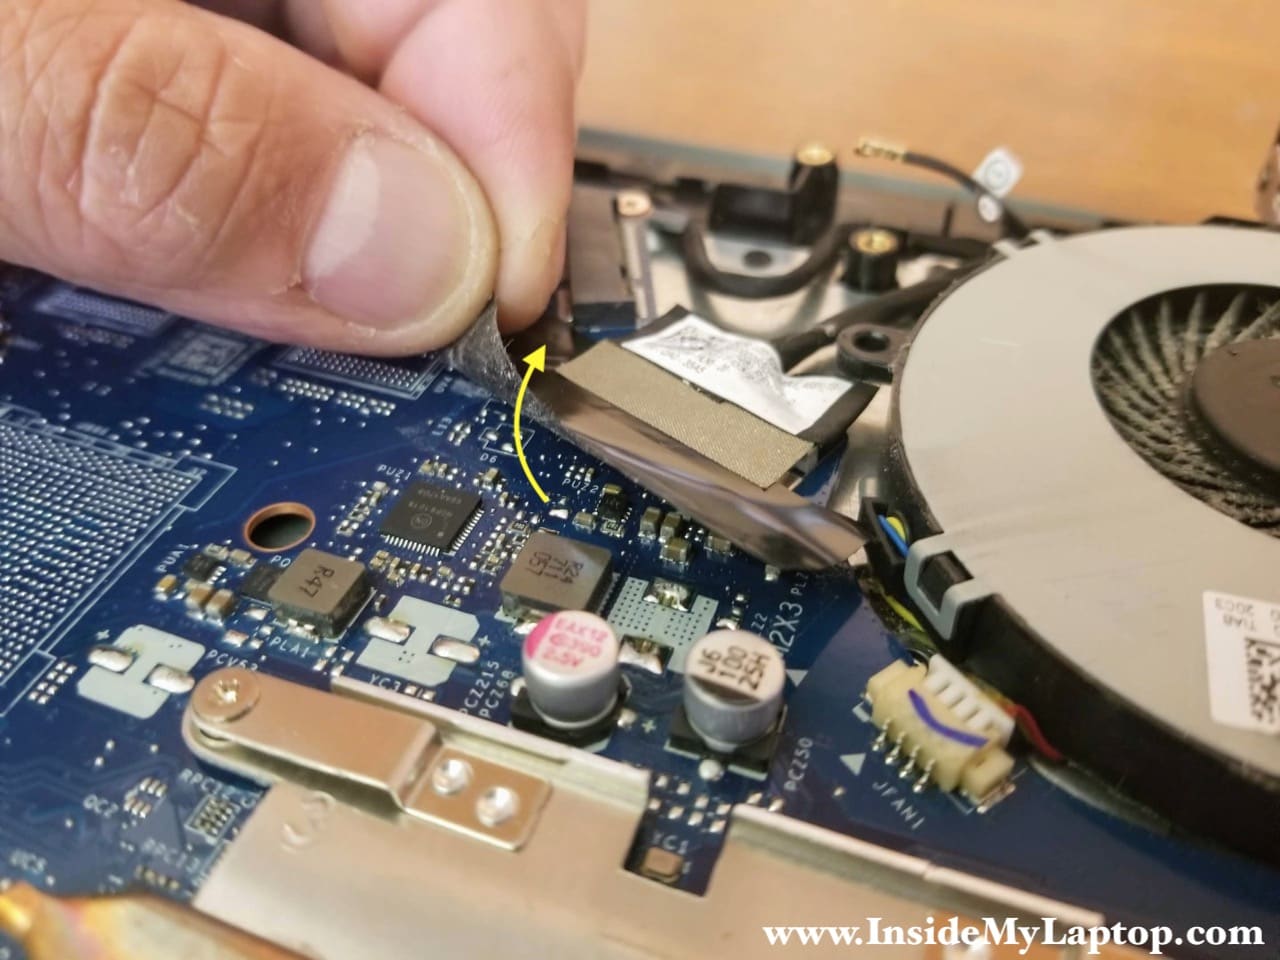
STEP 10.
Peel off the black tape securing the display cable connector.
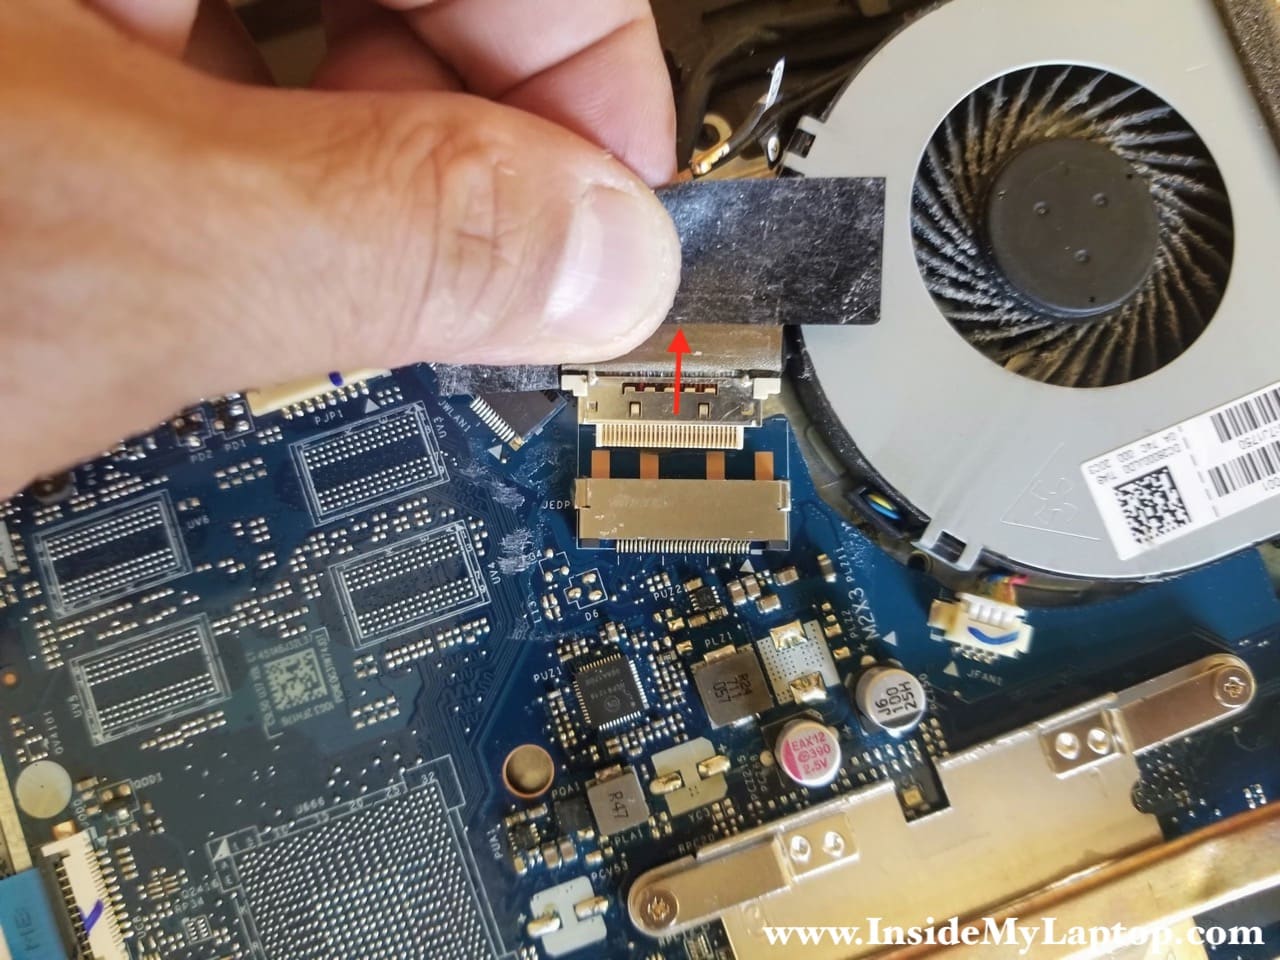
STEP 11.
Unplug the display video cable from the motherboard.
STEP 12.
Unroute the display cable and wireless antennas from the guided path.
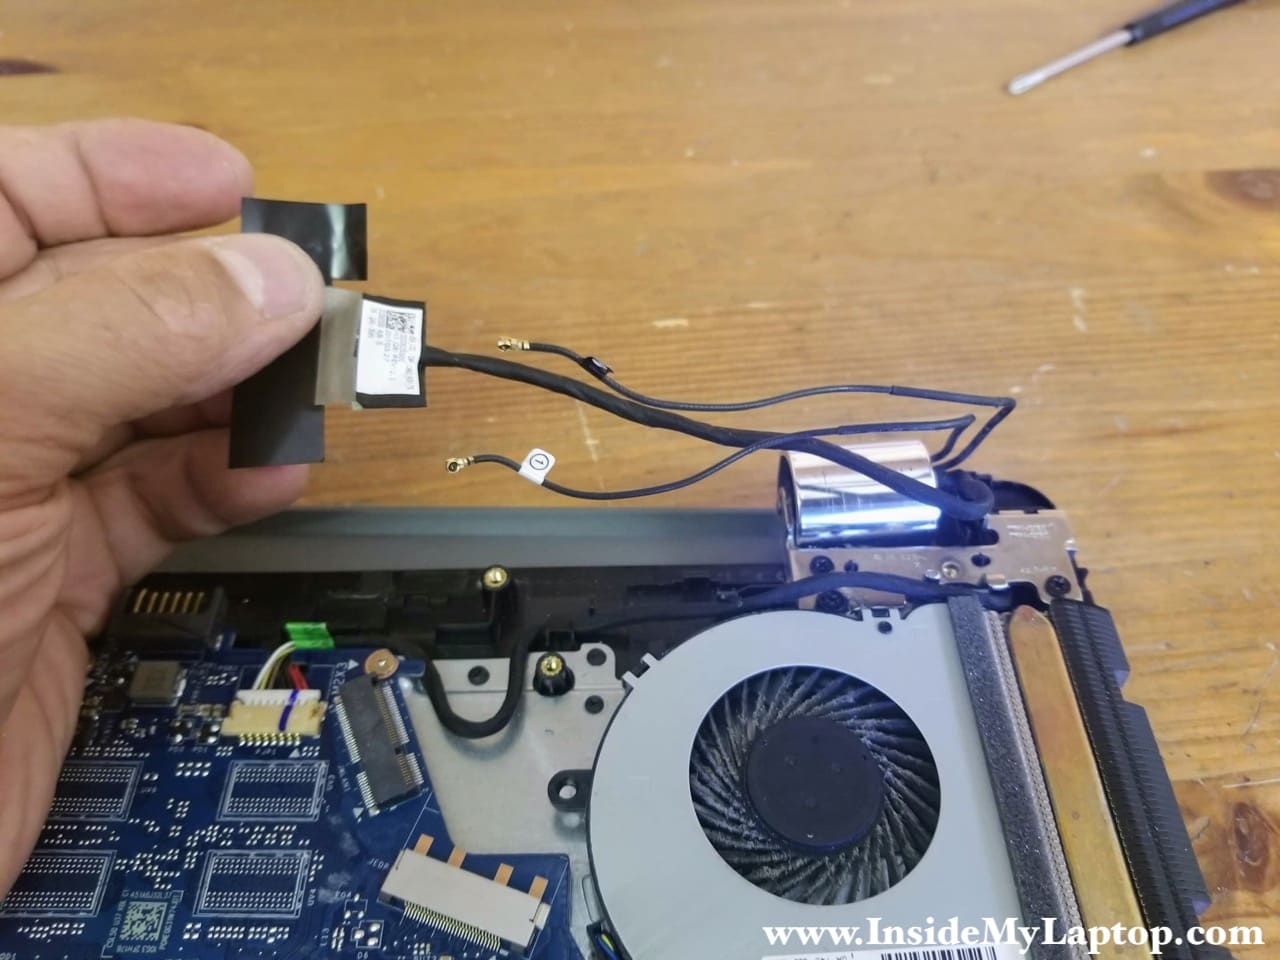
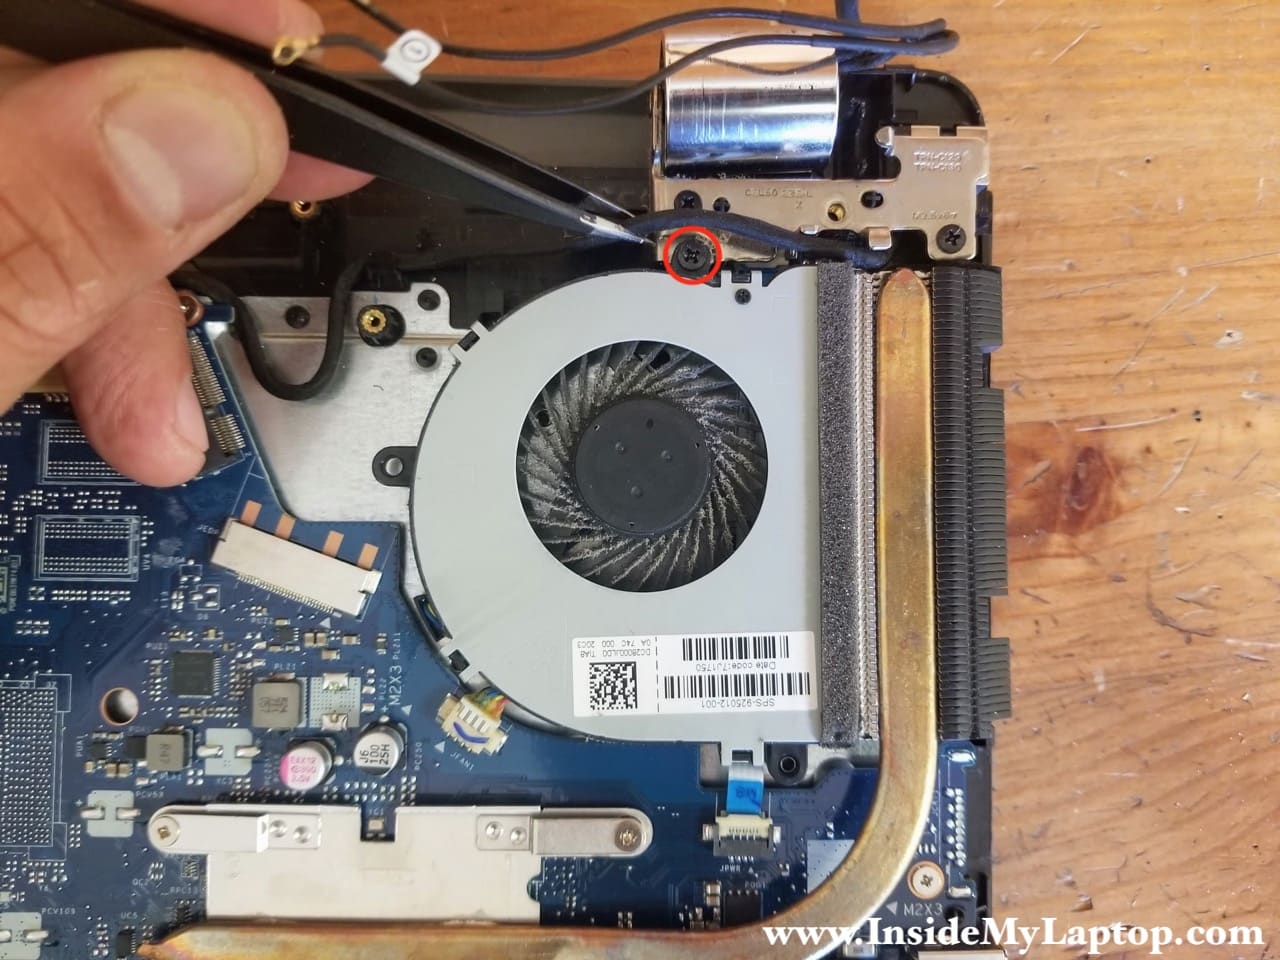
STEP 13.
Remove one screw securing the cooling fan.
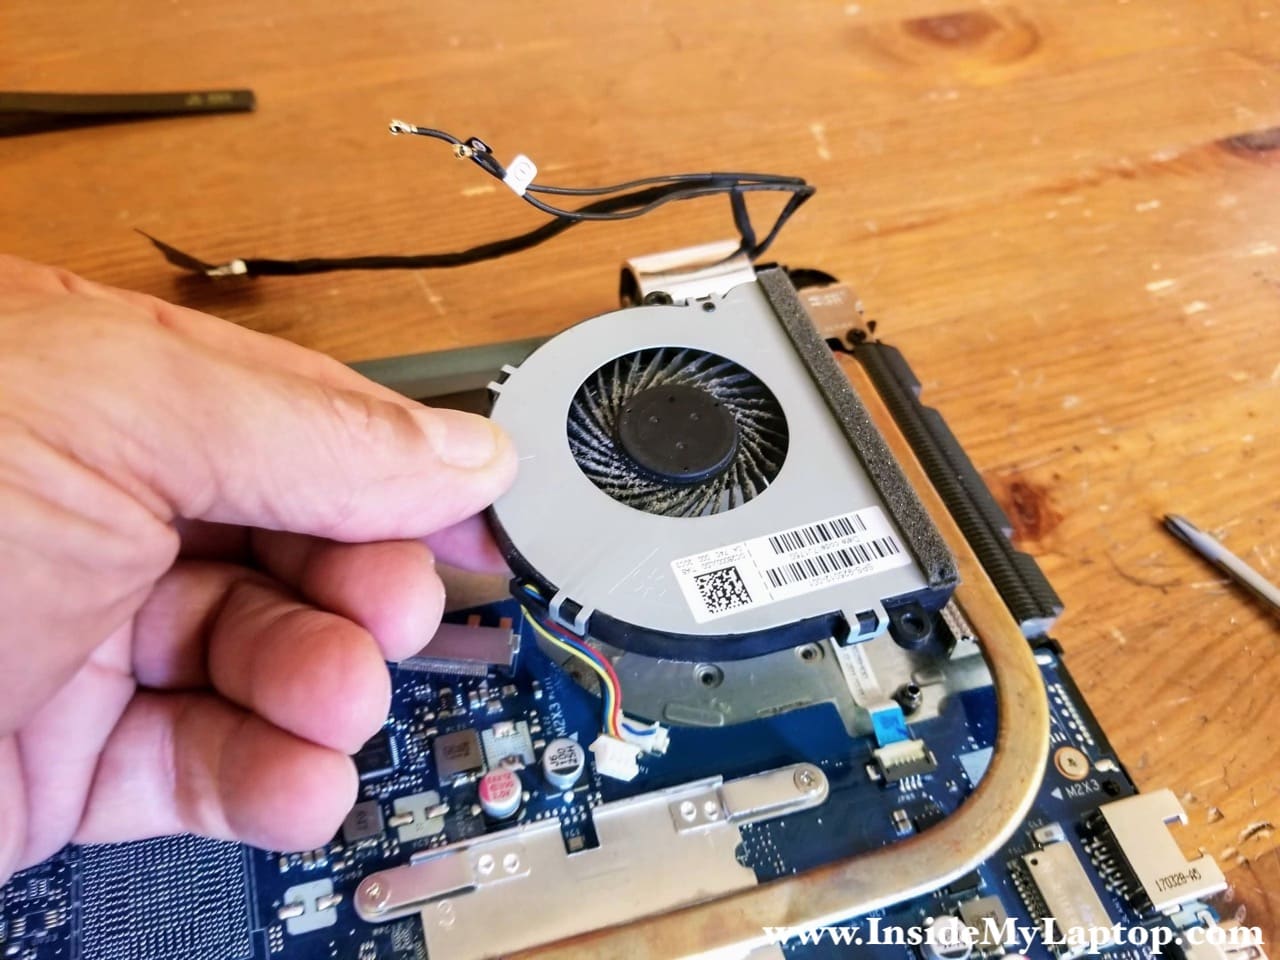
STEP 14.
Lift up the cooling fan, disconnect the cable and remove it.
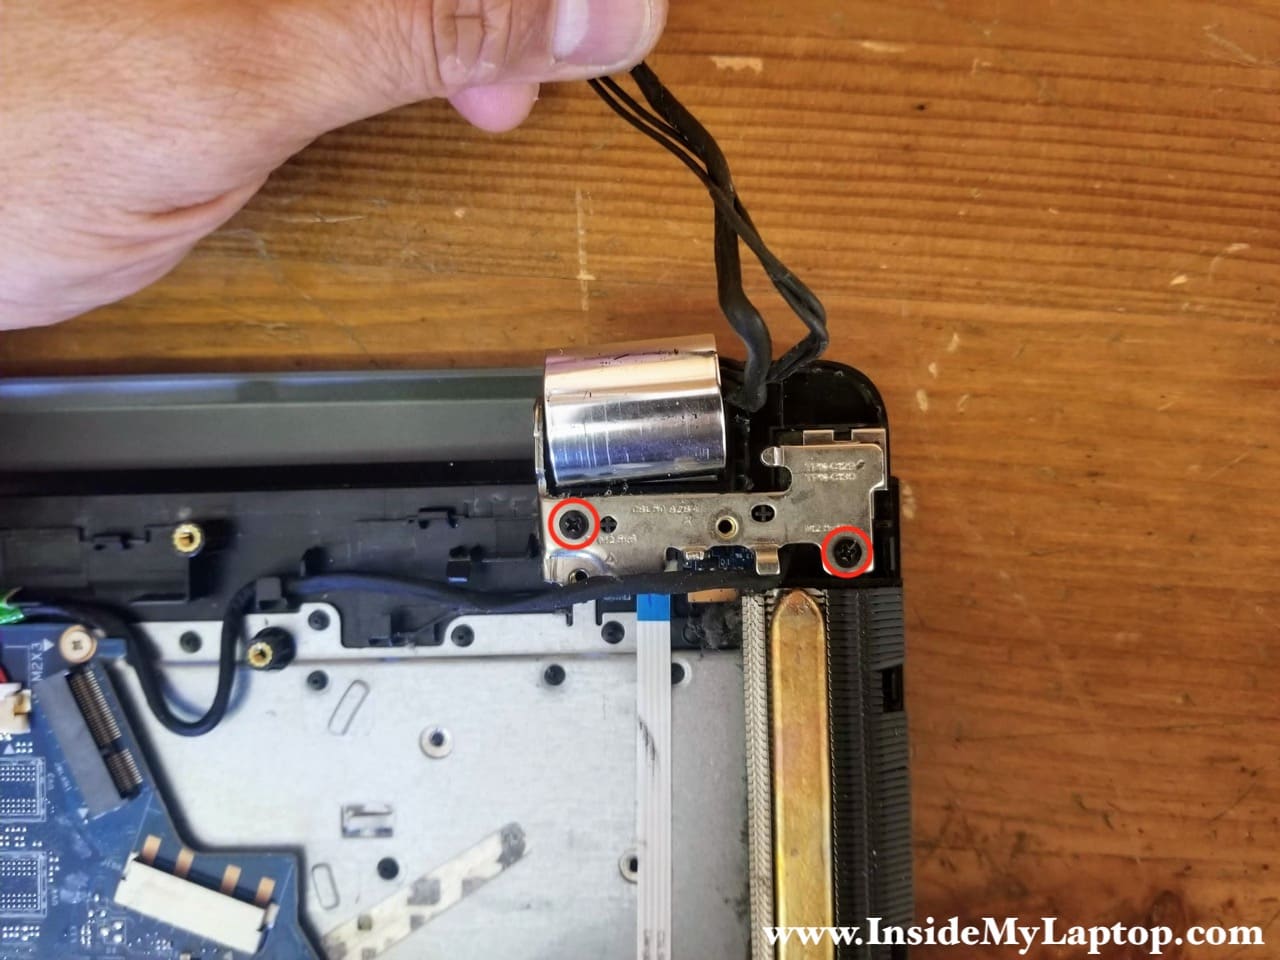
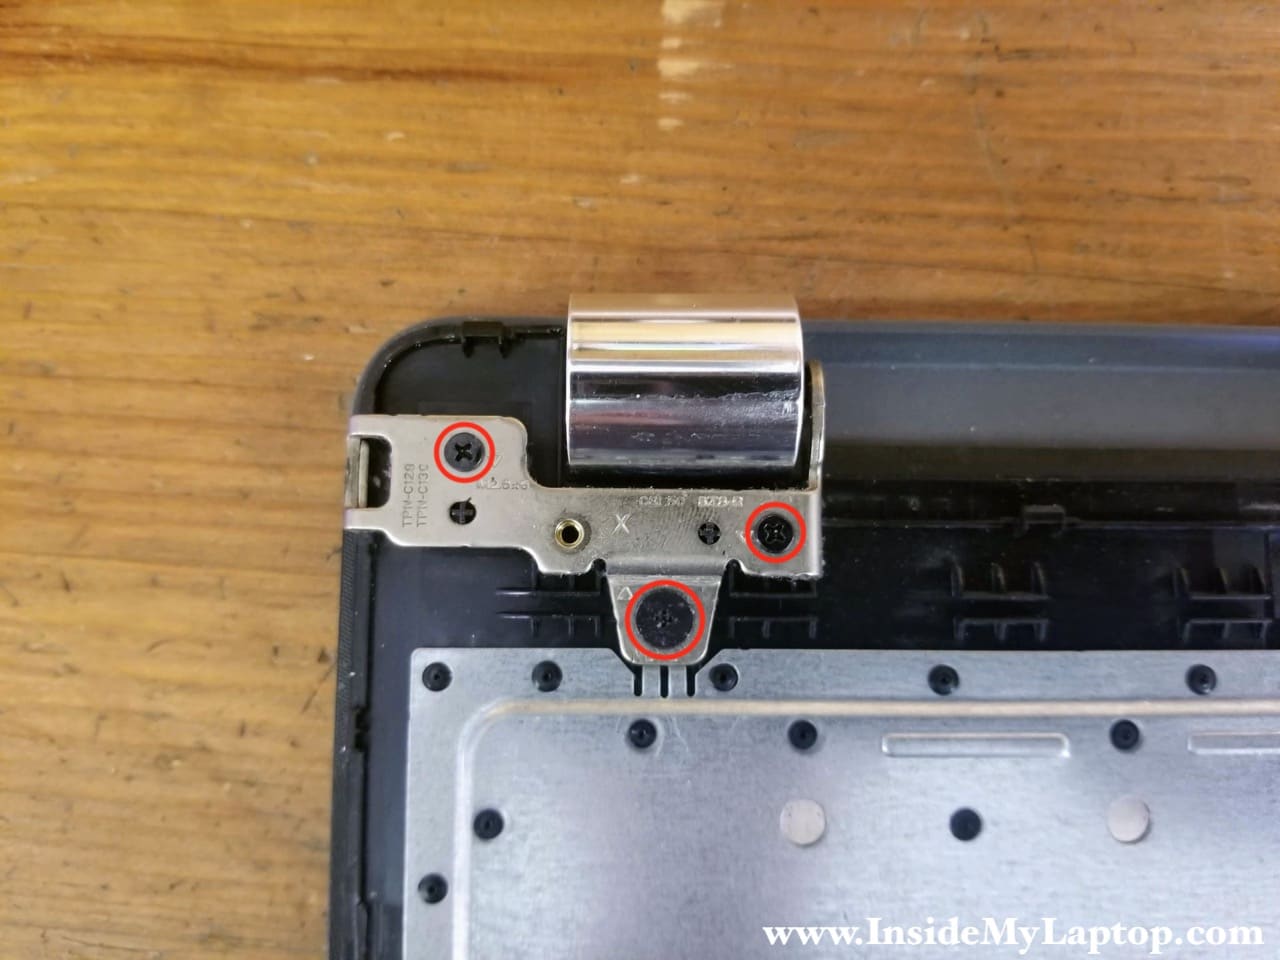
STEP 15.
Remove two screws securing the left hinge to the palmrest assembly.
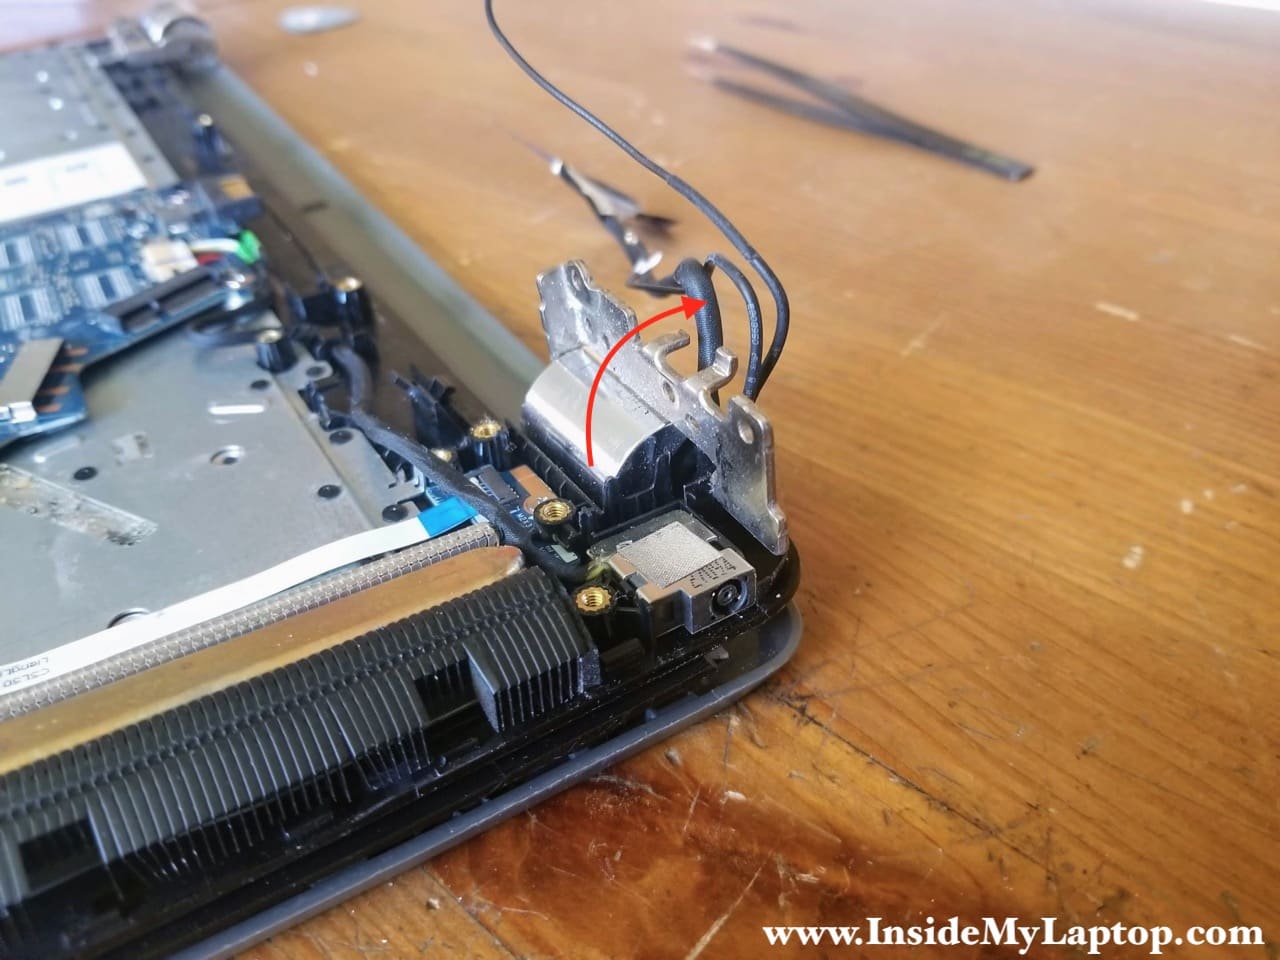
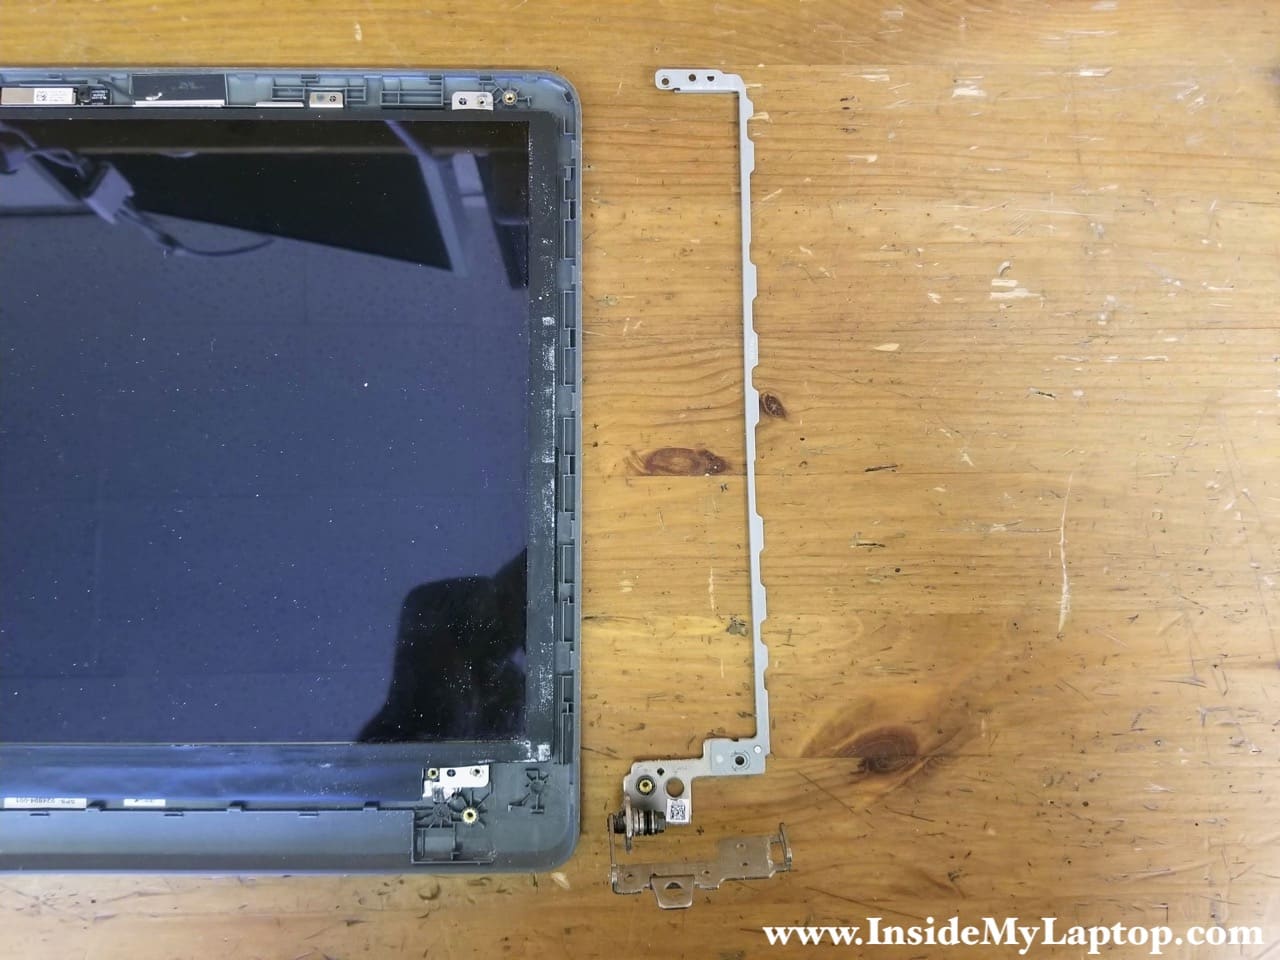
STEP 16.
Lift up the left hinge as it shown on the picture.
By the way, the DC power jack is mounted under the left hinge. If you need to replace the DC jack, you can do it now. Lift up the DC jack and unplug the cable. This step is not necessary for the display removal.
STEP 17.
Remove three screws securing the right hinge.
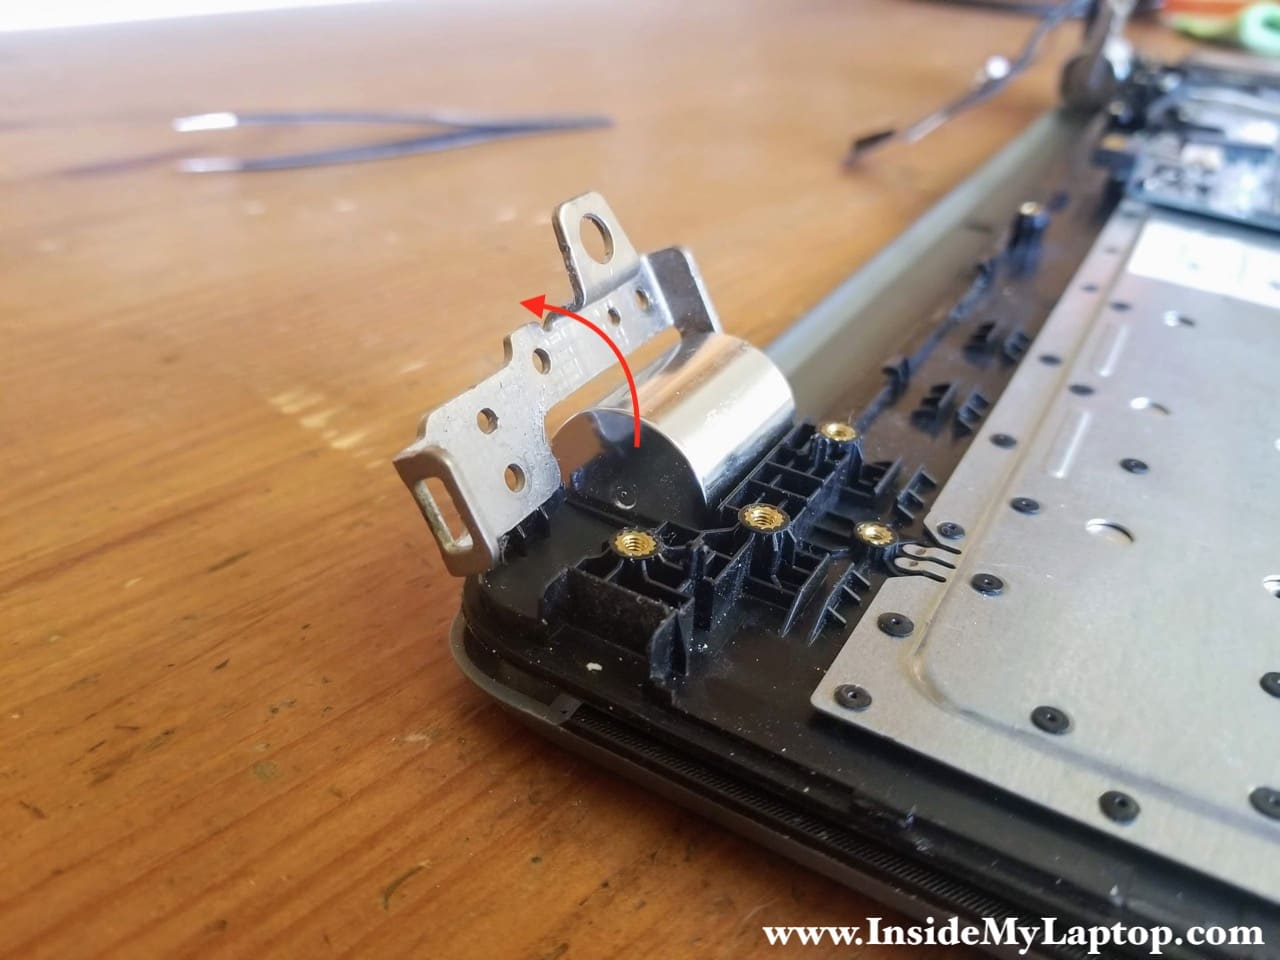
STEP 18.
Lift up the hinge.
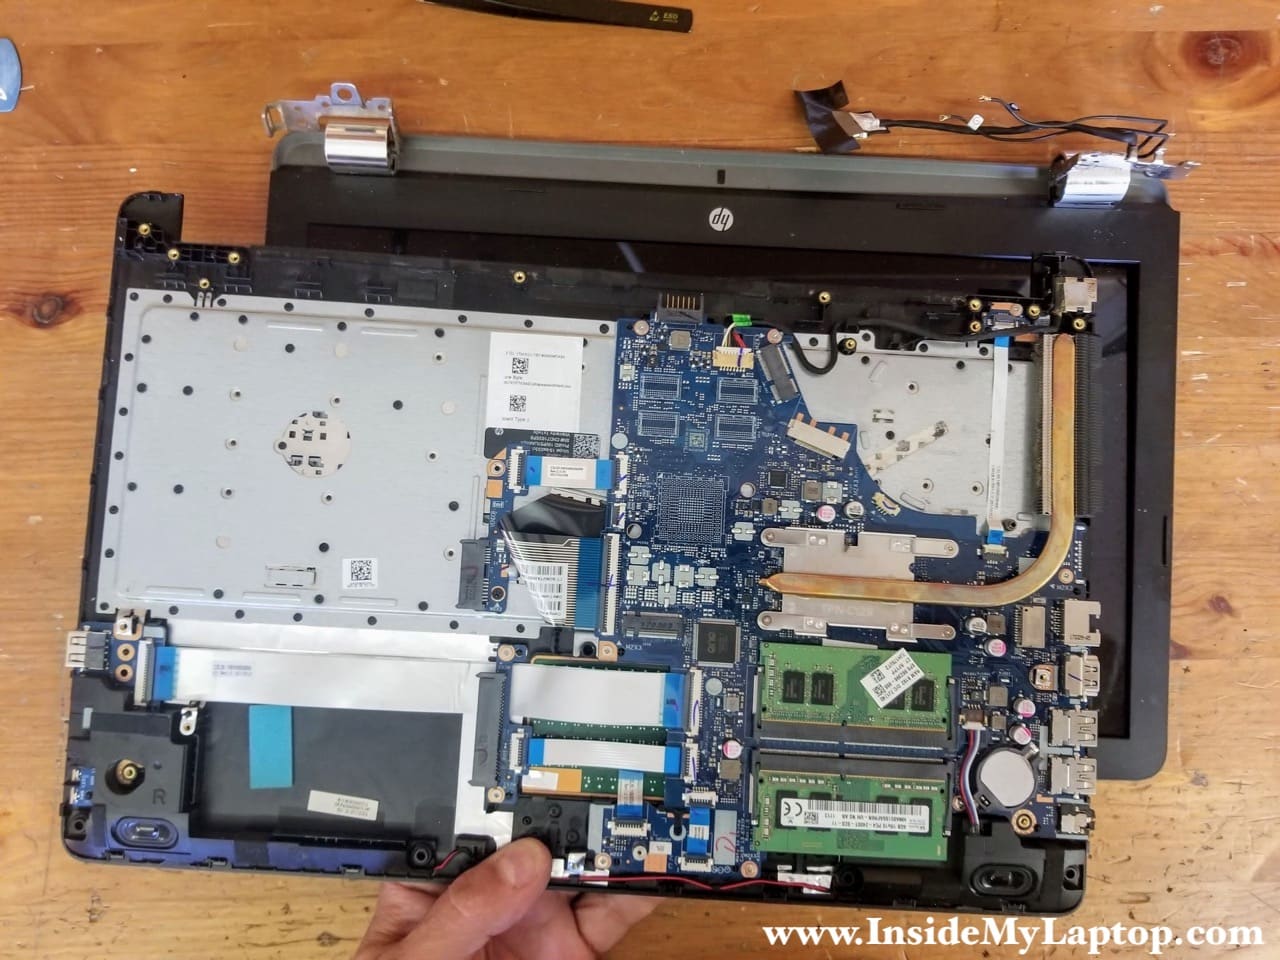
STEP 19.
With both hinges opened up, we can separate the palmrest assembly from the display.
HP 15 15g 15q Laptop LCD screen removal
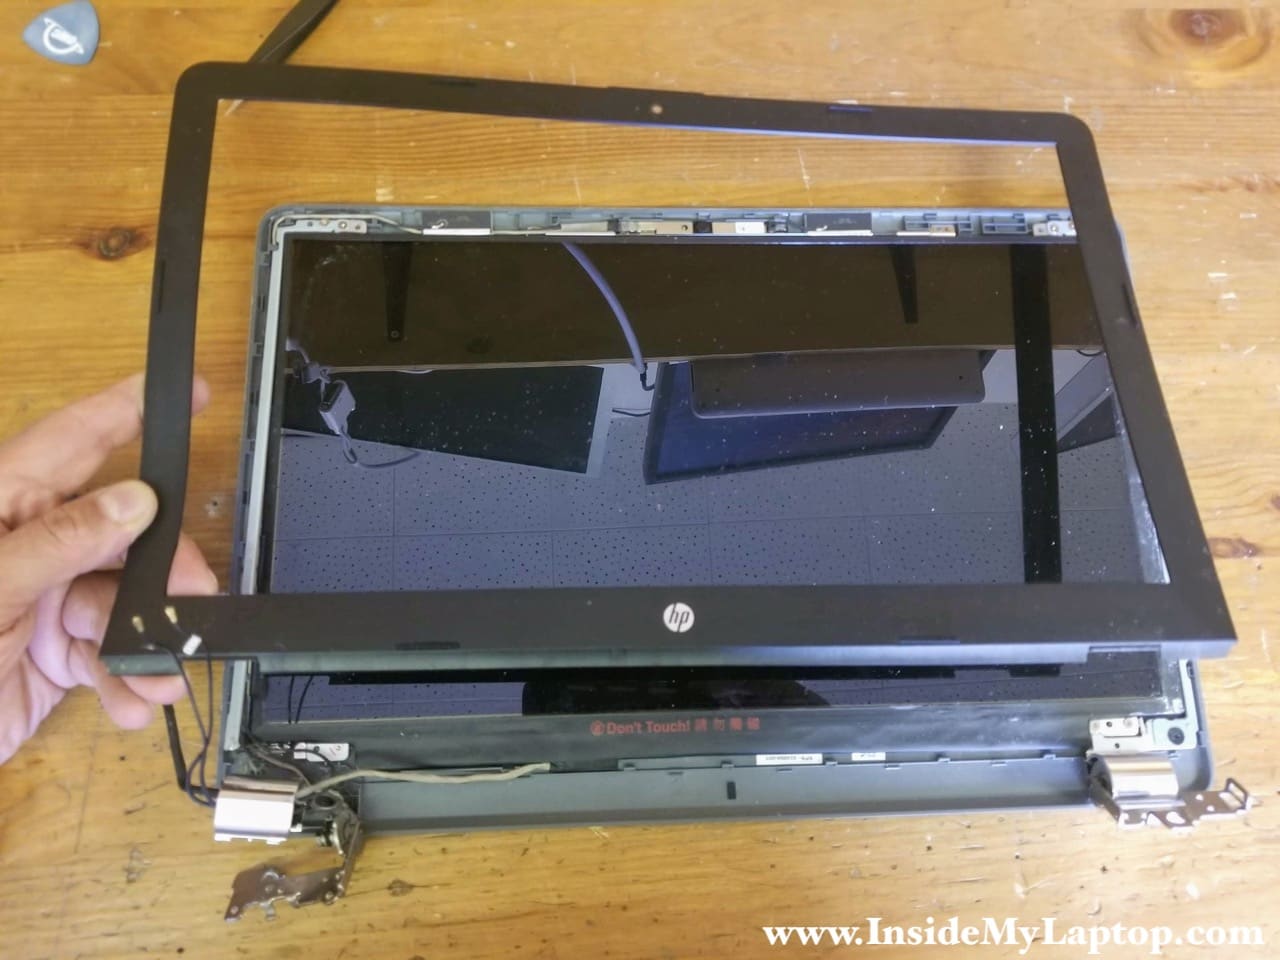
STEP 20.
With the display panel removed we can start taking it apart. Carefully separate the LCD bezel from the back cover. Wiggle the bezel to disengage hidden latches.

STEP 21.
Remove the LCD bezel.
STEP 22.
Now you can access one screw securing the silver hinge cover.
Remove the screw.

STEP 23.
Remove the right hinge cover.
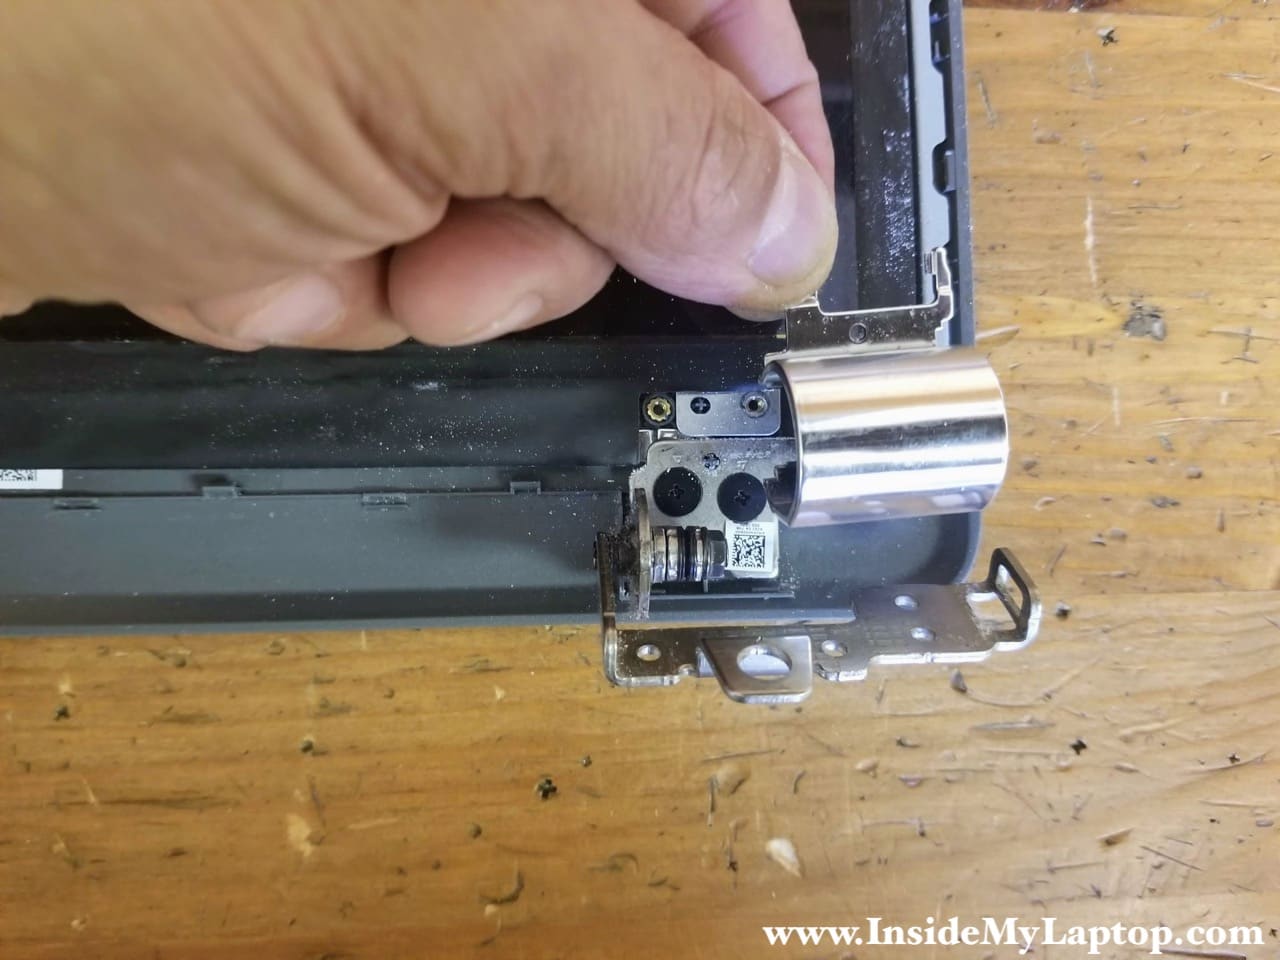
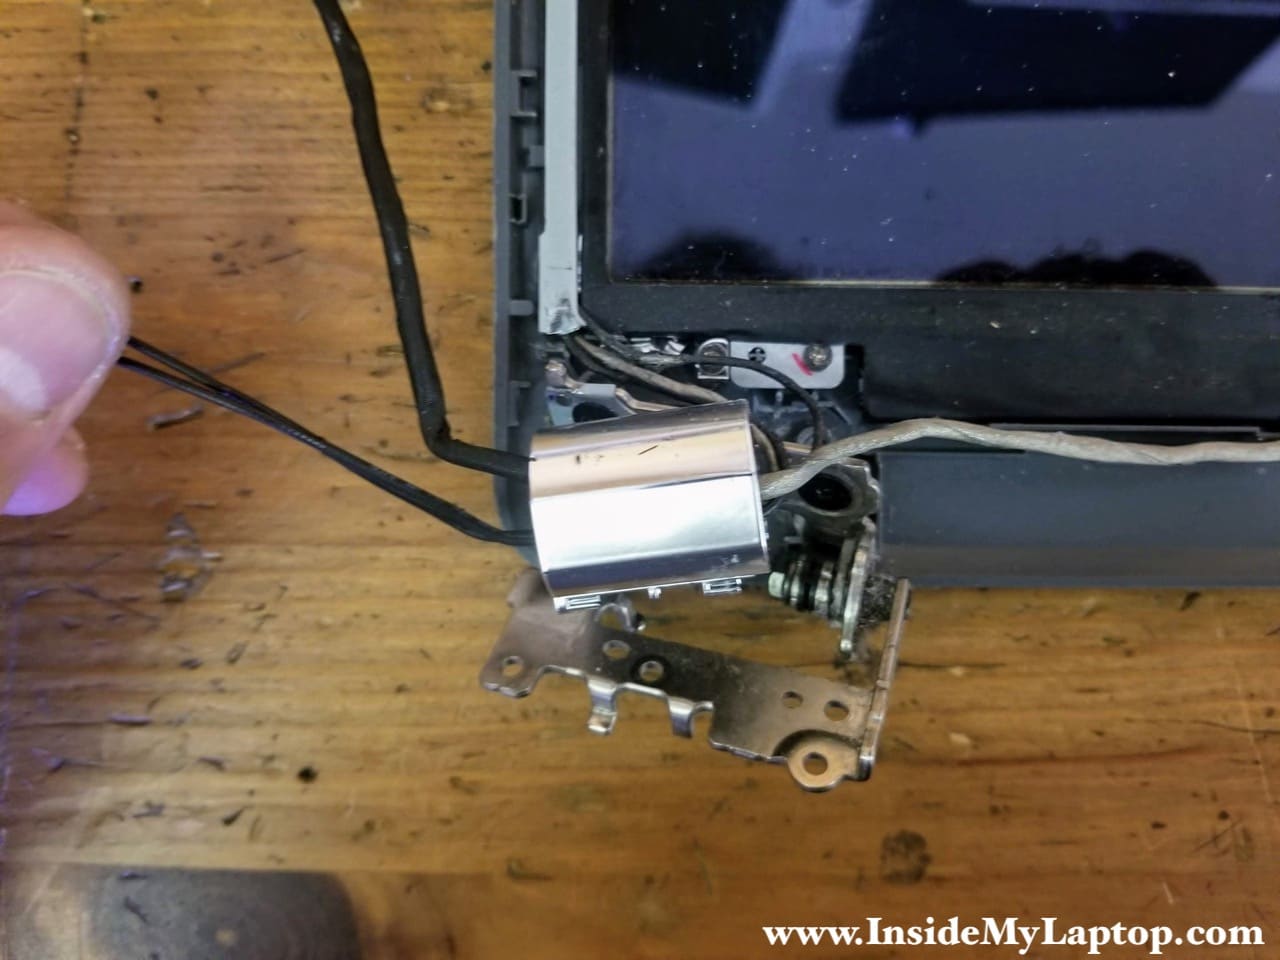
The left side of the display completely messed up. The left hinge broke off of the LCD cover, all screw anchors ripped off and the hinge cover is broken.
STEP 24.
The LCD screen and hinges are secured by six silver screws (color-coded in red) and six black screws (color-coded in green).
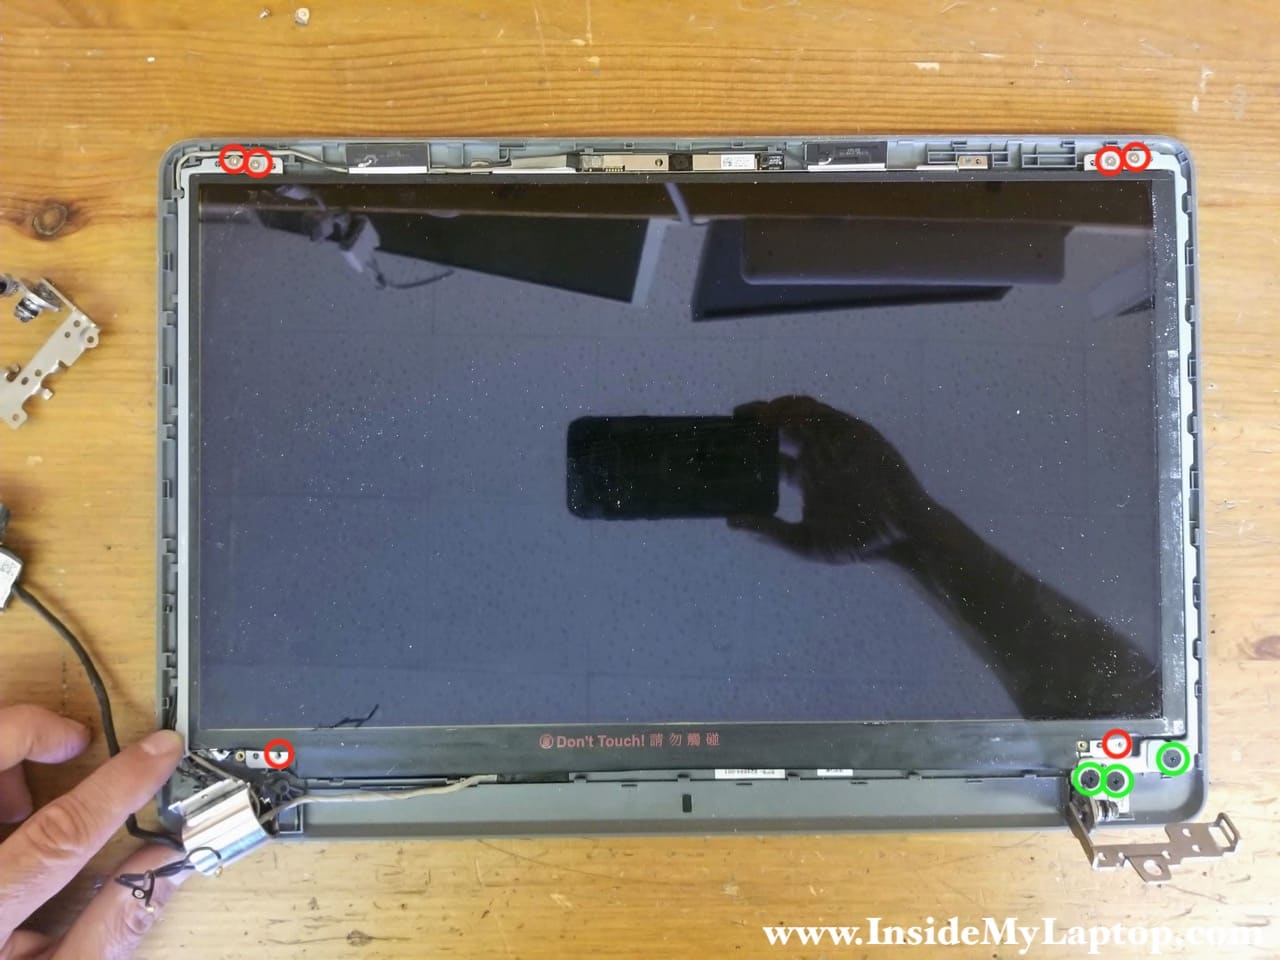
STEP 25.
After removing all these screws we can remove the display hinges with the LCD screen and replace them if necessary.
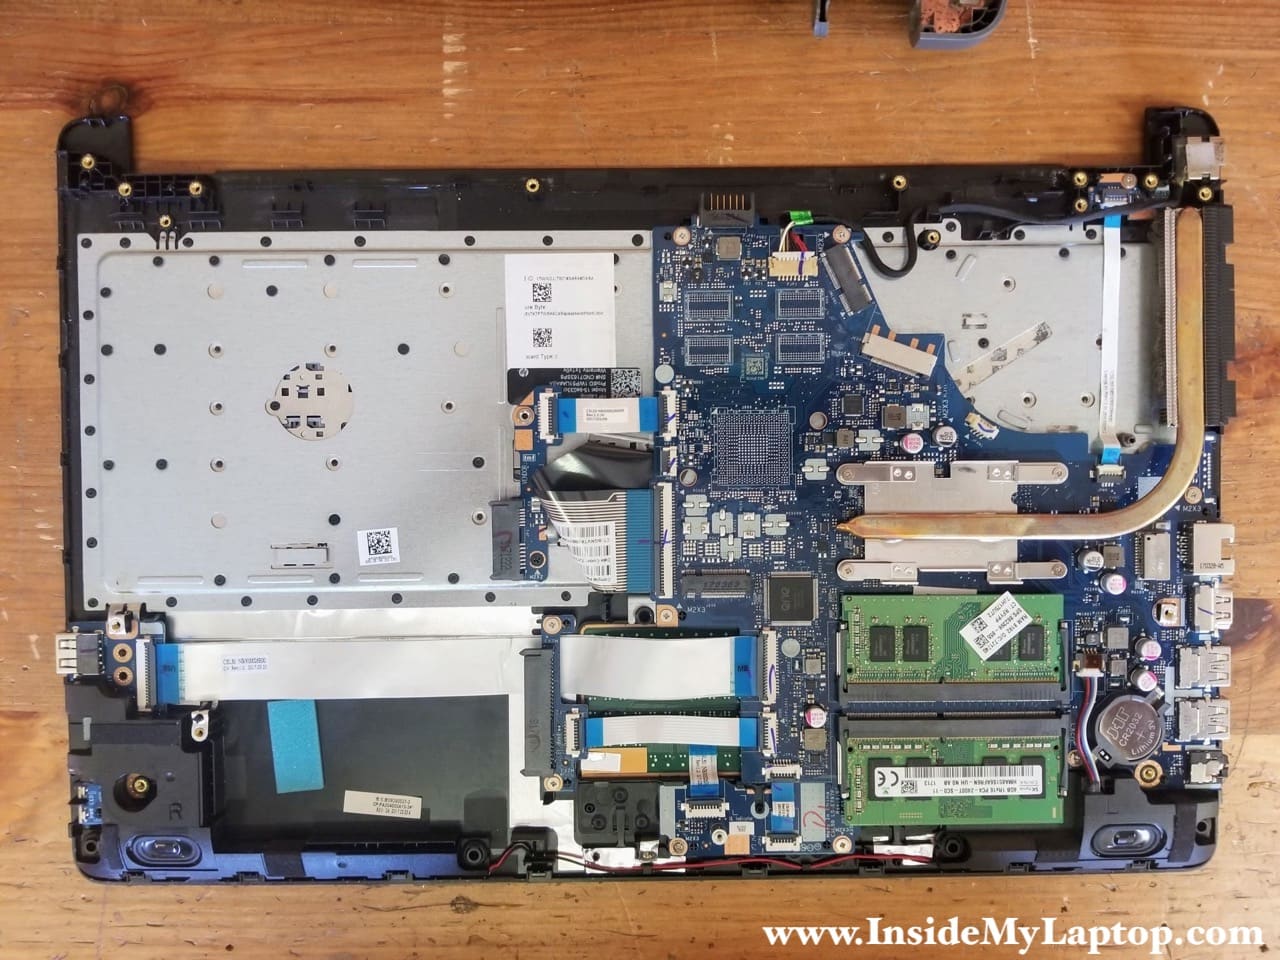
All components attached to the palmrest assembly can be easily accessed and removed if necessary.
HP 15-bs033cl motherboard has two memory slots. The CMOS battery is a regular CR2032 Lithium 3V coin battery. It’s located on the right side from the RAM slots.
The keyboard is permanently riveted to the palmrest assembly and cannot be easily removed.
Related posts: Disassembly guides for HP 15-cs series and HP 15-au series.
Tim
I have this laptop and the fan started making grinding noise. I want to find a replacement fan before taking it apart. Would you help me to find the correct fan for my laptop? Where I can buy it?
IML Tech
Tim, you can see the fan part number in the step 13. It’s 925012-001. Google the part number and you’ll find the replacement fan for your laptop. It’s available from Amazon or eBay.
Richard
Super helpful article! I’m replacing a screen after my neighbor tried to put his fist through it. (He dual boots to Linux, and Windows overwrote his boot partition one time too many.) I hadn’t found the service manual on HP’s website, so thank you for posting the link!
IML Tech
You are very welcome! I’m glad to help. Good luck with the screen replacement.
Joe
I need to replace the base where hinge has broken… what is the correct
part Number please