In this guide I show how to disassemble a Lenovo ThinkPad X1 Carbon 6th Generation laptop (type 20KH-CTO1WW). This guide will work for all machine types: 20KH and 20KG.
At the end of this guide I will add a link to the official Lenovo ThinkPad X1 Carbon machine types 20KH and 20KG hardware maintenance manual.
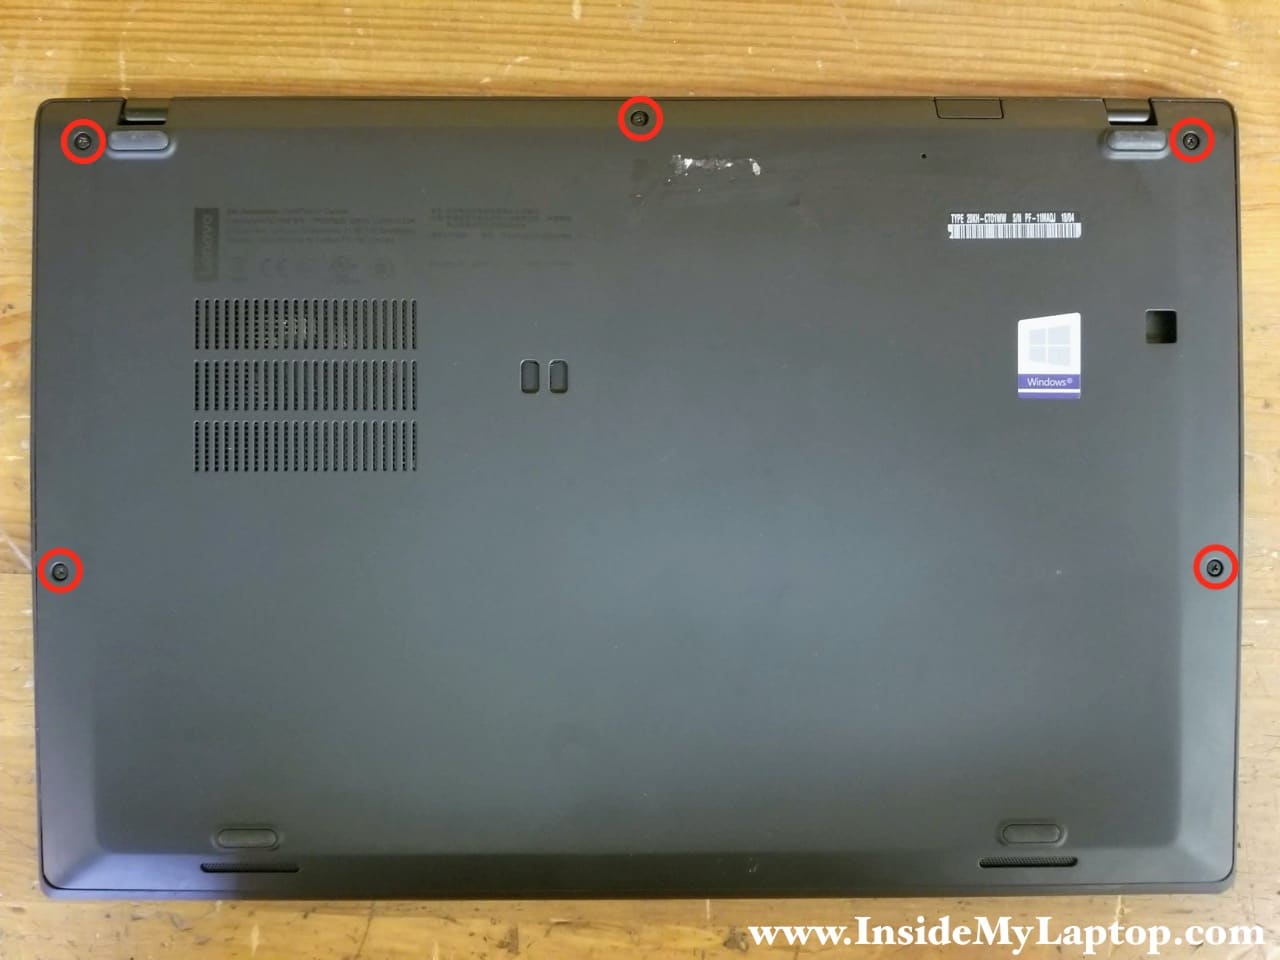
STEP 1.
Loosen five captive screws on the base cover. These screws will not separate from the cover.
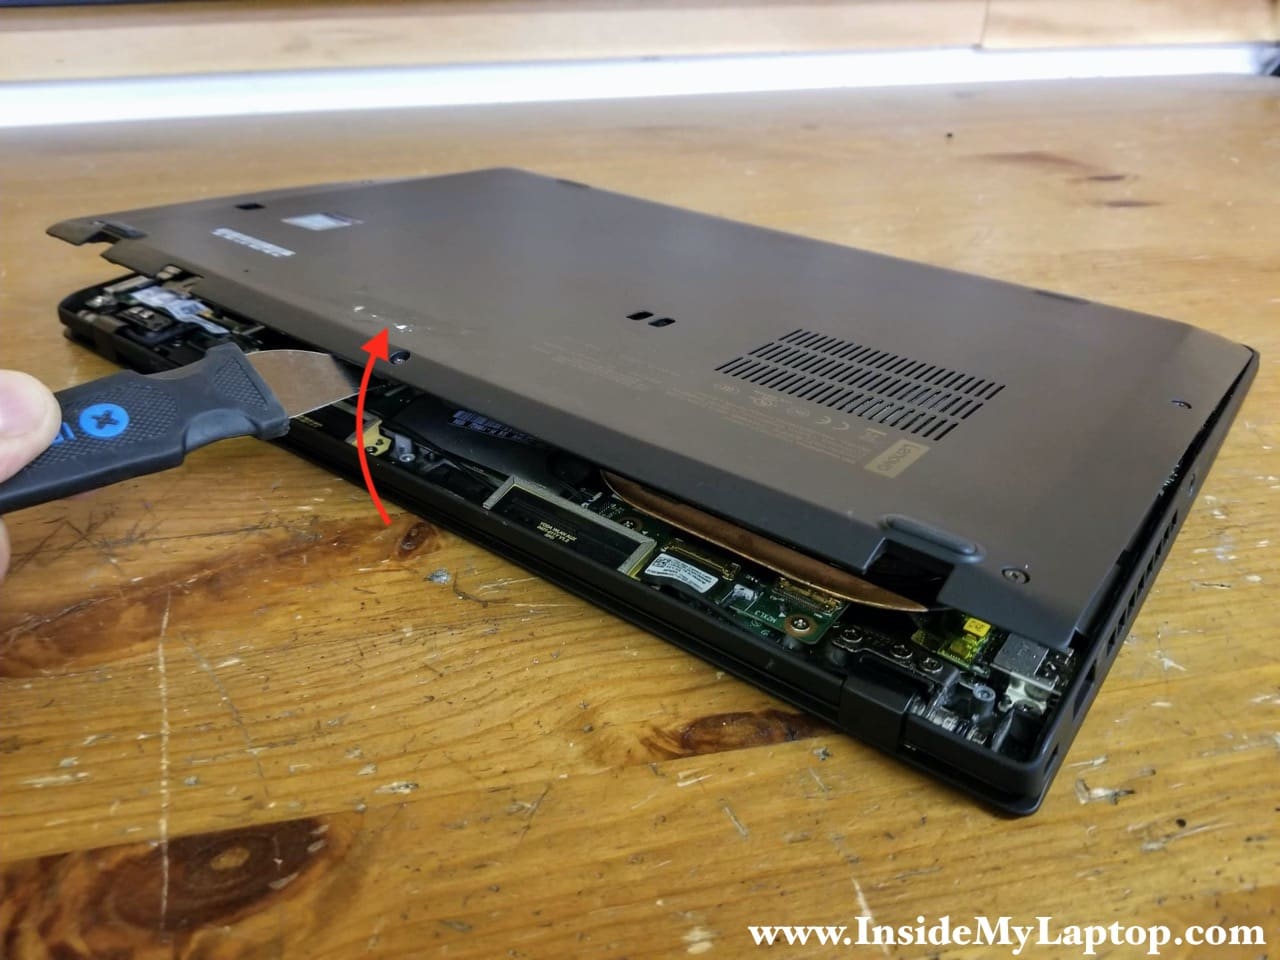
STEP 2.
Separate and remove the base cover from the rest of the machine.
Start removing the base cover from the display hinge side.
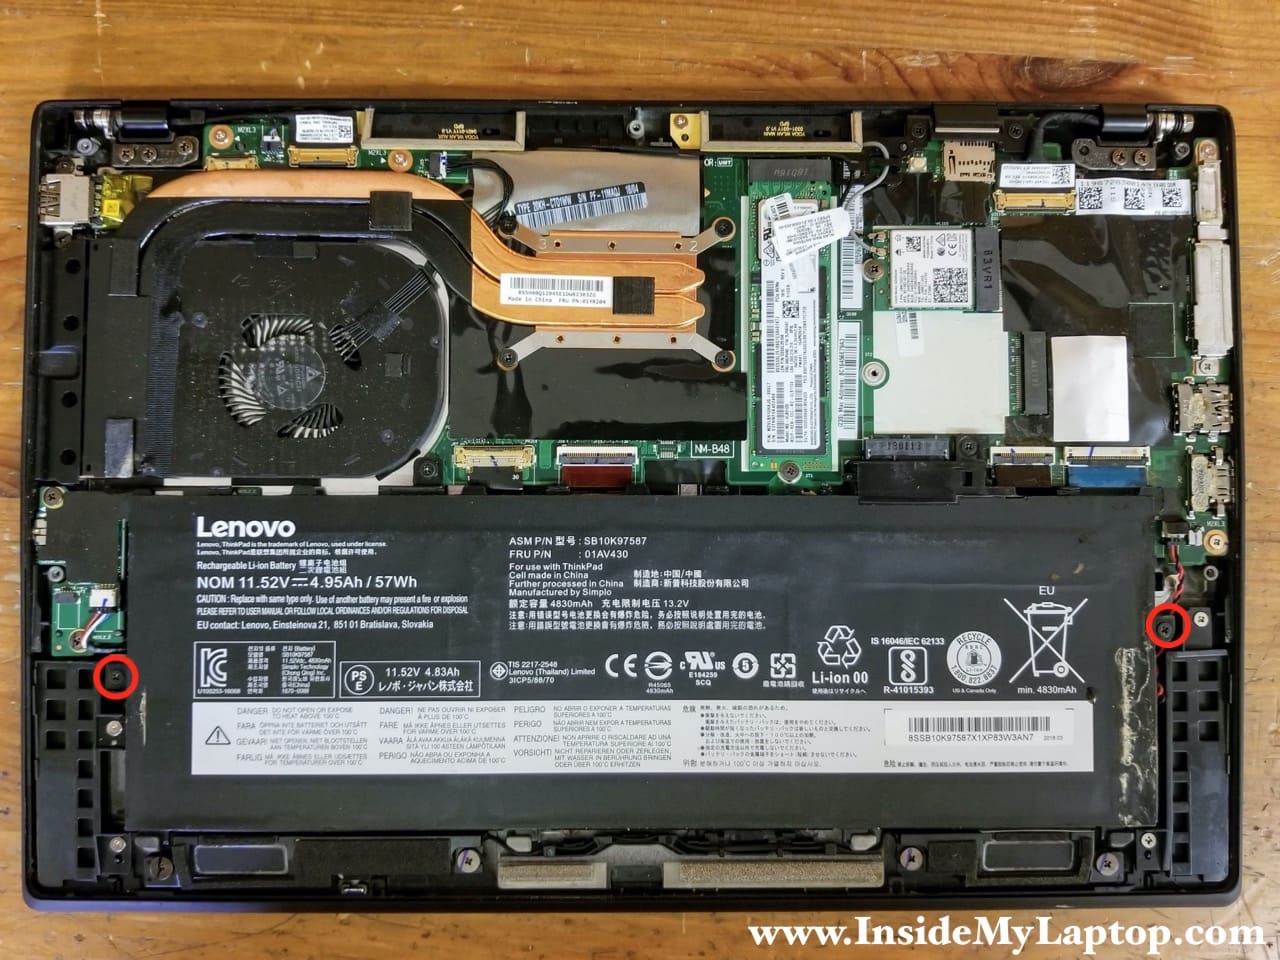
STEP 3.
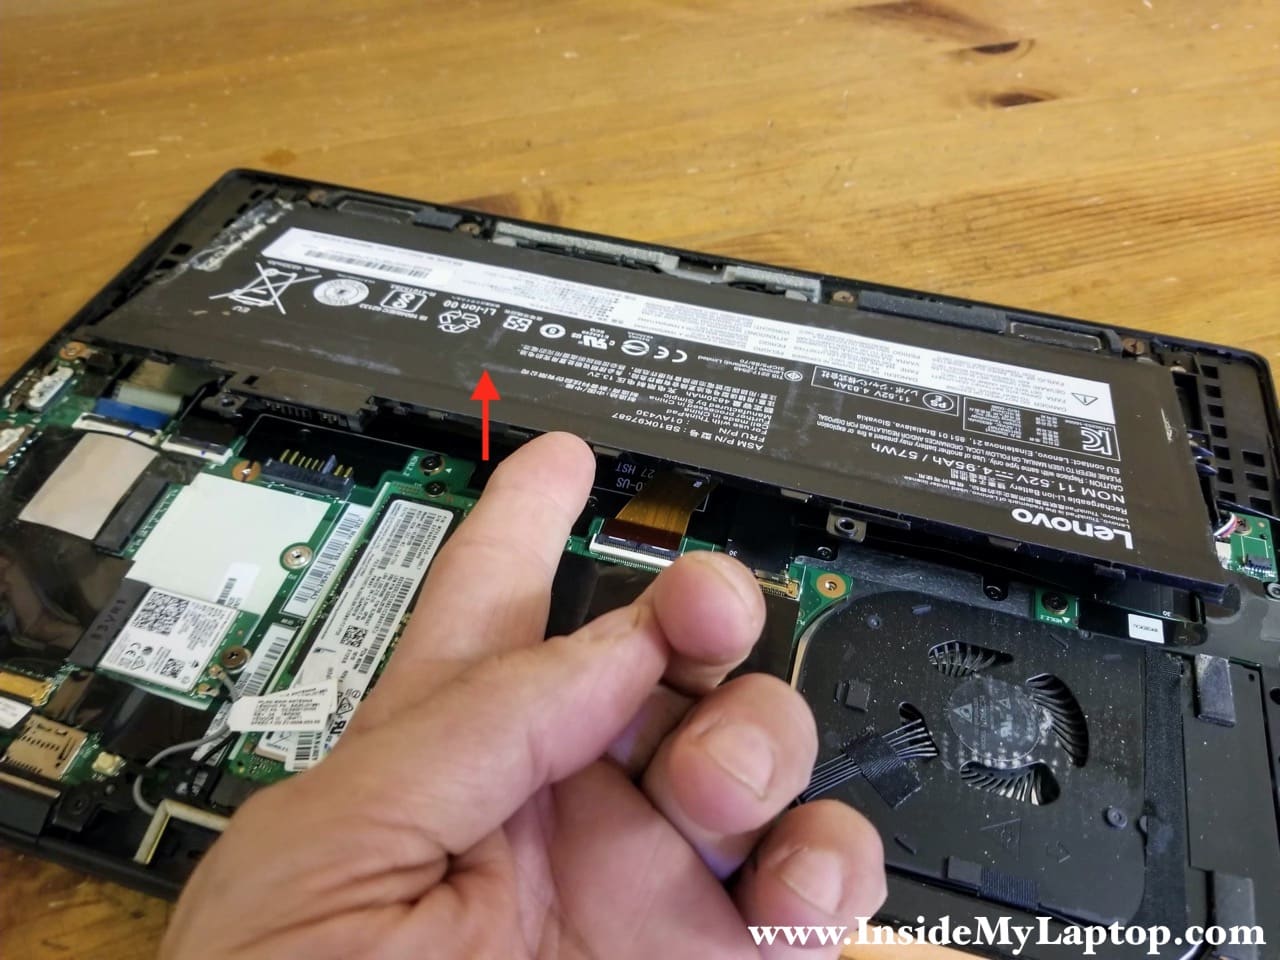
Remove two screws securing the battery.
Lenovo ThinkPad X1 Carbon 6th Generation part number: FRU P/N 01AV430 or ASM P/N SB10K97587.
STEP 4.
Lift up the back of the battery to disconnect it from the motherboard. Remove the battery.
STEP 5.
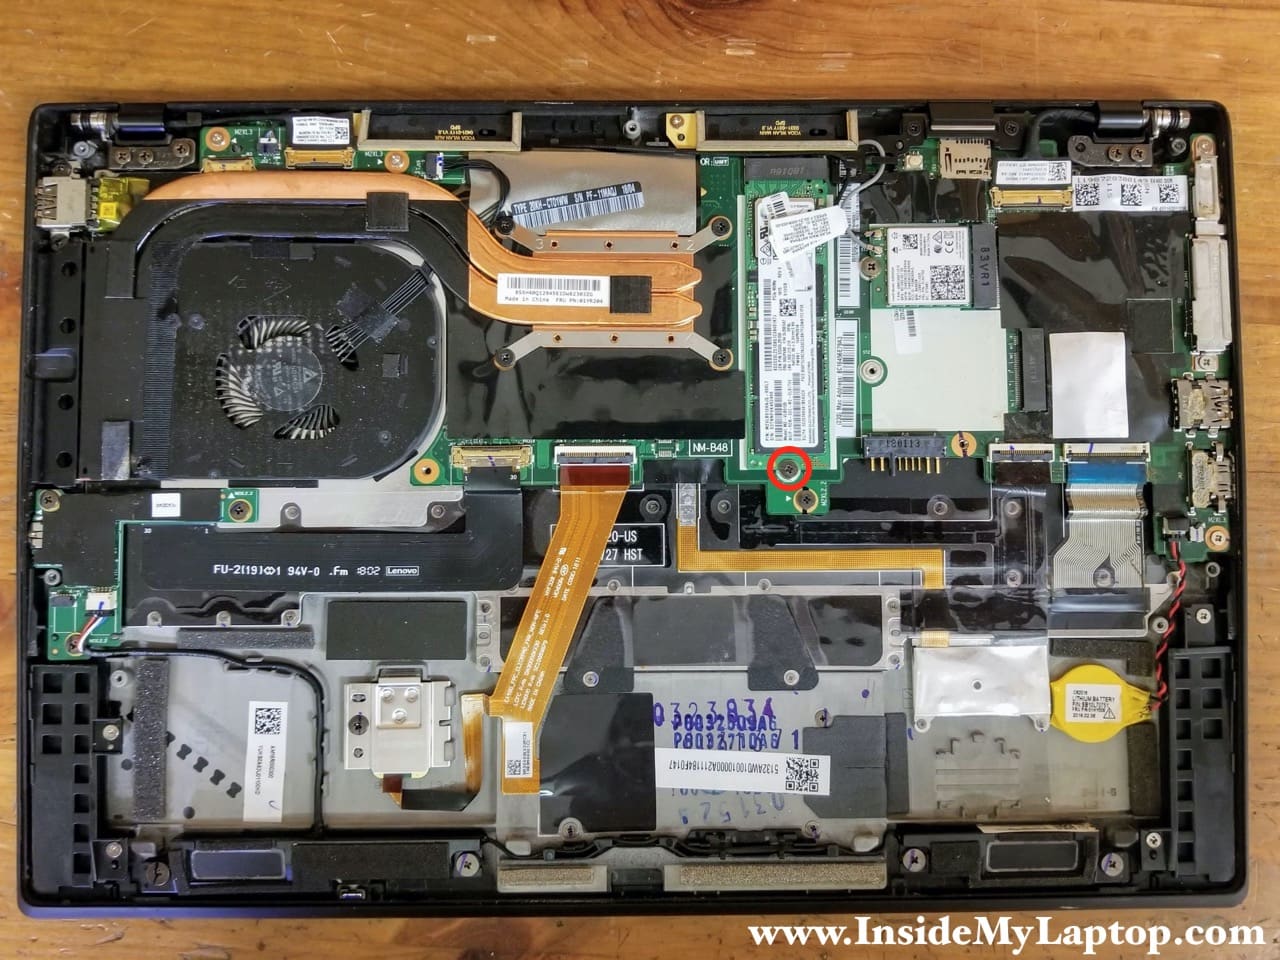
Remove one screw securing the solid state drive.
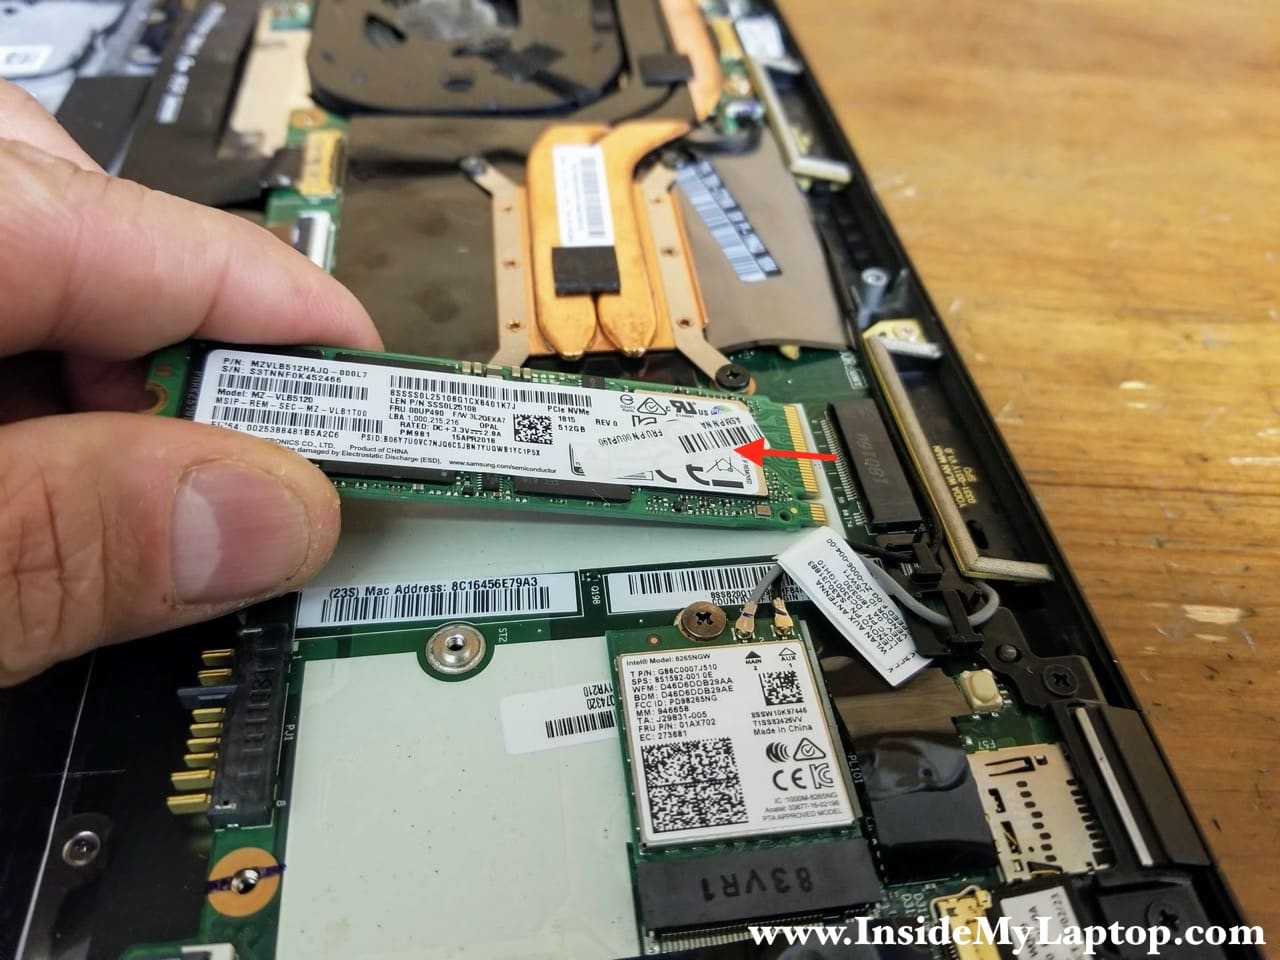
This is a PCIe NVMe M.2 SSD from Samsung (Model: MZ-VLB5120).
STEP 6.
Remove the SSD.
STEP 7.
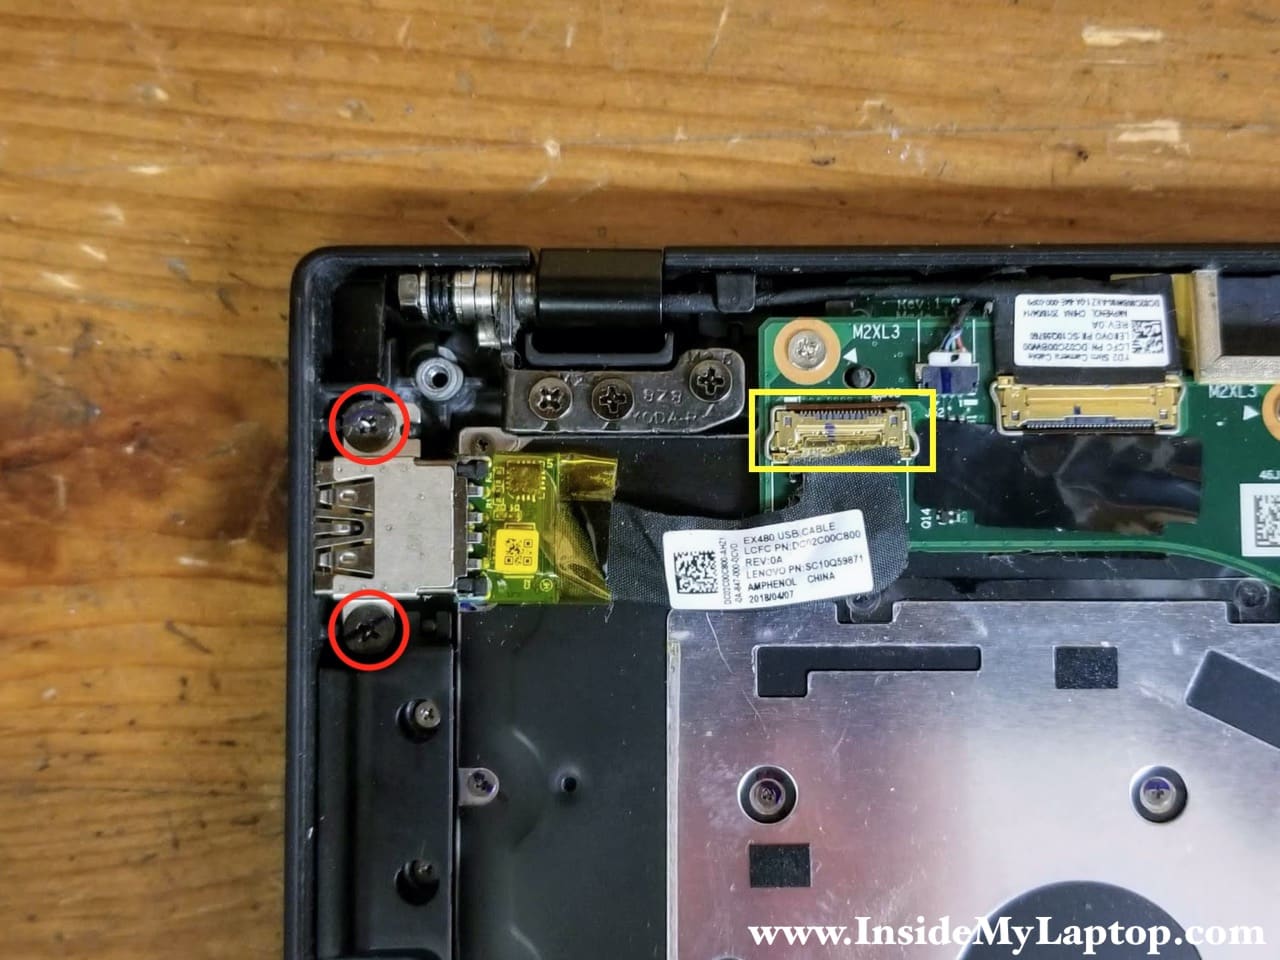
Remove three screws securing the audio jack board.
Disconnect the speaker cable (yellow) from the board.
Disconnect the audio jack board cable from the motherboard.

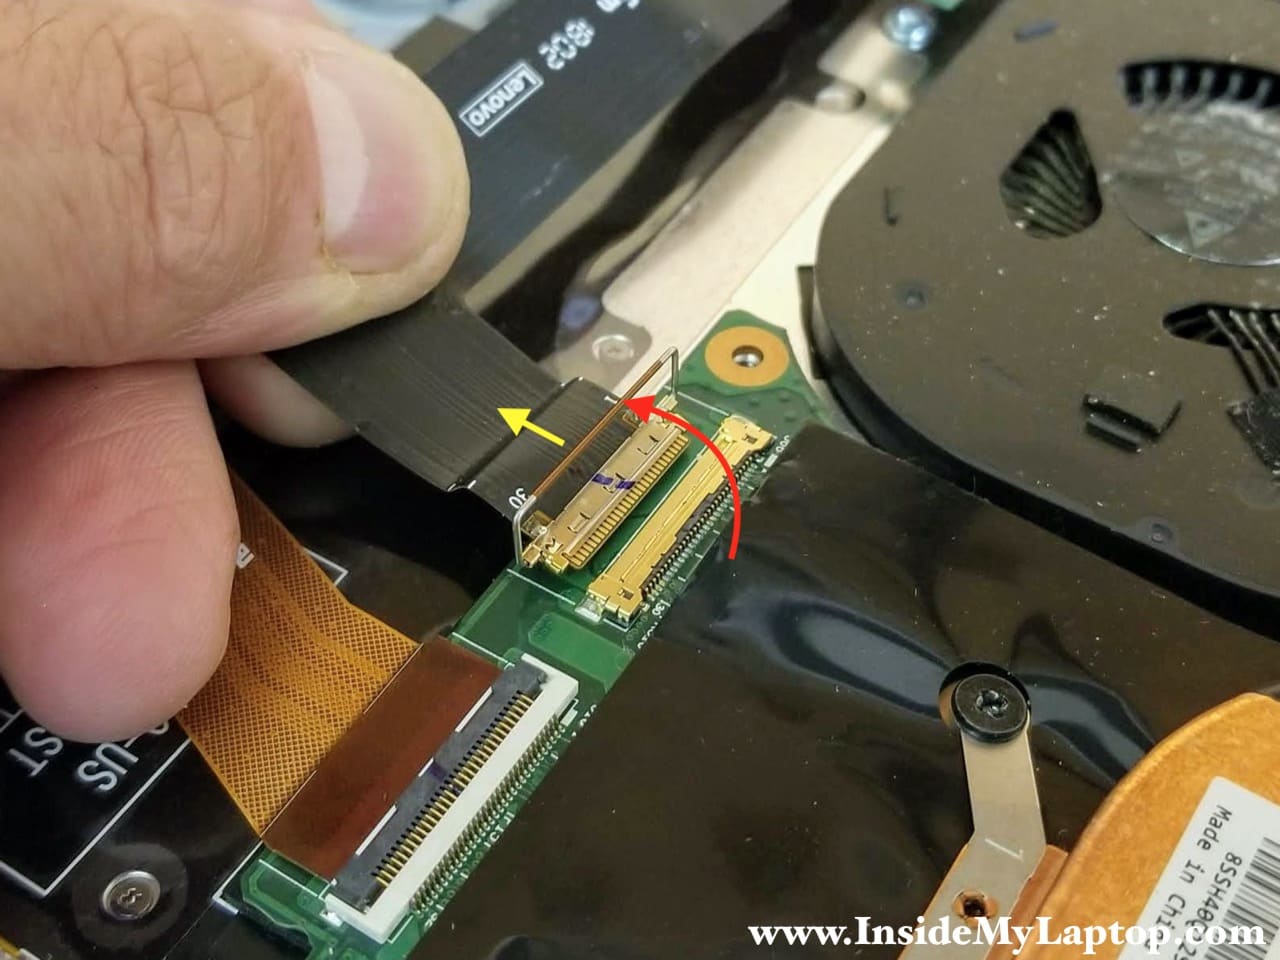
Here’s how to disconnect the audio jack cable.
Lift up the metal connector bracket to release the cable (red arrow) and pull the cable out (yellow arrow).
STEP 8.
Lift up and remove the audio jack board with the cable attached.

STEP 9.
Loosen four screws securing the processor heatsink.
Disconnect the cooling fan cable from the motherboard.

STEP 10.
Lift up the cooling module (heatsink with fan) and remove it.
Lenovo ThinkPad X1 Carbon 6th Generation cooling module FRU part number: 01YR204.

STEP 11.
Remove two screws securing the USB board.
Disconnect the USB board cable from the motherboard.
STEP 12.
Remove the USB board.

STEP 13.
Disconnect two antenna cables from the wireless card.

STEP 14.
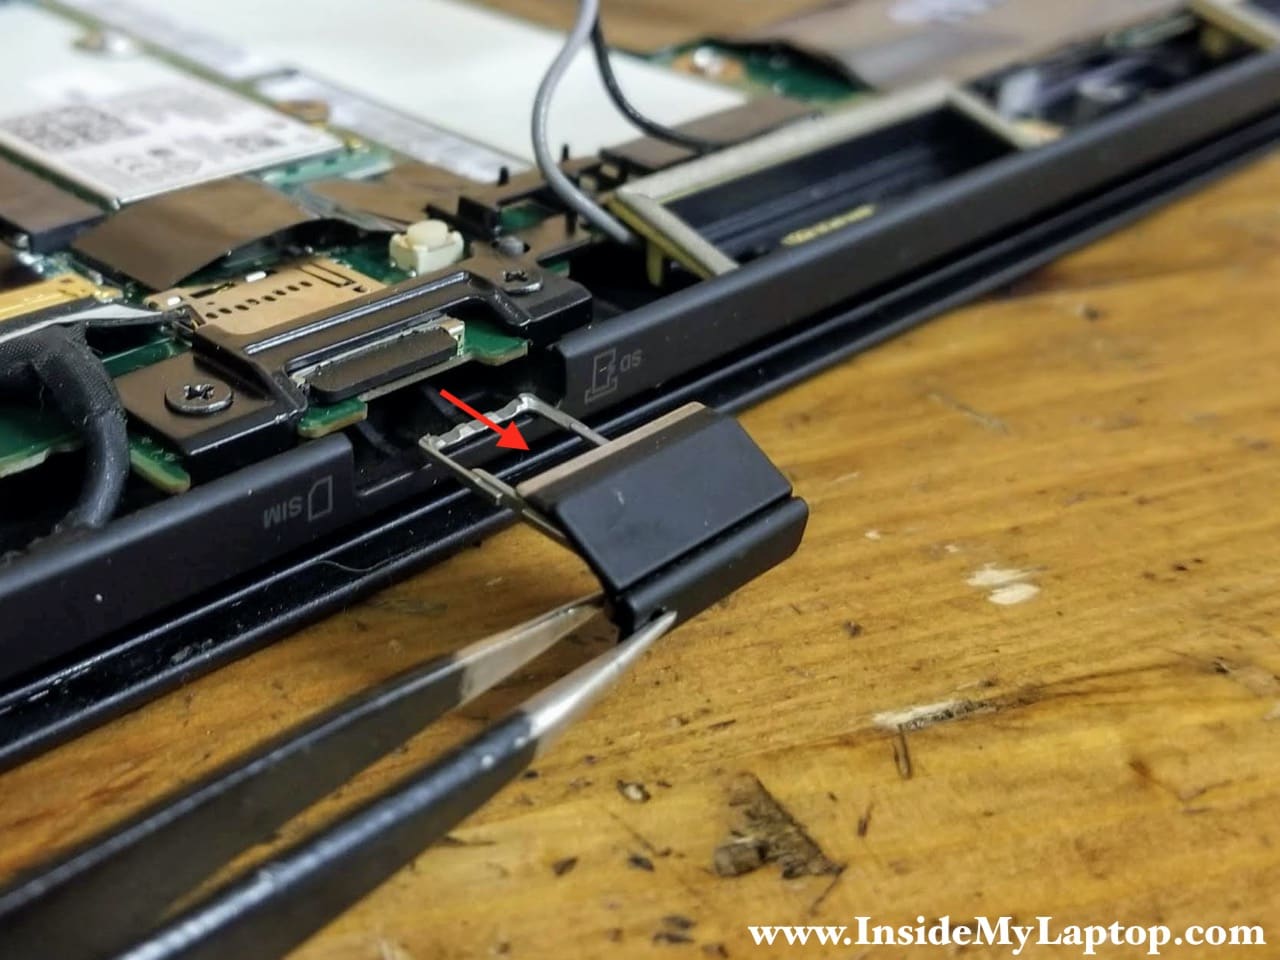
Insert a paper clip into the hole on the SIM/MicroSD card tray.
Push the clip in and the tray will pop out.

STEP 15.
Remove the SIM/MicroSD card tray.
STEP 16.
Un-route Wi-Fi antenna cables from the guided path.
Remove two screws from the Wi-Fi antenna guide.

STEP 17.
Remove the Wi-Fi antenna guide.

STEP 18.
Remove six screws securing the motherboard. One screw located under the SSD slot is larger than five other screws.
Disconnect the following color-coded cables:
– Power button cable (red).
– Two display cables (yellow and green).
– Touchpad/Finger scanner cable (orange).
– Trackpoint cable (blue).
– Keyboard cable (white).
– RTC battery cable (pink).
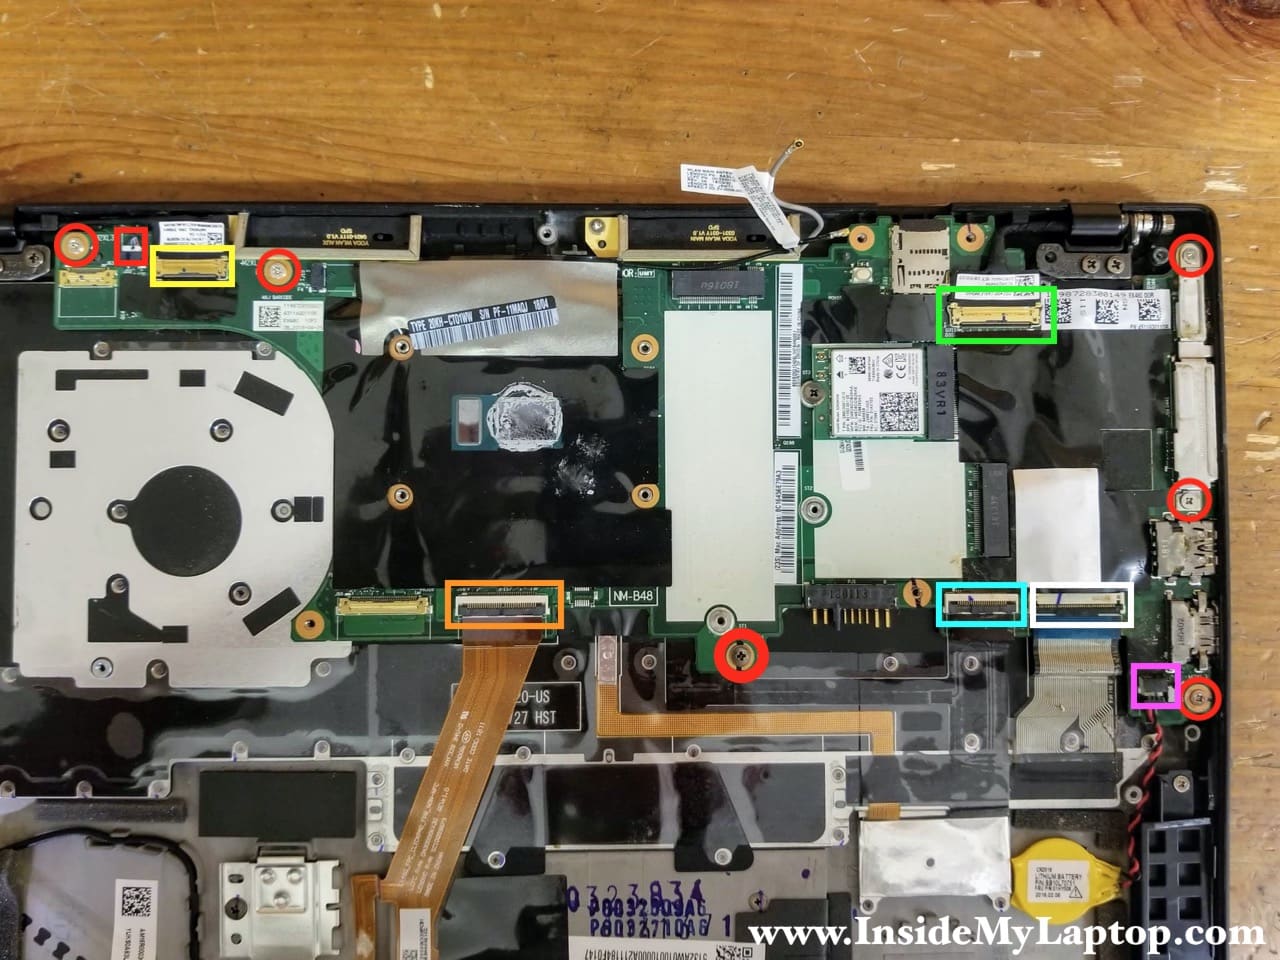
Here’s how to disconnect flat cables.
Unlock the connector by lifting up the locking tab (red arrow) and pull the cable out (yellow arrow).

STEP 19.
Lift up and remove the metal bracket.

STEP 20.
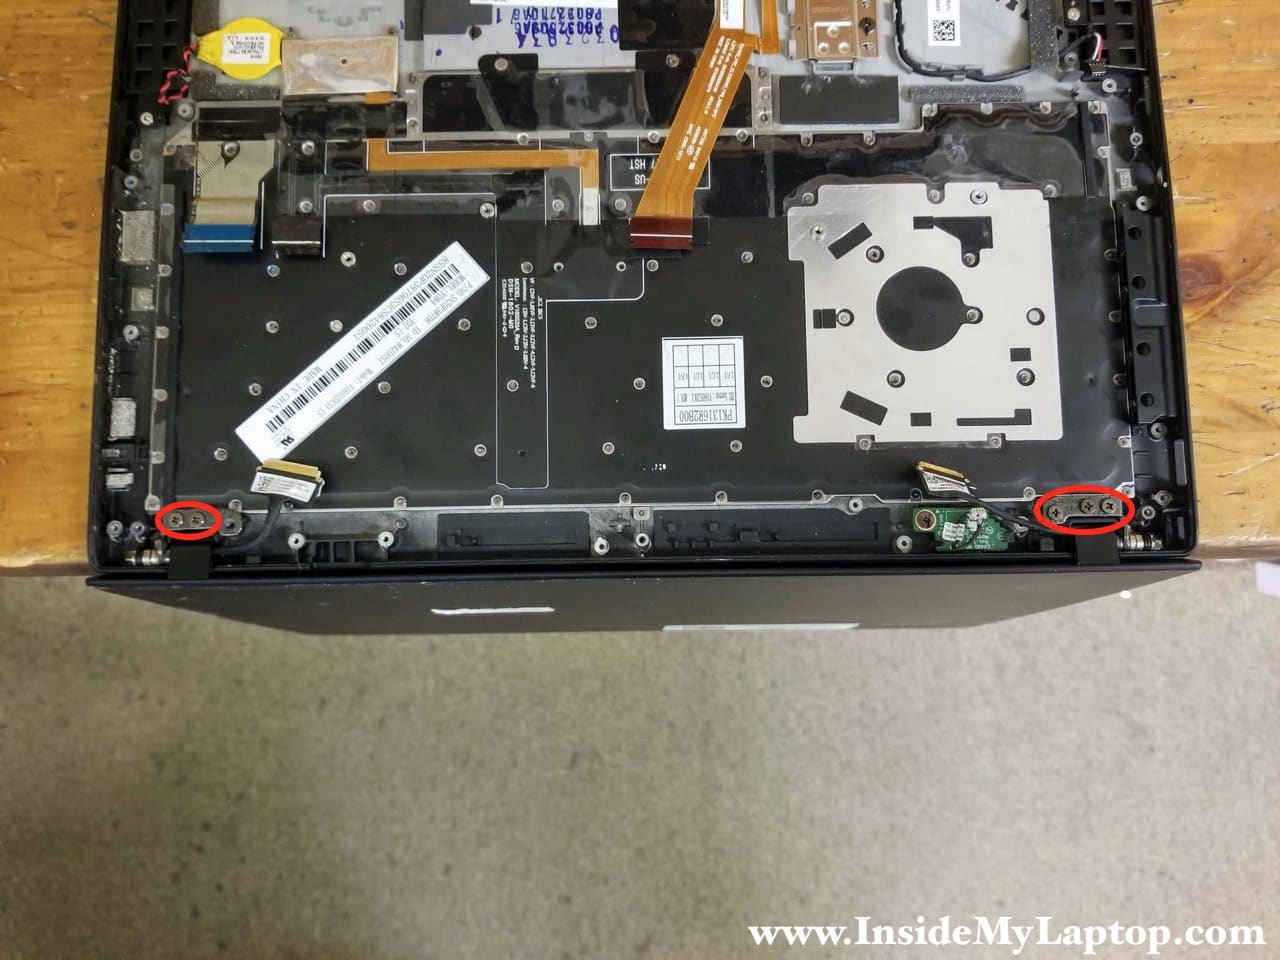
Remove two screws securing the left and right Wi-Fi antennas.

STEP 21.
Remove both Wi-Fi antennas from the top case assembly.

STEP 22.
Lift up the motherboard and remove it.
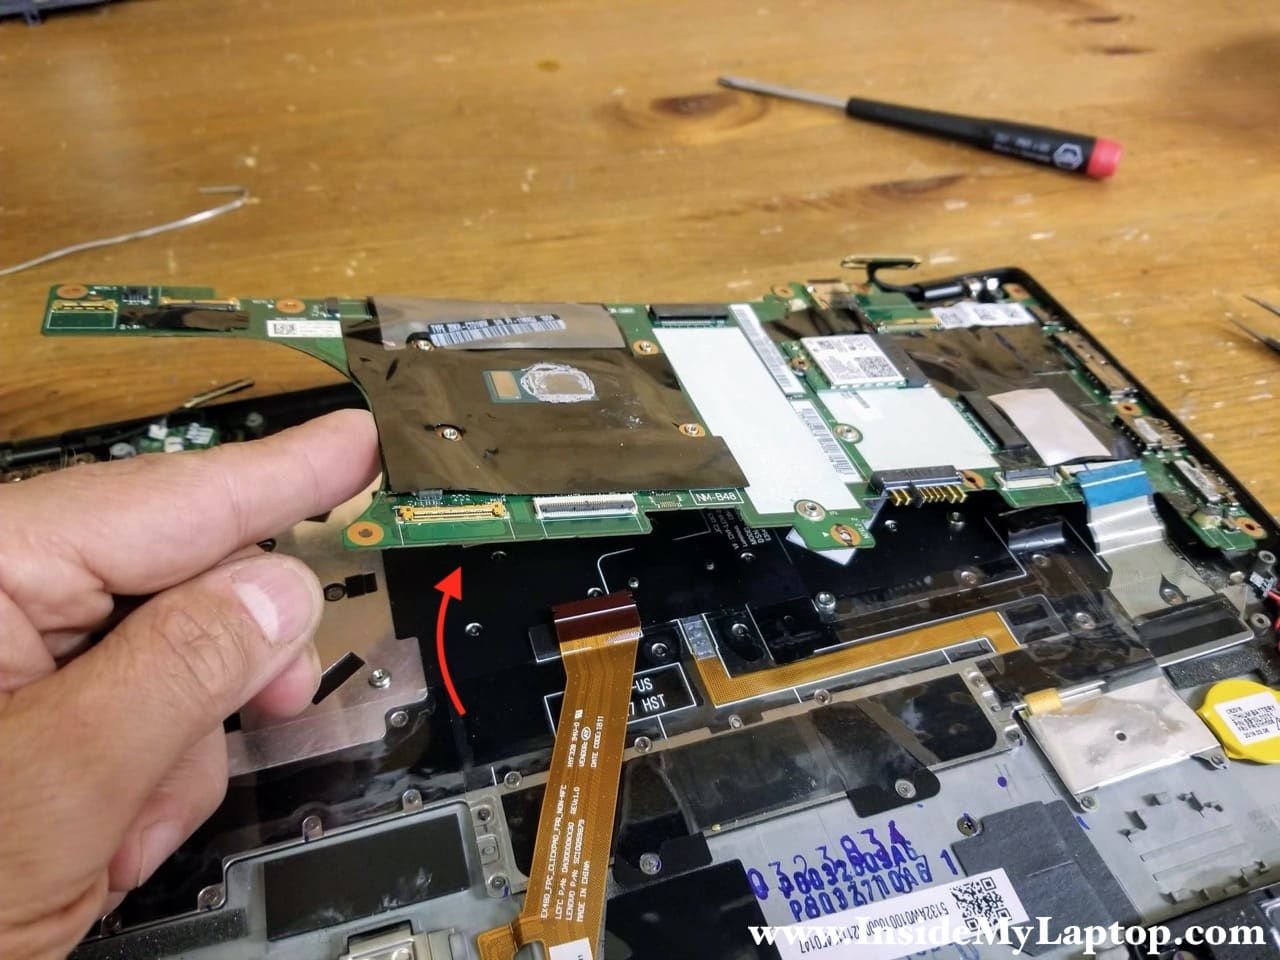
Here’s the other side of the motherboard. It’s almost entirely covered with a protective mylar sheet (it’s protecting the motherboard from liquid damage).

STEP 23.
Open the display at a 90 degree angle and place the laptop upside down on the edge of a desk.
Remove two screws from the left display hinge and three screws from the right display hinge.
STEP 24.
Remove the display from the top case assembly.

The keyboard in a Lenovo ThinkPad X1 Carbon 6th Generation laptop is attached to the top case with about 70 tiny screws. The keyboard can be removed and replaced.
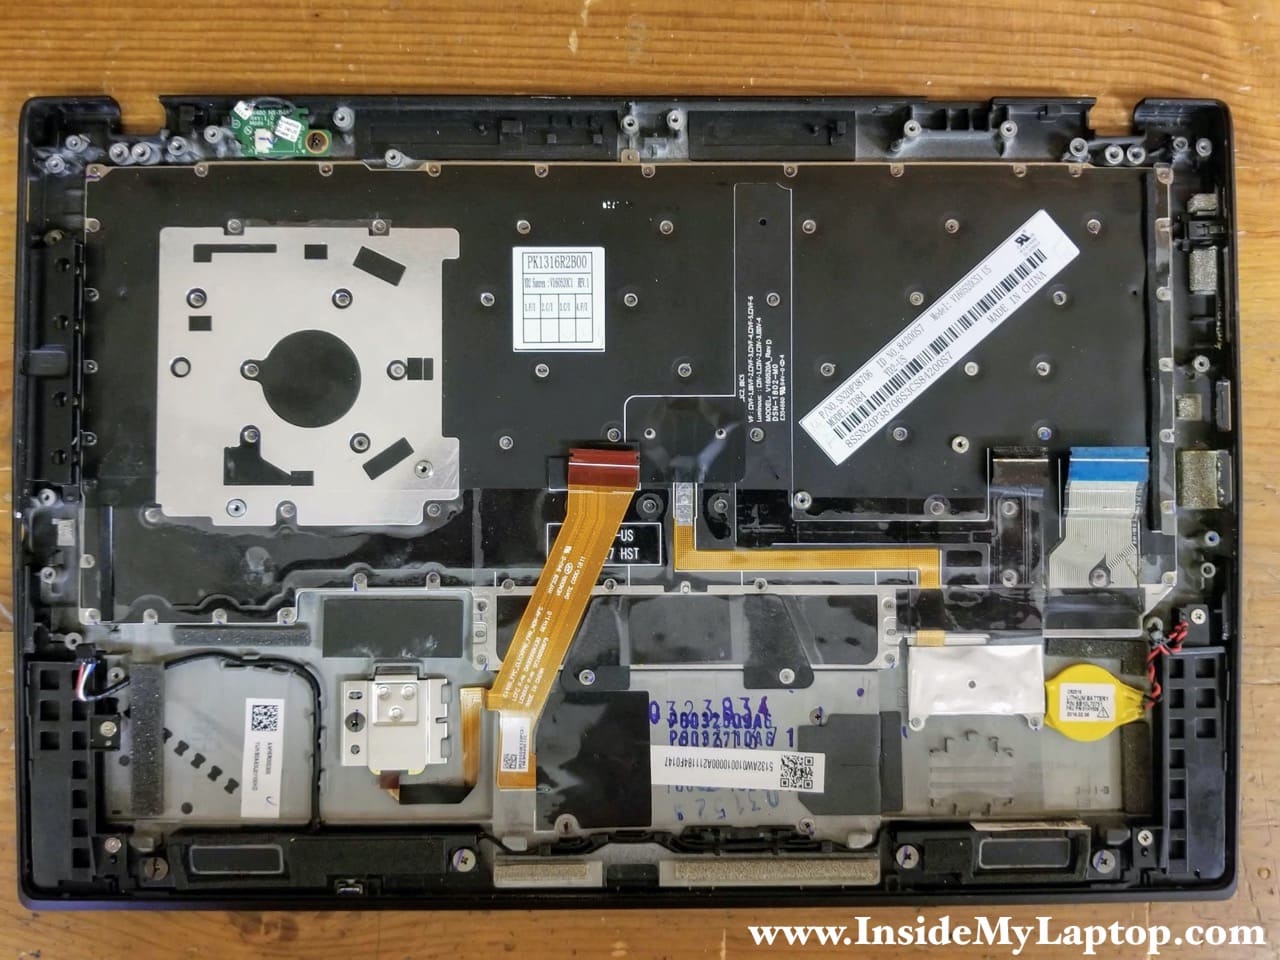
The power button is located on a separate board. This board can be easily removed and replaced if necessary.
