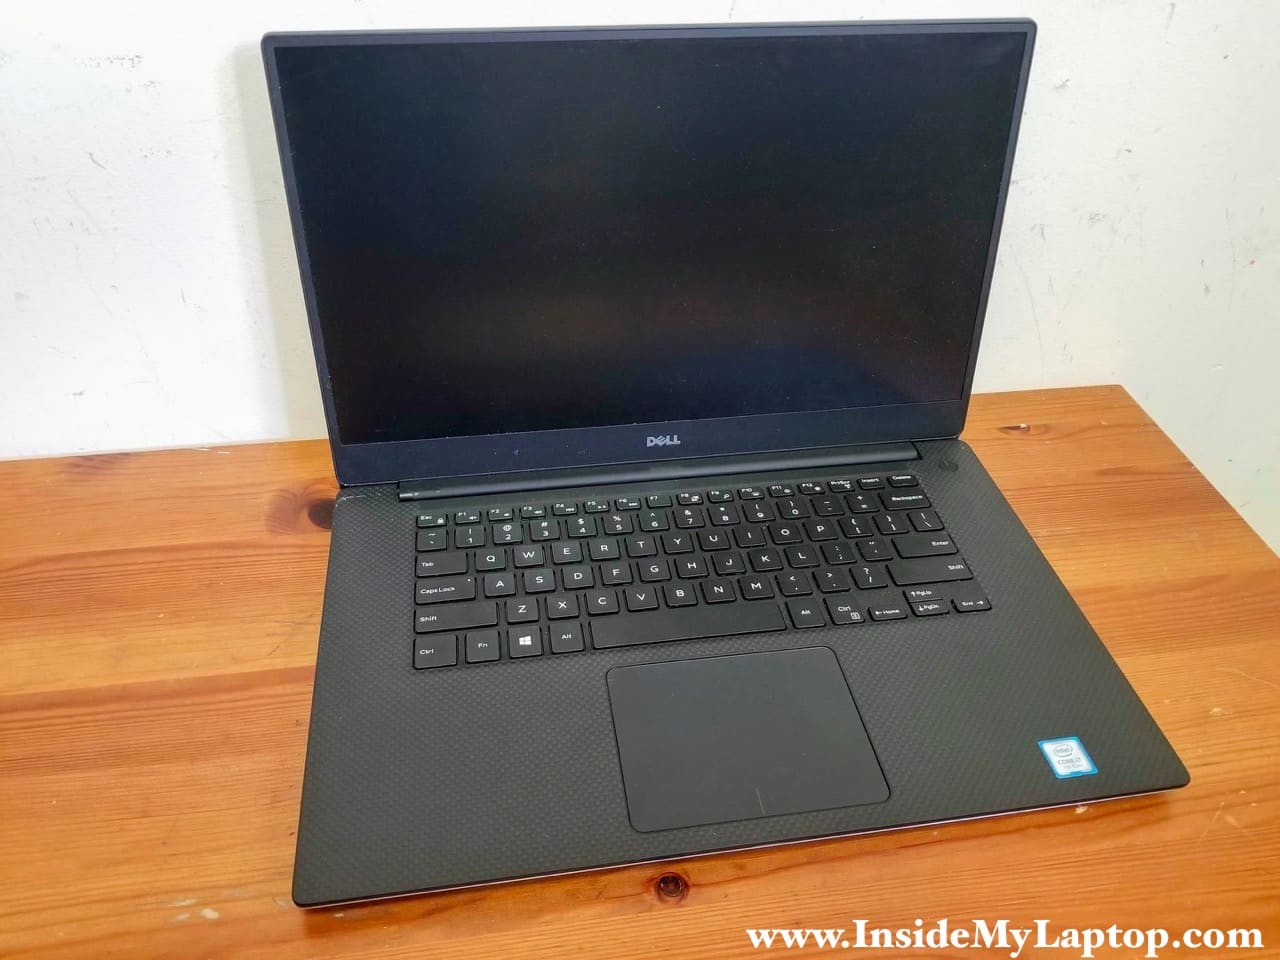
In this guide I explain how to disassemble a Dell XPS 15 9560 laptop (model P56F). I will walk you through complete laptop disassembly steps and the display panel removal.
Also you can use these instructions for taking apart a Dell XPS 15 9550 laptop which is almost identical but some models have a shorter battery and second 2.5″ hard drive.
At the end of this guide I will post links to the official Dell XPS 15 9560 and 9550 service manuals.
STEP 1.
Remove ten Torx5 screws from the base cover (color-coded in red).
Remove two Phillips screws located under the system badge flap (color-coded in green).
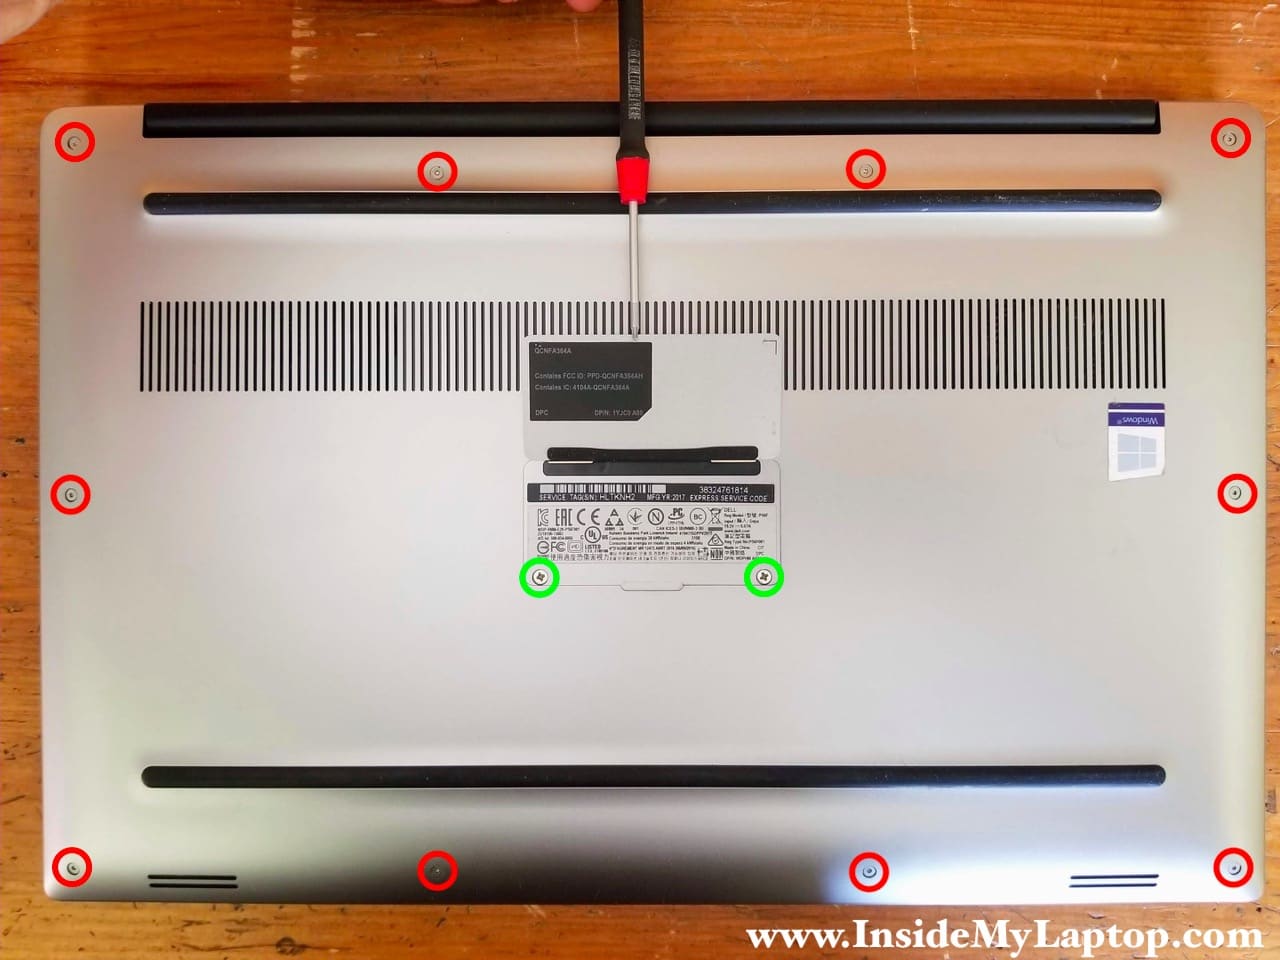
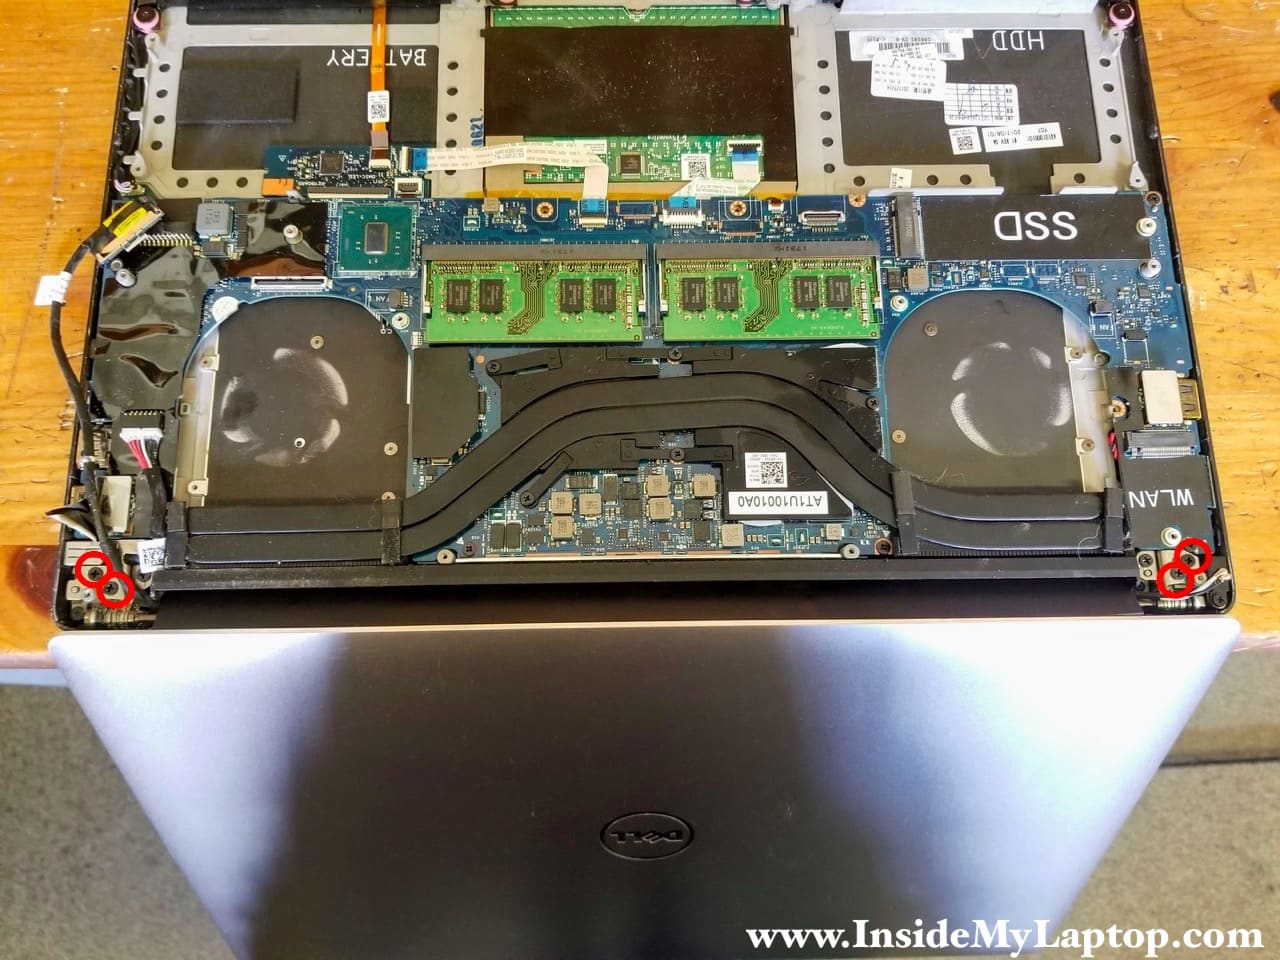
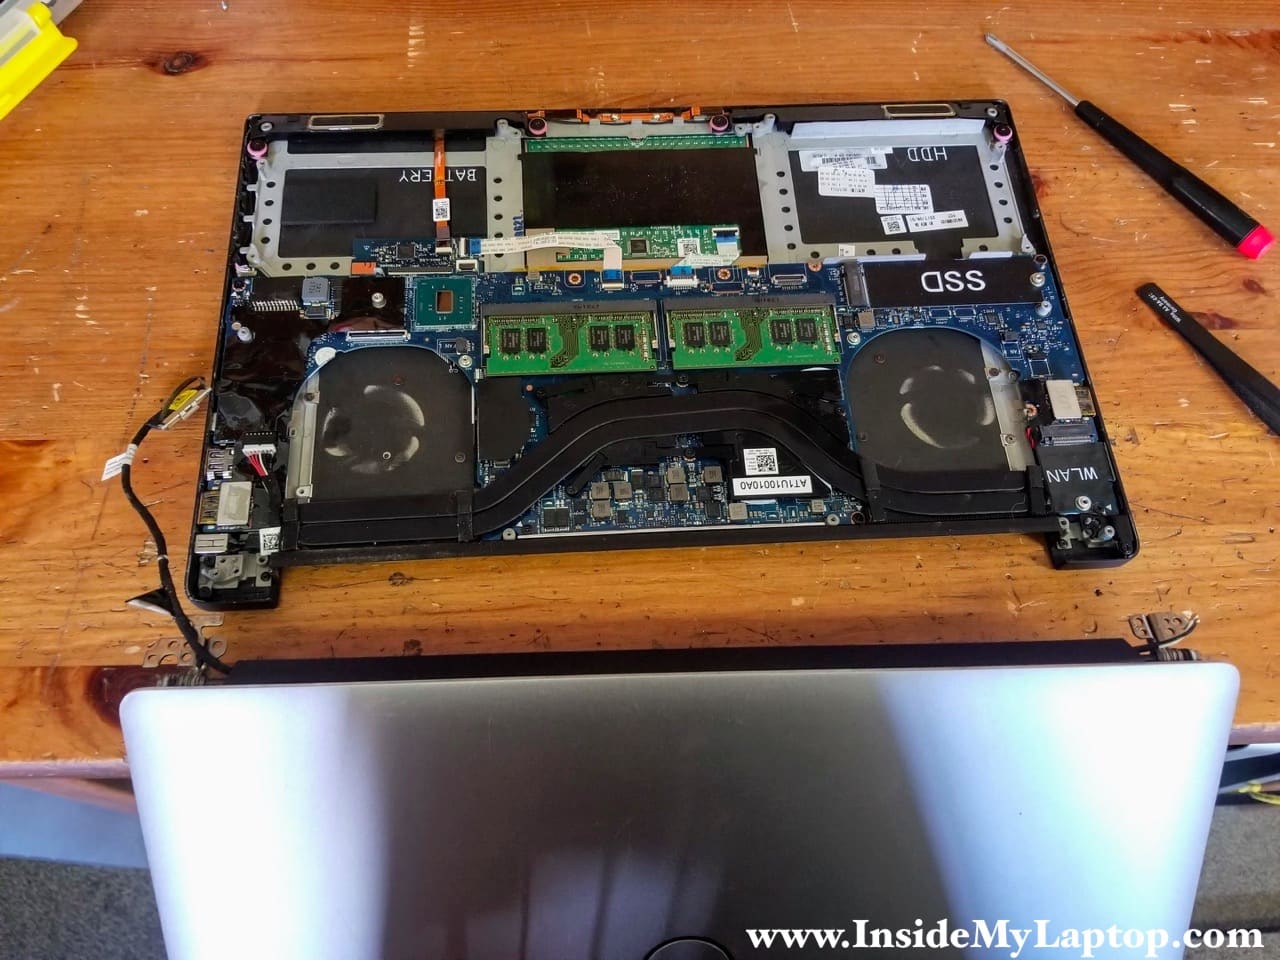
STEP 2.
Lift up the base cover from the display hinges side and remove it completely.

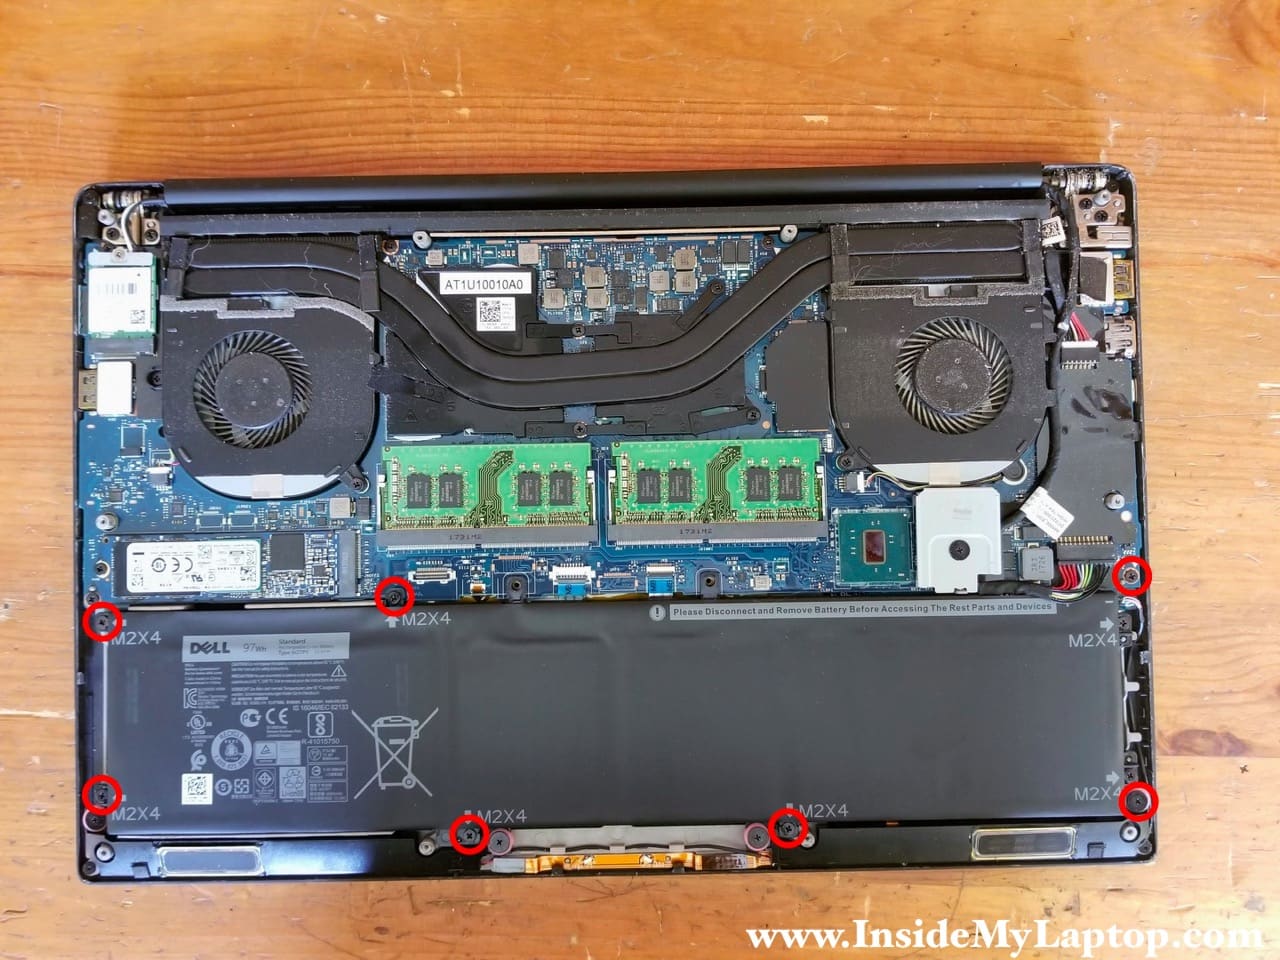
STEP 3.
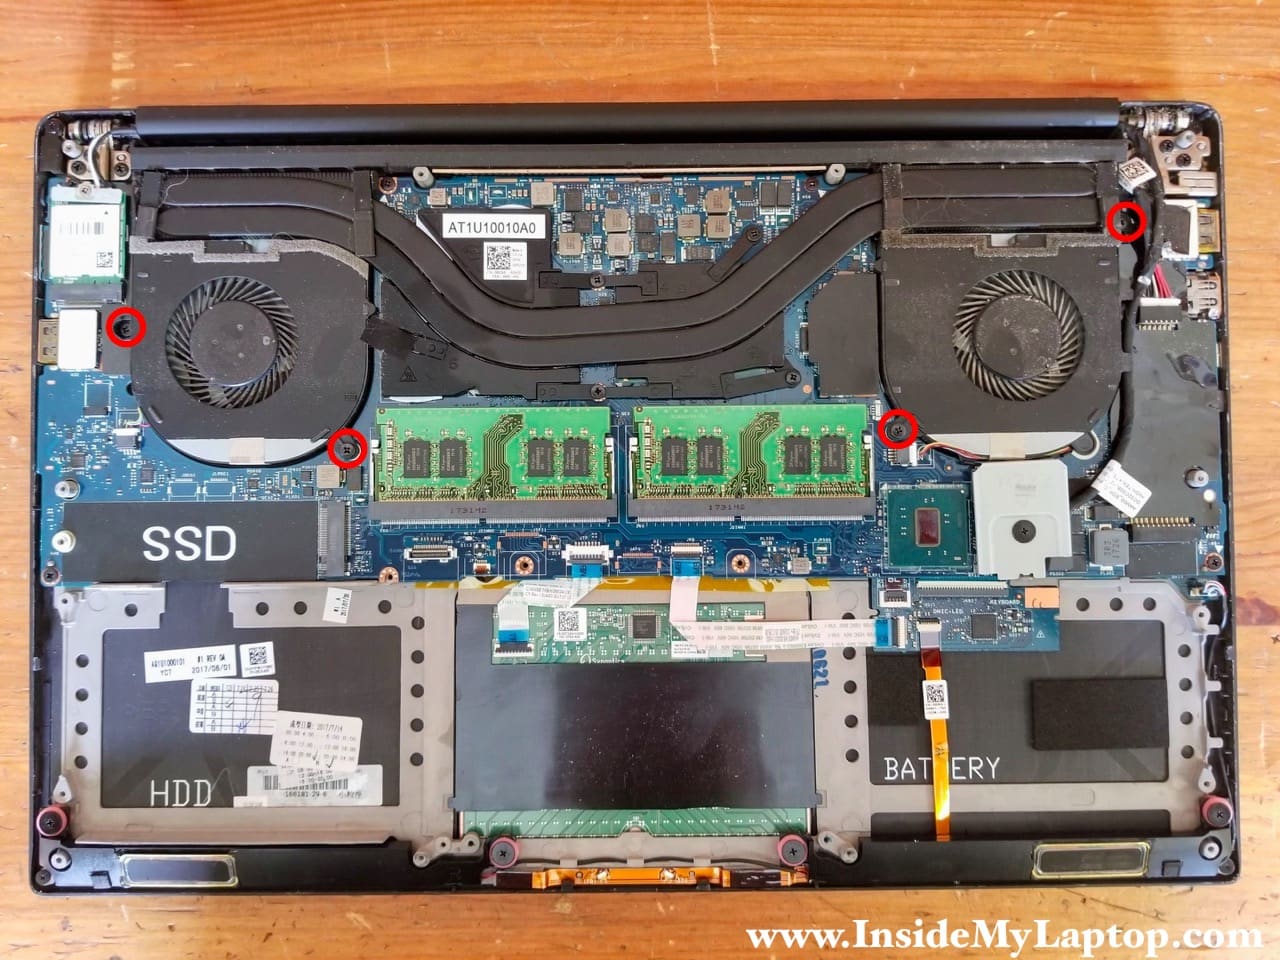
Remove seven screw attaching the battery to the palmrest assembly.
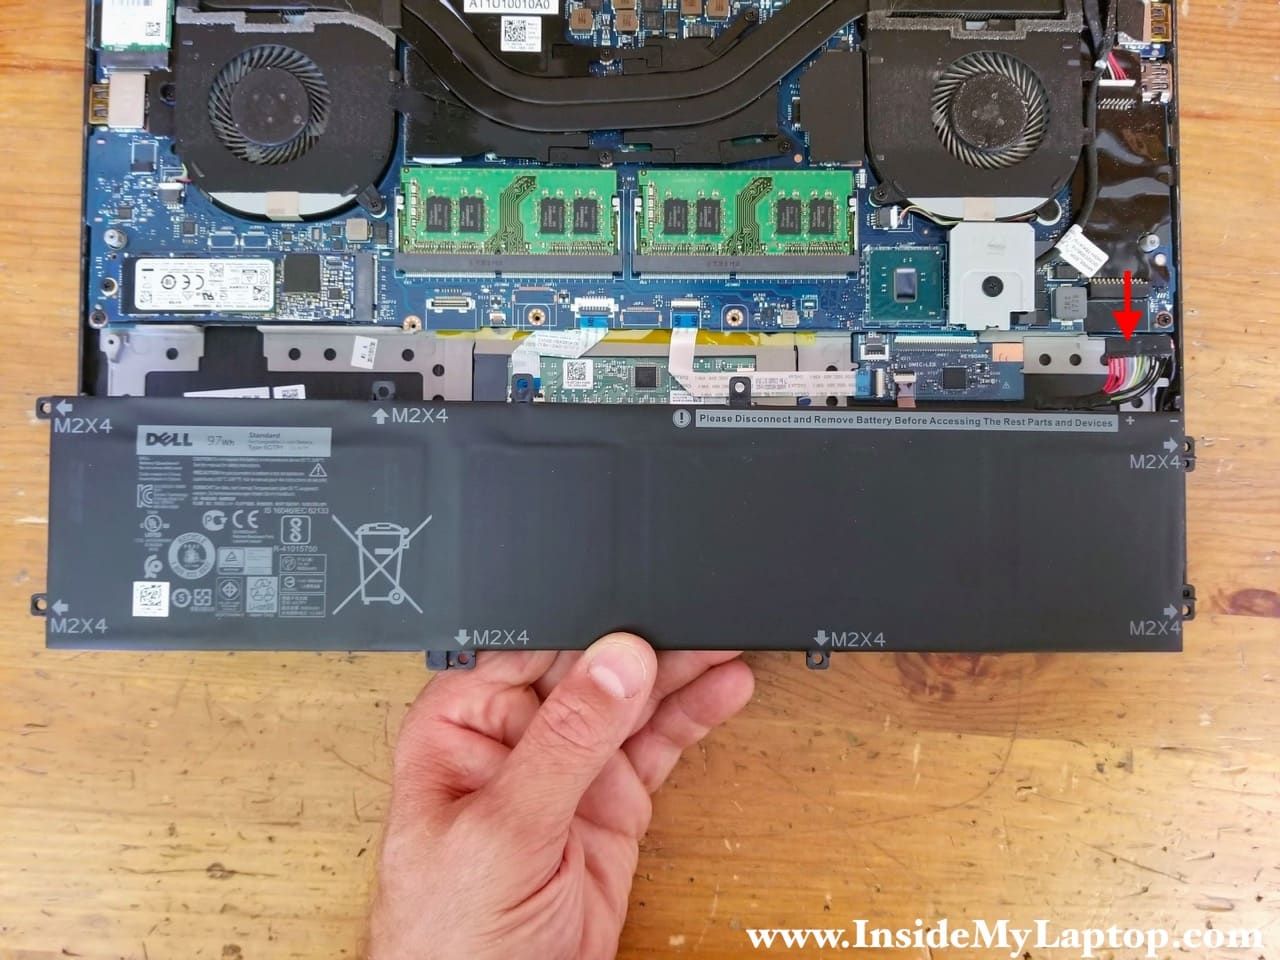
STEP 4.
Lift up the battery and disconnect it from the motherboard.
Remove and replace the battery if necessary.
Both RAM slots are accessible here. This laptop can handle up to 32GB DDR4 2400/2666/3200 SODIMM RAM modules.
STEP 5.
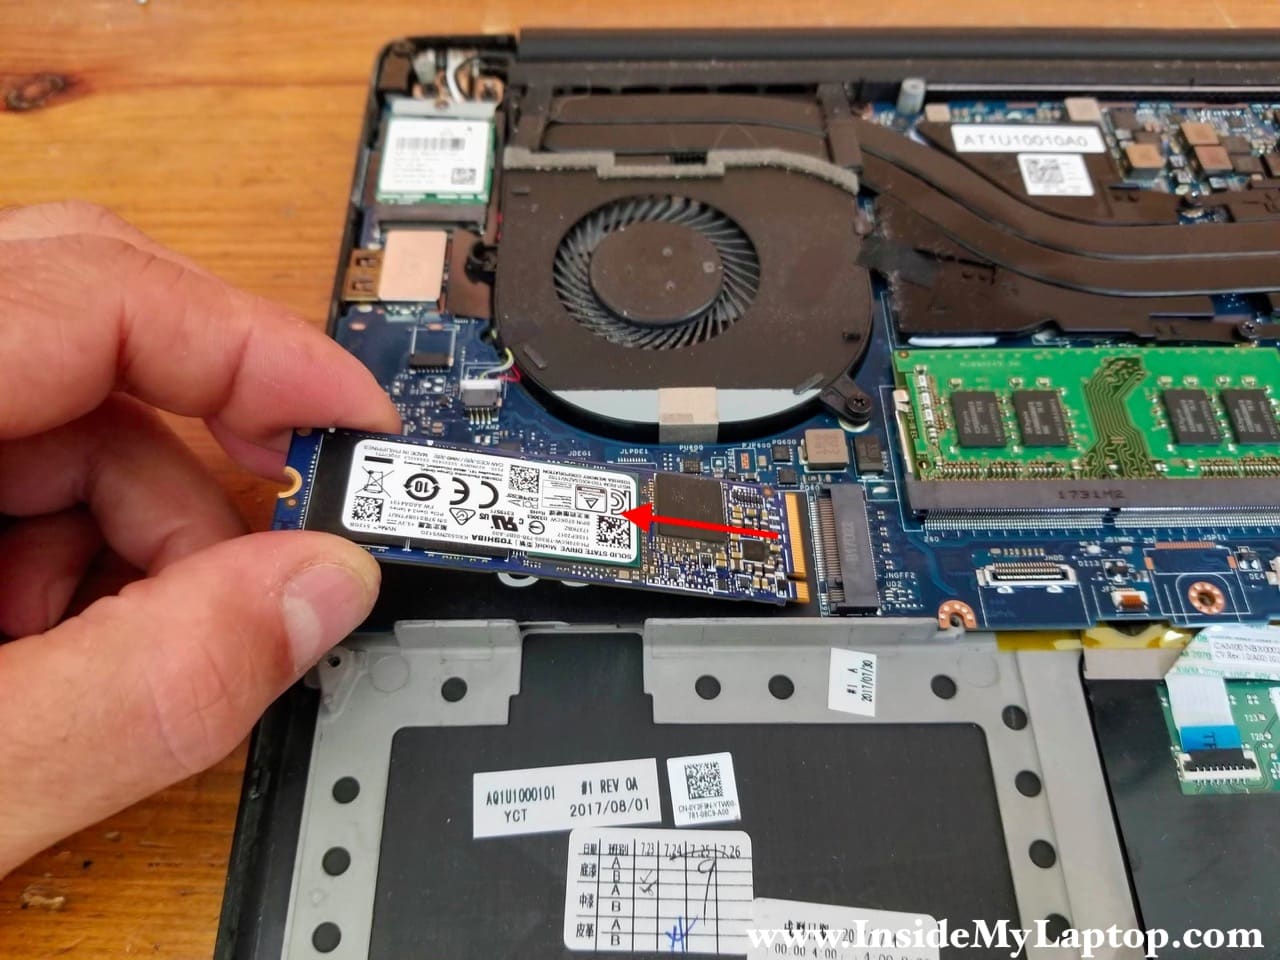
Remove one screw securing the solid stat drive and pull the SSD out. This is m.2 NVMe PCIe solid state drive (type 2280).
STEP 6.
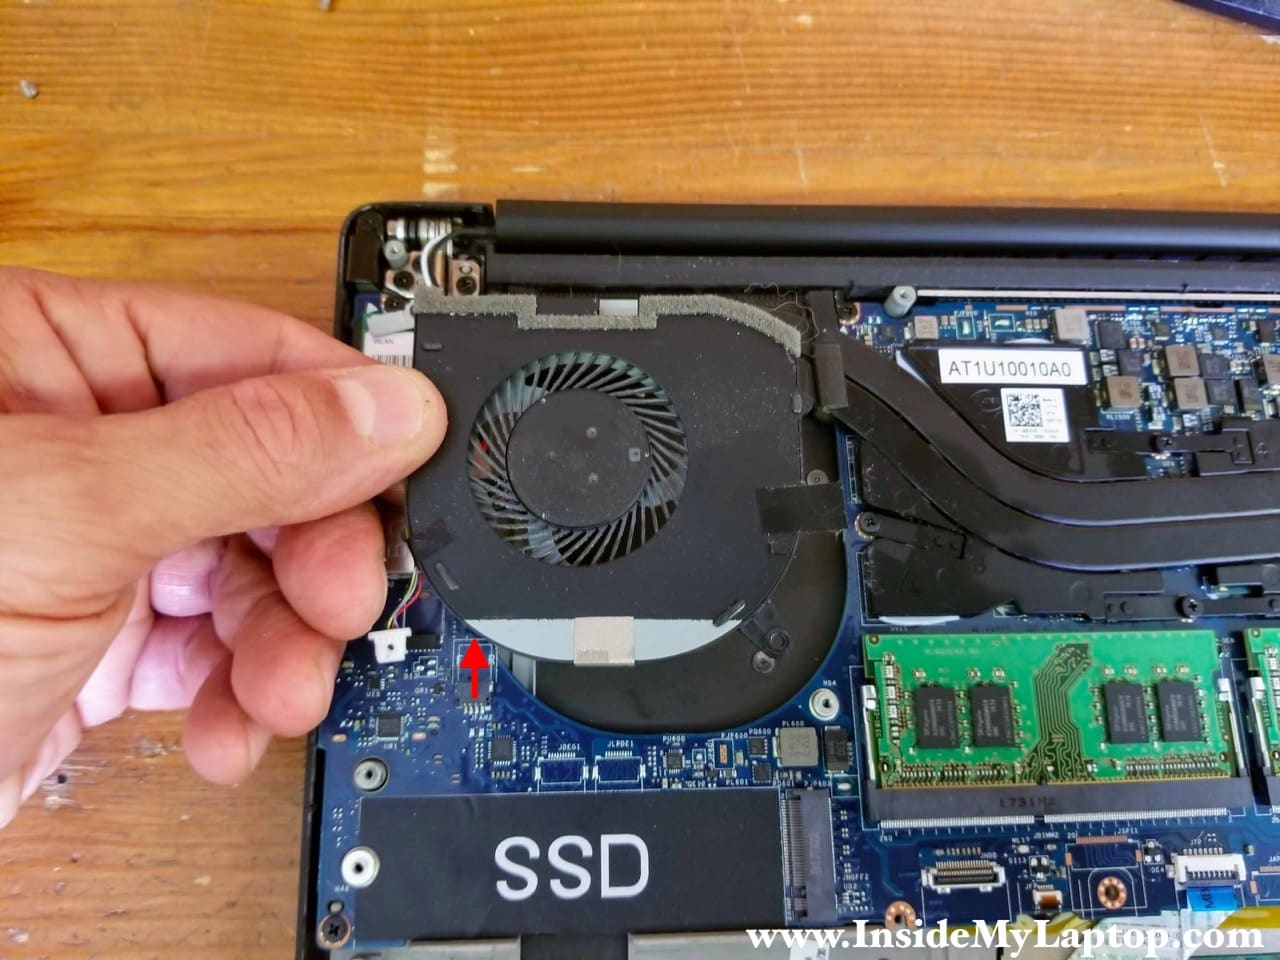
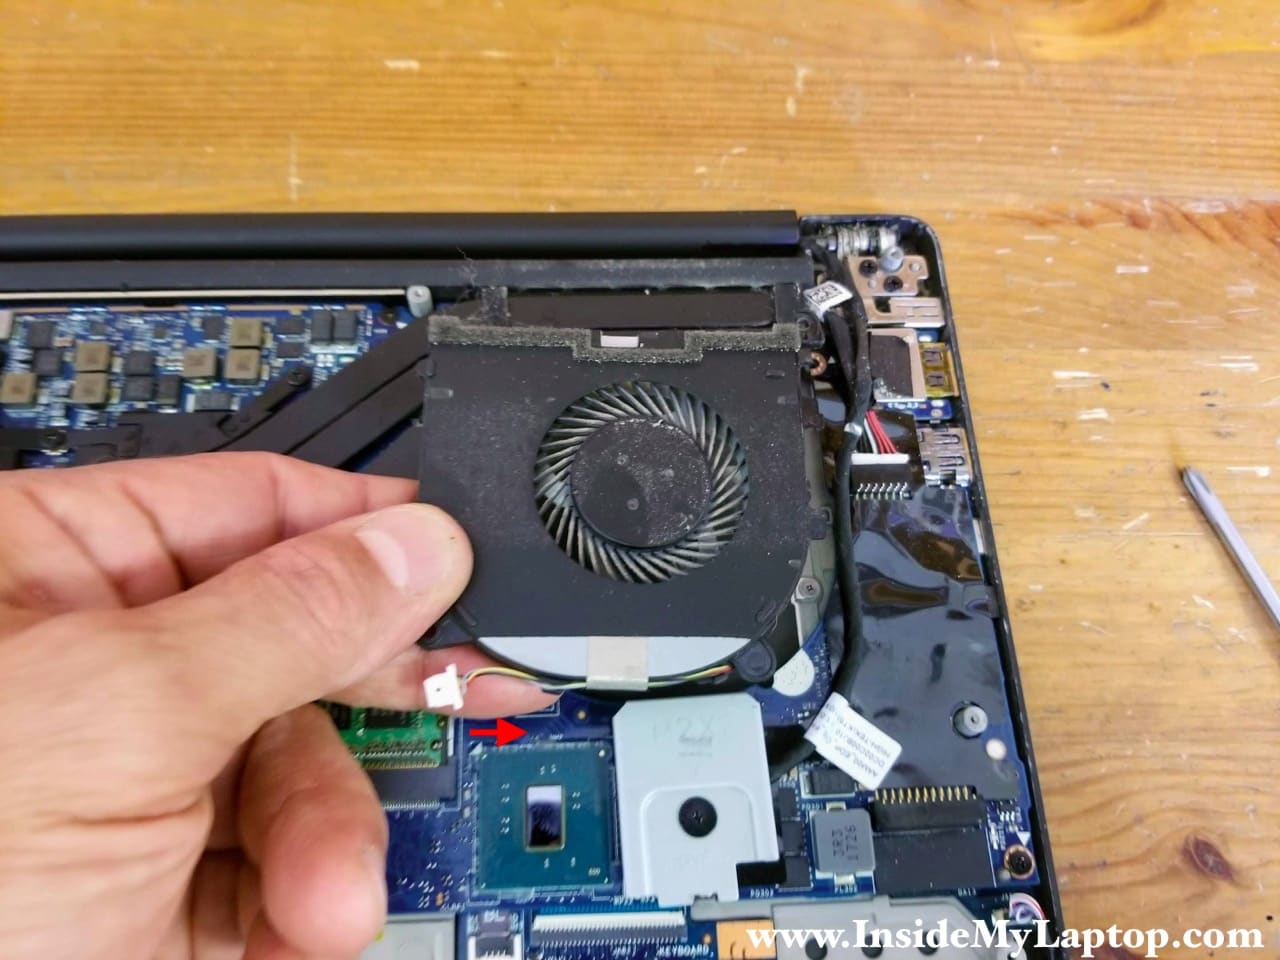
Remove two screws securing each cooling fan.
STEP 7.
Remove the right cooling fan and disconnect it from the motherboard.
STEP 8.
Remove the left cooling fan and disconnect it from the motherboard.
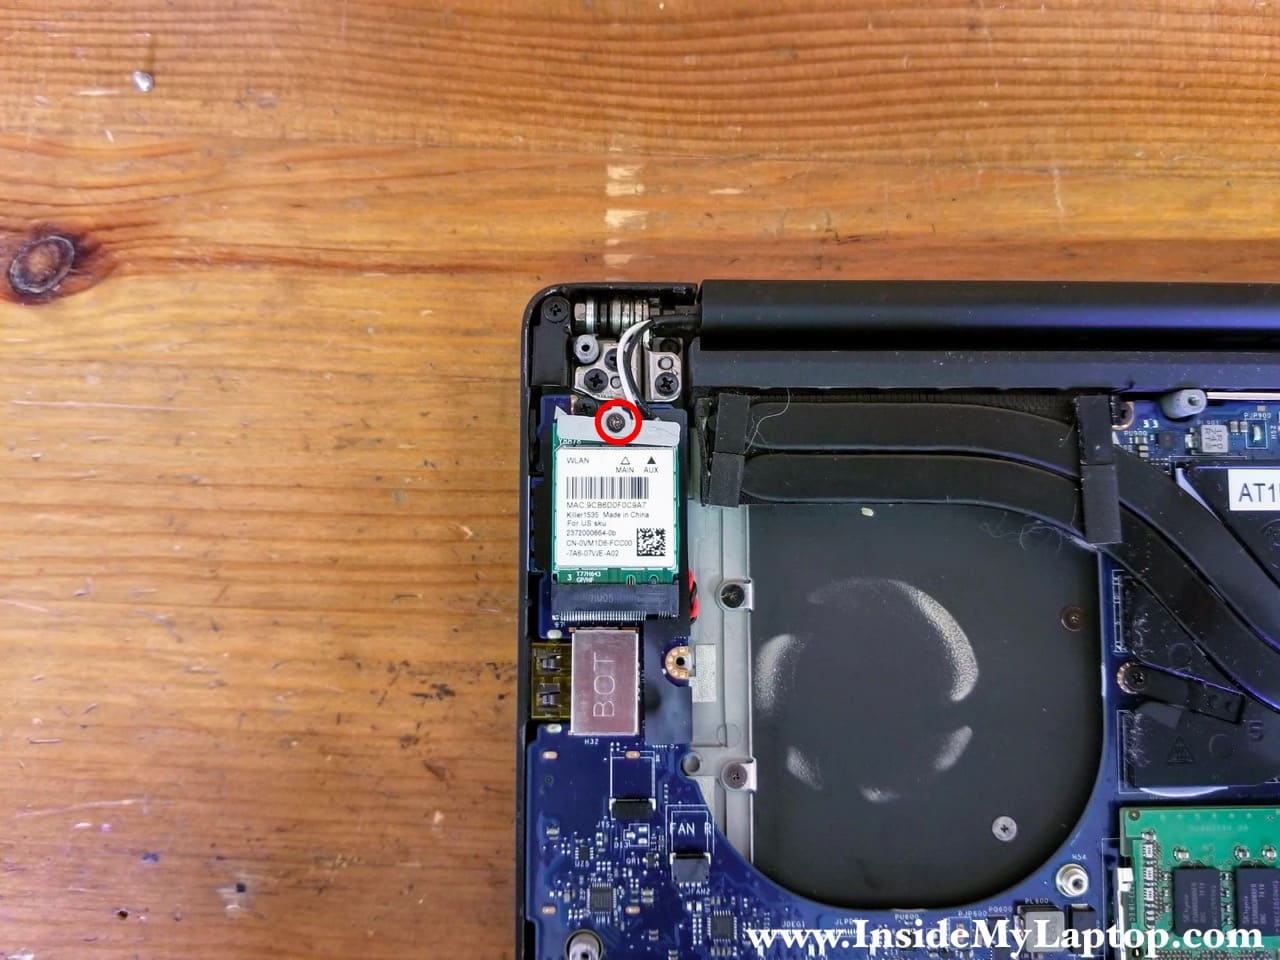
STEP 9.
Remove one screw from the wireless card antenna cable cover.
After this cover is removed the wireless card will pop up at a 20 degree angle.
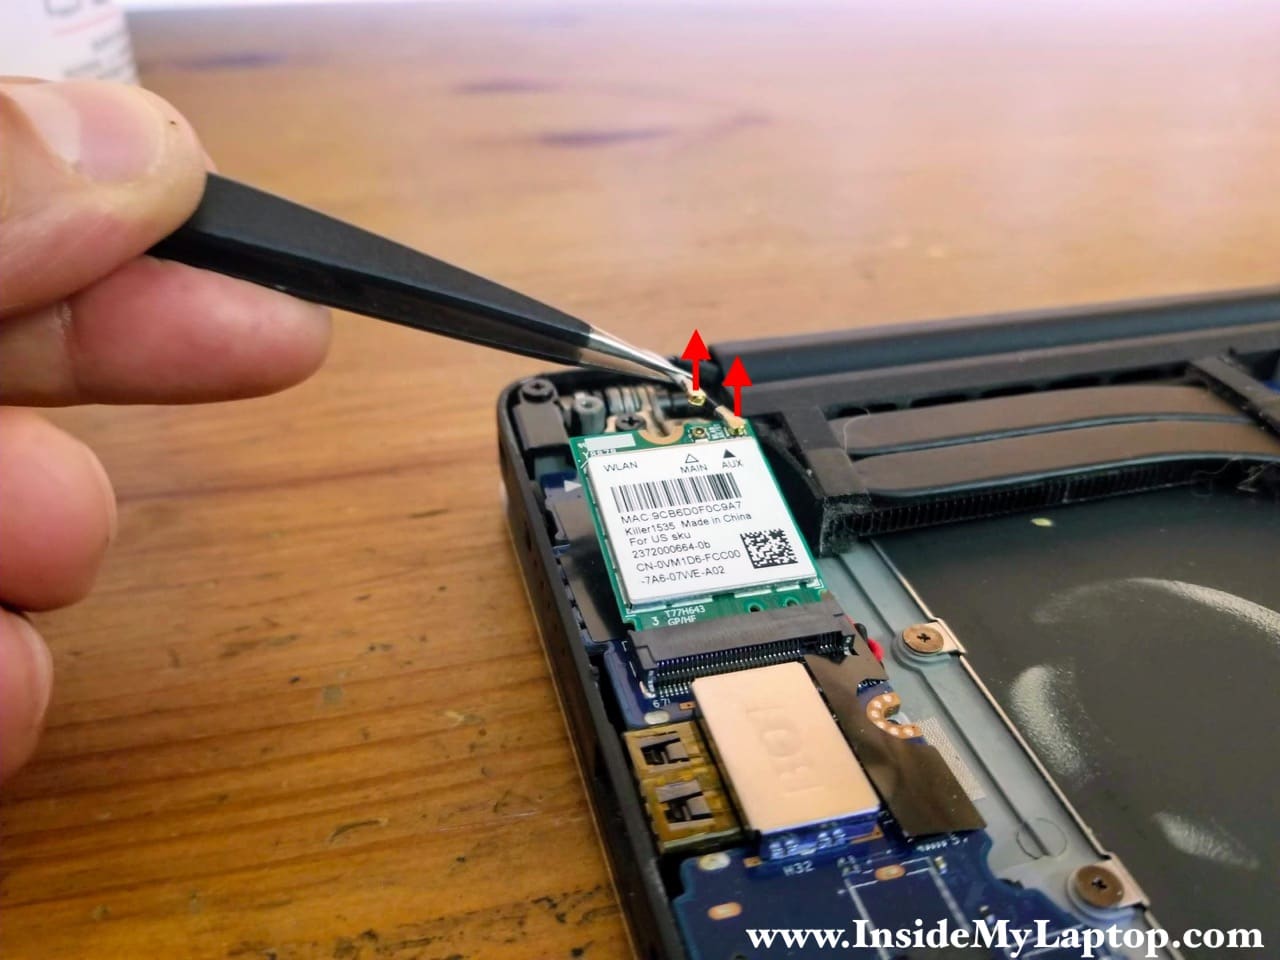
STEP 10.
Disconnect the main (white) and the auxiliary (black) antenna cables from the wireless card.
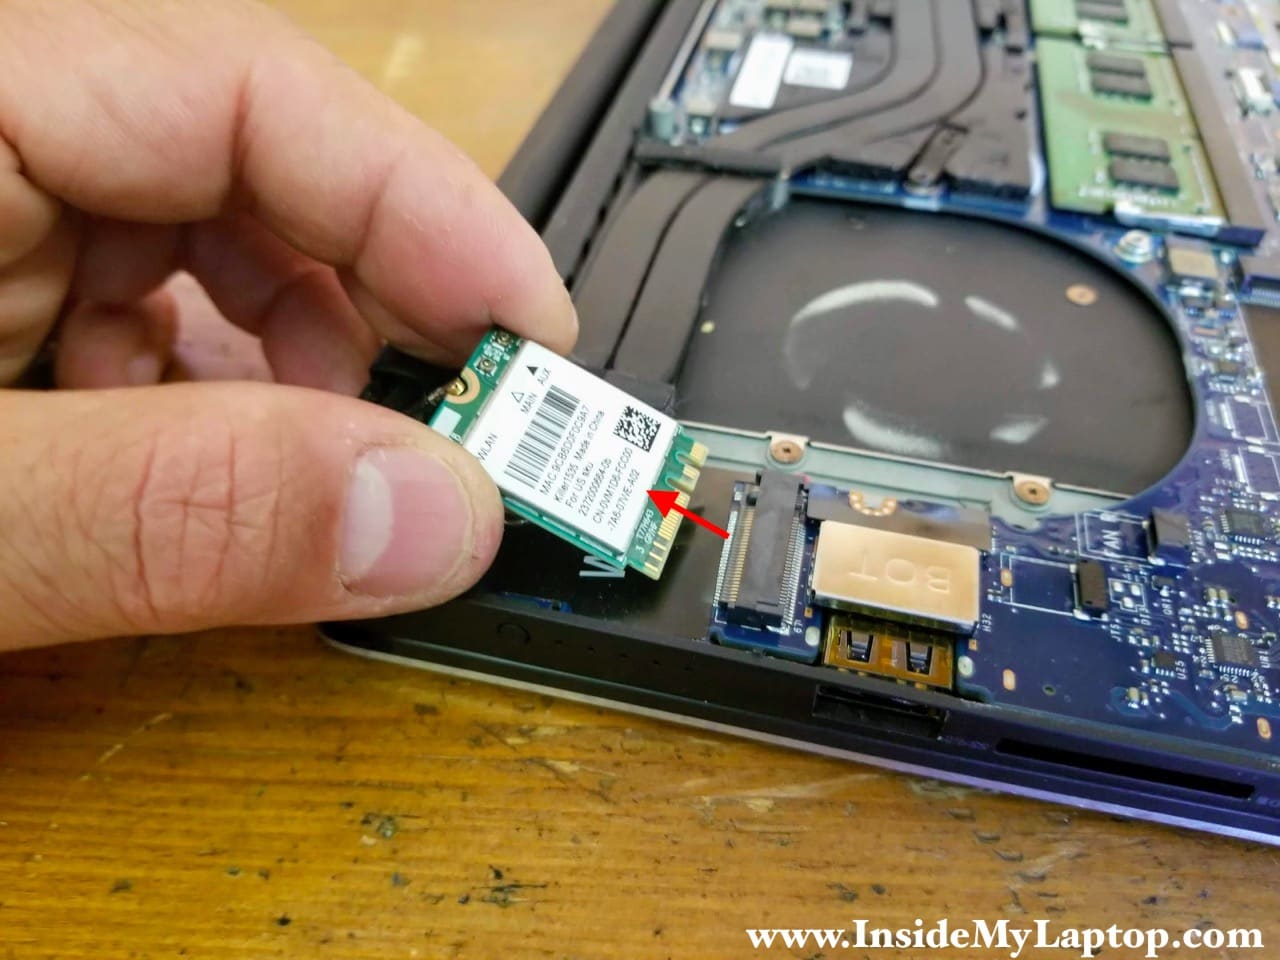
STEP 11.
Pull the wireless card out and remove it.
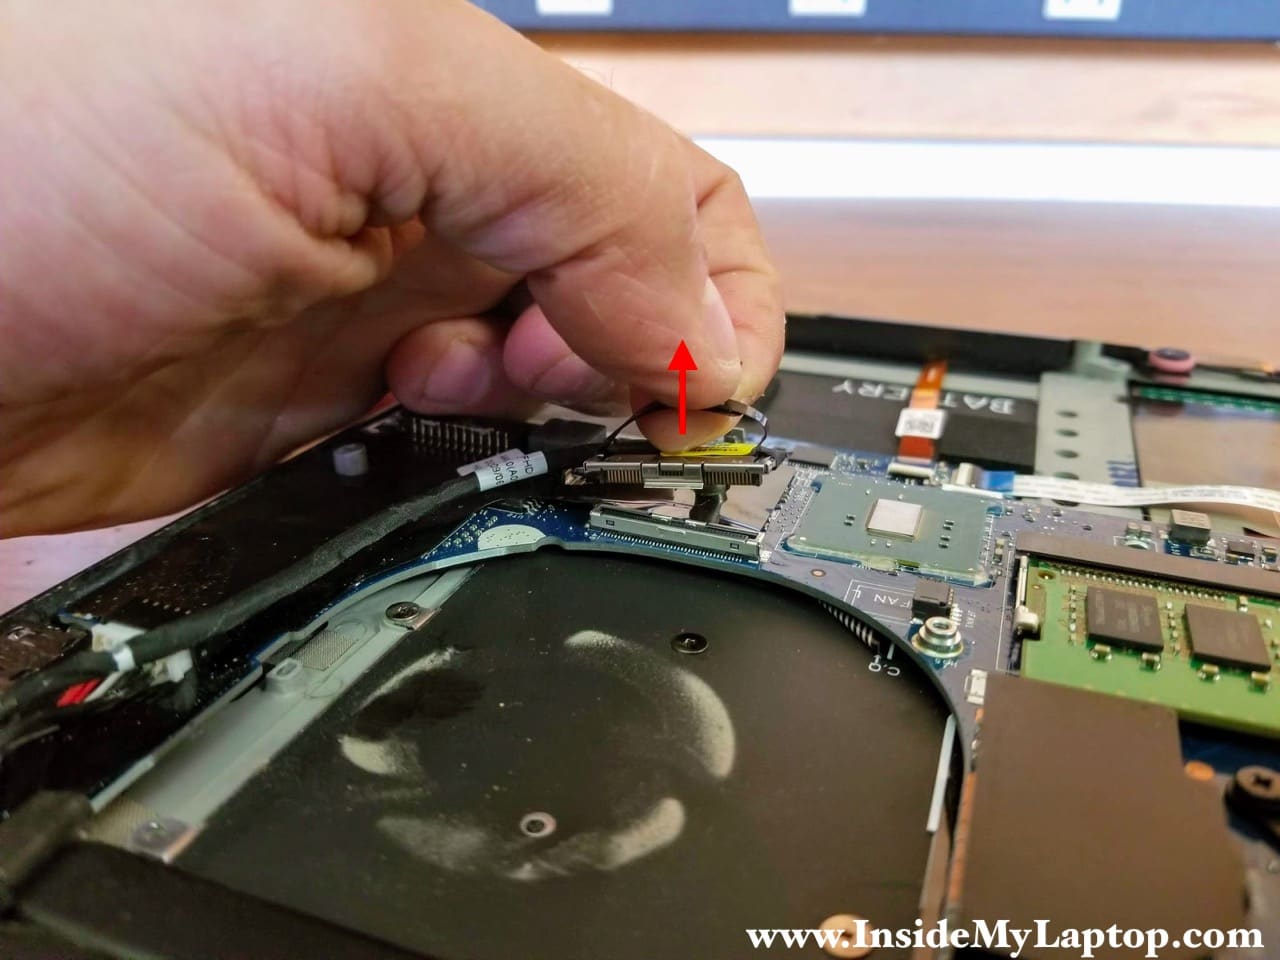
STEP 12.
Remove one screw from the display video cable connector cover.
Remove the cover.

STEP 13.
Disconnect the display video cable connector from the motherboard.
Simply pull it up by the black belt on top.
STEP 14.
Place the laptop upside down with the display open on the edge of your desk.
Remove four screws securing the display hinges.
STEP 15.
Separate the display panel from the palmrest assembly and remove it.
STEP 16.
Remove one screw attaching the DC power jack to the case.
By the way, in Dell XPS 15 9560/9550 laptops the DC power jack can be removed only after you remove the display panel. It’s mounted under the left display hinge.

STEP 17.
Unplug the DC power jack harness from the motherboard and remove it.

STEP 18.
Remove five screws securing the motherboard.
Disconnect all cables.

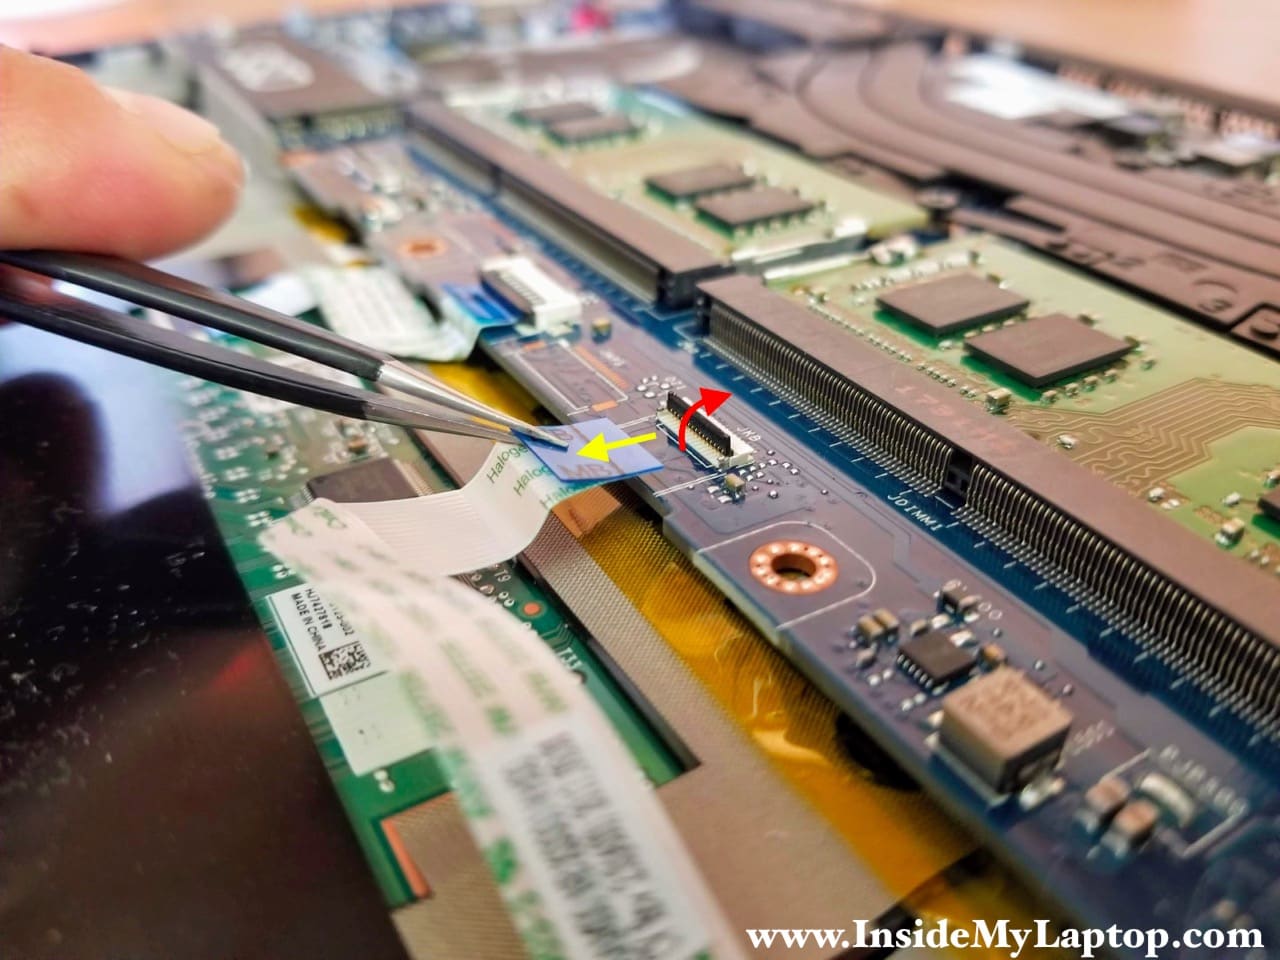
Here’s how to disconnect flat cables:
1. Unlock the connector by lifting up the locking tab (red arrow).
2. Pull the cable out (yellow arrow).
STEP 19.
Remove the motherboard.

The BIOS battery located on the other side of the motherboard.

The keyboard in Dell XPS 15 9560/9550 can be removed and replaced. It’s secured to the palmrest assembly by 31 small screws.

Handker
Display screen has 6 screws on 9560 actually (step 14) but very nice guide overall, thanks !