In this guide I show how to disassemble an Asus ROG GL551J (series GL551JW-DS74) laptop.
The main design features of this model:
– Both RAM modules and 2.5″ hard drive can be easily accessed under the service cover.
– The laptop has a 128GB mSATA SSD which can be removed and upgraded with a larger mSATA SSD.
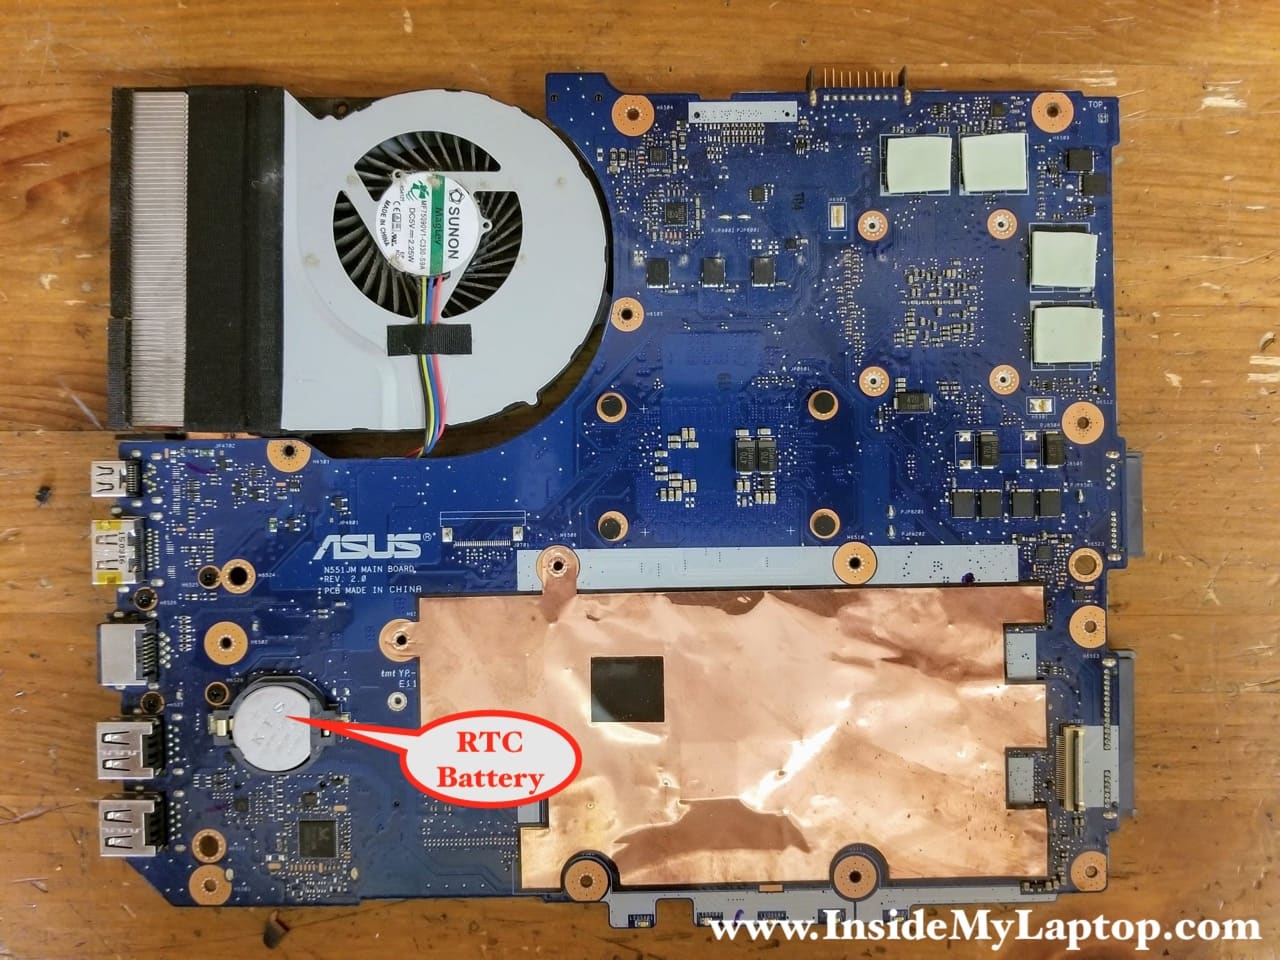
– The RTC battery is located on the bottom side of the motherboard and cannot be easily removed.
– In order to replace the cooling fan it’s necessary to remove the motherboard.
You will need the following tools during the disassembly process: Phillips screwdriver #0, tweezers, case opener tool.
STEP 1.
Unlock and remove the battery. Battery model: A32NI405.
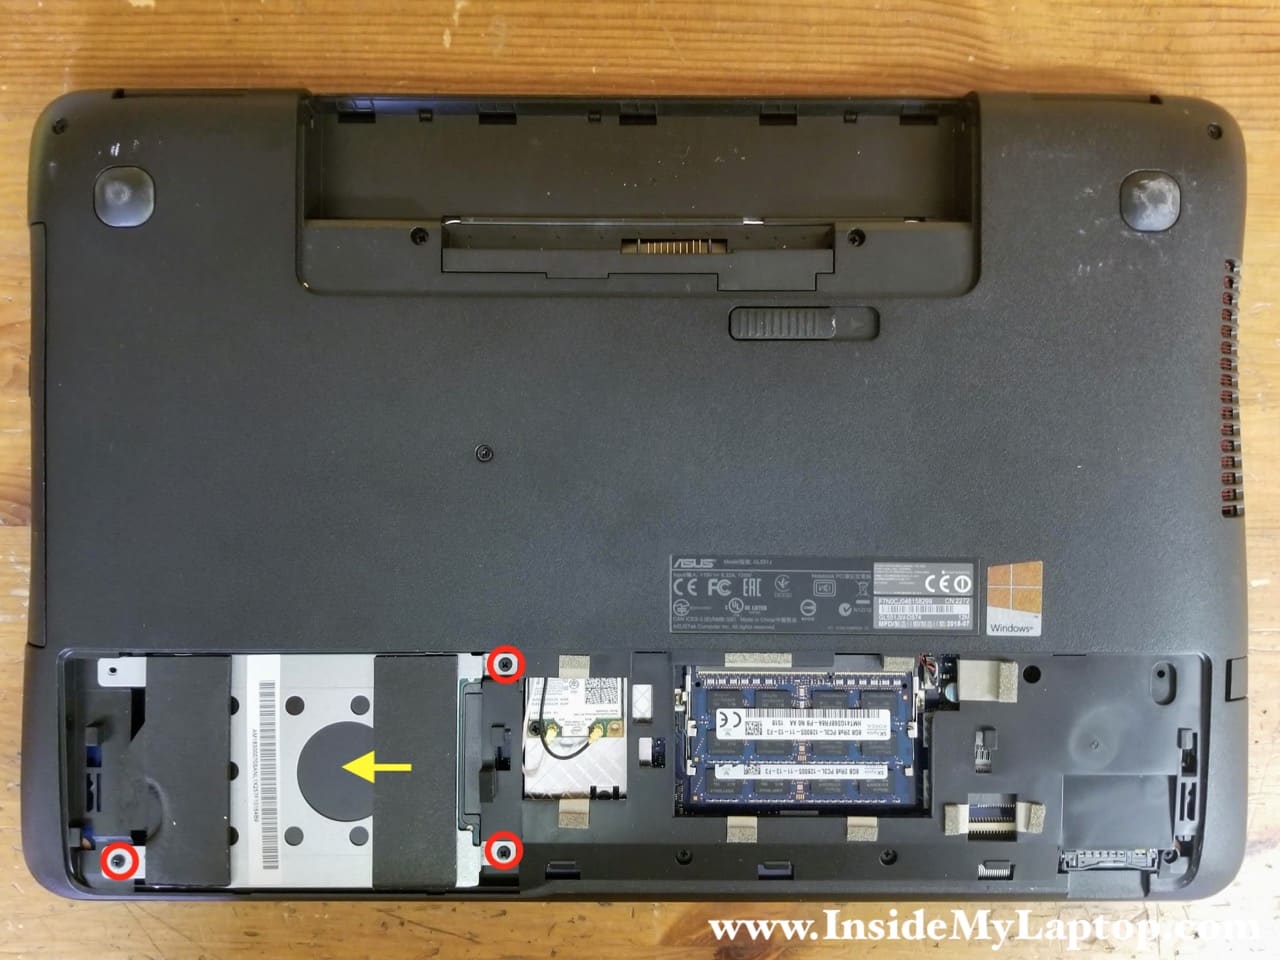
Remove two screws securing the service cover. Slide the cover down and remove it from the laptop.

STEP 2.
Remove three screws securing the hard drive mounting bracket.
Slide the hard drive assembly to the left to disconnect it from the SATA port.
Both RAM slots also accessible here. This laptop can handle up to 16GB (2x8GB) DDR3-12800 SODIMM RAM modules.
STEP 3.
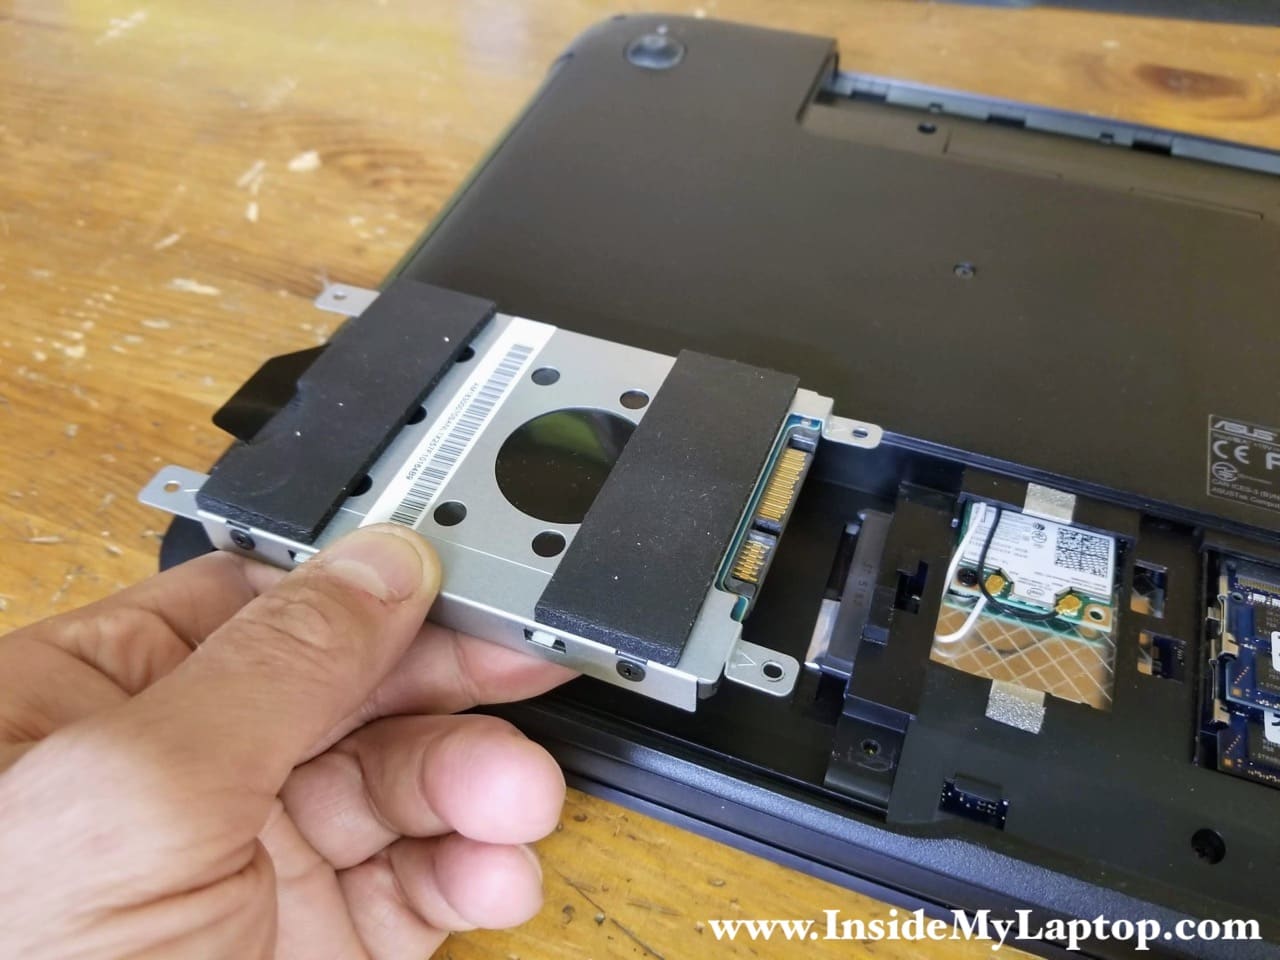
Lift up and remove the hard drive assembly. This laptop has a regular 2.5″ hard drive installed. Upgrading this drive to a 2.5″ solid state drive will improve the laptop performance significantly.
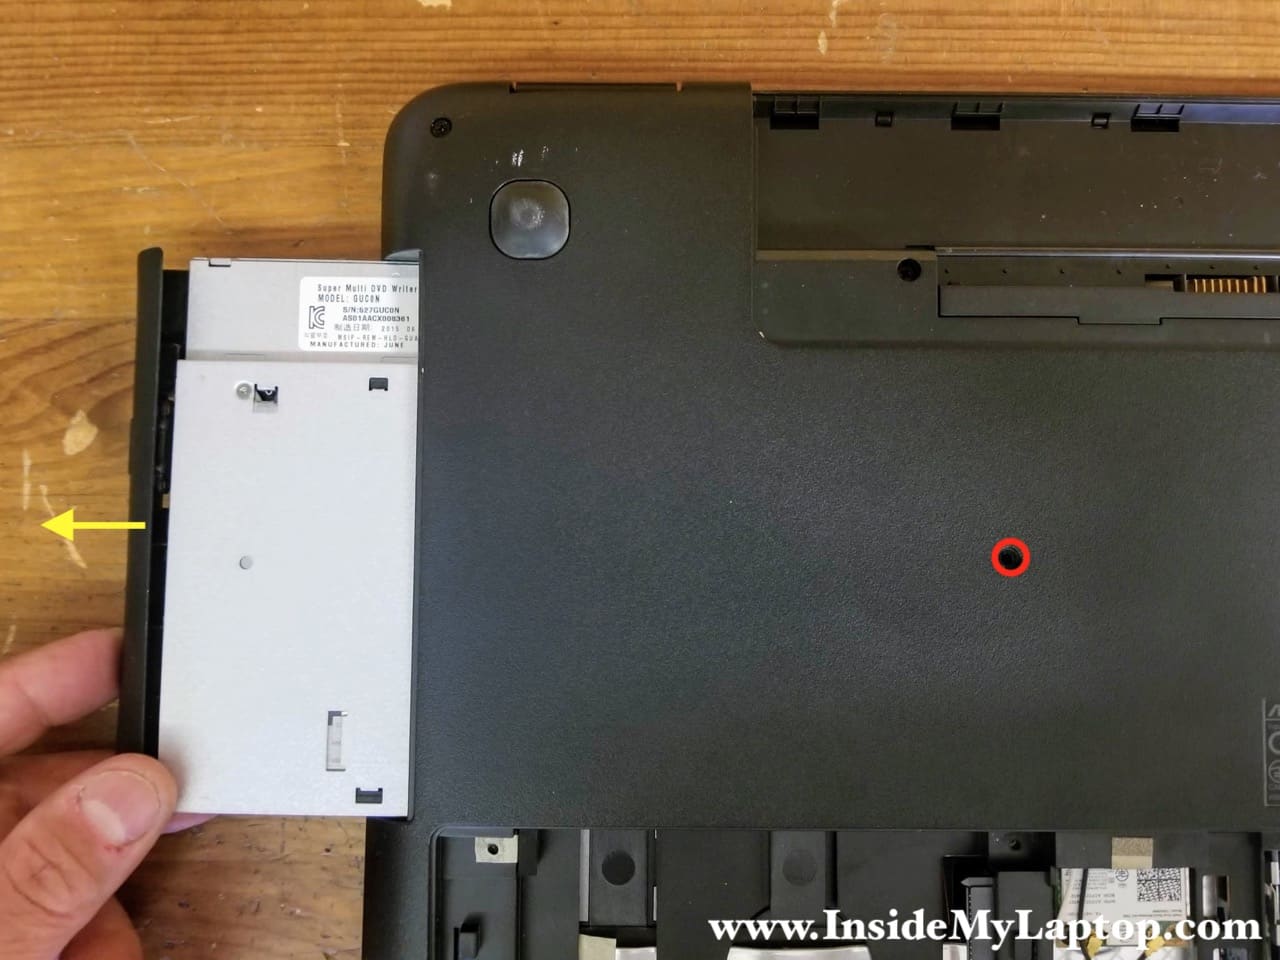
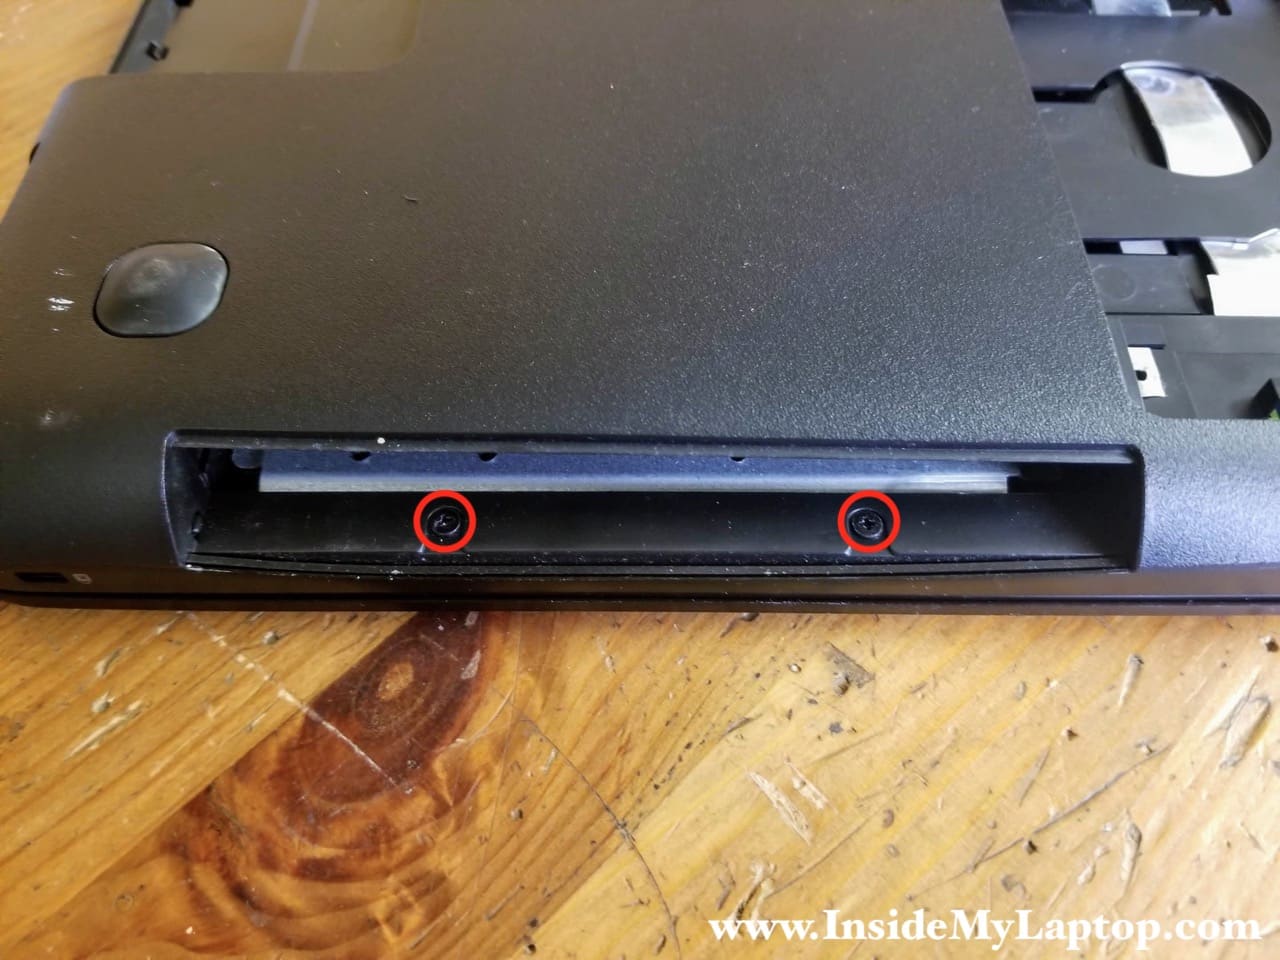
STEP 4.
Remove one screw securing the optical drive on the bottom of the laptop.
Pull the optical drive to the left and remove it.
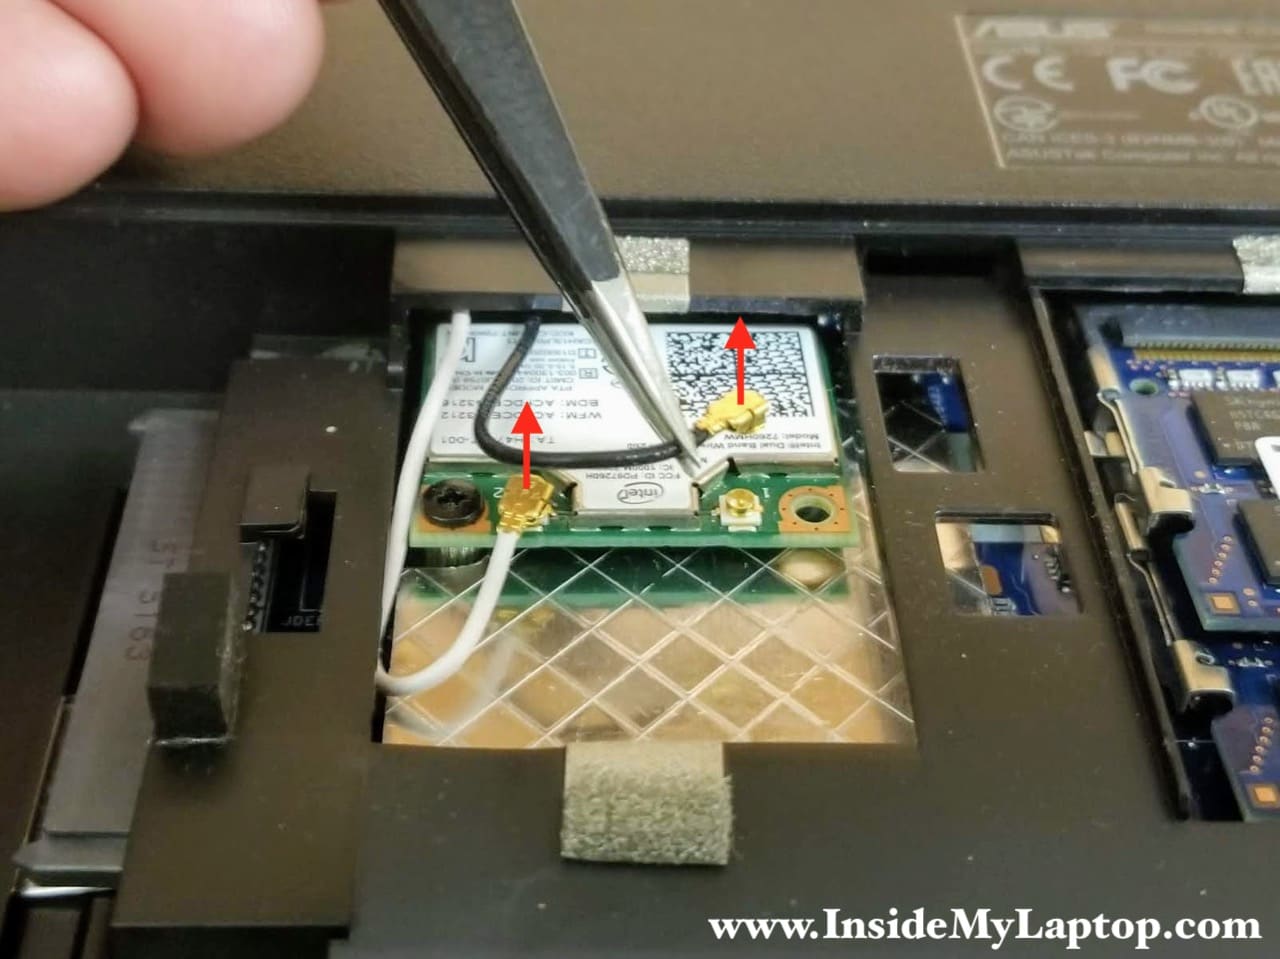
STEP 5.
Disconnect both antenna cables from the wireless card.
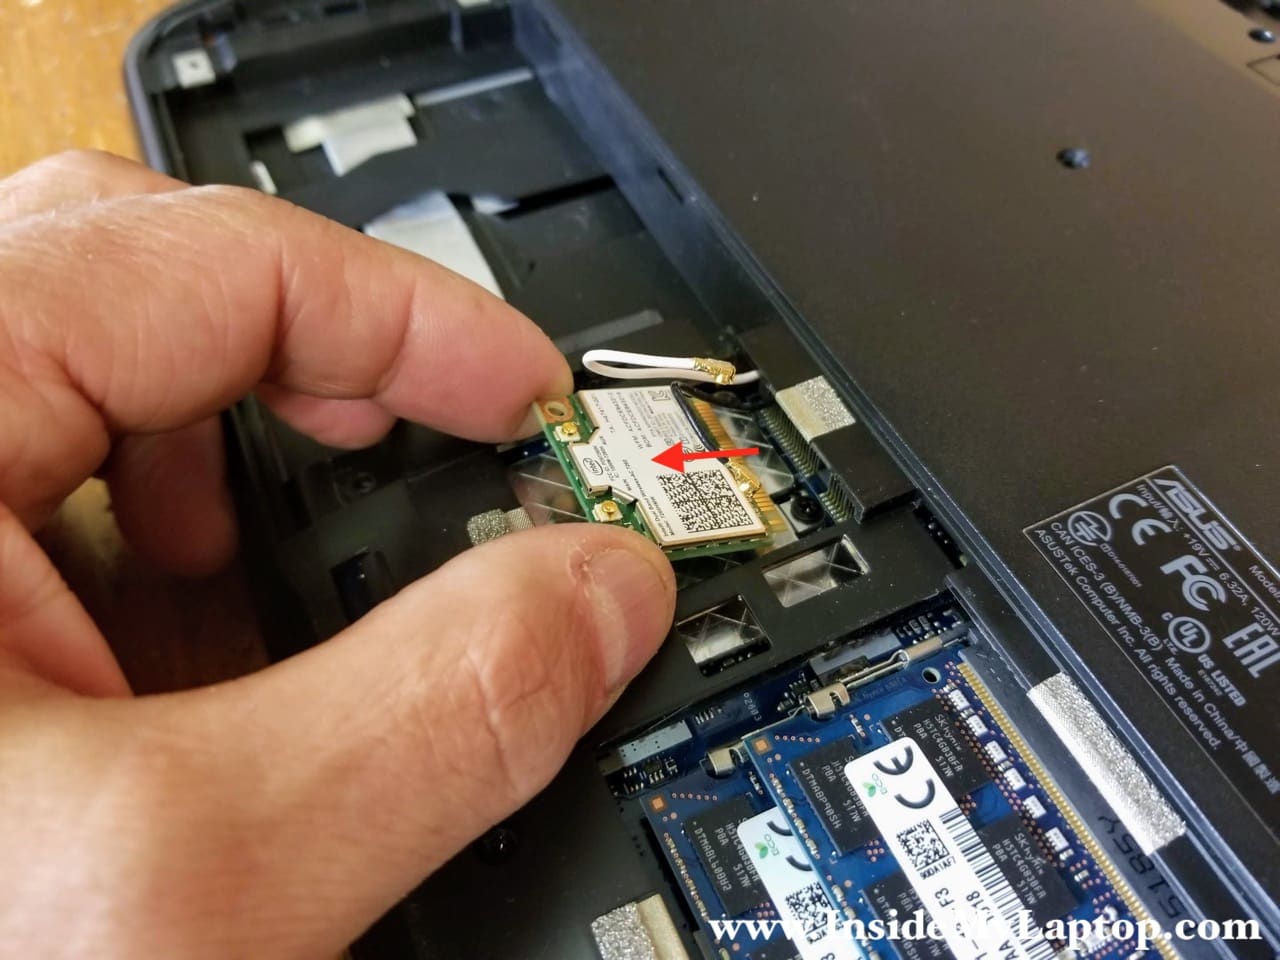
STEP 6.
Remove one screw securing the wireless card and pull the wireless card out.
STEP 7.
Remove all screws from the laptop base.
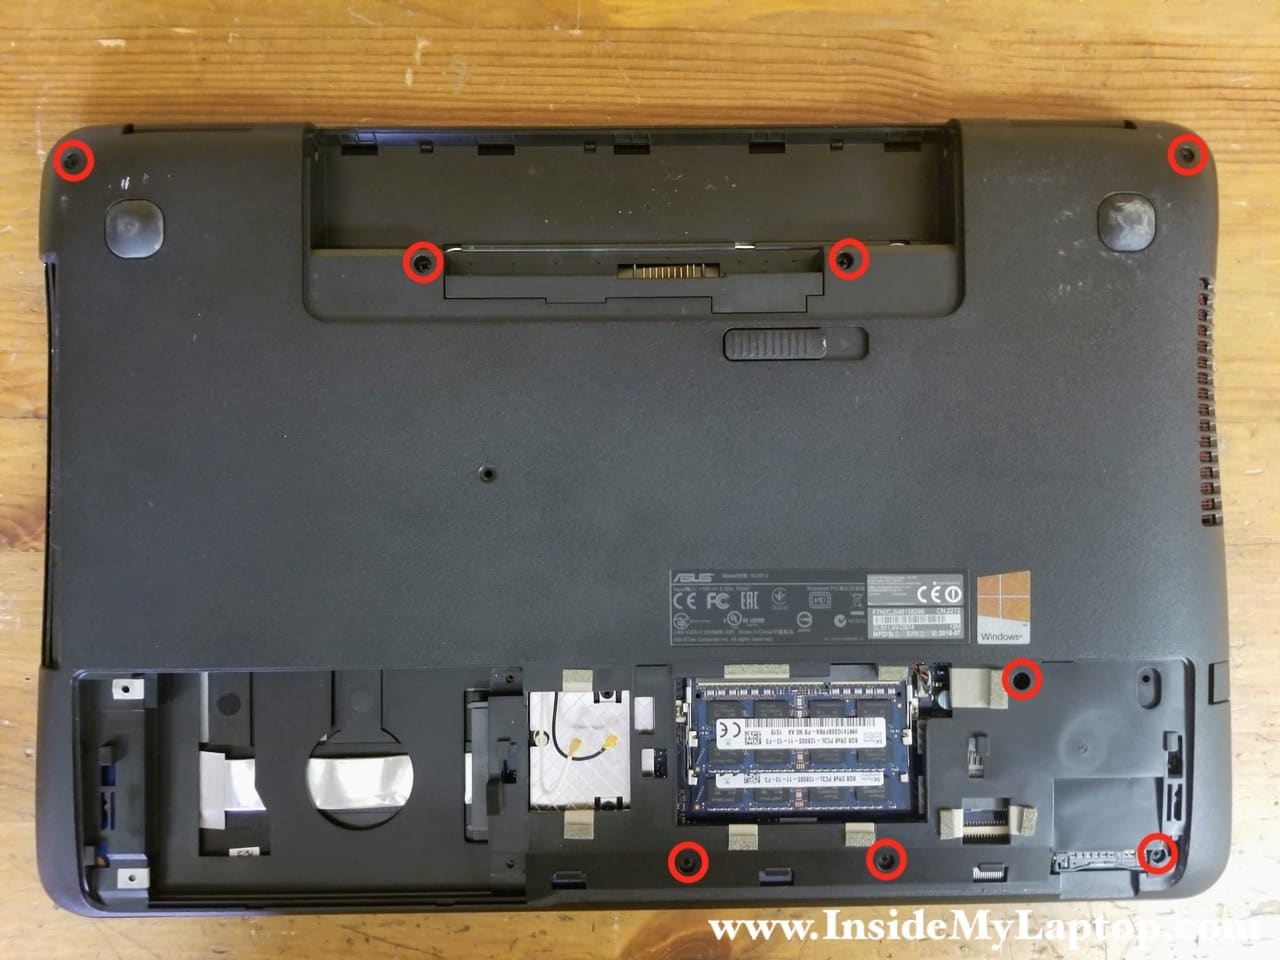
STEP 8.
Remove two more screws located in the optical drive bay.
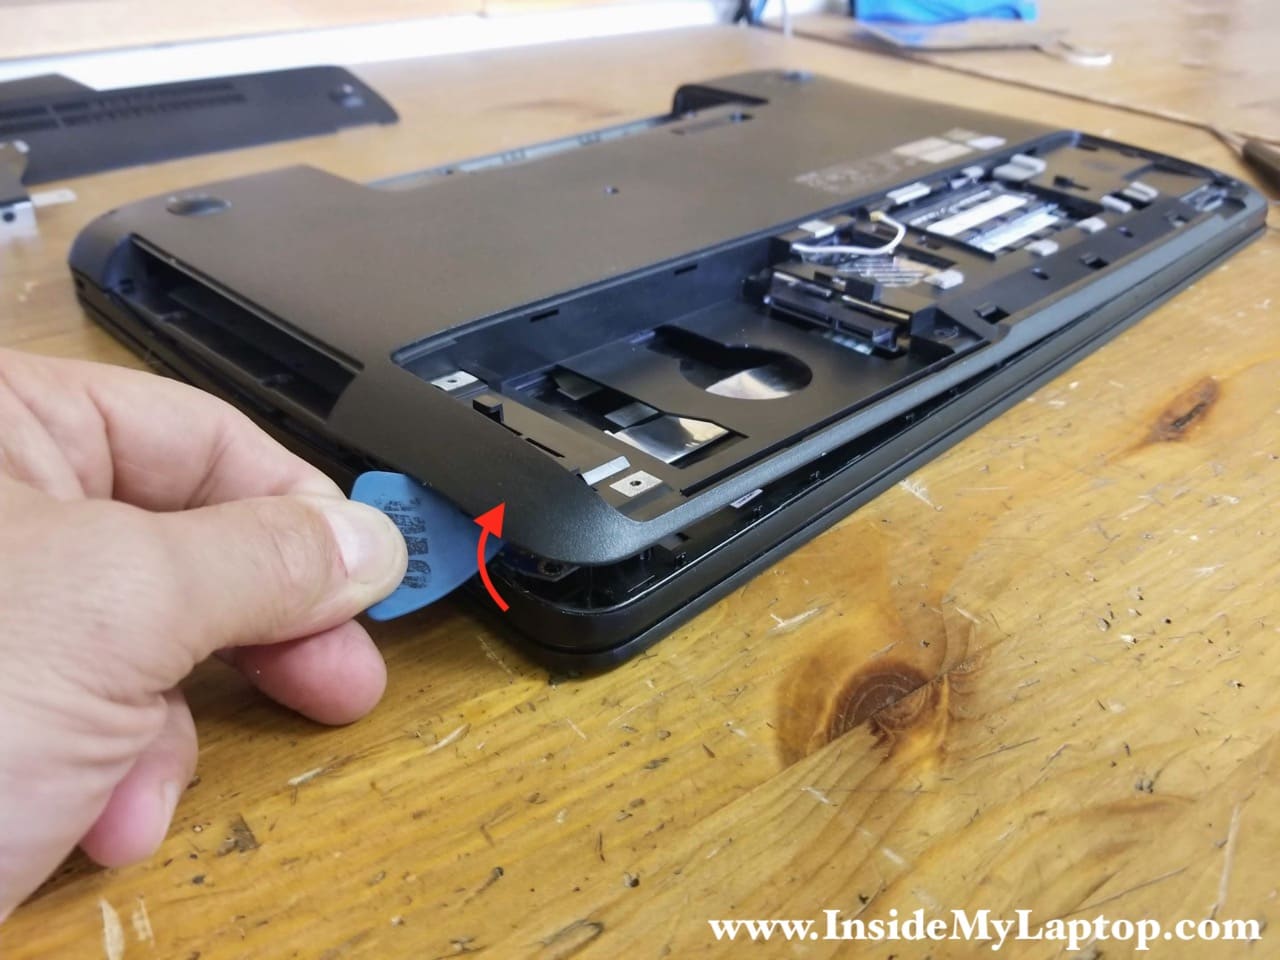
STEP 9.
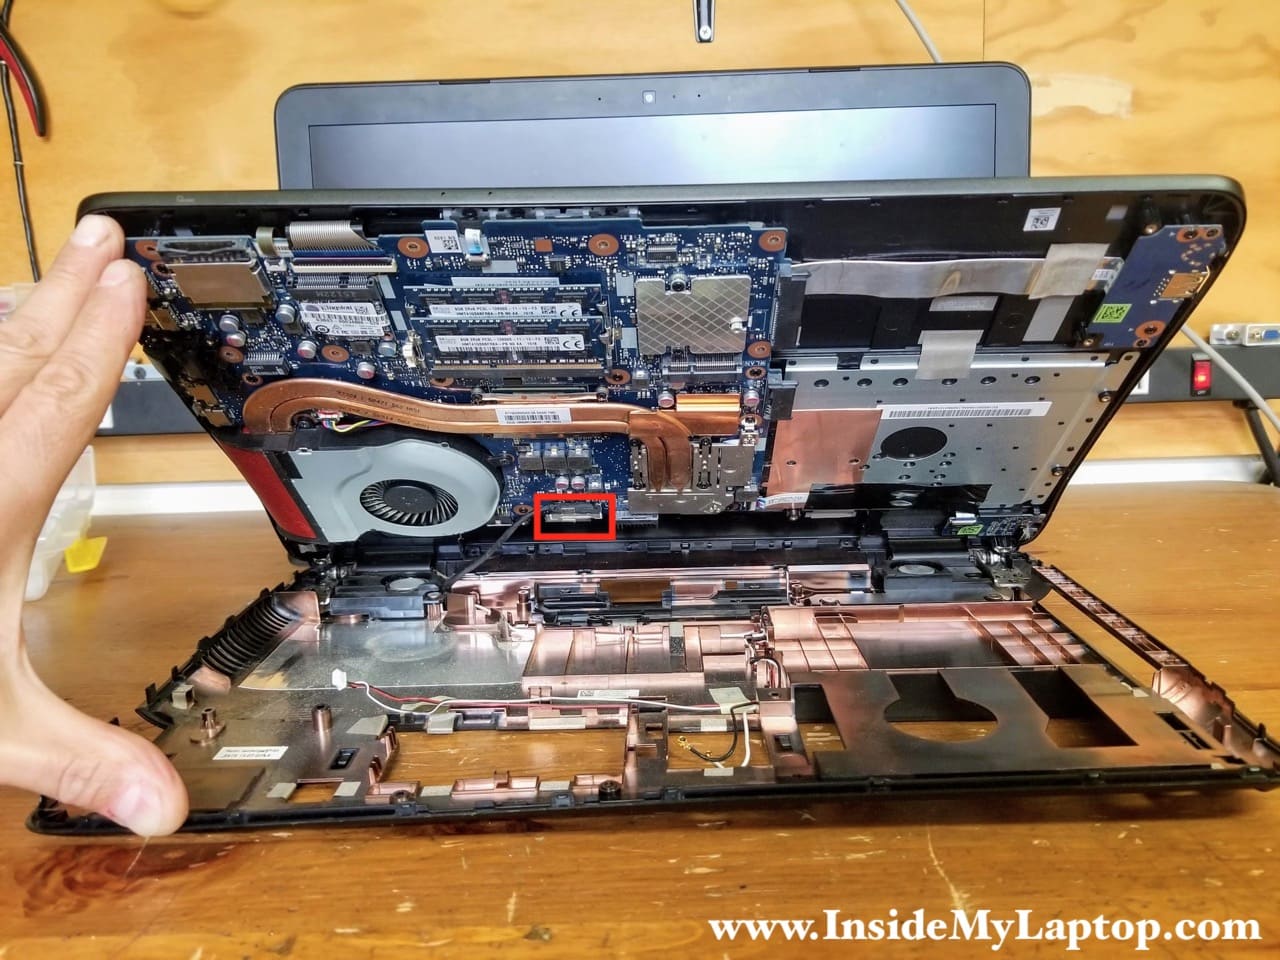
Separate the laptop base from the top case assembly.
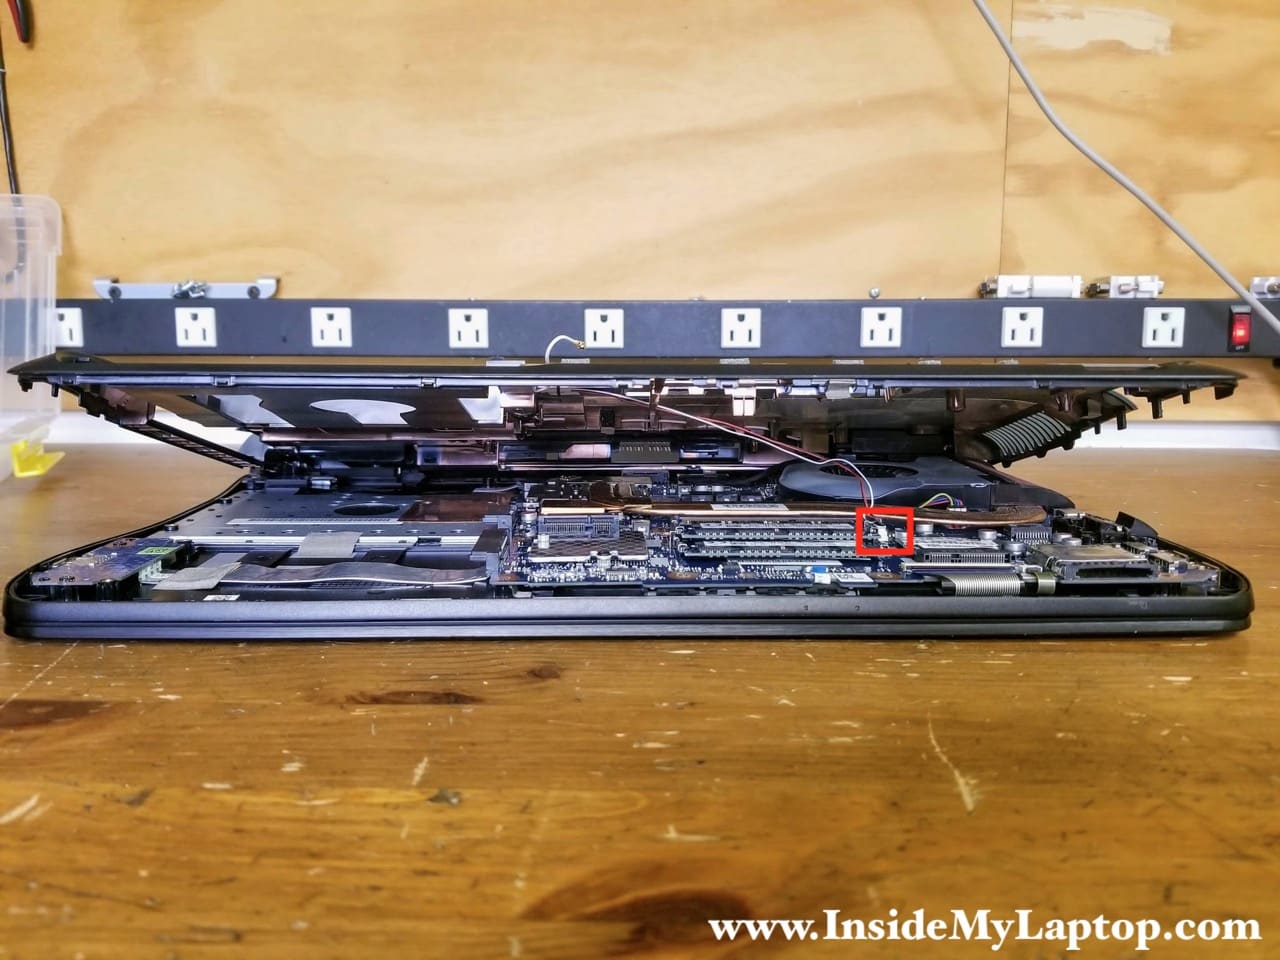
STEP 10.
Be careful, there are two cables still connected to the motherboard.
Lift up the laptop base so you can access and disconnect the speaker cable.
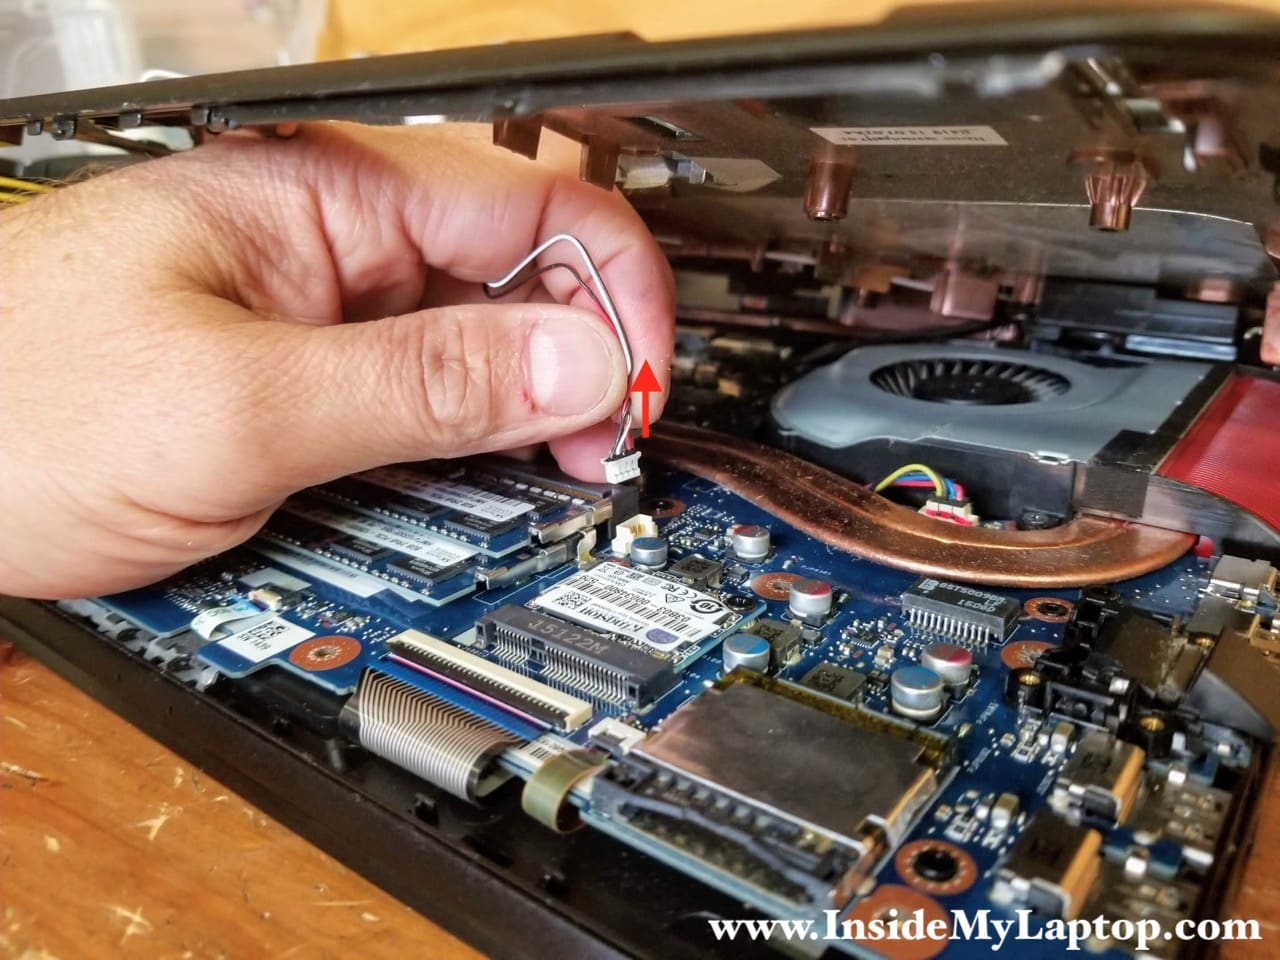
STEP 11.
Unplug the speaker cable from the motherboard.
STEP 12.
Turn the laptop upside down and lift up the top case until you can access the display cable.
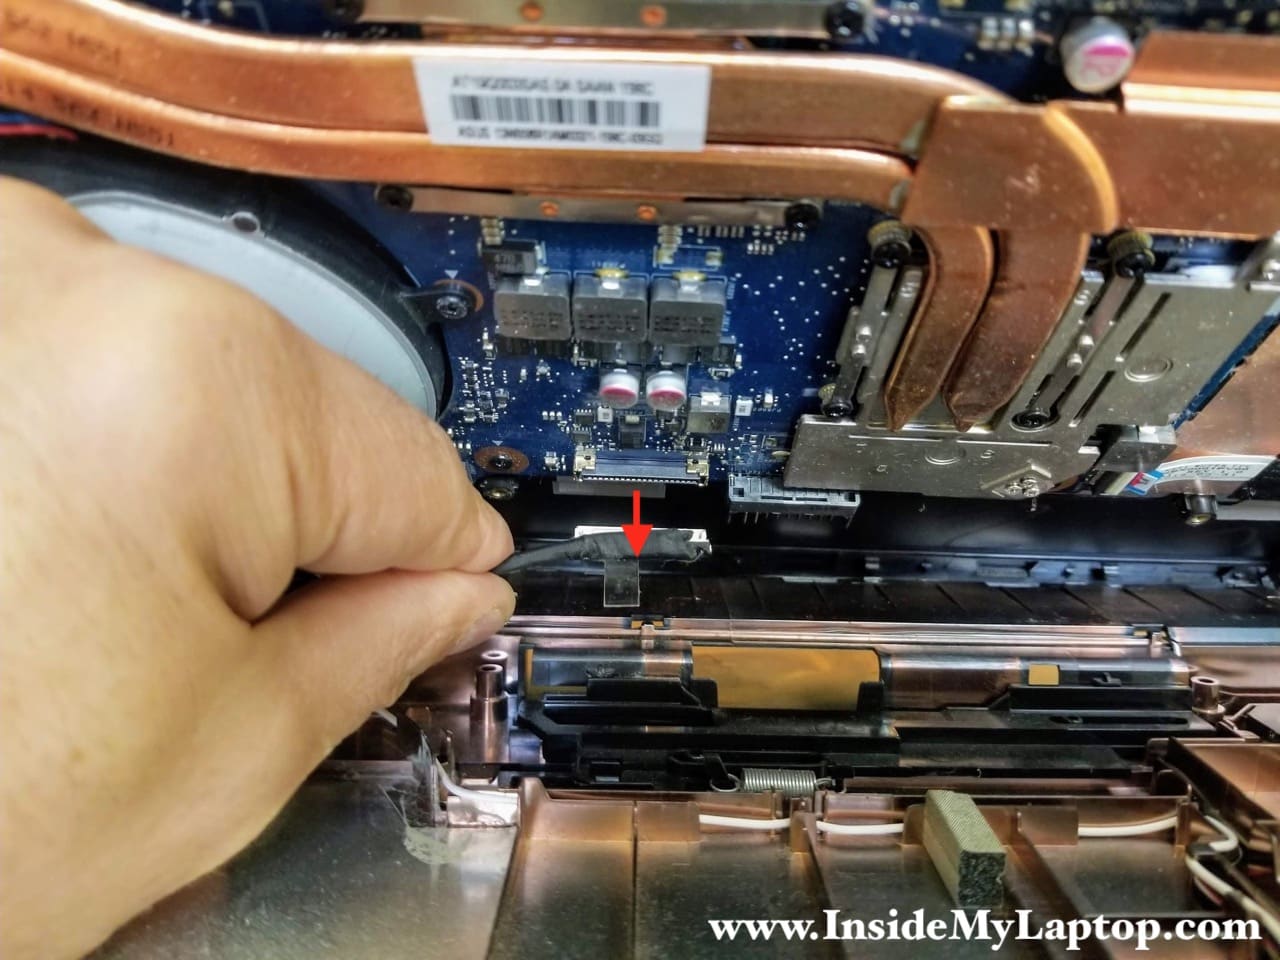
STEP 13.
Disconnect the display cable from the motherboard.
There is a plastic tab on the top of the connector. Pull it down to unplug the cable.
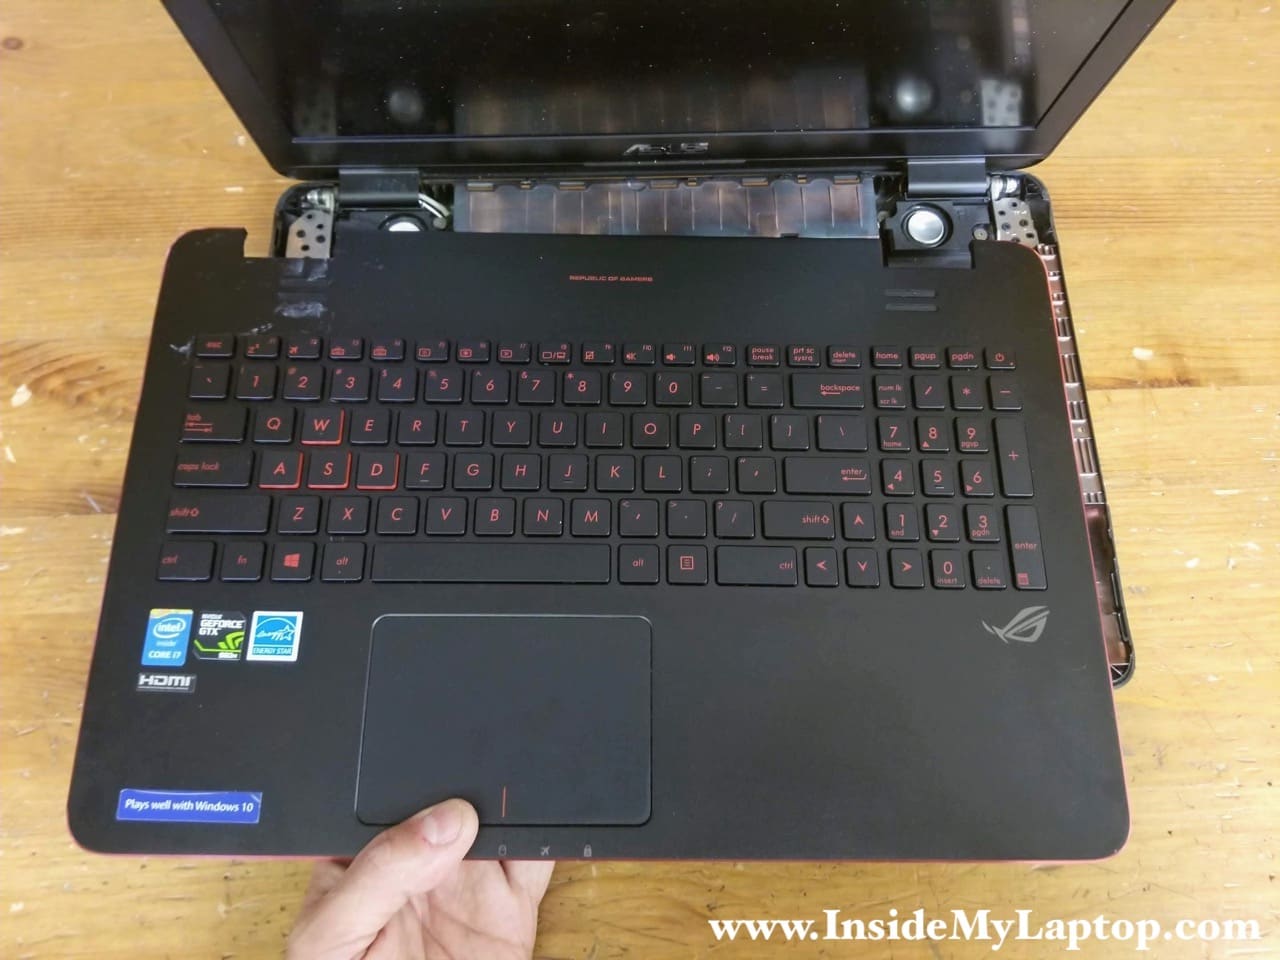
STEP 14.
Now you can remove the top case assembly (the motherboard is mounted to the top case).
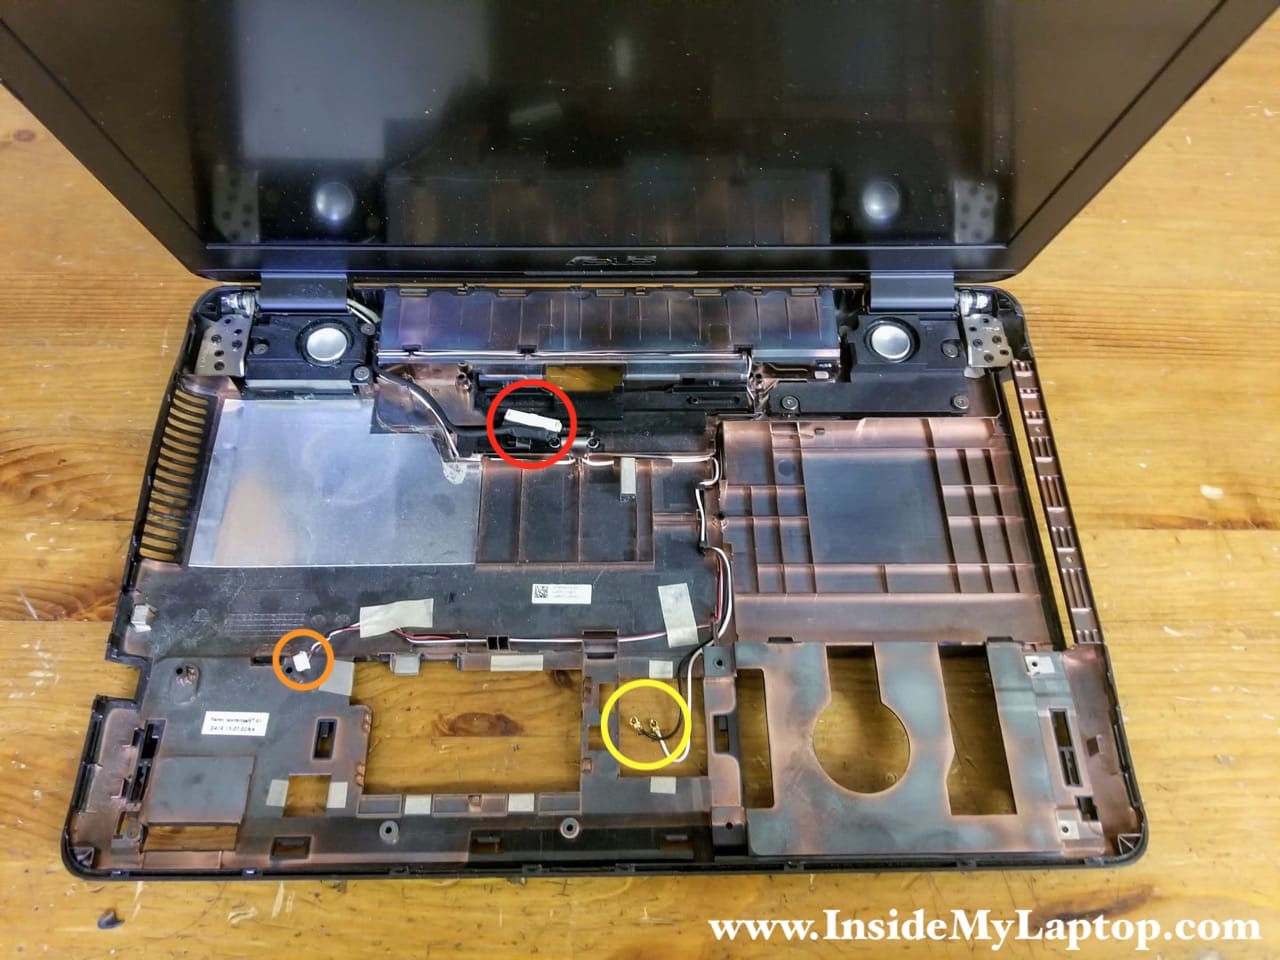
Here’s the laptop base/display assembly with the top case removed.
Again, you’ll have to have the display cable connector (red), speaker cable (orange) and wireless antenna cable (yellow) disconnected before removing the top case.
When the top case removed, you can access the mSATA SSD.
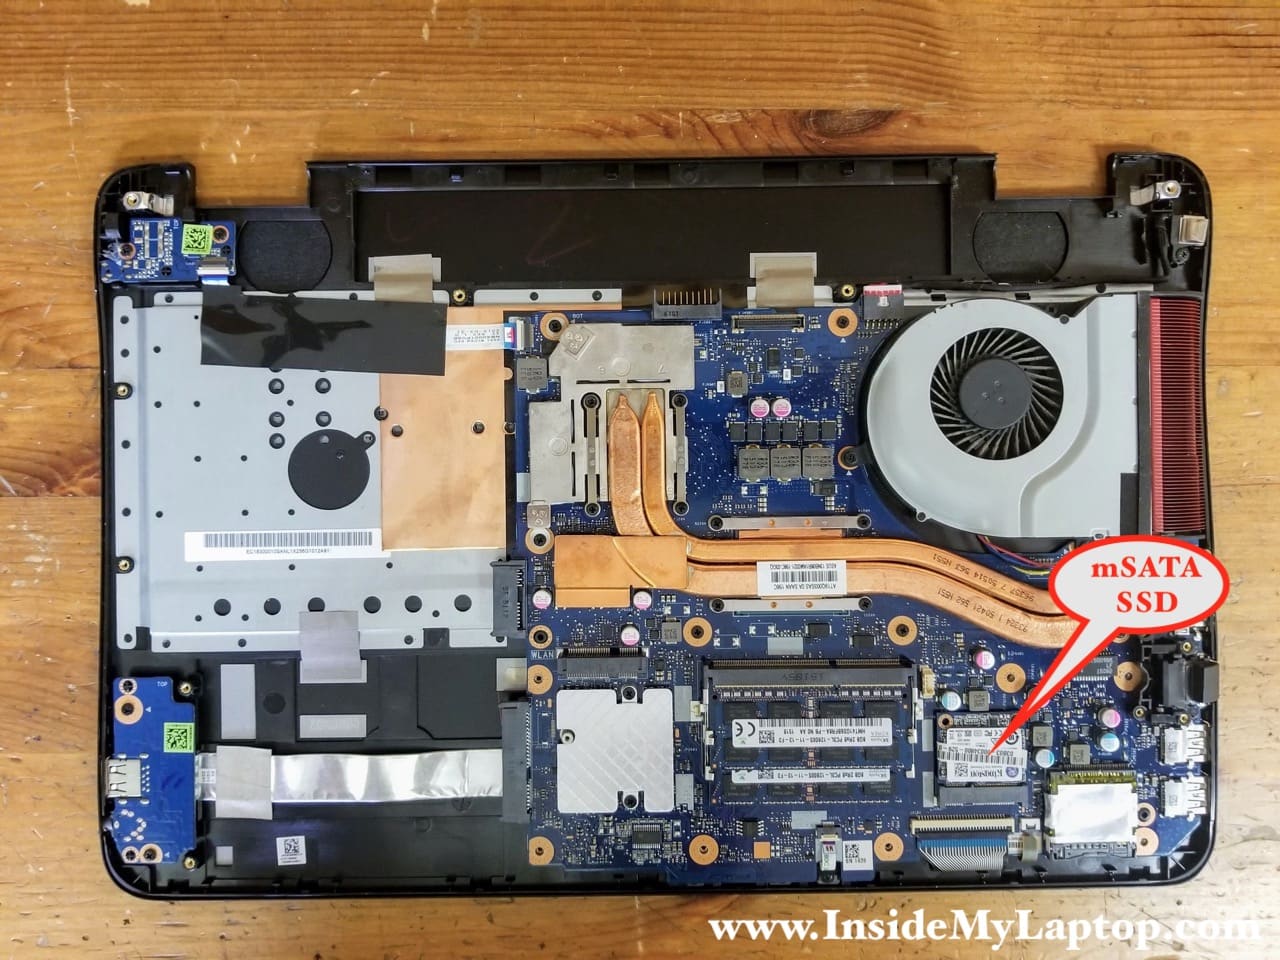
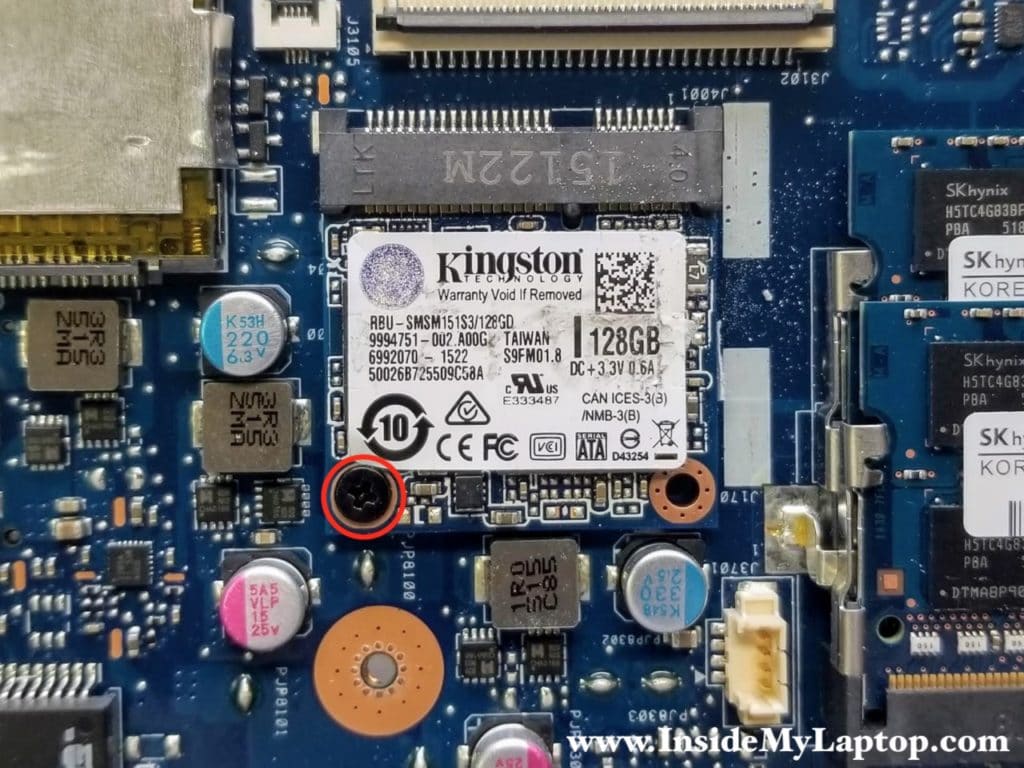
Asus ROG GL551J (series GL551JW-DS74) has a Kingston mSATA SSD installed.
Kingston SSD model: SMSM151S3/128GD – it’s a half size SSD.
NOTE: if you want to upgrade, you must use a half size SSD. There is not enough space for a full size mSATA SSD.
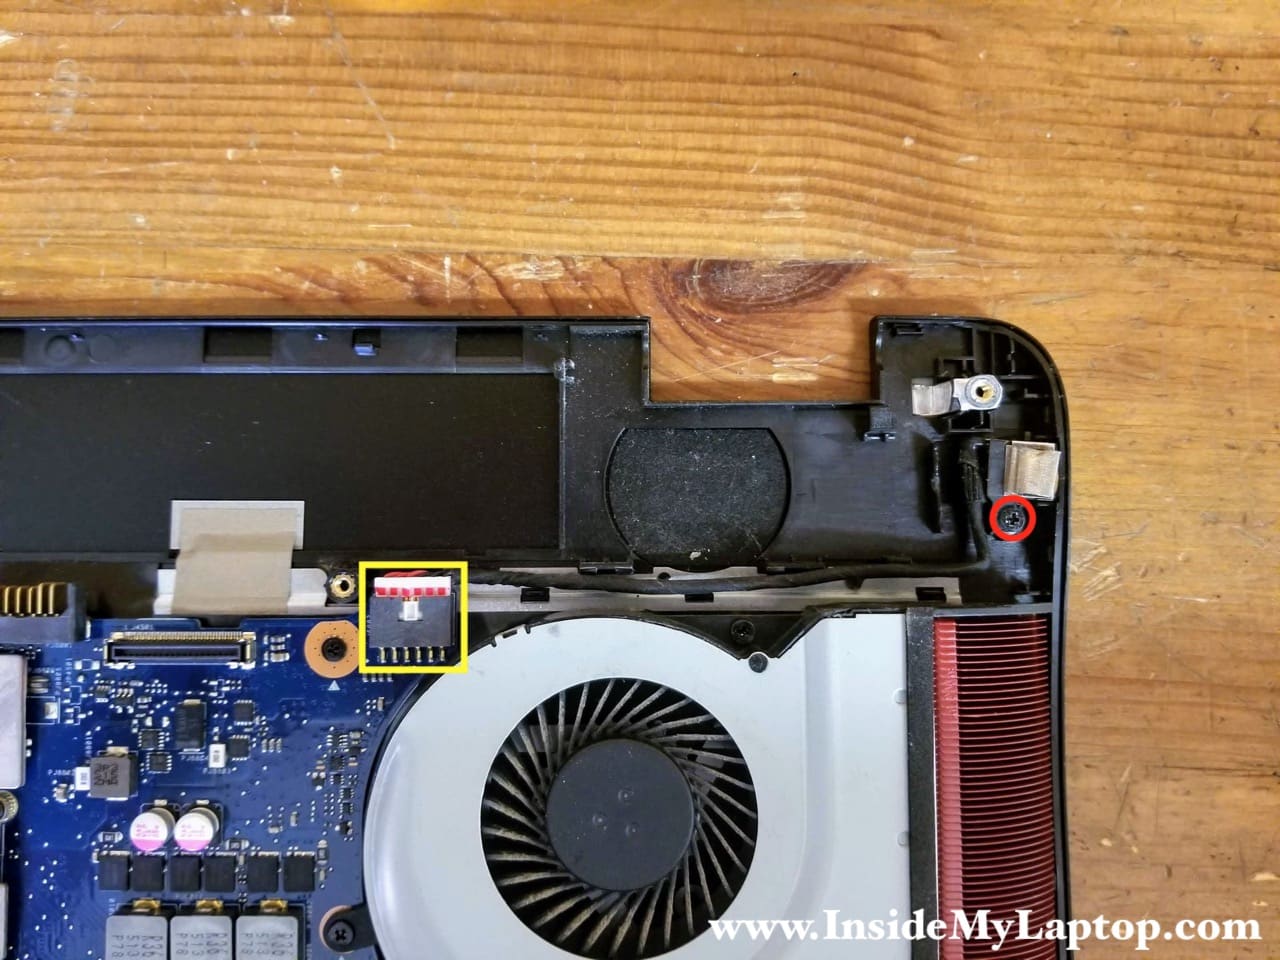
STEP 15.
Remove one screw securing the DC power jack to the top case.
Disconnect the DC jack cable from the motherboard.
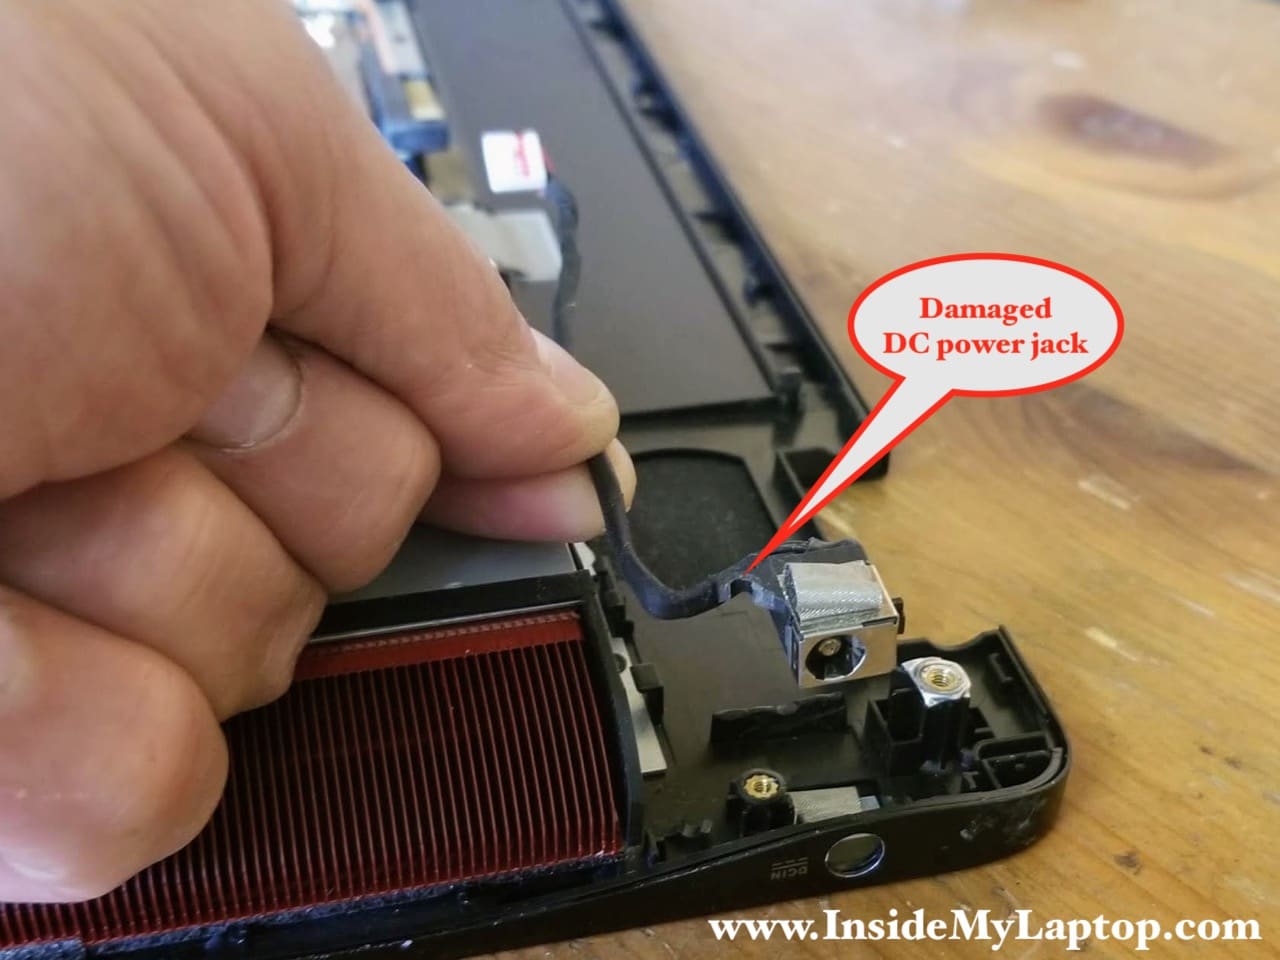
This particular Asus ROG GL551J laptop had a problem with the DC power jack. It was pushed in inside the case. Why it happened? Take a closer look at the picture. As you see the plastic bracket got cracked (laptop was dropped) and the DC jack got loose.
When I was researching a new jack I found many of them available on eBay but only a few of them had the mount for the screws. Pay attention to that.
STEP 16.
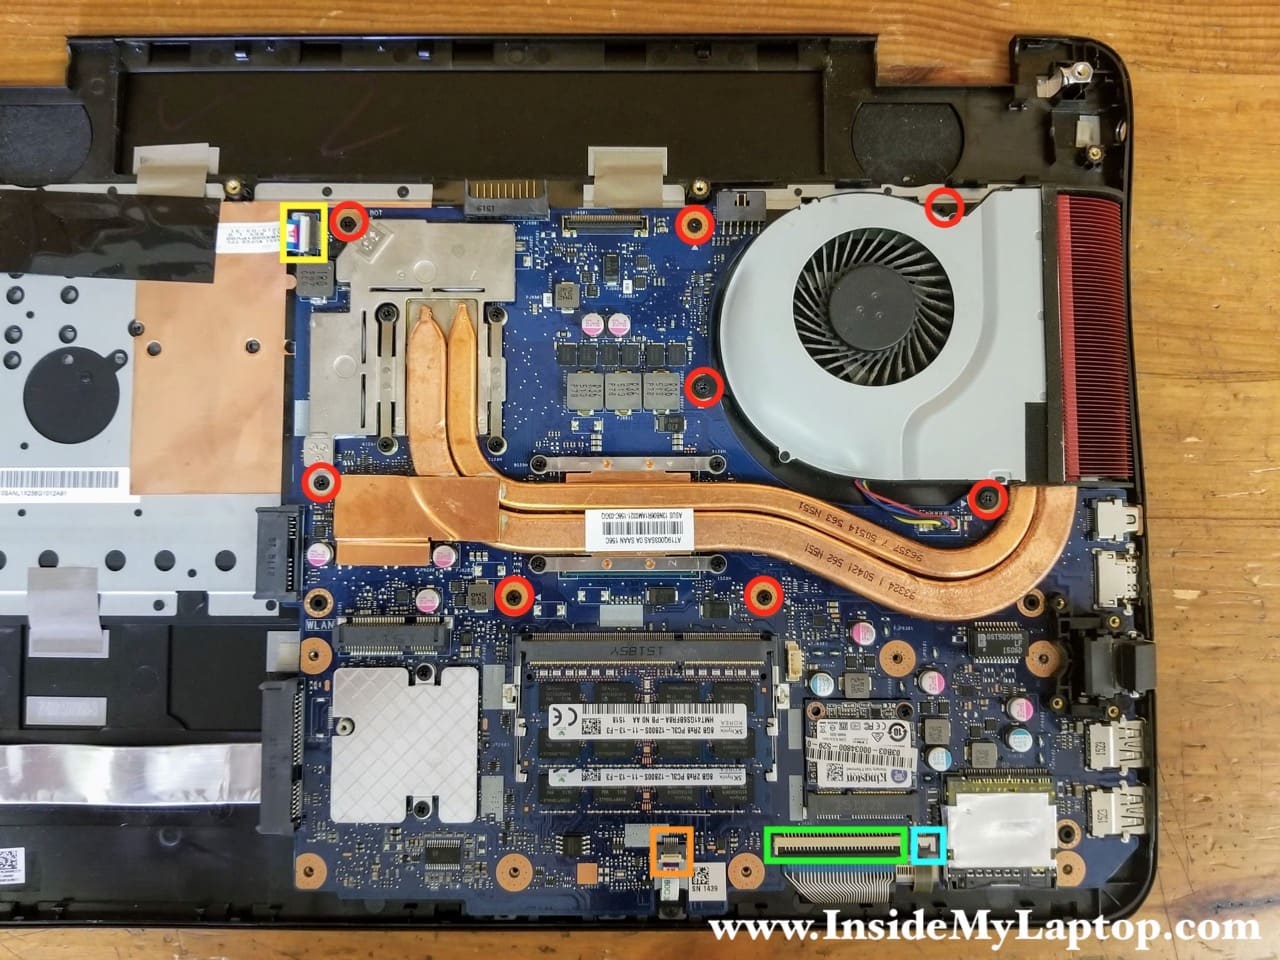
Remove eight screws securing the motherboard and cooling fan to the top case.
Disconnect the following color-coded cables:
– Touchpad cable (orange).
– Keyboard cable (green).
– Keyboard backlight cable (blue).
– WOFER FCC cable (yellow).
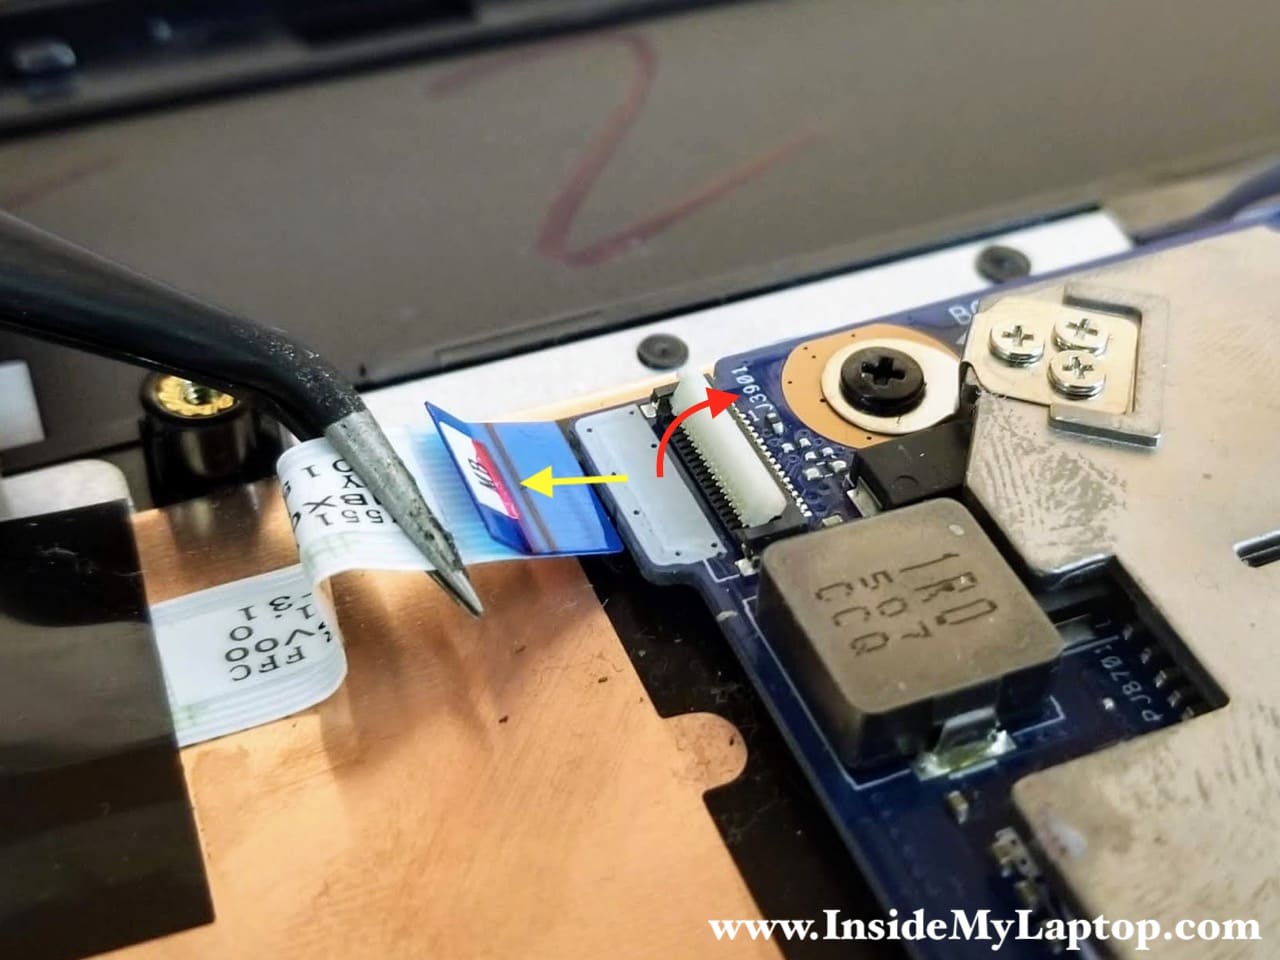
Here’s how to disconnect flat cables.
Lift up the locking tab to unlock the connector (red arrow) and pull the cable out (yellow arrow).
STEP 17.
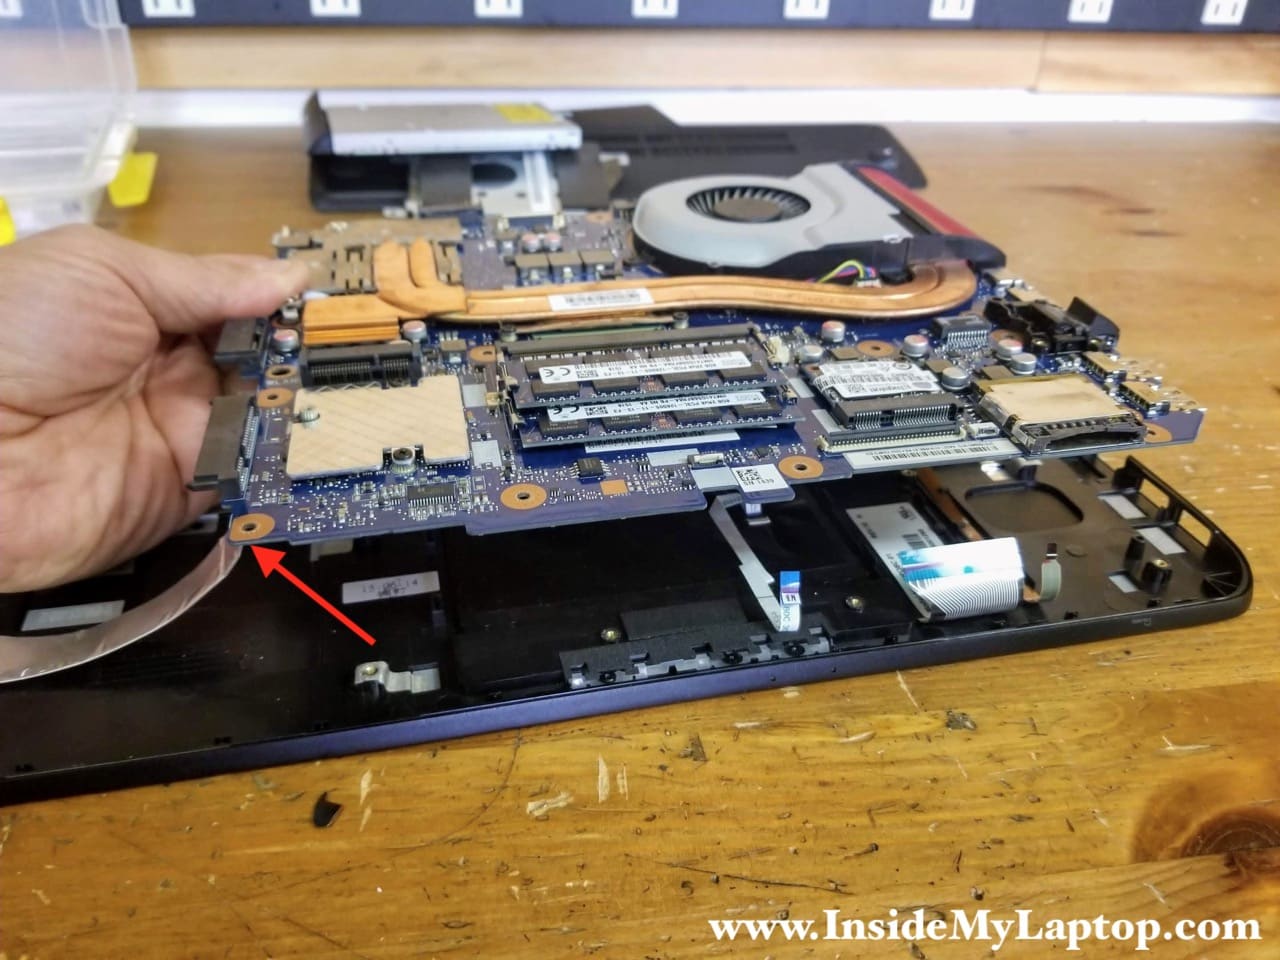
Separate the motherboard from the top case. Be careful because the USB Audio board cable is still connected to the other side.
The USB Audio board is glued to the top case. Make sure to unglue the cable before removing the motherboard.
STEP 18.
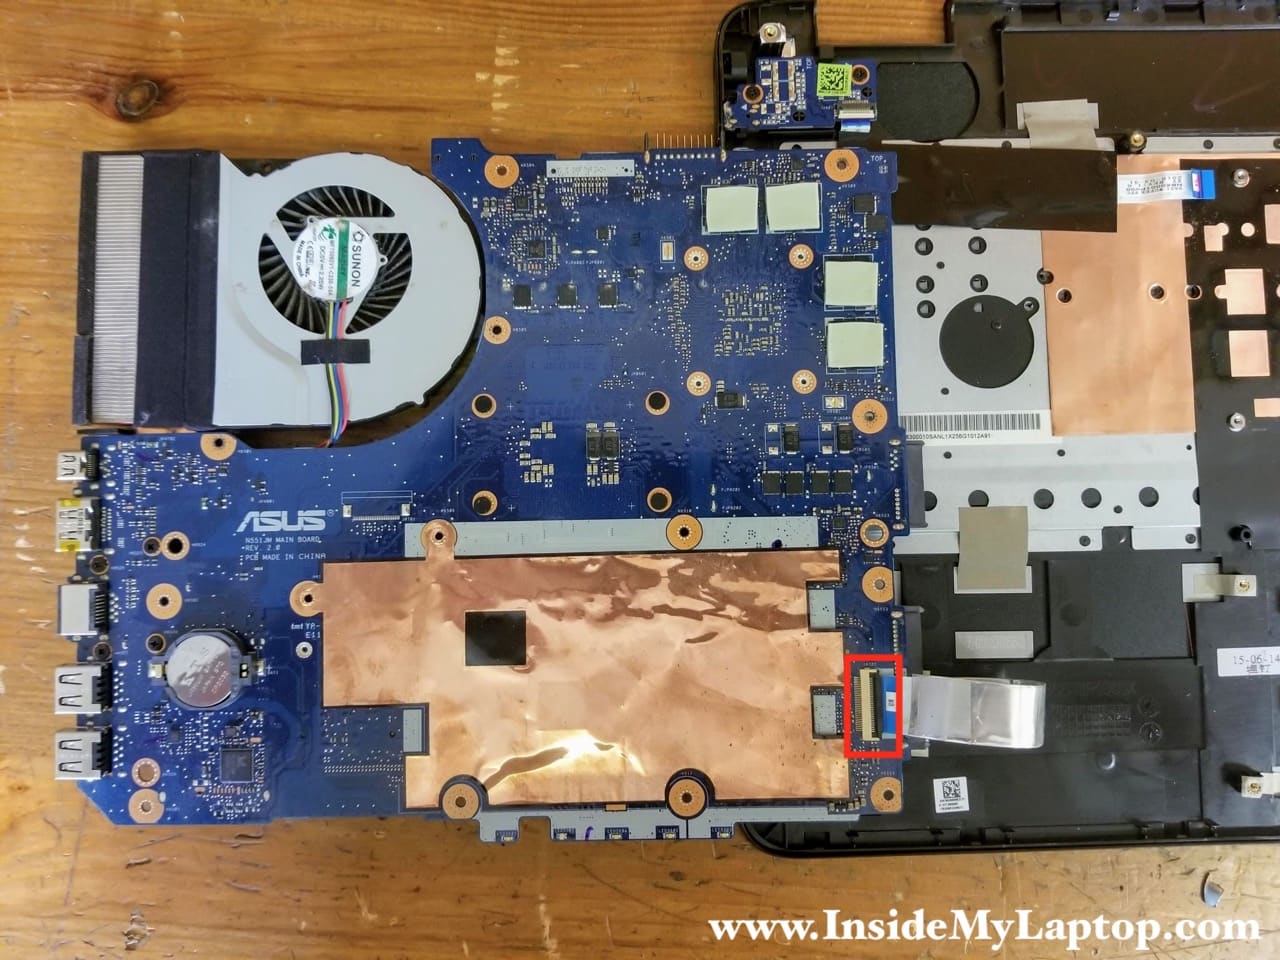
Turn the motherboard upside down and disconnect the USB Audio board cable.
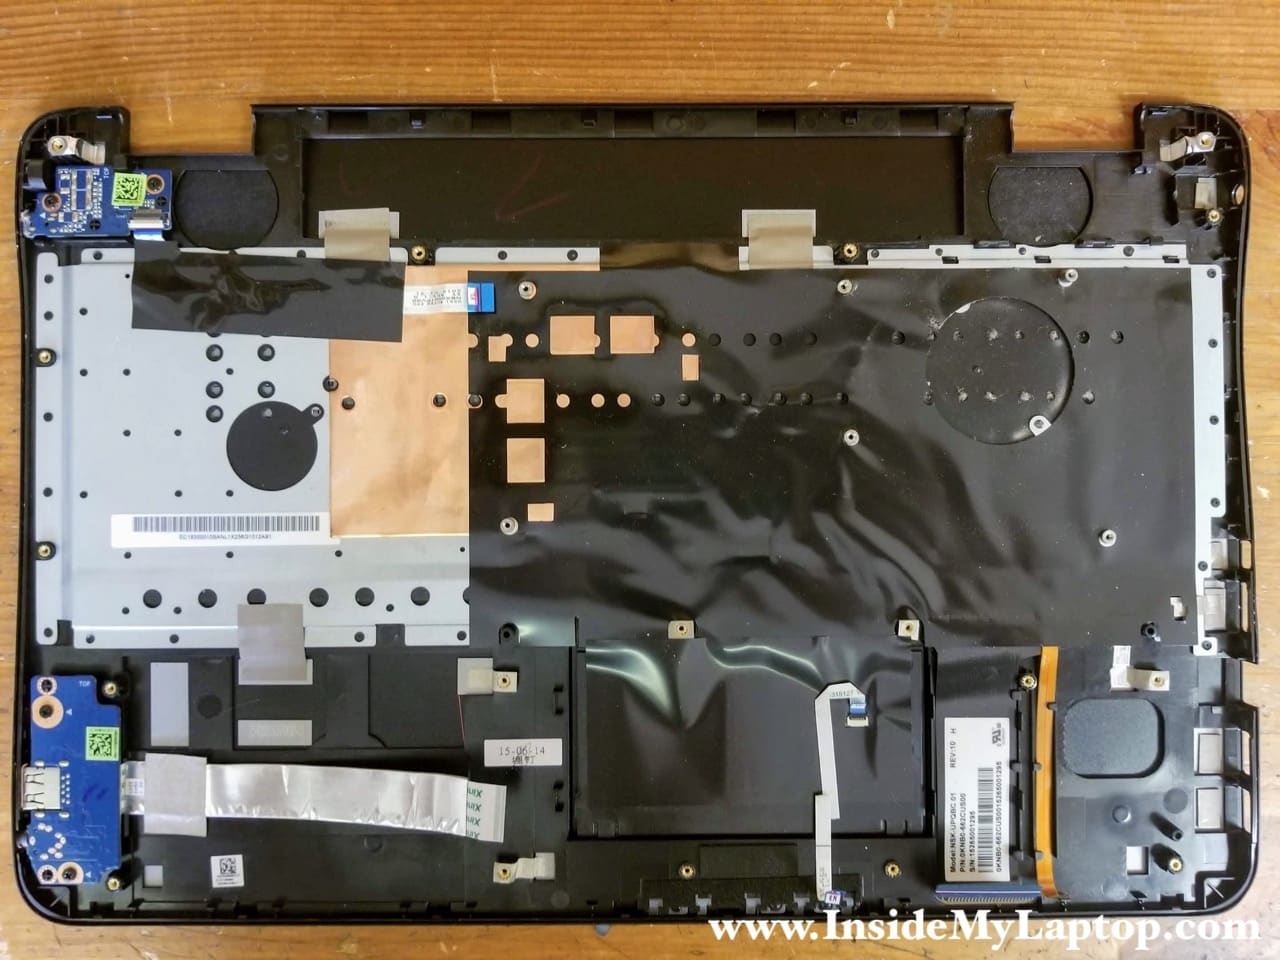
Here’s the top case with the motherboard removed.
Asus ROG GL551J has the keyboard permanently attached to the top case. The keyboard cannot be easily removed and replaced.
Here’s the other side of the motherboard. The RTC battery is located on this side.
The cooling fan is taped to the heatsink. The fan can be separated from the heatsink after you remove the tape.