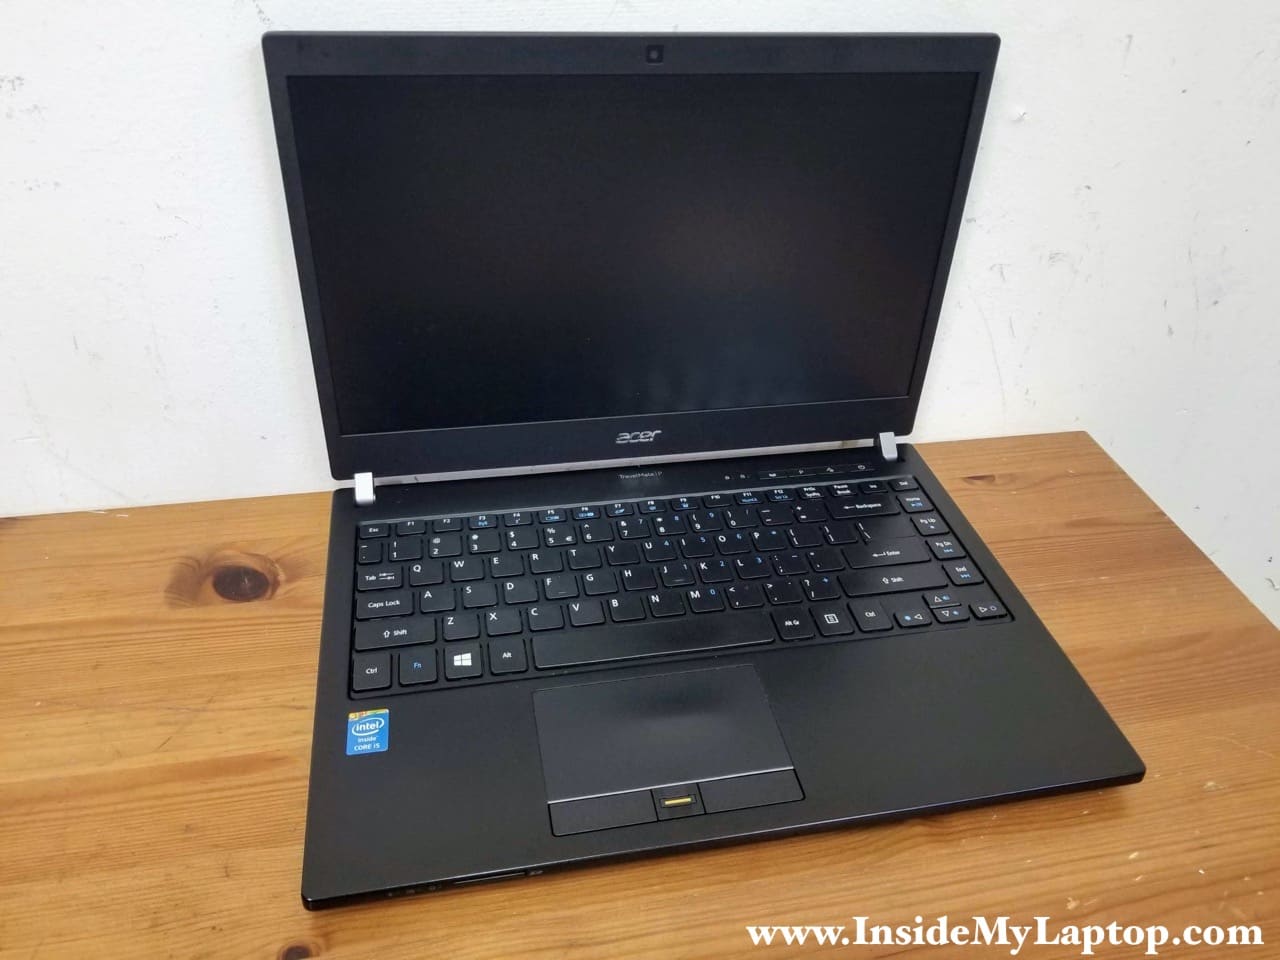
In this guide I show how to disassemble an Acer TravelMate P645 series laptop. In this particular case I’m taking apart model TMP 645-M-6839.
Acer TravelMate P645 series design highlights:
– Memory slot easily accessible from the bottom.
– Main battery mounted inside the laptop.
– CMOS battery soldered to the motherboard.
– DC power jack is not soldered.
– Keyboard can be separated from the top case.
– Power button board mounted under the motherboard.
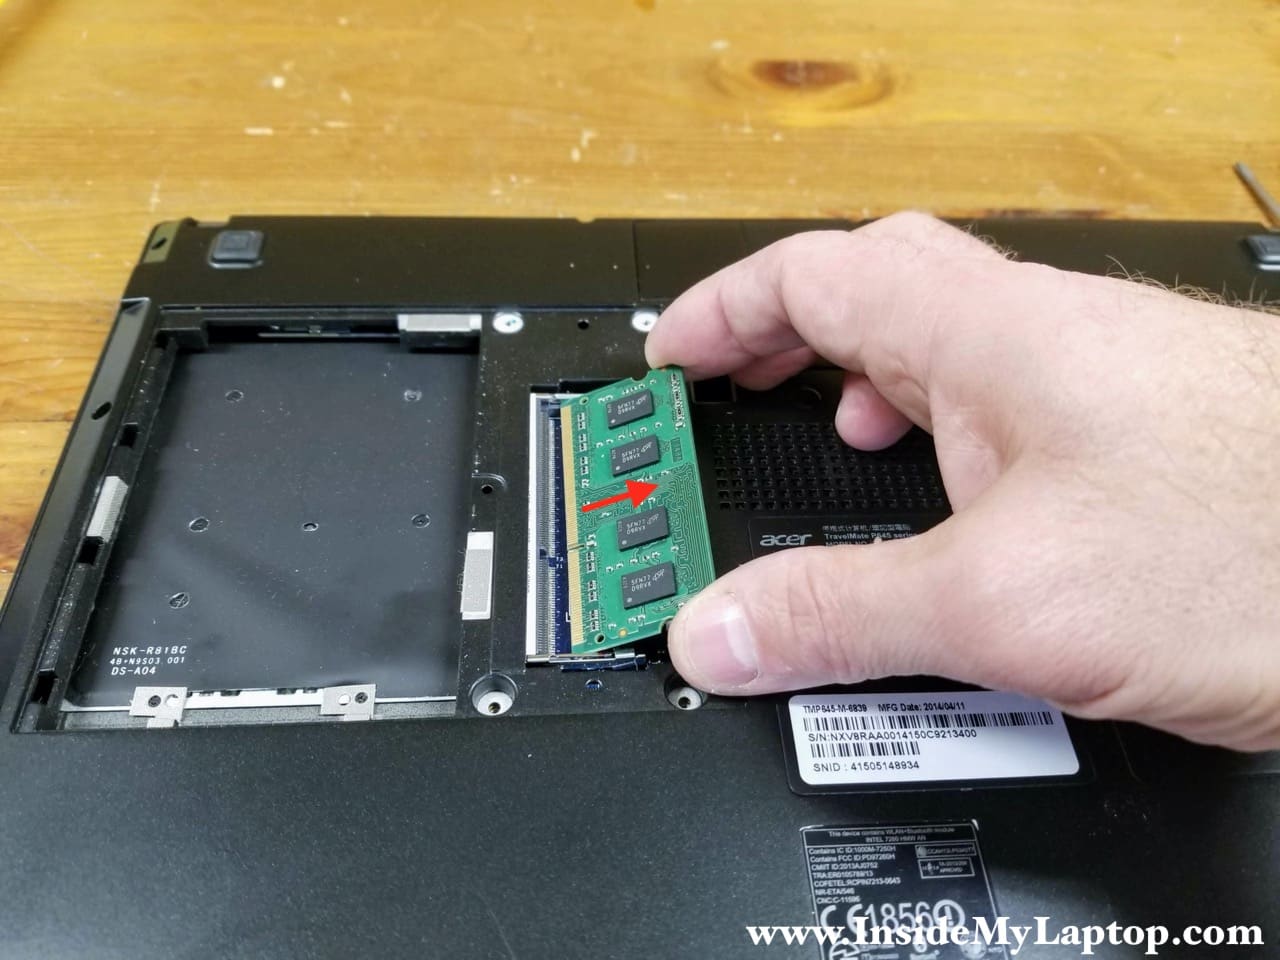
Memory removal
Acer TravelMate P645 has only one memory slot available for RAM upgrade. The memory slot located under the service cover and can be easily accessed.
Maximum memory for this laptop is 12GB (8GB module in the slot and 4GB soldered to the motherboard).
STEP 1.
Remove four screws securing the service cover. Remove the cover.

STEP 2.
Remove the memory module and replace it with a larger capacity module if necessary.
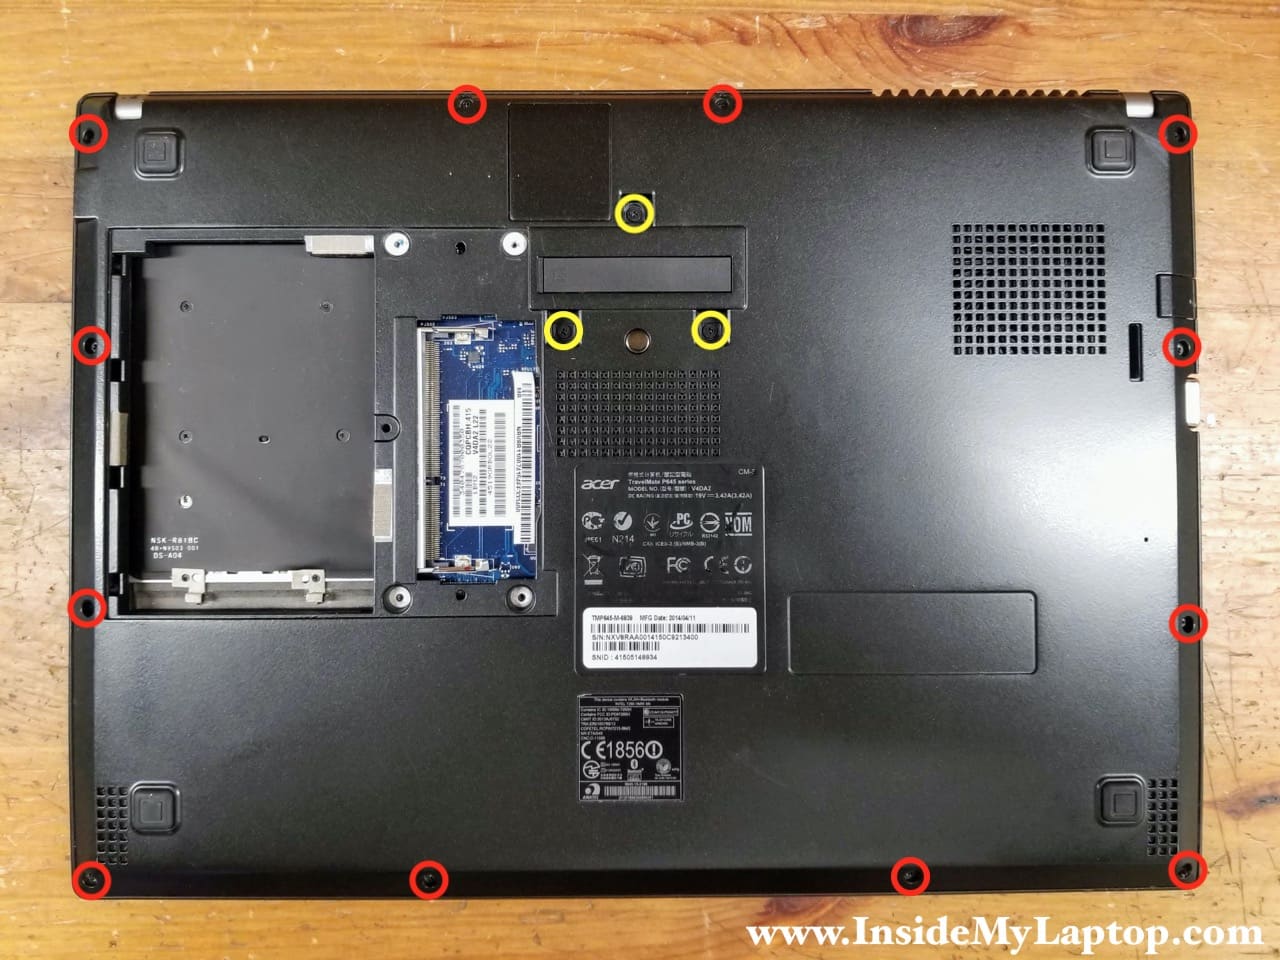
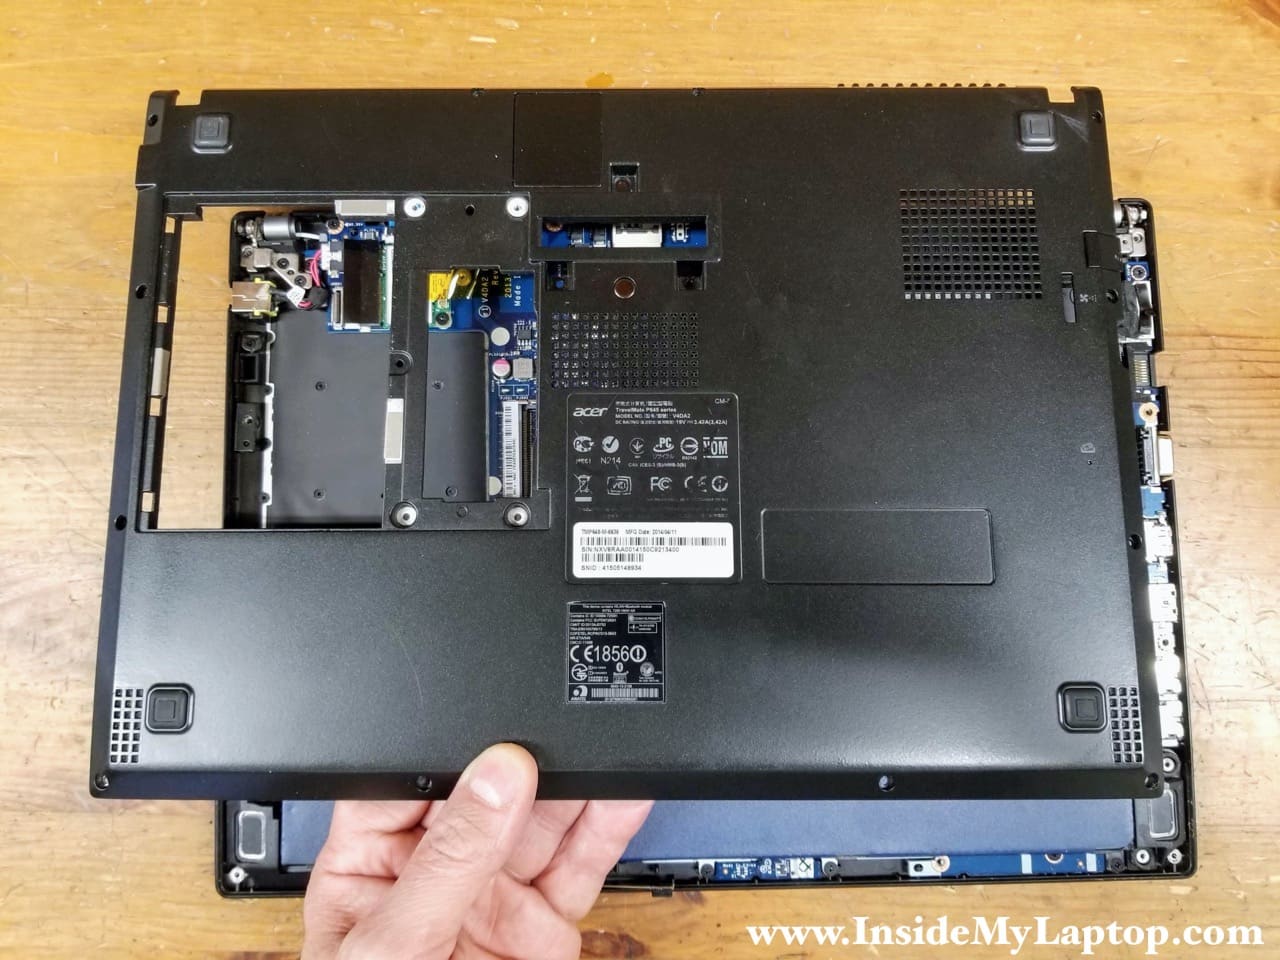
Base cover and battery removal
STEP 3.
Remove all screws from the base cover. Three screws color-coded in yellow are shorter than twelve other screws.
STEP 4.
Pry up the base cover using a thin case opener tool. Continue removing the base cover with your hands.
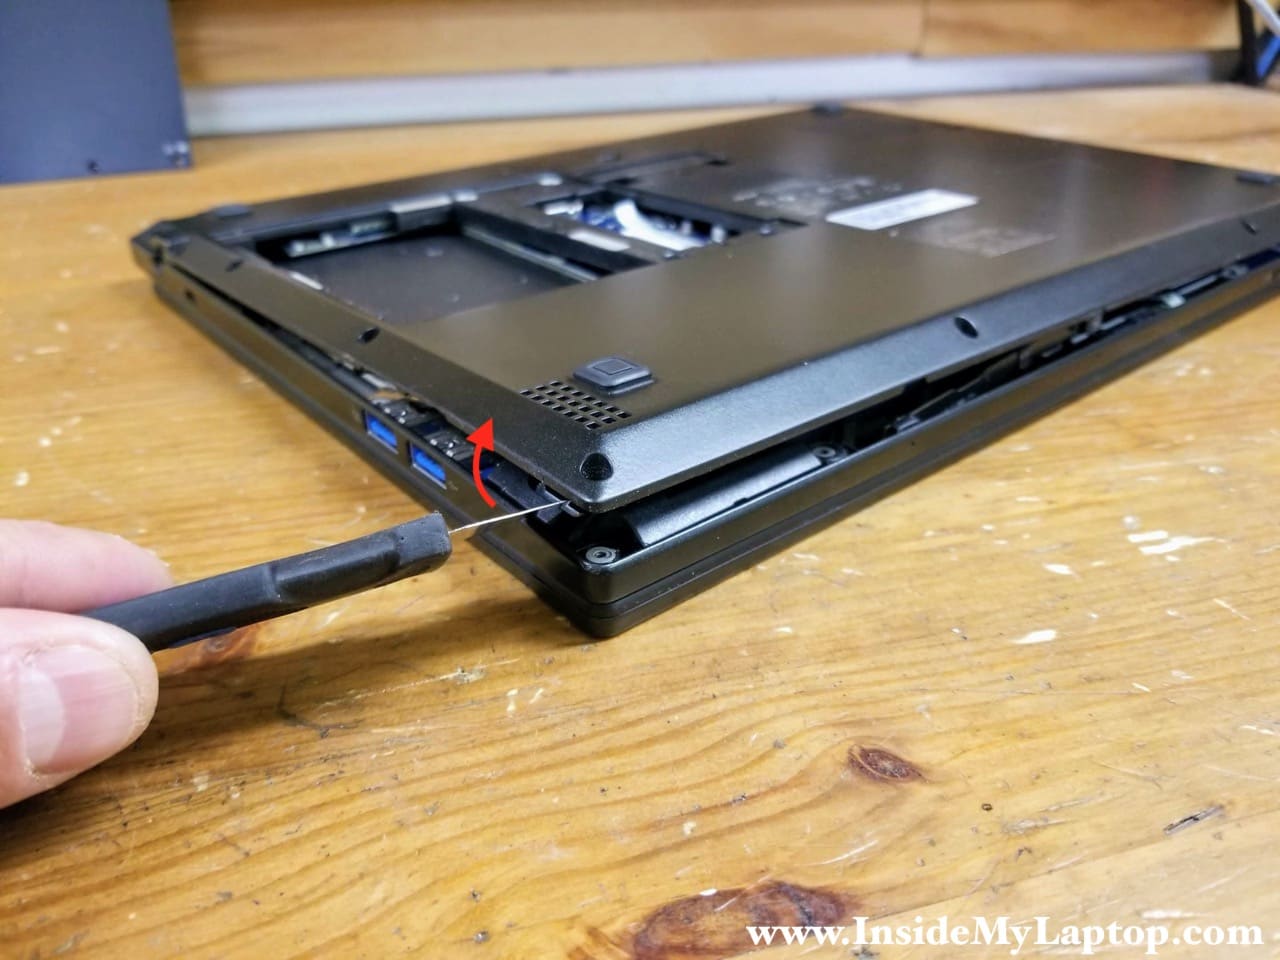
STEP 5.
Remove the base cover.
STEP 6.
Remove one screw securing the main battery.
By the way, Acer TravelMate P645 series laptop has the CMOS battery soldered to the motherboard.
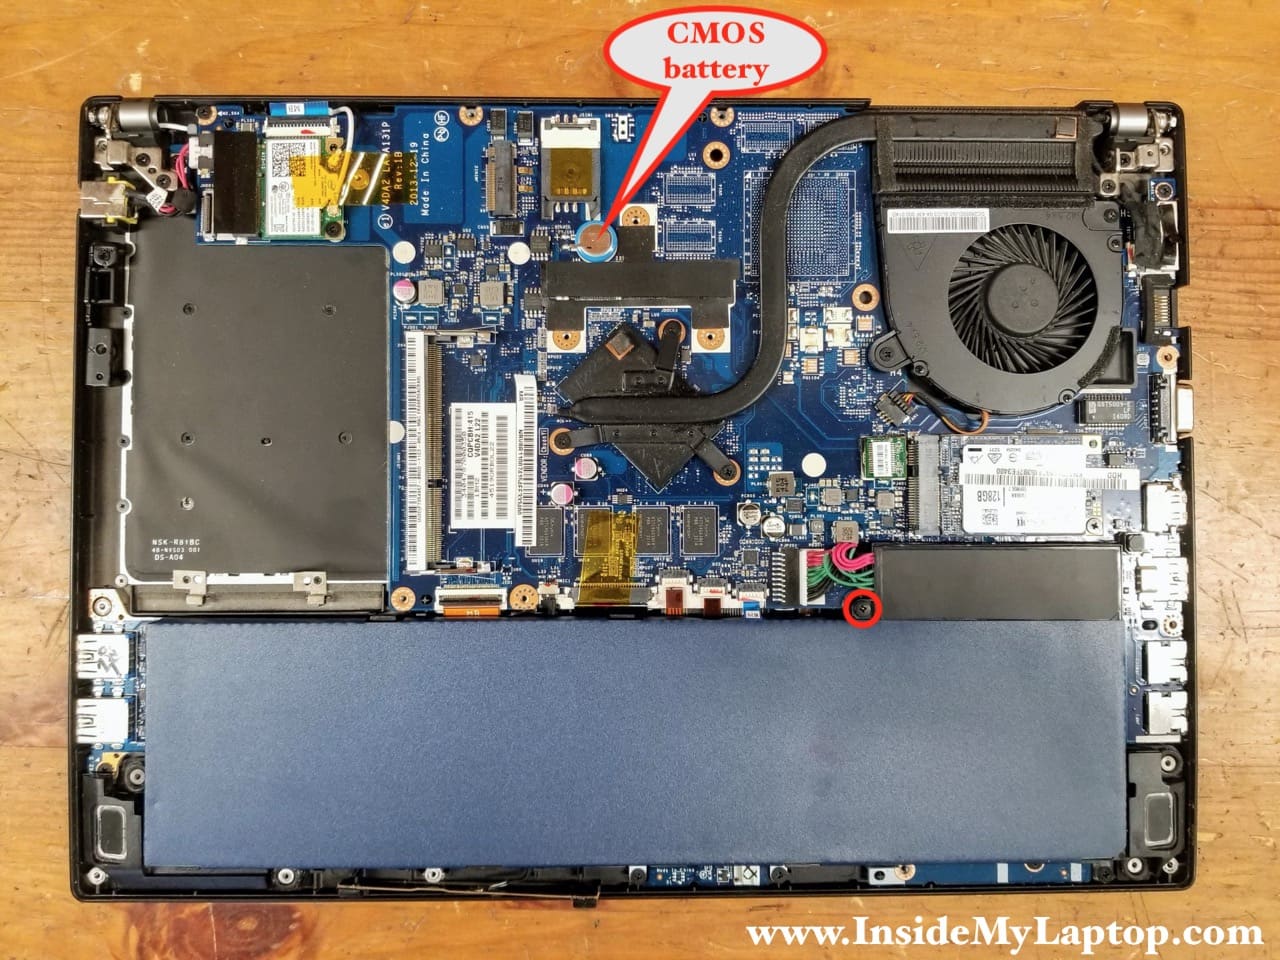
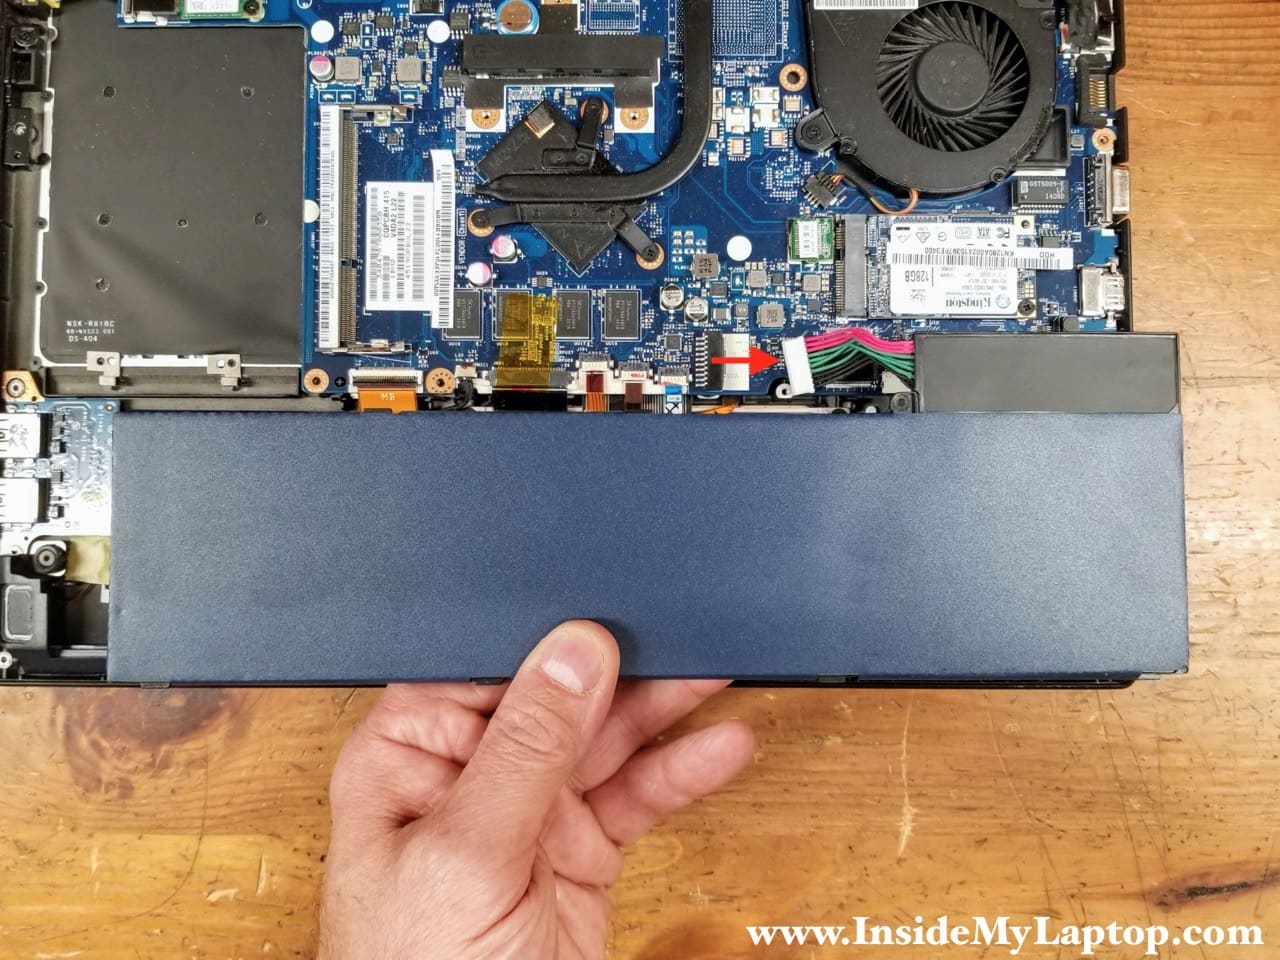
STEP 7.
Lift up the battery and disconnect the cable from the motherboard. Remove the battery.
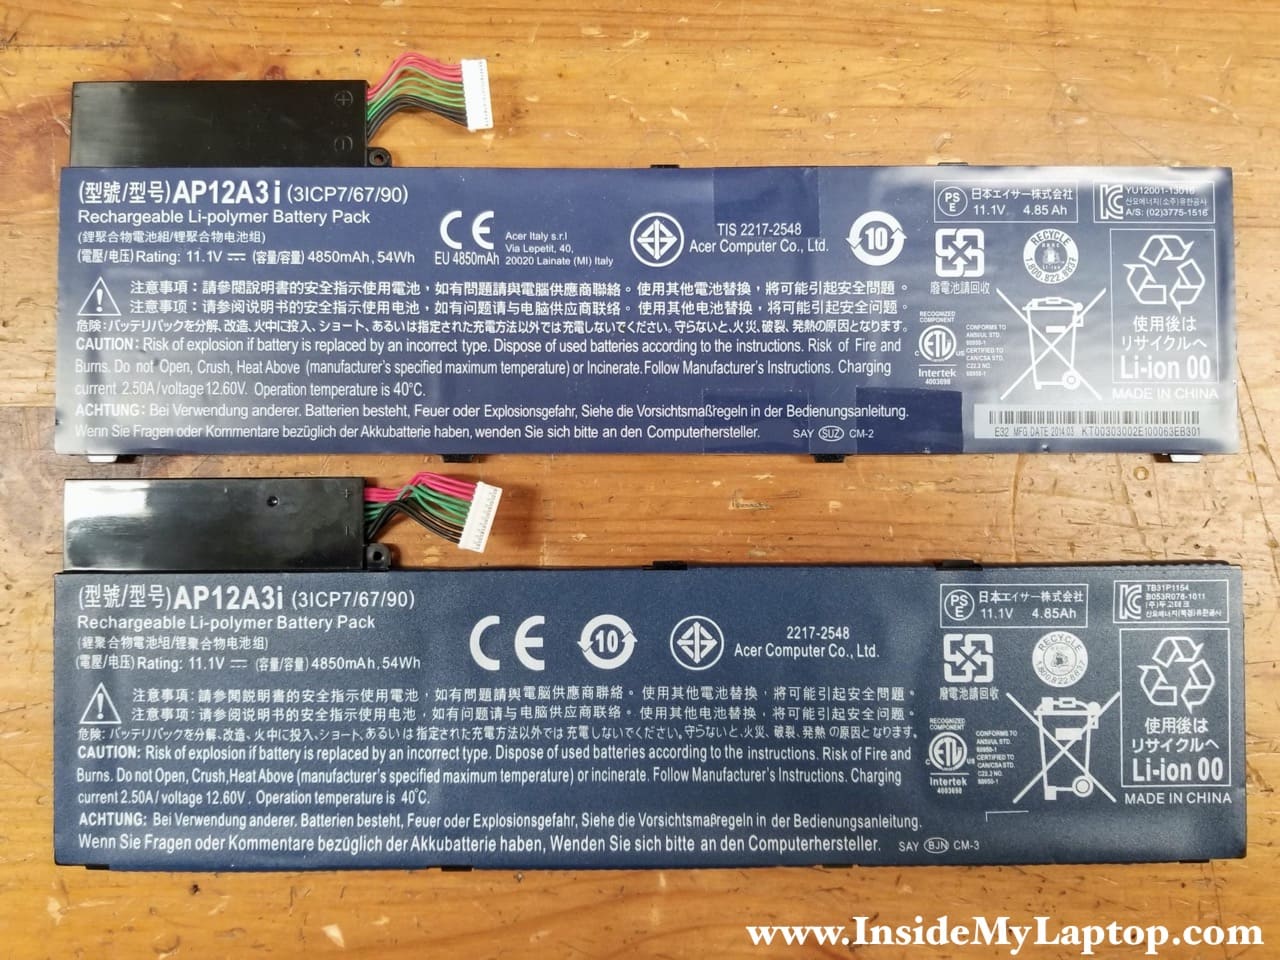
On the following picture you can see two batteries for Acer TravelMate P645. One of them is a genuine Acer battery (top) and another one is a fake knockoff (bottom). They look identical but the genuine battery has glossy paper and there is a serial number with MFG date printed in the lower right corner.
Cooling fan and SSD removal
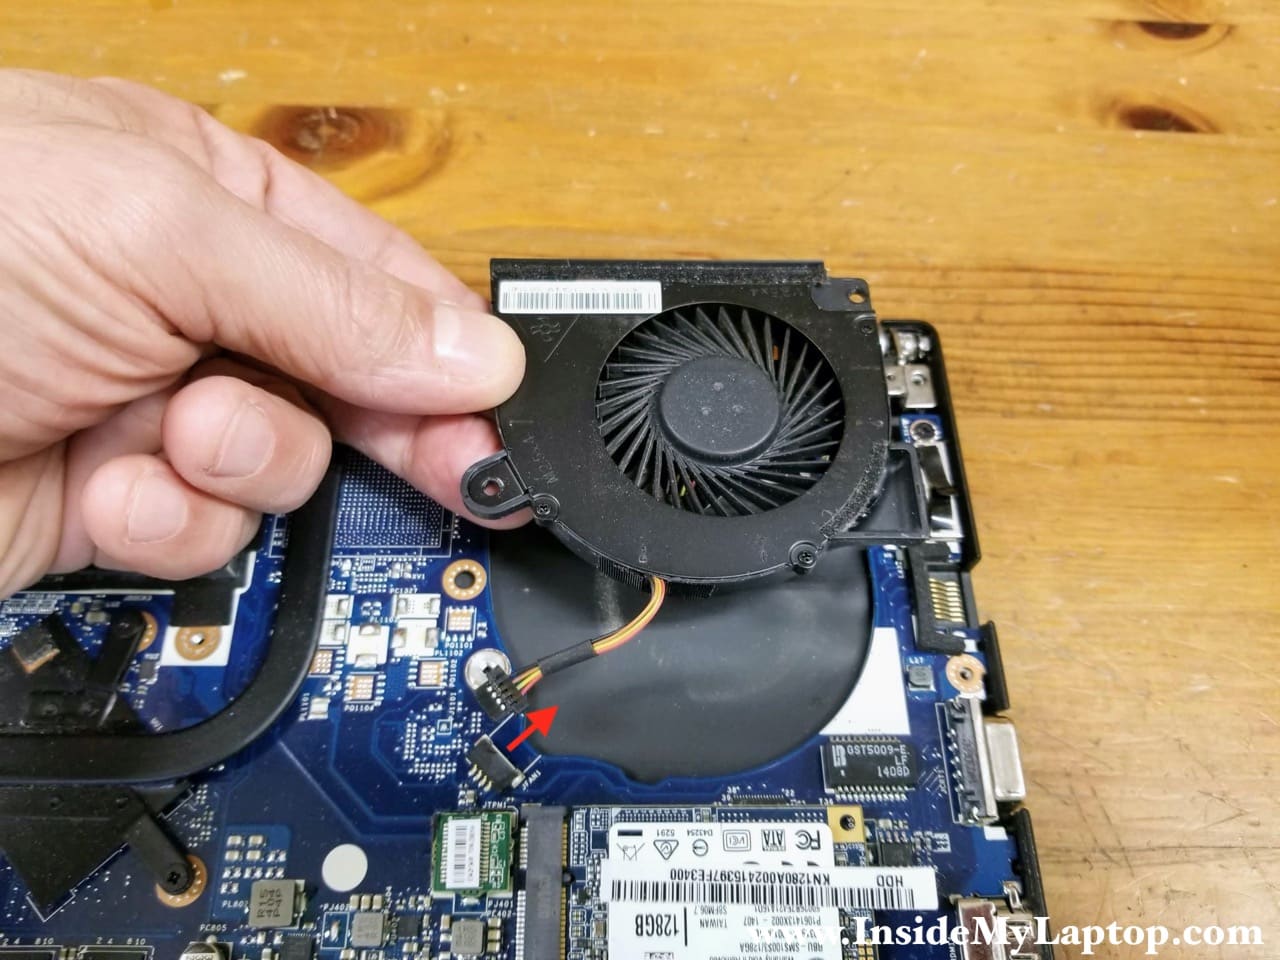
STEP 8.
Remove two screws securing the cooling fan.

STEP 9.
Disconnect the fan cable from the motherboard and remove the fan.
STEP 10.
Remove one screw securing the solid state drive. It’s a 128GB Kingston mSATA SSD.
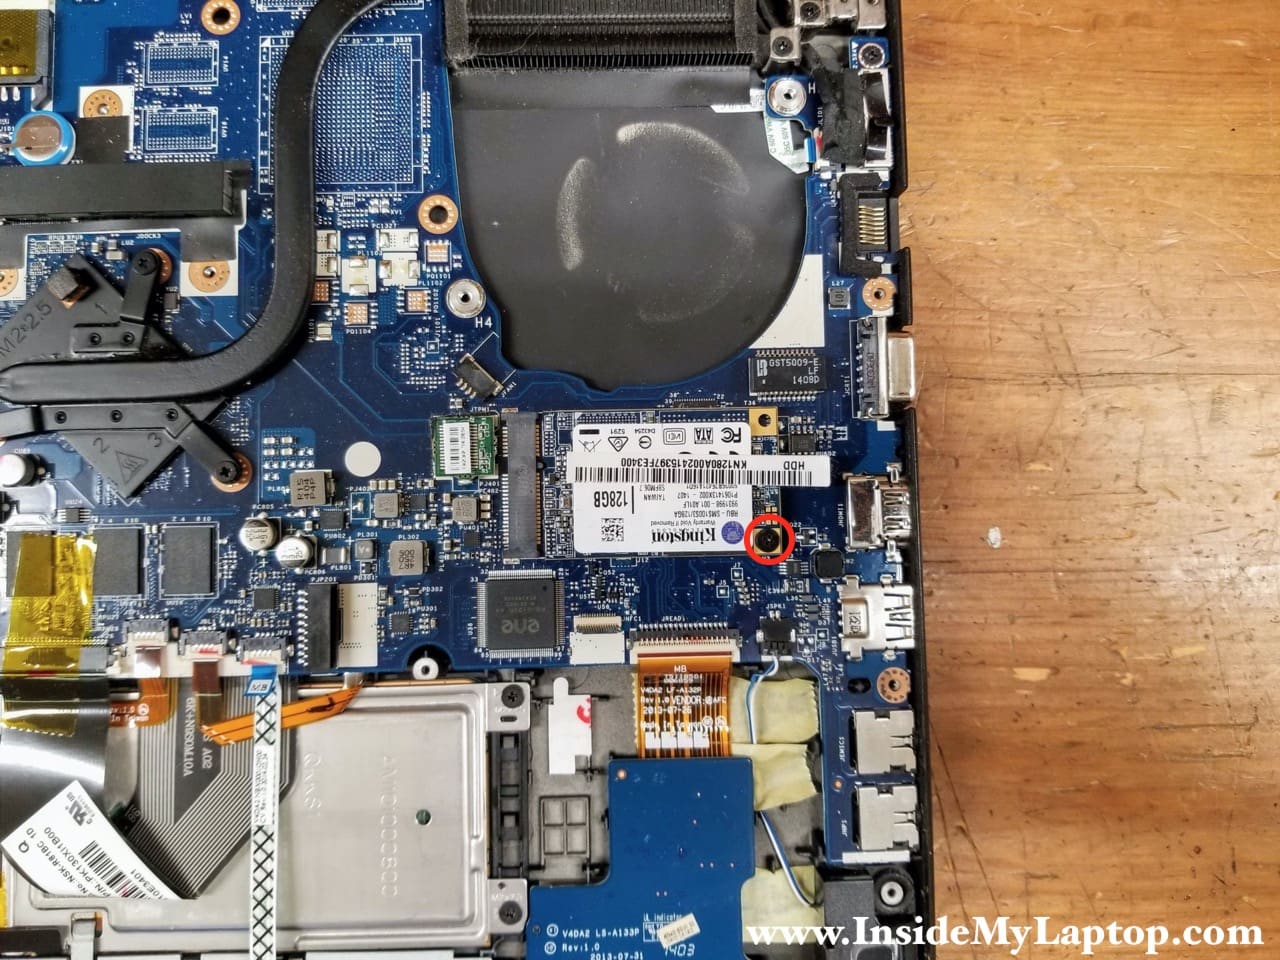
STEP 11.
Remove the SSD.
Acer TravelMate P645 series laptop supports mSATA SSDs. In this particular example we have a Kingston 128GB SMS100S3/128G mSATA SSD installed but you can use any third-party mSATA SSD instead (do not confuse it with PCIe NVMe m.2 type 2242 drive).

DC jack and Wi-Fi card removal
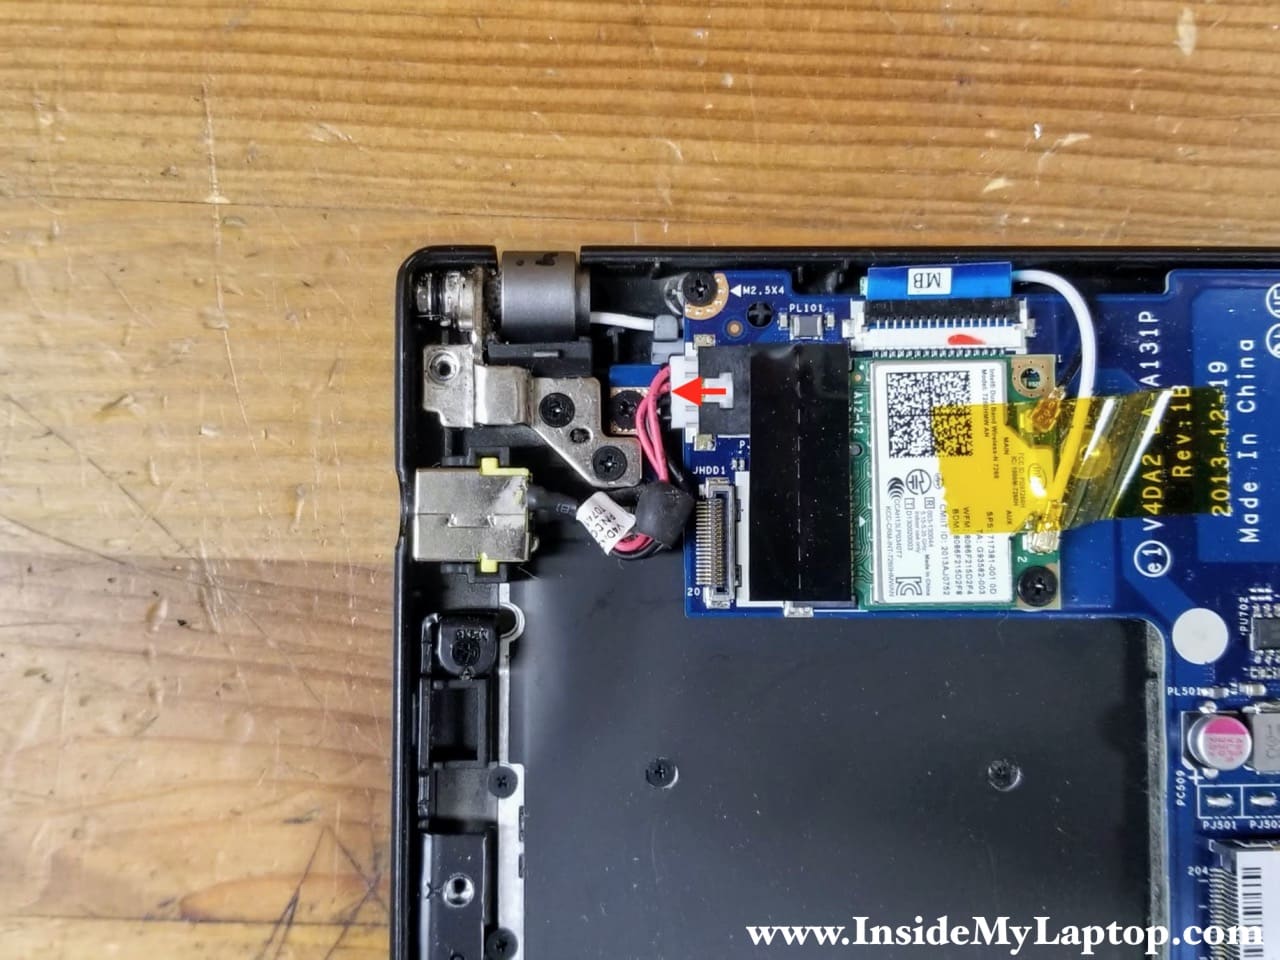
STEP 12.
Disconnect the DC power jack cable from the motherboard.
STEP 13.
Lift up and remove the DC power jack.

STEP 14.
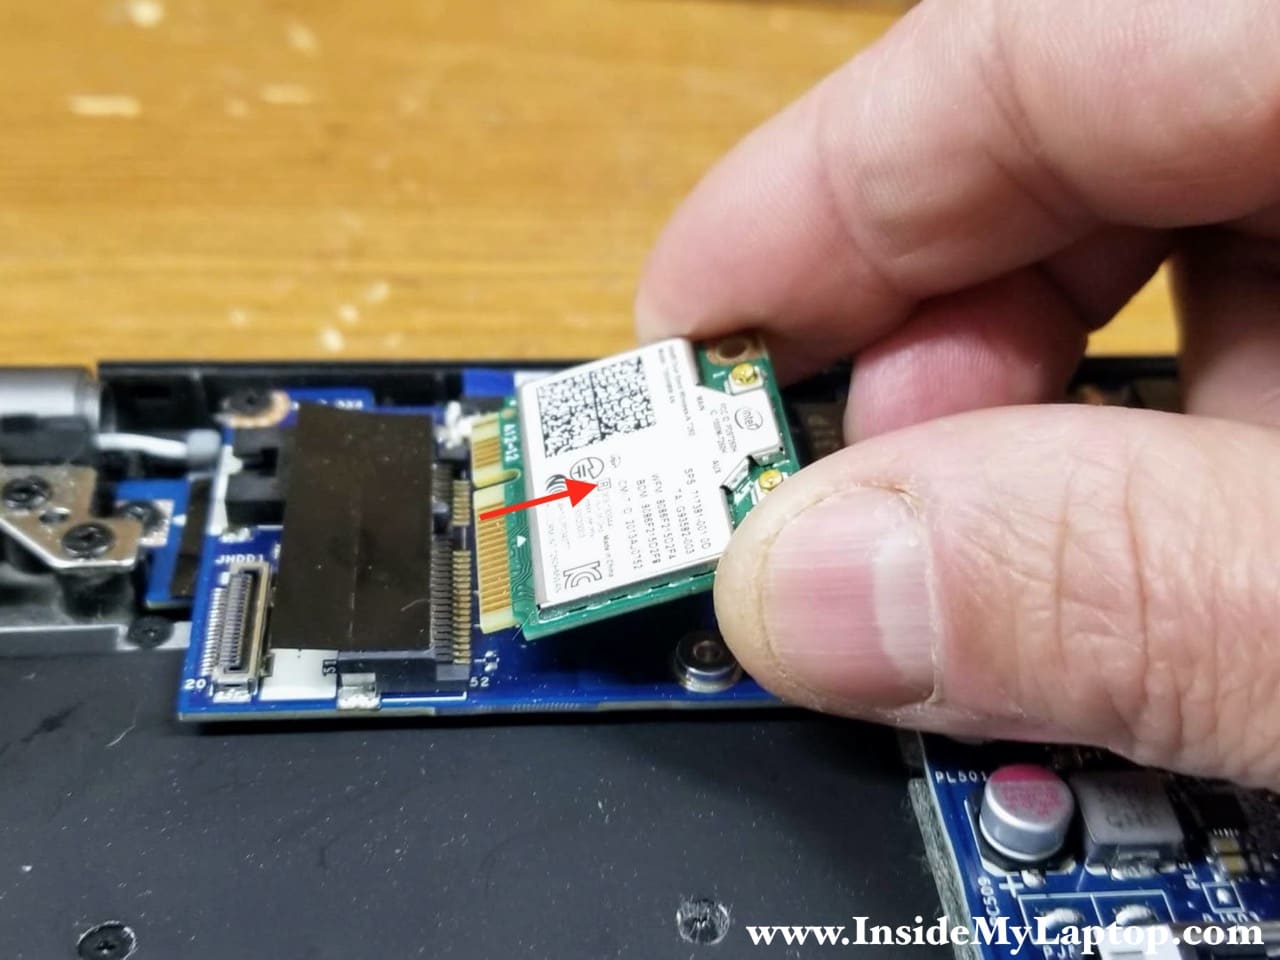
Disconnect two antenna cables from the wireless card.
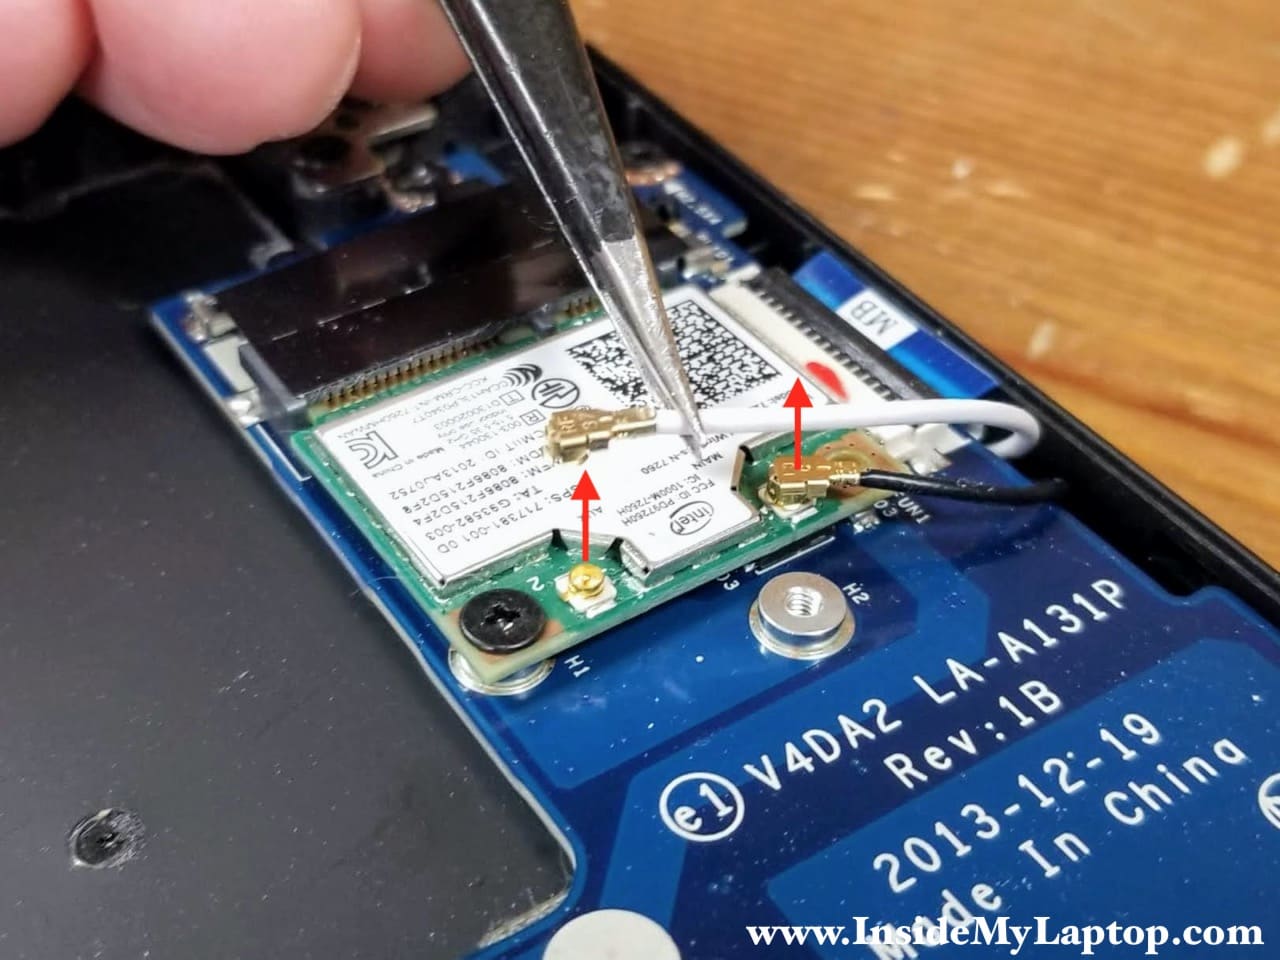
STEP 15.
Remove one screw securing the wireless card and pull the card out.
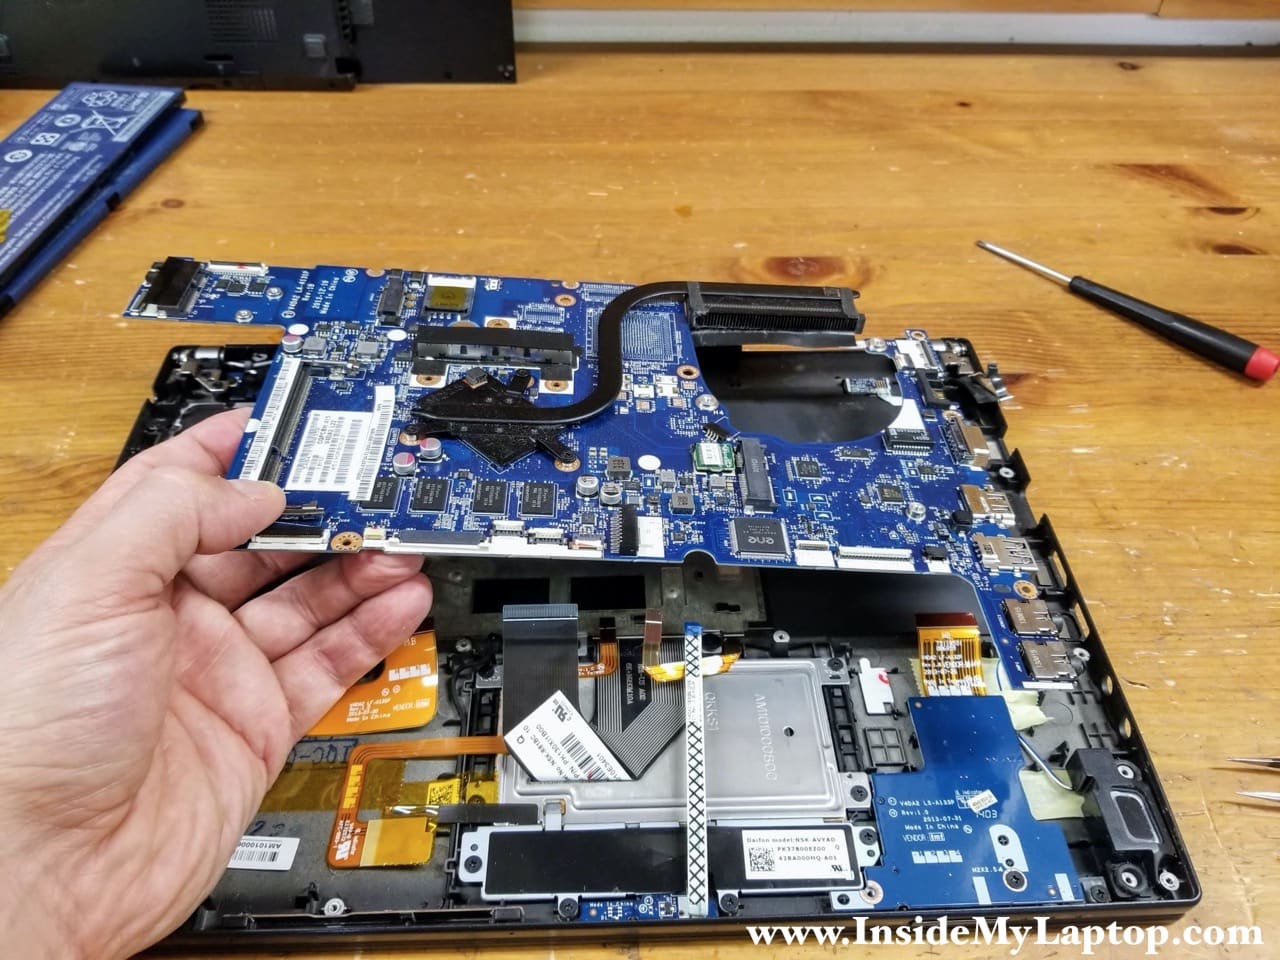
Motherboard and power button board removal
STEP 16.
Remove two screws securing the motherboard to the top case and disconnect all cables.
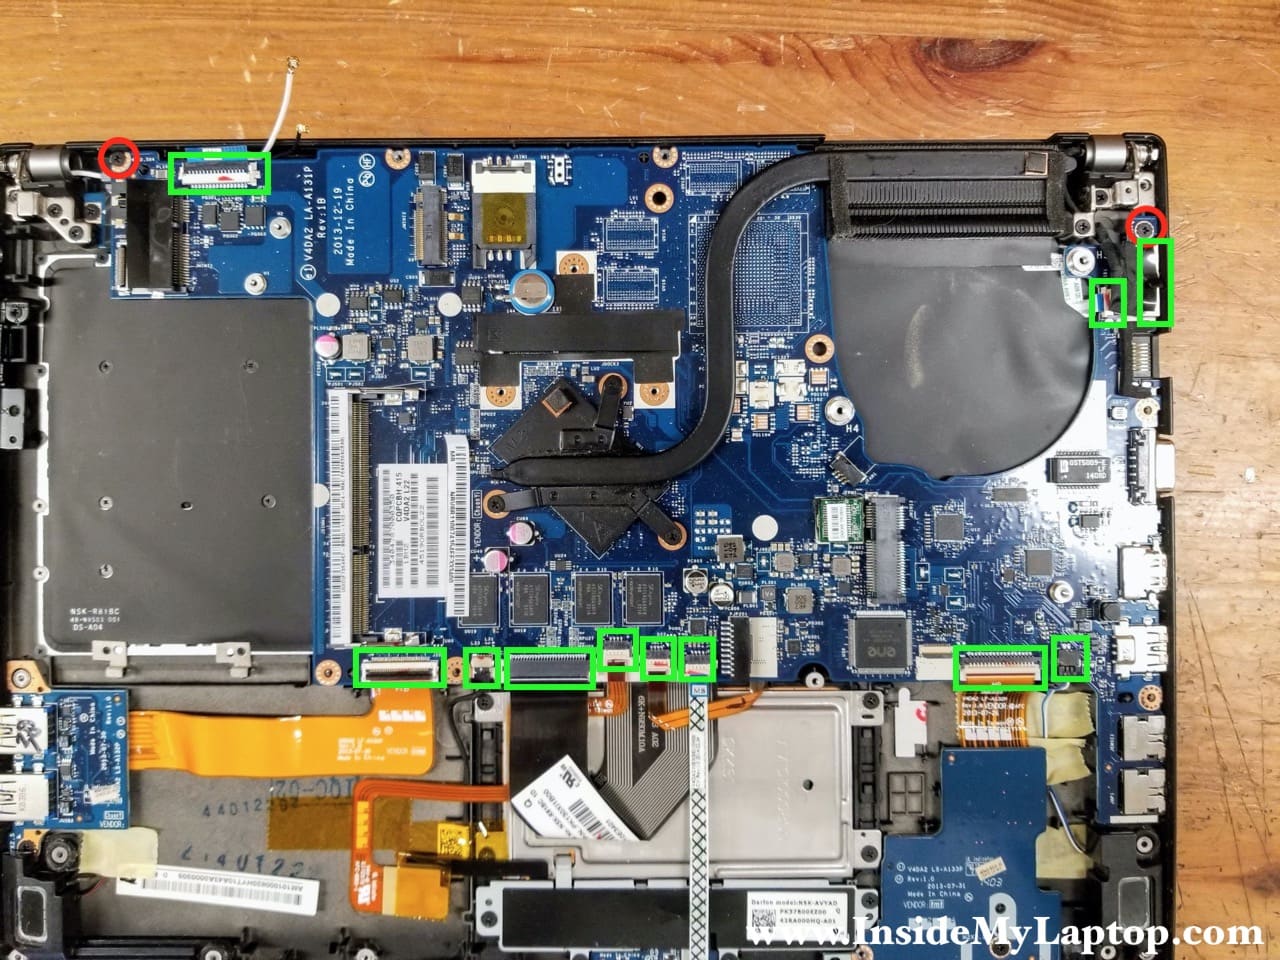
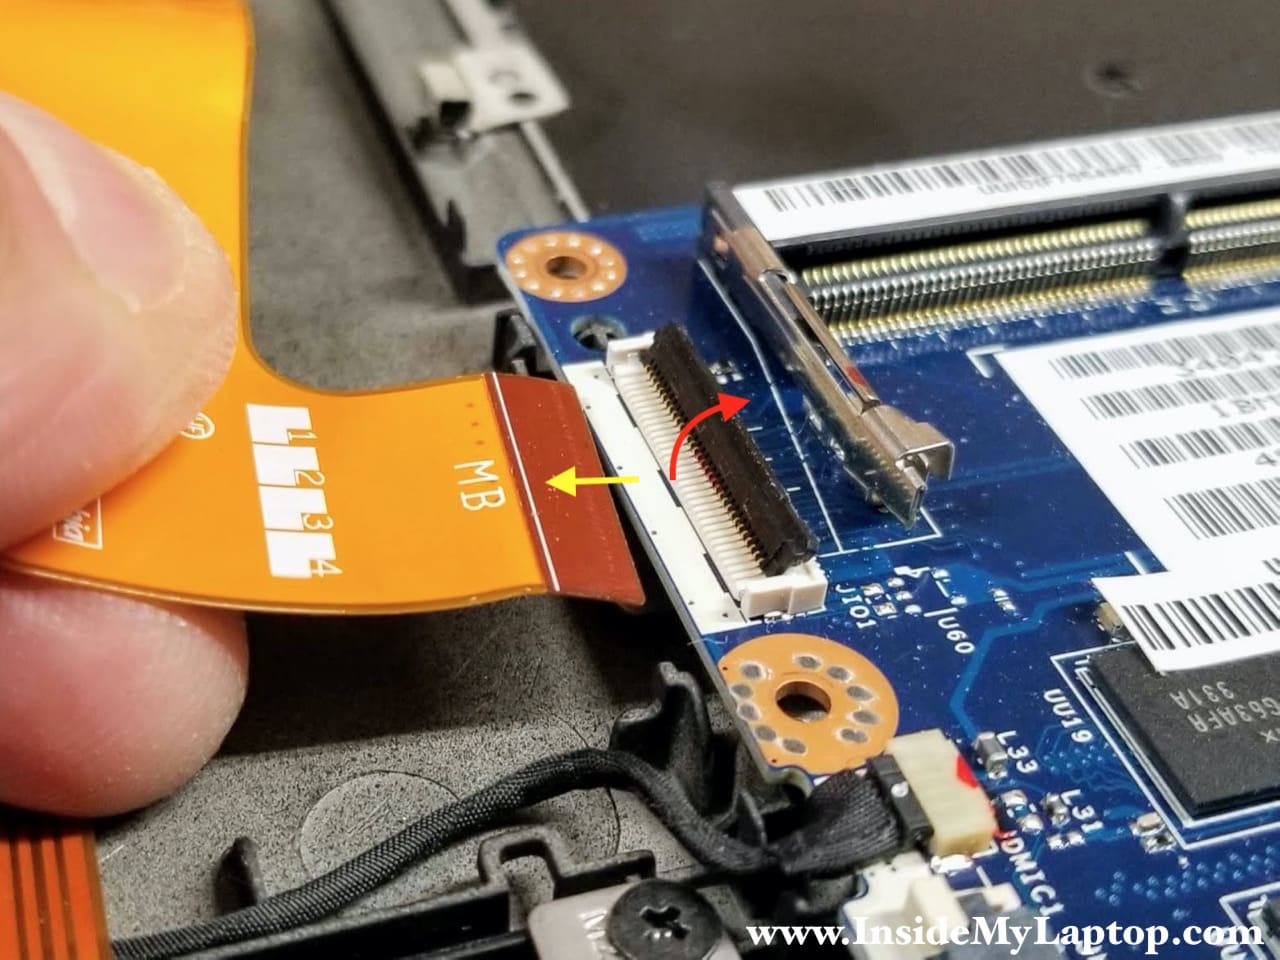
Most flat cables can be released as shown on the following picture.
1. Unlock the connector by lifting up the locking tab (red arrow).
2. Pull the cable out.
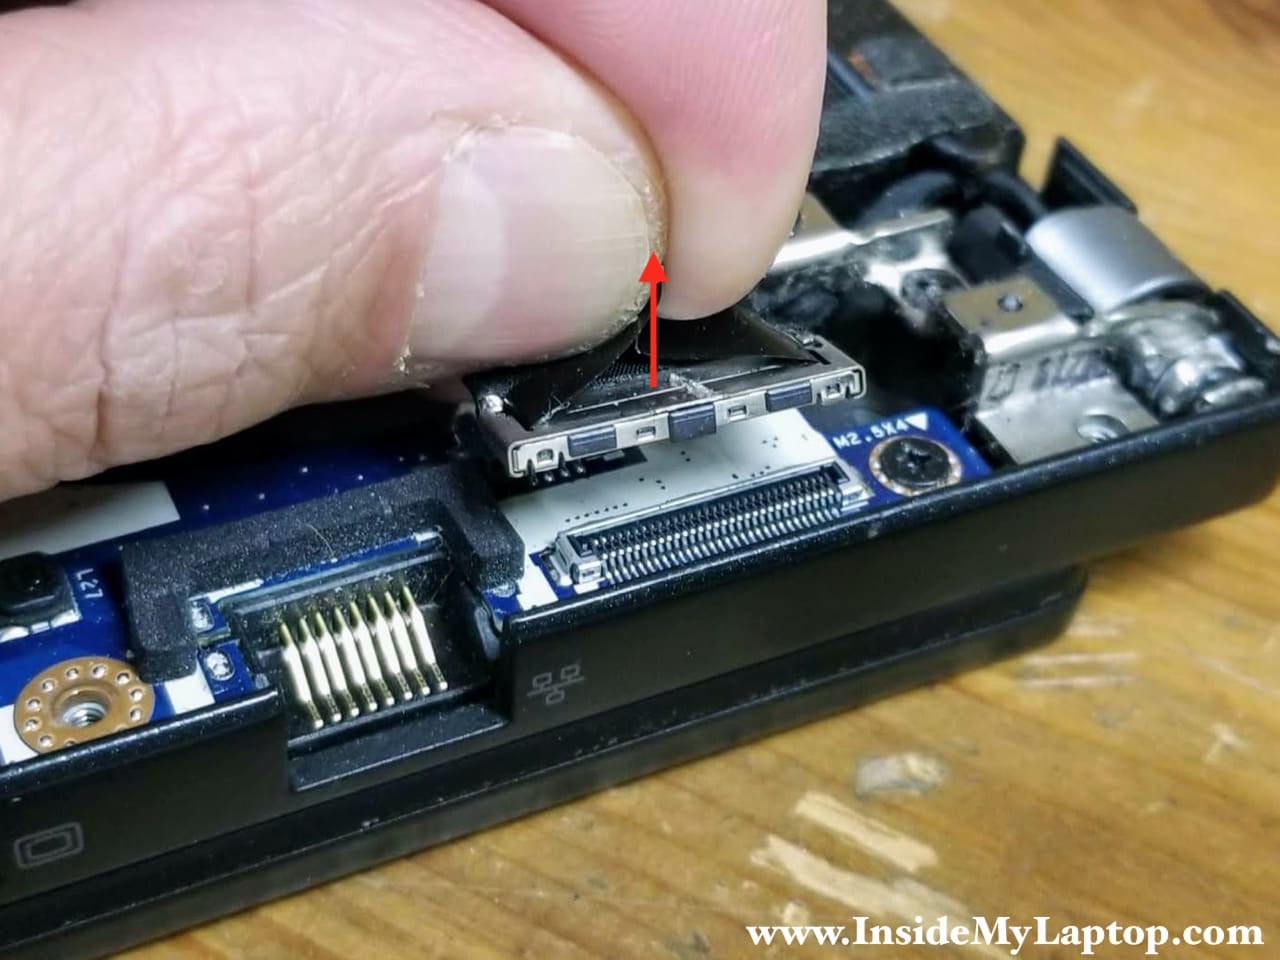
The keyboard cable has a different connector type.
In order to unlock this connector it’s necessary to slide the white locking tab to the direction shown by two red arrows. After that you can pull the cable out.

The display cable connector has a black tab on top. Pull the connector up to unplug it from the motherboard.
STEP 17.
Remove the motherboard from the top case assembly.
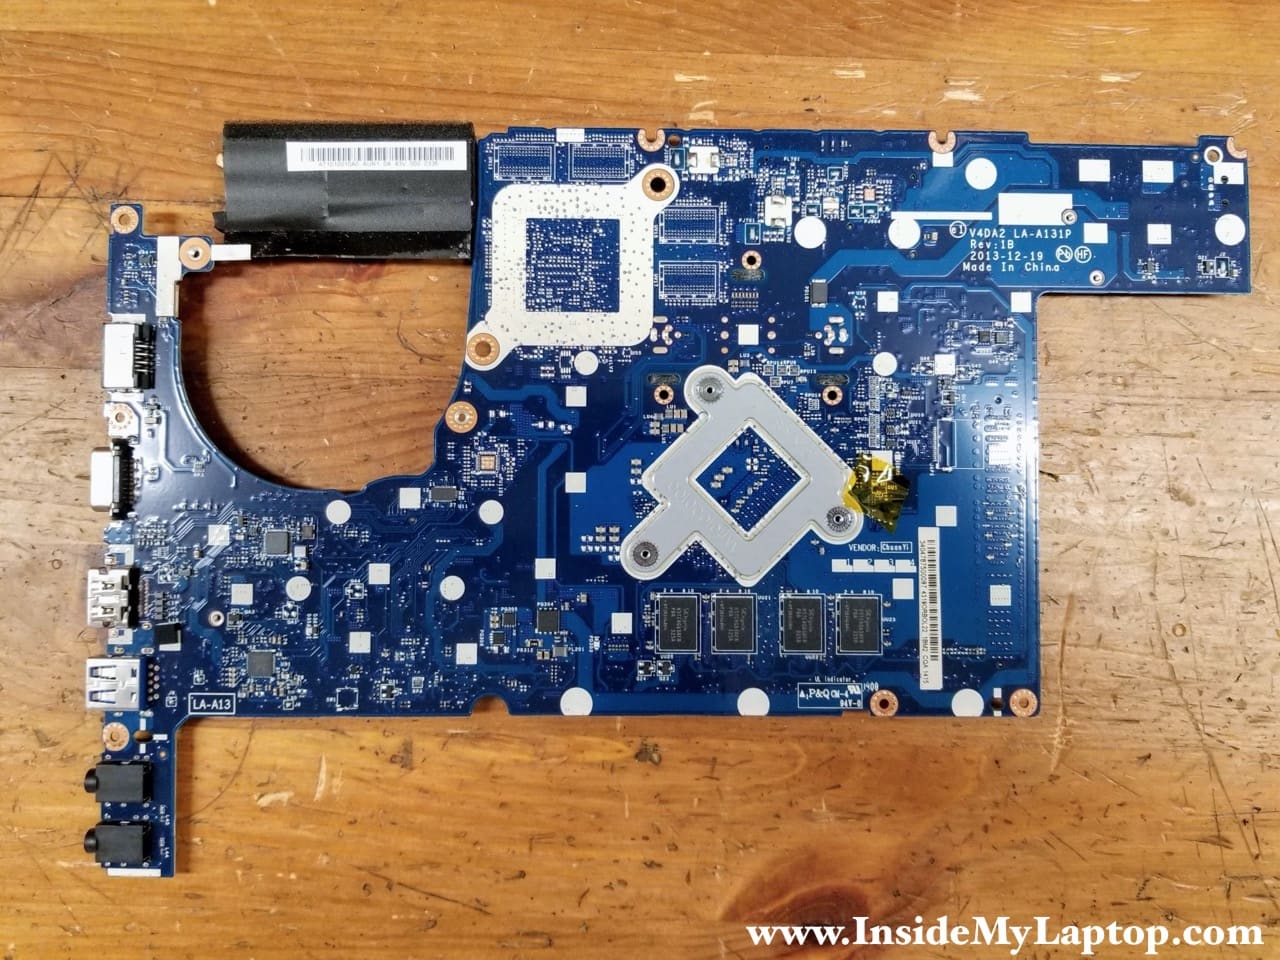
Here’s the other side of the motherboard.
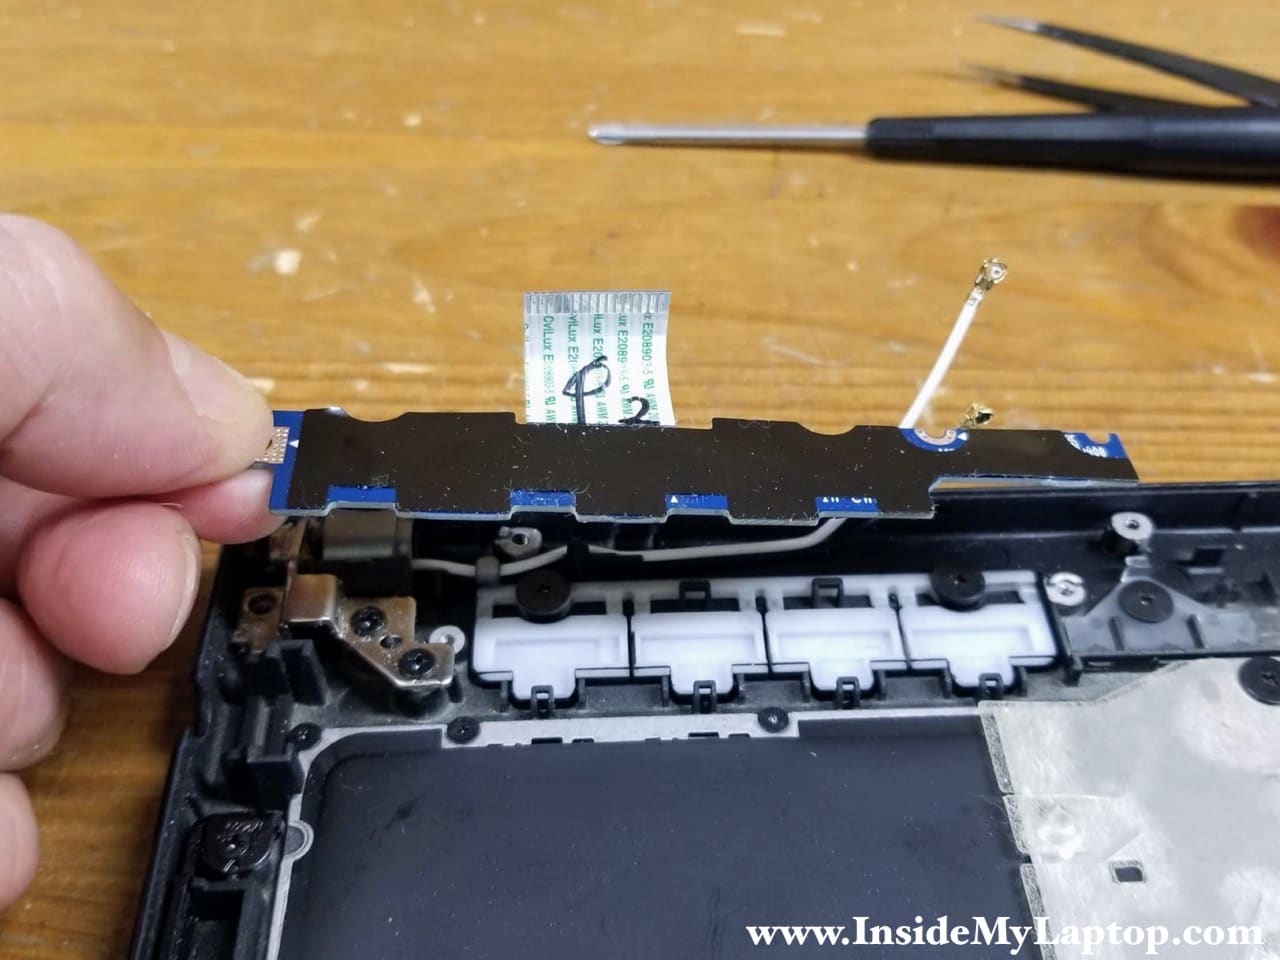
The power button located on a separate board (which is mounted under the motherboard).
STEP 18.
Remove two screws securing the power button board.

STEP 19.
Lift up and remove the power button board.
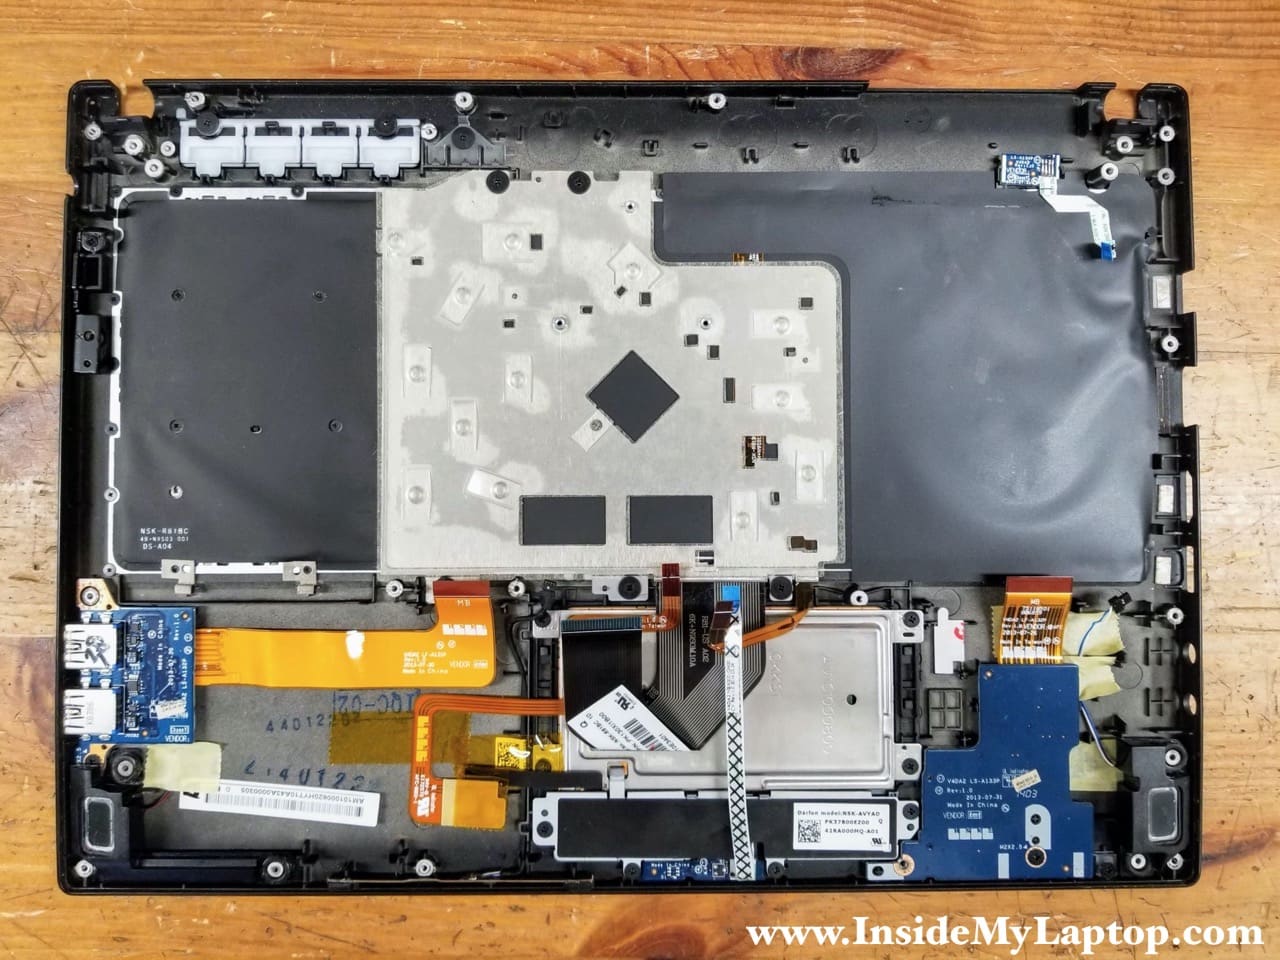
The keyboard in Acer TravelMate P645 series laptop is removable.
Display removal and disassembly
In order to separate the display panel from the top case it’s necessary to open the display 90 degrees and place the laptop upside down on the desk edge.
STEP 20.
Remove four screws securing both display hinges.
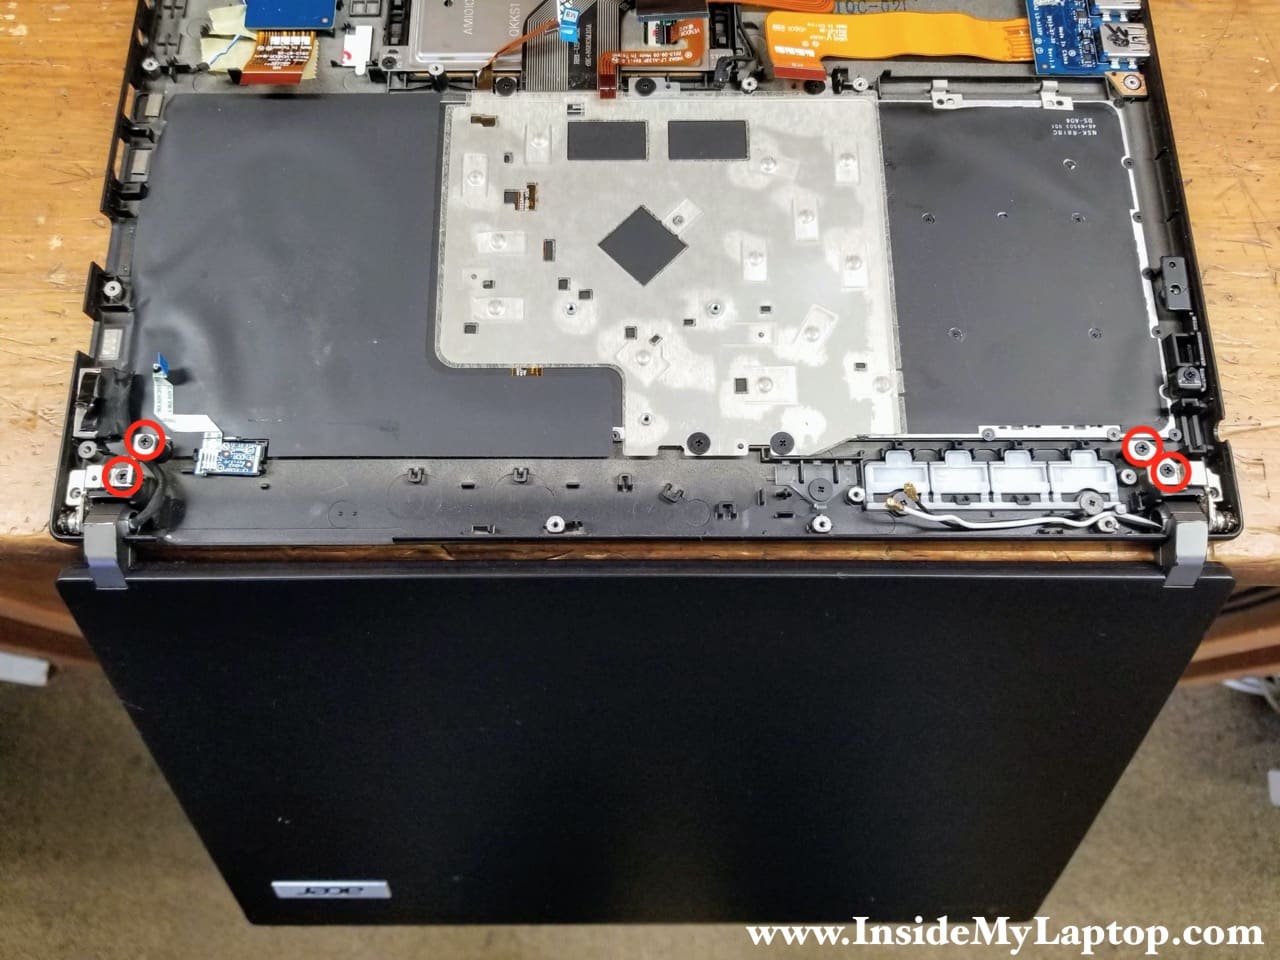
STEP 21.
Separate the display panel from the top case.
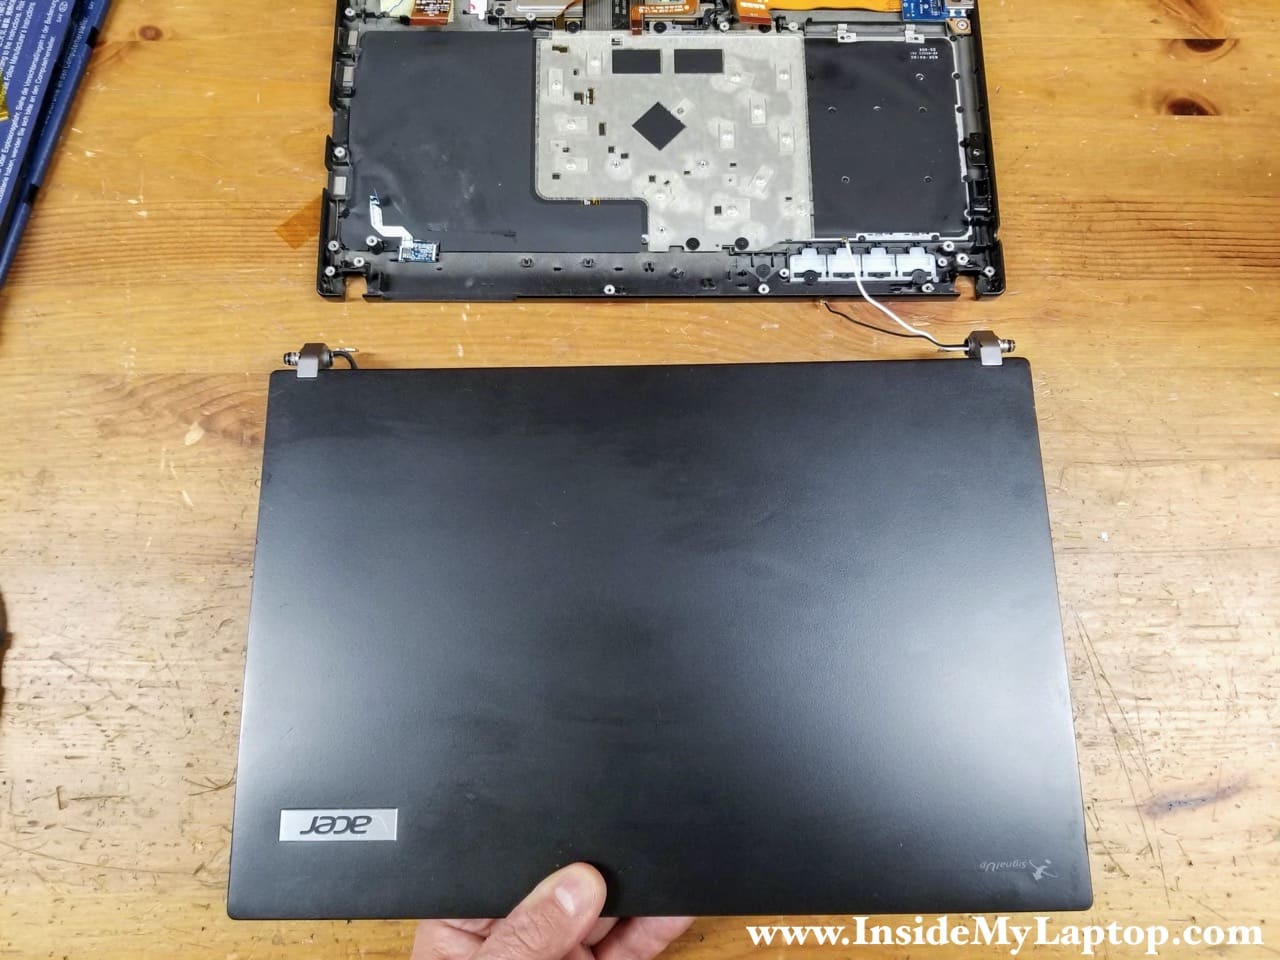
It is not necessary to remove the display panel in order to take it apart. You can take it apart while the display is still attached to the top case.
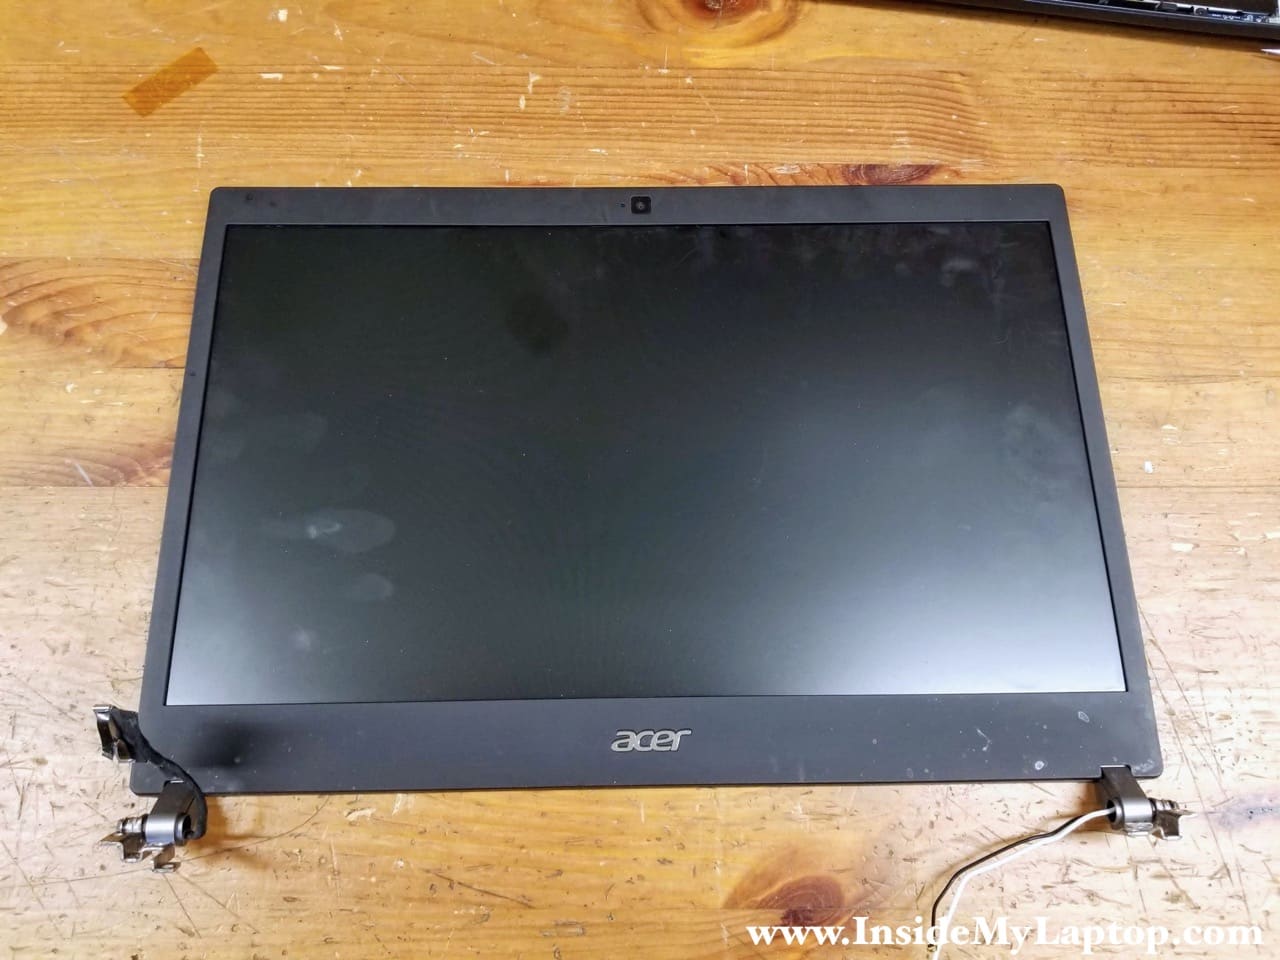
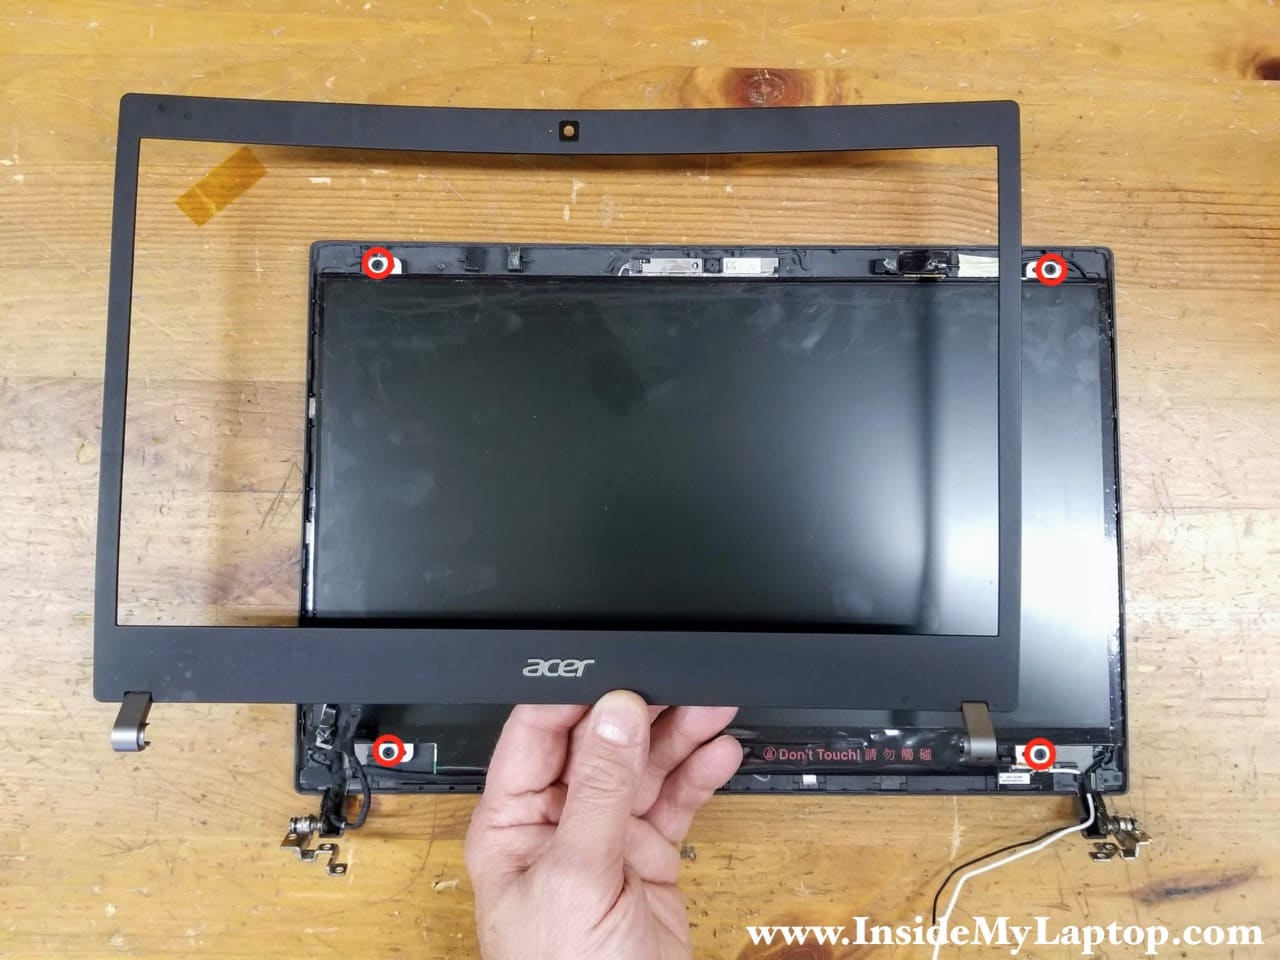
STEP 22.
Carefully separate the screen bezel from the display and remove it. There are many hidden latches attaching the bezel to the case. Wiggle the bezel to release the latches.
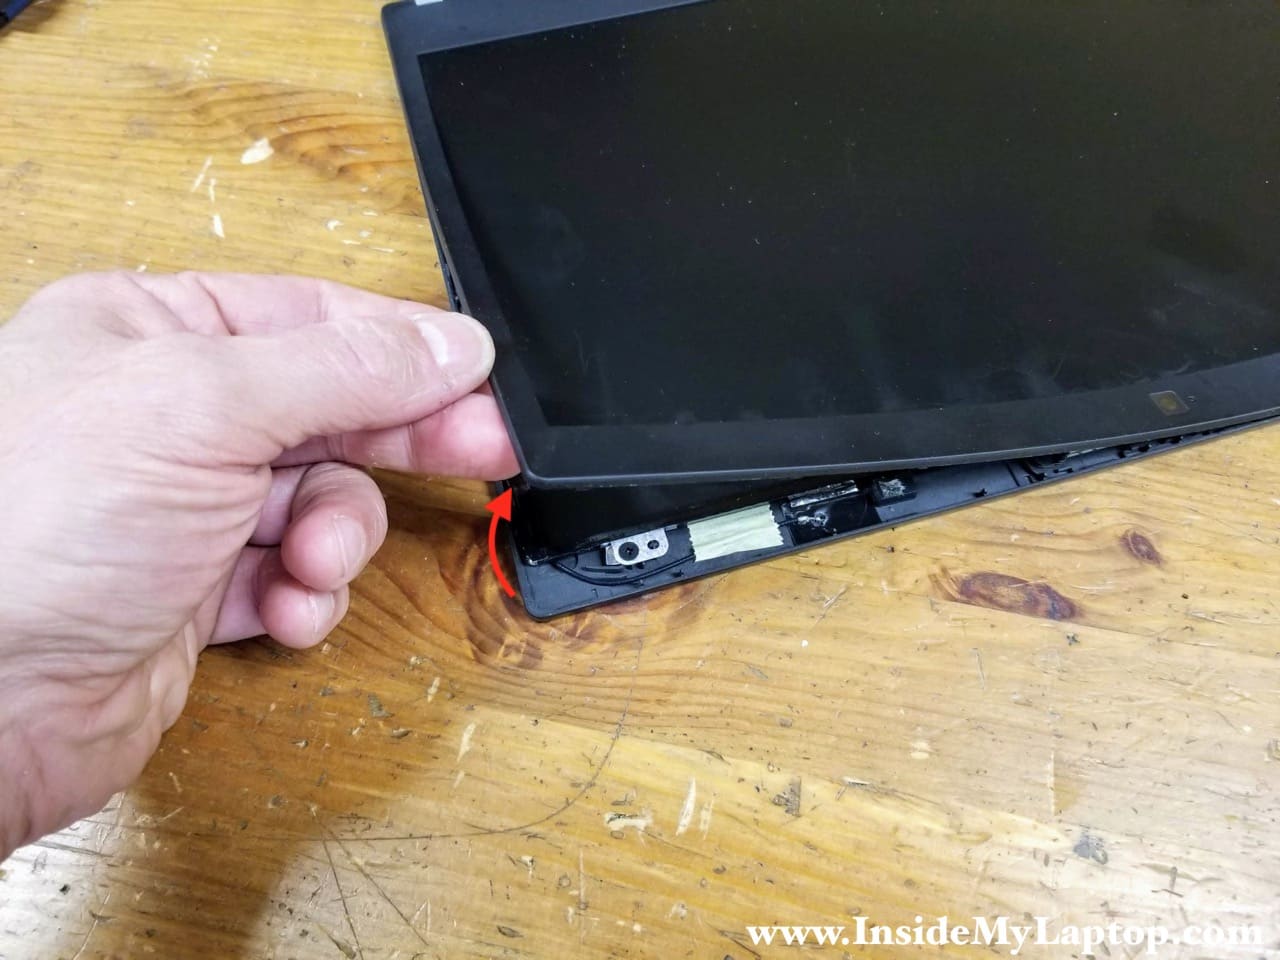
STEP 23.
When the bezel is removed you can access and remove four screws attaching the LCD screen to the back cover. After that you can separate the LCD screen from the cover, disconnect the video cable and remove the screen completely.
Toby
Please i need your assistance no amd driver seems to be working on my acer travelmate p645 on windows 10
Julius Meshack
I need the screen of Acer laptop
IML Tech
Julius, you can find screen model number printed on the back side of the original screen. Search this part number on eBay or Amazon and you will find a replacement screen.
neonwoo
what’s the compatible ssd for this model? I bought m.2 sata but it says it’s too long for it.
IML Tech
neonwoo, the slot it mSATA, not m.2.
Search for mSATA SSD instead. I’ll be adding some more details to the post. Thanks for the suggestion.
Sattva
how do you remove the keyboard? is it easy and straightforward? this part is not mentioned in your otherwise excellent disassembly guide.
IML Tech
Removing the keyboard shouldn’t be complicated after you remove the motherboard. It looks like in this model the keyboard is attached to the top case assembly by screws (it’s not permanently riveted). When you remove all the screws holding the keyboard, you can separate it from the top case.
Sheraz
Dear, I have disassembled very first time my laptop accer p645. Where to find RAM when very first time disassemble laptop p645. I have found empty slots with no ram inserted. I could not find any in my laptop please help me. Is it inserted other side of the mother board or elsewhere?
IML Tech
Sheraz,
This laptop has only one RAM slot. Some memory is build into the logic board and cannot be removed.
Take a look at the second picture in the step 17. 4 rectangular chips on the bottom of the motherboard is RAM.