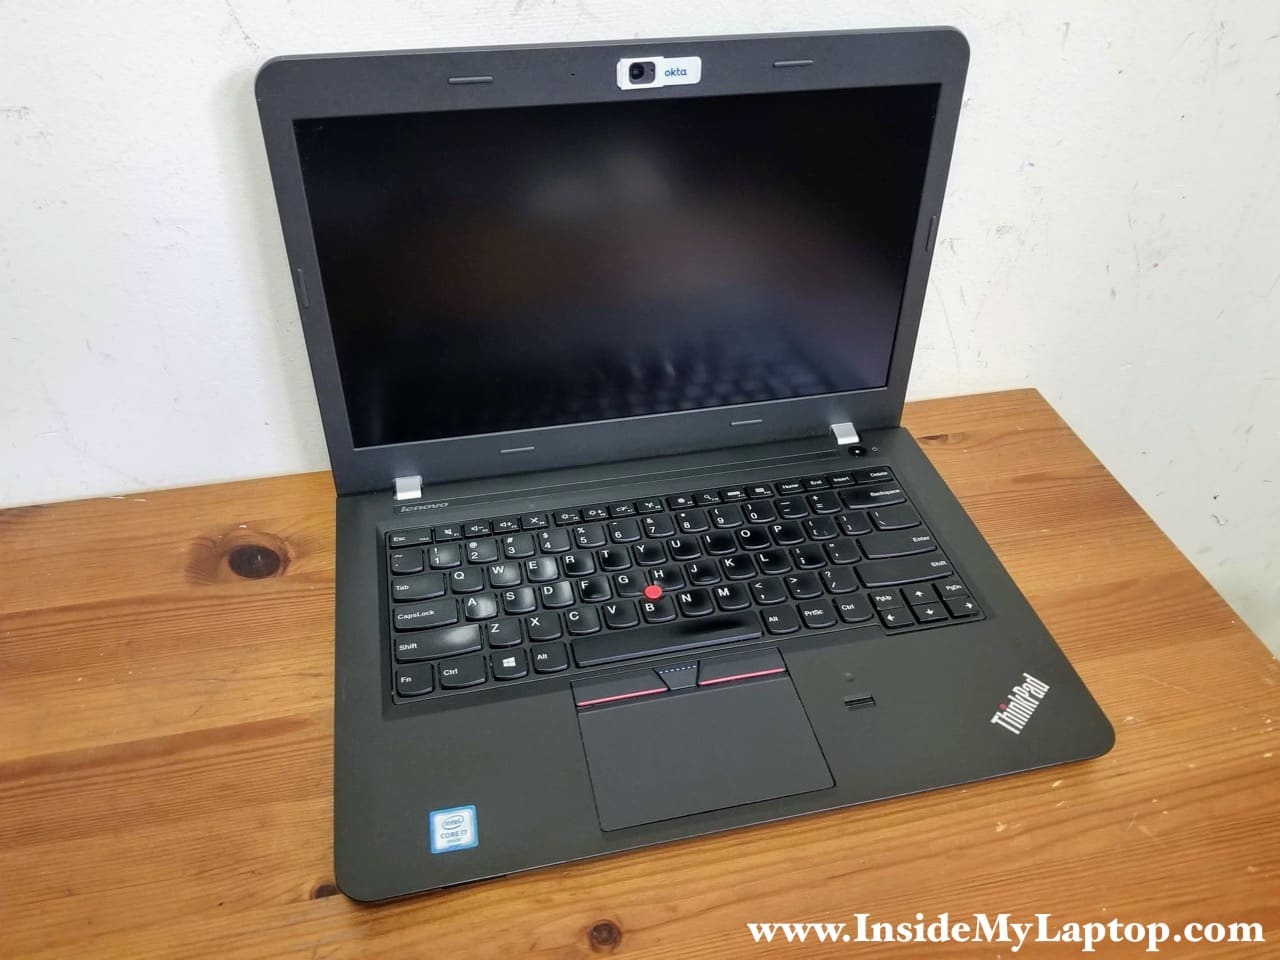
In this guide I show how to take apart a Lenovo ThinkPad E460 E465 laptop (machine types 20ET, 20EU, 20EX).
The pros and cons of Lenovo ThinkPad E460 E465 design:
– The keyboard is easily removable and replaceable.
– Both memory slots and the hard drive easily accessible.
– The battery can be replaced only after the motherboard is removed.
– The LCD screen can be replaced only after the display panel is removed.
For your convenience, at the end of this disassembly guide I link to the official Lenovo ThinkPad E460 E465 service manual.
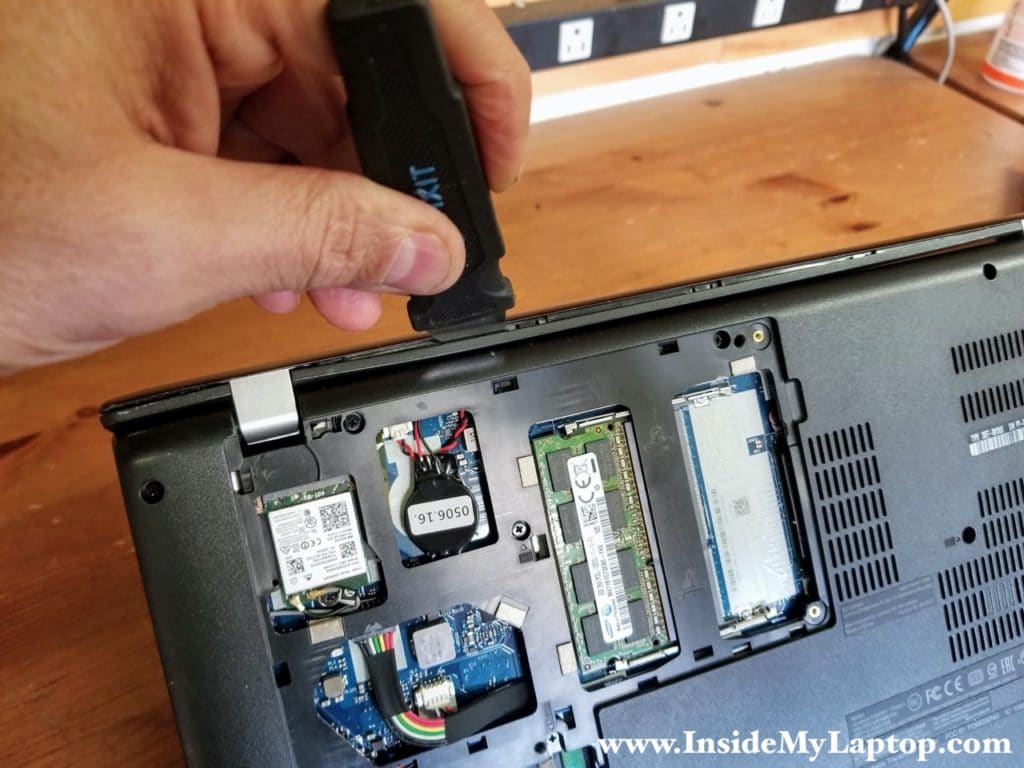
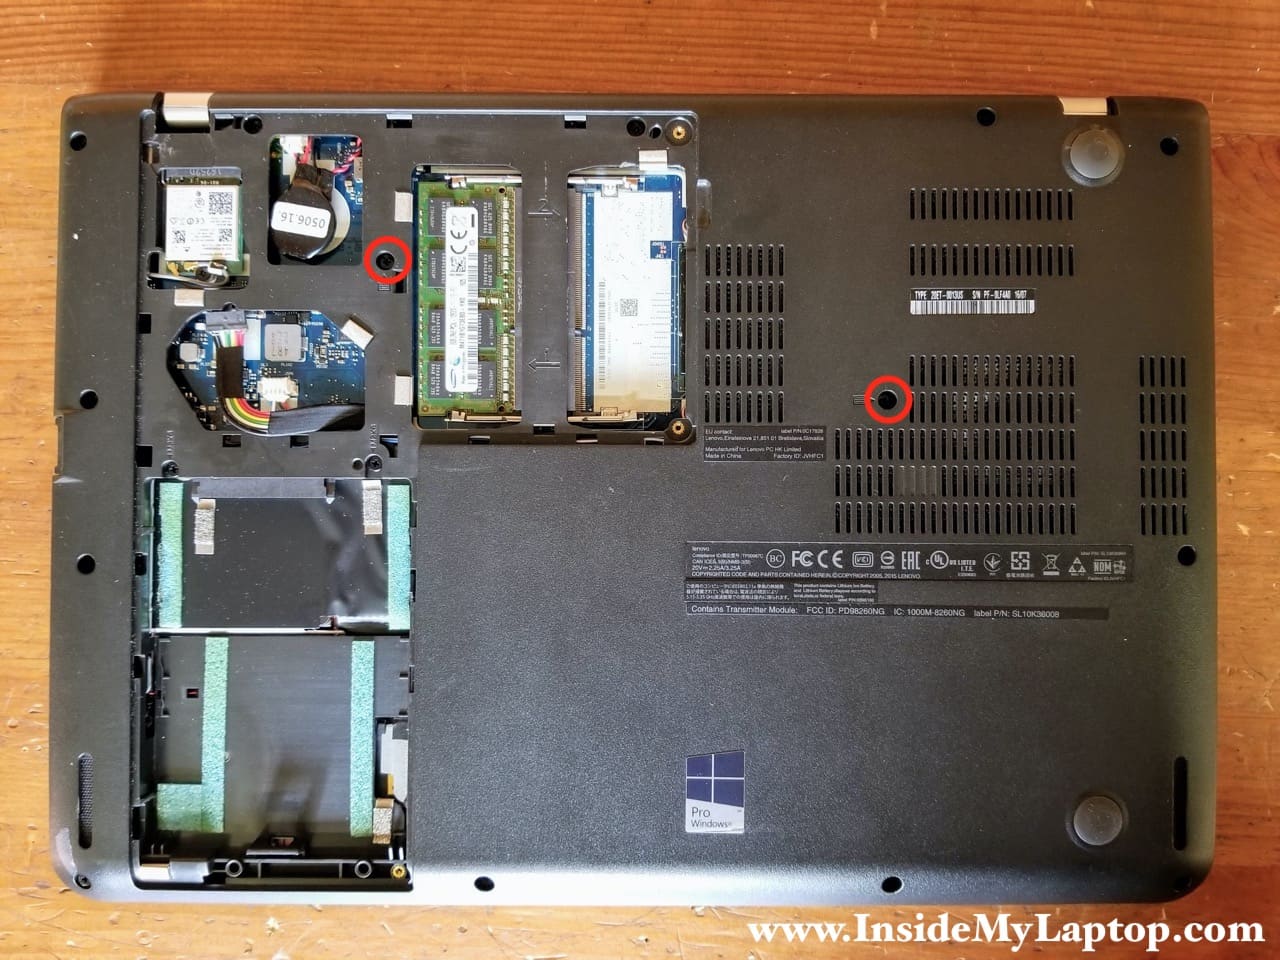
STEP 1.
Loosen three captive screws securing the service cover. Remove the cover.

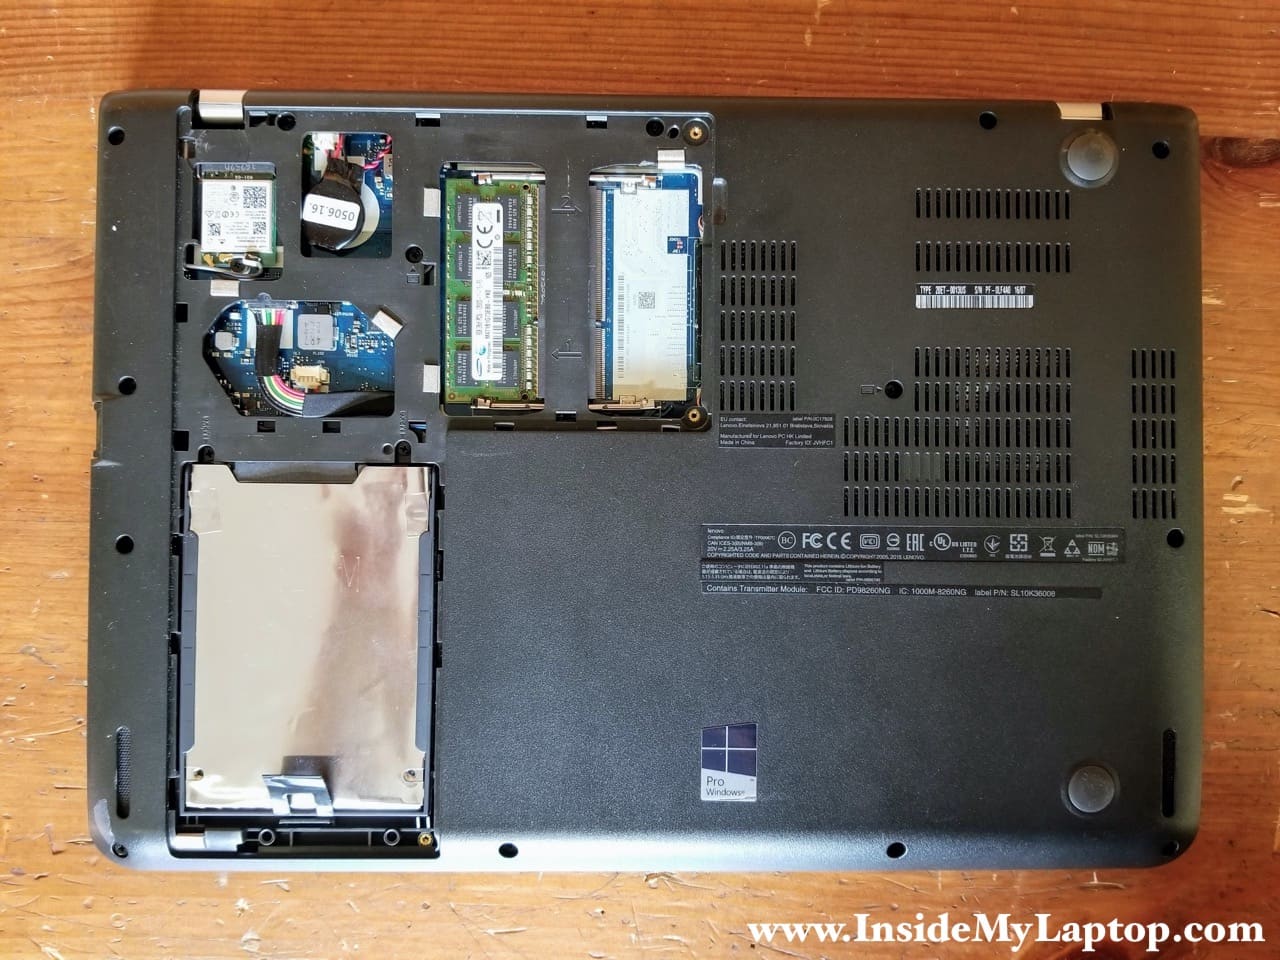
Under the service cover you can access both memory slots, hard drive, wireless card and CMOS battery.
This laptop can take up to 16GB (2x8GB) DDR3-1600 SODIMM RAM.
STEP 2.
Disconnect the battery cable from the motherboard.

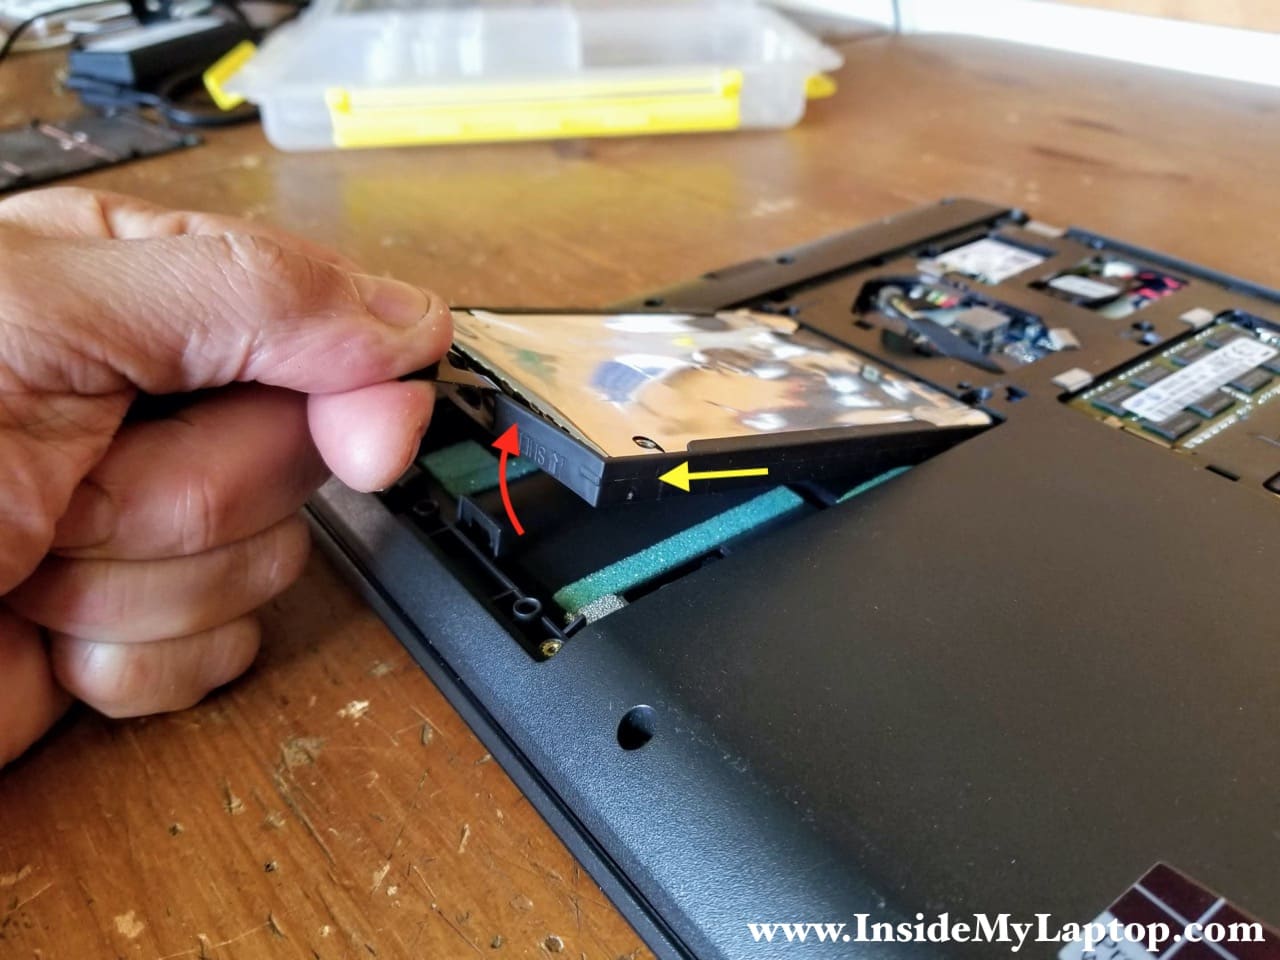
STEP 3.
There is a latch securing one side of the hard drive assembly to the laptop base.
Lift up the hard drive by the black tab (red arrow) and disconnect from the SATA port (yellow arrow).
Upgrading this drive to a 2.5″ solid state drive will speed up the laptop significantly.
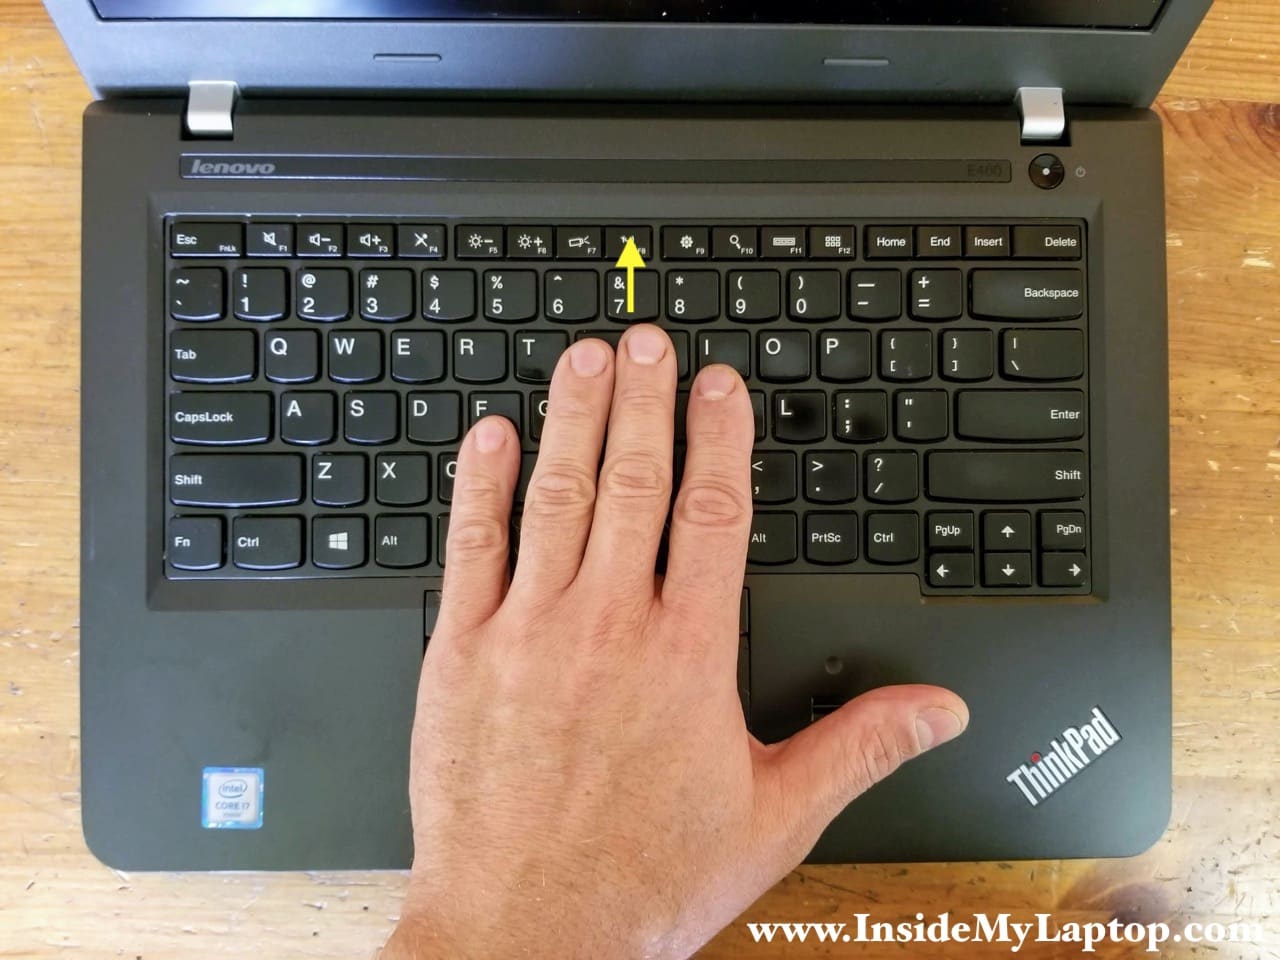
Removing the keyboard
STEP 4.
Remove two screws securing the keyboard on the bottom of the laptop.
STEP 5.
Turn the laptop upside down and slide the keyboard towards the display.
The top side of the keyboard will move under the bezel. You know you did it properly when you see a gap between the lower side of the keyboard and the palmrest.
Seven keyboard tabs will get exposed.

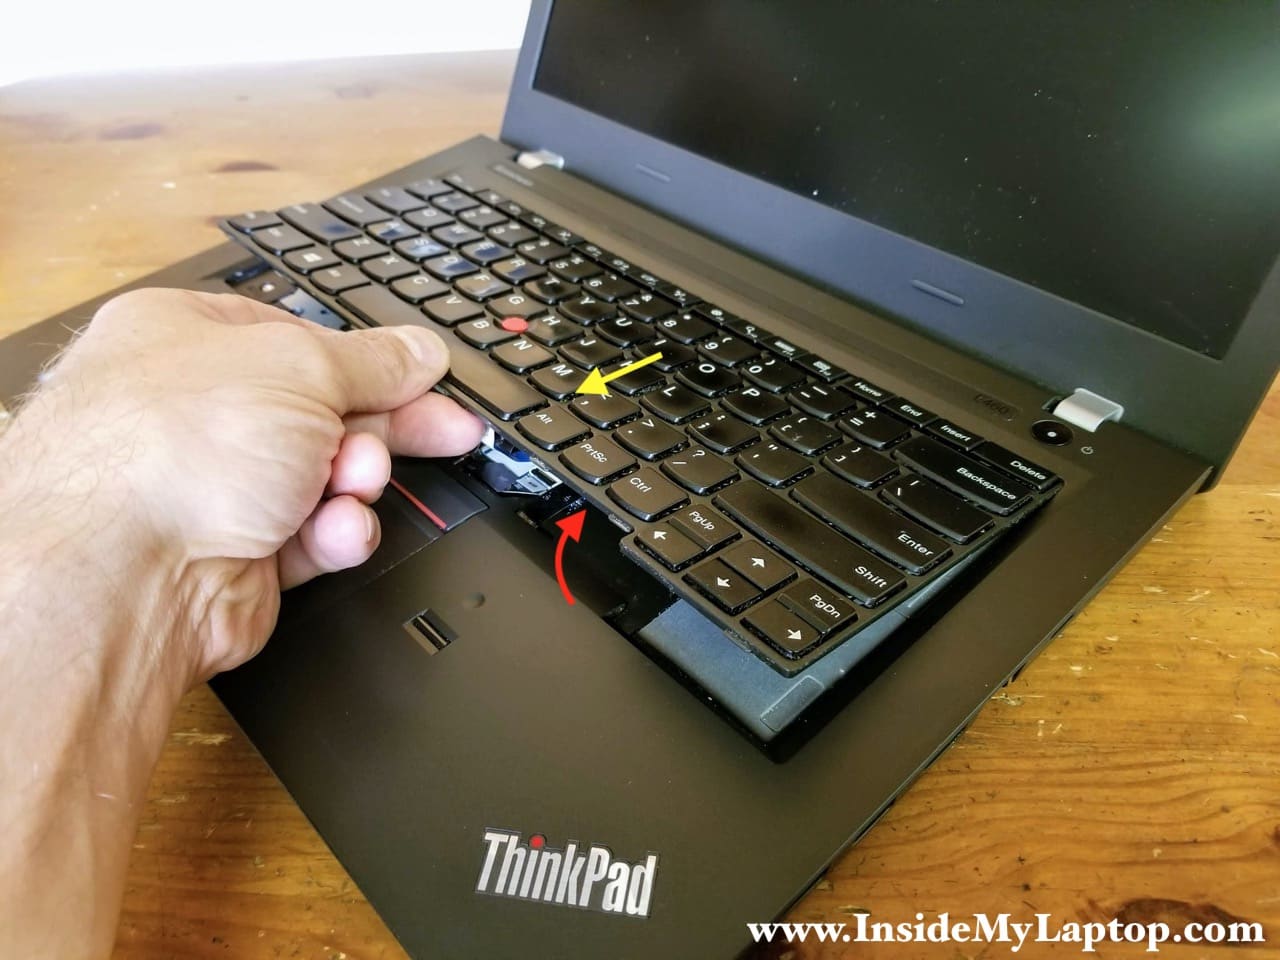
STEP 6.
Lift up the lower side of the keyboard (red arrow). Separate it from the top case and pull towards the touchpad (yellow arrow).
STEP 7.
Turn the keyboard upside down on place it on the palmrest. Now you can access the keyboard cable (red) and the trackpoint cable (yellow).
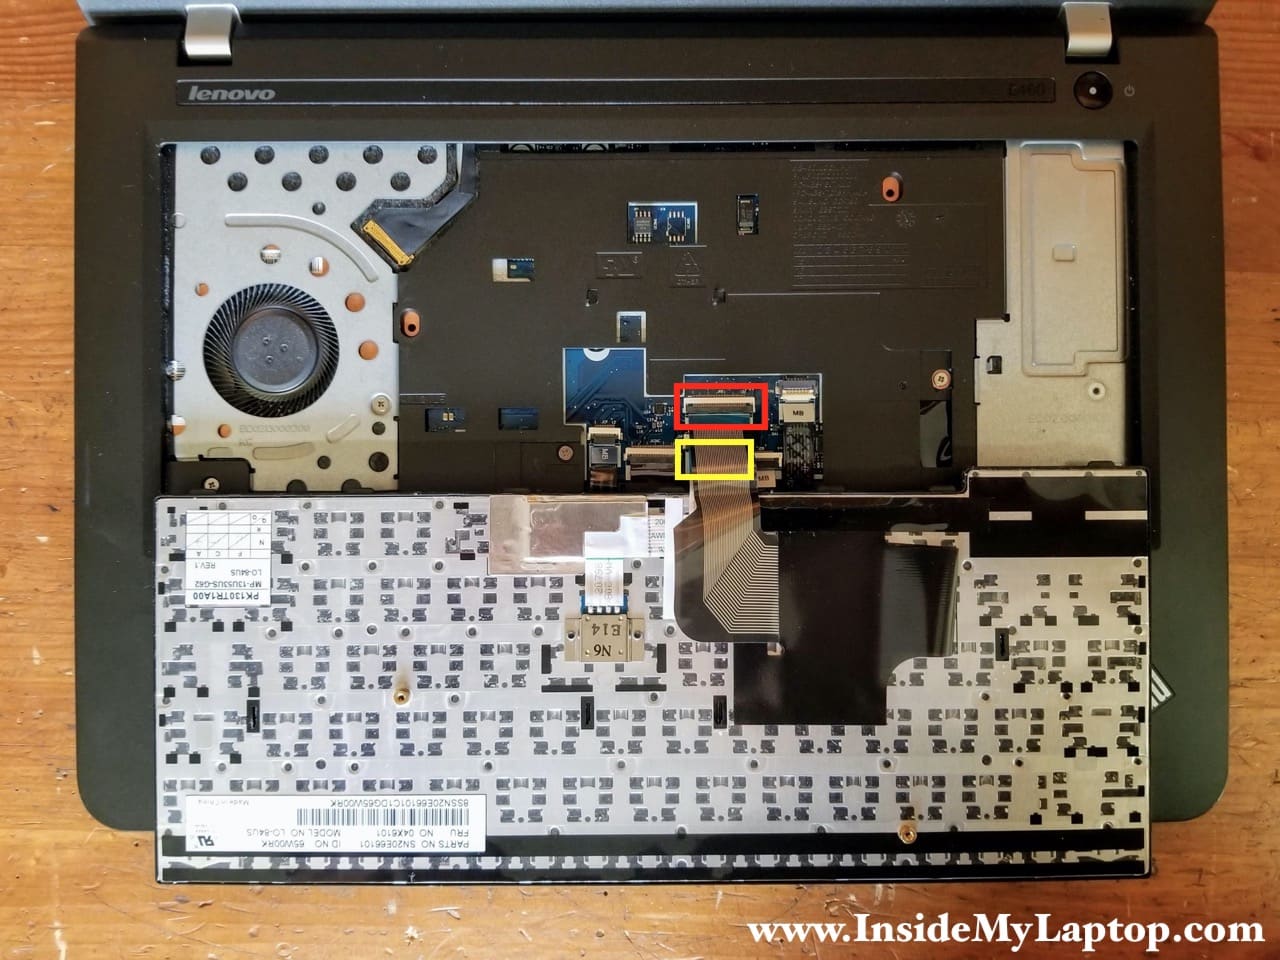
Here’s how to disconnect the keyboard cable.
– Lift up the locking tab to unlock the connector (red arrow).
– Lift up the cable and remove it from the connector (yellow arrow).
The trackpoint connector located right under the keyboard cable. Disconnect the second cable the same way.
Remove the keyboard from the laptop.
Lenovo ThinkPad E460 E465 keyboard FRU (spare part) number: 04X6101

Removing the palmrest assembly
STEP 8.
Remove all screws from the bottom.

STEP 8.
Remove three screws securing the top case.
Disconnect the touchpad cable (green), the media card reader cable (yellow) and the fingerprint scanner cable (green).

STEP 9.
Start separating the palmrest from the base. Using a case opener tool pry up the palmrest to release all hidden latches underneath.
STEP 10.
Lift up the palmrest and move it away from the display. Remove the palmrest.

On the other side of the palmrest you can access the fingerprint scanner and the media card reader.

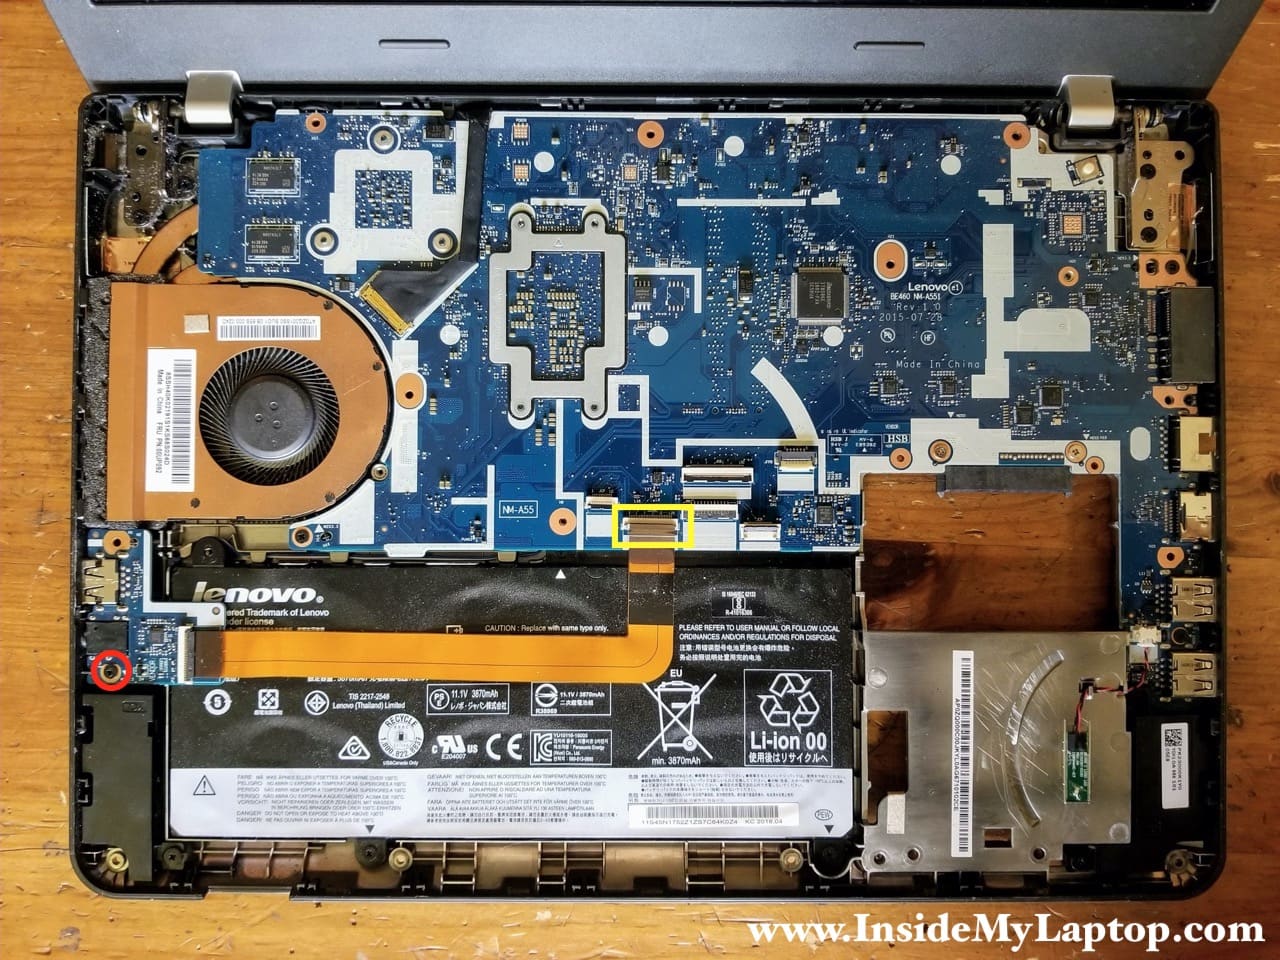
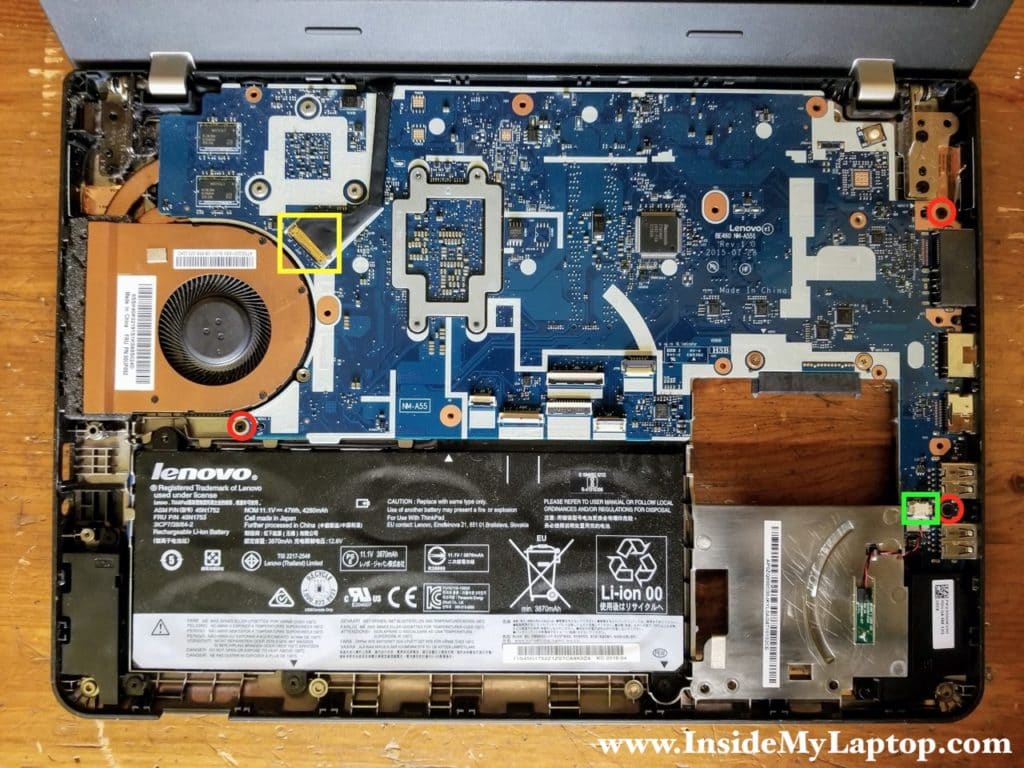
Removing the motherboard and the battery
Lenovo ThinkPad E460 E465 has the battery mounted under the motherboard.
STEP 11.
Remove one screw securing the USB audio board cable. Disconnect the I/O cable from the motherboard.
STEP 12.
Lift up and remove the USB audio board. The I/O cable glued to the battery with adhesive tape. Carefully separate the cable from the battery.

STEP 13.
Remove three screws securing the motherboard.
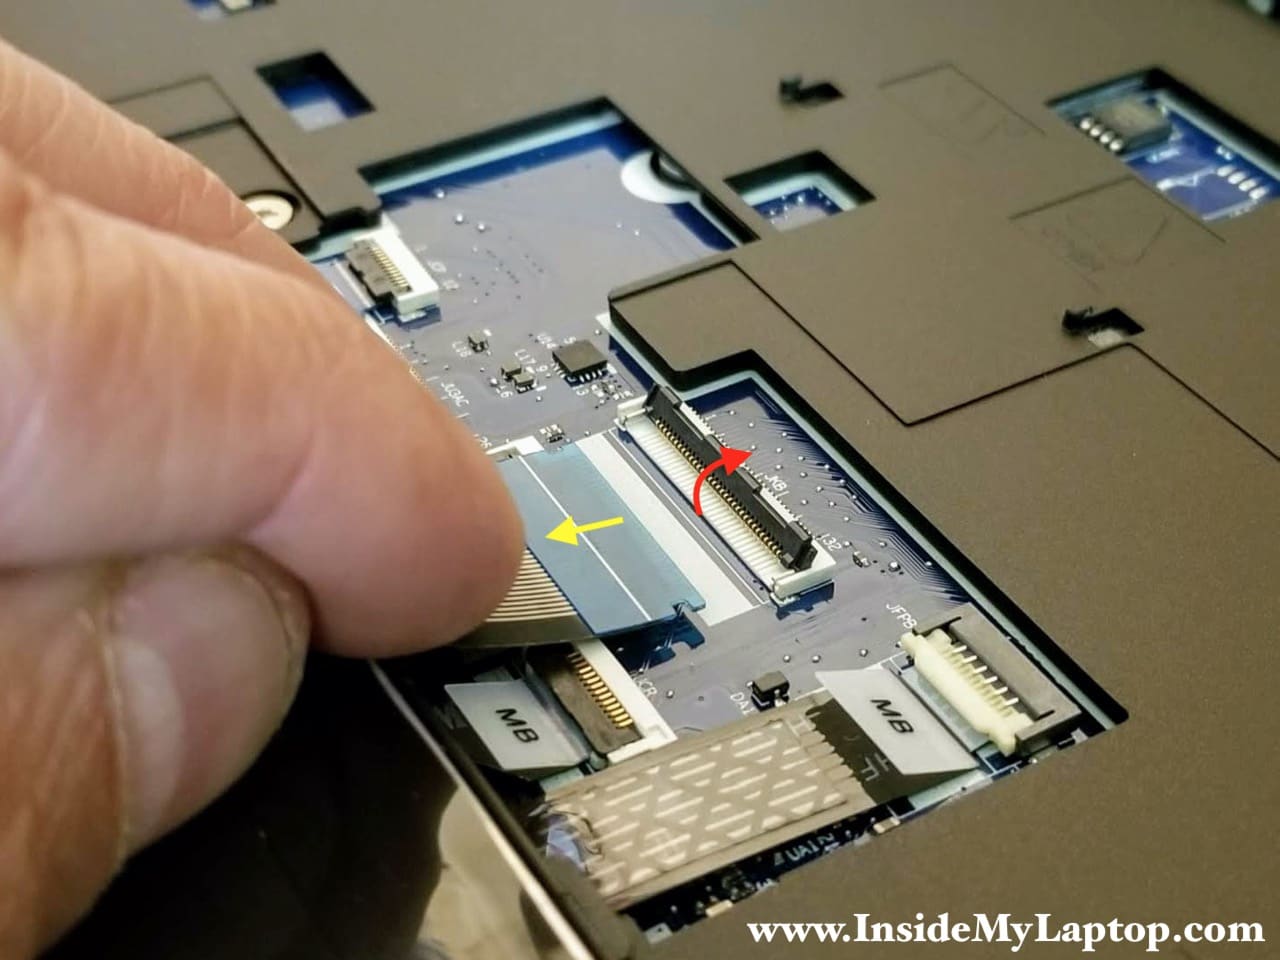
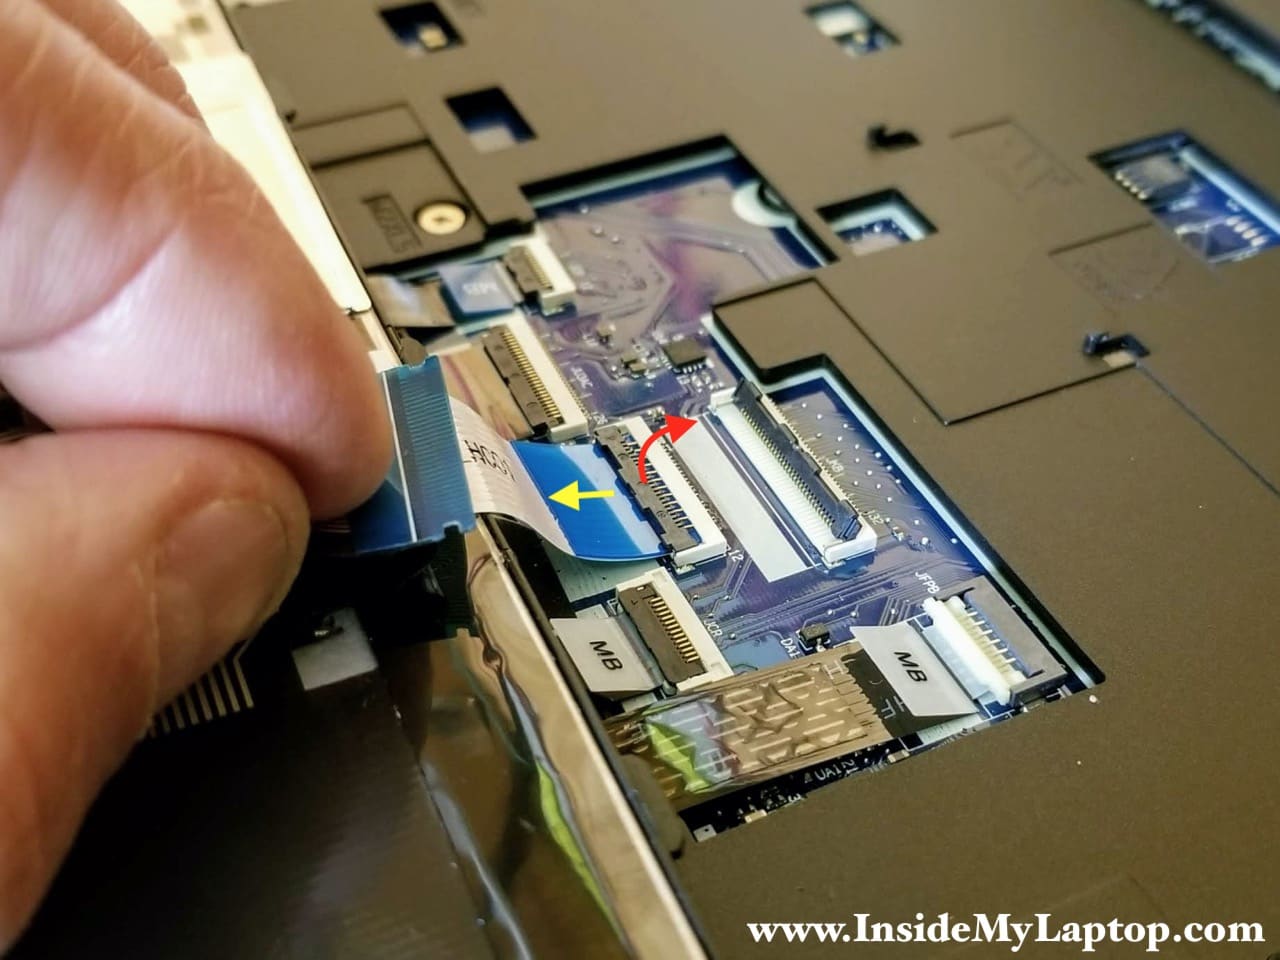
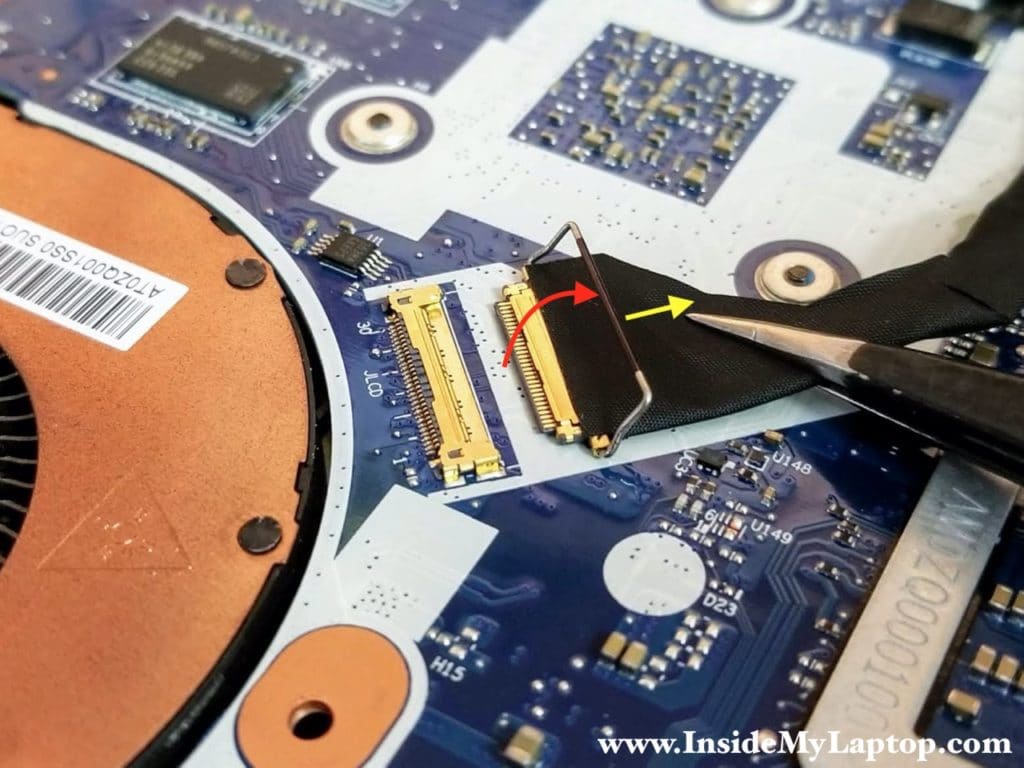
Disconnect the display cable (yellow) and the ThinkPad logo light cable (green).
Here’s how to disconnect the display cable.
Lift up the metal bracket securing the connection and pull the cable out.
STEP 14.
Disconnect the speaker cable.
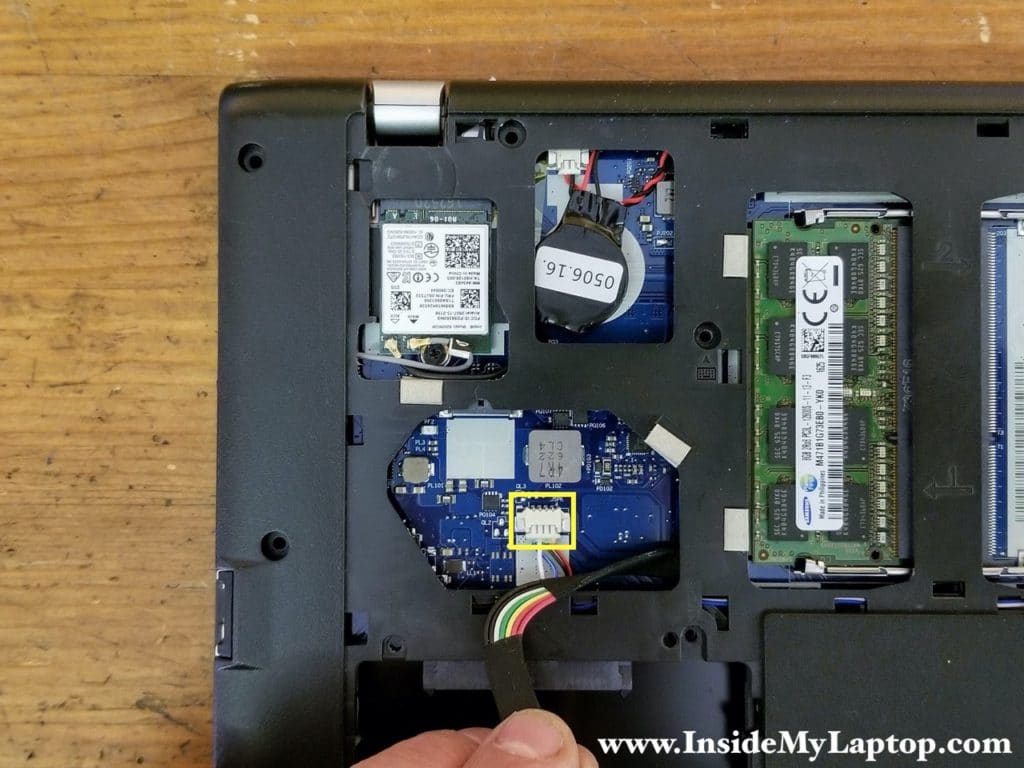
STEP 15.
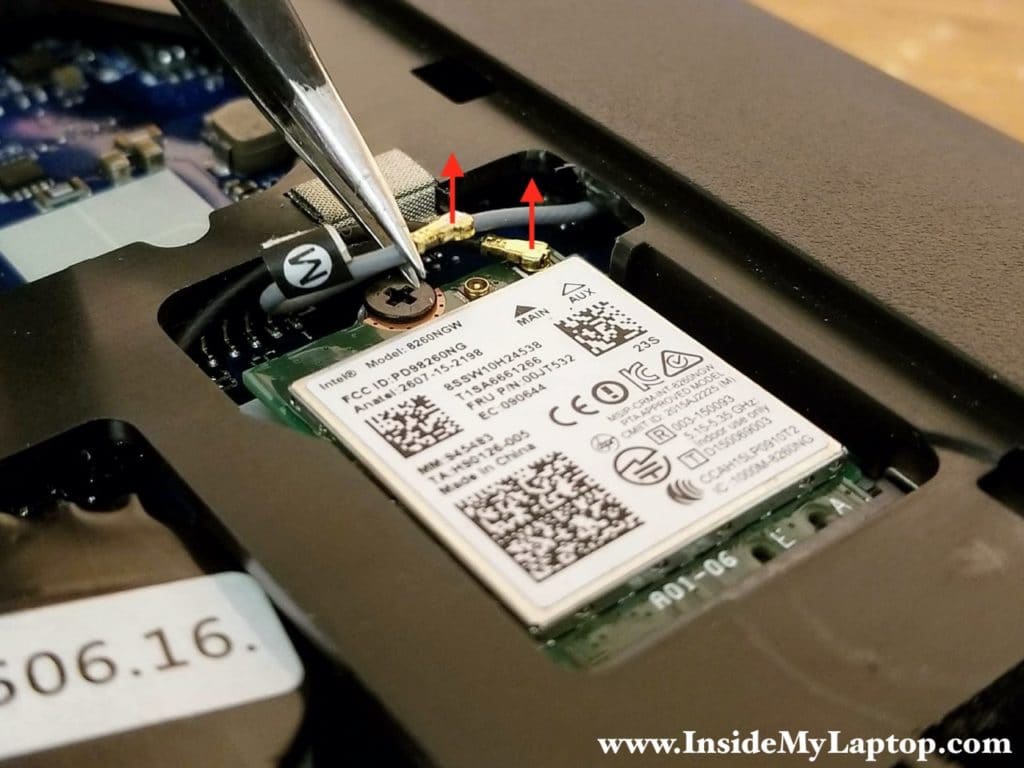
Disconnect both antenna cables from the wireless card.
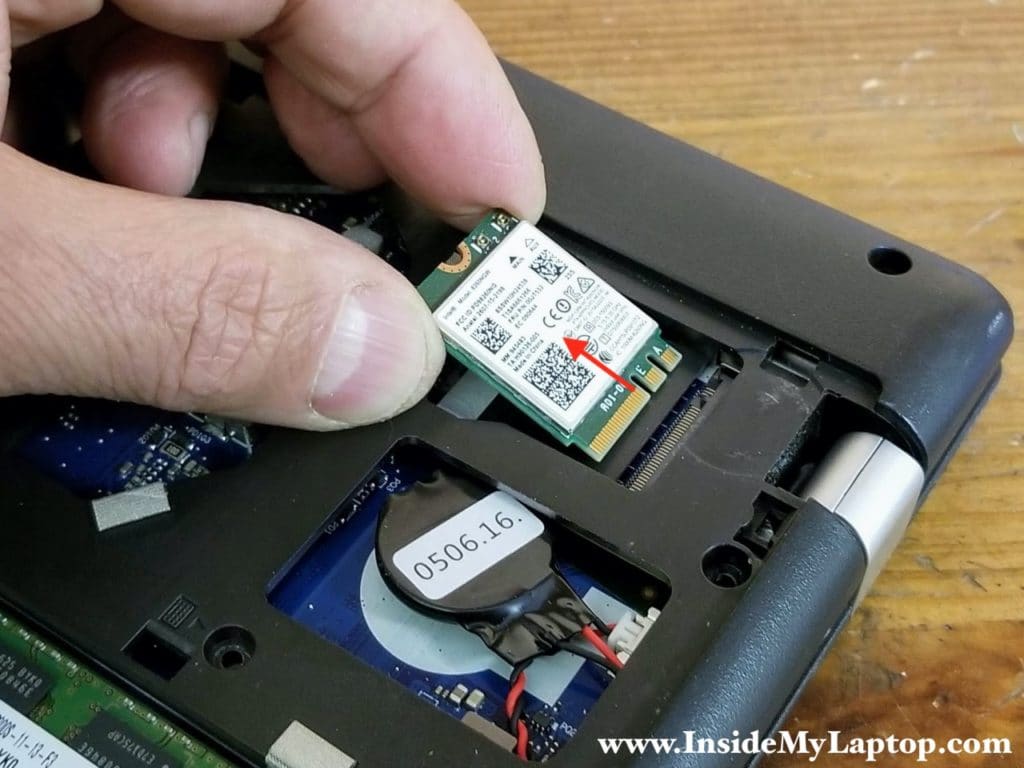
STEP 16.
Remove one screw securing the wireless card and pull it out.
STEP 17.
Lift up the left side of the motherboard and remove it from the base.
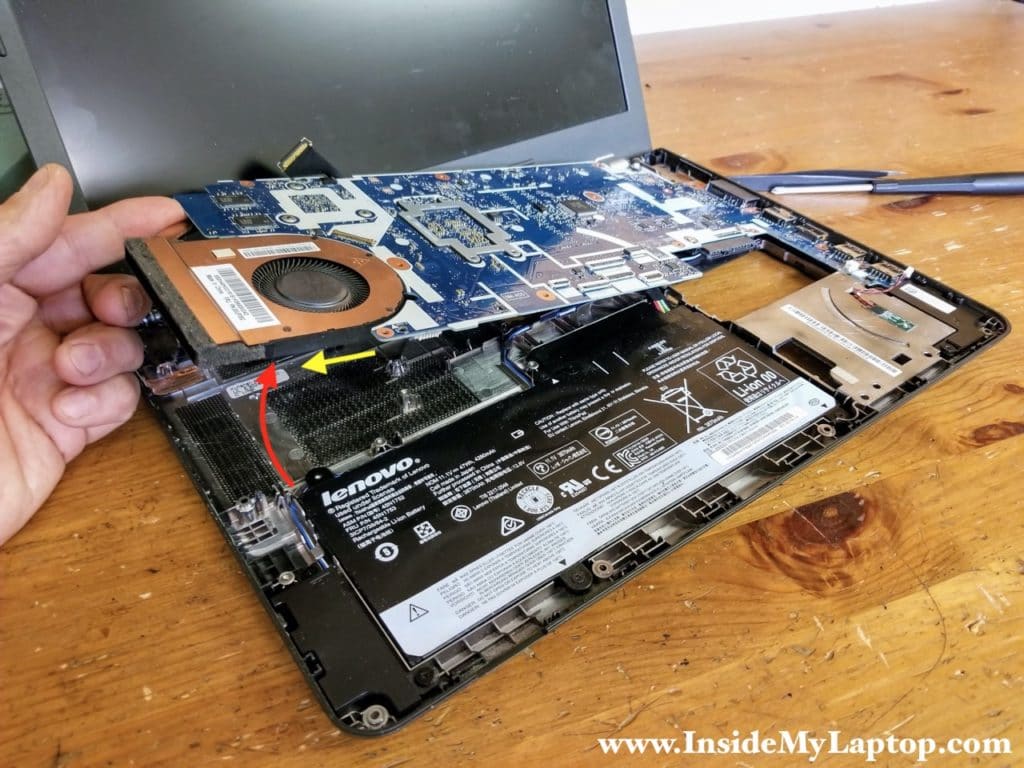
Here’s the other side of the motherboard. I left the CMOS battery connected to the motherboard to save the BIOS settings.
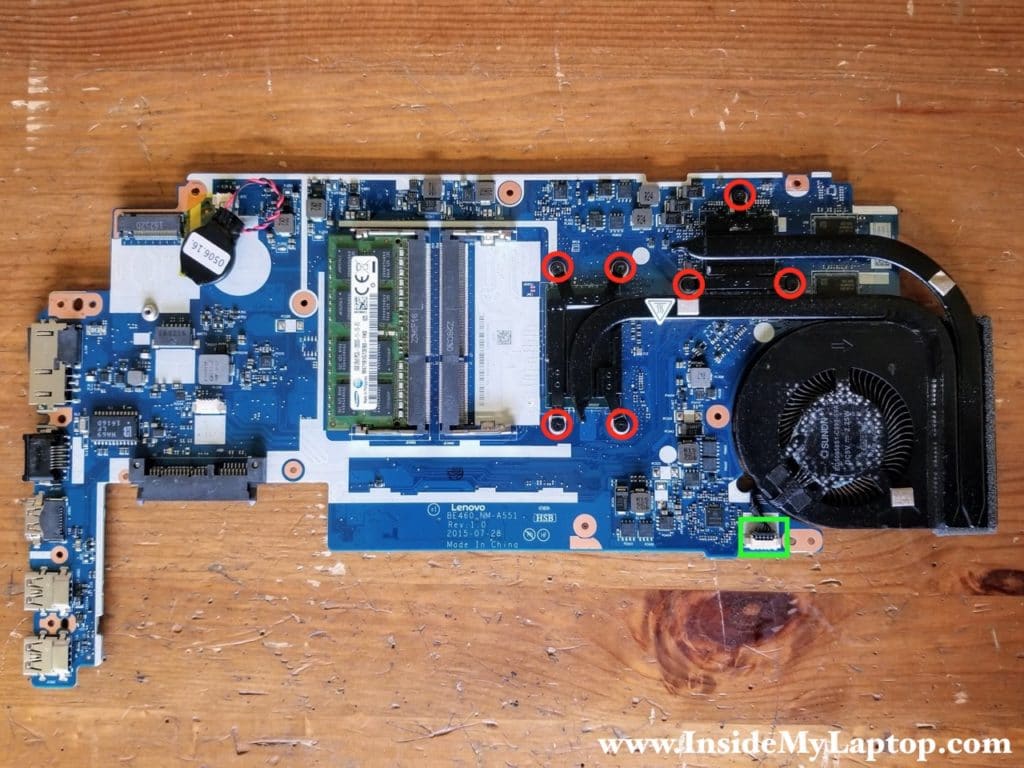
The cooling fan is a part of the heatsink assembly. Lenovo ThinkPad E460 E465 heatsink assembly FRU number: 00UP092
If you buy a brand new genuine Lenovo heatsink, it should arrive with the thermal paste pre-applied.
STEP 18.
Loosen seven captive screws securing the heatsink assembly. Disconnect the fan cable from the motherboard. Now you can remove the heatsink.
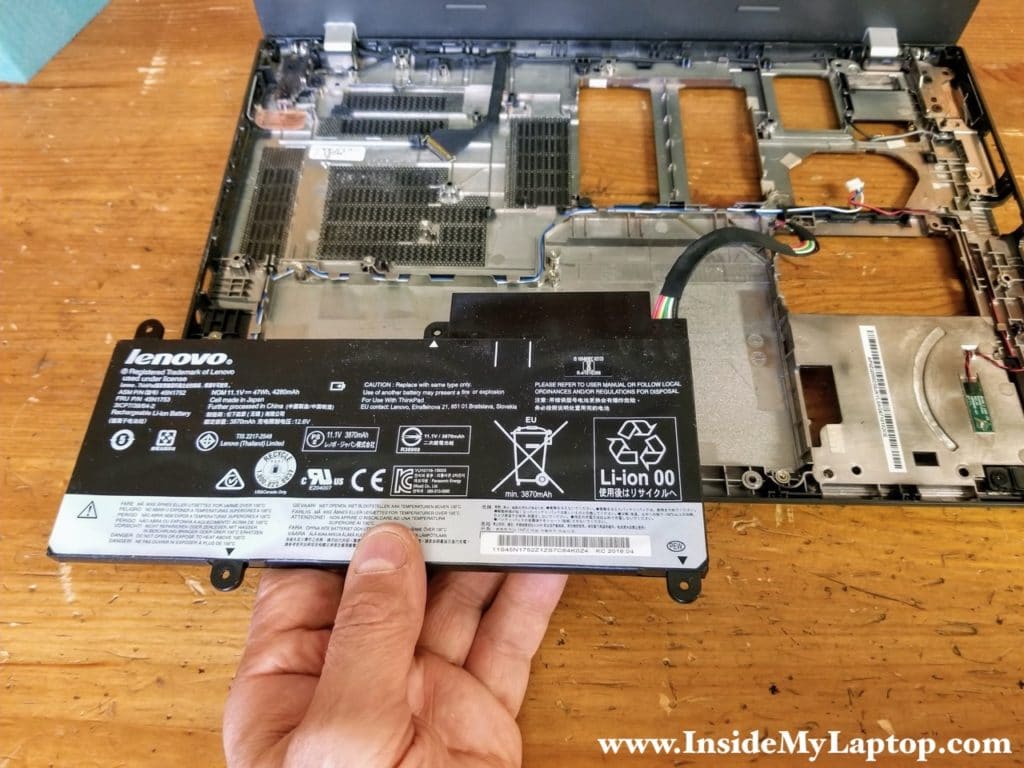
STEP 19.
Remove two screws securing the battery.
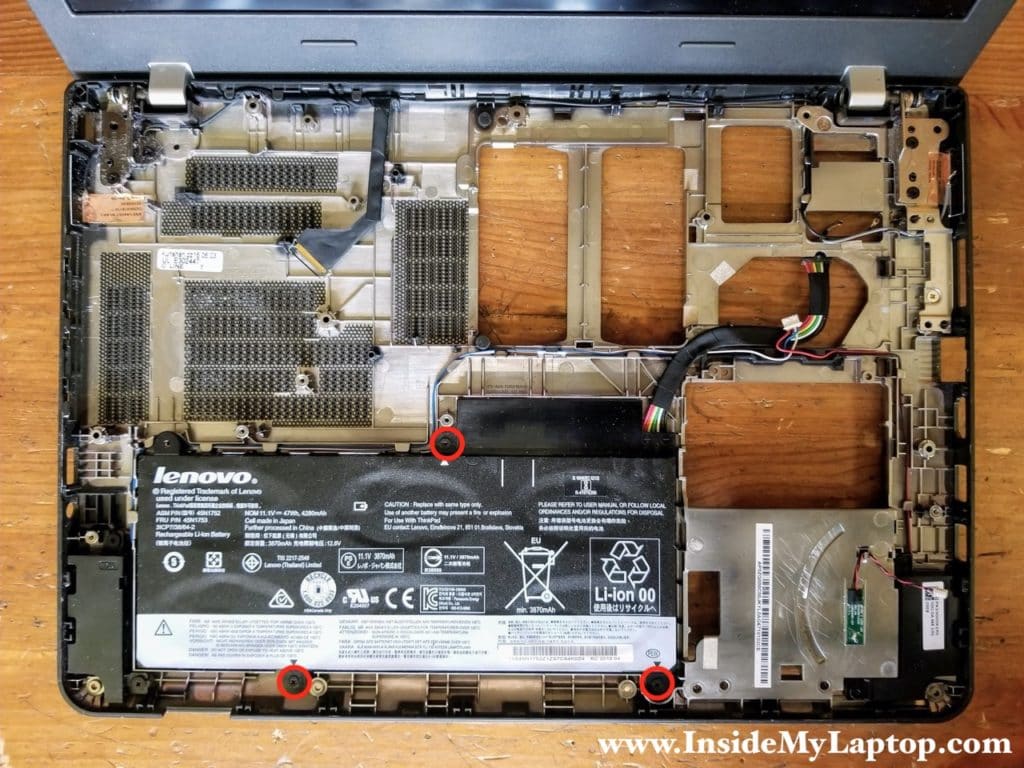
STEP 20.
Remove the battery.
Lenovo ThinkPad E460 E465 battery FRU number: 45N1753
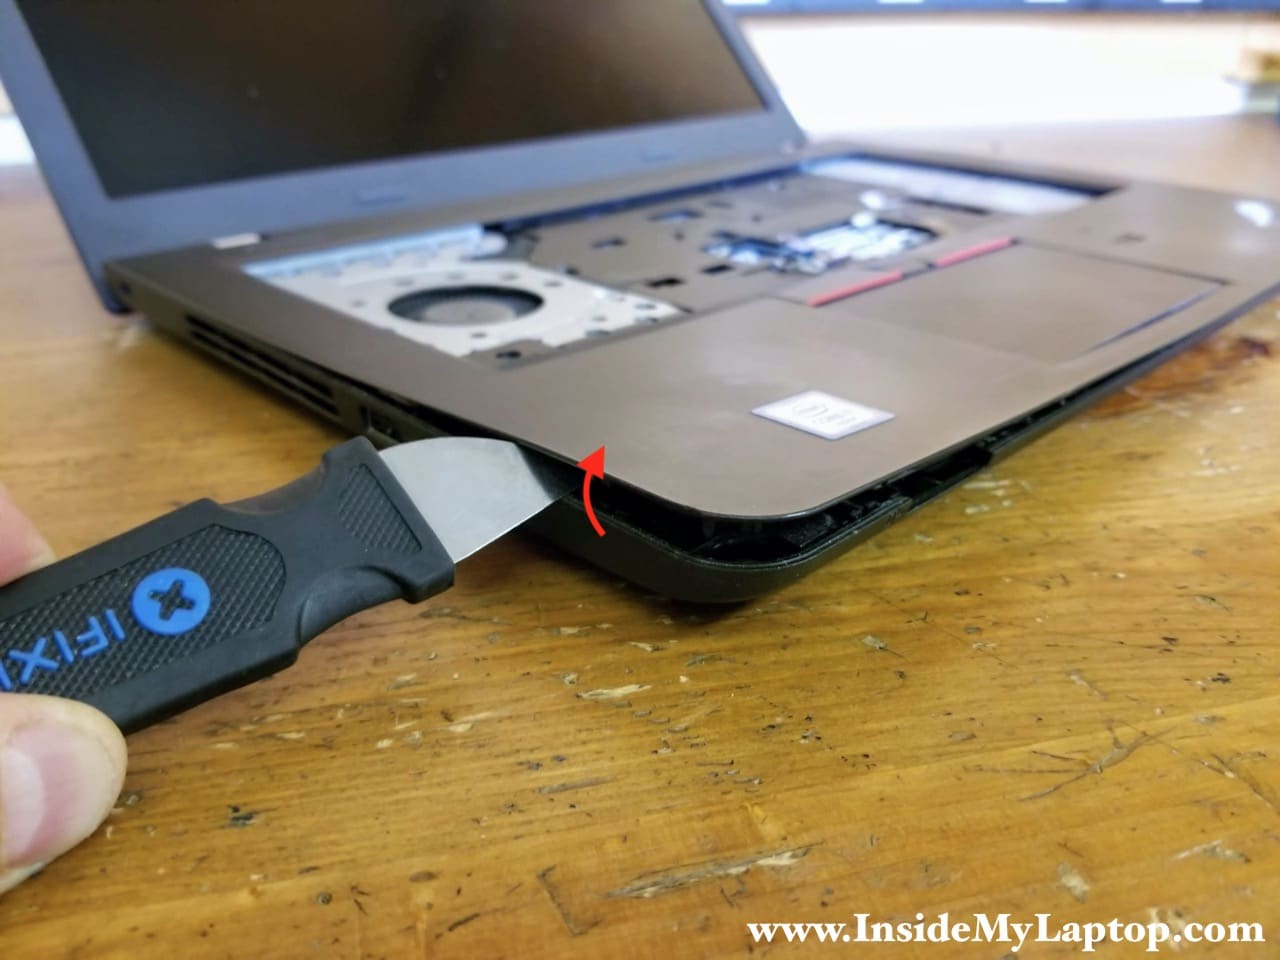
Removing the display panel
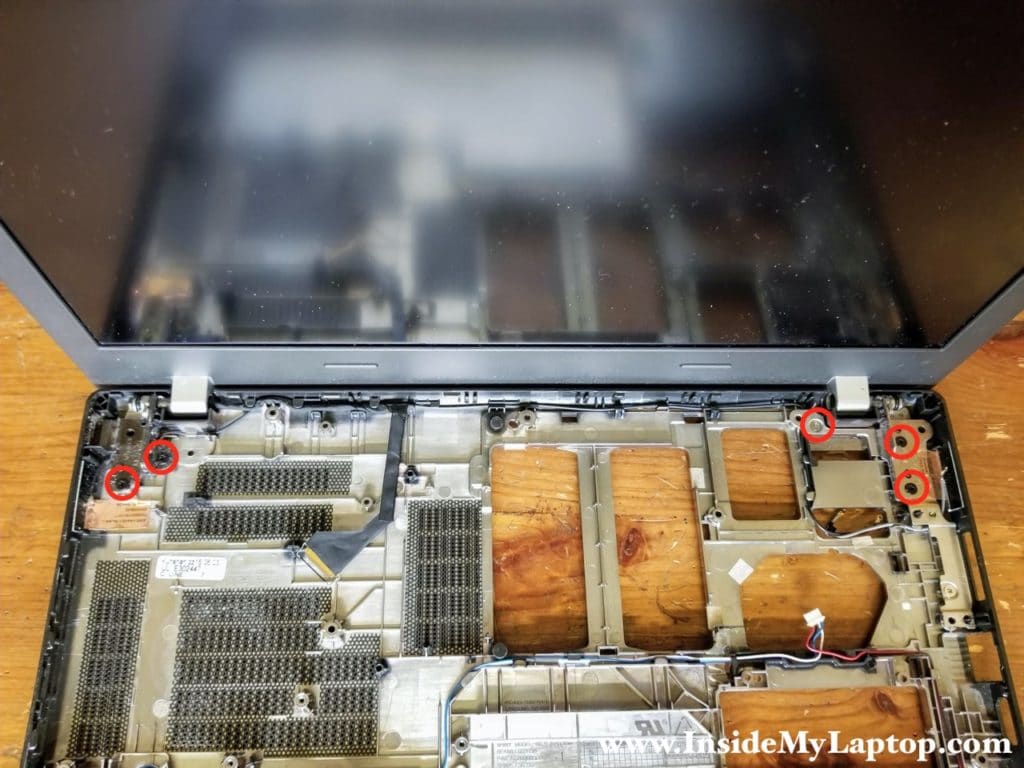
STEP 21.
Remove two screws from the left display hinge and three screws from the right hinge.
Un-route the display cable from the guided path on the base.
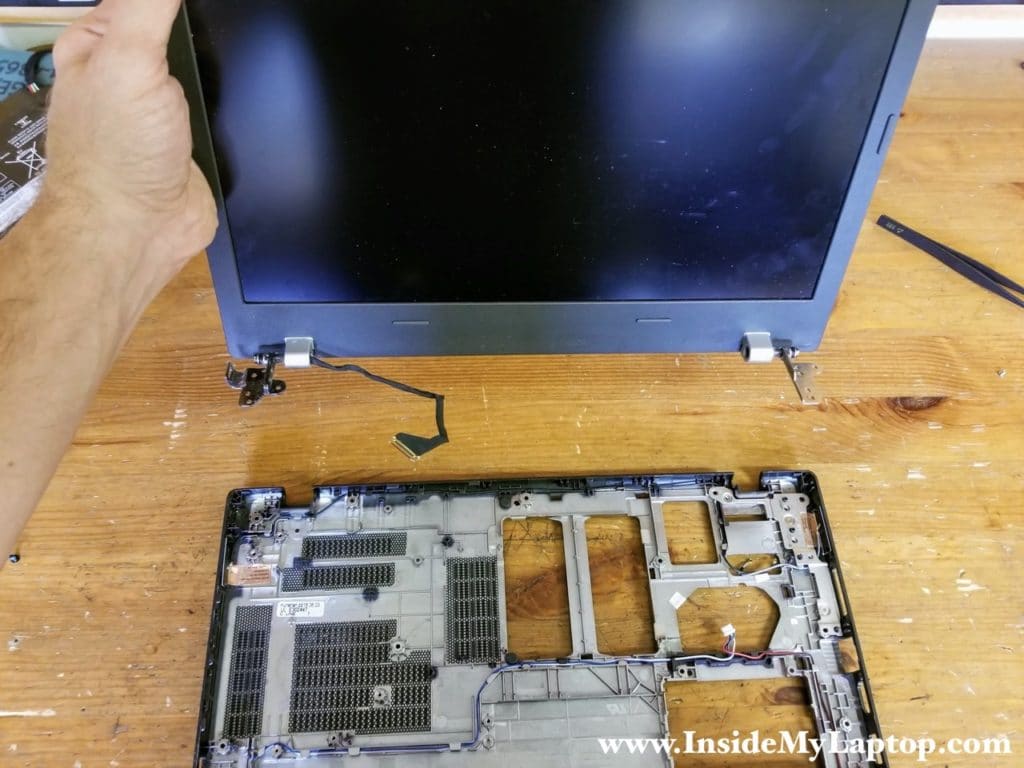
STEP 22.
Remove the display panel.
After I reassemble the laptop back together, I tried to figure out if it’s possible to remove and replace the LCD screen without removing the display.
It is NOT possible. In order to remove the LCD screen it’s necessary to remove the display panel first as it shown in the step 22.
I had no trouble removing the screen bezel.
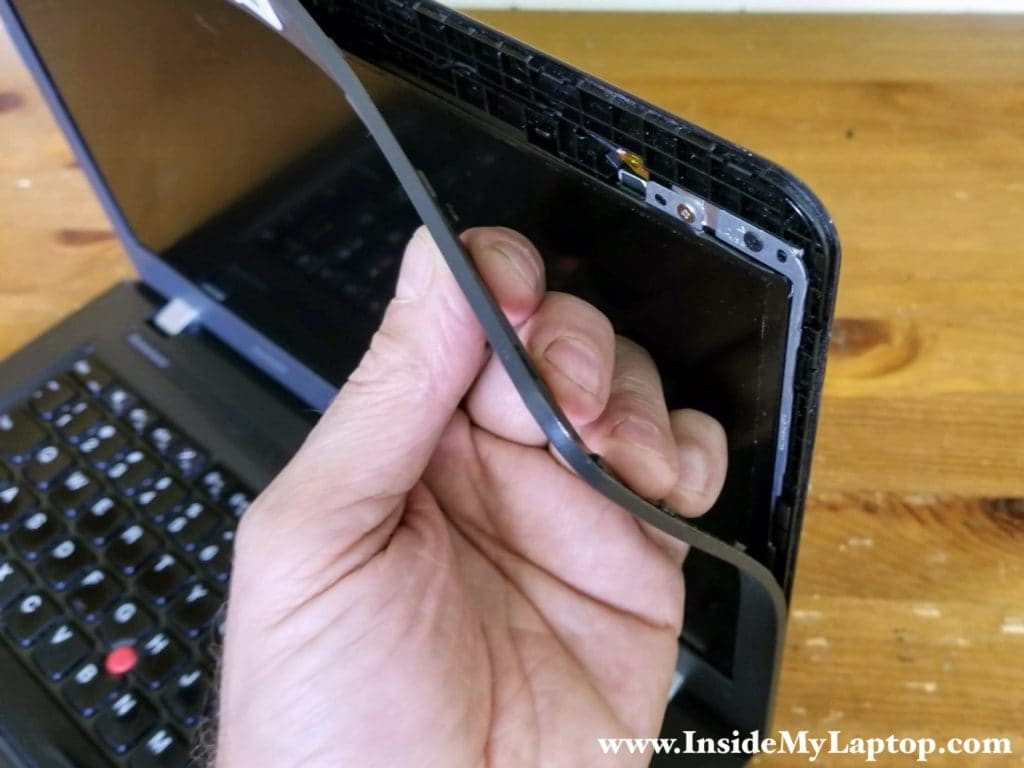
I was able to remove the bezel on the top and both sides but got stuck on the bottom.
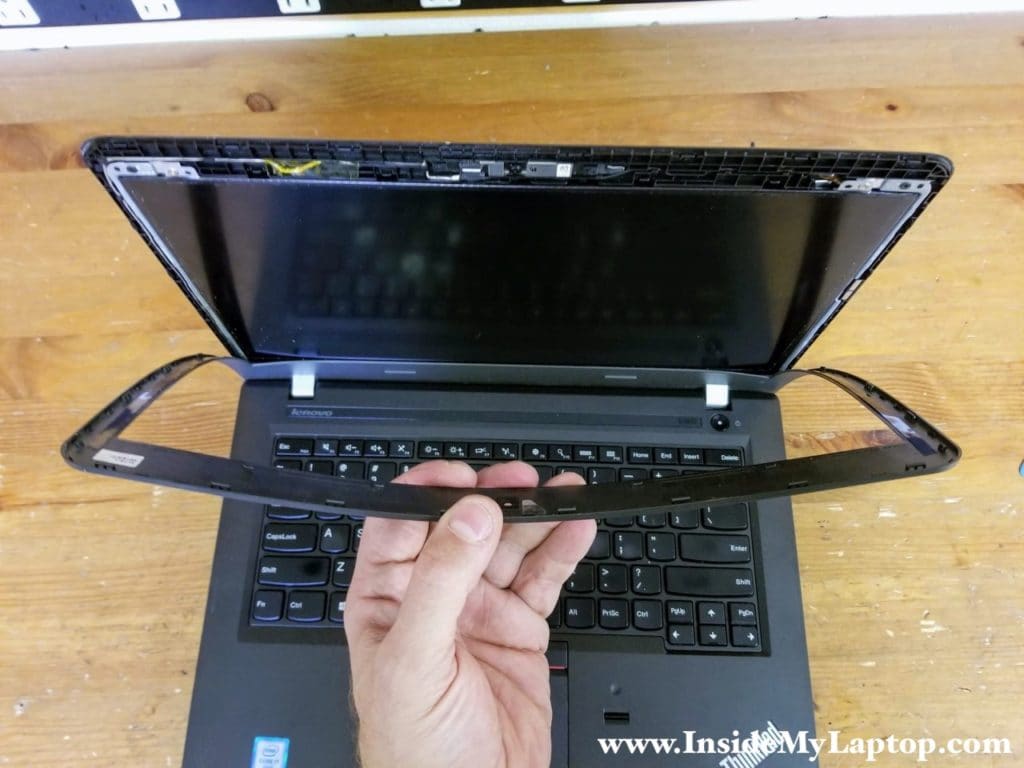
With the display panel attached, there is not enough space to remove the bezel on the bottom.
Let me repeat. If you have to replace the screen, you will have to remove the display panel and take it apart after that. Once the bezel is removed, it’s very easy to replace the screen.