In this guide I will show how to take apart HP Spectre x360 13-4103dx laptop.
According to the official maintenance and service guide this guide should fit HP Spectre x360 Convertible PC (model numbers 13-4000 through 4099 and 13-4100 through 4199) and HP Spectre Pro x360 Convertible PC.
You can refer the official manual for the detailed product description, the complete list of spare part numbers and hardware diagnostics tips.
HP Spectre x360 13-4103dx disassembly steps
STEP 1.
Remove eight Torx T5 screws from the bottom cover.
Two screws in the upper left and right corners are longer than other six screws.

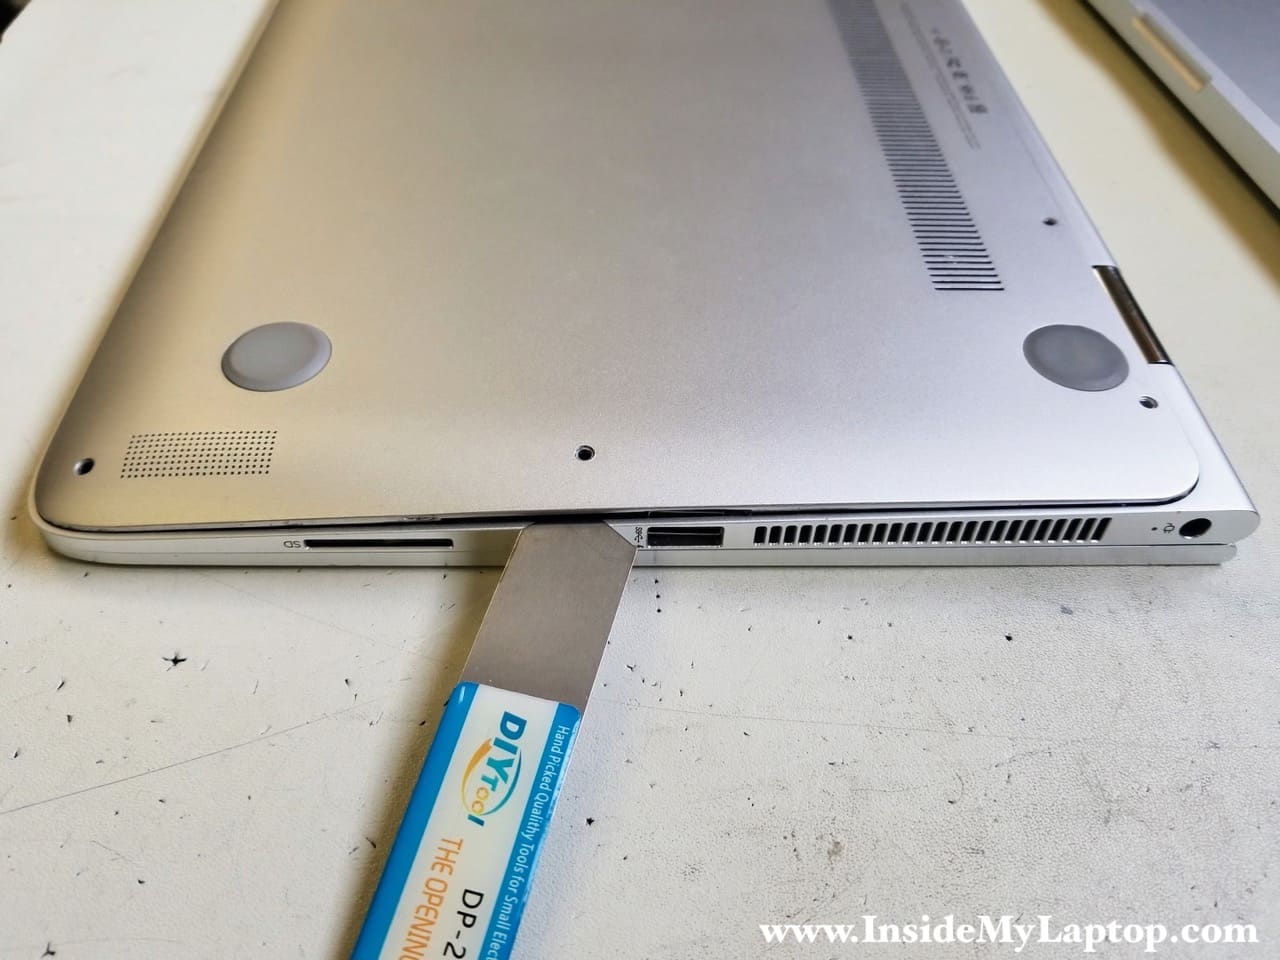
STEP 2.
Using a thin metal case opening tool (or any other similar tool) separate the bottom cover from the laptop.
I found it’s easier to remove the bottom cover if you start separating it on the side of the laptop.
Remove the bottom cover.
STEP 3.
Remove four screws securing the battery.

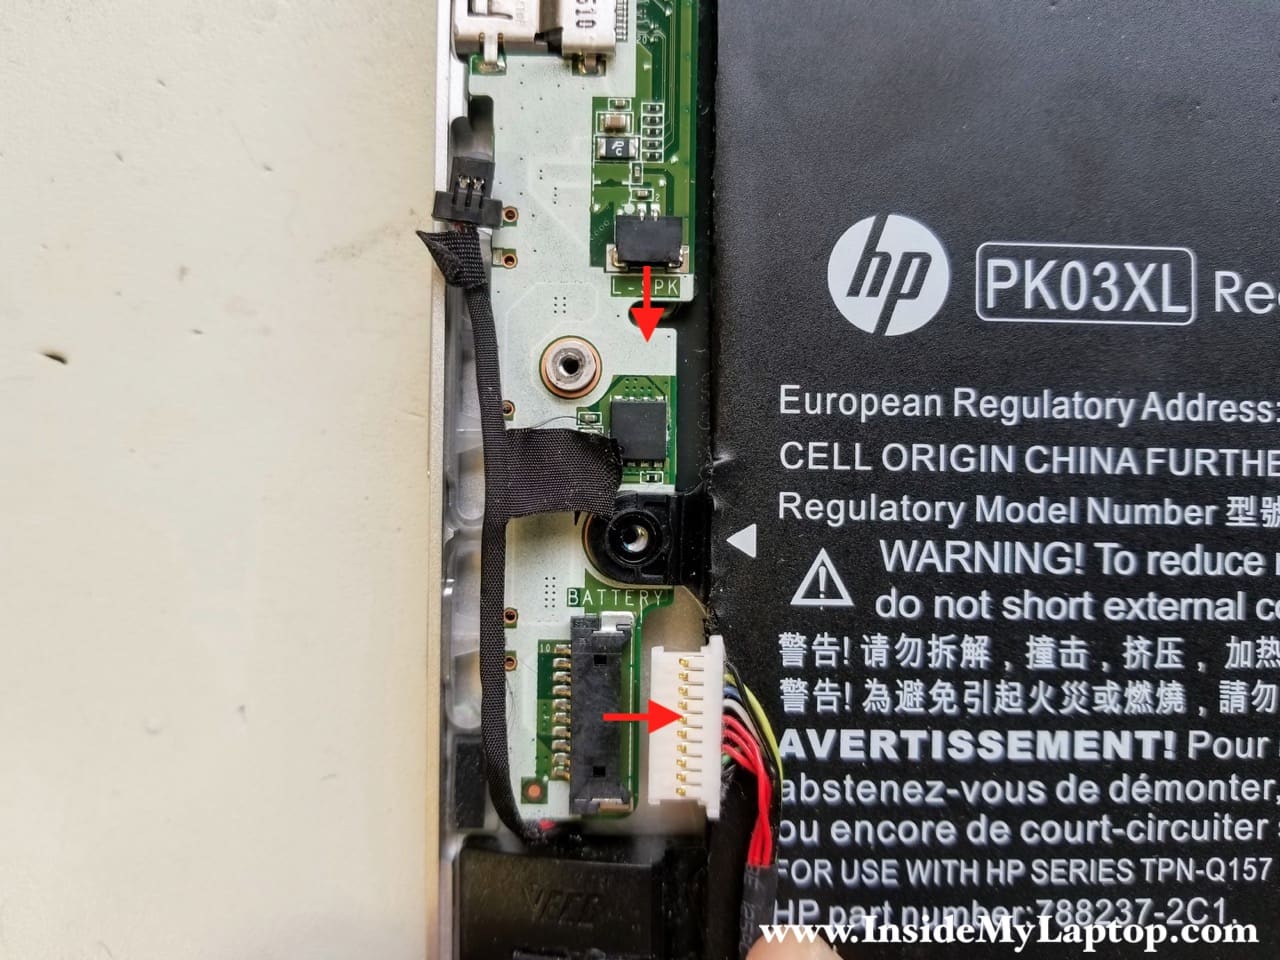
STEP 4.
The right speaker cable is taped to the battery. Peel off the tape and disconnect the speaker cable from the motherboard.
Also, unplug the battery cable connector.
STEP 5.
Disconnect the left speaker cable and un-rout the cable from the guided path on the side of the battery.

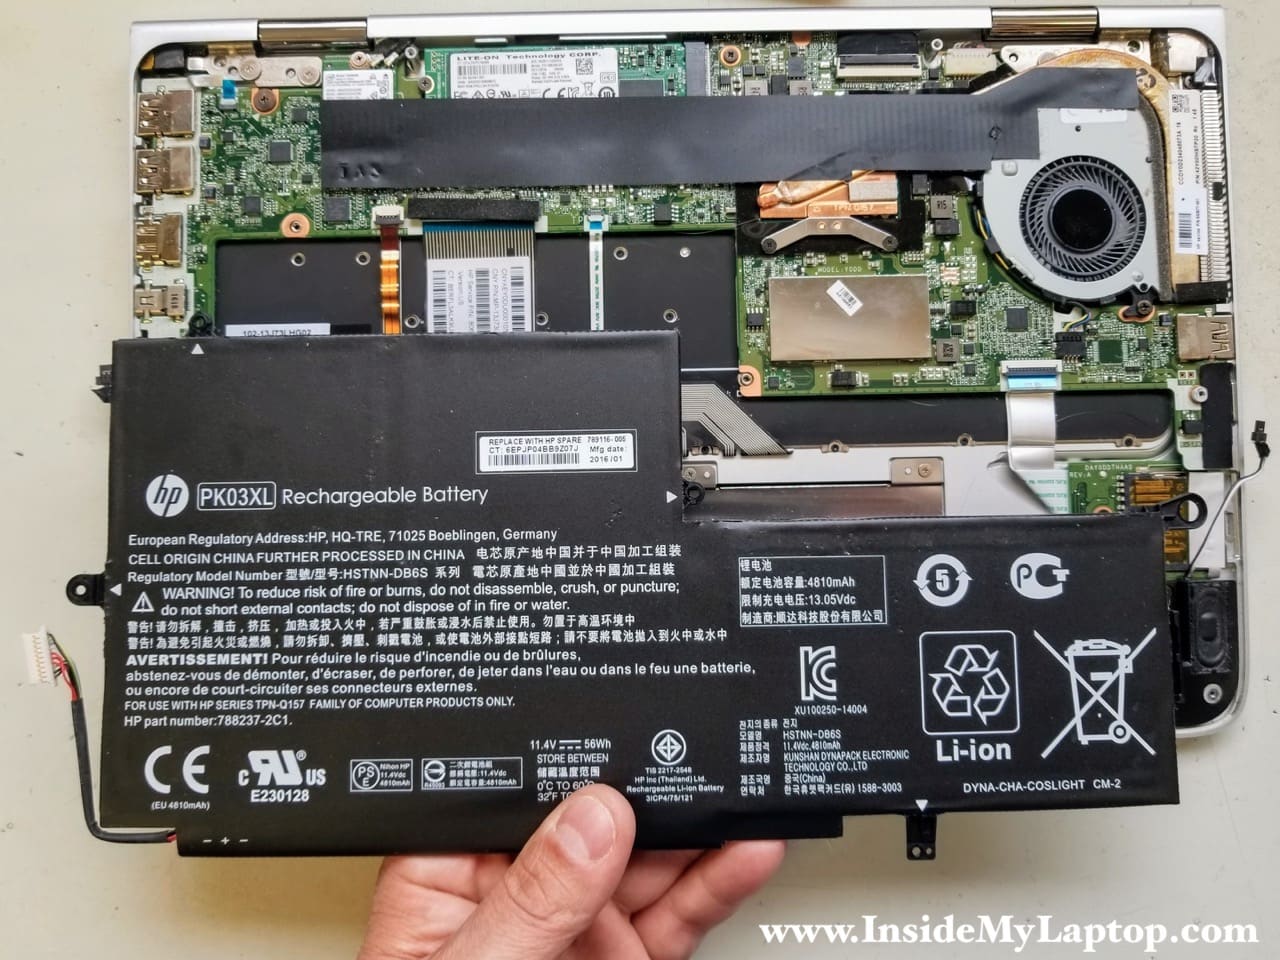
STEP 6.
Remove the battery.
This is 11.4v-56Wh battery. HP spare part number: 789116-005. Battery type PK03XL.
STEP 7.
Remove two screws securing the right speaker.
Lift up and remove the speaker.

STEP 8.
Remove one screw securing the left speaker.
Lift up and remove the speaker.
STEP 9.
Peel off the black mylar tape which partially covers the wireless card, SSD and cooing fan.

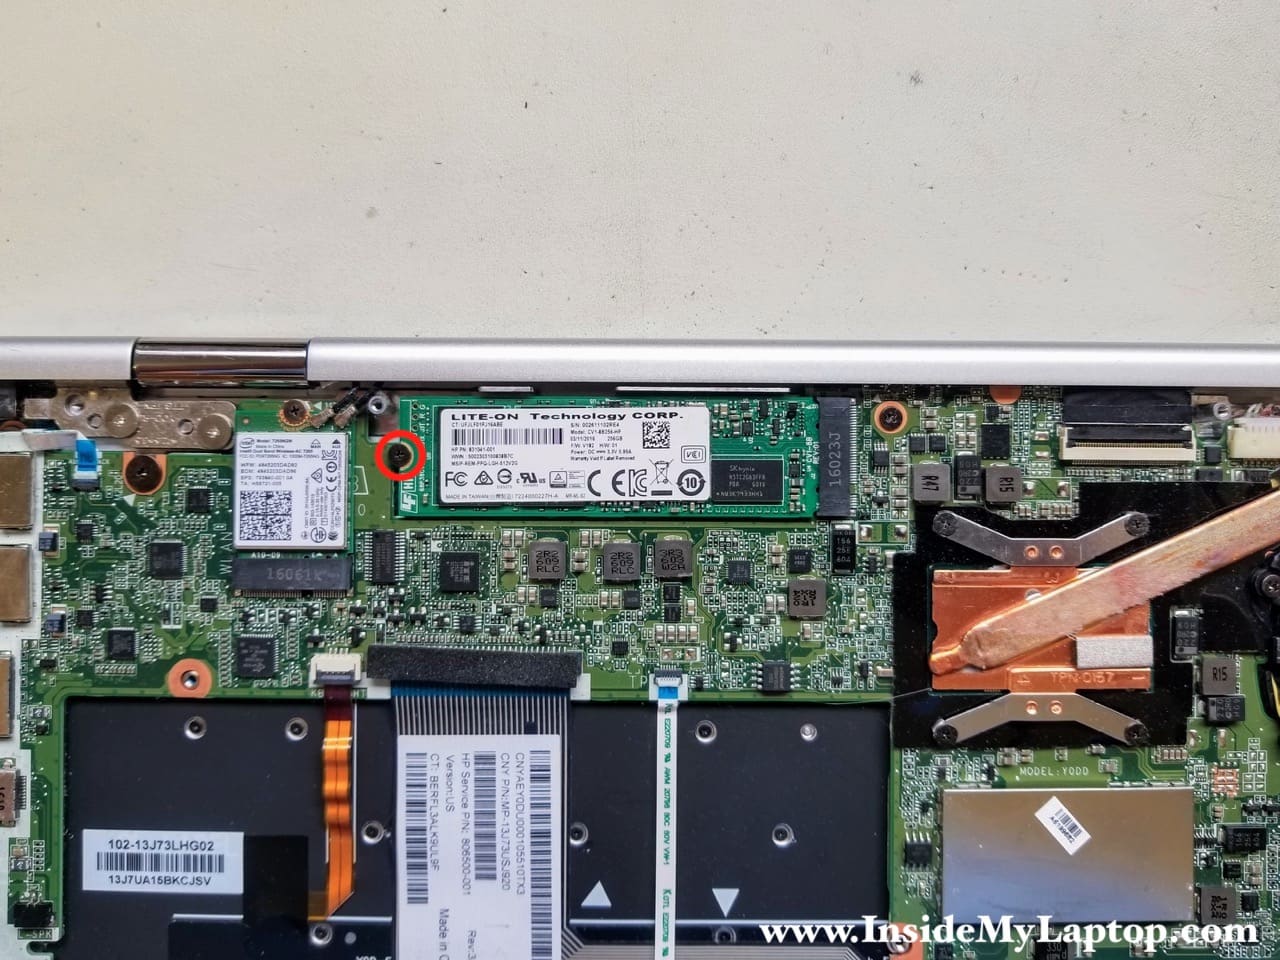
STEP 10.
Remove one screw securing the SSD.
Pull the SSD out of the slot.
This particular laptop came with a m.2 SATA III SSD. HP part number:Â 831041-001.
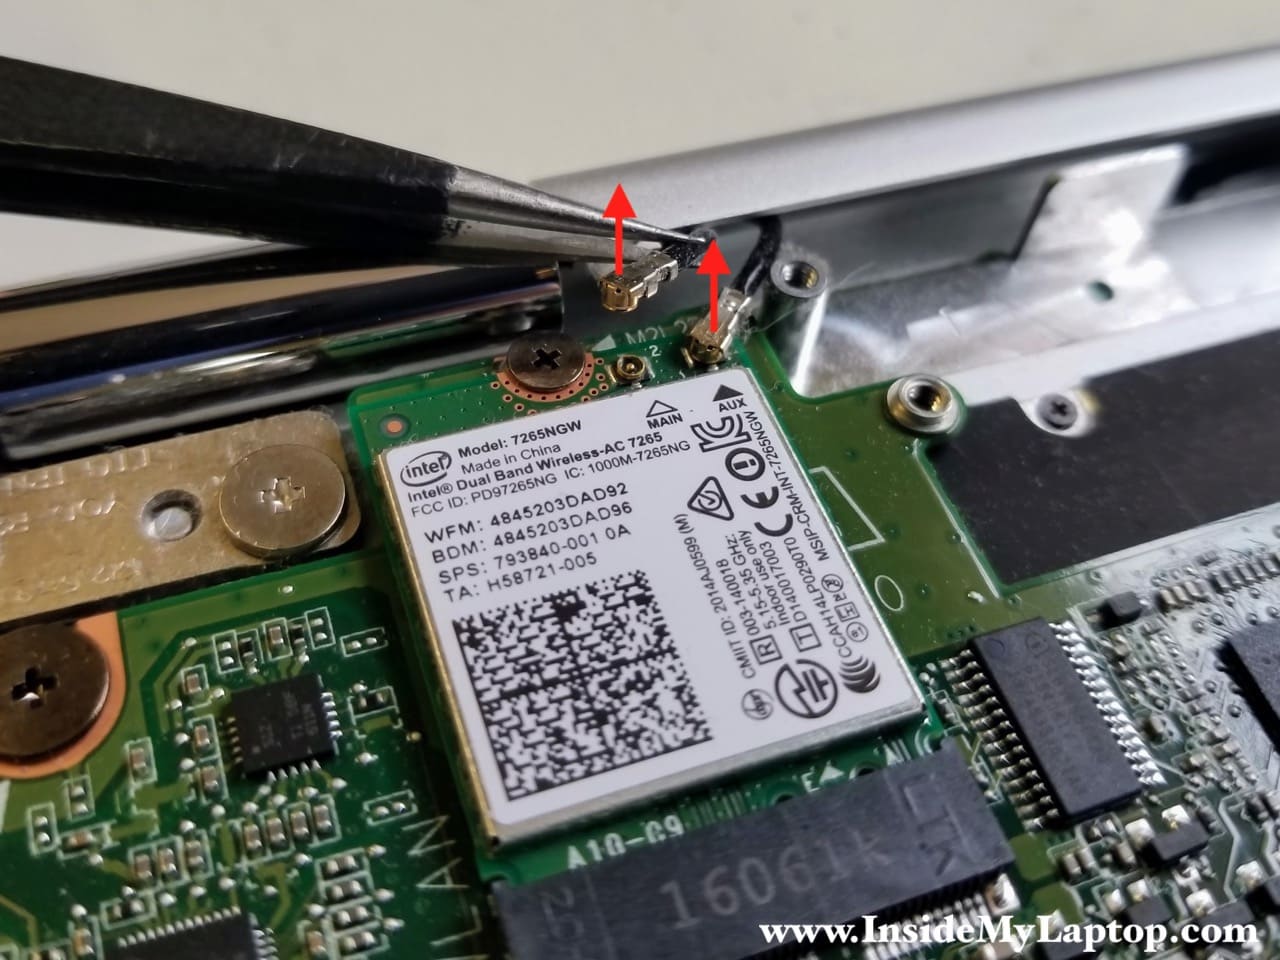
STEP 11.
Disconnect two antenna cables from the wireless card.
Remove one screw securing the wireless card.
This is a Intel Dual Band Wireless-AC 7265 module. Model: 7265NGW. HP part number: 793840-001.
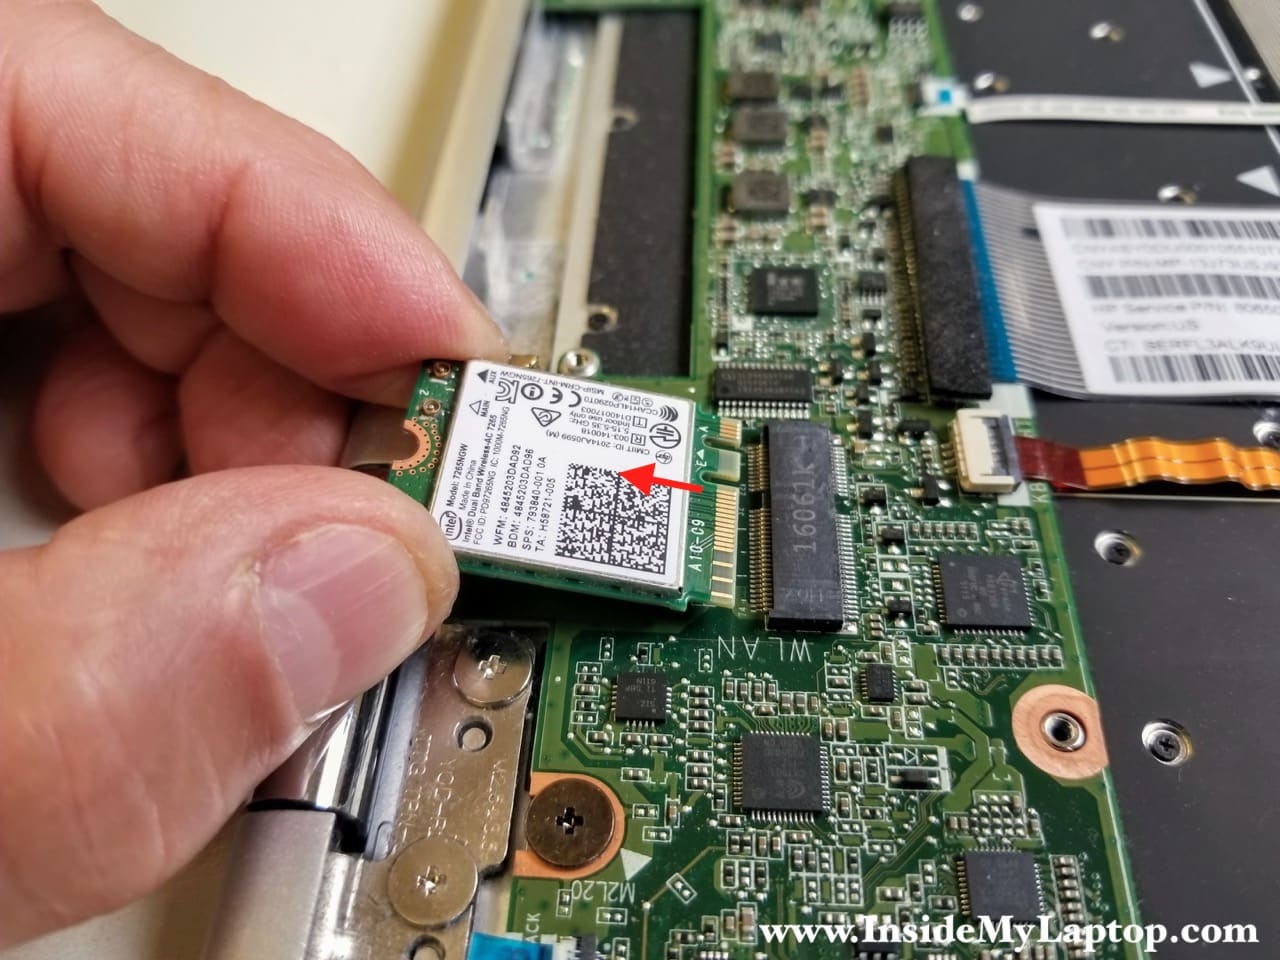
STEP 12.
Pull the wireless card out.
STEP 13.
Remove two screws securing the cooling fan and disconnect the fan cable.

STEP 14.
Remove the cooling fan.
I found HP part number printed on the other side: 830675-001.

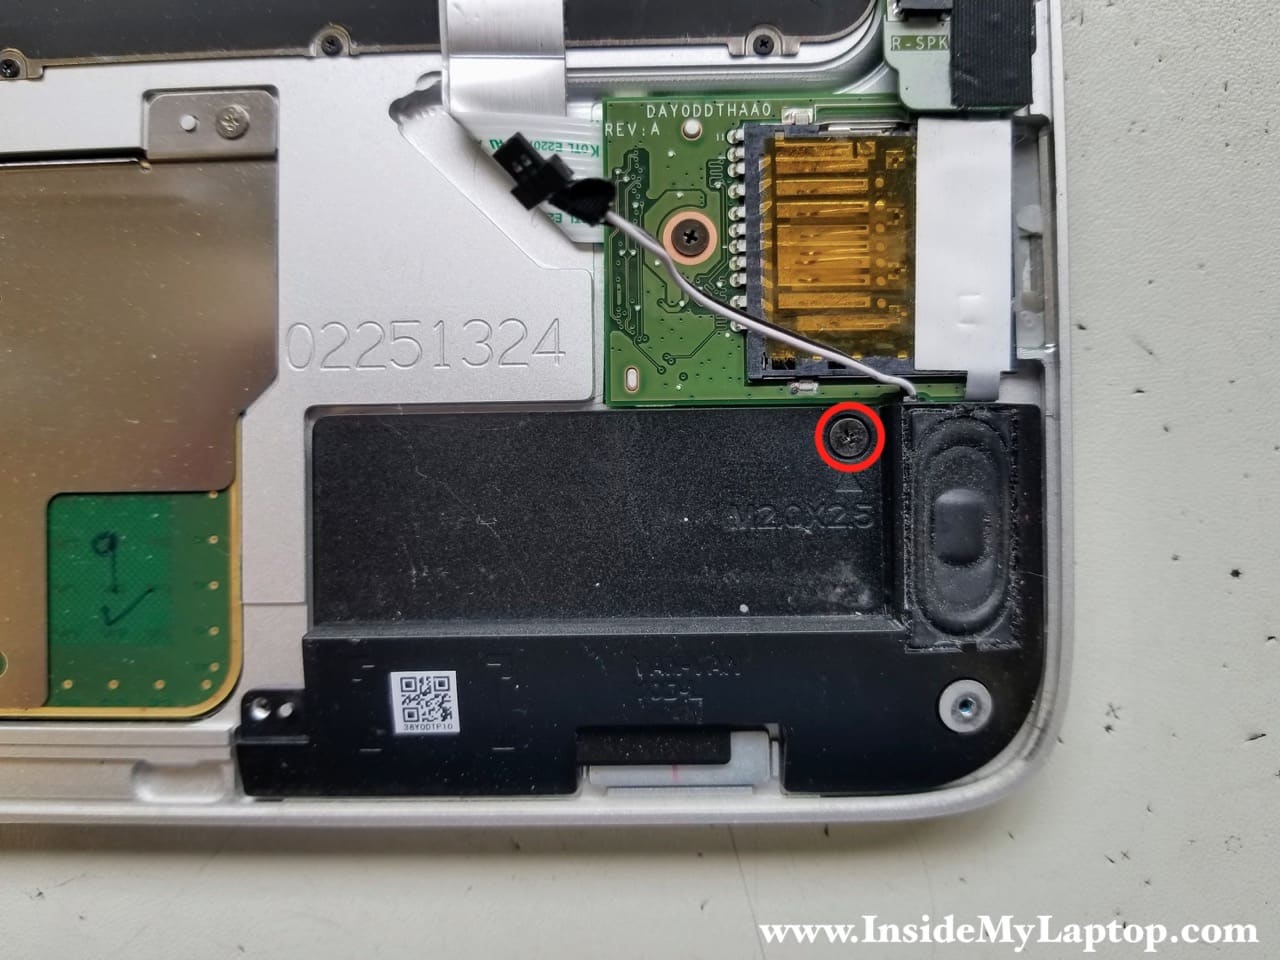
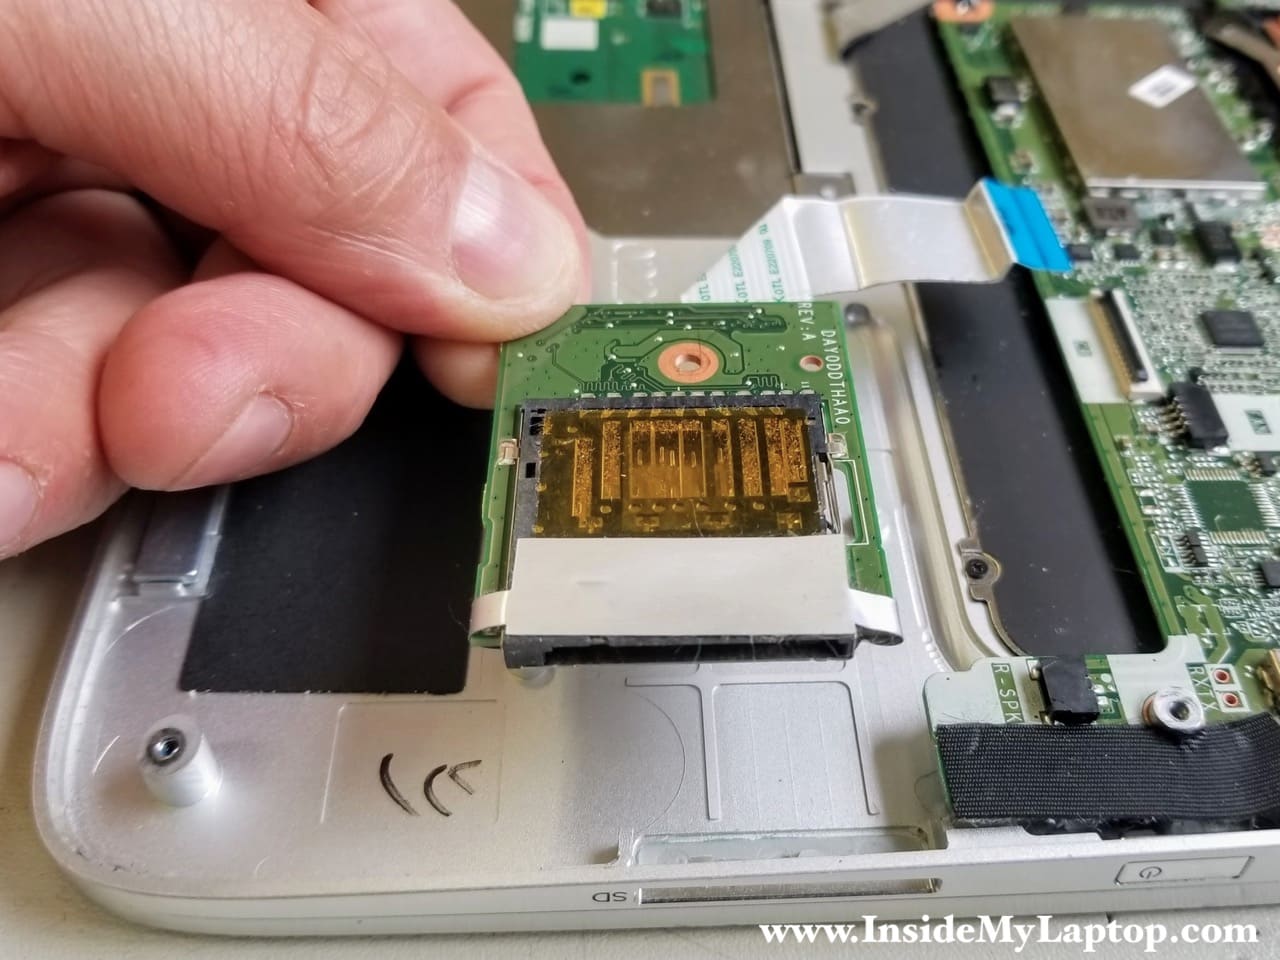
STEP 15.
Disconnect the SD card reader cable from the motherboard.
Remove one screw securing the SD card reader.

Here’s how to disconnect flat cables:
- Unlock the connector by lifting up the locking tab (red arrow).
- Pull the cable out of the connector (yellow arrow).

STEP 16.
Remove the SD card reader.
STEP 17.
Remove the black adheasive spunge that secures the keyboard cable connector.
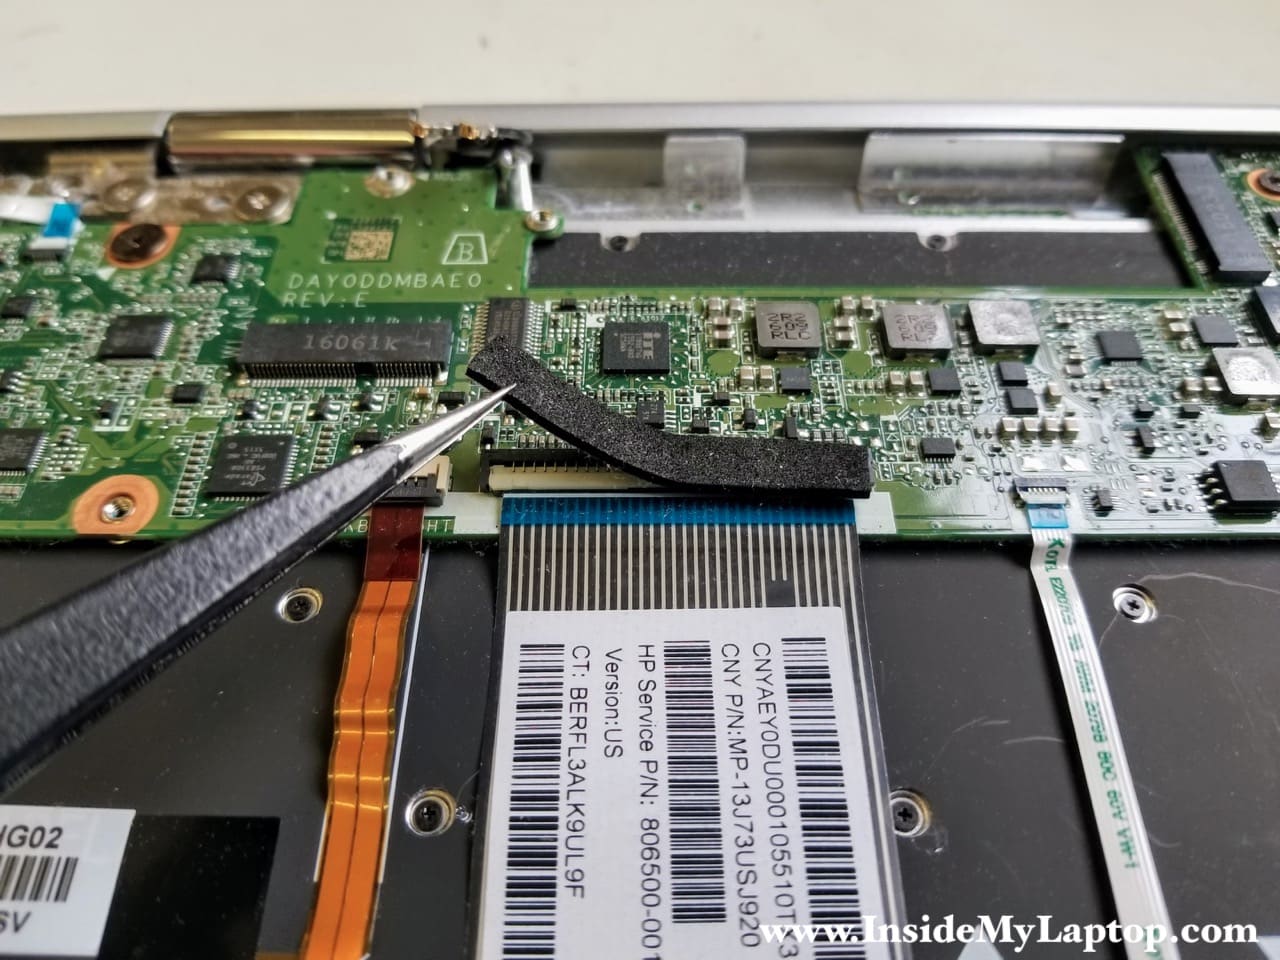
STEP 18.
Disconnect the following cables from the motherboard:
- Headphone board cable (yellow square)
- Keyboard backlight cable (red square)
- Keyboard data cable (orange rectangle)
- Touchpad cable (green square)
- Display panel video cable (blue rectangle)
- DC-IN power jack cable (purple rectangle)
Remove two screws attaching the motherboard to the top case assembly.

STEP 19.
Remove the motherboard.
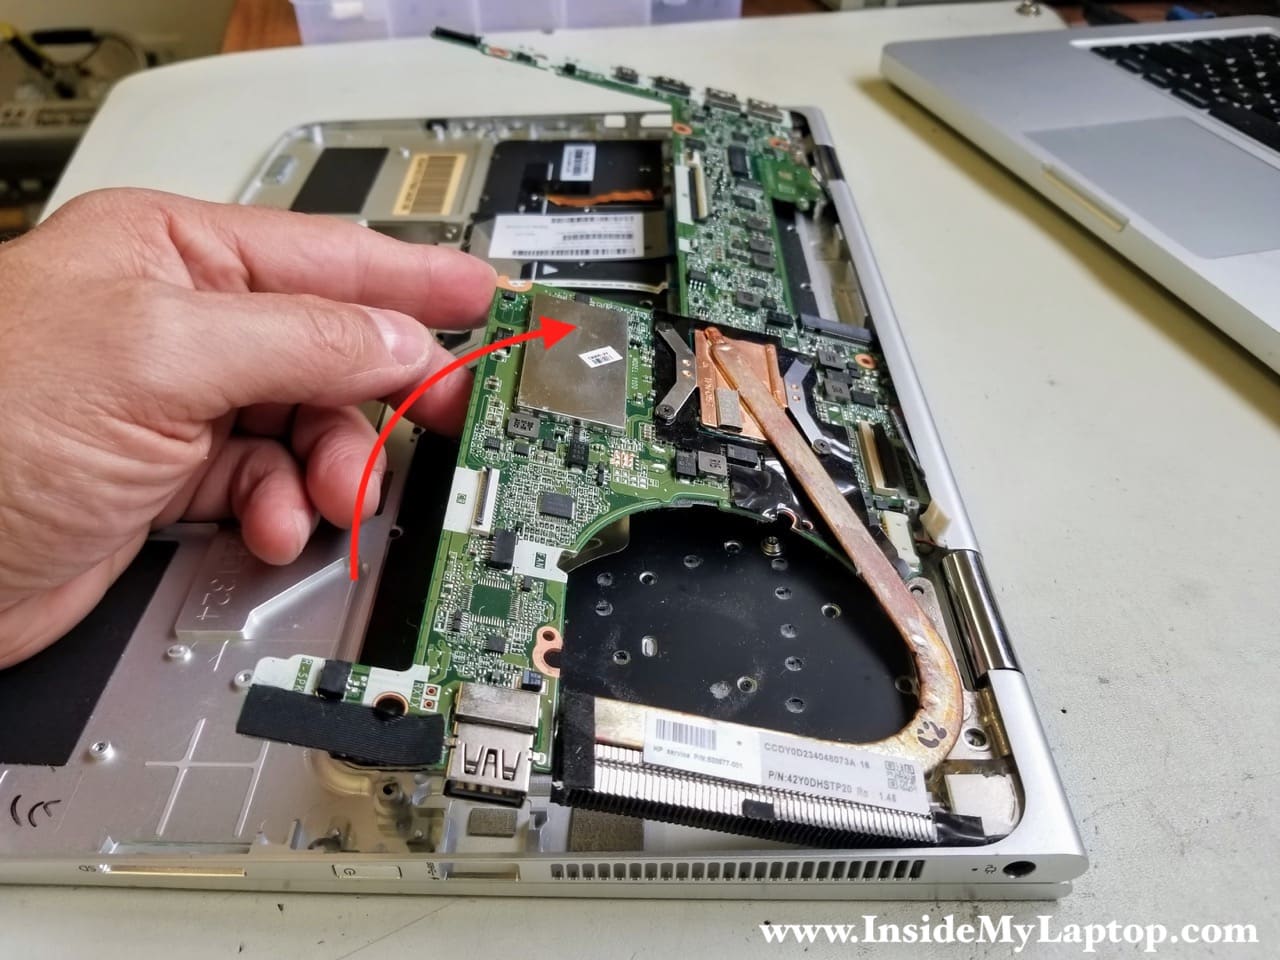
Here’s a picture of the other side of the motherboard.

The headphone jack and DC-IN power jack are mounted under the left and right hinges.

STEP 20.
Remove two screws securing the left hinge.
Remove one screw securing the DC-IN power jack.

STEP 21.
Lift up the left hinge. It will open up at a 30 degree angle.

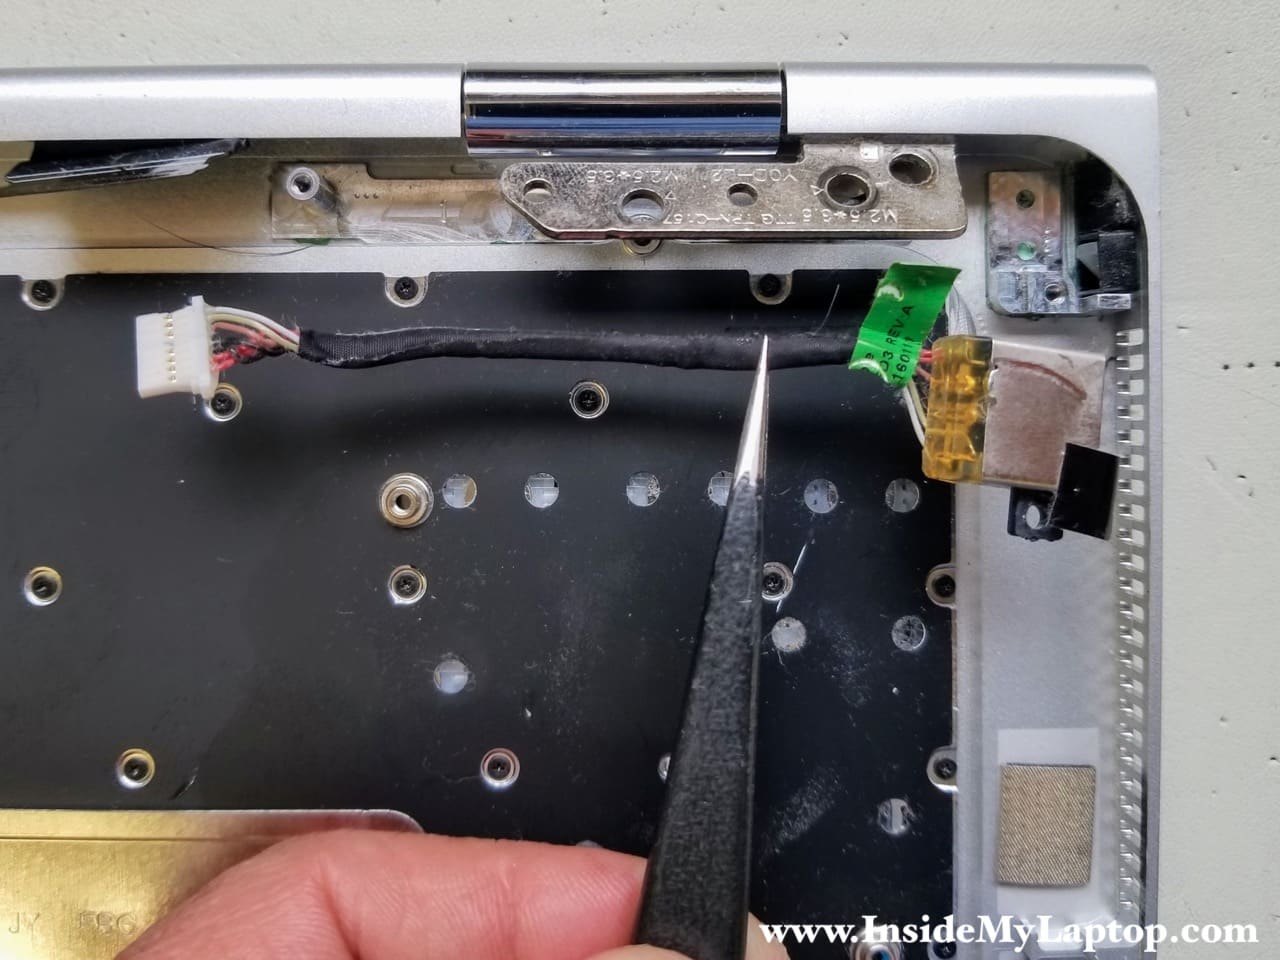
STEP 22.
Now you can remove the DC-IN power jack.
The harness is glued to the top case with adhesive tape.
STEP 23.
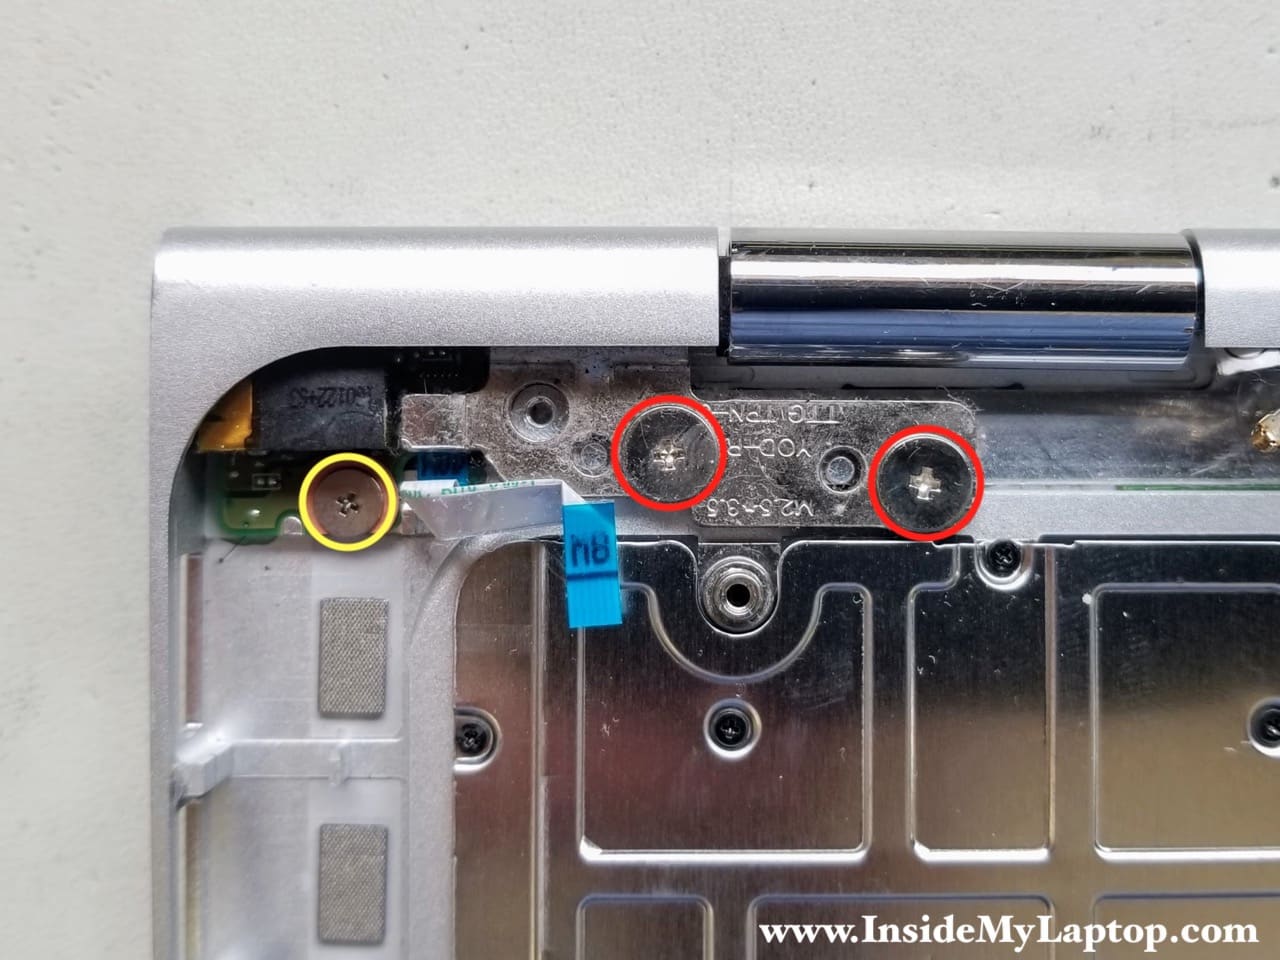
Remove two screws securing the right hinge.
Remove one screw securing the headphone jack.
STEP 24.
Lift up the right hinge.
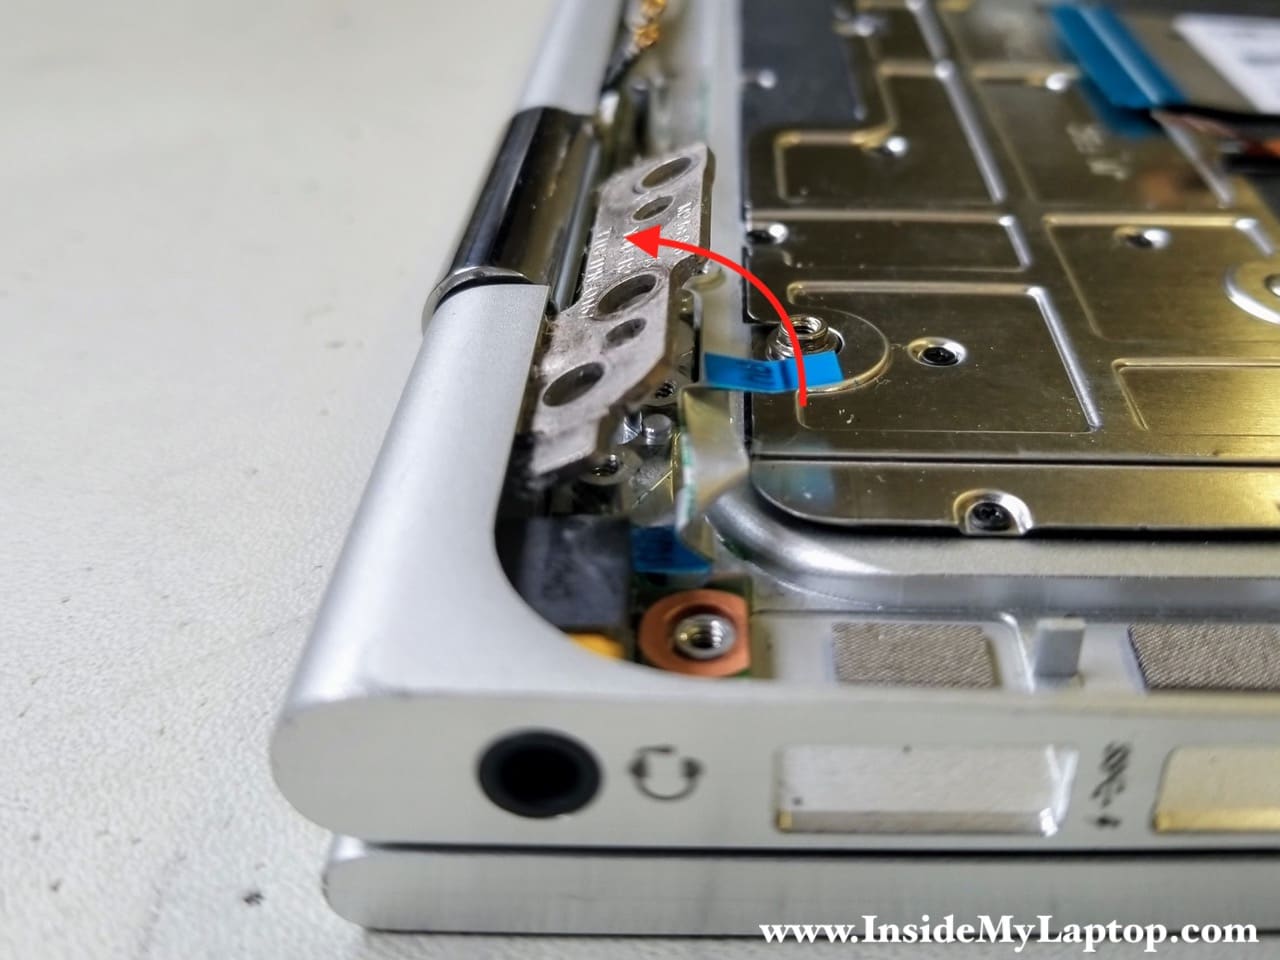
STEP 25.
Remove the headphone jack.

STEP 26.
Remove five screws securing the touchpad.
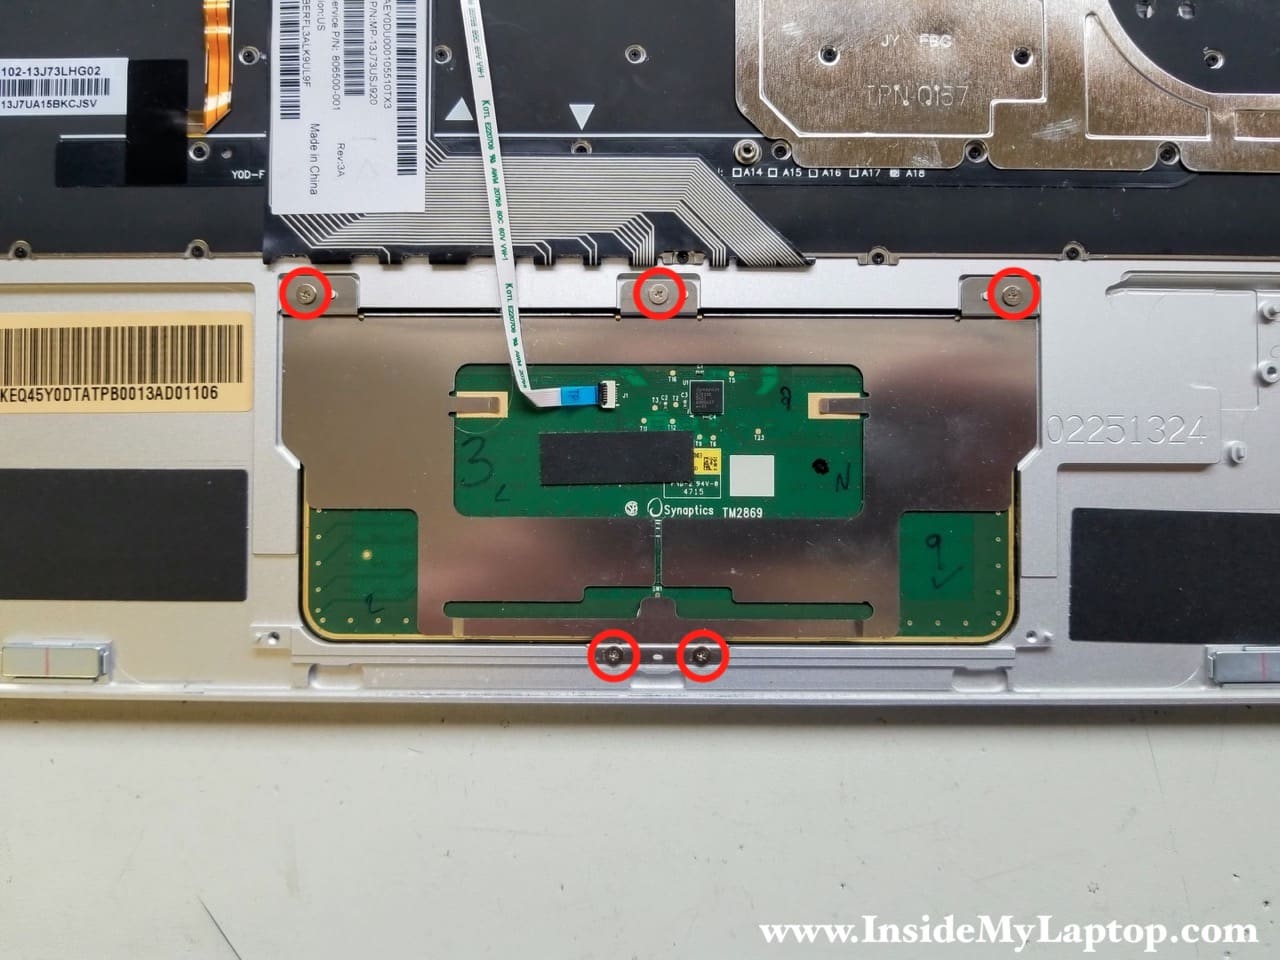
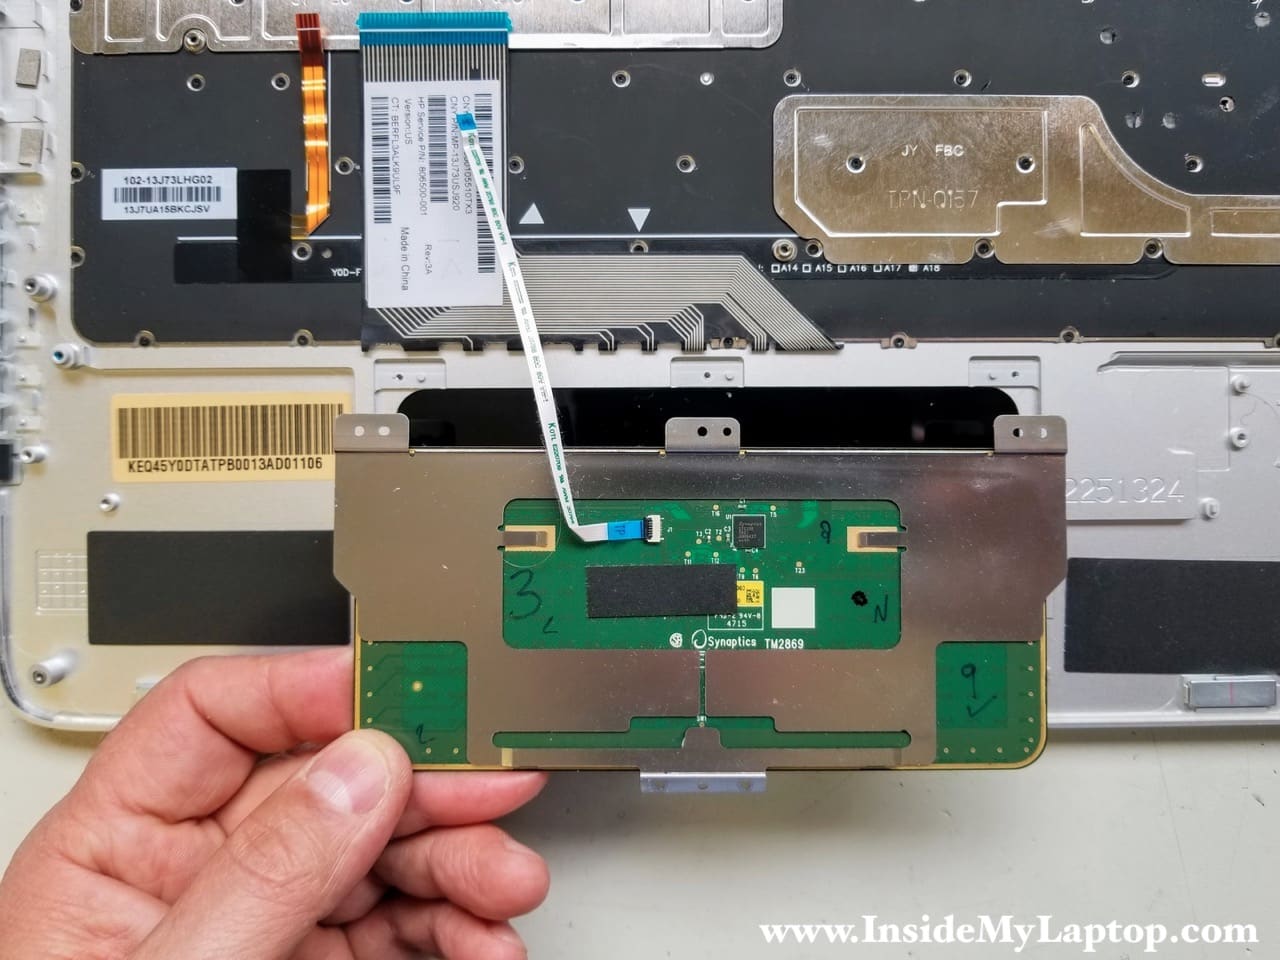
STEP 27.
Remove the touchpad.
In HP Spectre x360 13-4103dx laptop the keyboard is not riveted to the top case like in many other HP models.
The keyboard is replaceable.
In order to remove the keyboard you will have to remove 55 small screws fastening the keyboard to the top case.
The keyboard HP part number printed on the sticker:Â 806500-001.

Related disassembly guides:
J. B. Thorstad
I wasn’t sure how to contact you with a question, please. I have an ASUS V550CA laptop. I wish to replace the WLAN card it shipped with as it only currently supports the slower 2.4 Mhz speed. Do you know whether the WLAN card is replaceable? Thank you very much.
ali
would you pls tell me the model of the motherboard of this laptop or any link i can buy it .
IML Tech
ali, you can see the motherboard model in the step 19. It’s printed on the motherboard: DAY0DDMBAE0.
Looks like it’s available on eBay. Also, you can google the model number and probably find some other sellers.
Jim Whitehouse
Excellent description and detailed tear down of the hp spectre x360 13-4100 series 2-1 one. I have the service manual as well and have had Hp work on the laptop a few times with warrenty / hardware issues. One thing I began to notice more and more where issues with my wireless card. People said it was a know issue either drivers / board. But recently having become super annoyed with the almost hourly disruption of my wireless signal I decided to do some inspection of my computer myself.
Much to my horror I discover where the wireless card and antennas connect or are supposed to; that both the connection of wifi card and antennas were not staying in place. Its a tight fit and trying to move around and connect the antenna to wifi card is tight. But as it turns of both the contacts on the wifi card and antennas have been forced in so roughly that instead of snapping on. They are bendt. Each should be a circle with one easily and firmly snapping into the other. Instead of being a nice round circle like two buttons snapping together. They have been mushed or mangled to the point where they will not snap together. HP did a horrible job both with this design and when they worked on my computer.
I am in the process of trying to replace the card and antennas. I tried to see if I could fix the rounded parts but just to bent. HP service / repair said sorry but I could have do this. I cant find any information about the wiring for the antennas other than hp saying how hard it is and send it end for additional charge. They did it the first place. I was hoping you had some information or pictures about the antennas.
I first thought about cutting of bad ends and wiring new ones on but not much space or extra length. I was thinking maybe a could wire it better myself. Any help or insight would be greatly appreciated. Sorry for the long explanation.
Sincerely……………………….Jim W.
IML Tech
Jim, the display panel is a sealed unit so opening it up and replacing both antenna cables is not an option.
You have a few options to make the wireless connection working again:
1. Expensive but reliable option. Replacing the entire display assembly. Maybe you can find a pre-owned not very expensive display on eBay.
2. Cheap but difficult repair. You can buy a set of wireless antenna cables. They are pretty much standard so the brand doesn’t really matter. Cut the damaged heads off as close as you can and try soldering new cables. The problem is HP Spectre x360 13-4100 has a very short Wi-Fi cables and you will have very limited space to work.
3. Cheap but also difficult repair. You can try removing the damaged heads from the existing antennas and replacing them with the heads from the new cables.
4. Cheap and fast. Buy an external USB Wi-Fi dongle for about $20. Hopefully the signal will be strong enough to cover your needs.
For options 2 and 3 you will need a microscope and micro soldering gun.
JP
Hi. Great step by step. Other than the t5 I’ve read a p000 and p003 r needed.
Can you confirm all the Size screw drivers I’ll need to replace the keyboard
Regards
Ioannis Papalazaridis
hi from Greece
i read and see all your review, very detailed, and i have this laptop…
my problem is the cmos battery in my laptop, and i don’t see it in your review…
where is it???
Regards
IML Tech
This laptop doesn’t have CMOS battery.
Erf
This model does not have cmos battery or jumper. I need to force reset the cmos. What should I do? Which pins should i short?