
In this guide I will be taking apart a HP EliteBook Folio 9470m Ultrabook.
I will show how to access both RAM slots, remove the hard drive and keyboard.
Also, I will show a shortcut for removing the cooling fan and DC jack.
Make sure the laptop is turned off before you start the disassembly process.
You’ll need a small Phillips screwdriver and Torx 8 screwdriver.
STEP 1.
Unlock and remove the battery.
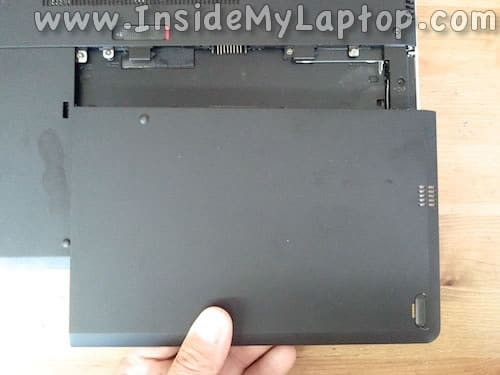
STEP 2.
Loosen two screws securing the hard drive cover.
Slide the cover to the left and remove it.

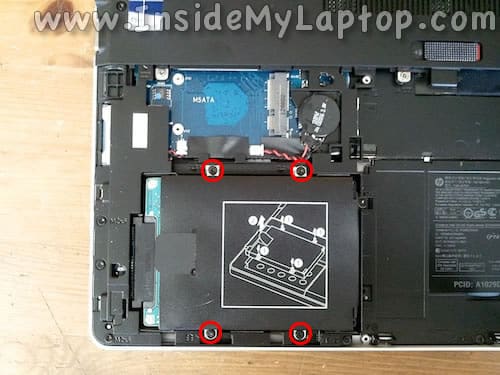
STEP 3.
Loosen four screws securing the hard drive.
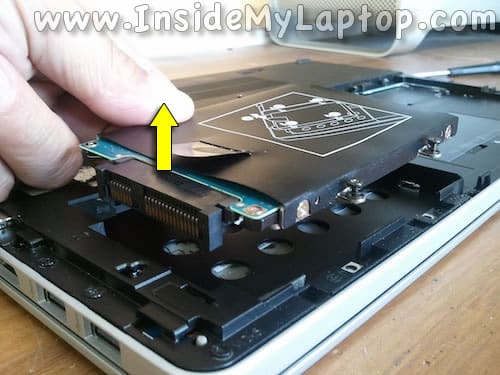
STEP 4.
Pull the hard drive assembly up by the black tab located on the top.
You’ll have to disconnect the hard drive connector from the motherboard.
I recommend replacing this regular 2.5″ SATA hard drive to a 2.5″ SATA solid state drive. Doing so will improve the laptop performance significantly.
The connector can be easily removed from the hard drive if necessary.

Also, under the hard drive cover you can get access to the mSATA slot and CMOS battery.
In this particular case HP EliteBook Folio 9470m came without mSATA solid state drive installed.

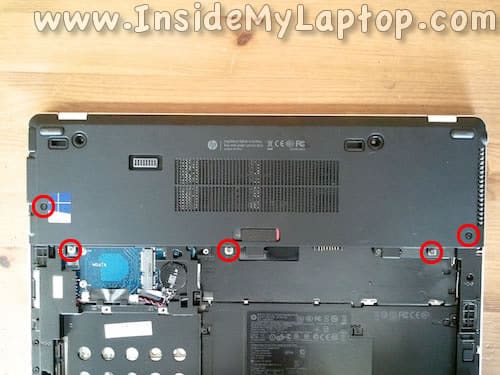
STEP 5.
Loosen five screws securing the bottom cover.
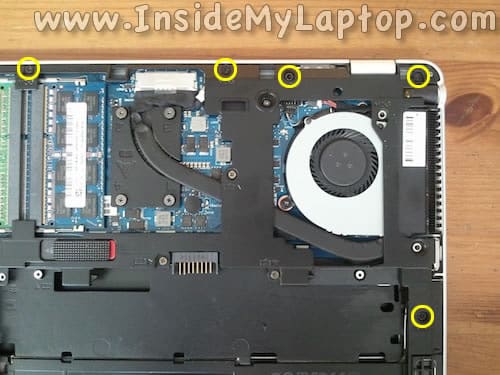
STEP 6.
Remove the cover.

Now you can access both RAM modules, Wi-Fi card and cooling fan.
This laptop supports up to 16GB (2x8GB) DDR3-12800 SODIMM RAM modules.

STEP 7.
Loosen four screws securing the keyboard on the bottom.
STEP 8.
In order to separate the keyboard from the top cover you’ll have to use a knife blade.
Insert the blade between the keyboard and top cover. Be careful. Try not to scratch the cover.
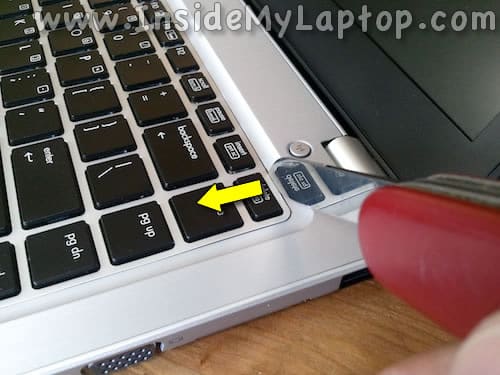
There are a few plastic tabs securing the keyboard.
You’ll have to disengage these tabs and lift up the keyboard as it shown on the following picture.
The official HP service manual shows a different keyboard removal technique on the page 55.
You’ll find a link to the official manual at the end of this guide.

STEP 9.
Continue lifting up the keyboard while disengaging tabs.
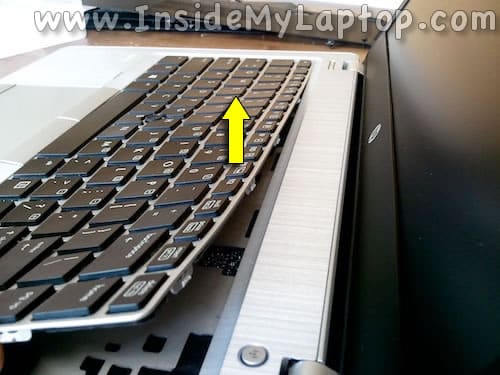
STEP 10.
Separate the keyboard from the top cover and place it upside down on the palm rest.

STEP 11.
There are three cables connecting the keyboard to the motherboard.
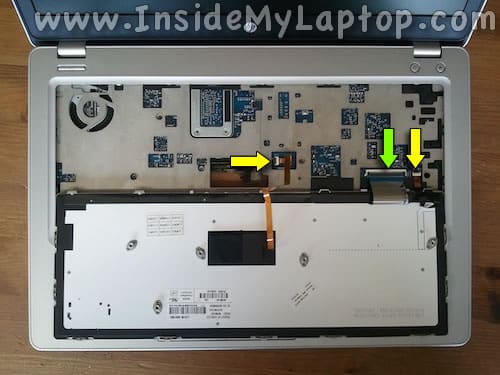
Here’s how to disconnect two narrow cables.
1. Lift up the connector retaining tab with your fingernail (yellow arrow). The retainer will open up at a 90 degree angle.
2. Pull the cable from the connector (green arrow).
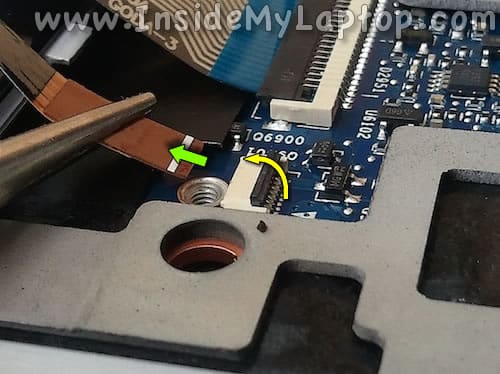
Disconnect the wide cable the same way.
Open up the retaining tab (yellow arrow) and pull the cable out (green arrow).

STEP 12.
Now you can remove the keyboard completely.

Here’s the laptop with the keyboard removed.

STEP 13.
There are two screws securing the cooling fan.
Loosen one screw (red) and remove another (yellow).

STEP 14.
Disconnect the cooling fan cable from the motherboard.

STEP 15.
According to the HP service manual, you’ll have to remove the base enclosure in order to remove the cooling fan but here’s a shortcut.
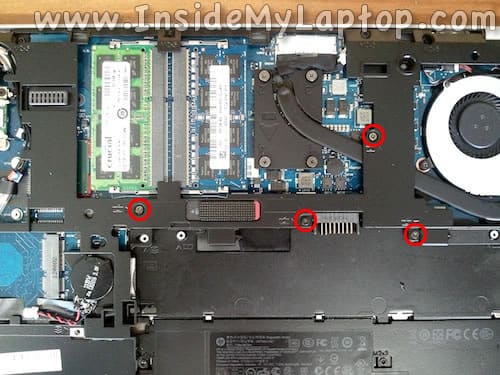
Remove five shown screws securing the base enclosure.
Now you will be able to lift up the enclosure just enough to get access to the fan.

STEP 16.
With the enclosure lifted up, pull the fan out of the case.
Now you can clean it up or replace if necessary.

STEP 17.
Disconnect the DC jack cable from the motherboard.
Again, with the enclosure lifted up, pull the DC jack harness from the laptop.

The DC jack is ready for the replacement.

Mike
Thanks!
tom
Well written, short, clear. Good instuctions, thank you !
Gab
Great presentation
Well done
Andy
Very good. Thanks.
Carrie
I have a HP Pavilion dv9000 laptop for some reason it says no software detected and that’s is far as it go’s I can’t seen to do anything with it.