In this post I will guide you through the keyboard replacement procedure on a liquid damaged 11″ or 13″ MacBook Air.
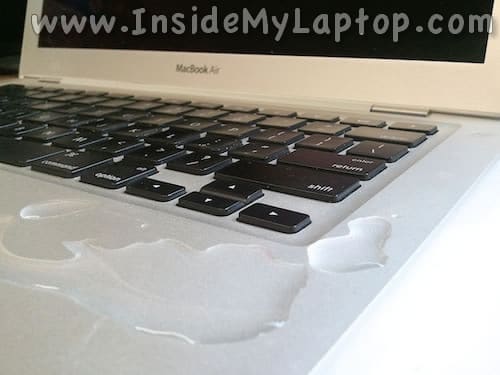
In my case a little bit of water was spilled on the lower right corner. After that some of the keys stopped working but the rest of the laptop worked just fine. I was able to use it with an external USB keyboard.
Unfortunately, the keyboard is permanently attached to the top case and cannot be easily replaced like on a MacBook Pro.
I will show you two methods. One is relatively easy but expensive and another one is pretty difficult but cheap. Read on.
Method 1. Expensive and easy.
If the keyboard is damaged you can replace the entire top case assembly which includes the palm rest and keyboard.
STEP 1.
Make sure you have all necessary screwdrivers before starting the disassembly process.
Models 2008-2009: Phillips #00 and T6 torx.
Models 2010-2014: Phillips #00, T5 torx, T6 torx, 5 point pentalobe (this is a special one).
Complete MacBook Air screwdriver kits are available on eBay.
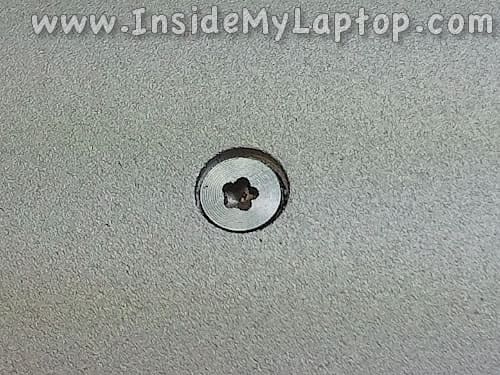
On the following picture you can see the 5 point pentalobe screw.
STEP 2.
Find a new (recommended) or used replacement top case assembly. There are plenty of them available on eBay.

Make sure it matches your laptop model number (for example A1369, A1466, etc…). The model number can be found on the bottom cover.
Alternatively, you can search for the replacement part using the model year and screen size (for example 11.6″ Mid 2013, 13″ Early 2014, etc…).
STEP 3.
Find the correct disassembly procedure here.
1. Select your screen size from the disassembly categories.
2. Select your model year.
3. Select the upper case replacement instructions. This is the most complete guide which you can follow in order to replace the top case keyboard assembly.
Method 2. Cheap and difficult.
Apple designed the top case assembly to be not serviceable but it’s still possible to replace just the keyboard.
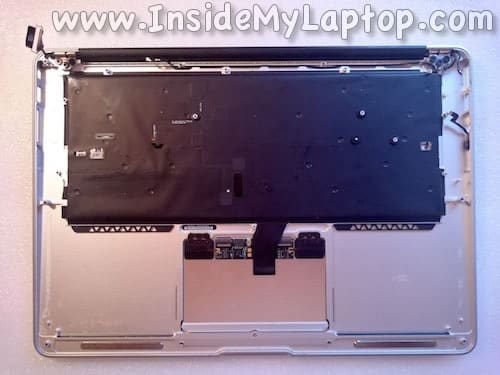
Disassemble the laptop so you have only to top case with the keyboard and trackpad attached to it.
It’s not necessary to remove the display.
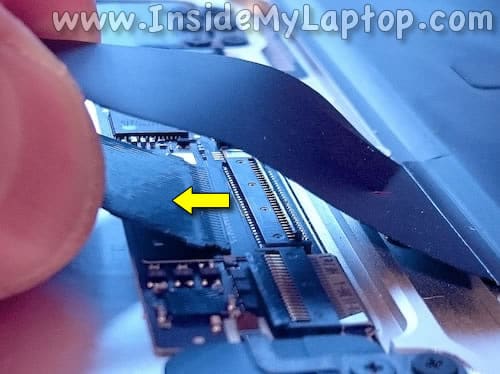
STEP 1.
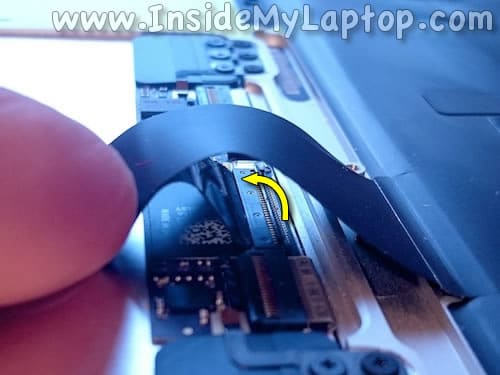
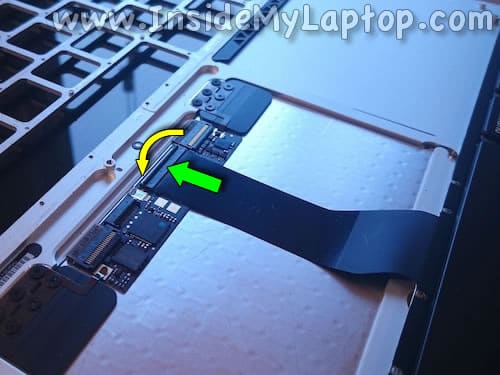
Lift up the keyboard cable and VERY CAREFULLY unlock the connector on the trackpad.
Do it by lifting up the right side of the cable retainer. It will open up at a 90 degree angle.
Work slowly. If you break the connector you will have to replace the trackpad.
STEP 2.
Pull the cable out of the connector.
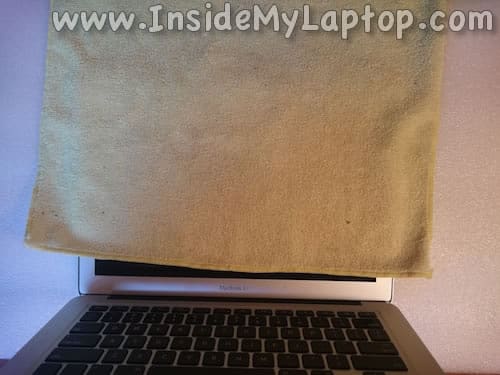
STEP 3.
I would suggest covering the screen with a soft cloth. It will help to prevent any accidental scratches.
It’s better to remove the display completely to be on a safe side.
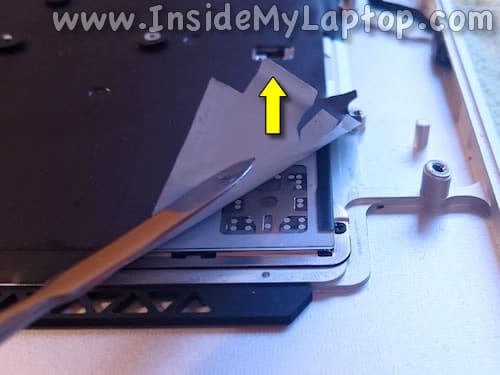
STEP 4.
Start separating the backlight from the keyboard.
It’s secured by adhesive tape.
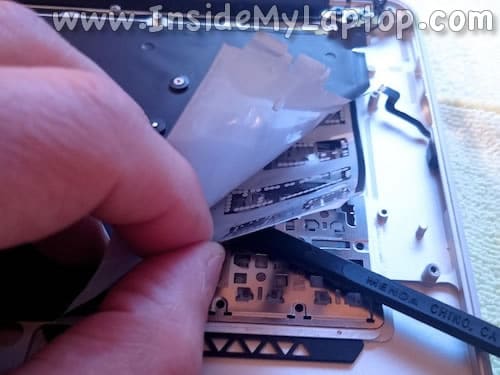
STEP 5.
The backlight has a few layers.
Basically, you will have to remove all layers located above the metal keyboard surface.
Do not separate them from each other.
STEP 6.
I found the backlight glued to the keyboard very well and hard to remove.
Heating up the backlight with a hair dryer made it much easier.
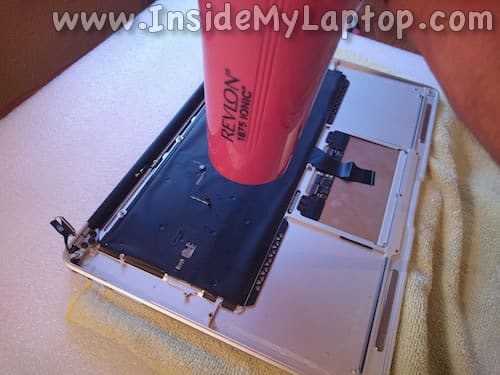
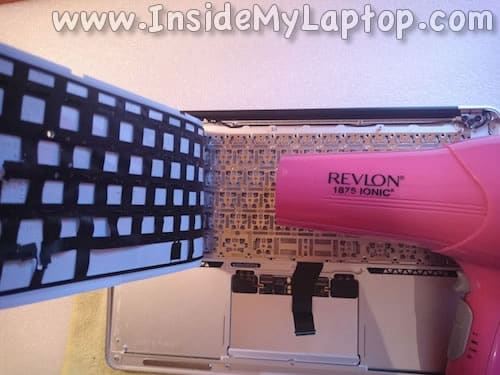
STEP 7.
Continue separating the backlight.
I was very careful but still damaged the lower layer of the backlight assembly.
If you do that, don’t worry too much. It still can be reused.

STEP 8.
While removing the backlight keep heating it up with a hair dryer.
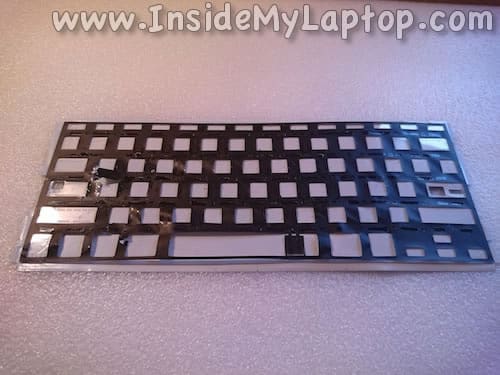
STEP 9.
The backlight has been removed! A little bit damaged but still can be used again.
STEP 10.
Now the fun part begins.
The keyboard is ready for the removal.
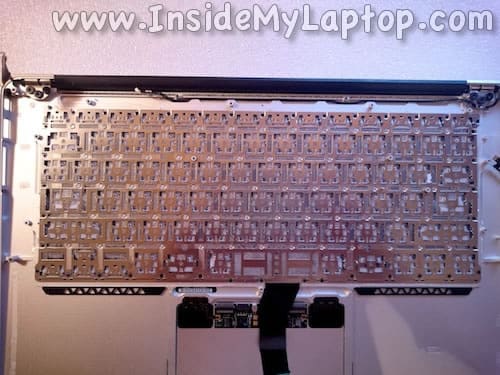
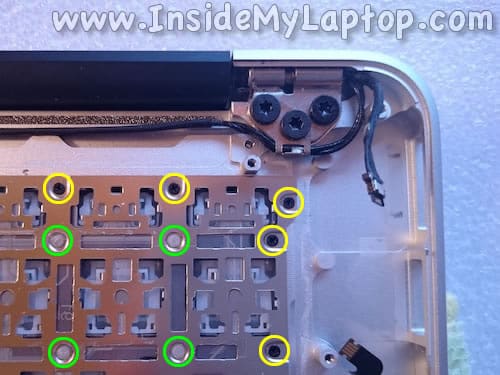
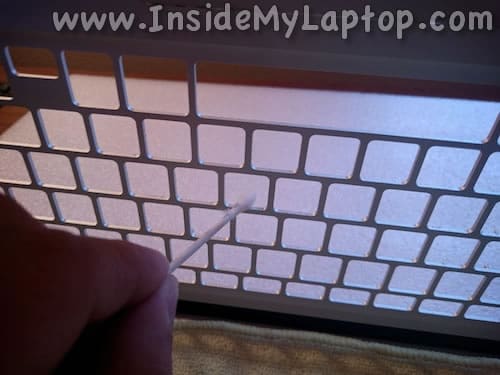
STEP 11.
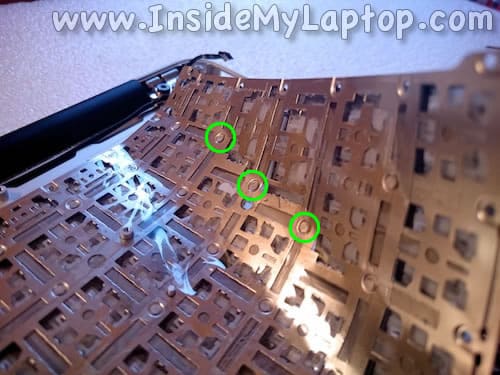
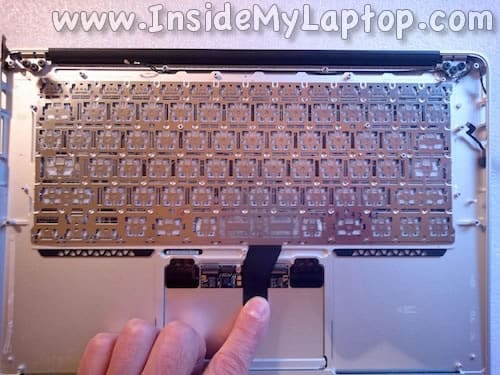
The keyboard is secured to the top case by 40 black screws (marked with yellow circles) along the perimeter and 52 rivets (green circles).
Remove all screws using a hight quality precision Phillips screwdriver. I suggest using a Wiha PH00 or something similar.
If you proceed with a bad quality screwdriver, it will be a nightmare to remove and install all those microscopic screws.
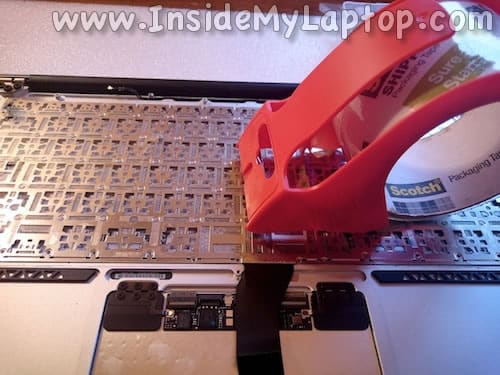
STEP 12.
After all 40 black screws removed, cover the back side of the keyboard with clear tape.
The tape will help to keep rivets attached to the keyboard during the disassembly process.
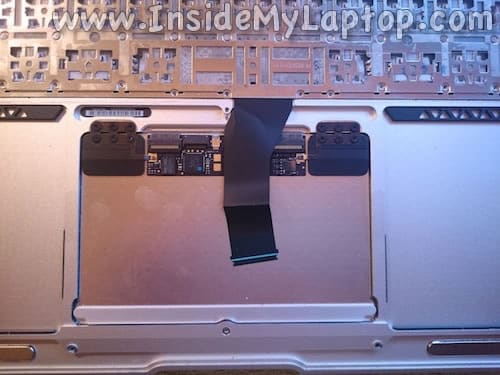
STEP 13.
Again, make sure the keyboard cable is disconnected from the trackpad.
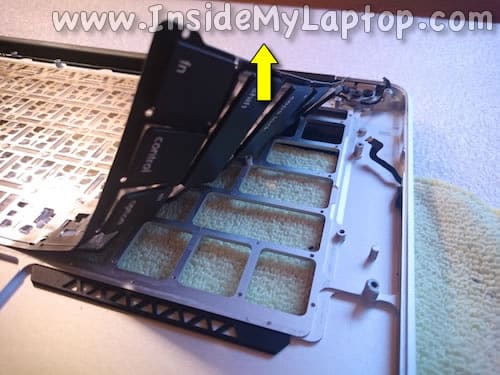
STEP 14.
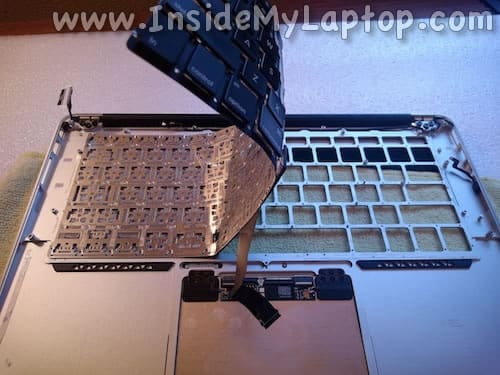
Now start separating the keyboard from the aluminum frame.
You will have to apply some reasonable force to break the rivets. Some rivets will separate from the frame (that’s what we need) and some will stay attached.
While removing the damaged keyboard it will bend… badly. Don’t worry about that. You don’t need it anymore.
STEP 15.
The rivets will stay attached to the keyboard because you secured them with clear tape in the step 12.
STEP 16.
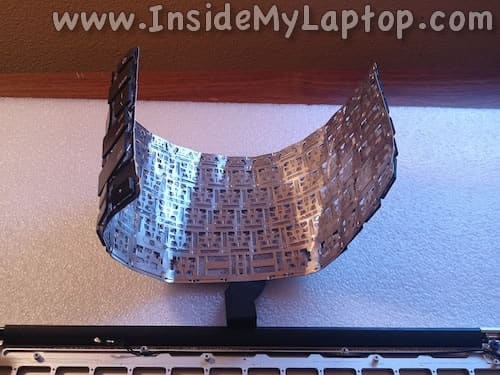
Continue separating the keyboard.
Again, some force is necessary.
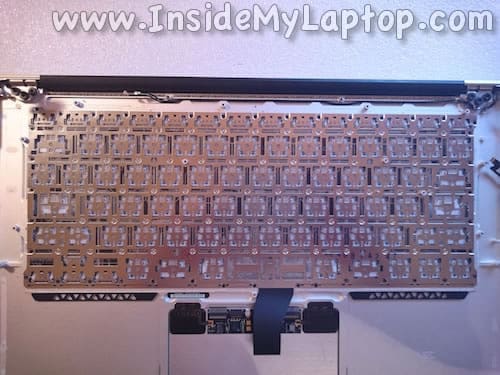
STEP 17.
Now it’s completely removed and damaged. I don’t think I will use it anytime soon. 🙂
STEP 18.
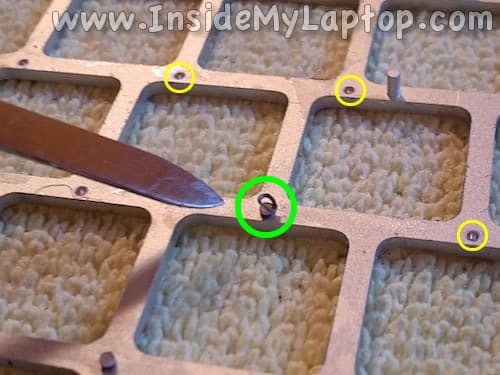
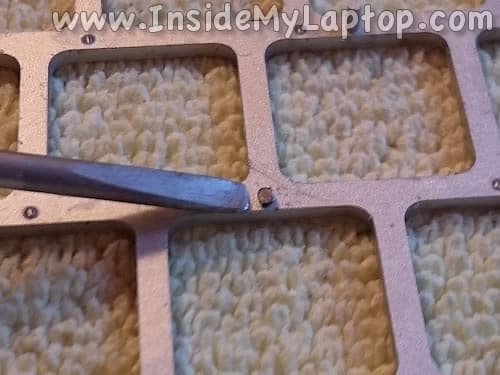
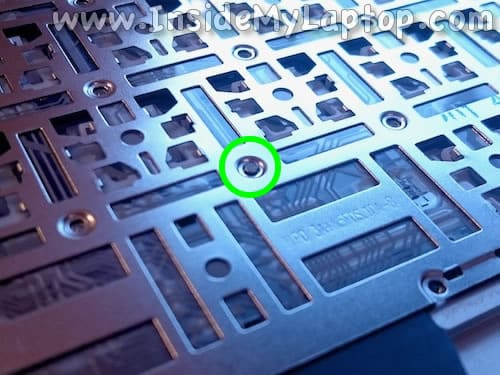
When a rivet separates from the frame It leaves a small hole in there (yellow circles). That’s exactly what we need. We’ll be using these holes to secure a new keyboard with screws.
Some rivets well stay attached to the frame (green circle).
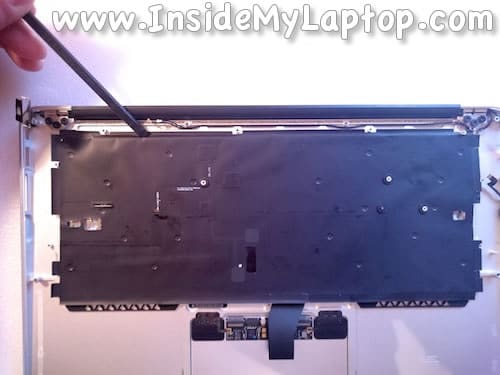
STEP 19.
You can knock it off using a flat head screwdriver and a small hammer.
Position the screwdriver as it shown on the picture and slightly tap on the back.
The rivet will separate from the frame leaving a small hole underneath.
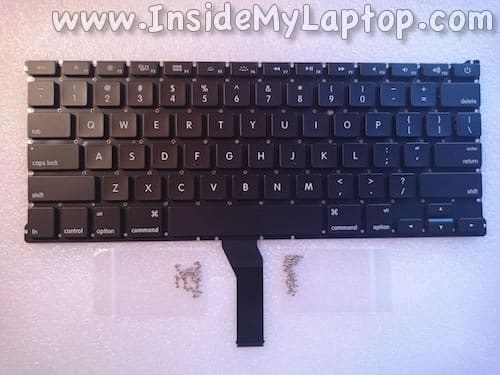
STEP 20.
A new aftermarket keyboard is ready for installation.
Also, you will need 52 screws to replace the rivets. Also available on eBay.
By the way, some sellers offer sets of 50 screws but you need 52 of them, at least for a MacBook Air 13″ used in my example.
STEP 21.
Before installing a new keyboard clean up the aluminum frame using a cotton swab and alcohol.
STEP 22.
Plug in the keyboard cable into the connector and lock it.
STEP 23.
Turn the keyboard upside down and position it on the top case frame.
Push on the cable to bend it the same way as the original one.
STEP 24.
Make sure the keyboard positioned correctly and all studs on the frame go thought the holes.
STEP 25.
Secure the keyboard with 40 black screws (along the perimeter) and 52 silver screws (instead of broken rivets).
STEP 26.
Install the backlight back in place and glue it back to the frame.
If you damaged the backlight while removing it, you can buy a new one on eBay.
Assemble the MacBook Air and test the keyboard.
My damaged backlight works just fine!
If you removed the logic board and found that it’s damaged by liquid, you can try cleaning it up.
Don’t want to fix the laptop but need the data? Here’s how to access files on the hard drive or SSD.
Ryan F.
Thank you. Daughter just spilled water on Mid 2012 MacBook Air 13″ A1466. Power button works but all the other keys are dead…backlights seems to work.
I will try your step by step instructions…thanks again.
Lily
i spilled liquid on my laptop, keyboard works fine.. lights are the problem.. only some of them turn on.
Amarand Agasi
Quick question:
Are the “52 silver screws (instead of broken rivets)” the same as the “40 black screws (along the perimeter)” or are they different screws, other than color? Do you know what the rivet-replacing screws are specs-wise? Does the case need to be modified or do the screws go right in? Thanks!
Jens
Had problems with the keys “2, w, s, F2”. Replaced the keyboard according to your guide and everything works perfectly now.
I had some problems with the rivets at step 12, as most of them stayed on the aluminum frame. I took of the display and used a hammer and a flathead screwdriver to take them all of in 2 mins. If the rivets are not removed the keyboard won’t fit probably.
Paul
Do you know if I can replace A1466 2012 topcase with 2013/2014 one? The mic seen to be the only difference, which is dual in 2013 model. Is there going to be a problem?
Pat
I would like a bit more details as to how the rivet’s holes would be magically threaded for screws! I don’t expect such tiny screws to be self-threading.
flock
Hey! Just wanted to say thank you. My Air (2011 11″) is like new!
A few points to note:
-don’t bring the dryer/heater too close to the backlight layer. Mine almost melted and it was a pain in the ass to put back into the chassis (but it did work despite the damage)
– be very careful when you put the screws back on the new keyboard. I lost one that got stuck in one of the keys and had to remove everything and start over. Use a magnet screwdriver if available.