In this guide I explain how to replace the LCD screen on a Dell Latitude D5420.
It’s very easy to replace the screen on this laptop. The entire replacement procedure took me about 15 minutes.
Before you start taking it apart, make sure the computer is turned off and battery removed.
STEP 1.
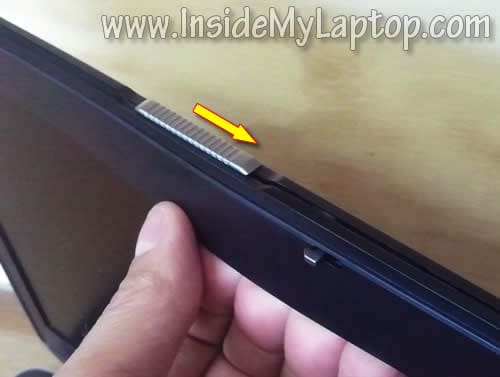
Insert your fingers under the display bezel.
Slide the display close switch to the right and at the same time wiggle the bezel and start separating it from the display.

STEP 2.
Continue separating the bezel on the top of the display assembly.
After that move to the lower part of the display.

STEP 3.
Remove the bezel from the display assembly.

STEP 4.
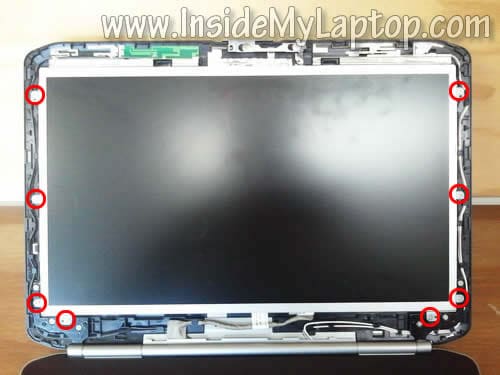
Remove eight screws securing the LCD assembly.

STEP 5.
Separate the LCD from the display back cover and place it face down on the keyboard/palmrest.

STEP 6.
Now you can access the video cable.

STEP 7.
Carefully remove clear sticky tape securing the connection.
Unplug the video cable.

STEP 8.
Remove the LCD from the display.

STEP 9.
Remove three screw securing the right mounting bracket. Transfer this bracket to the new LCD screen.
Do the same with the left mounting bracket.

How to find a new compatible LCD for Dell Latitude E5420?
The best way is searching by the original model number which is printed on the back side of the screen.
In my Dell Latitude E5420 I had the following LCD installed: model N140BGE-L11 (Rev.C1).

sandeep baral
very useful information
We are able to resolve our lcd issue with help of this article
Pep
Very useful. ¡¡¡