
In this guide I show how to disassemble Toshiba Satellite E45t Ultrabook. I will explain how to get an access to all main components and remove the keyboard.
If you want to replace the keyboard on a Toshiba Satellite E45t Ultrabook, you will have to take it apart completely and remove the motherboard.
You should be able to use this disassembly guide for the following Toshiba Ultrabook models:
- Satellite E45T-B4106
- Satellite E45T-B4300
- Satellite E45t-A4100
- Satellite E45t-A4200
- Satellite E45t-A4300
- Satellite E45t-AST2N01
- Satellite E45t-AST2N02
- Satellite E45t-B4204
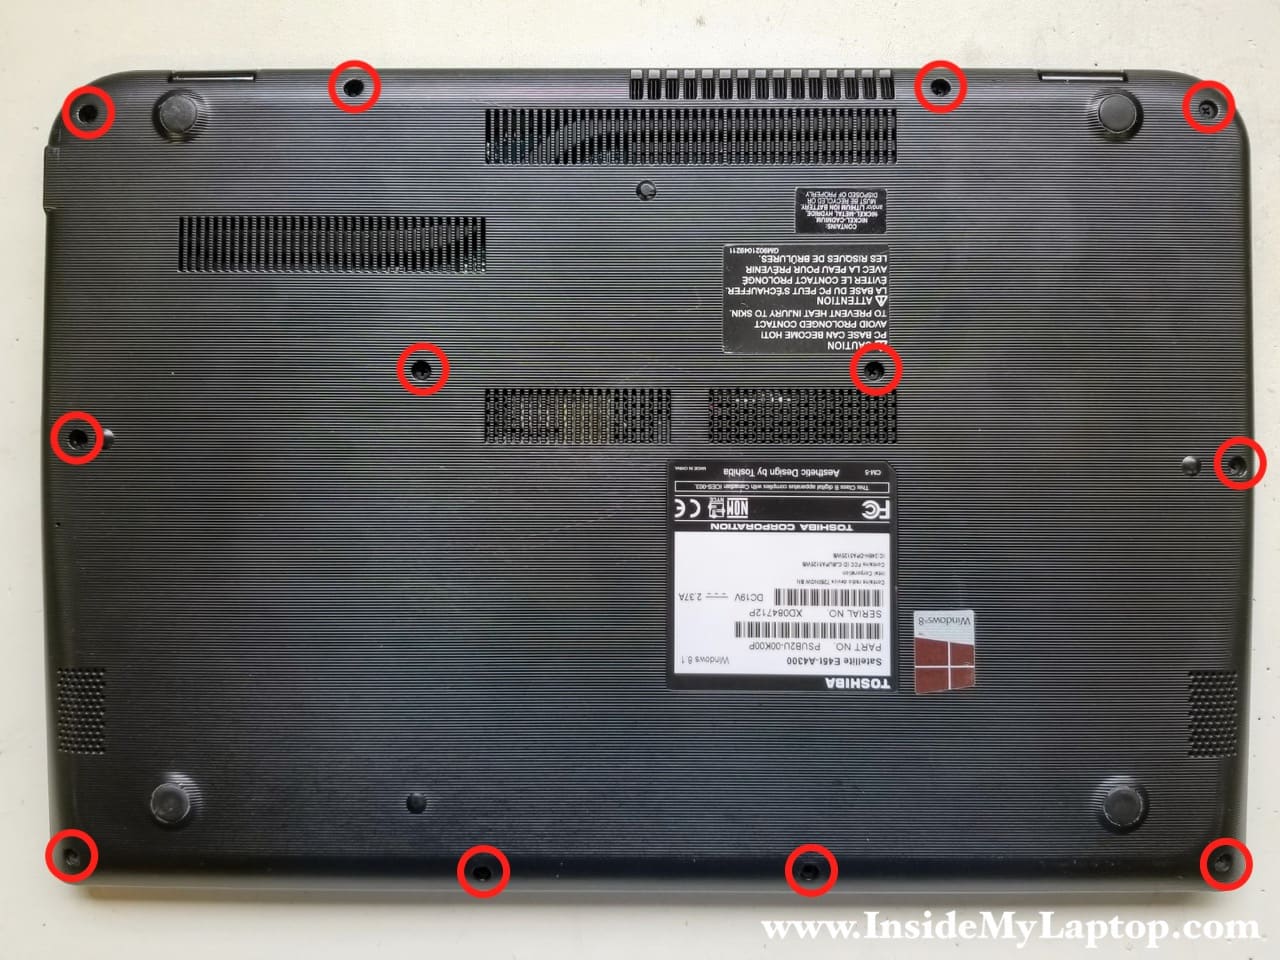
STEP 1.
Remove all screws from the bottom of the laptop.
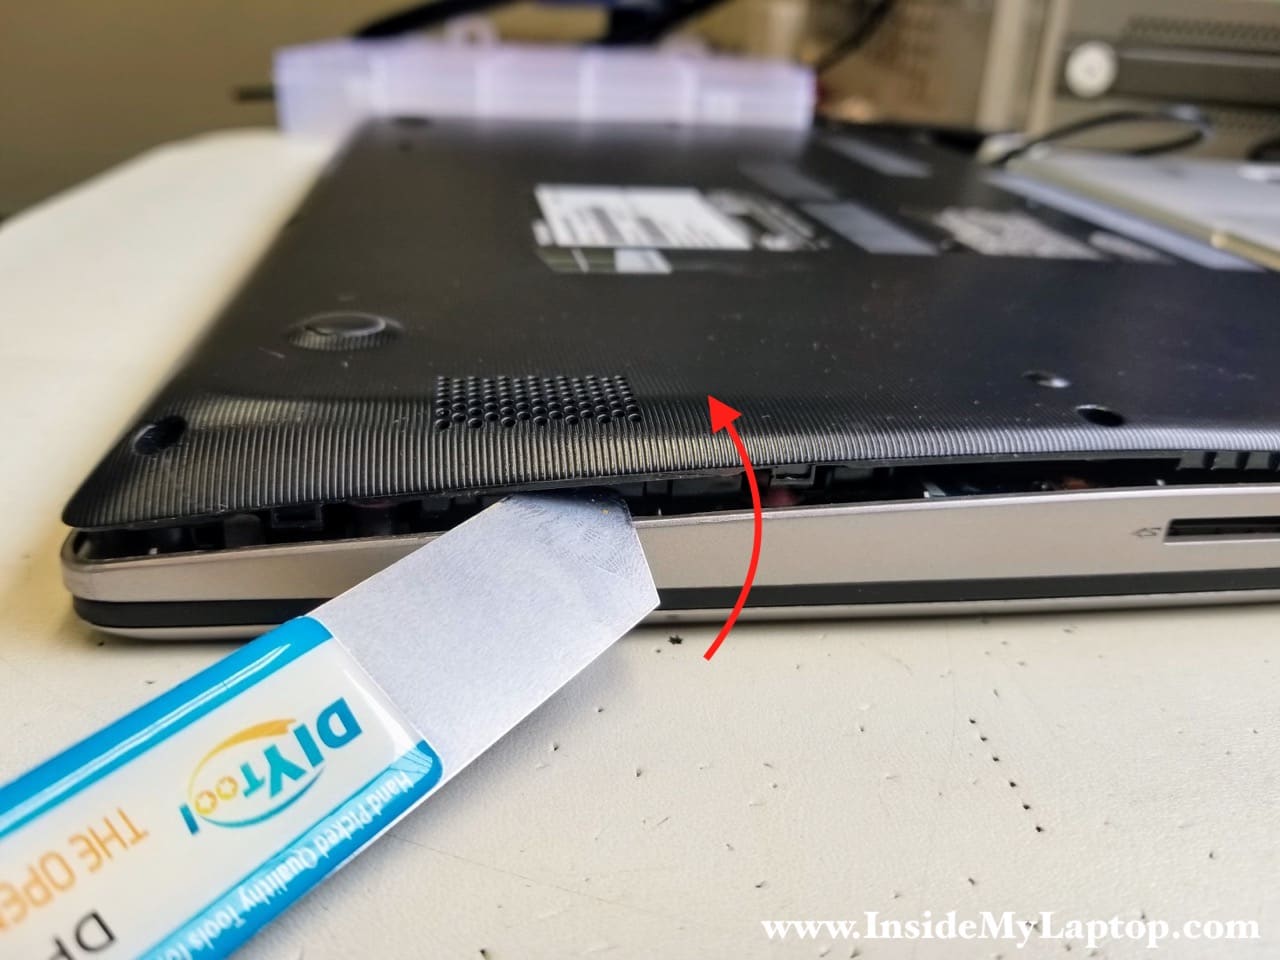
STEP 2.
Insert a thin metal case opener tool between the bottom cover and the top case assembly.
Pry the bottom cover up to unfasten it from the top case. Continue removing it with your fingers. You’ll have to apply some reasonable force to separate two parts from each other.
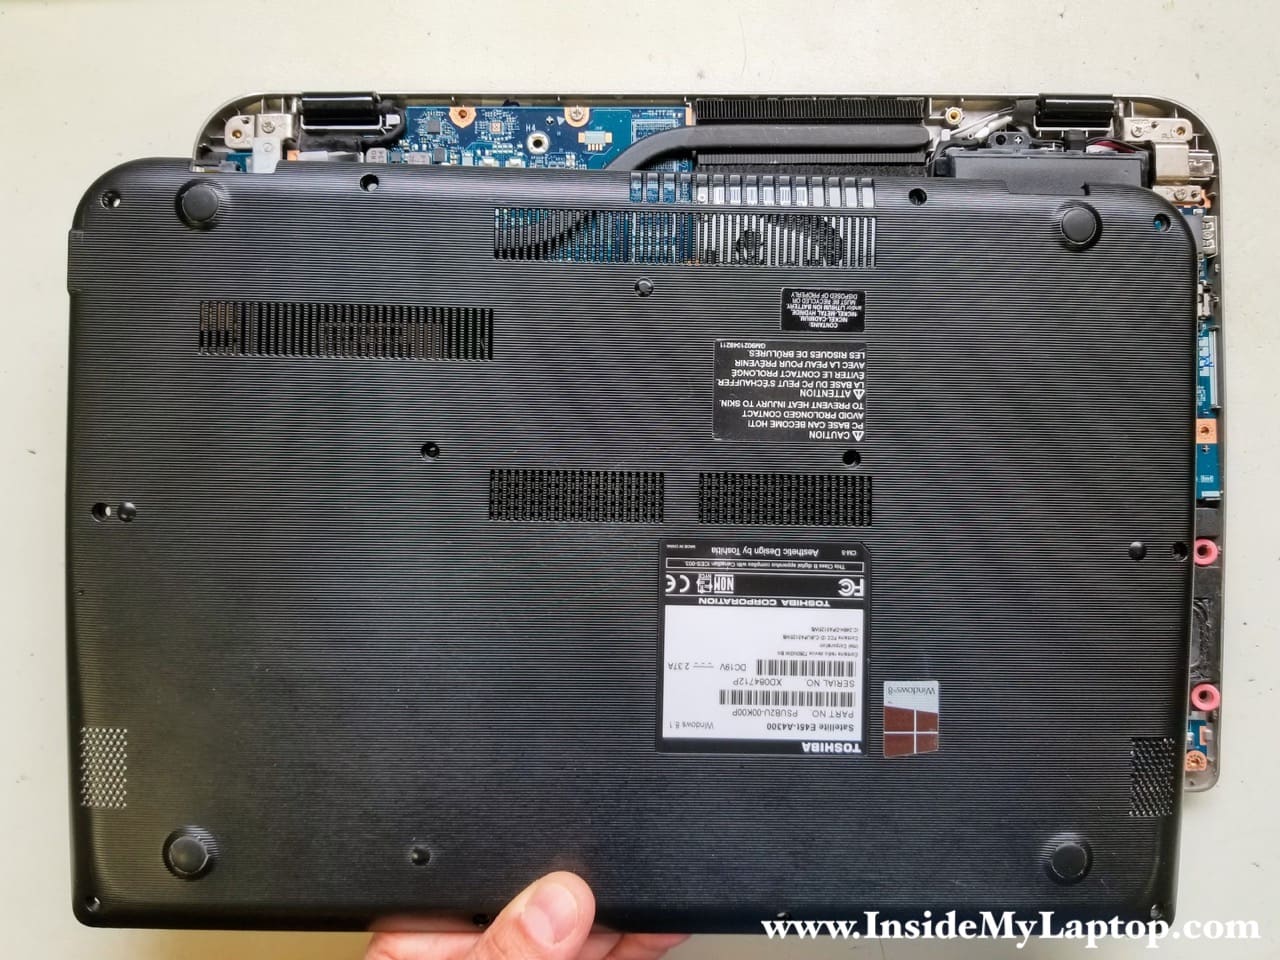
STEP 3.
Remove the bottom cover.
STEP 4.
Remove one screw fixing the battery.
Peel off the clear tape securing the battery cable connection. Unplug the battery cable from the motherboard.

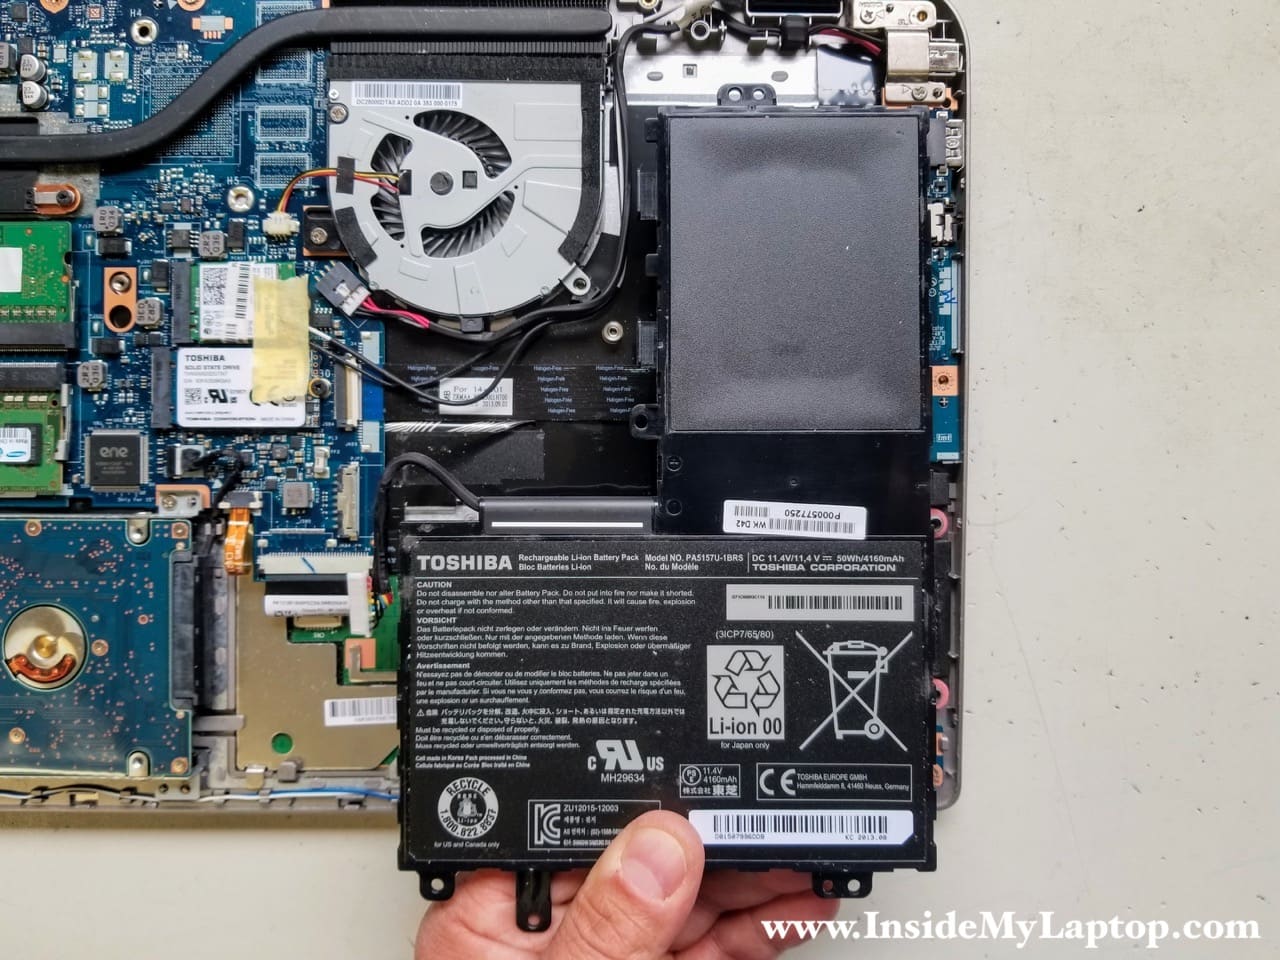
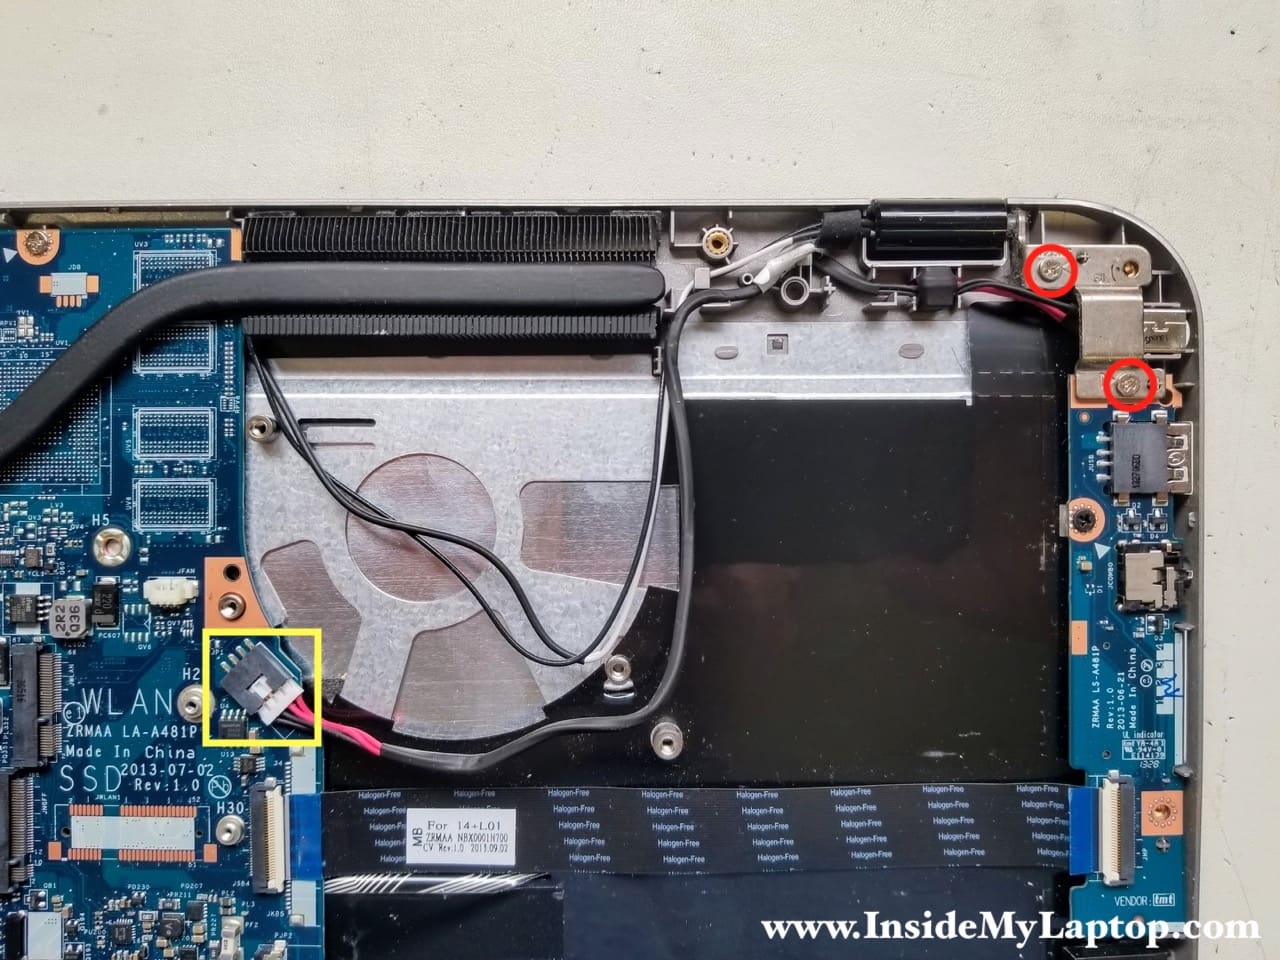
STEP 5.
The Wi-Fi antenna cables and the DC jack harness routed on the left side of the battery. Un-route these cables from the guided path on the battery. Remove the battery.
Replacement battery type PA5157U-1BRS.
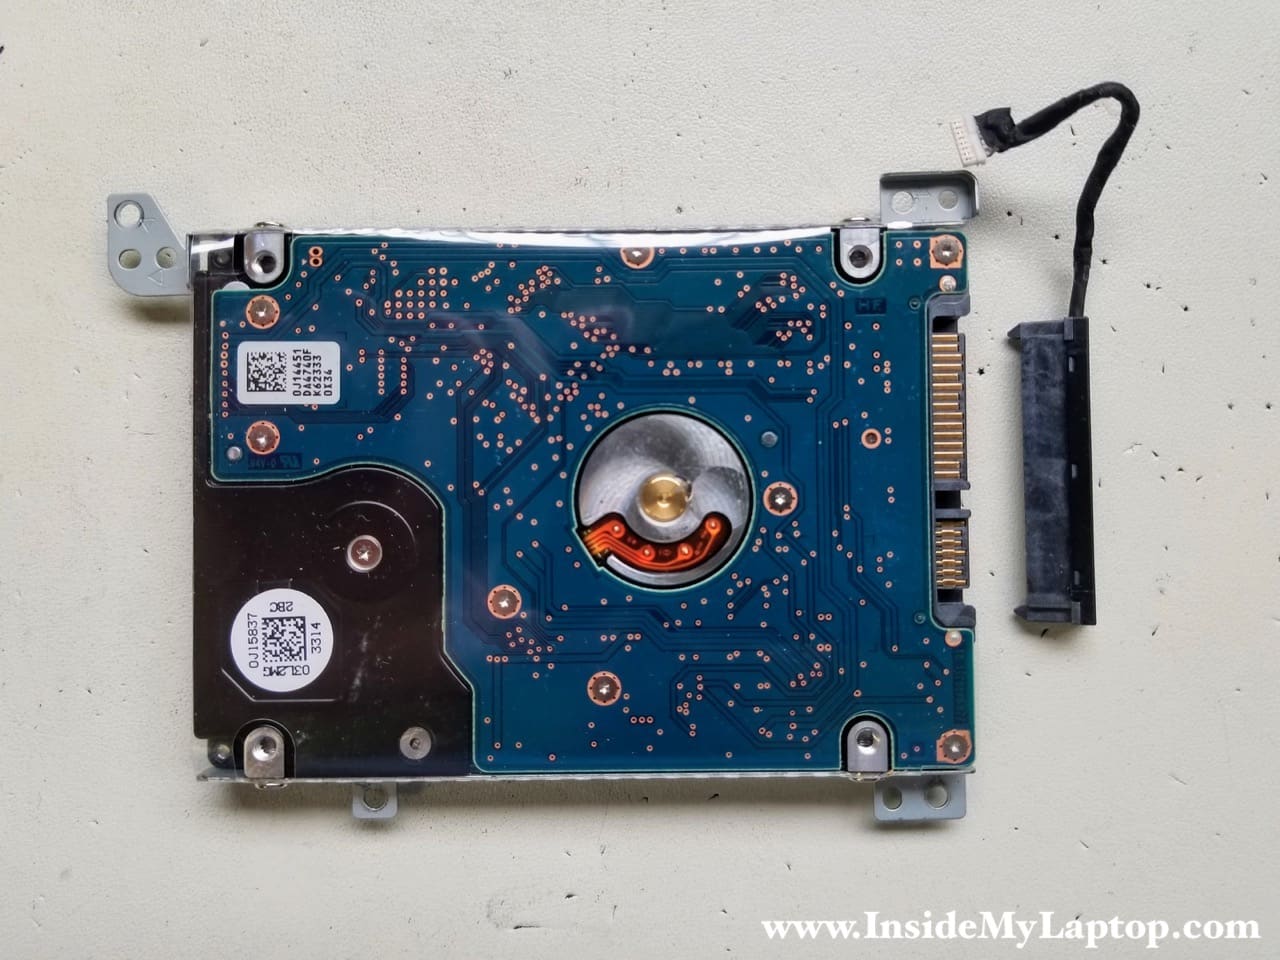
STEP 5.
Remove three screws fixing the hard drive bracket. Unplug the hard drive SATA cable from the motherboard (yellow square). Remove the hard drive.

If you plan to replace the hard drive or upgrade it to a SSD, you will have to transfer the bracket and cable to the new drive.
I recommend upgrading this regular hard drive to a 2.5″ SATA solid state drive to improve laptop performance.
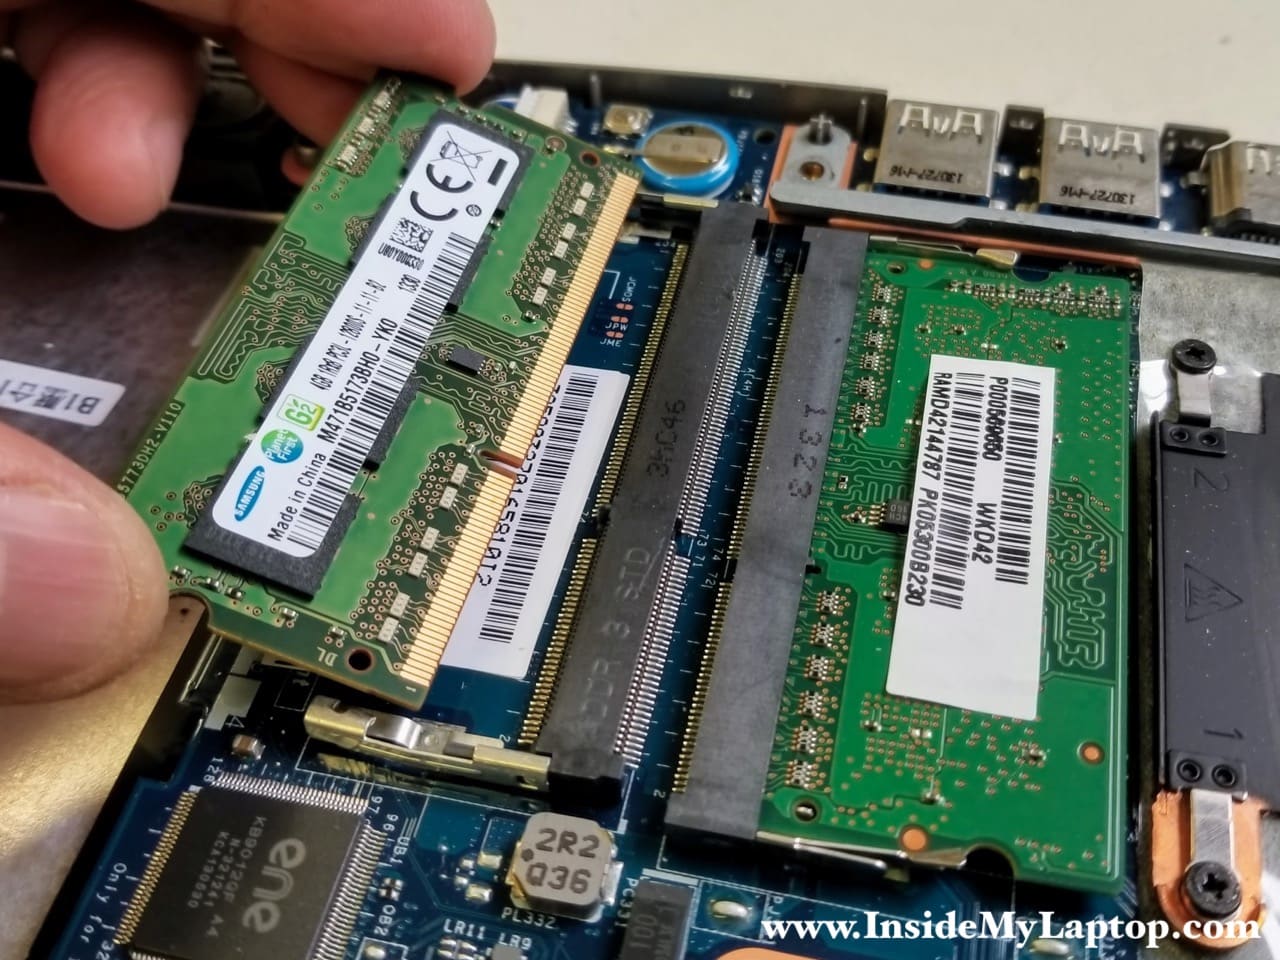
STEP 6.
Toshiba Satellite E45t Ultrabook motherboard has two memory slots. You can leave both memory modules connected unless you plan to replace or upgrade them.
You can install up to 16GB (2x8GB) DDR3-12800 SODIMM RAM modules into these slots.
STEP 7.
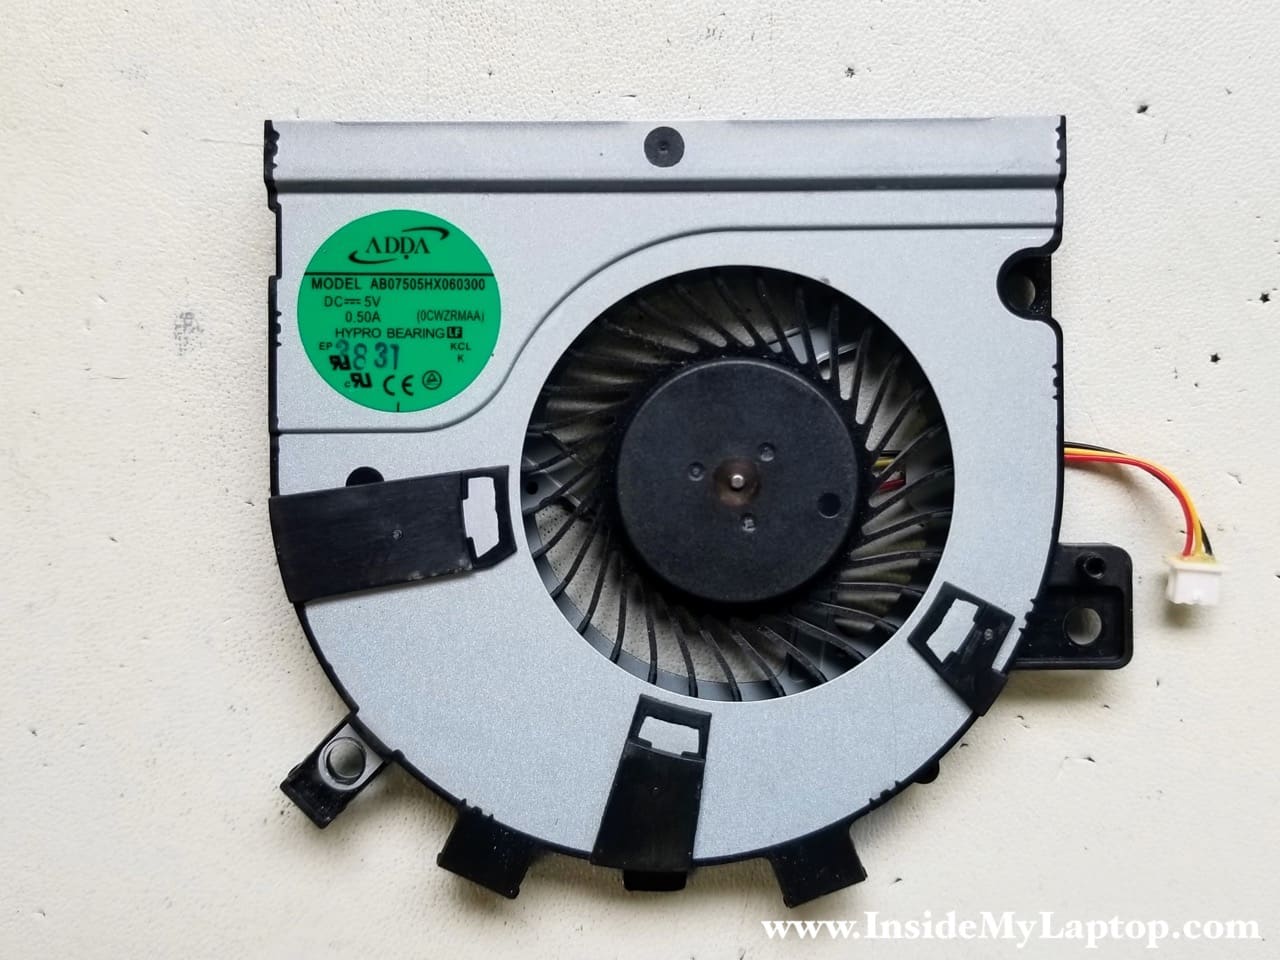
Remove two screws attaching the cooling fan to the case. Unplug the fan cable from the motherboard.
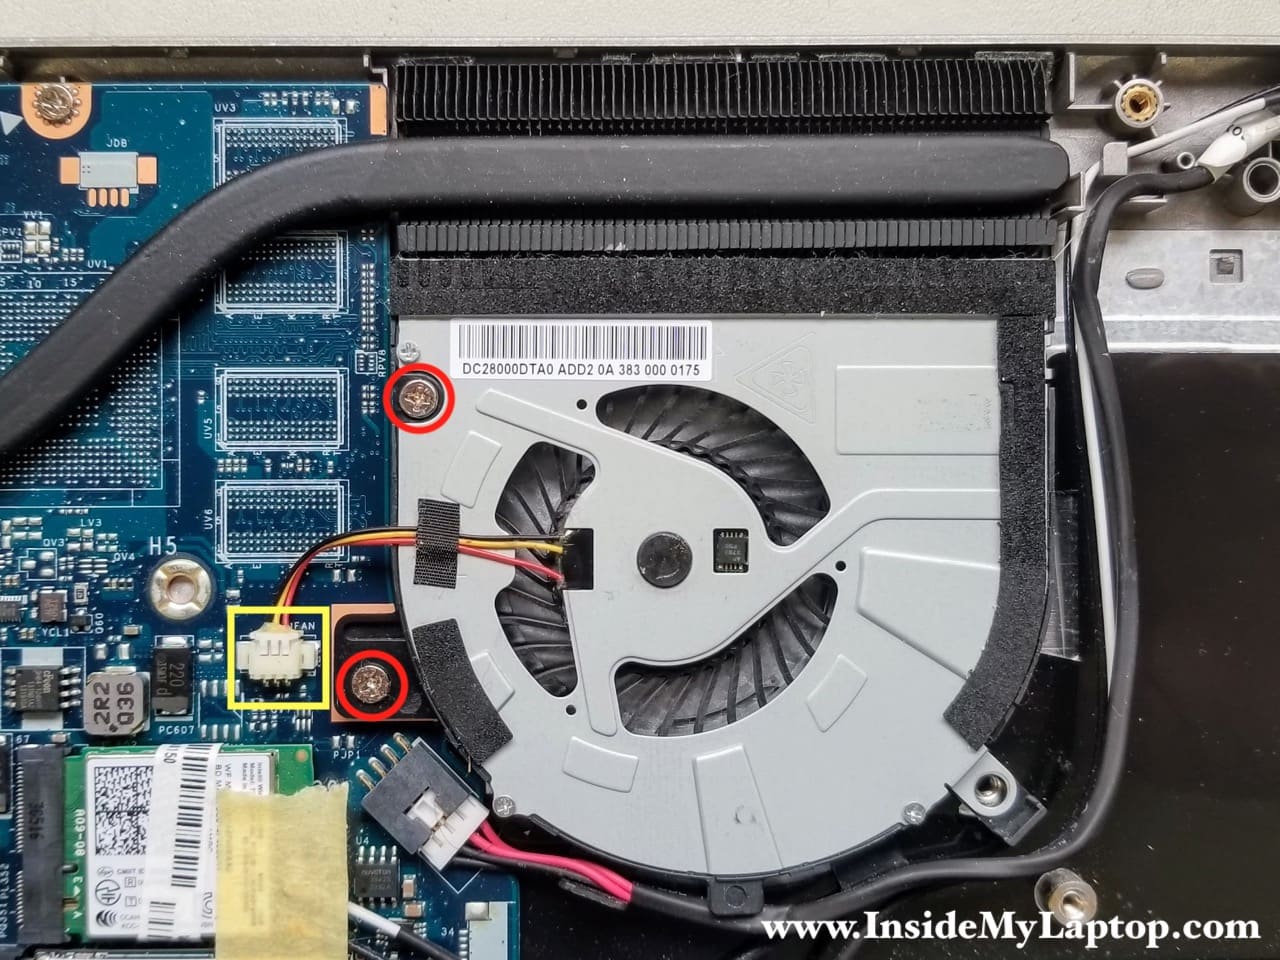
Remove the fan and replace it if necessary. The original fan part number is printed on the green label:Â AB07505HX060300.
STEP 8.
Unplug both Wi-Fi antenna cables from the wireless card.
Wi-Fi cable with a white sleeve connected to the port #2 (Main port).

STEP 9.
Remove two screws securing the Wi-Fi card and Toshiba 32GB cache SSD. Both cards will pop up at a 20 degree angle.
Pull both card out of the slots.
This step is optional unless you plan to replace the Wi-Fi card or cache SSD. You can leave them connected to the motherboard.

STEP 10.
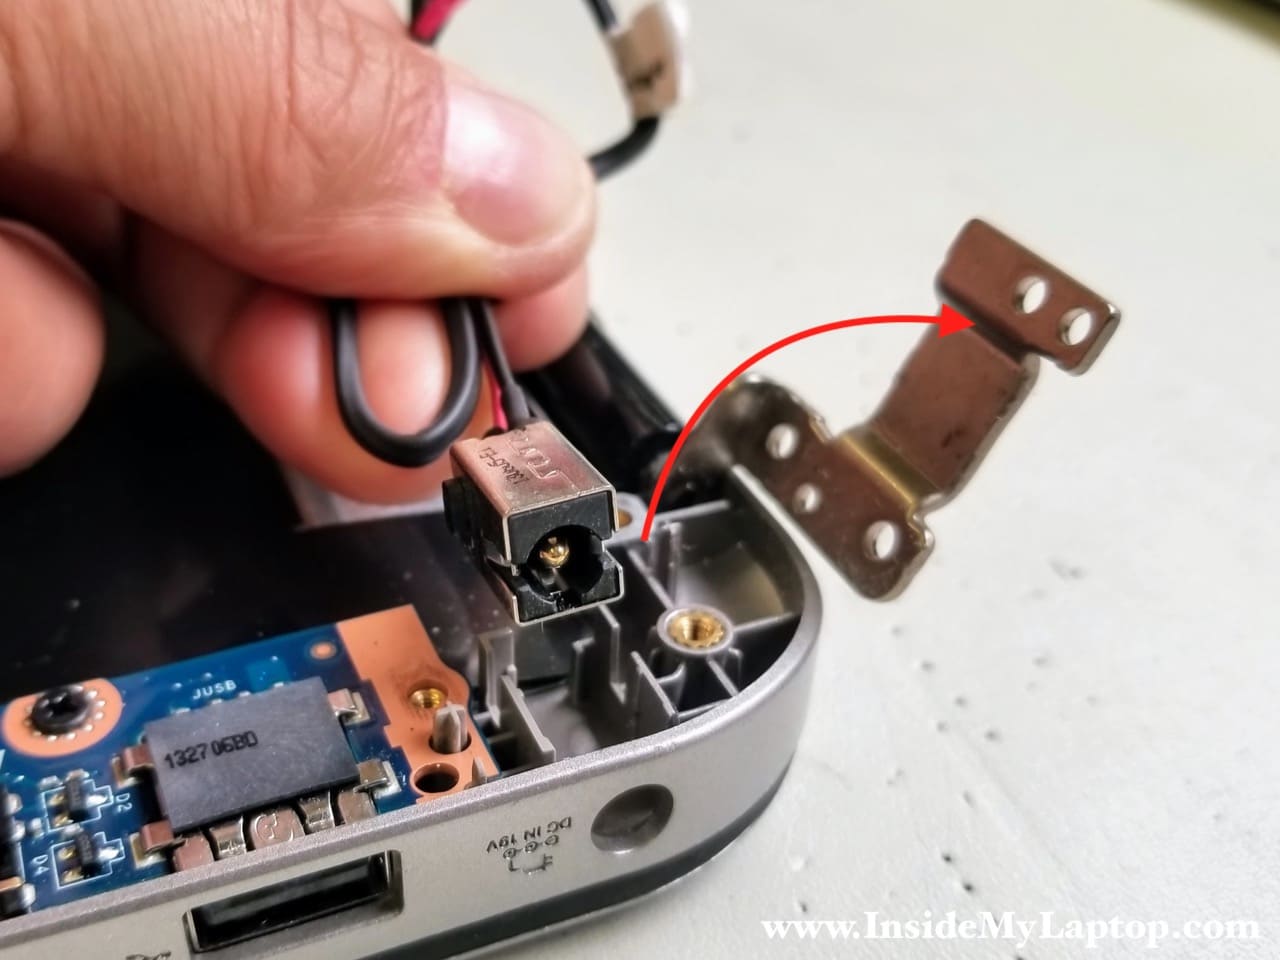
The DC power jack is mounted under the hinge. Let’s remove the jack.
Unplug the DC jack harness from the motherboard and remove two screws securing the hinge.
STEP 11.
Open up the hinge to release the jack.
Lift up the DC jack from the case and remove it.
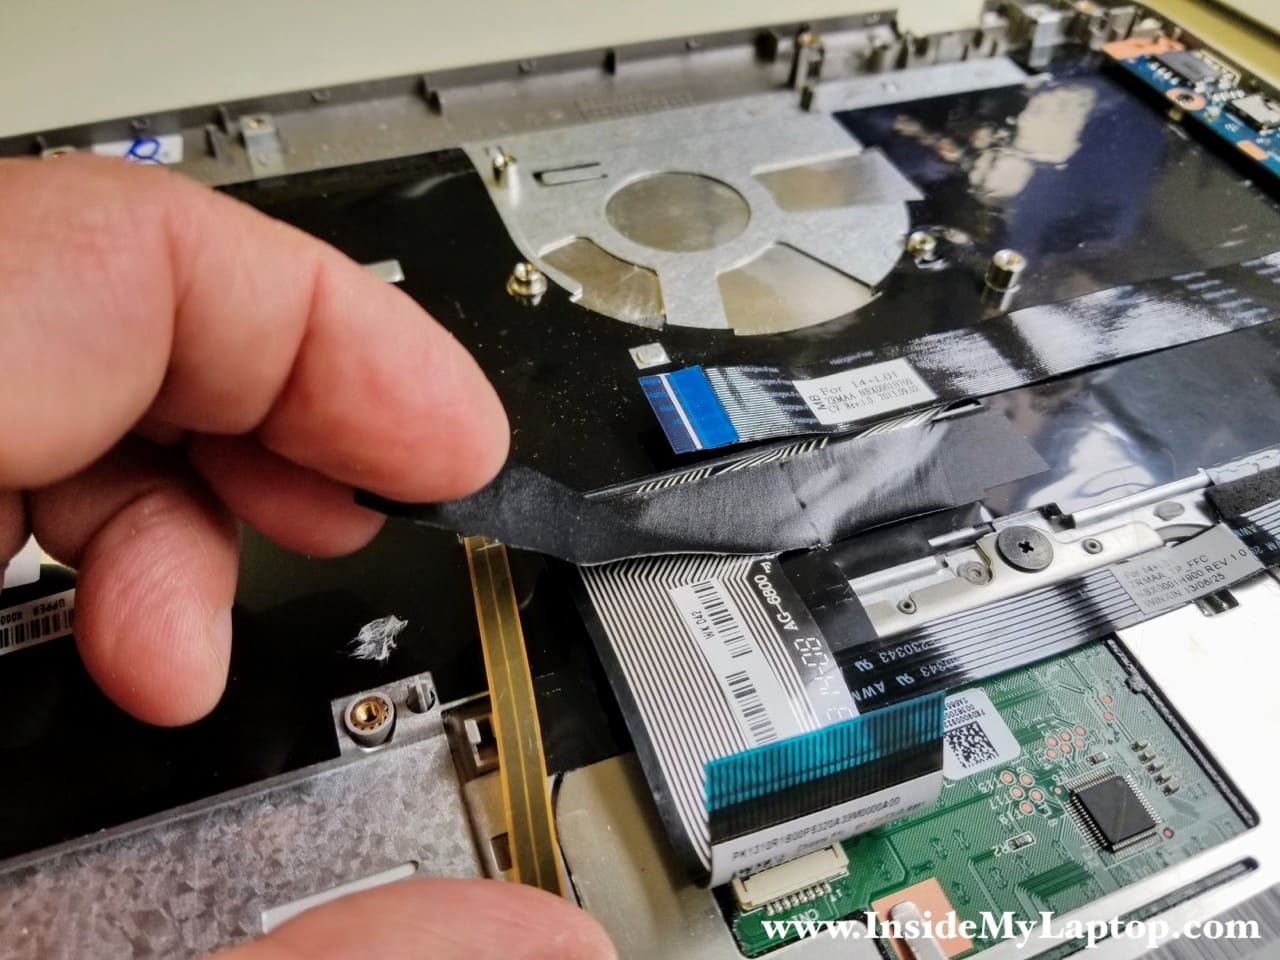
STEP 12.
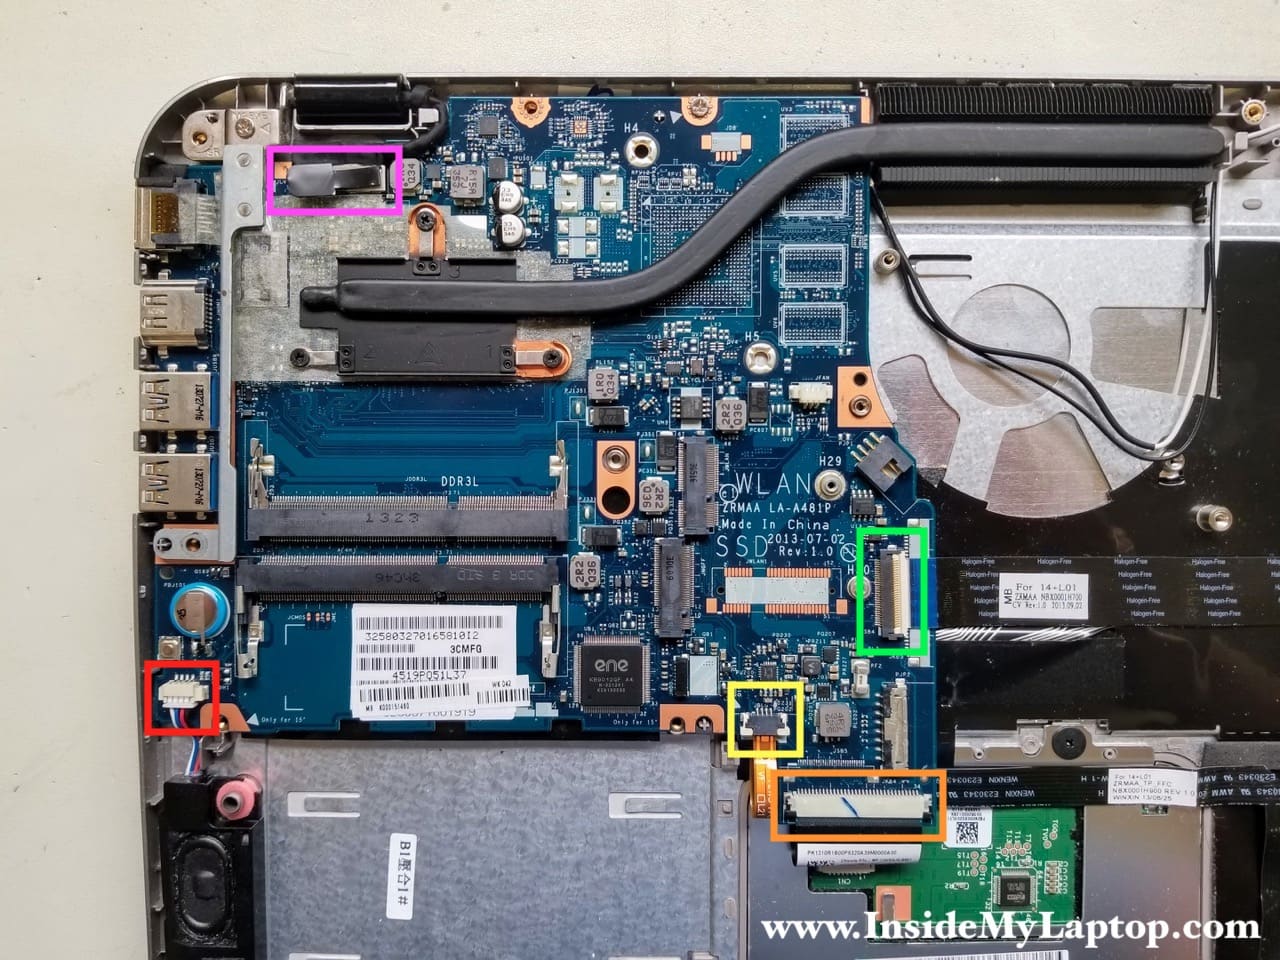
Disconnect the following cables from the motherboard:
- Speaker cable (red square)
- Keyboard backlight cable (yellow square)
- Keyboard data cable (orange rectangular)
- USB Audio SD card reader cable (green rectangular)
- Touch screen video cable (pink rectangular)
Here’s how to release the USB Audio SD card board cable.
Lift up the white locking connector tab and pull the cable out.
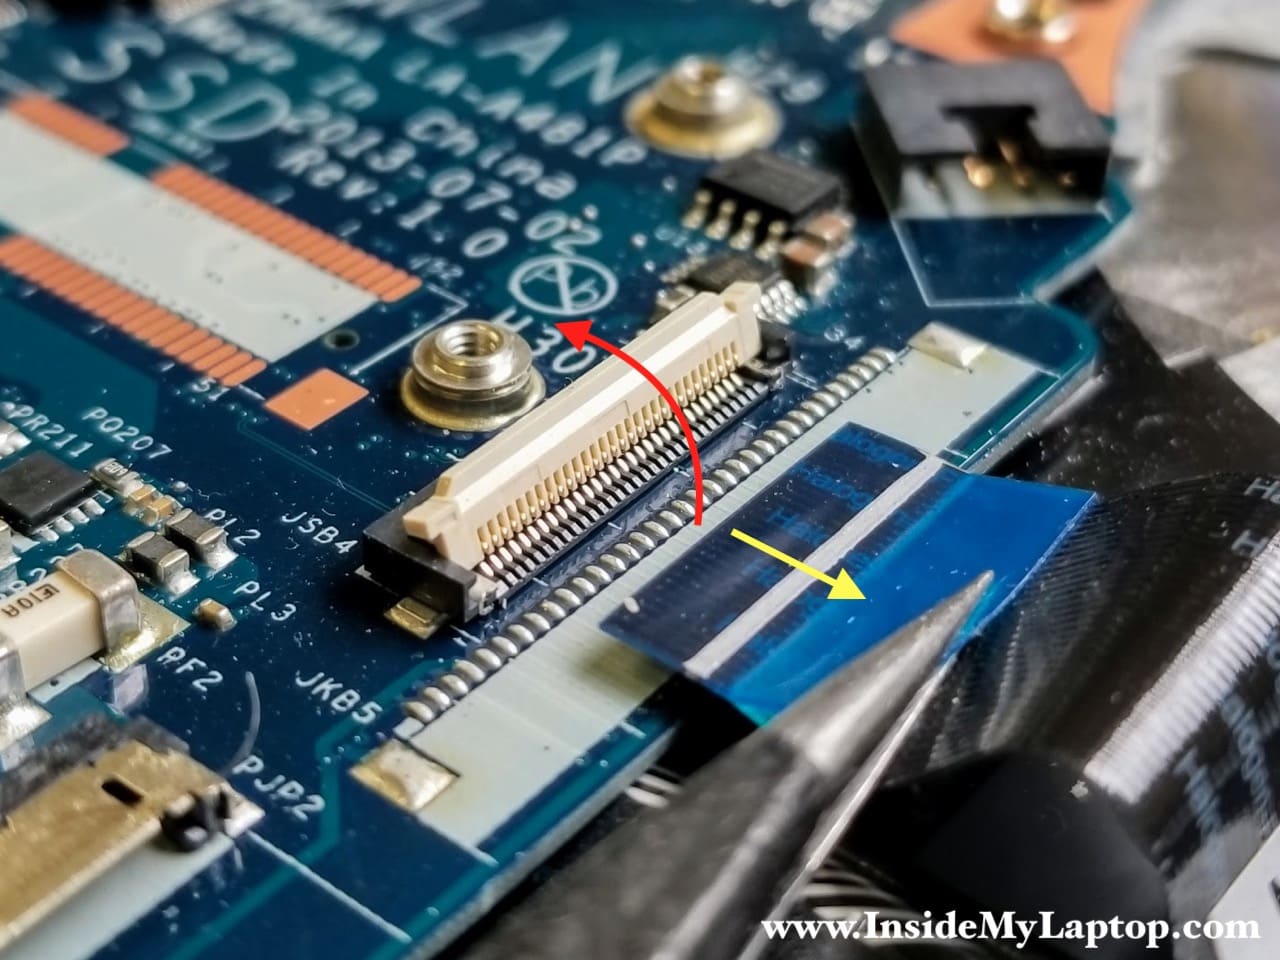
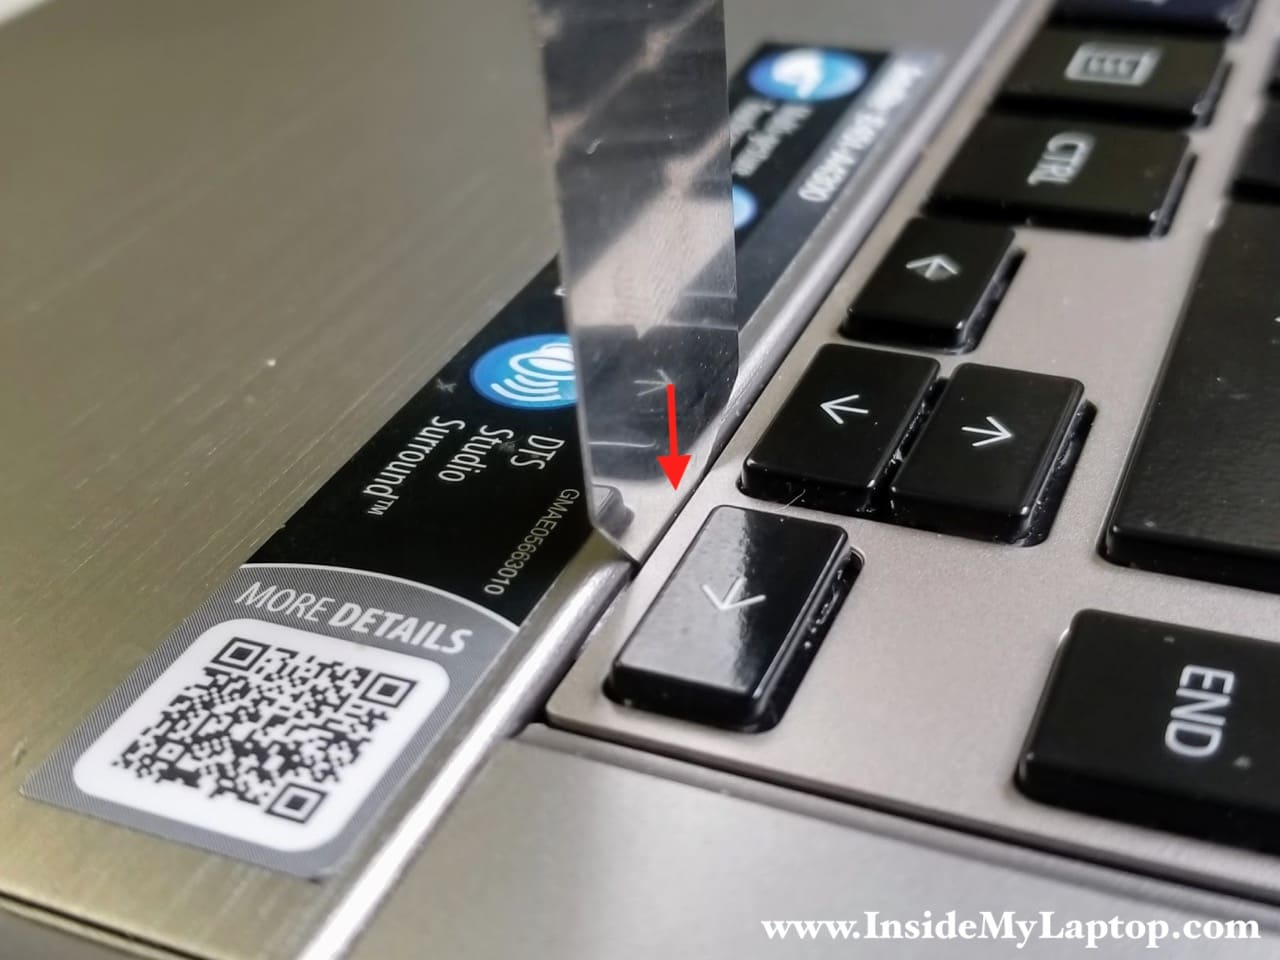
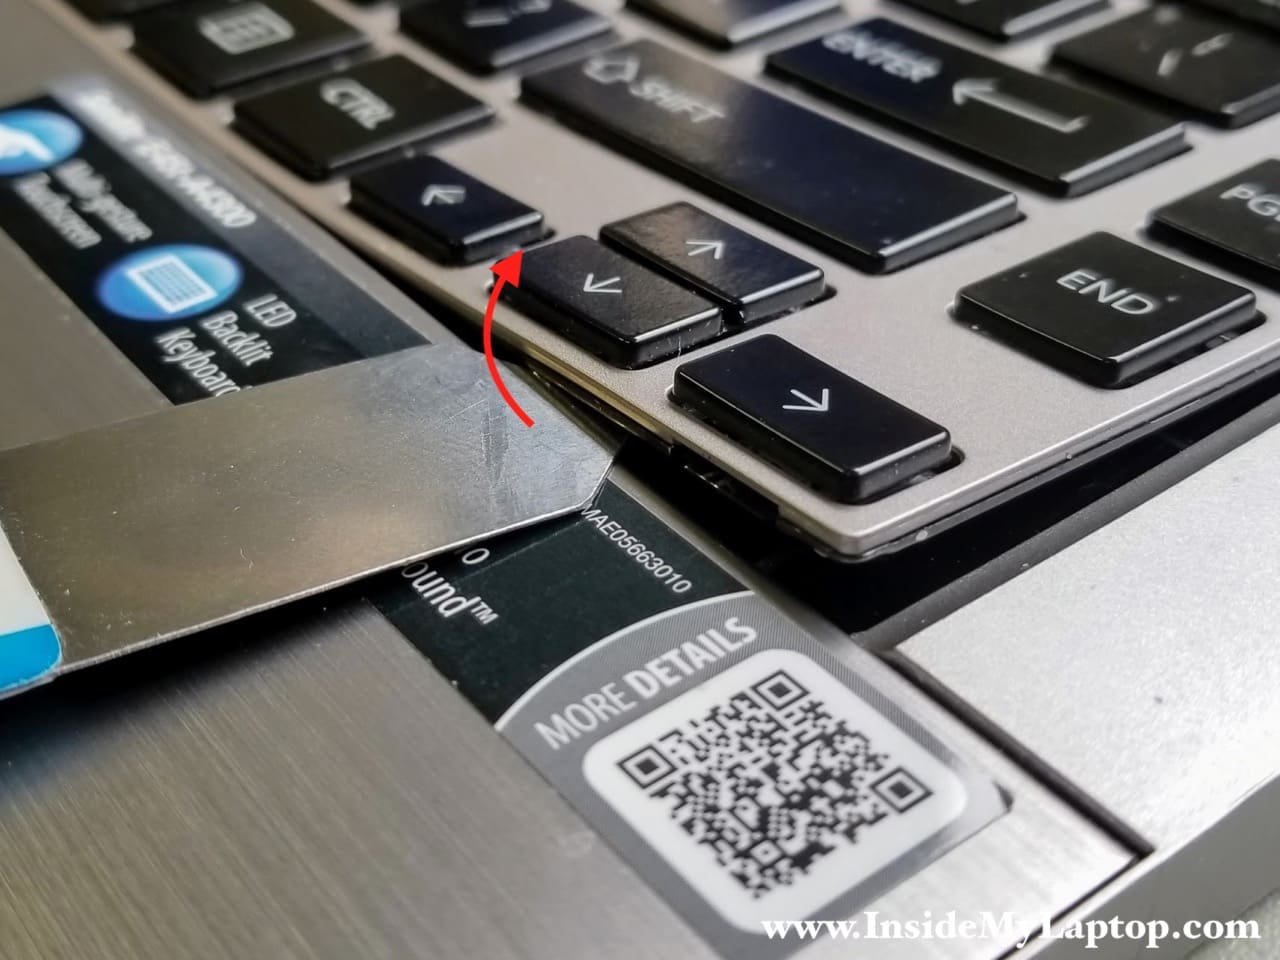
The keyboard cables connectors are different. On the following picture I show how to release the data cable but the backlight connector is similar, just smaller.
Slide the locking tab about 2 millimeters to the shown direction (two red arrows). Pull the cable out (yellow arrow).
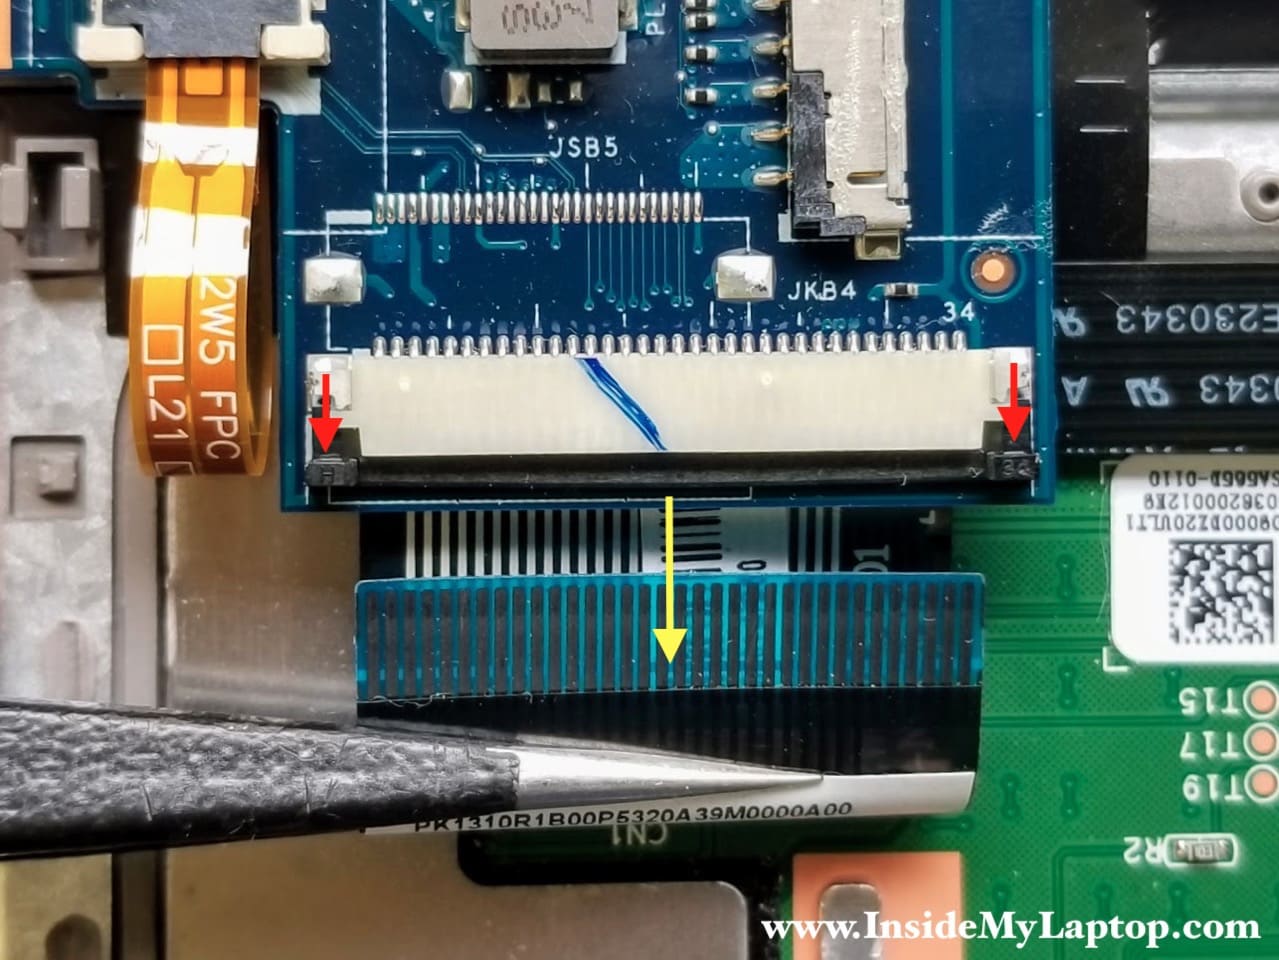
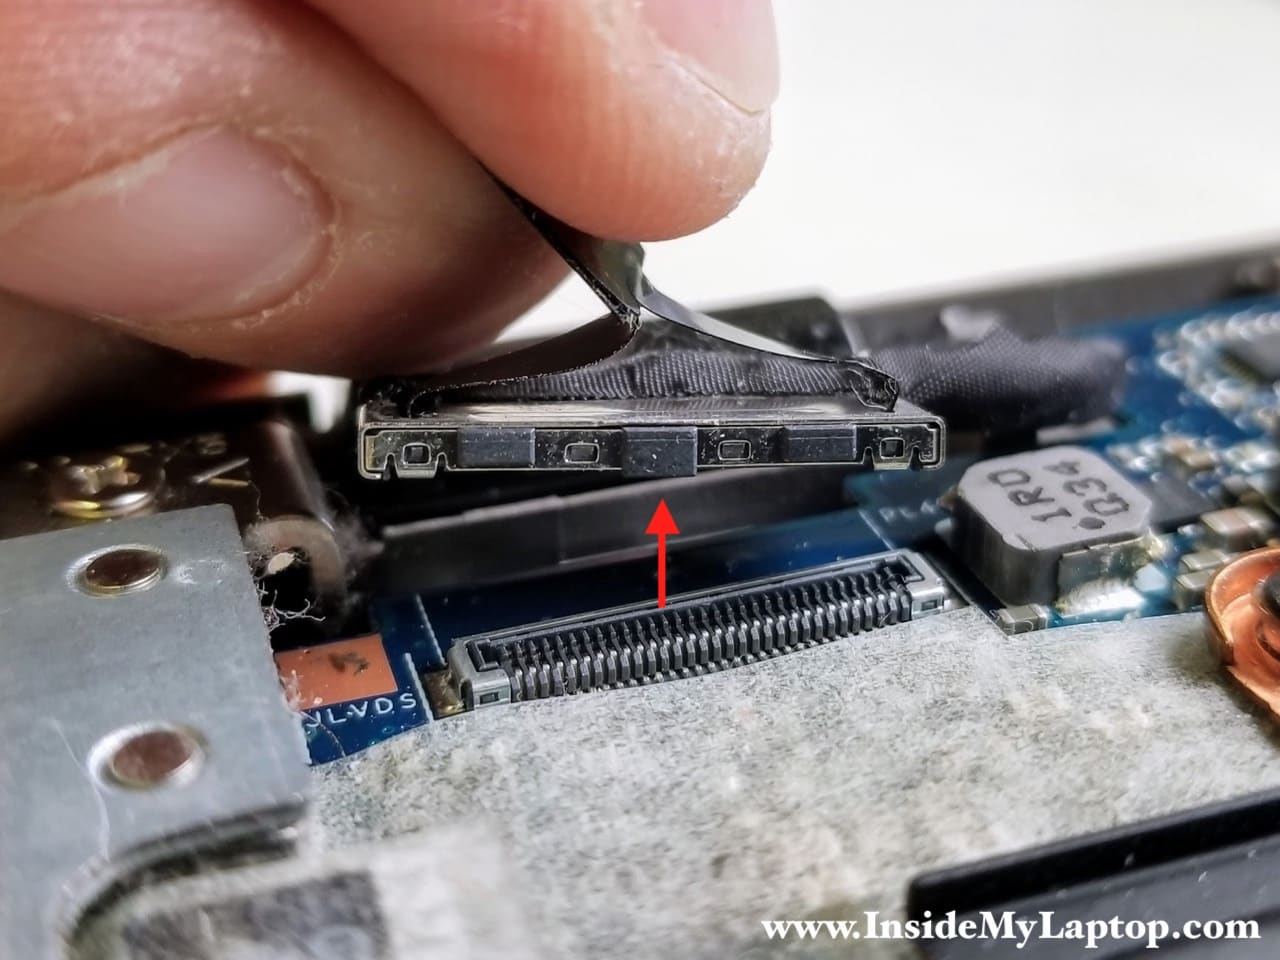
Unplug the touch screen video cable using the black belt on the top.
STEP 13.
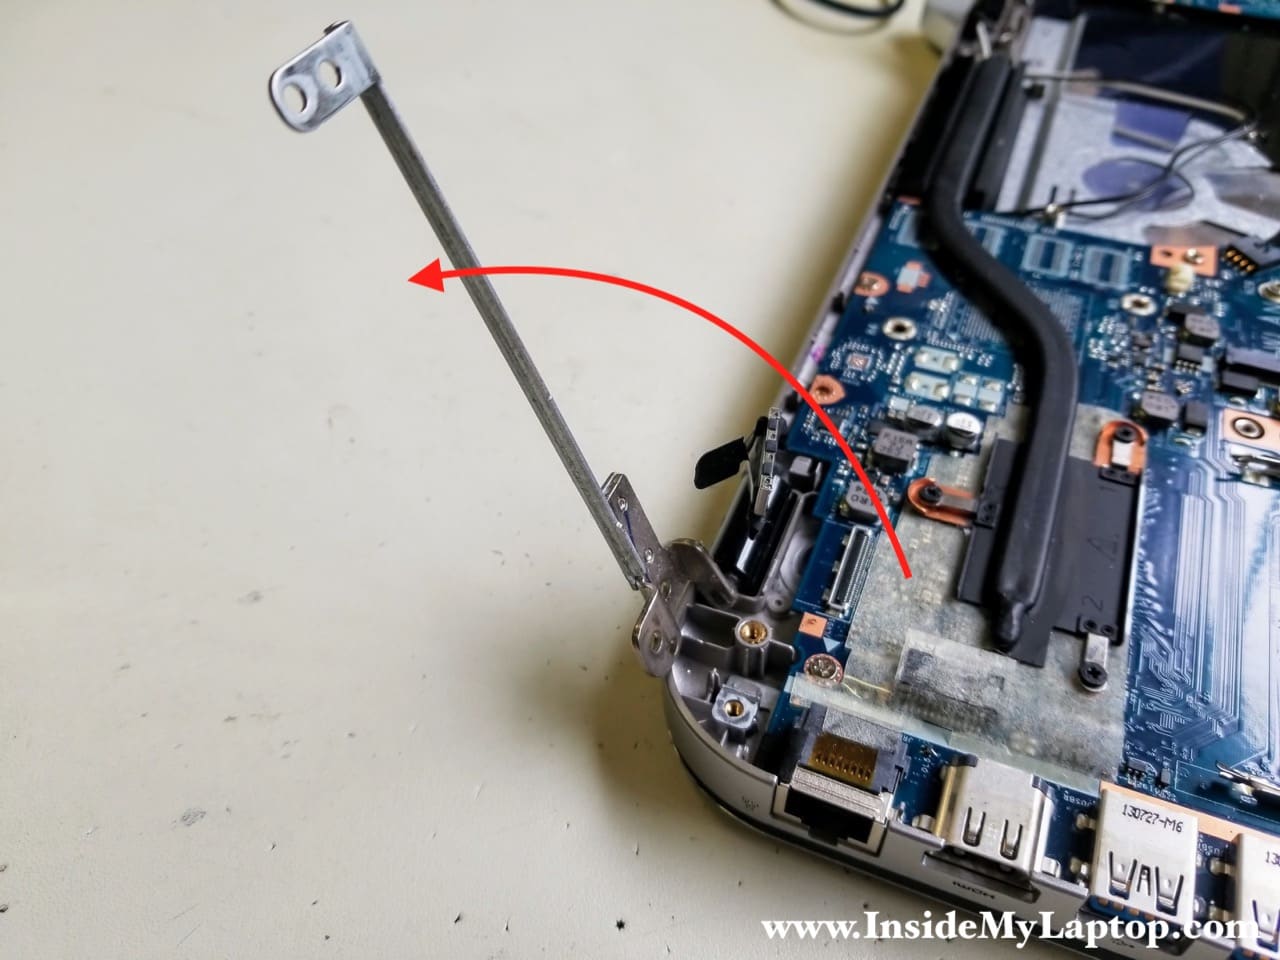
Remove one screw securing the hinge. I forgot to circle it on the picture but you’ll find it easily.
Open up the hinge.
STEP 14.
Remove two screws securing the motherboard.
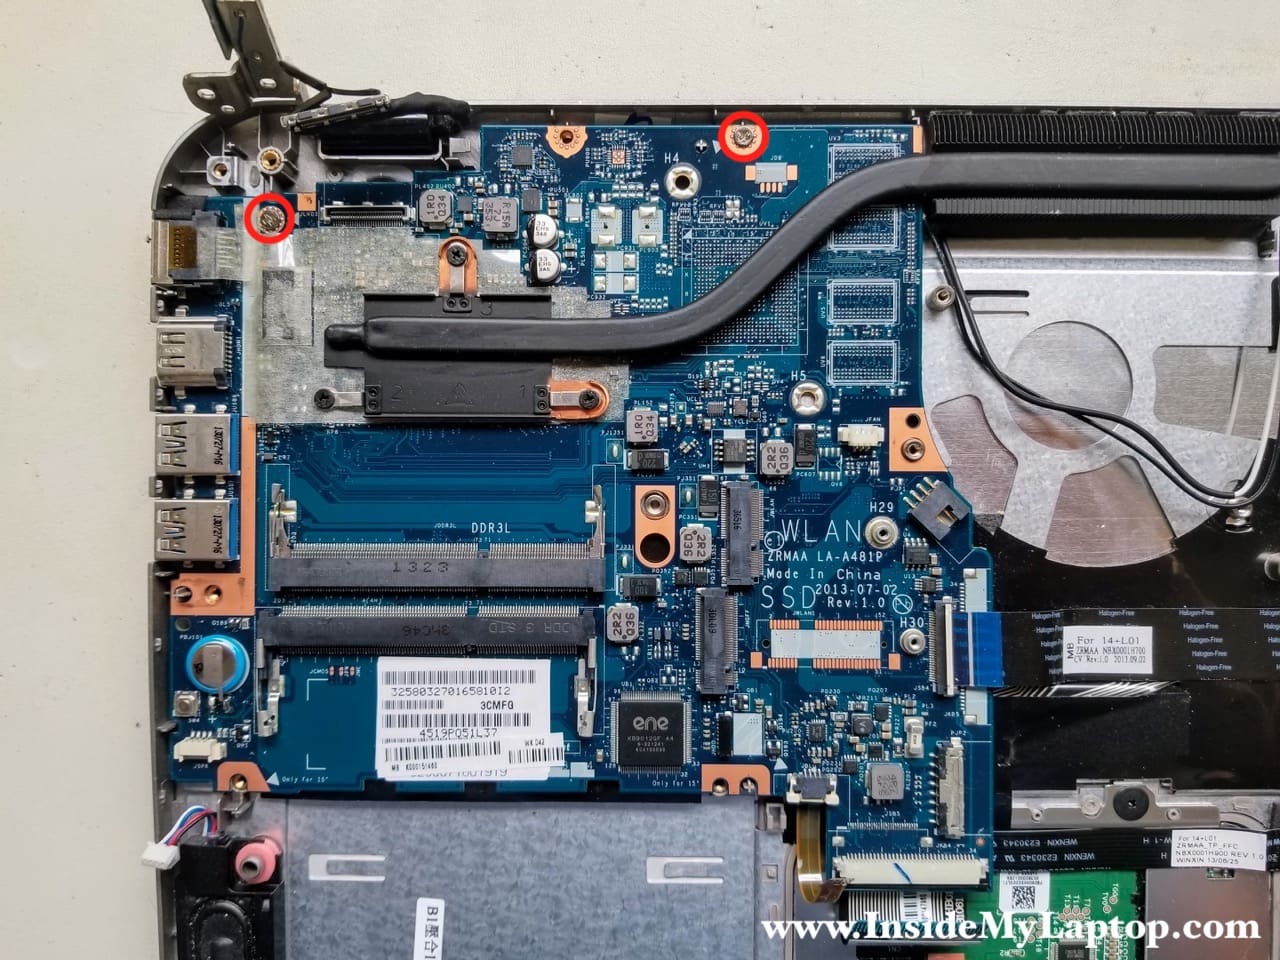
STEP 15.
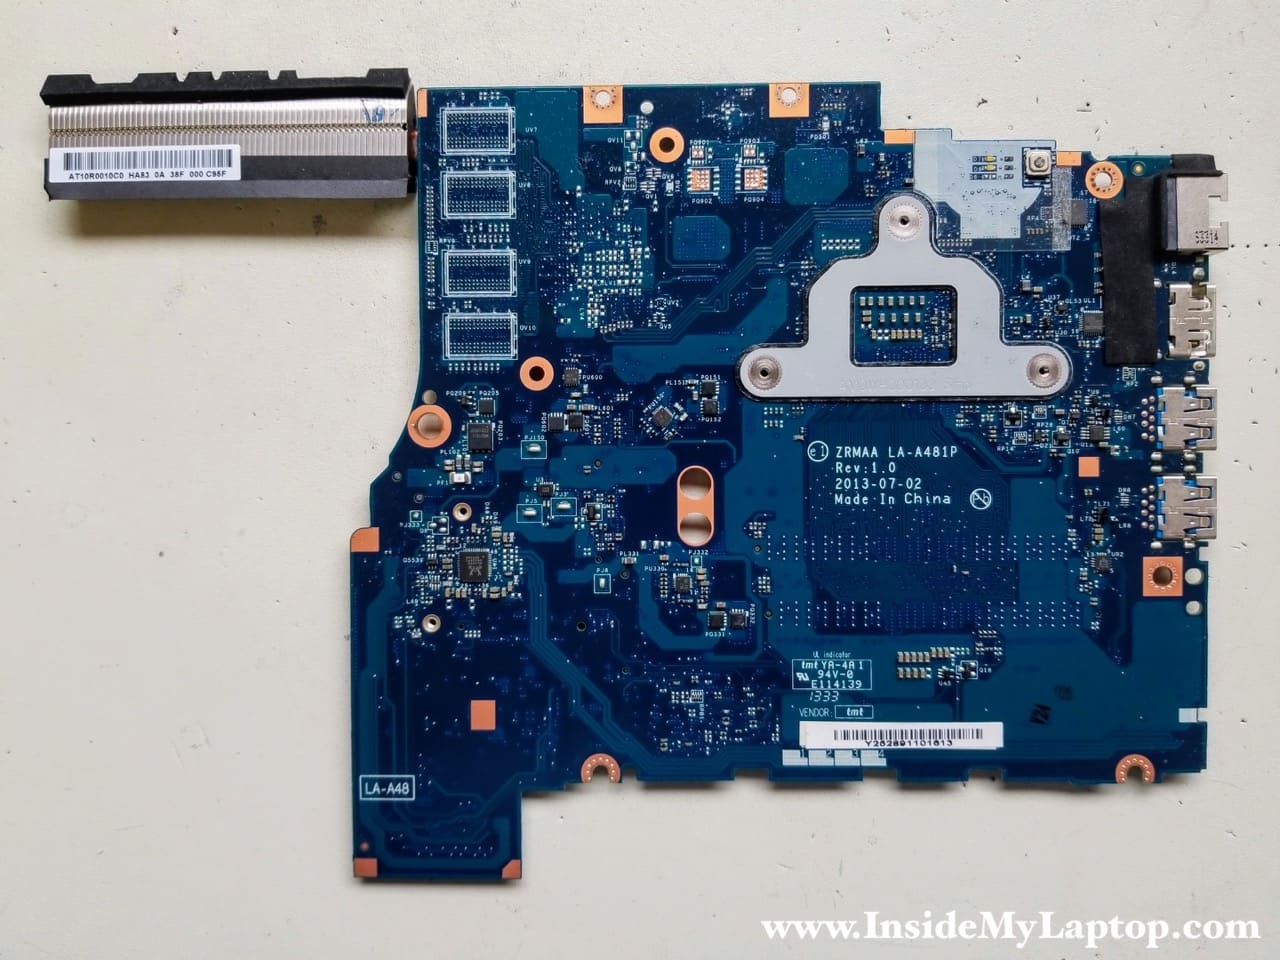
Remove the motherboard from the laptop case.

Here’s the other side of the motherboard.
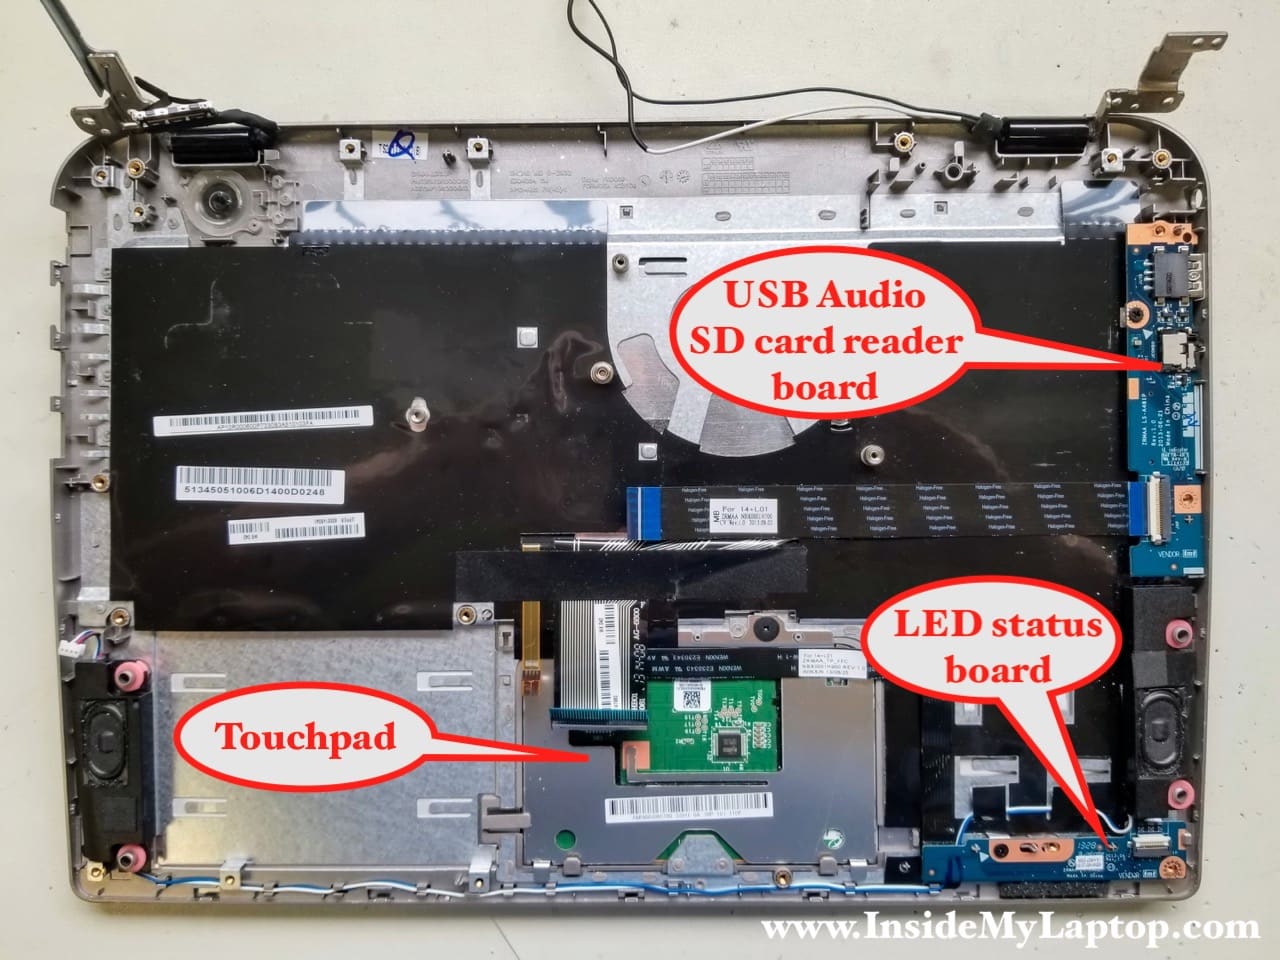
The following components are still attached to the top case but can be easily removed:
- USB Audio SD card reader board with the cable.
- LED status board with the cable.
- Touchpad (mounted under a metal bracket).
STEP 16.
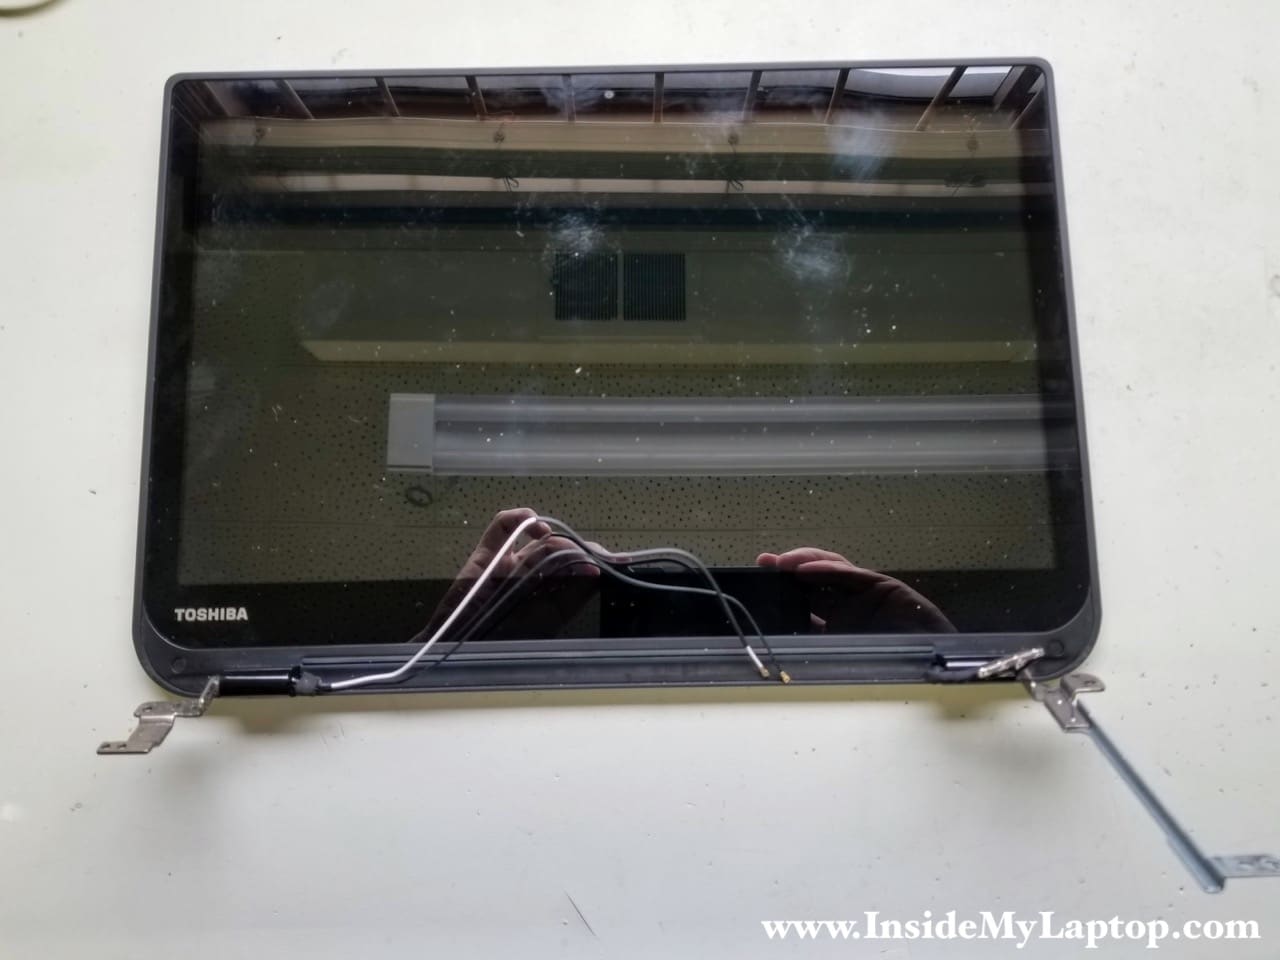
With both hinges opened up the touch screen display can be easily separated from the top case.
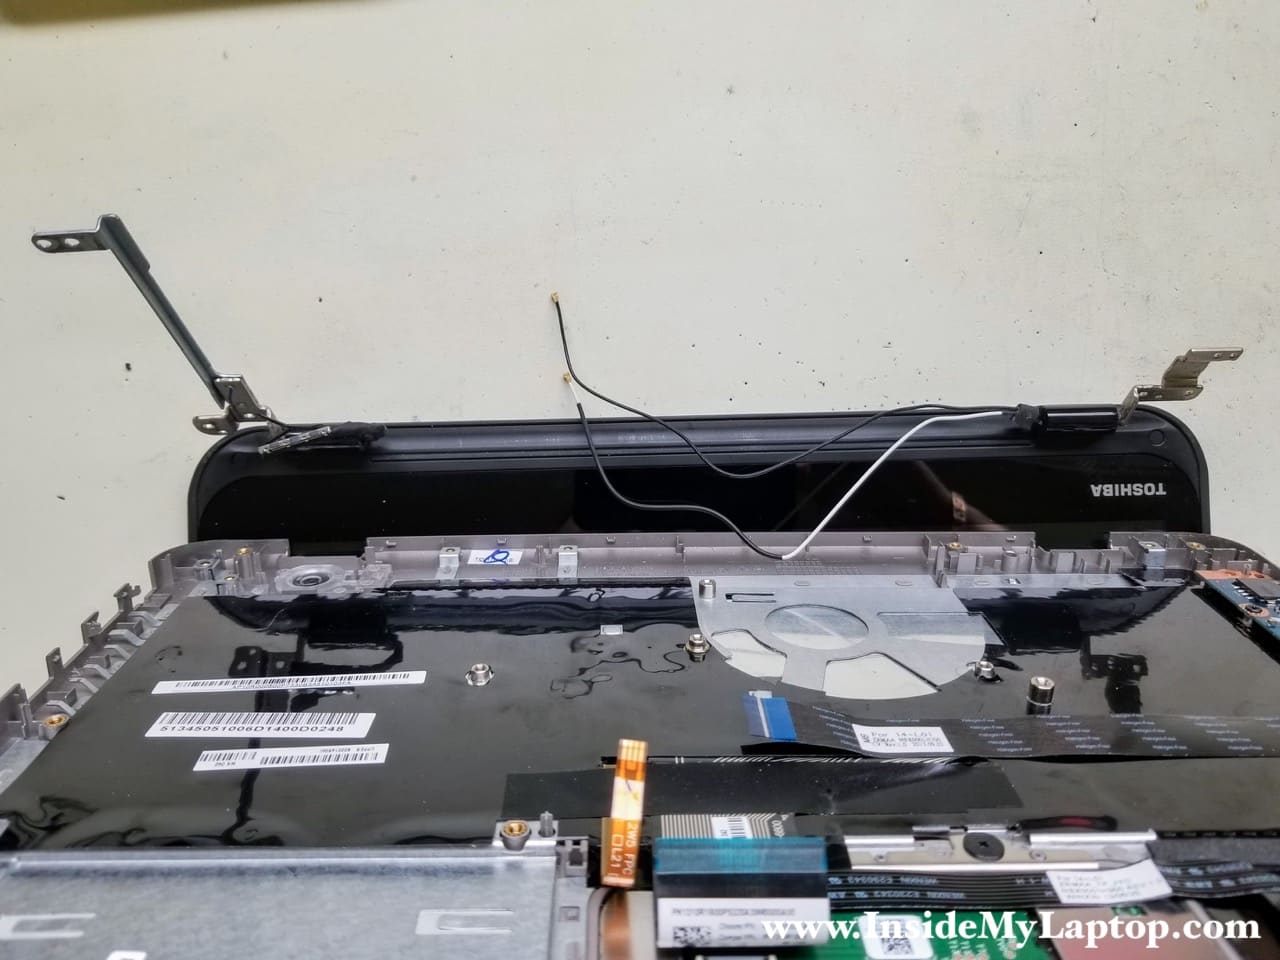
The display has been removed.
STEP 16.
Peel off the black sticky tape securing the keyboard cables to the top cover.
This tape is the reason why it’s impossible to remove the keyboard without removing the motherboard.
STEP 17.
There are a few hidden latches securing the bottom side of the keyboard to the palmrest. You’ll need a thin metal case opener to release the latches. You can use a thin knife blade instead.
Insert the case opener between the keyboard and the palmrest.
STEP 18.
Pry the keyboard up to separate it from the palmrest.
Move the case opener to the next latch and repeat steps 17 and 18.
STEP 19.
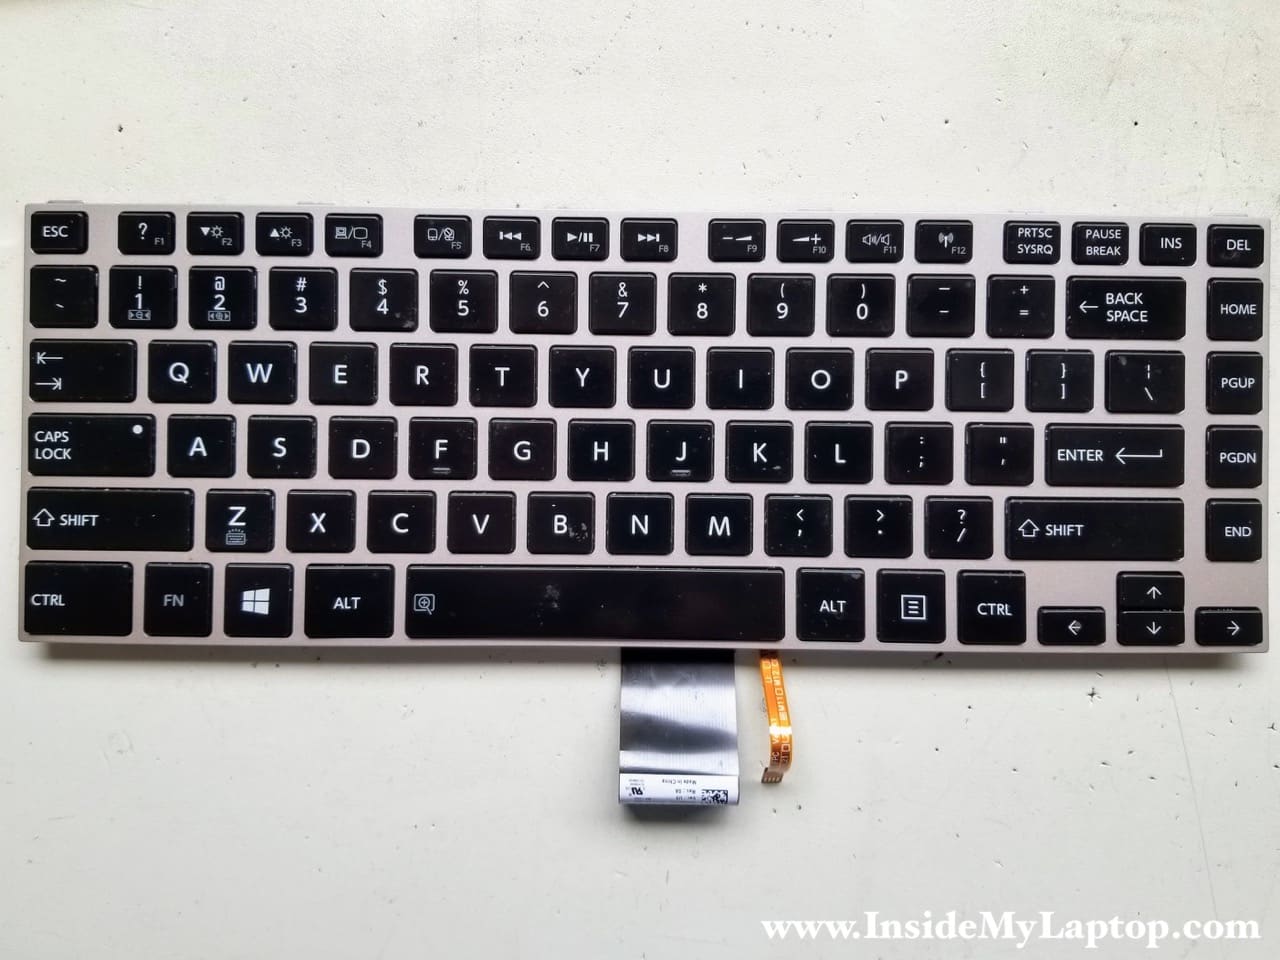
After all hidden latches are released, lift up the keyboard from the case.
After that move the keyboard to the shown direction and pull the cables through the opening in the case.

STEP 20.
The keyboard has been removed and now it can be replaced with a new one.
Don Radomski
Good site very well done. I’m puzzled by ESD not being mentioned. Though I haven’t looked at all of the procedures, the ones I saw don’t mention ESD precautions and you don’t mention it with your tools, such as the soldering iron having a grounded tip or anti-static wrist straps. Has the problem gone away when I wasn’t looking, or is it just taken for granted these days?
IML Tech
I never used anti-static wrist straps. Never had a problem. Just be careful and don’t touch the motherboard components.
Mitch
Thank you very much for this walkthrough. You saved me at least an hour of trying to determine what screws to remove and when. There are no video walkthrough disassemblies of the E45T, but I’d argue that step-by-step photos are probably better.
Thank you again!
Howard Robinson
I wish there were instructions on how to remove the touchpad, I have been unable to remove it.
IML Tech
Howard, I’m not sure why you having a problem with removing the touchpad. It looks like all you have to do is remove two screws and disconnect the cables.
It’s necessary to remove the motherboard fist as it shown on the step 15. After that you can access the touchpad screws.
Eli
Hi thank you for this guide. This realy helps. Do you have idea what cause the electric shock on the palm rest?
IML Tech
Probably badly designed grounding.
Eli
Is there a way to fix this? What about putting insulator on the screwholes attaching the motherboard to the metalic case?
IML Tech
I’m not sure if this is going to help but you can try I guess. I remember a long time ago Toshiba Satellite A75 had a similar issue with the top case. The problem was so bad that Toshiba had to replace top cases with a modified version on countless laptops. I’m not sure what kind of modification it was.
Kennedy
My laptop appears dead nothing is turning on even after plugging in the charger the led does not turn on if i touched the mother board with does it mean it is dead
IML Tech
Could be failed charger. It’s necessary to test the charger with a voltmeter.
Vincent
Very helpful page for this model and website in general. Refreshing to find blog-like page with good written directions and actual close-up pics (and not just a YT video). Especially since I could not find a Toshiba Service Manual for this Toshiba Satellite E45t-A4200. I’m helping a friend from church (for free). Needs a new battery but no surprise there. The 512gb spinning-platter HDD is going bad (Crystal Disk Info confirms SMART is reading Caution). So, what’s the deal with this rumored 32gb SSD cache drive? Is it a separate component or is it part of the HDD (like a Hybrid of some kind)? If I remove old (bad) HDD and (baby) SSD … do you think the my new 2.5inch 480gb SATA-3/600 Kingston SSD run at the full SATA-3/600 speed?
IML Tech
32GB cache SSD is a separate component. You can see this drive in the step 5, it’s right above the yellow square.
Just install a regular 2.5″ SATA SSD instead of the failed spinning drive. It should run at full speed.