In this guide I will be taking apart an Acer Aspire S3-391-6497 Ultrabook.
I will show how to remove the bottom cover in order to access the cooling fan, SATA hard drive, mSATA SSD drive and other internal components.
Make sure the laptop is turned off.
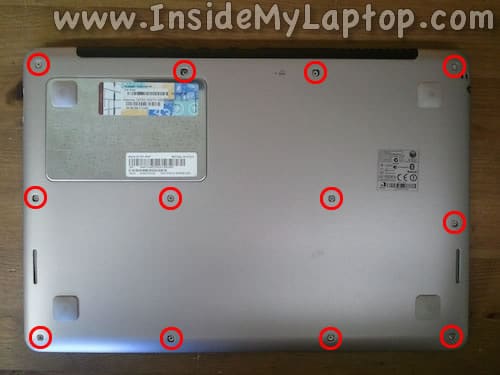
STEP 1.
Remove all marked screws from the bottom cover.
STEP 2.
Separate the bottom cover from the rest of the laptop and turn is upside down on the table.
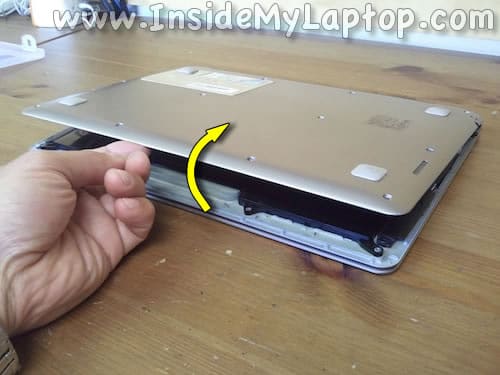
The Wi-Fi antennas are built into the bottom case.
Be careful, the antenna cables still connected to the Wi-Fi module.
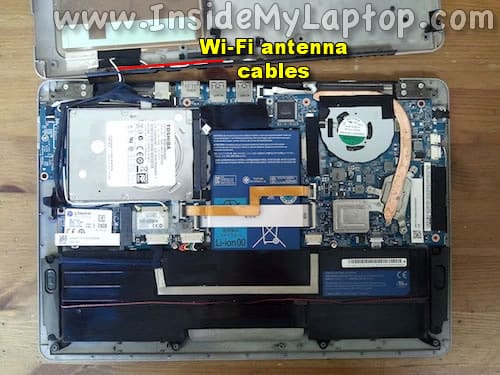
Before you touch any internal components it’s a good idea to disconnect the battery.
Unplug the battery connector from the motherboard by the edges.
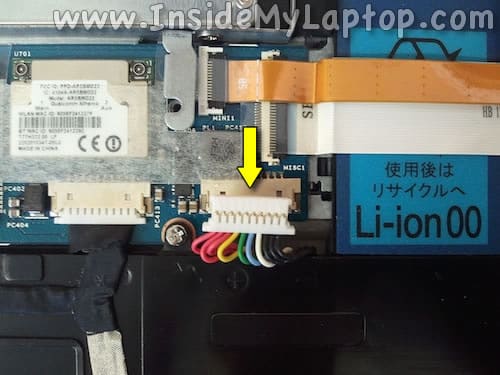
STEP 3.
Remove tape securing Wi-Fi antenna cables.
STEP 4.
Unplug both antenna cables from the Wi-Fi module.
Now you can remove the bottom cover completely.

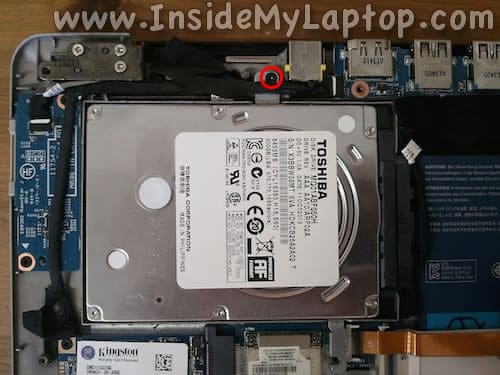
STEP 5.
Remove one screw securing the SATA hard drive.
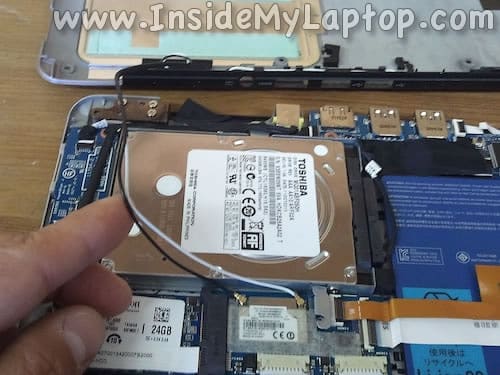
STEP 6.
Lift up the hard drive from the laptop and move it away from the battery.
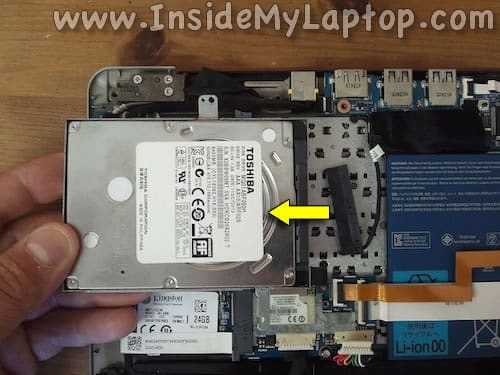
Disconnect the SATA cable.
Now the hard drive can be replaced or upgraded if necessary.
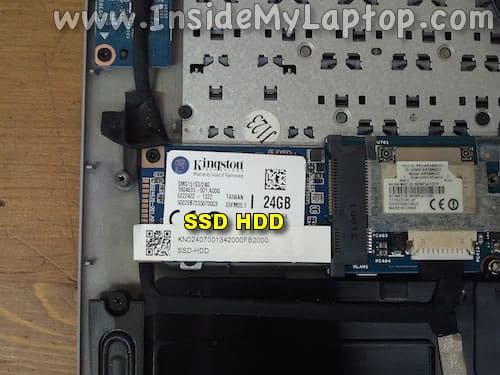
I recommend replacing this regular 2.5″ SATA hard drive to a 2.5″ SATA solid state drive. Doing so will improve the laptop performance significantly.Â
Acer Aspire S3 series laptop comes with a 24GB mSATA (mini PCIe form factor) drive installed.
This drive allows the laptop to use Intel Rapid Start Technology which enables systems to quickly resume from deep sleep.
If you manually reinstalled Windows OS on the main SATA hard drive, you’ll have to configure the mSATA drive to work with Intel Rapid Start Technology.
STEP 7.
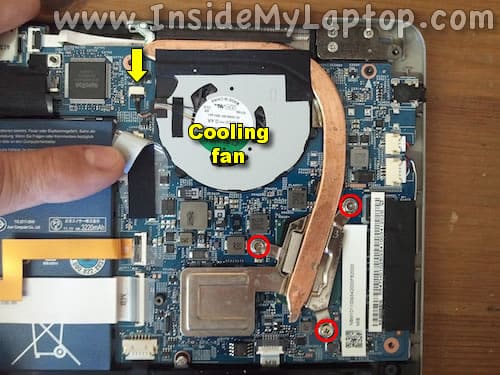
When the bottom cover is removed, you can easily access the cooling module.
The cooling fan attached to the heat sink.
In order to remove the cooling module you’ll have to remove three heat sink screws and disconnect fan cable from the motherboard.
STEP 8.
The DC power jack attached to a cable. It’s not soldered to the motherboard.

onekotan
THANK YOU!!!
Hey i replace my motherbord because it was disabled. I buy a new Motherbord that is not the same in all cases. it only support a i5 processor but the Gefore is a better one. the original i7-Porzessor is gone, but with the i5-processor i don’t need so much cooling. I repeared it in March 2015 and it still running.
For all the others: There are two types of the 5745G-Motherbord. Wen you are the owner of that one with the i5 processor, it is impossible to replace it with the i7.