In this guide I explain how to disassemble an HP Spectre x360 Convertible PC model 13t-ae000.
For this disassembly you will need the following repair tools: Phillips #0 screwdriver, Torx T5 screwdrivers, needle nose tweezers.
As usual, at the end of this guide you will find a link to the HP service manual which has a list of service part numbers for all internal laptop components.
Base cover and battery removal
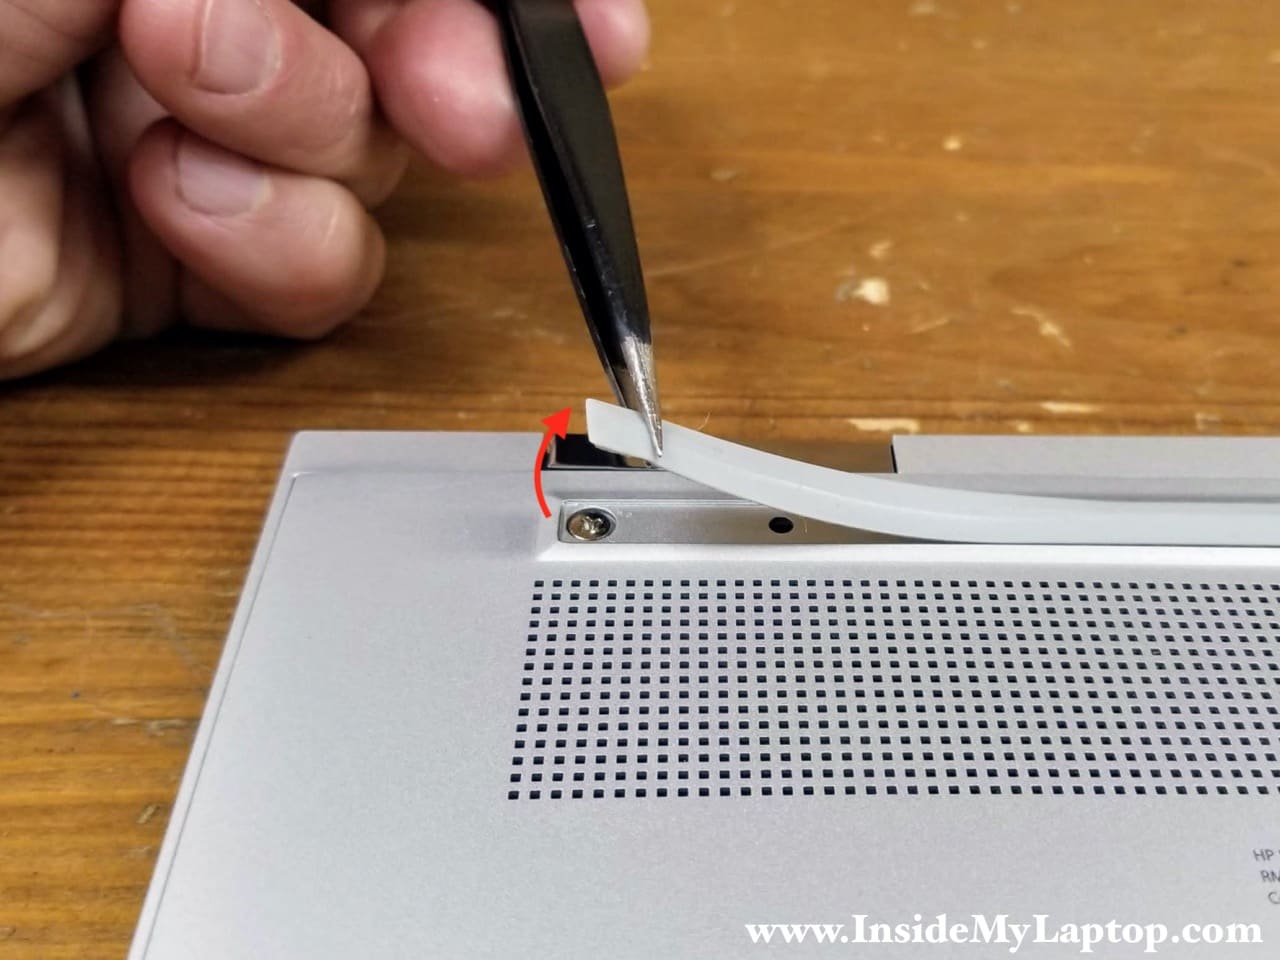
STEP 1.
Peel off the rear bottom foot. The foot is attached to the base cover with double-sided adhesive. There are four screws hidden under the foot.
STEP 2.
Remove four Phillis screws (red) and two Torx T5 screws (yellow) securing the base cover.

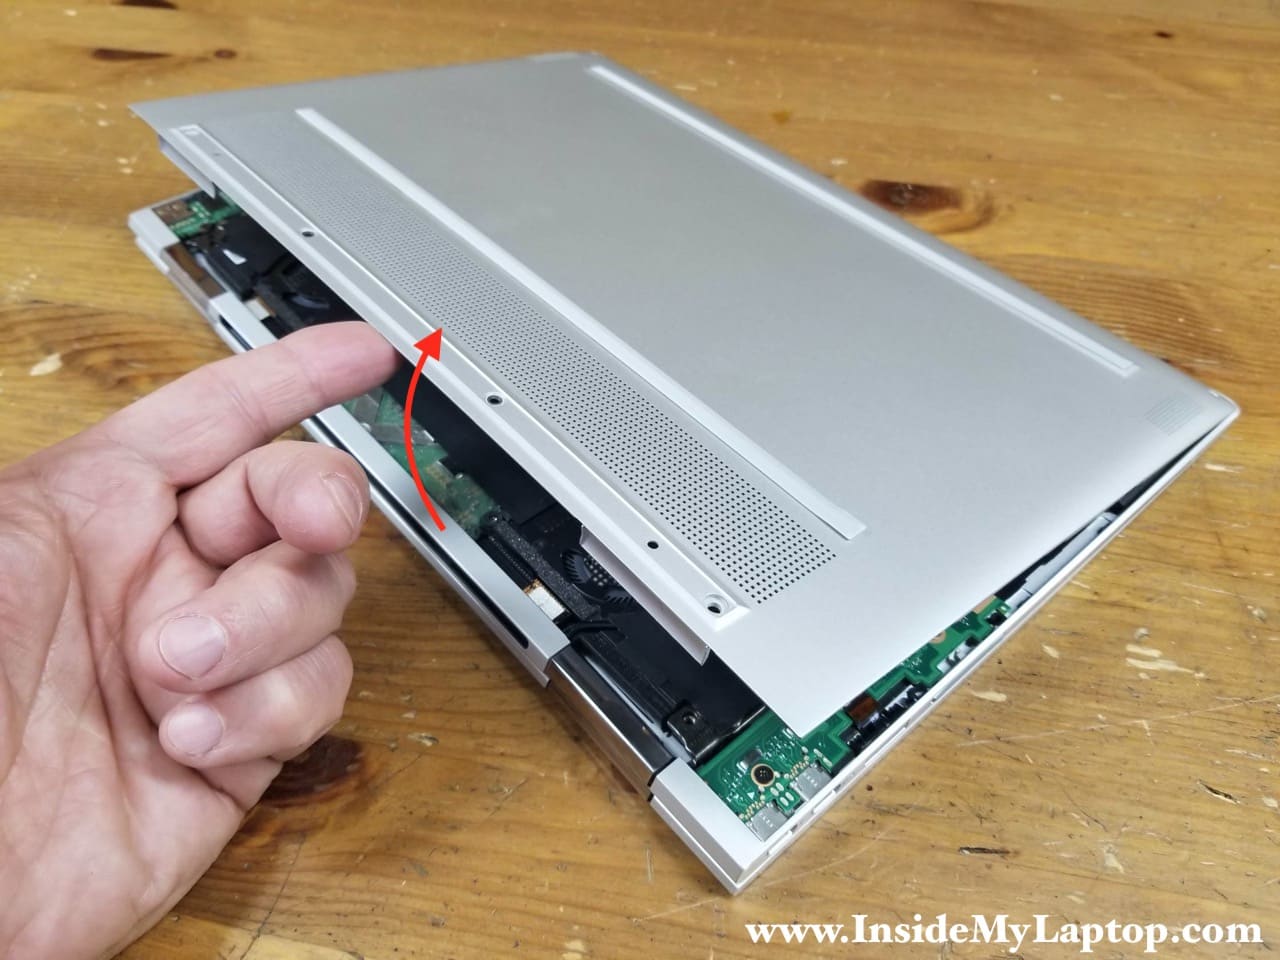
STEP 3.
Start separating the base cover from the top case assembly somewhere around the display hinges area. Remove the base cover.
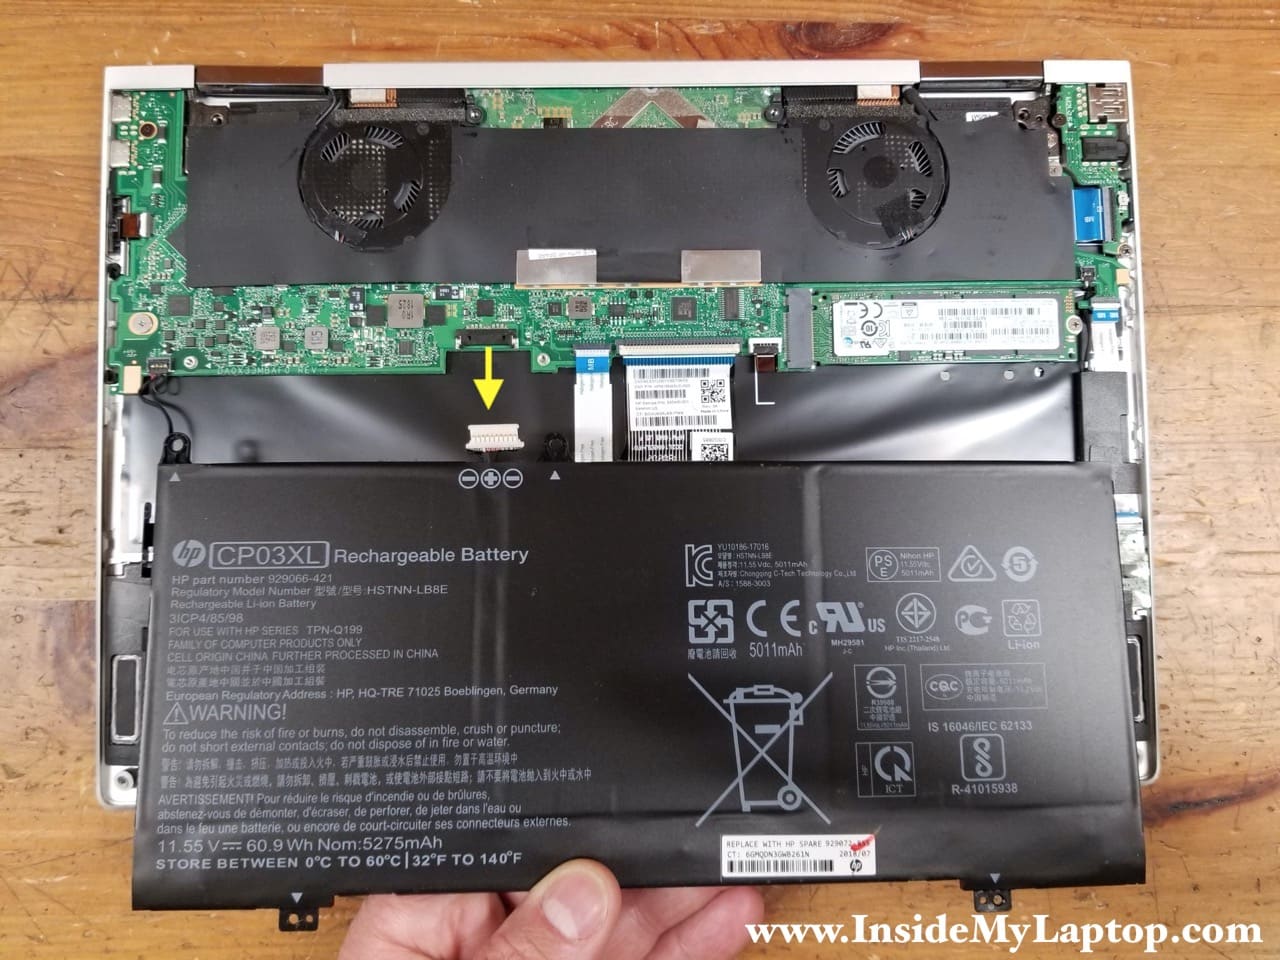
STEP 4.
Remove four screws securing the battery.
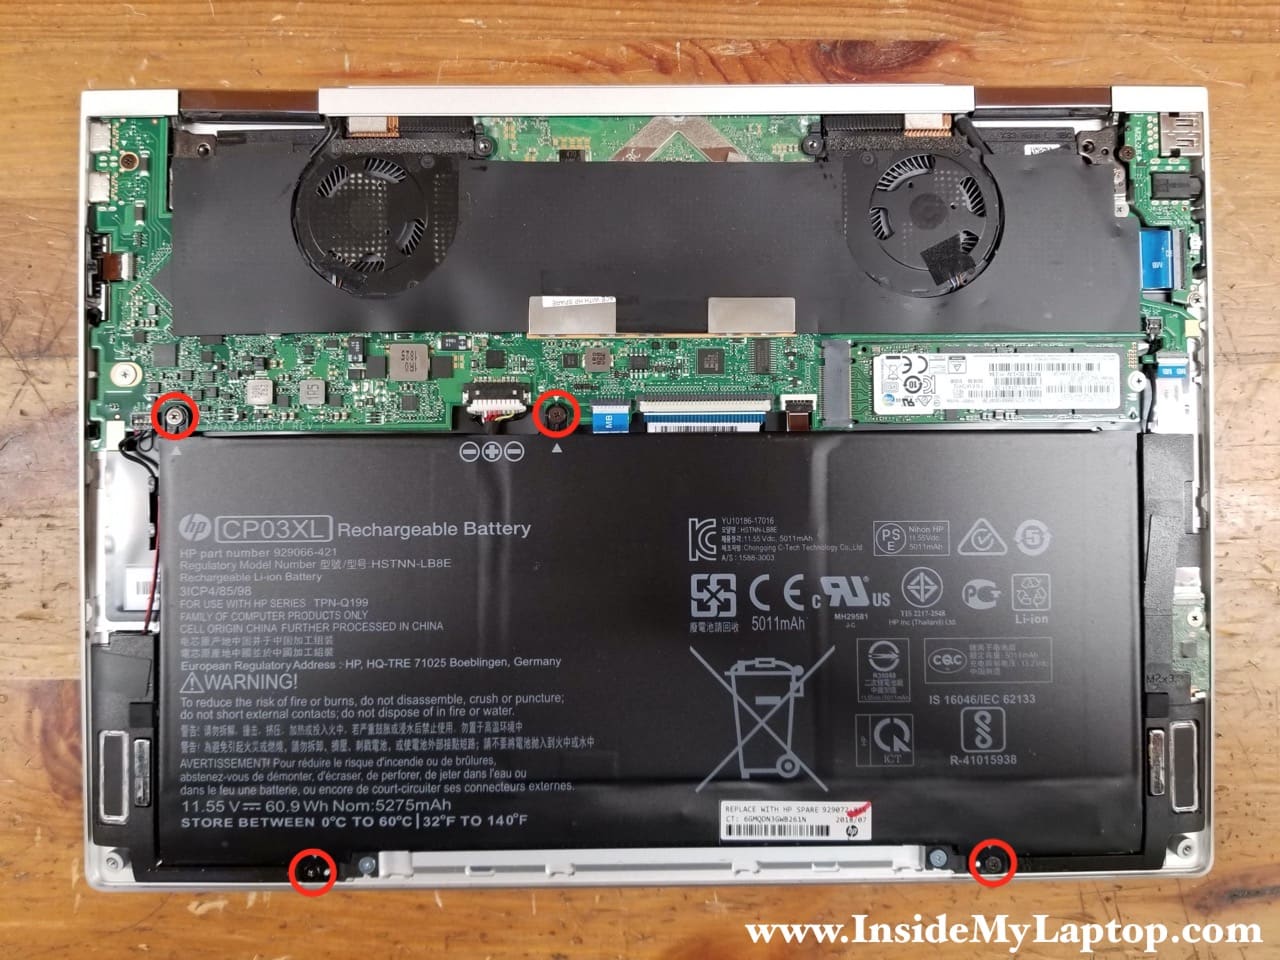
STEP 5.
Lift up the battery and disconnect the battery cable from the motherboard. Remove the battery.
HP Spectre x360 Convertible PC 13t-ae000 battery type: CP03XL.
HP service part number: 929072-855.
SSD removal and RAM access
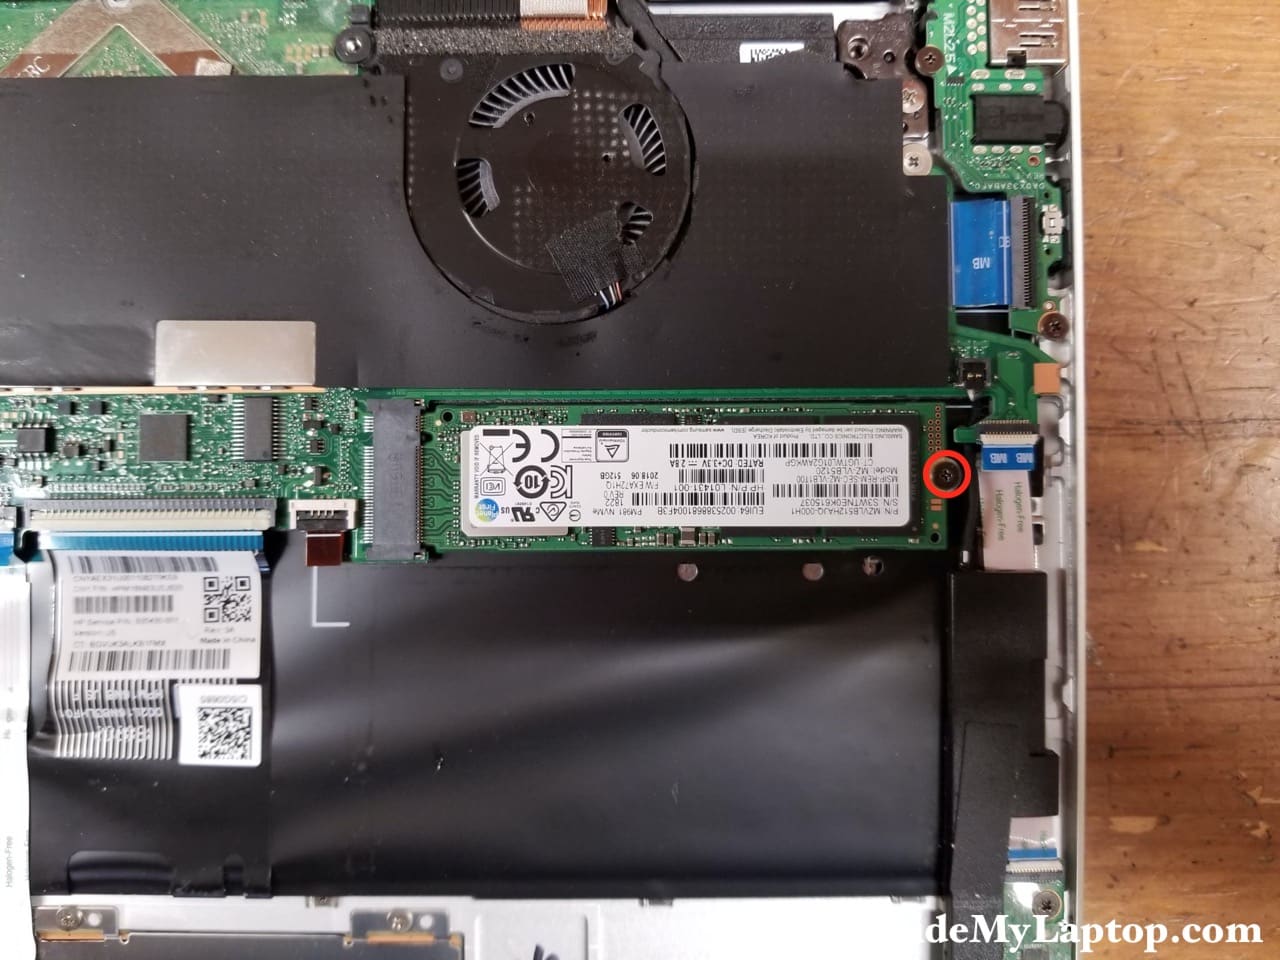
STEP 6.
Remove one screw securing the PCIe NVMe M.2 solid state drive (type 2280).
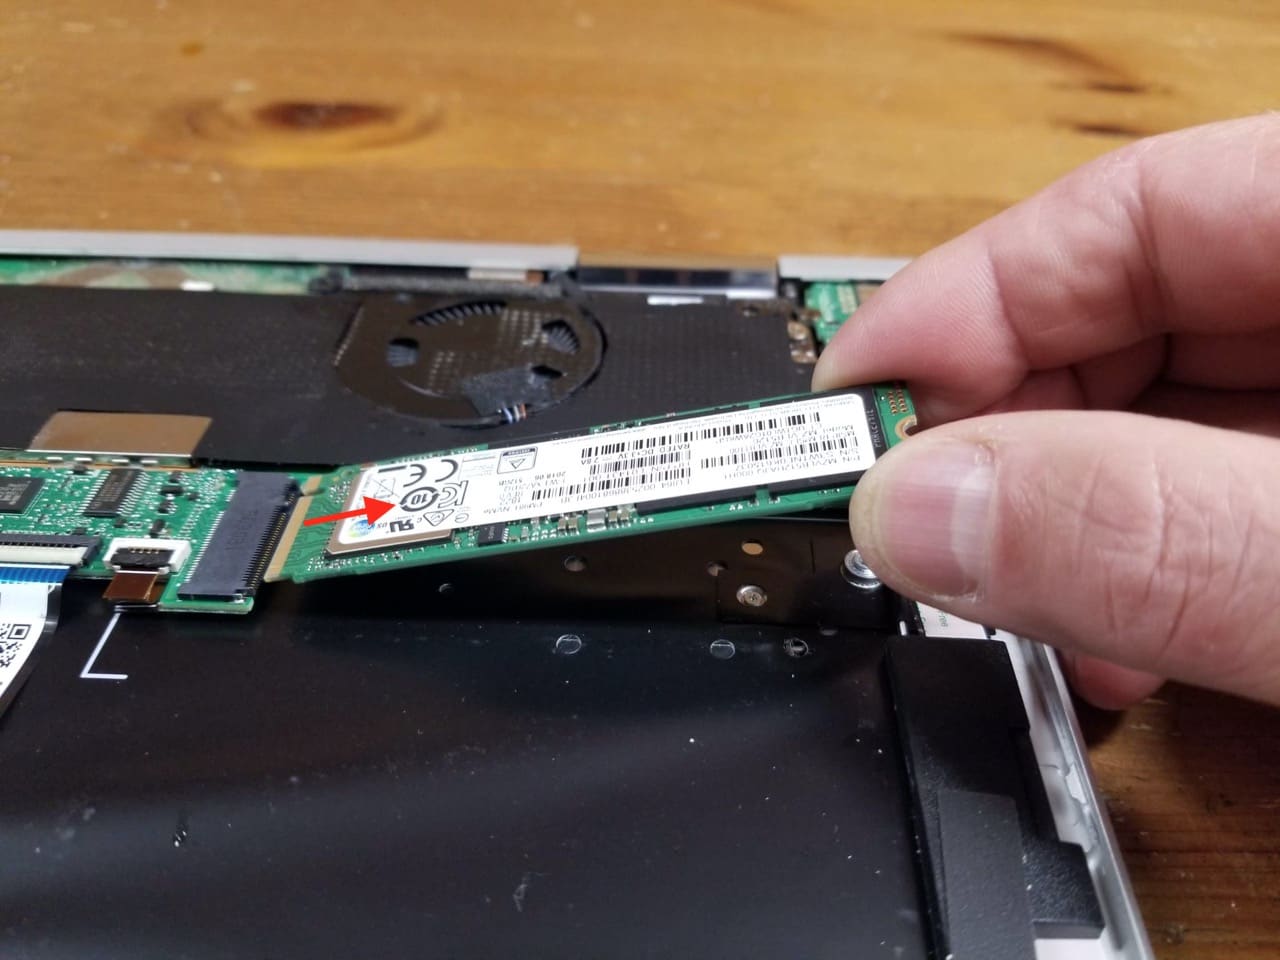
STEP 7.
Pull the solid state drive out and remove it.
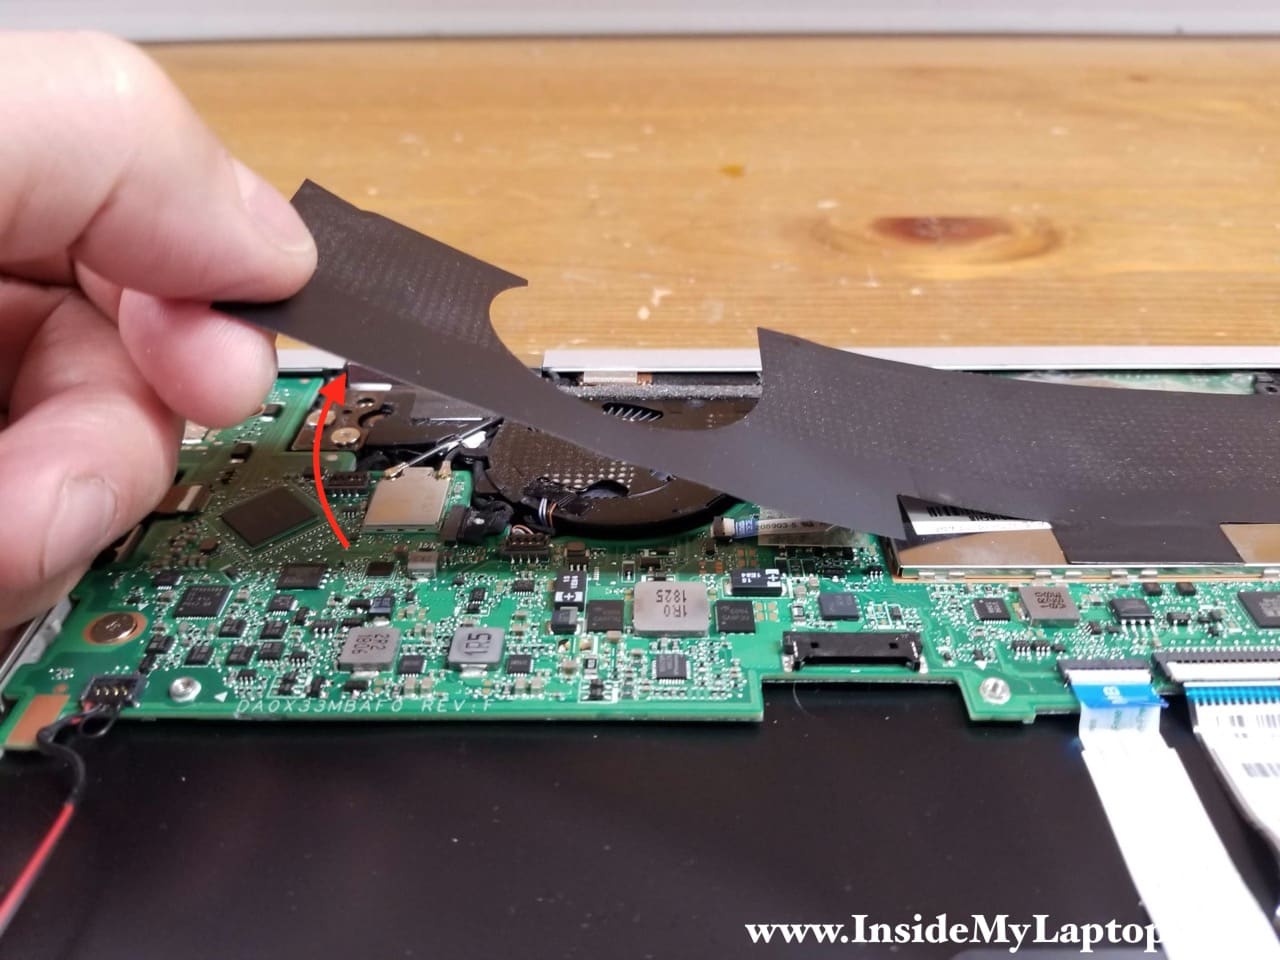
STEP 8.
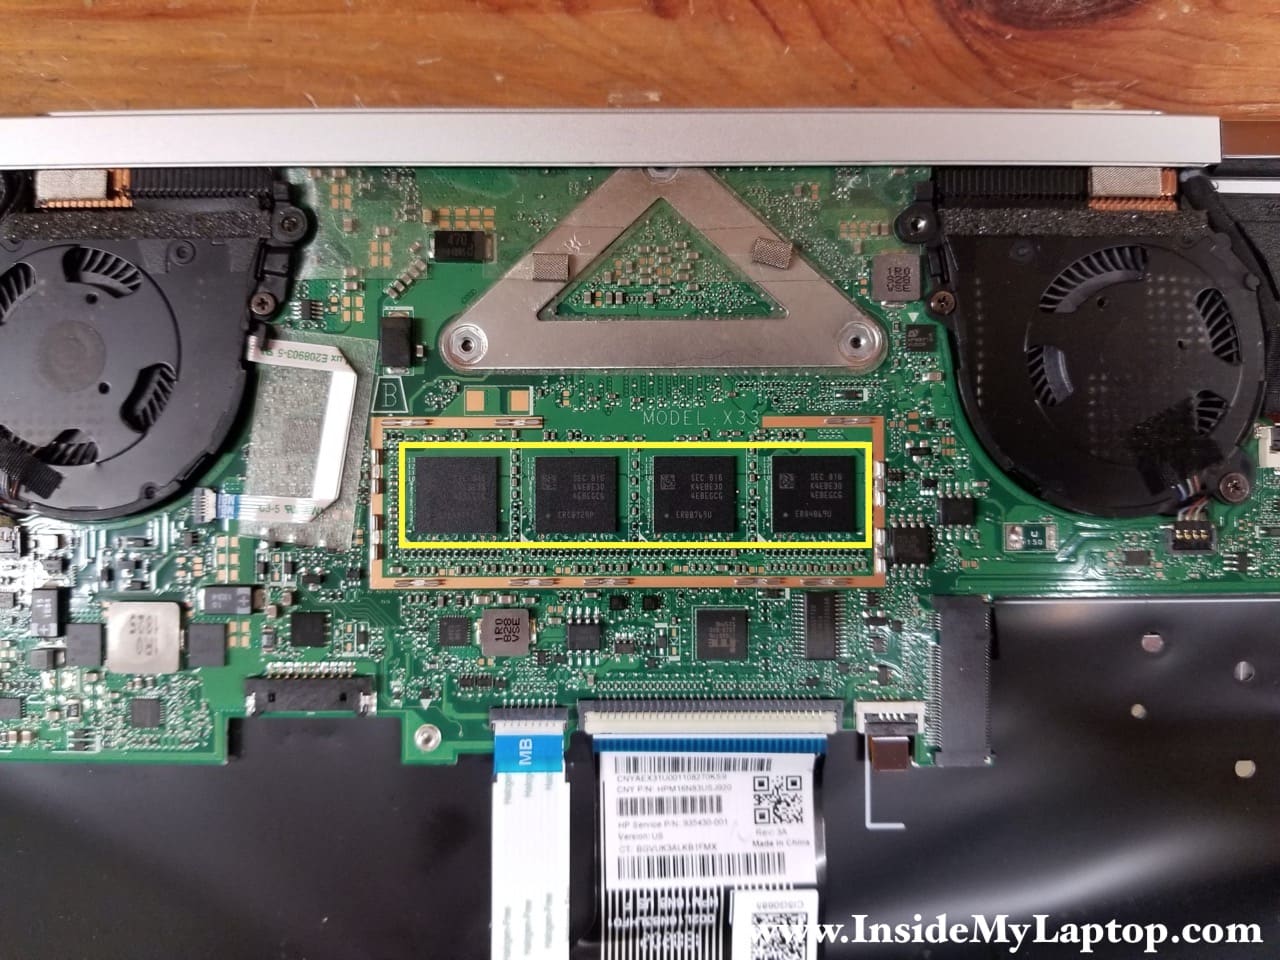
Carefully peel off the mylar sheet from the motherboard.
It’s not necessary to remove the memory cover. I just wanted to show where the laptop memory is located.

HP Spectre x360 13t-ae000 has non-removable memory. All memory chips are soldered to the motherboard.
In order to remove the display panel and it is necessary to remove both cooling fans and both rear speakers first.
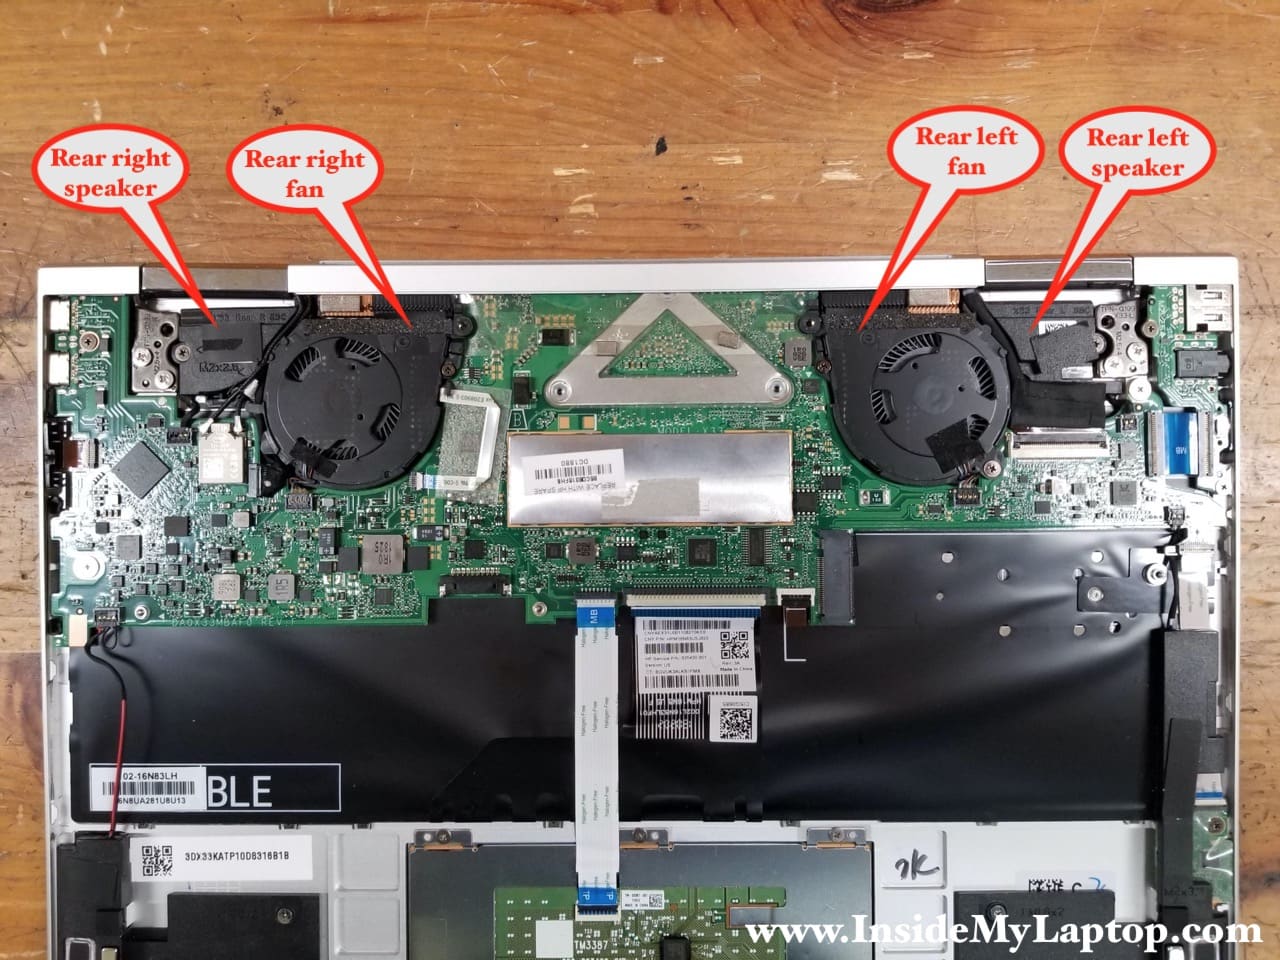
Right fan and rear right speaker removal
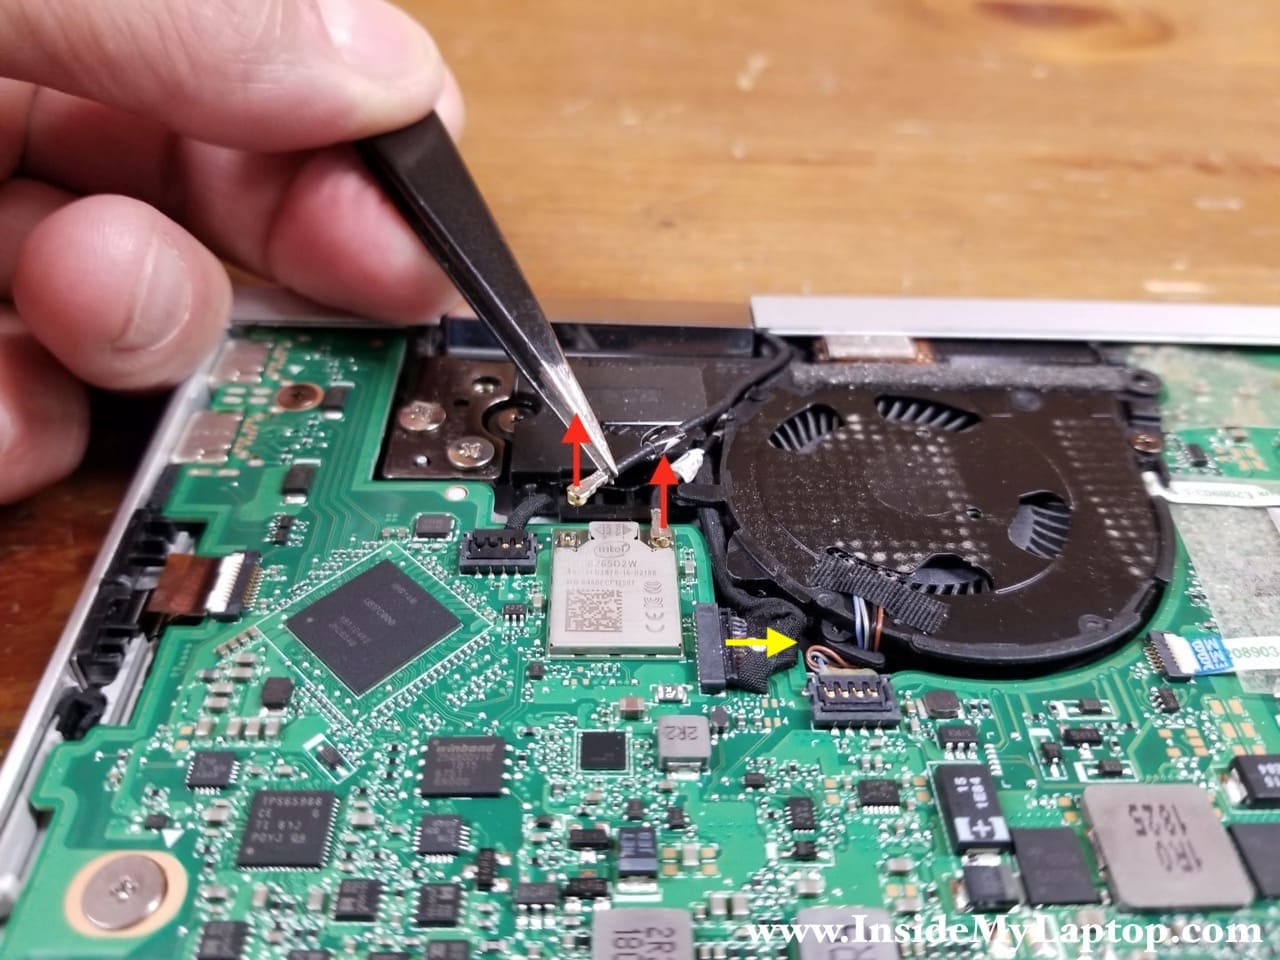
STEP 9.
Disconnect two antenna cables from the wireless card. HP Spectre x360 13t-ae000 laptop has the wireless card soldered to the motherboard.
Disconnect the webcam/microphone module cable (yellow arrow).
STEP 10.
Un-route Wi-Fi antenna cables and webcam/microphone cable from the guided path.
Remove two screws securing the right cooling fan.
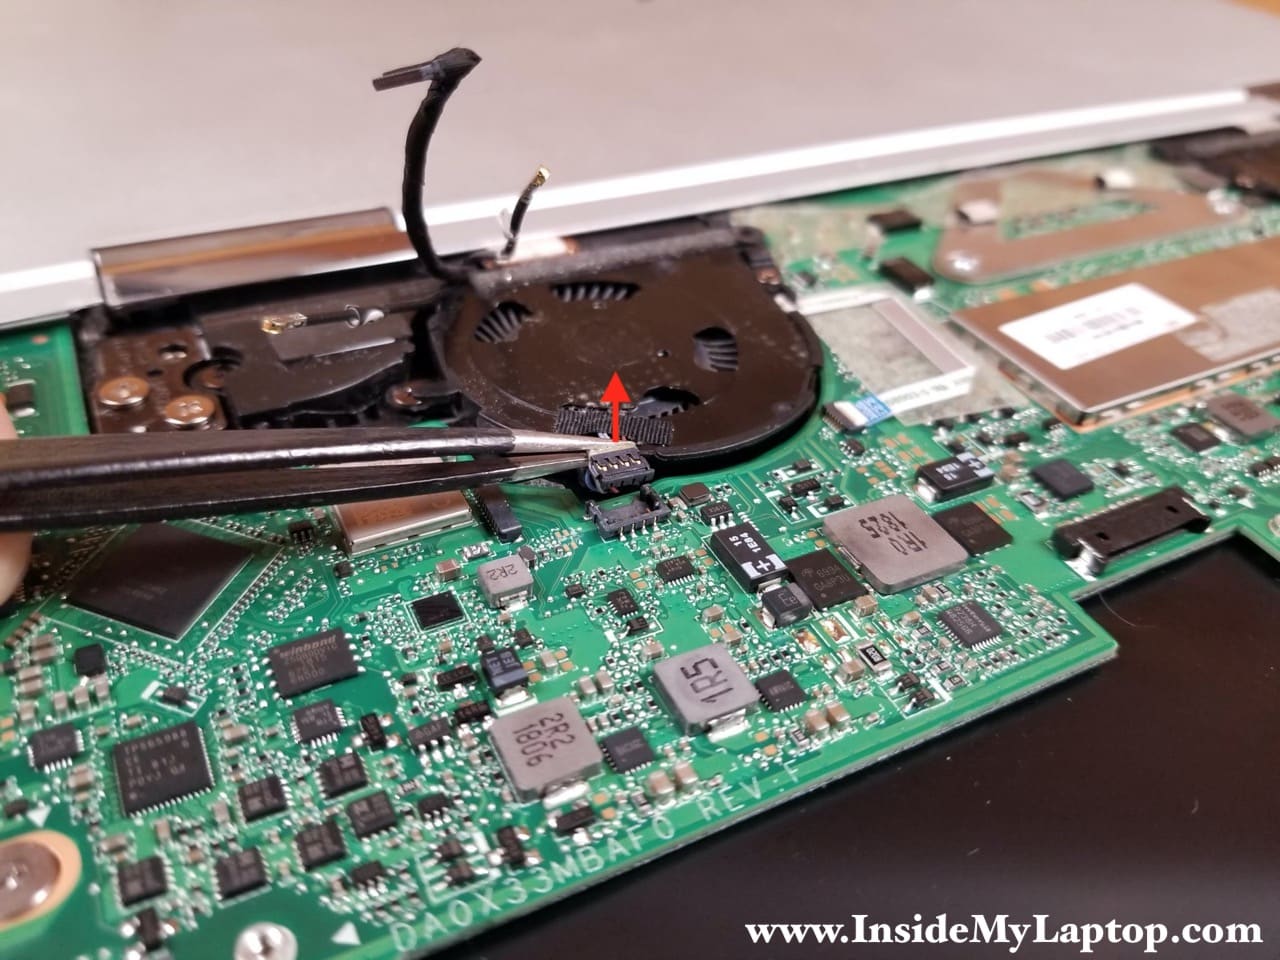
Disconnect the fan cable (yellow) and the infrared sensor board cable (green) from the motherboard.
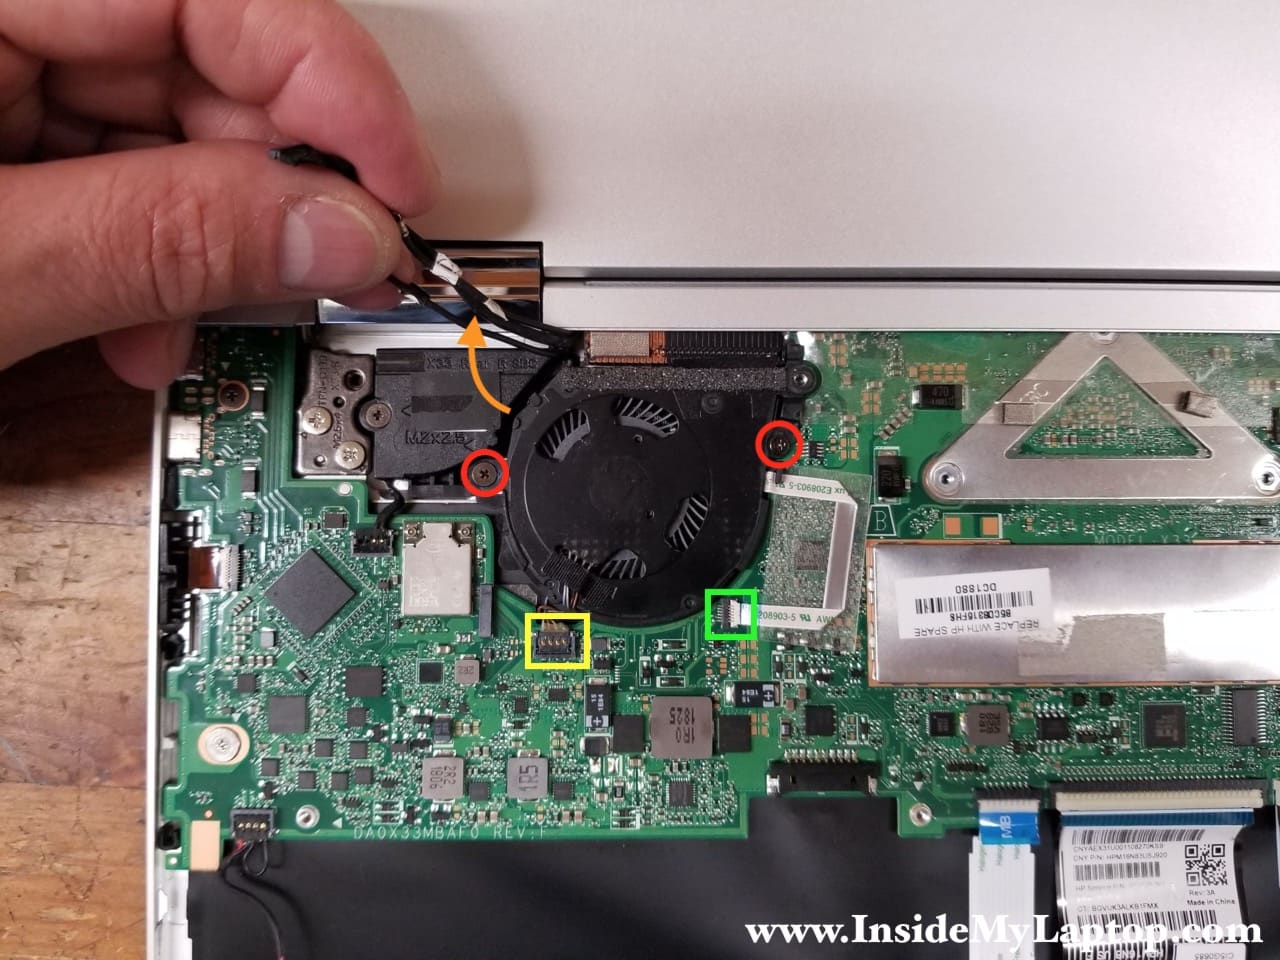
Here’s how to disconnect the fan cable. Grab the cables attached to the connector with the needle nose tweezers and lift it up. This connector plugs/unplugs vertically.
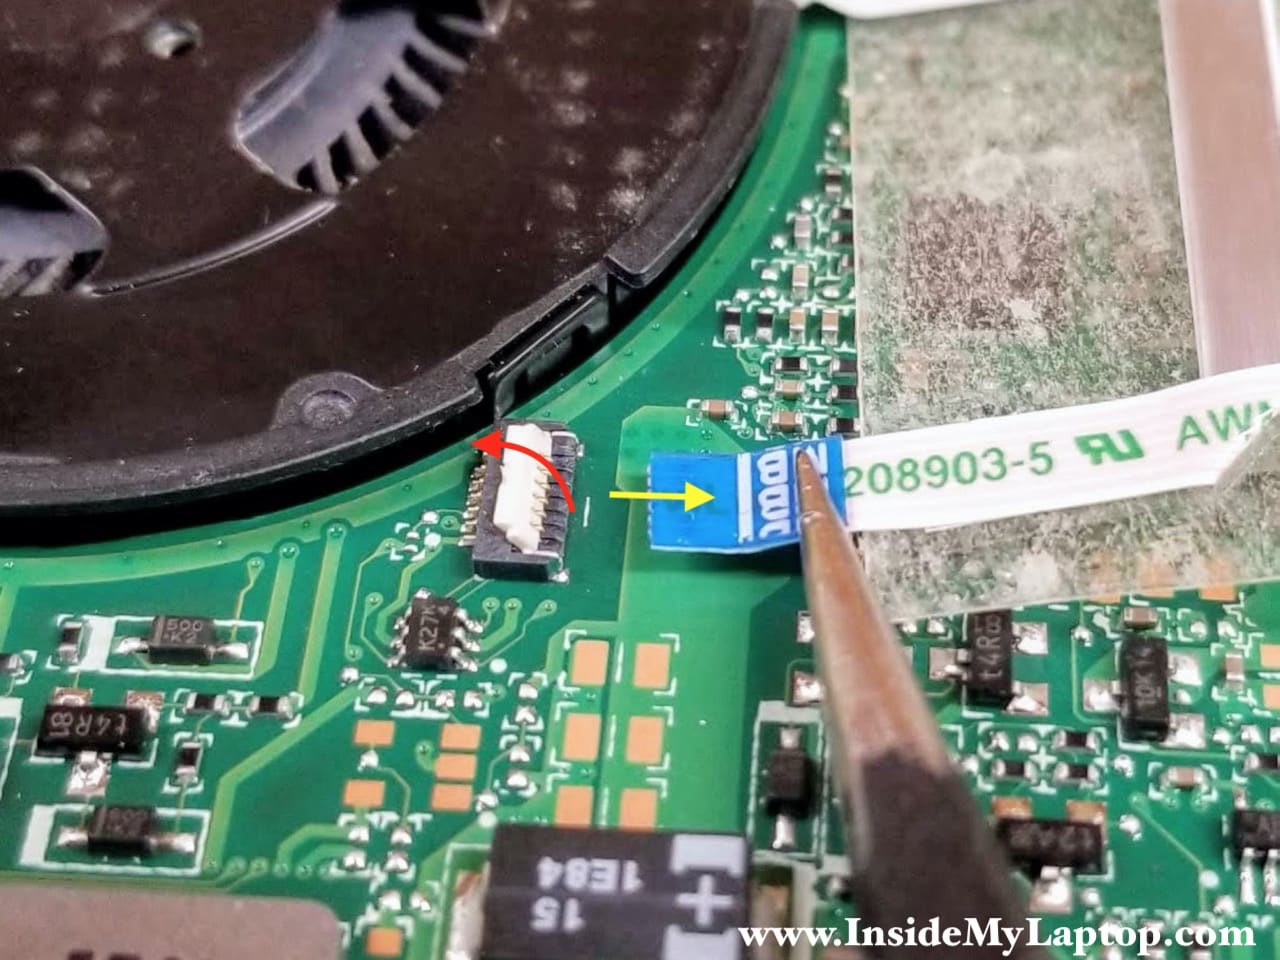
Here’s how to disconnect the infrared sensor board cable. Lift up the locking tab securing the cable inside the connector (red arrow) and pull the cable out.
STEP 11.
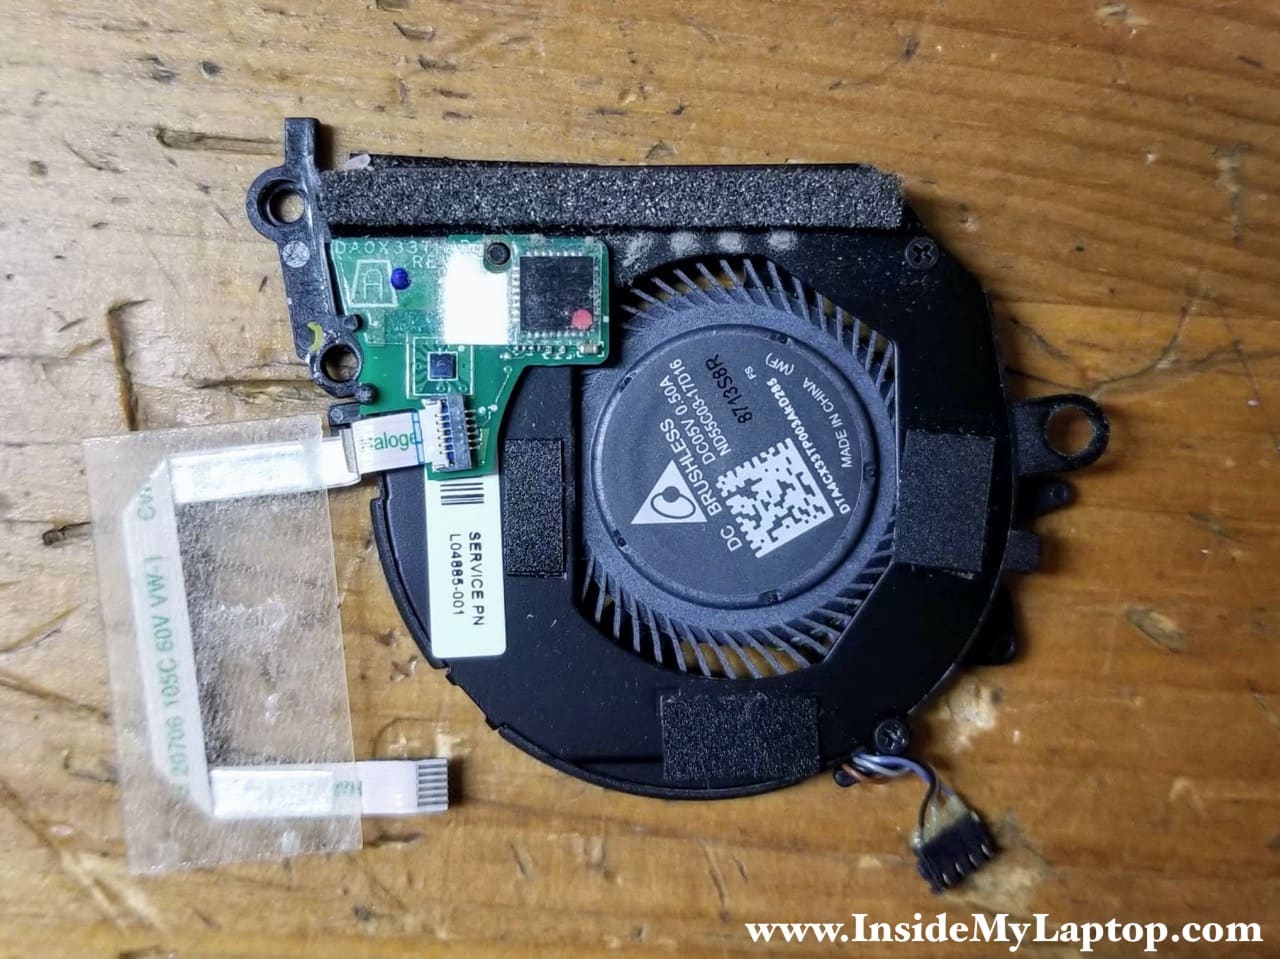
Lift up and remove the right cooling fan.

HP Spectre x360 13t-ae000 right fan service part number: L04885-001.
The infrared sensor board attached to the fan with double-sided adhesive.
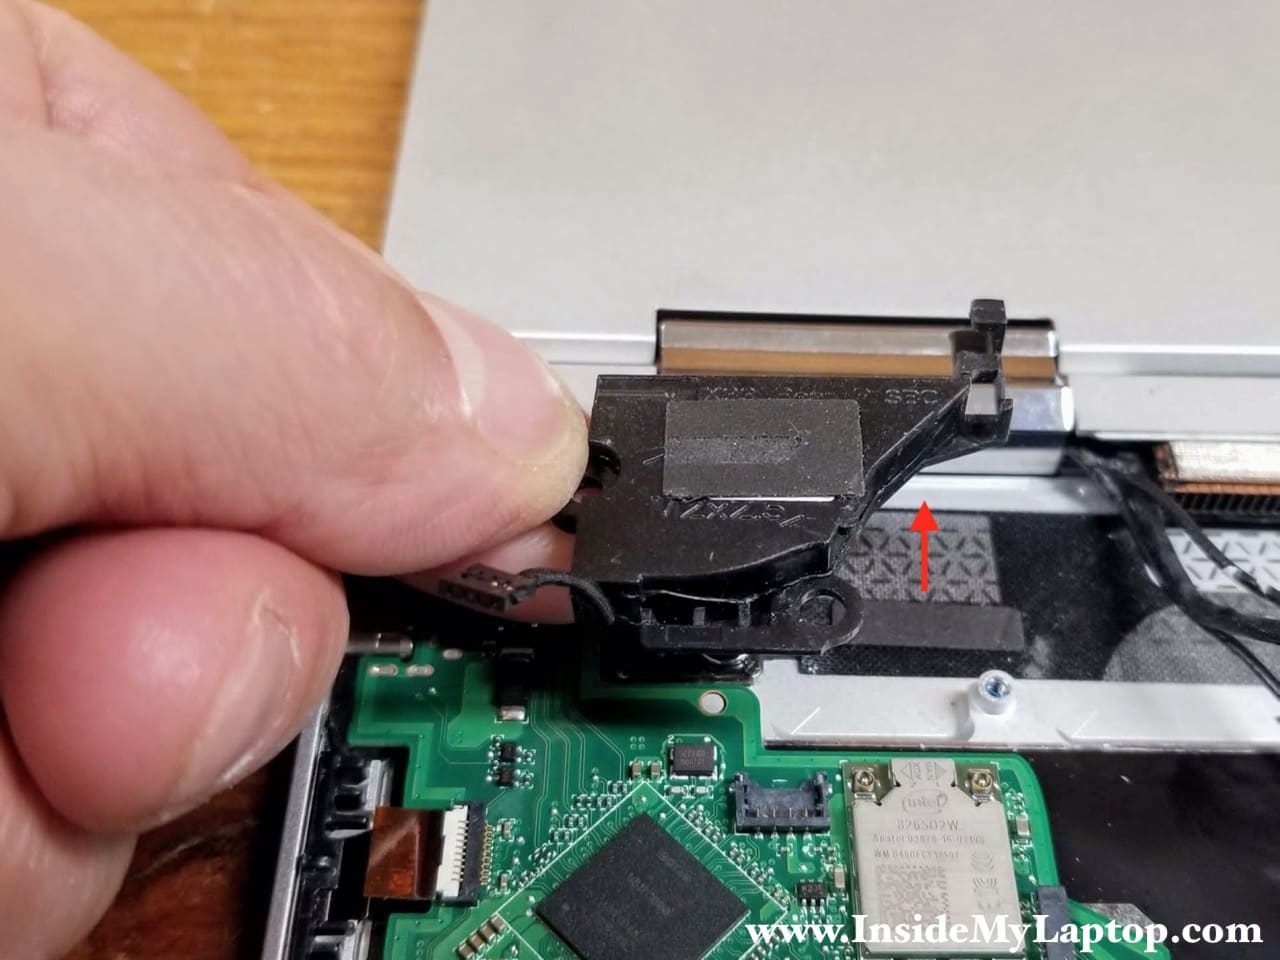
STEP 12.
Remove one screw from the rear right speaker and disconnect the cable.
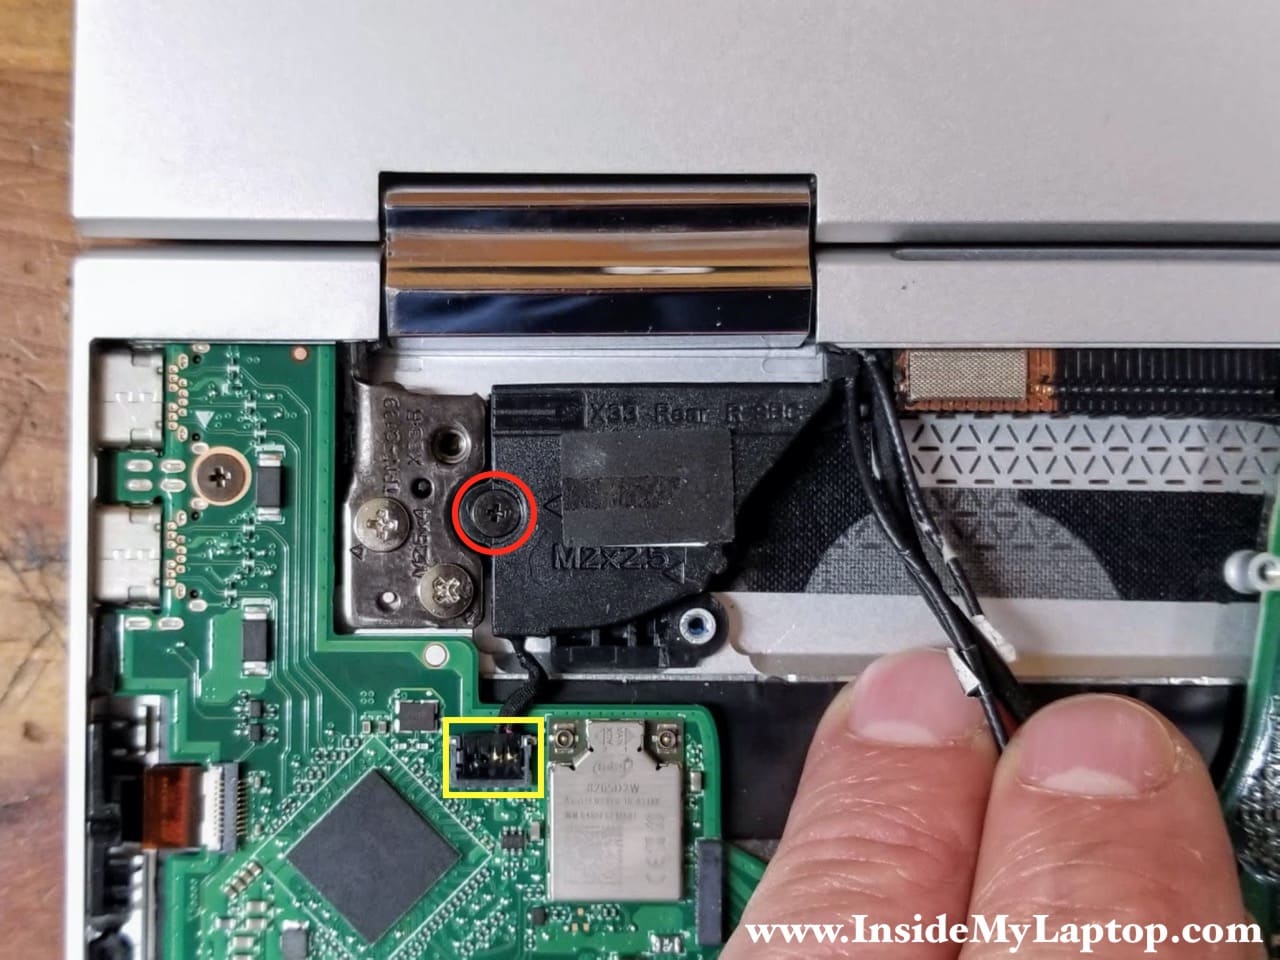
Disconnect the right speaker cable the same way as the fan cable earlier.

STEP 13.
Lift up and remove the rear right speaker.
Left fan and rear left speaker removal
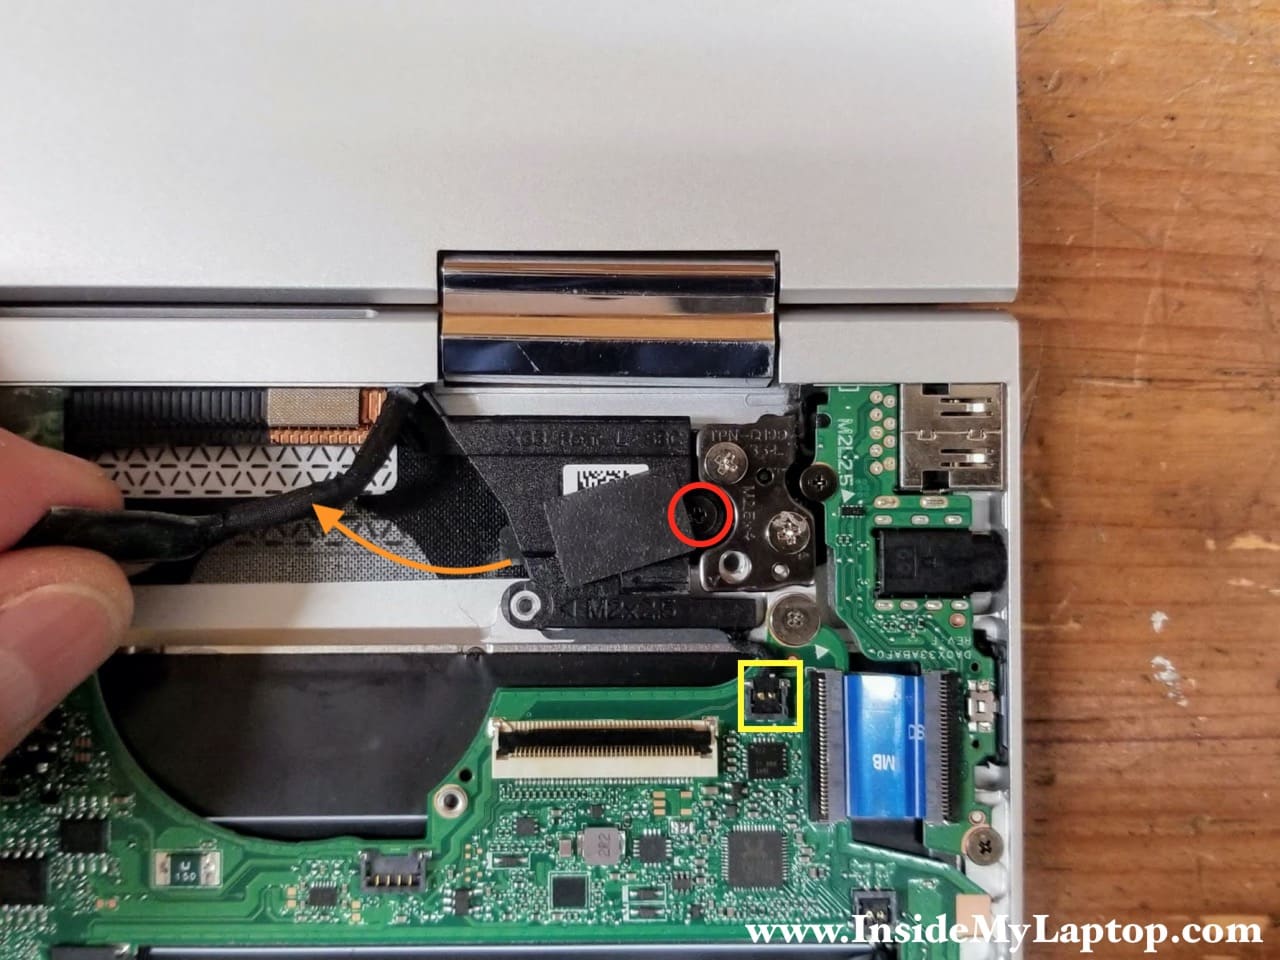
STEP 14.
Disconnect the display cable from the motherboard.
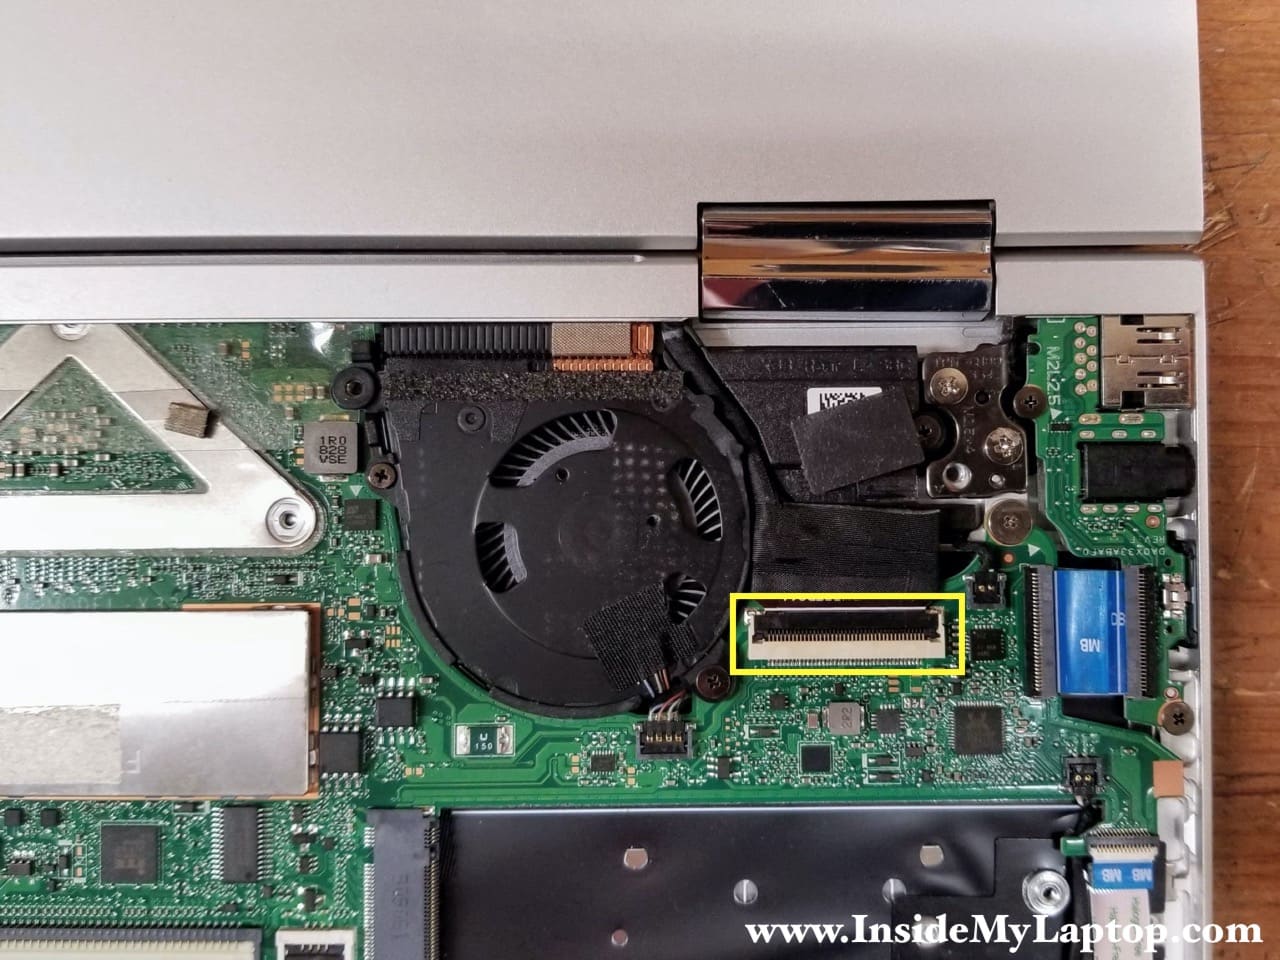
Lift up the locking tab securing the cable inside the connector. Lift up and remove the cable from the connector.

STEP 15.
Un-route the display cable from the guided path.
Remove three screws securing the left cooling fan.
Disconnect the fan cable from the motherboard.
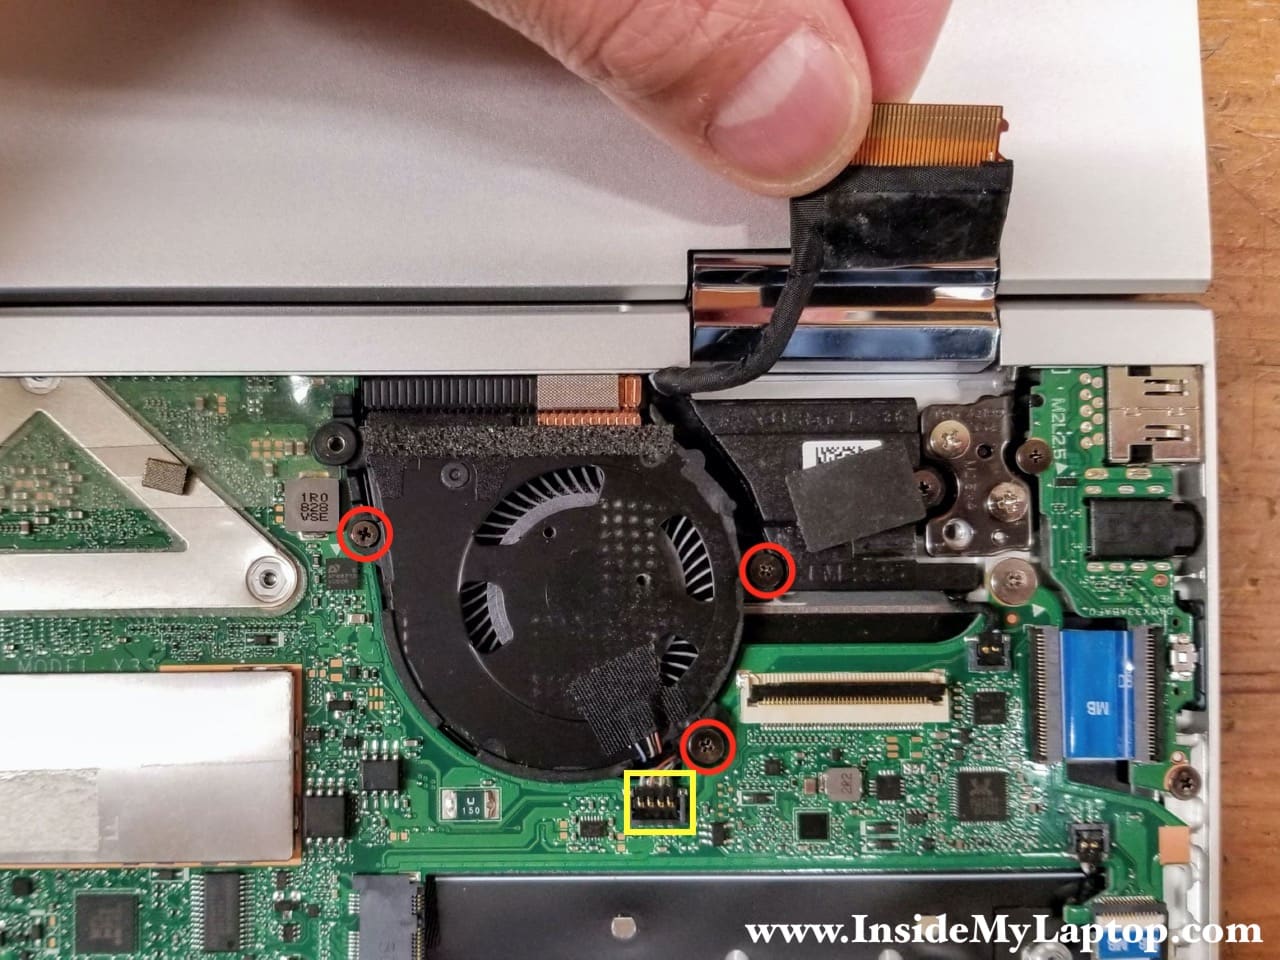
STEP 16.
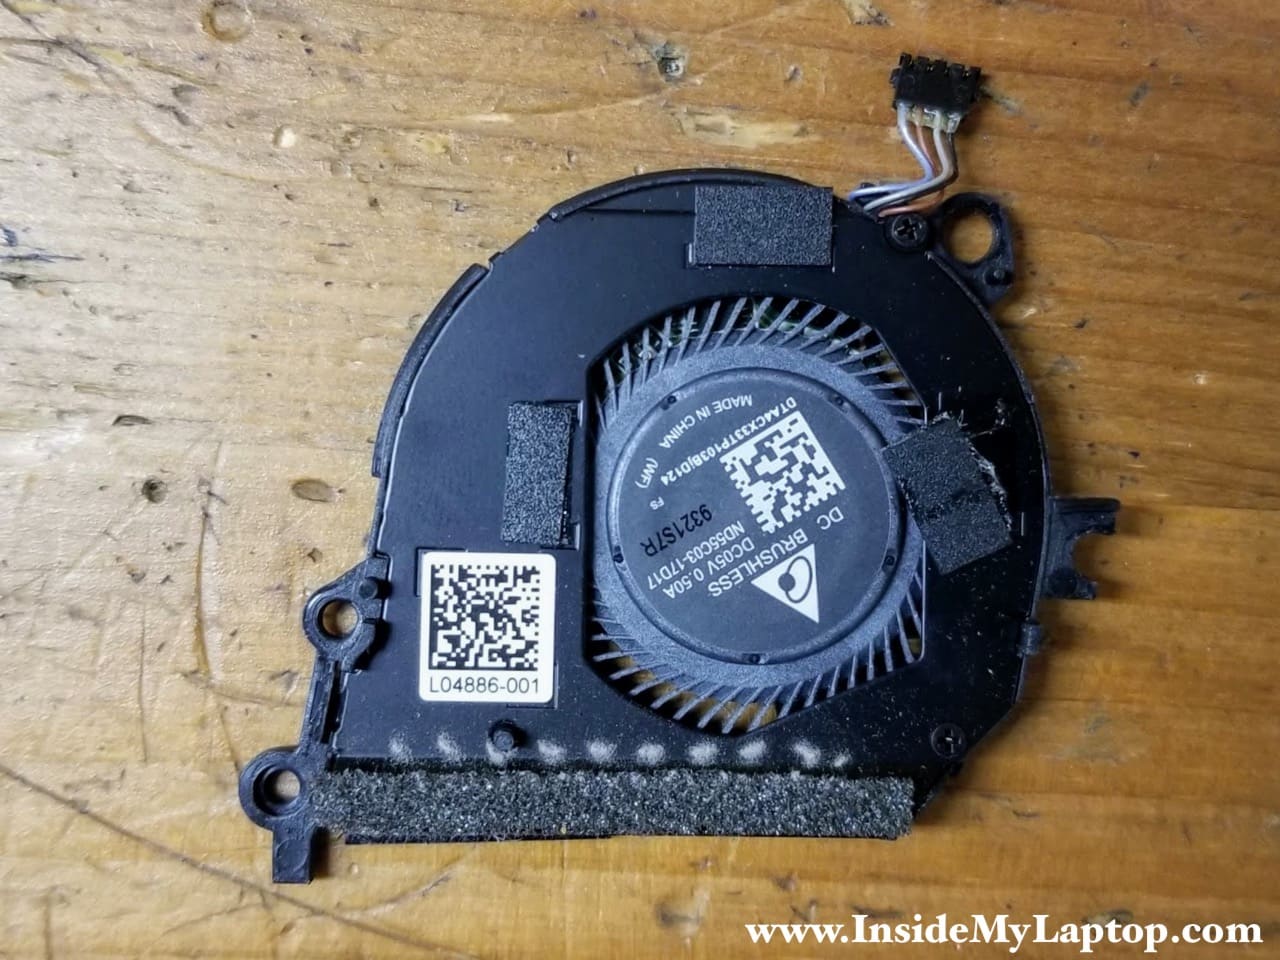
Lift up and remove the left cooling fan.

HP Spectre x360 13t-ae000 left fan service part number: L04886-001.
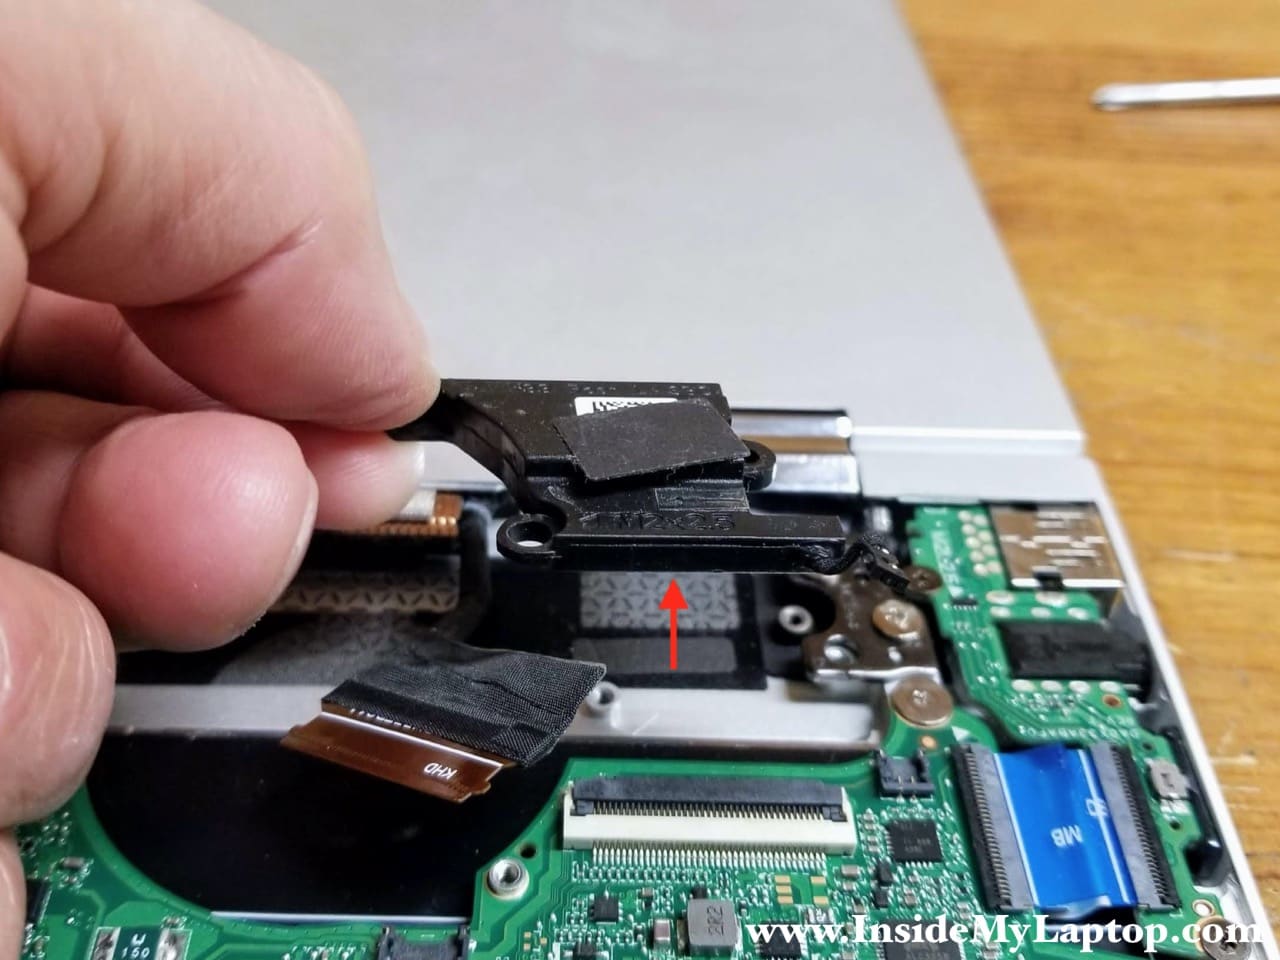
STEP 17.
Remove one screw securing the rear left speaker and disconnect the speaker cable from the motherboard.
STEP 18.
Lift up and remove the rear left speaker.
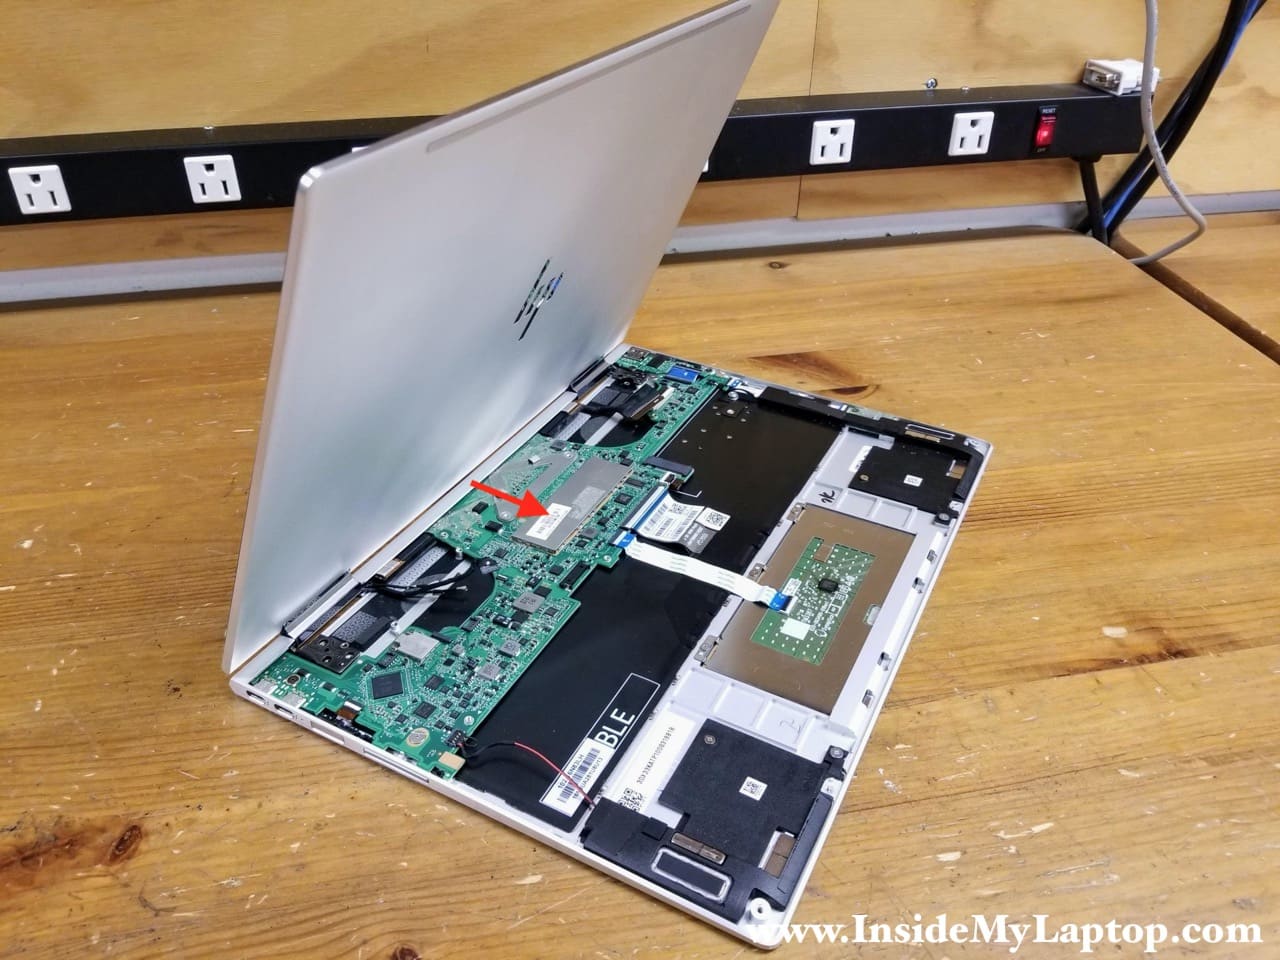
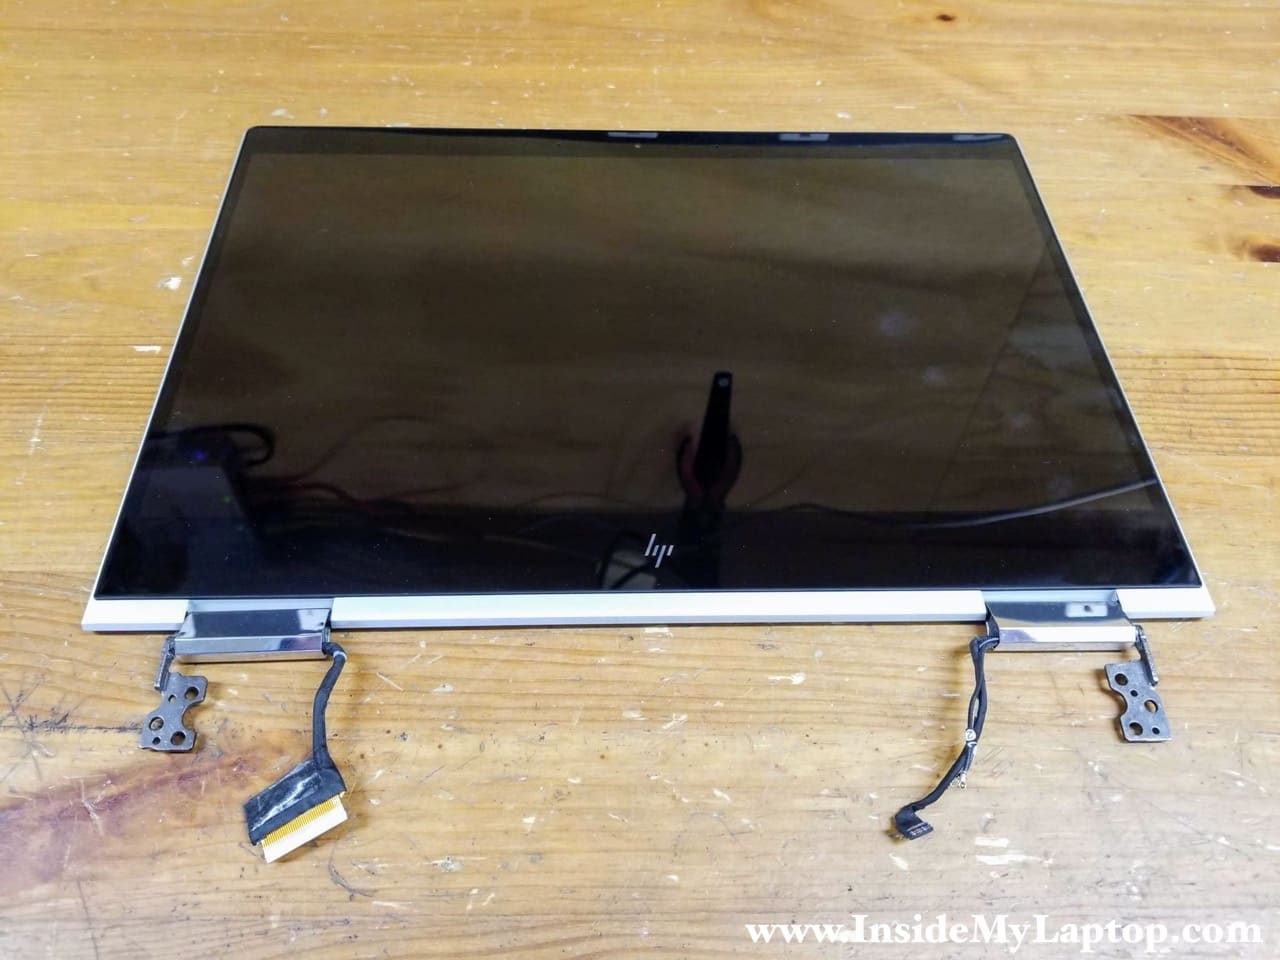
Display panel removal
STEP 19.
Remove four screws securing the left and right display hinges.

STEP 20.
Open up the display panel as it shown on the following picture. Move the display panel towards the touchpad to separate it from the top case assembly.
STEP 21.
Lift up and remove the display panel.
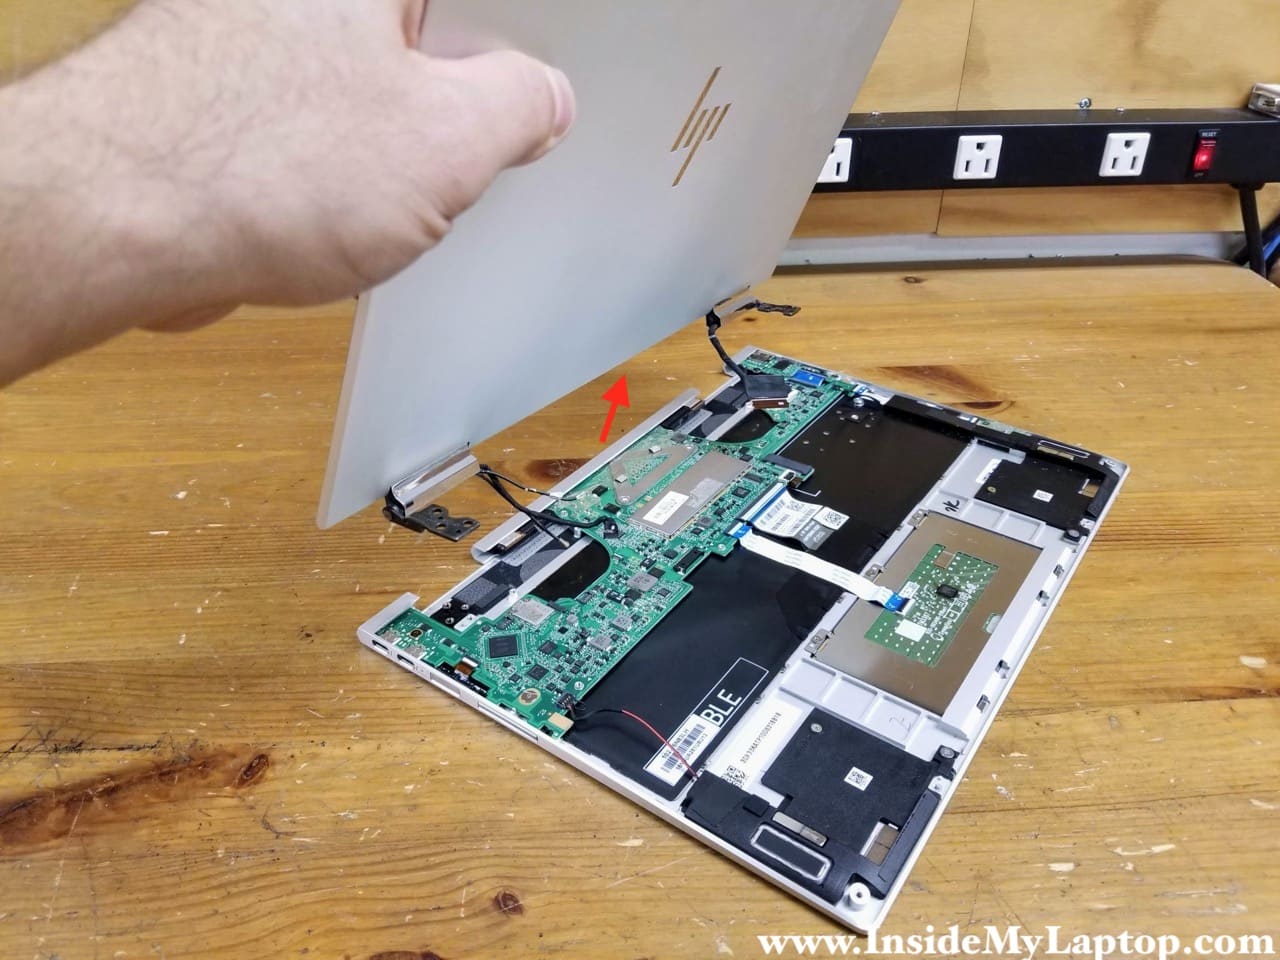
HP Spectre x360 13t-ae000 has a sealed display panel and it cannot be easily disassembled. The screen is glued to the back cover. If you crack the front glass or the LCD screen fails, it’s easier to replace the entire display assembly.
Here’s the top case assembly with the display panel removed. Now we can remove the USB audio jack board and the motherboard.
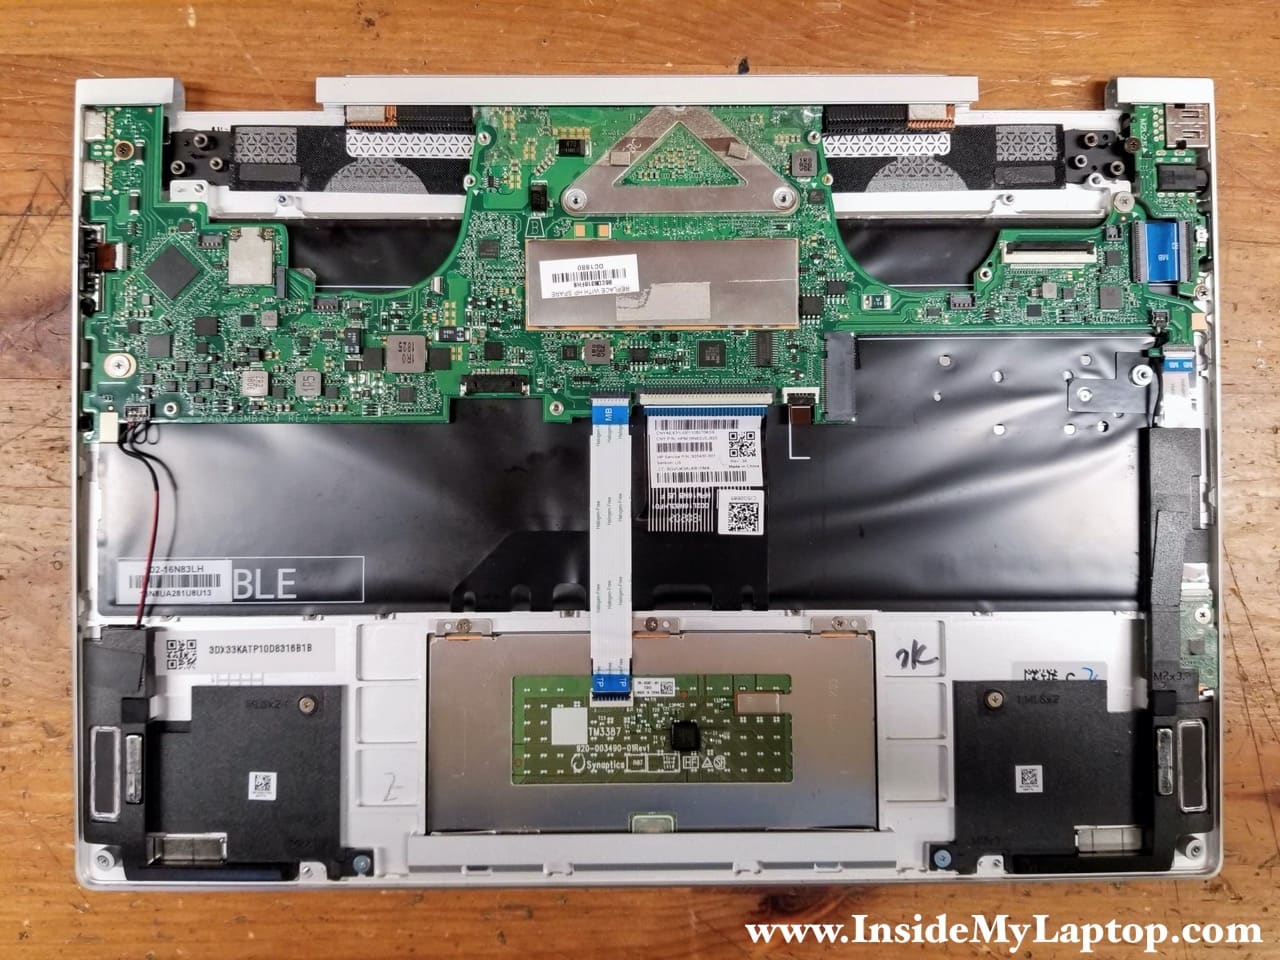
USB audio jack board removal
STEP 22.
Remove two screws from the USB audio jack board. Disconnect the I/O cable from the motherboard.
You can disconnect the I/O cable from the board instead.
Don’t forget to unlock the connector before disconnecting the I/O cable.

STEP 23.
Lift up and remove the USB audio board. Part of the I/O cable is located under the motherboard. You’ll have to pull the I/O cable out while removing the USB audio jack board.
Yeah, it’s easier to remove if you disconnect the I/O cable from that board, not the motherboard.

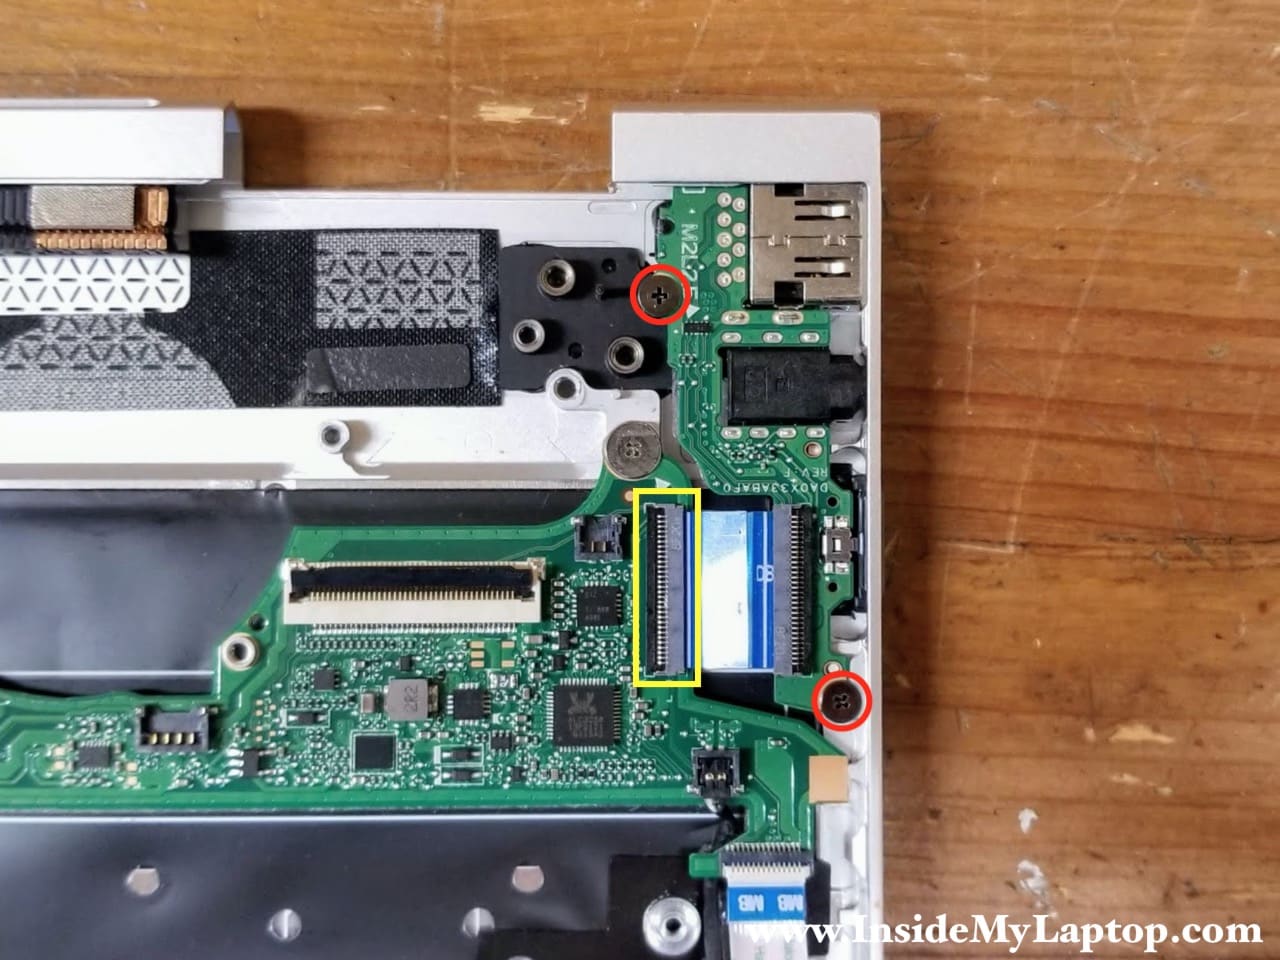
Motherboard removal
STEP 24.
Remove three screws securing the motherboard.
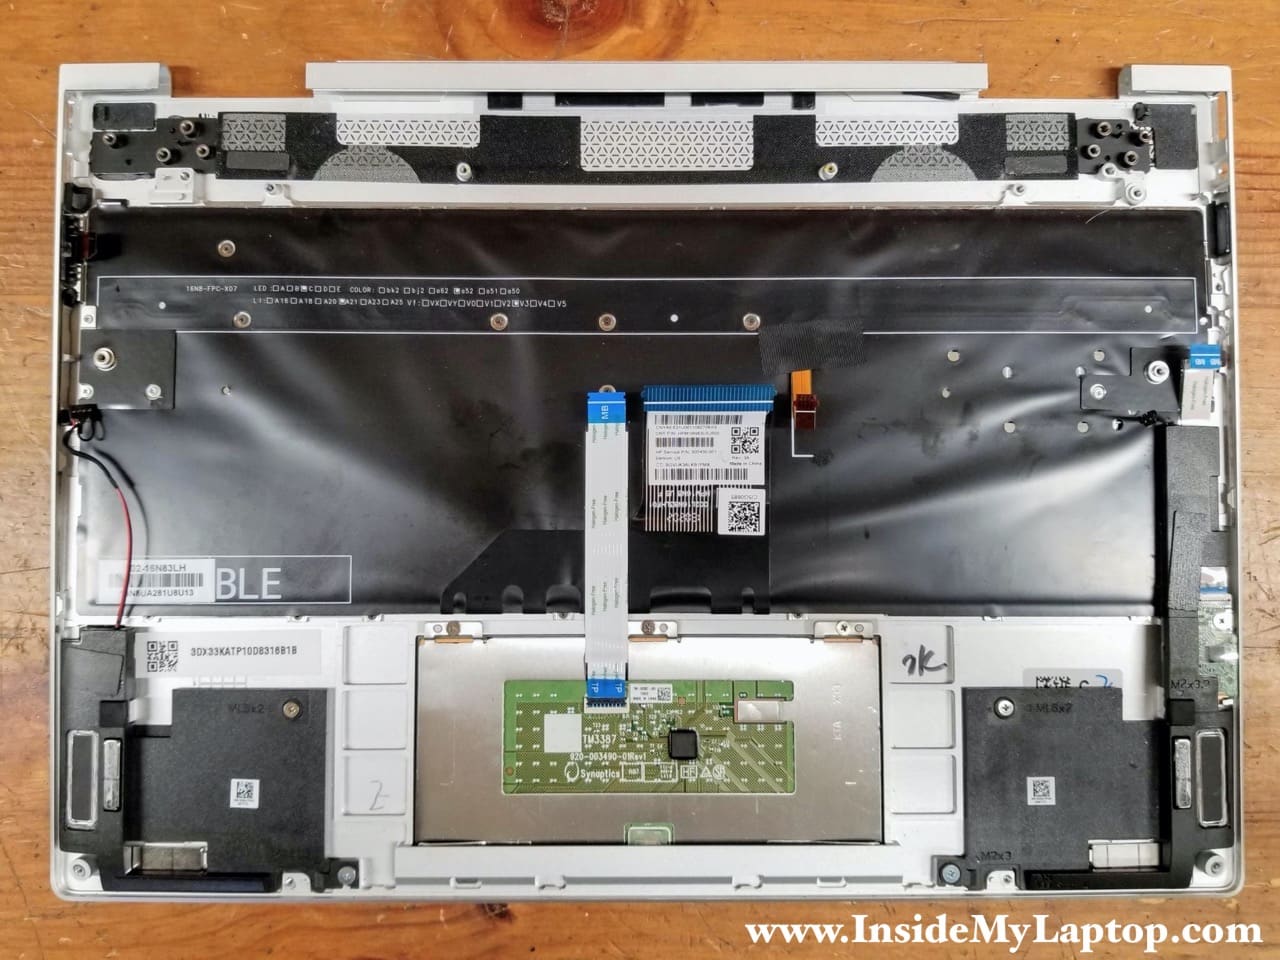
Disconnect the following color-coded cables:
– Fingerprint reader cable (orange).
– Front right speaker cable (green).
– Touchpad cable (yellow).
– Keyboard and keyboard backlight cables (light blue).
– Front left speaker cable (dark blue).
– Card reader cable (pink).

STEP 25.
Separate the motherboard from the top case assembly.

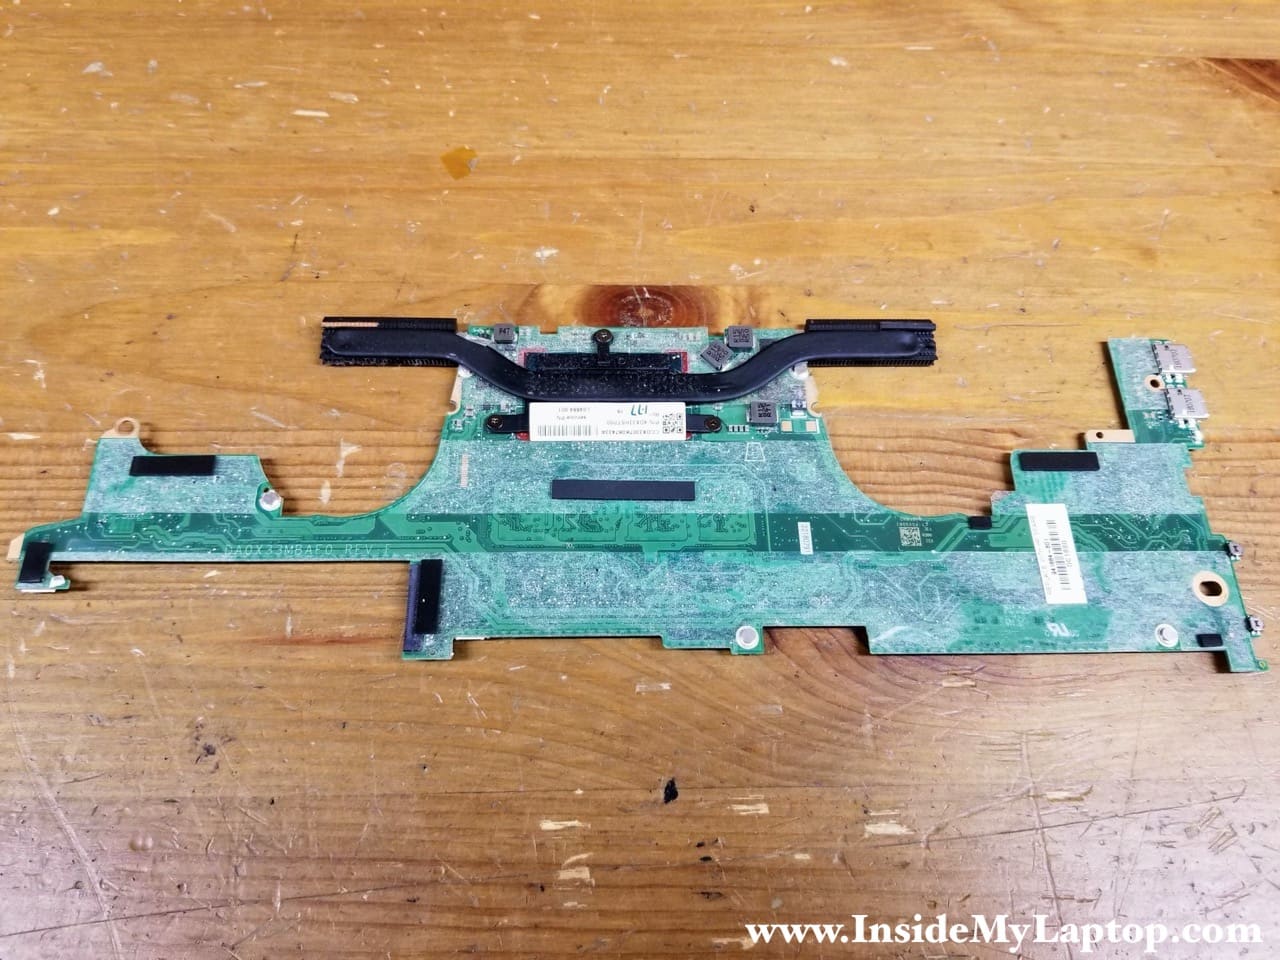
STEP 26.
Remove the motherboard.

Here’s the other side of the motherboard. HP service part number: L04884-001.
I believe the HP Spectre x360 Convertible PC 13t-ae000 laptop has a removable keyboard and it can be replaced without replacing the entire top case assembly. In order to remove the keyboard it’s necessary to peel off the keyboard backlight and remove the keyboard screws.