In the following guide I explain how to disassemble a Dell XPS 17 L701X laptop.
During the disassembly process I’ll go though the following major steps:
STEP 1-8: Accessing both RAM modules. Removing the hard drive and optical drive.
STEP 8-14: Disconnecting and removing the palmrest.
STEP 15-20: Removing the keyboard.
STEP 20-26: Removing the bottom cover.
STEP 27-28: Accessing and removing the cooling fan. Accessing the DC power jack.
Before you start taking it apart make sure the computer is turned off.
STEP 1.
Unlock and remove the main battery.
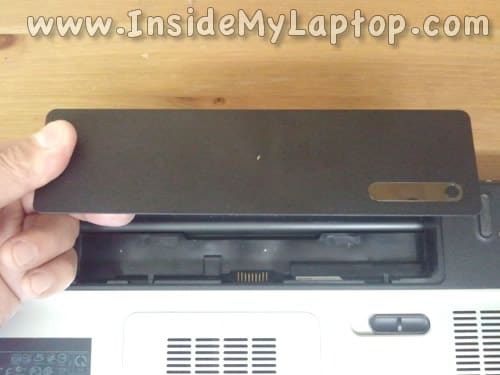
STEP 2.
Remove the service cover on the bottom.

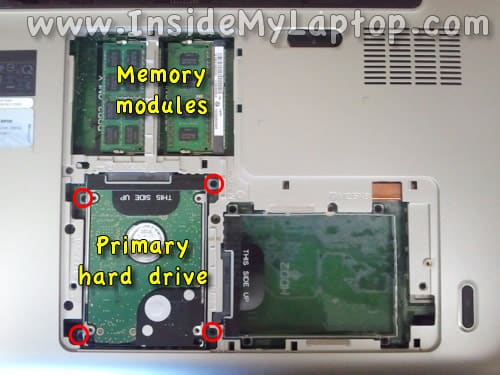
STEP 3.
Under the service cover you can access both memory modules and hard drive.
Remove four screws securing the main hard drive mounting bracket.
This laptop has 4 memory slots and can handle up to 16GB (4x4GB) DDR3-12800 SODIMM memory modules.
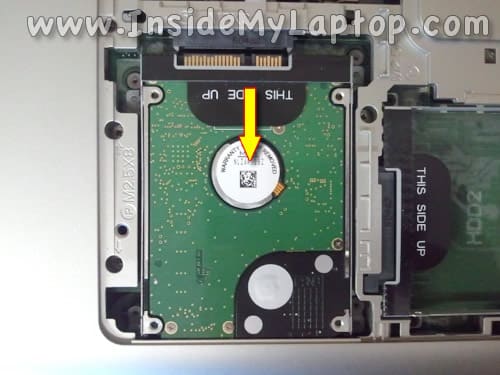
STEP 4.
Slide the hard drive to the shown direction in order to disconnect it from the motherboard.
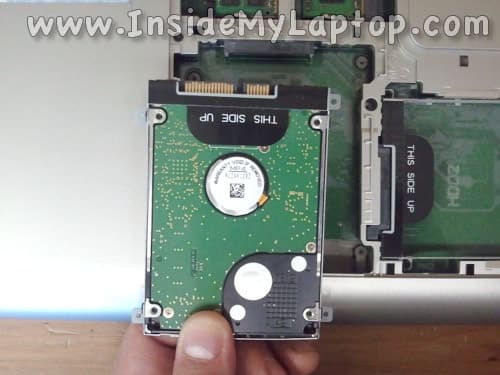
STEP 5.
Remove the primary hard drive.
Upgrading this regular 2.5″ SATA hard drive to a 2.5″ SATA solid state drive will improve laptop performance significantly.
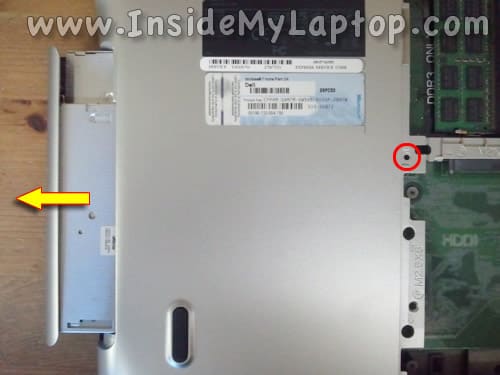
STEP 6.
Remove one screw securing the optical drive.
Pull the optical drive and remove it.
UPDATE: you’ll find three screws located under the DVD drive. These screws must be removed before you can  remove the palmrest assembly in the step 8.
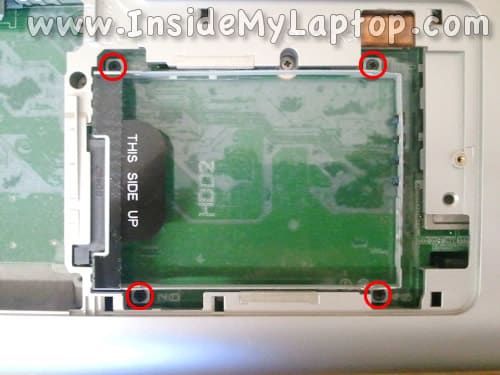
STEP 7.
Remove for screws securing the secondary hard drive mounting bracket.
In my Dell XPS L701X I had only one hard drive installed.
Remove the mounting bracket.
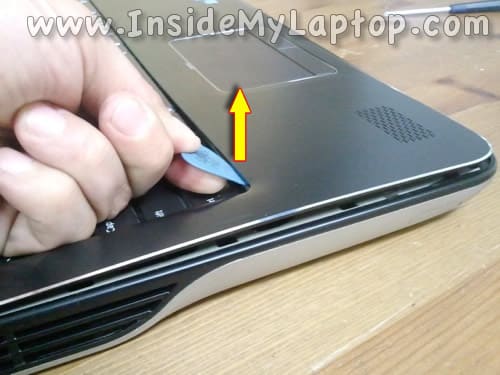
STEP 8.
Start removing the palmrest.
UPDATE: three screws located under the DVD drive (removed in STEP 6) has to be removed in order to remove the palmrest assembly.
Insert a piece of plastic (I’m using the guitar pick) under the palmrest and lift it up.
STEP 9.
Continue removing the palmrest with your fingers.
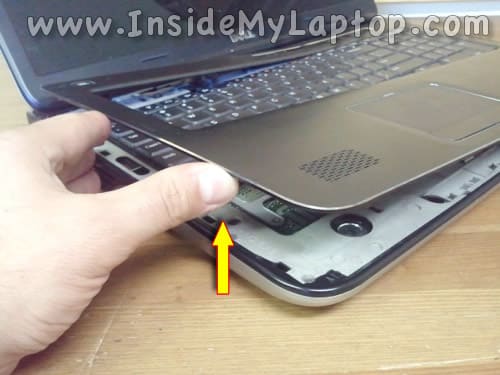
WARNING! The touchpad cables are still connected to the motherboard.
Before you can remove the palmrest completely it’s necessary to disconnect the touchpad cables.
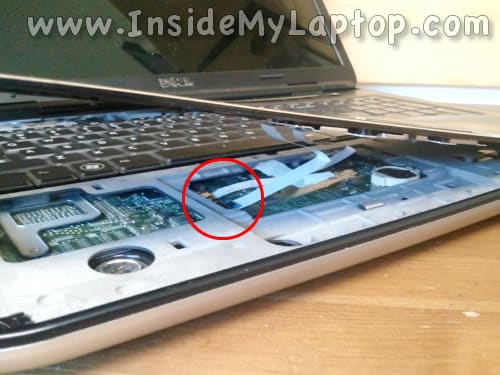
STEP 10.
The palmrest has been separated from the base.

STEP 11.
Place the palmrest so you can access the touchpad cables.
In the following two steps I explain how to unlock connectors and release cables.
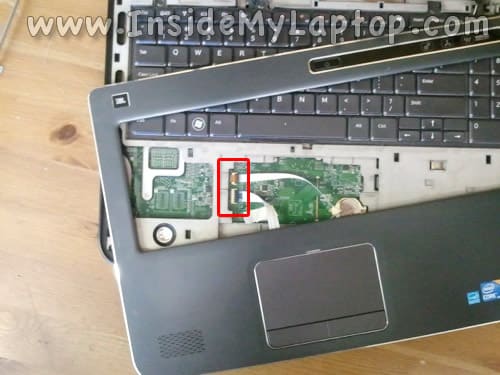
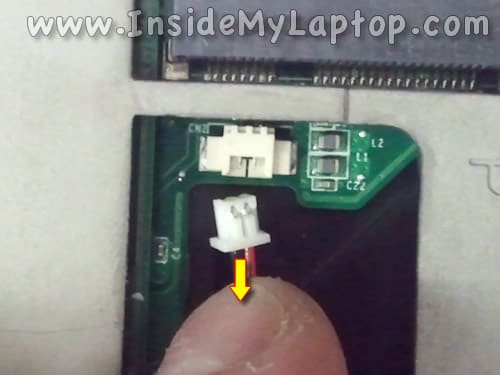
STEP 12.
In order to unlock the connector you’ll have to lift up the right side of the cable retainer.
The retainer will open up at a 90 degree angle.
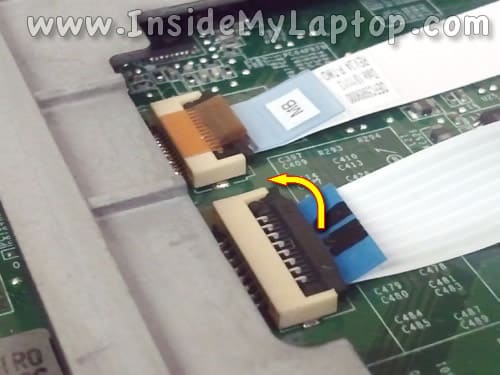
STEP 13.
On the following picture the connector shown in the UNLOCKED position. Now you can pull the cable from the connector.
Disconnect the second touchpad cable.

STEP 14.
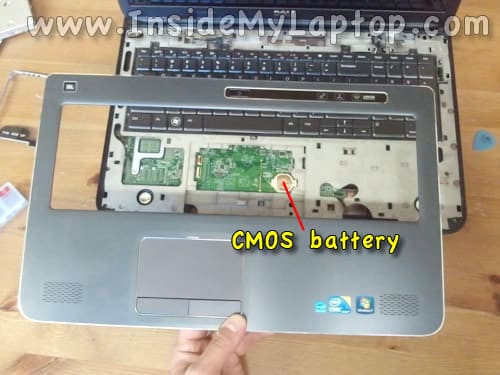
Now you can remove the palmrest from the laptop completely.
After the palmrest removed you can access the CMOS battery.
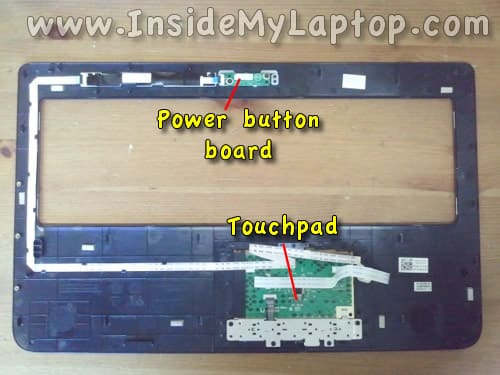
Here’s the bottom side of the palmrest.
Here you can access the touchpad and power button board.
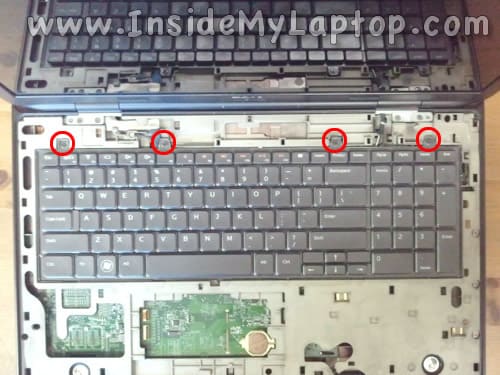
STEP 15.
Remove four screws securing the keyboard.
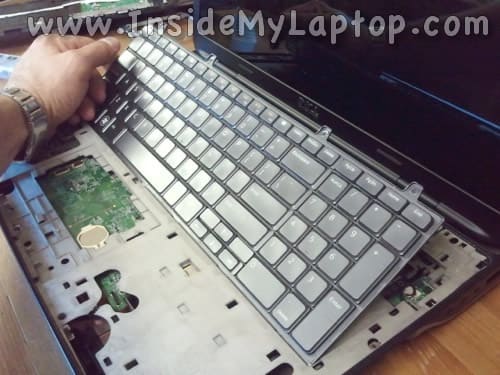
STEP 16.
Lift up the keyboard and turn it upside down.
STEP 17.
Now you can access the keyboard cable connector.
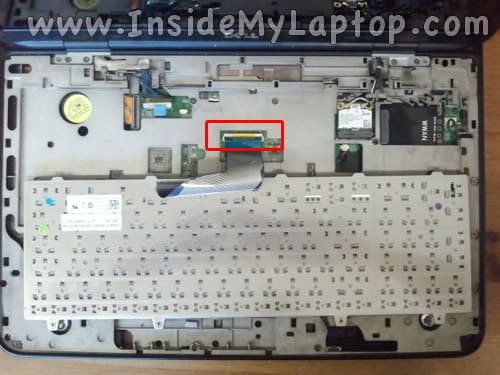
STEP 18.
Unlock the connector by lifting up the left side of the cable retainer.
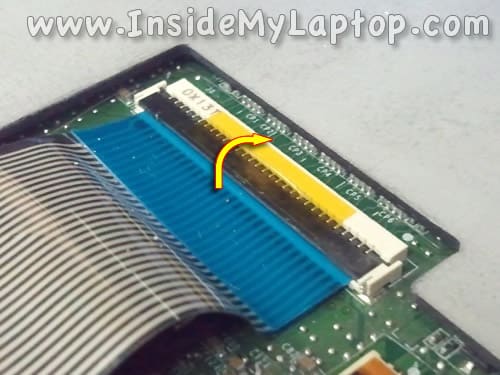
STEP 19.
Disconnect the keyboard cable from the connector.

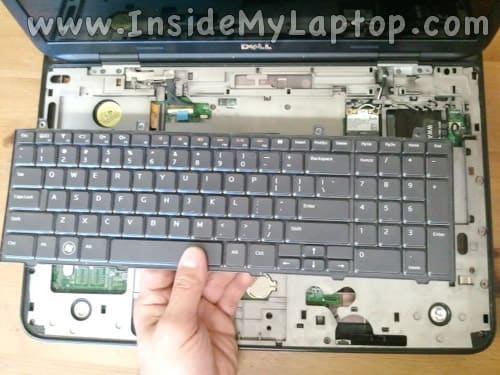
STEP 20.
Remove the keyboard.
STEP 21.
Remove screws securing the top cover assembly.
Unplug the speaker cable from the motherboard.
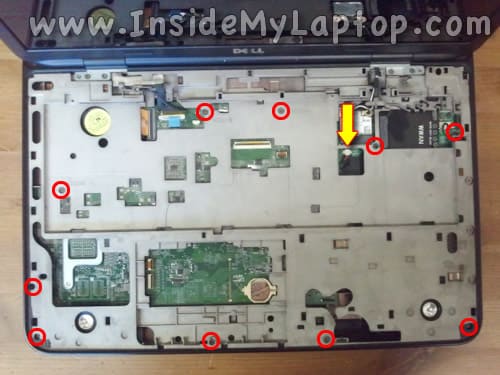
Here’s how to unplug the cable.
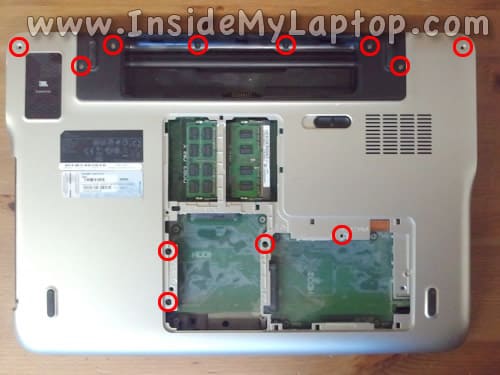
STEP 22.
Remove screws from the bottom.
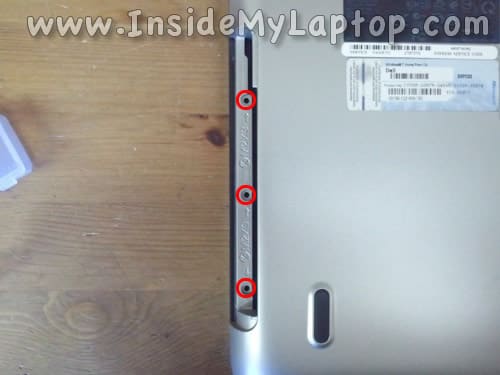
STEP 23.
Don’t forget three screws located in the optical drive bay.
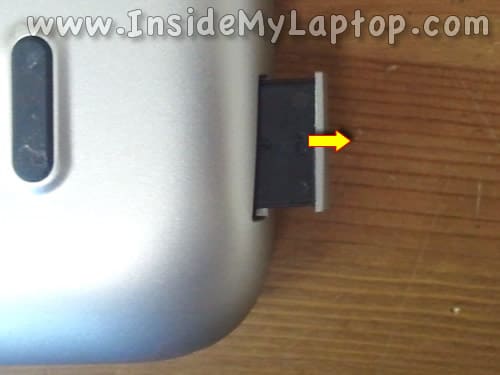
STEP 24.
Remove the SD slot cover.
STEP 25.
Start separating the bottom cover from.
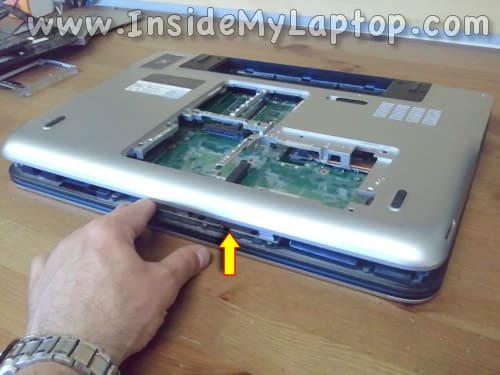
STEP 26.
Remove the bottom cover.
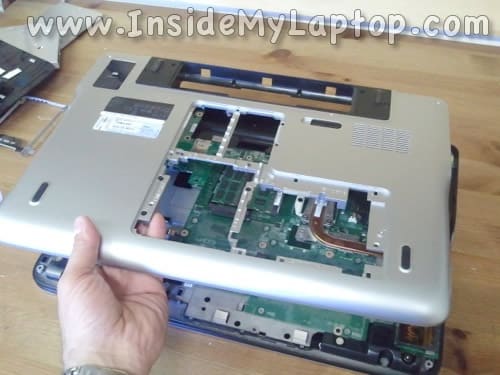
The bottom cover has been removed.
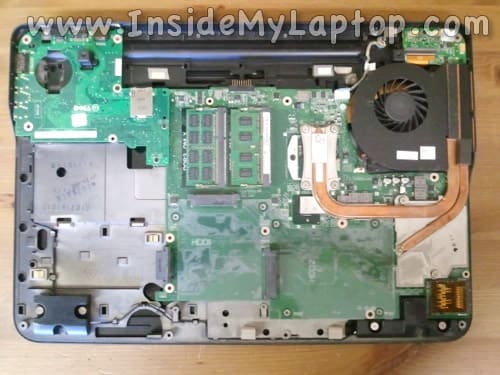
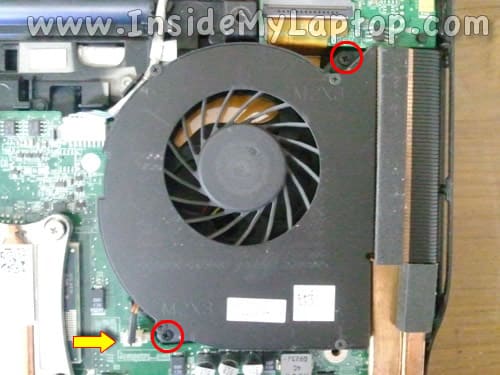
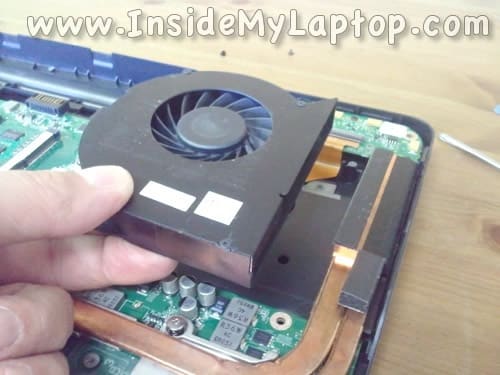
STEP 27.
Remove two screws securing the cooling fan.
Disconnect fan cable from the motherboard.
STEP 28.
Remove the fan.
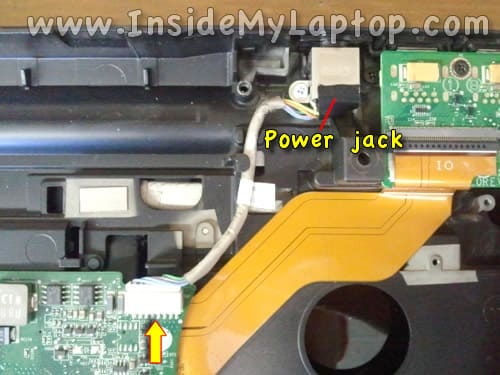
The DC power jack connected to a cable. It can be easily removed and replaced.
Alex
Hi, thanks for the great instruction on the L702x. I was just wondering whether it is necessary to remove all the front panels if I simply need to access the GPU and Heat Sink. Do you know if it is possible just to remove just the underside of the laptop to get to the GPU and Heat Sink?
Thanks
IML Tech
@ Alex,
I don’t think you’ll be able to remove the bottom cover without removing screws shown in the step 21. It means you’ll have to go though all steps for that.
Louis
Hi! I’m in the process of putting my laptop back together (the heatsink was in dire need of cleaning out after 2 years) and I noticed that the screws by the CD drive (step 23) appear to be attached to the underside of the palm rest, therefore NEED to be removed before the palm rest comes out.
I had immense difficulty removing the right side of my palm rest, and I continued with the other steps first and after removing the optical drive screws the palm rest popped out easily. A fantastic guide otherwise, much appreciated.
rob
Thanks for the walk through! Like Louis, the screws by the CD drive must be removed before the right side of the palm rest could be removed. Glad I noticed your comment before I broke the palm rest. 🙂
IML Tech
@ rob,
Thank you for this comment. I edited the guide.
Katerina
I am in need of cleaning my fan and heat sink for my XPS L701X computer. How much of my computer has to be taken apart to get to it? This guide is the best I’ve seen and I would not have a problem disassembling the unit but I don’t want to remove anymore than is really necessary.
IML Tech
@ Katerina,
You cannot remove the bottom cover as it shown in the step 26 without removing screws shown in the step 21. It means you’ll have to go though all steps in order to access the cooling fan assemble and clean it up properly.
Also, you can try cleaning fans without disassembly. Just blow air (using air compressor or canned air) into the fan grill on the bottom of the laptop.
Kenan
Great guide! I will be tearing mine down tonight to get the heatsink and fans all cleaned out. I was wondering if the tear down will be similar with a 1702 Dell? I have the 1701 and my wife has the 1702. Since I will be taking mine apart, I figure it can’t hurt to do them both one after another so they are both cleaned up. Thanks for the help.
Steve
Hi!, interesting guide. I was wondering, in other guides I have found on the internet they always remove the LCD panel, do you have to remove the panel in order the remove the heatsink and clean the fan? I have a L701X. Thank you in advance
IML Tech
@ Steve,
I created this guide for a XPS L701X laptop.
In order to access and clean up the fan you’ll have to remove the bottom cover as it shown on the step 26.
As you see, I didn’t have to remove the display. It’s still attached to the laptop.
If you have the same laptop model you don’t have to remove the display.
thad
I took apart my lap top as dictated by your step by step instructions. They were excellent.
I have a question, how would you proceed to attack a problem, from this point of the computer being taken apart? The problem I’m having with the computer is it starts and then immediately shuts down, less than a second. I looked for shorts and couldn’t find any.
Also there is one part hanging out, a bitty microboard attached by wires to the mother board coming out of a corner on the primary harddrive. Did I miss a step or accidentally knock something loose? It has com written on it.
Sincere thanks,
Thad
IML Tech
@ thad,
What happens if you remove the battery and try turning it on just on AC power. Does it turn on at all?
Maybe you forgot to connect the DC jack (if you disconnected it for some reason) and the laptop will not turn on because there is not power?
Dave Benner
Thanks for the help in allowing me to change my power jack. Excellent instructions!
Oisin
Hi, first and foremost, excellent guide. This really is a “walk through”.
I haven’t opened the laptop yet, but plan to this evening. I seem to have knocked the power jack out of position (tilted it backwards by pushing my laptop into a wall), which has lead to the infamous “plugged in, not charging” issue, permenantly. I’m hoping when I push the jack back into place it will reconnect with a part of the cable which isn’t in contact, as I feel this is most likely the issue, and not an issue with the chip which recognises the official Dell charger.
Anyway, to my main point. I assume it is necessary to de-static myself before opening the laptop? I’ve never opened a laptop before but am a seasoned PC builder, and would usually leave the PSU plugged in with socket power/PSU power off to ground the entire case. Is this advisable regarding the laptop, or would I just be better off investing in a de-static cable?
Thanks for any help.
IML Tech
@ Oisin,
You are correct. If your body carries static electricity it’s better to get rid of it before opening up the case.
Normally I touch a metal case (PC case for example) before touching internal laptop components and it works for me.
Dajomas
Hi,
first of all, thank you very much for this very excellent guide! My fan sounded like it was a 747, ready for take-off so I decided to plunch in at the deep end and open up my laptop. Thanx to your guide, I had everything opened and closed within 30 minutes. I woould not have been able to do so without this guide.
I have a L701X but in step 21, I have no cable connected to the connector. Sound is still working fine so I don’t think I missed something, it just wasn’t there.
Compliments on your guide!
pamela
I just want to replace my cmos battery do I have to take it all apart to do that.. I have an XPS 17
Leonardo
Sir. First, i want to say I’m really gratefull and I want to apologize for my english (I’m from argentina, so I don’t speak english usually). Your step by step guide saved my life. I saw a video on youtube but wasn’t really clear. Your guide is amazing. Before this I could cook an egg on my laptop. And its cooler sounds like a 747 as I’ve read on another comment. If You could post pictures of the different screws and its locations would be usefull. I.E: hdd screws, Case screws, etc. Btw to the people who asked if its necessary to remove all components. I didn’t removed memory modules and hard disks. Thanks again!
Leonardo
@Pamela I have te same model and I’m sorry to tell you this but yes, you have to do all the steps he described. The cmos battery is just under the palm rest.