
In this guide I explain how to disassemble Lenovo ideapad 300-15ISK laptop. I attempted to make this disassembly guide very detailed and clear so it’s easy to follow.
I’ll be using following tools: PH1 Phillips screwdriver, case opening pry tool and tweezers.
STEP 1.
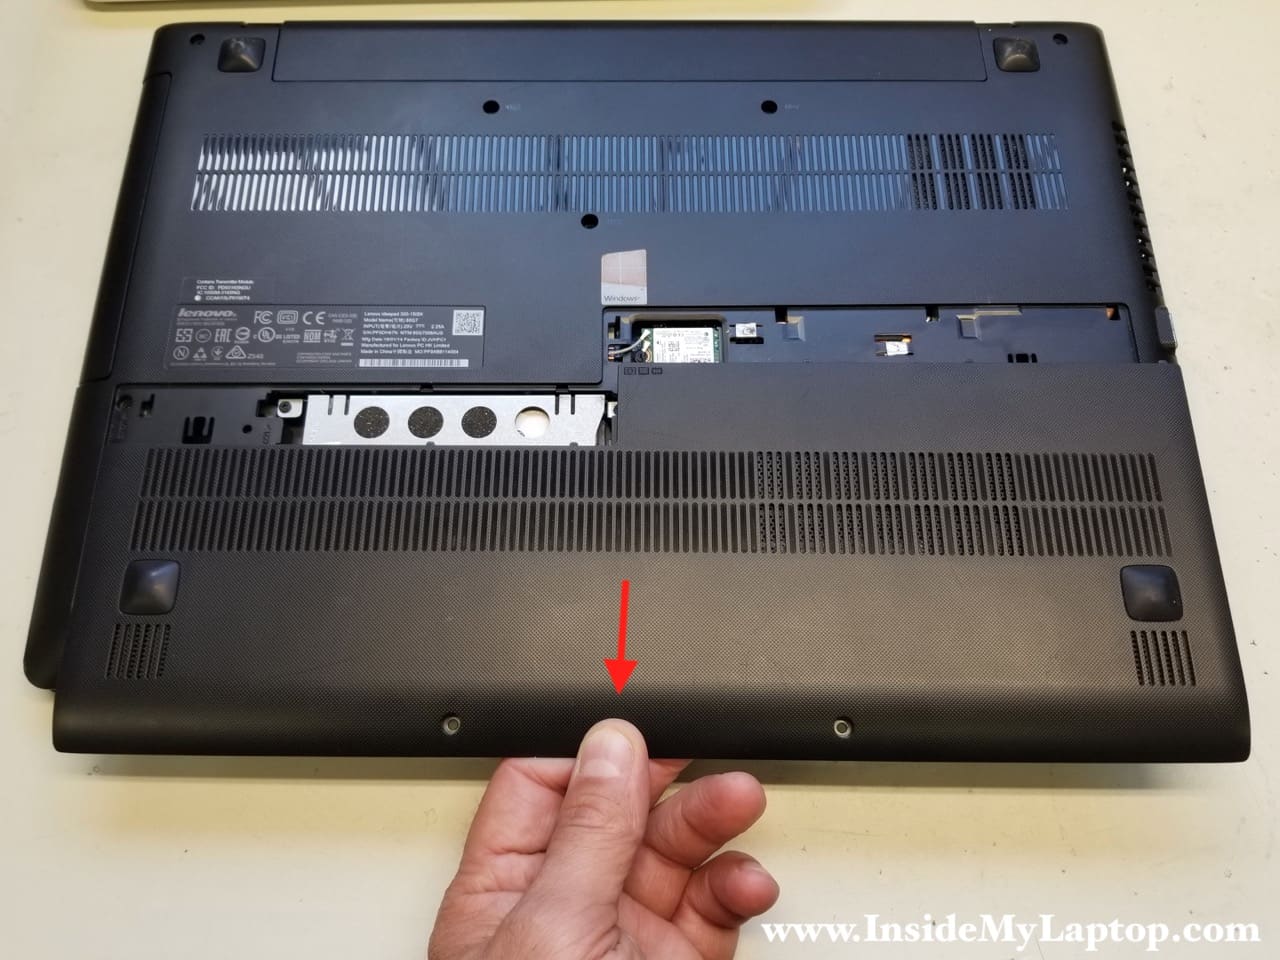
Remove two screws from the cover on the bottom.
Keep these screws separately, they are thicker than other screws.

Slide the cover to the shown direction and remove it from the laptop.
STEP 2.
Remove four screws securing the hard drive assembly.
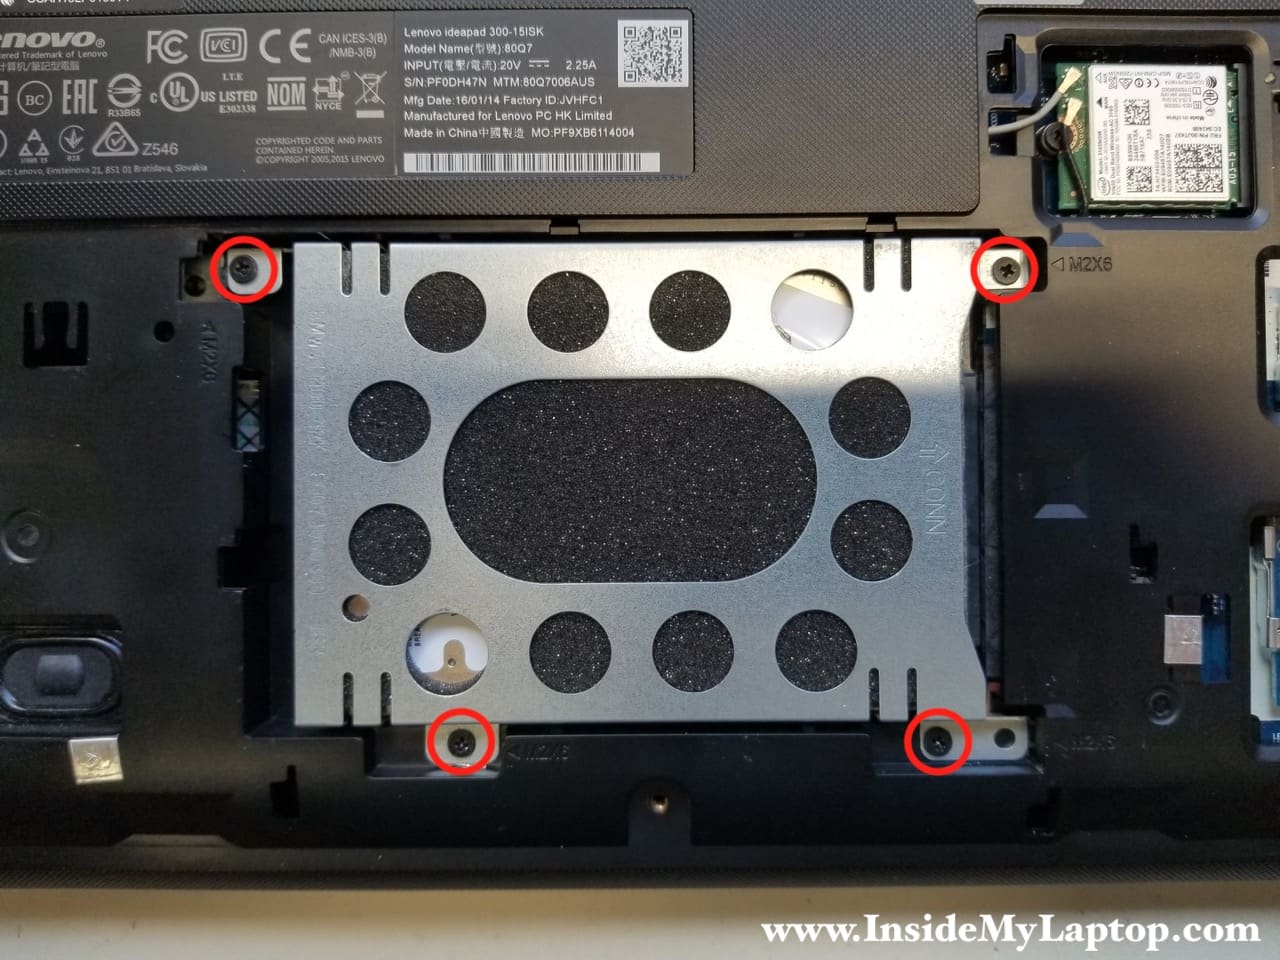
Slide the hard drive to the left (yellow arrow) to disconnect it from the motherboard.
Remove the hard drive. Upgrading this regular 2.5″ SATA hard drive to a 2.5″ solid state drive will speed up the laptop significantly.

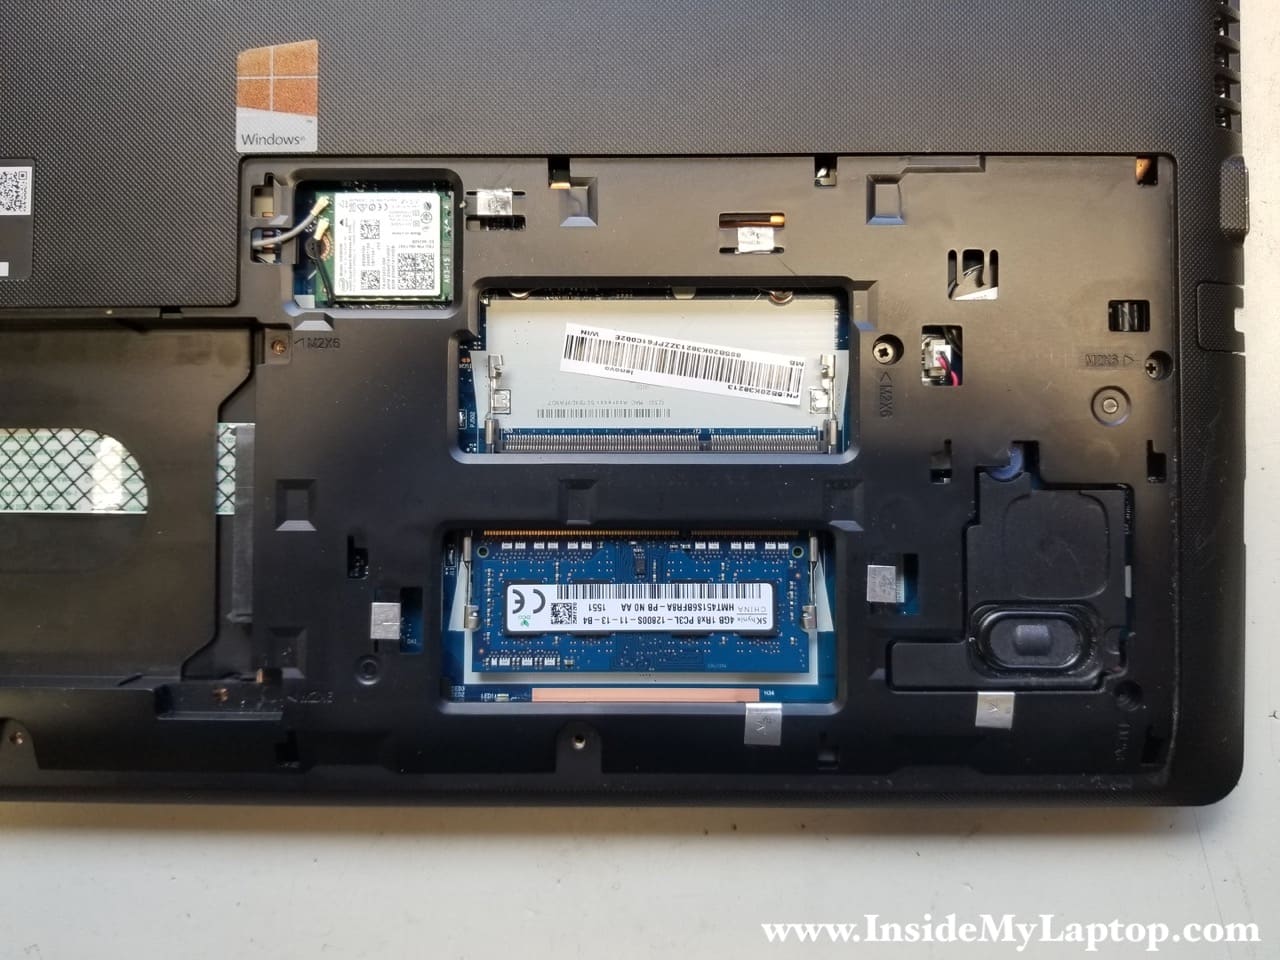
Also, here you can access both memory slots. It’s not necessary to remove the memory module.
This laptop can handle up to 16GB (2x8GB) DDR3-12800 SODIMM RAM modules.
STEP 3.
Remove three screws securing the keyboard.

STEP 4.
I’m using flat pry tool to separate the keyboard from the case.

After the keyboard separated from the case you can continue removing it with your fingers.
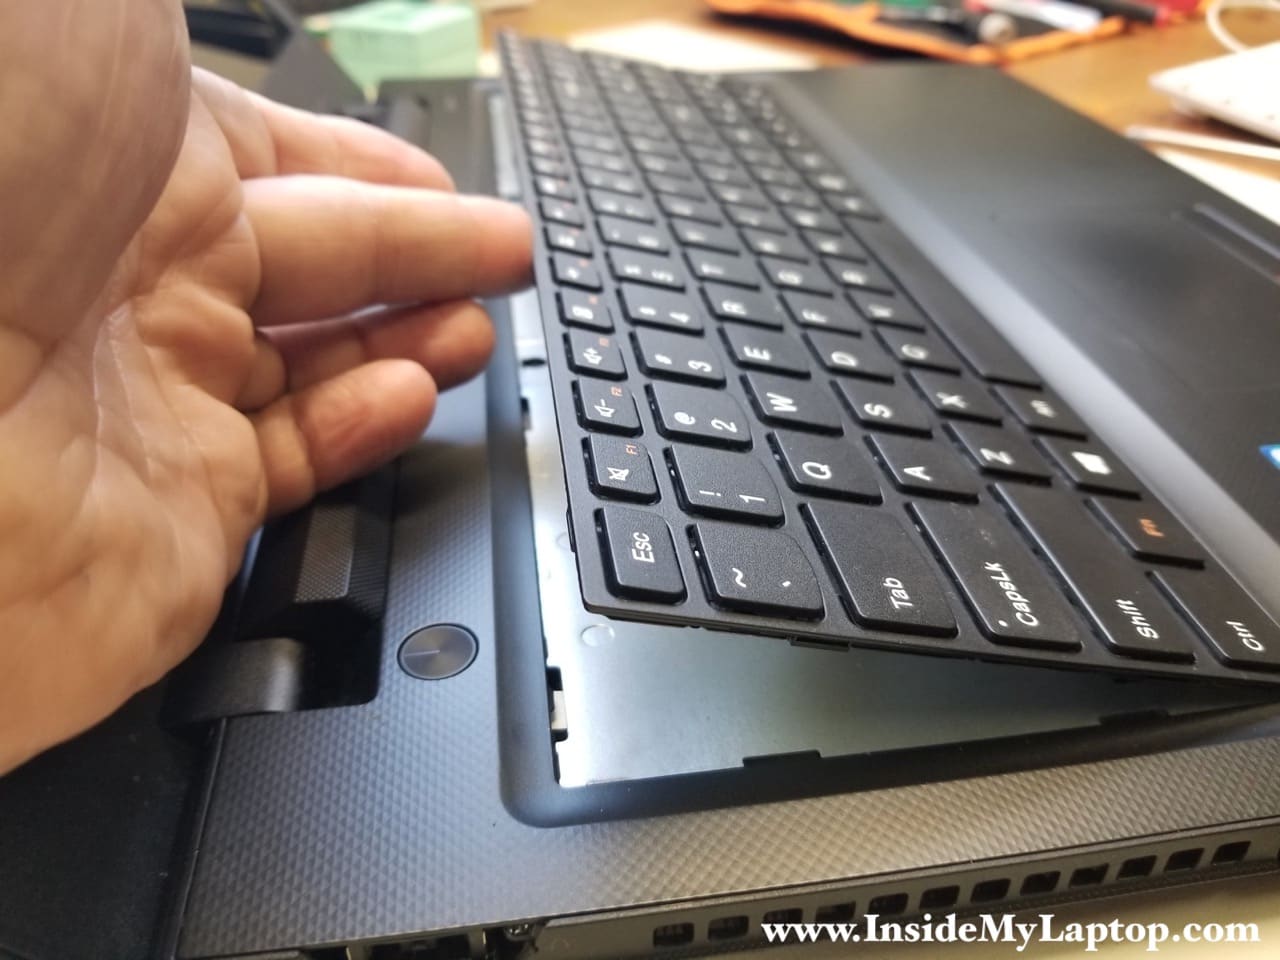
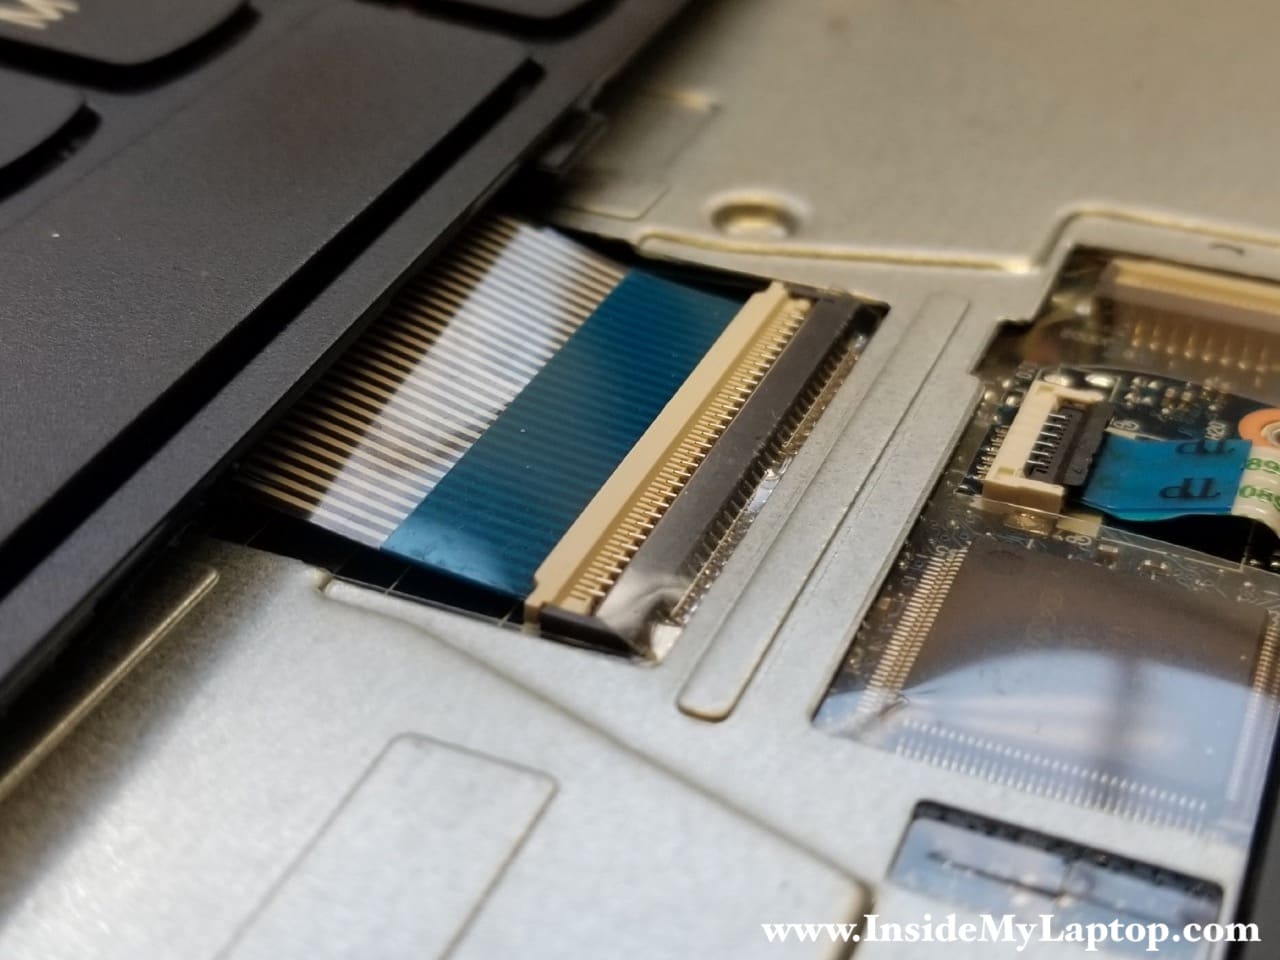
Slide the keyboard towards the display assembly to access the connector underneath.
In the next step I’ll show how to release the keyboard cable.
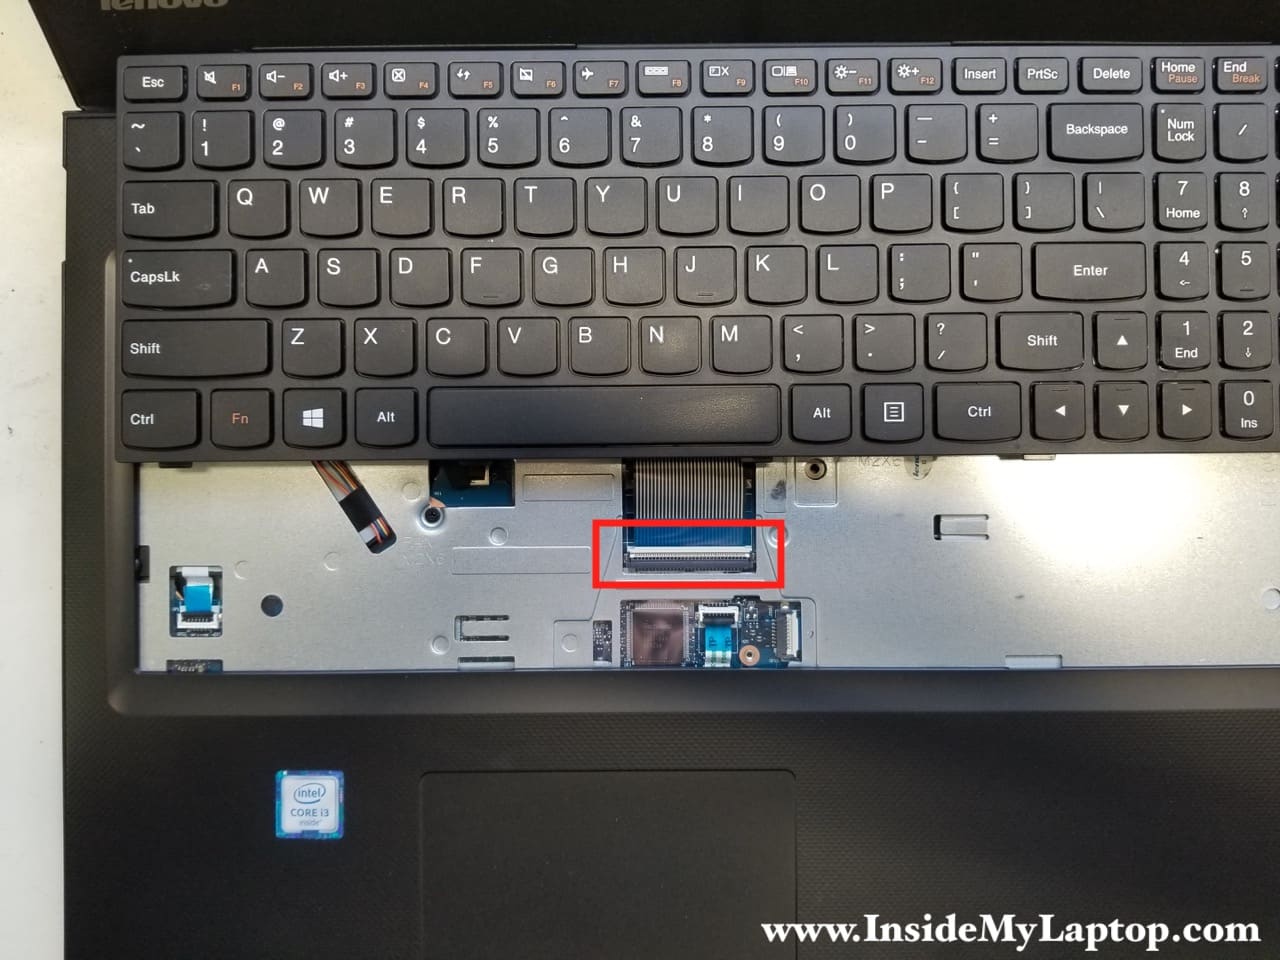
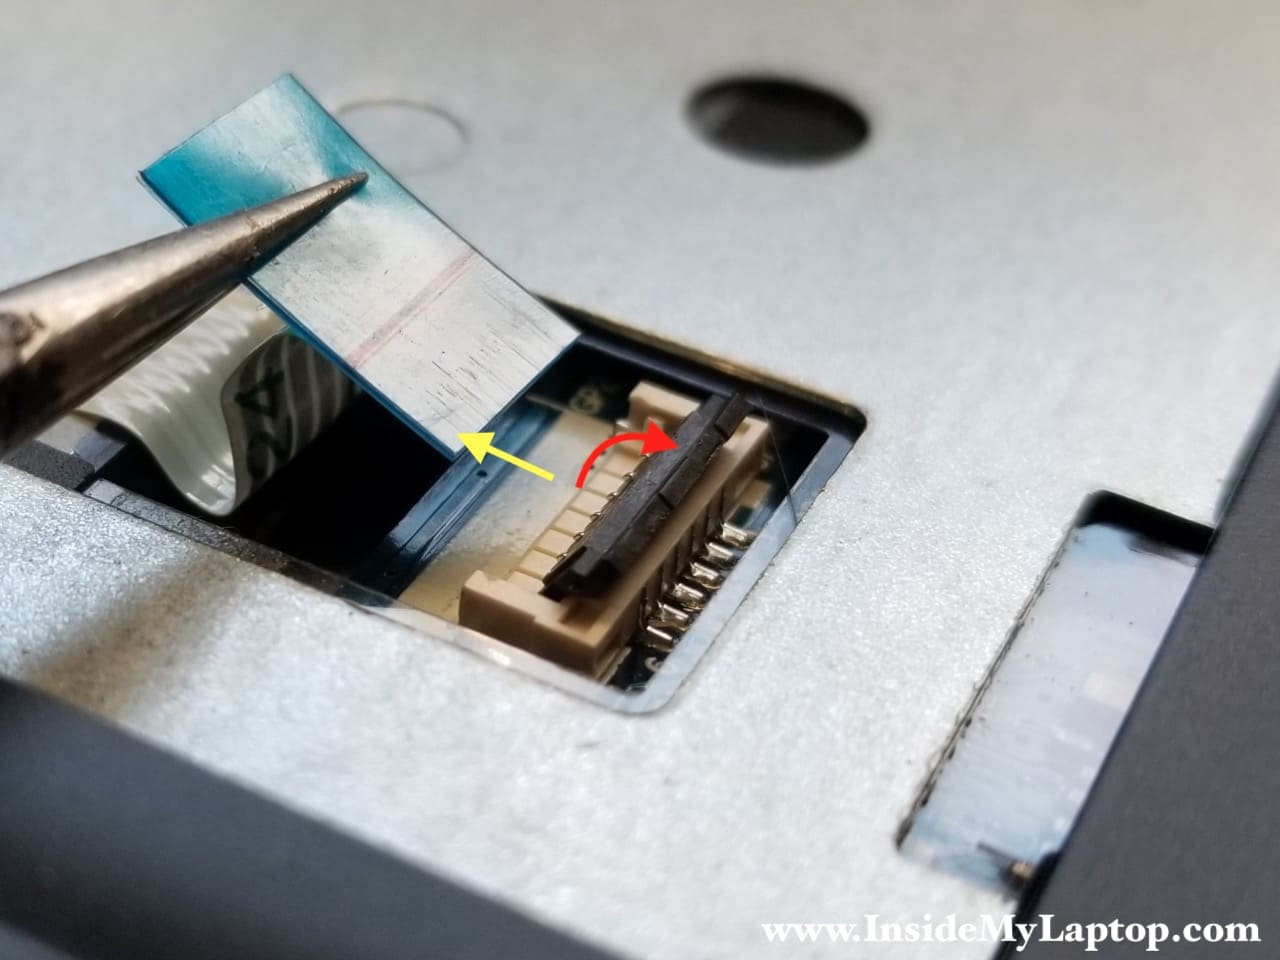
STEP 5.
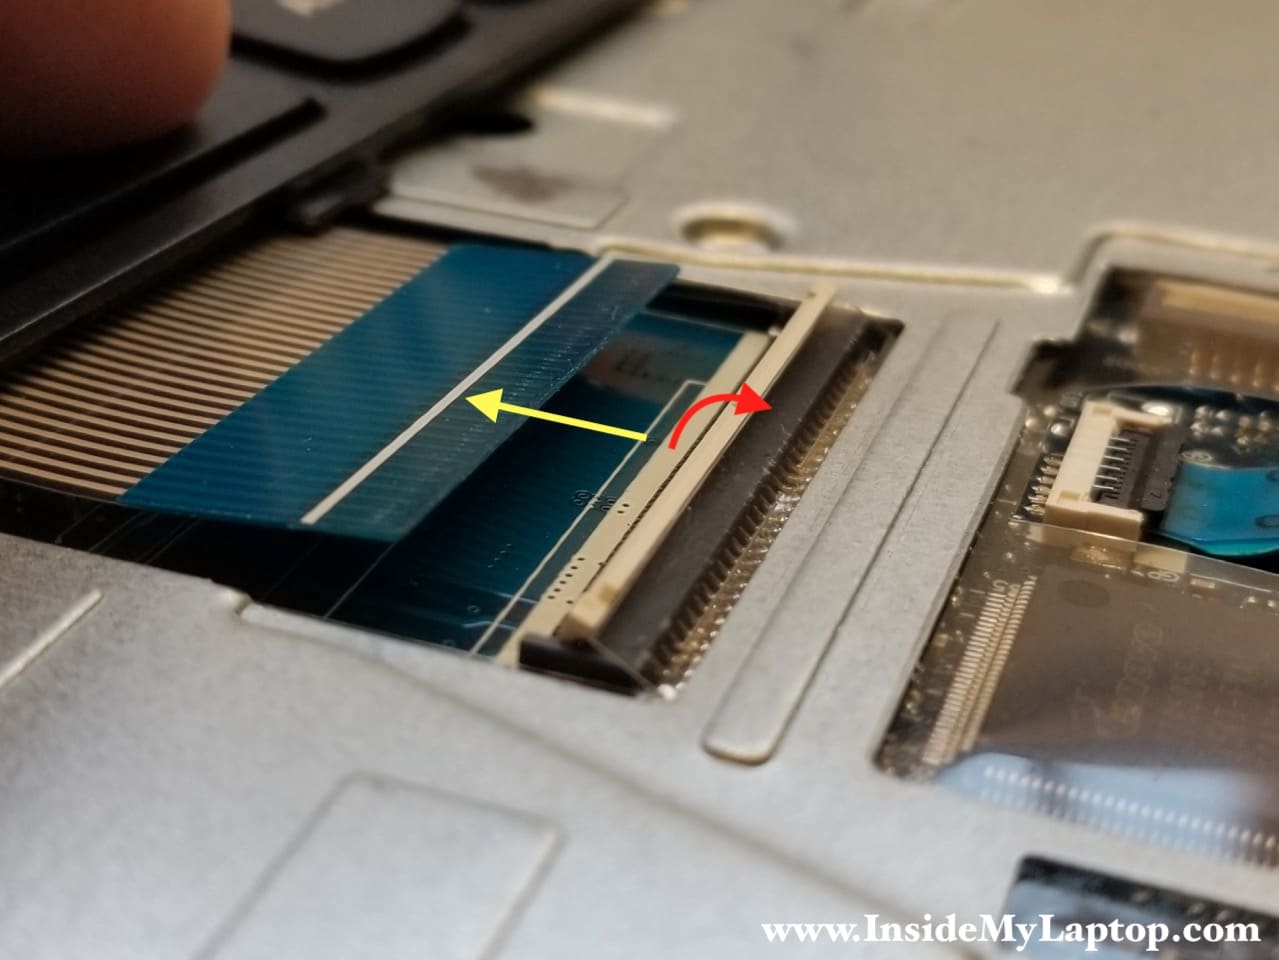
On this picture the keyboard connector shown in the locked state. It must be unlocked in order to release the cable.
Lift up the locking tab (red arrow) and pull cable out (yellow arrow).
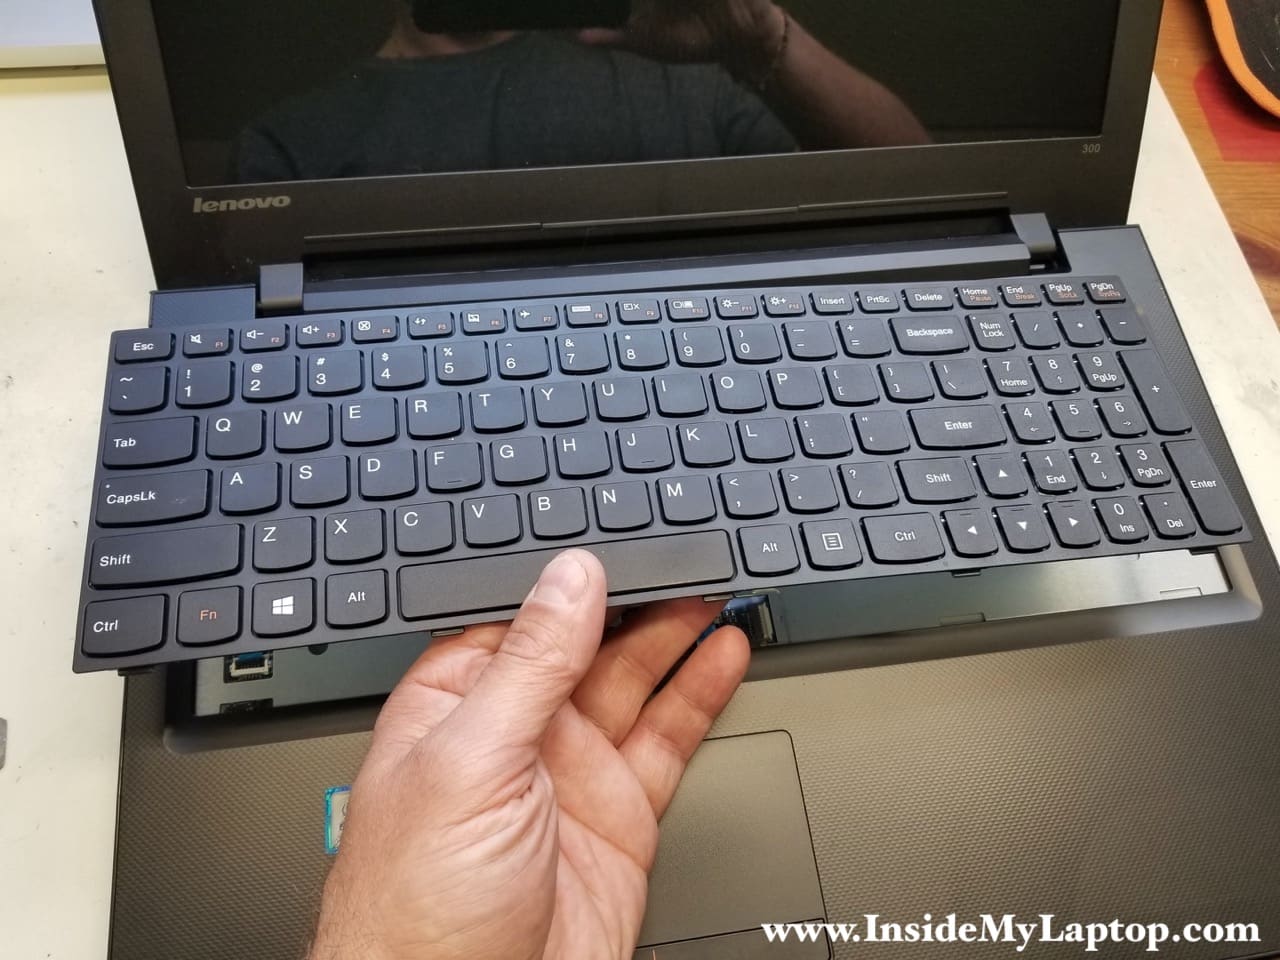
STEP 6.
Now you can remove the keyboard.
STEP 7.
Remove two screws securing the top case assembly.
Disconnect the power button cable and trackpad cable.

Unlock the connector (red arrow) and pull the cable out (white arrow).
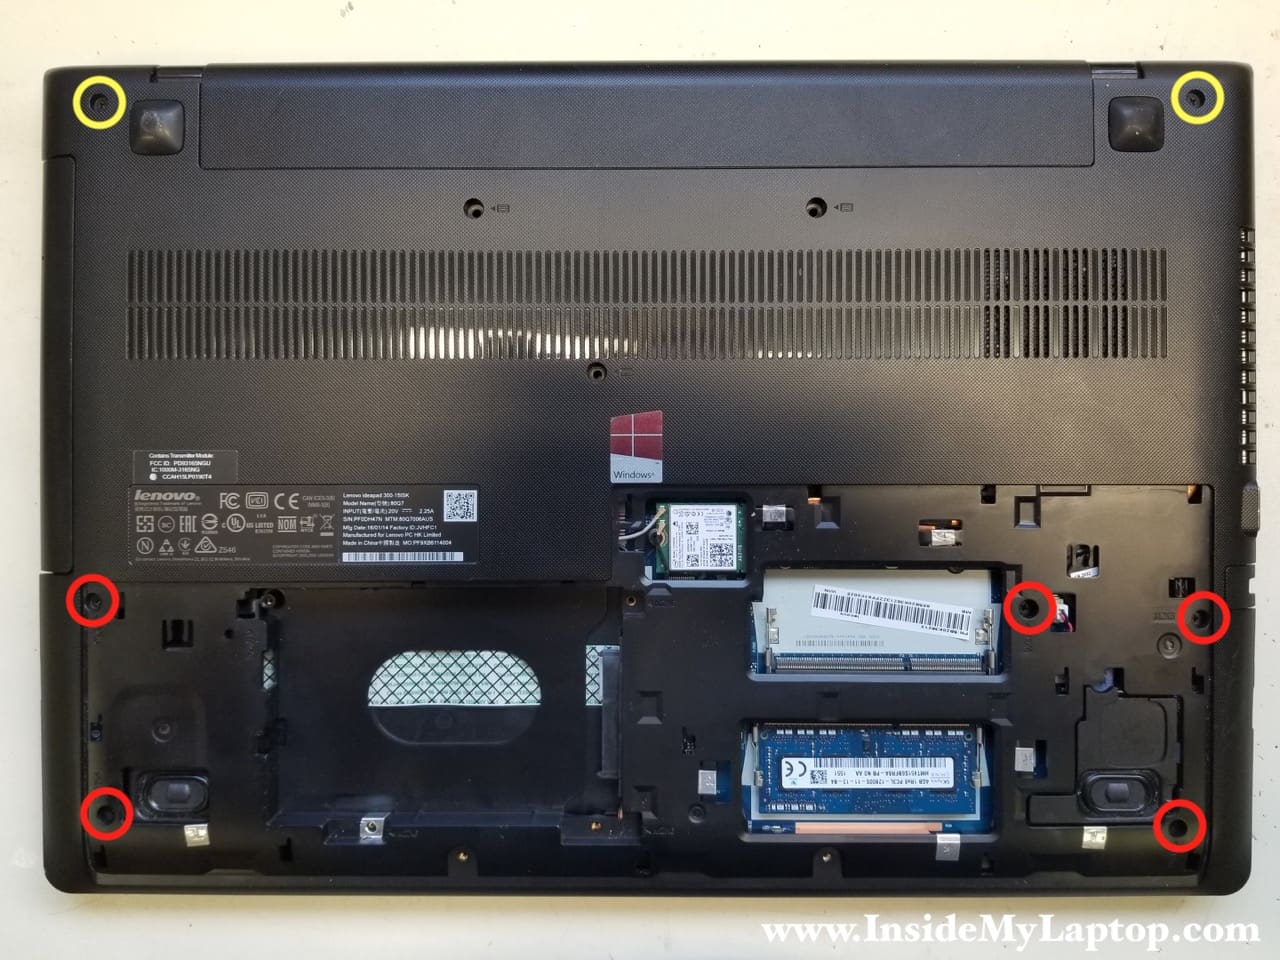
STEP 8.
Remove seven screws from the bottom.
Two screws I marked with yellow circles are thicker than other screws.
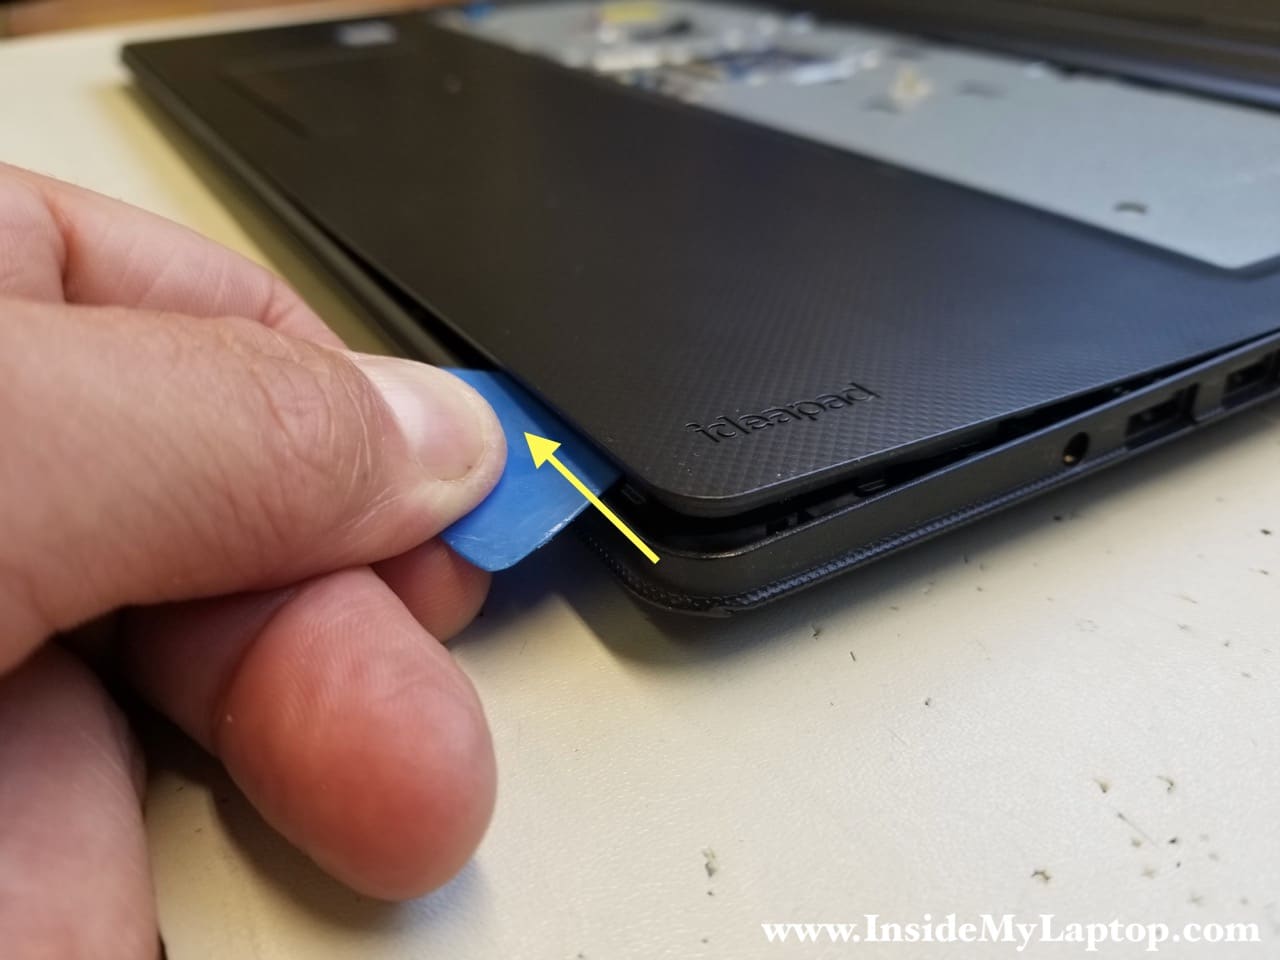
STEP 9.
Start separating the top case assembly from the bottom. I’m using plastic pry tool for that.
Continue separating the top case with your fingers. You’ll have to apply some reasonable force to unsnap the top case from the bottom case.
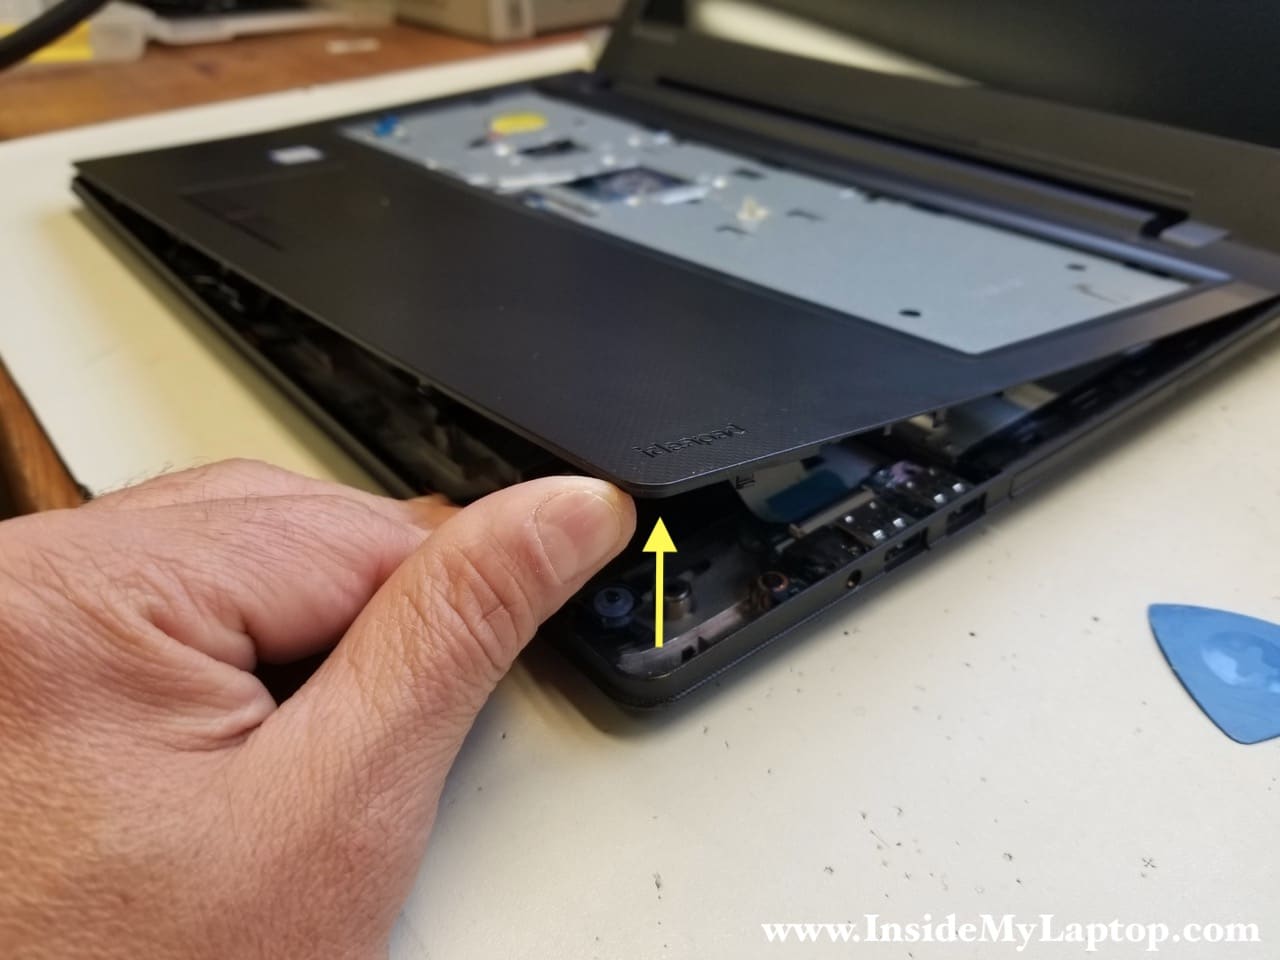
Remove the top case (palmrest) assembly.
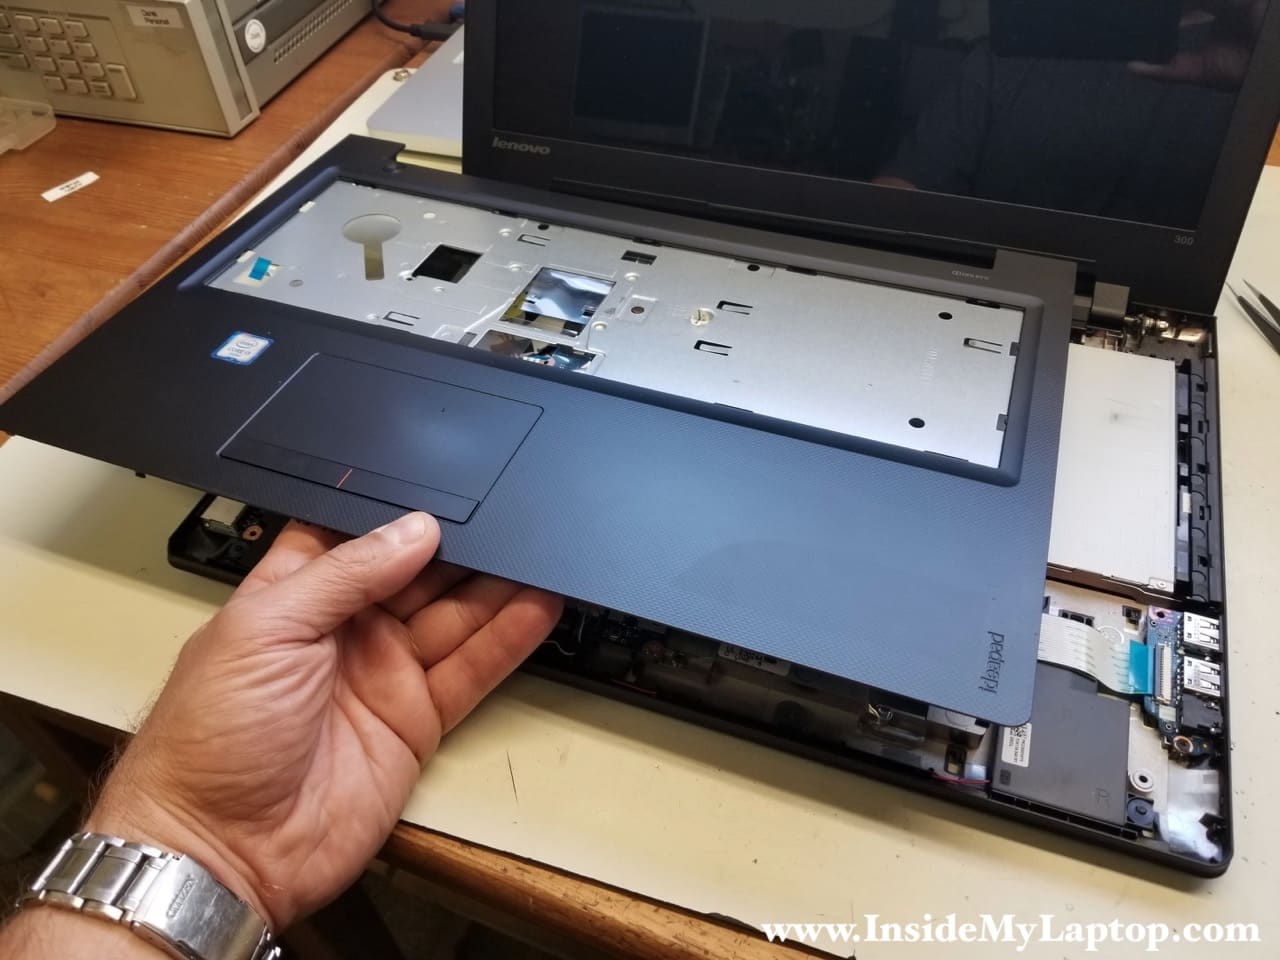
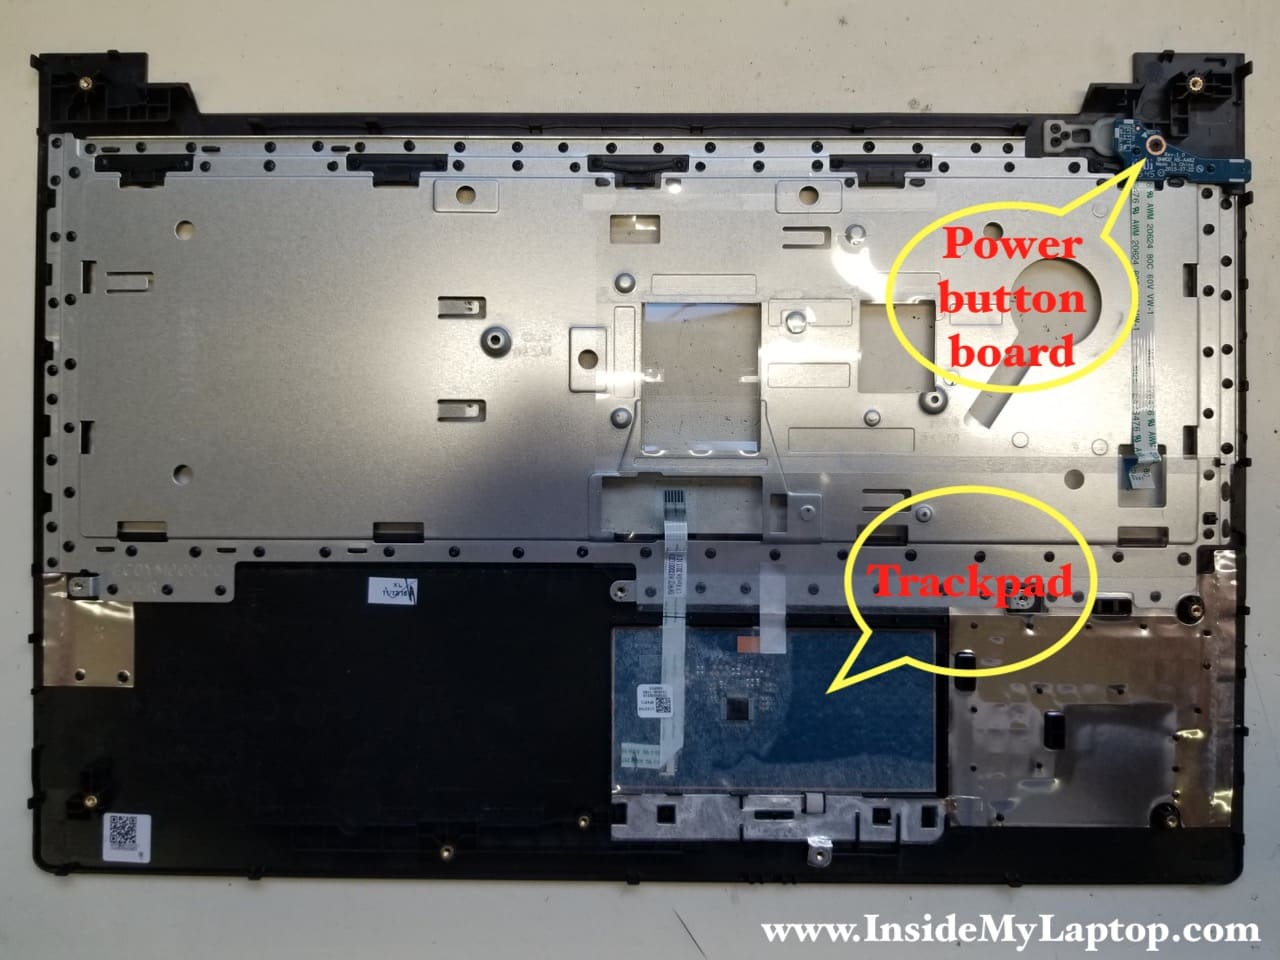
On the other side you can access the trackpad and power button board.
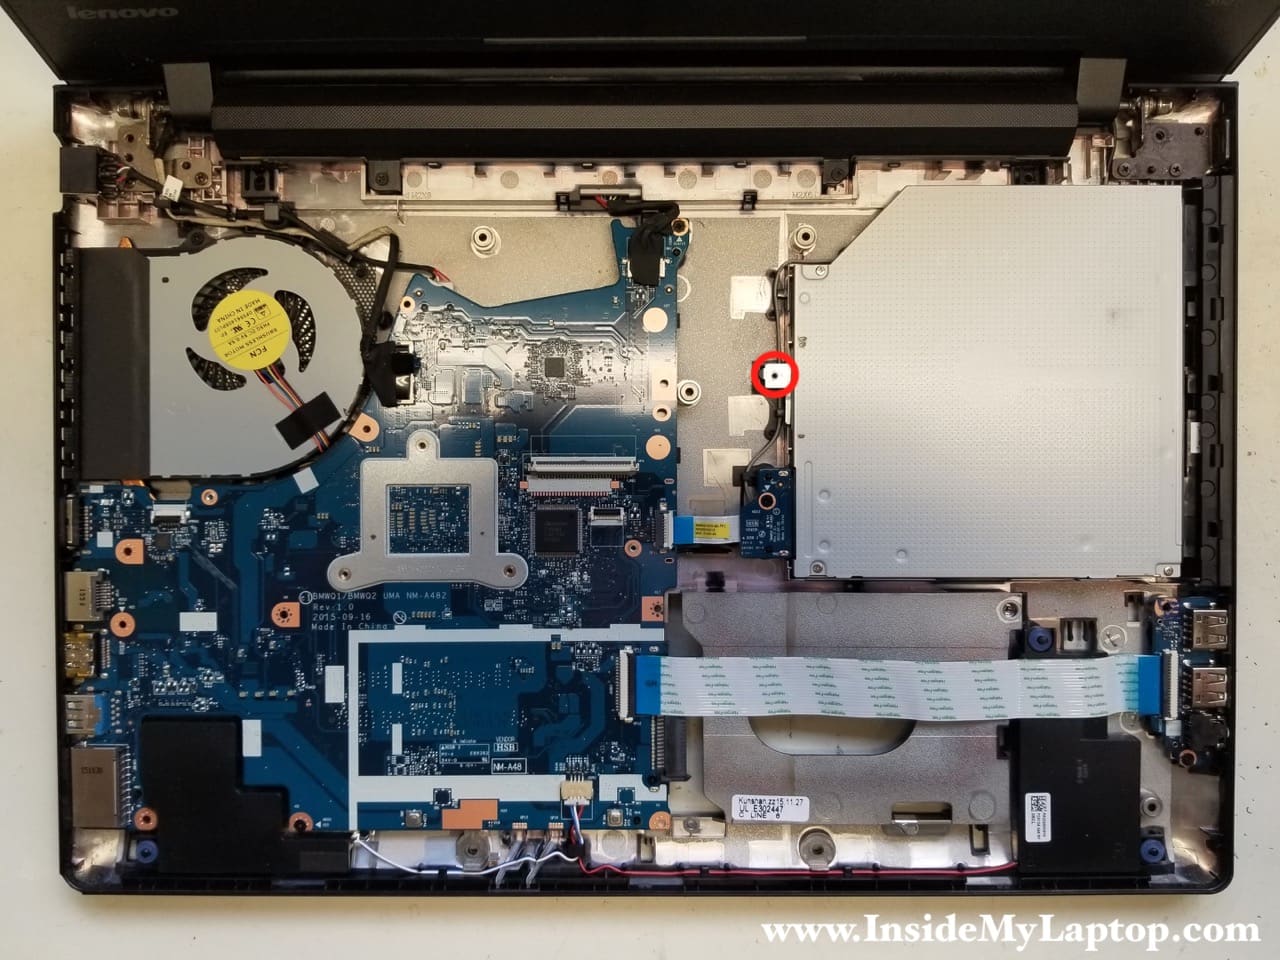
STEP 10.
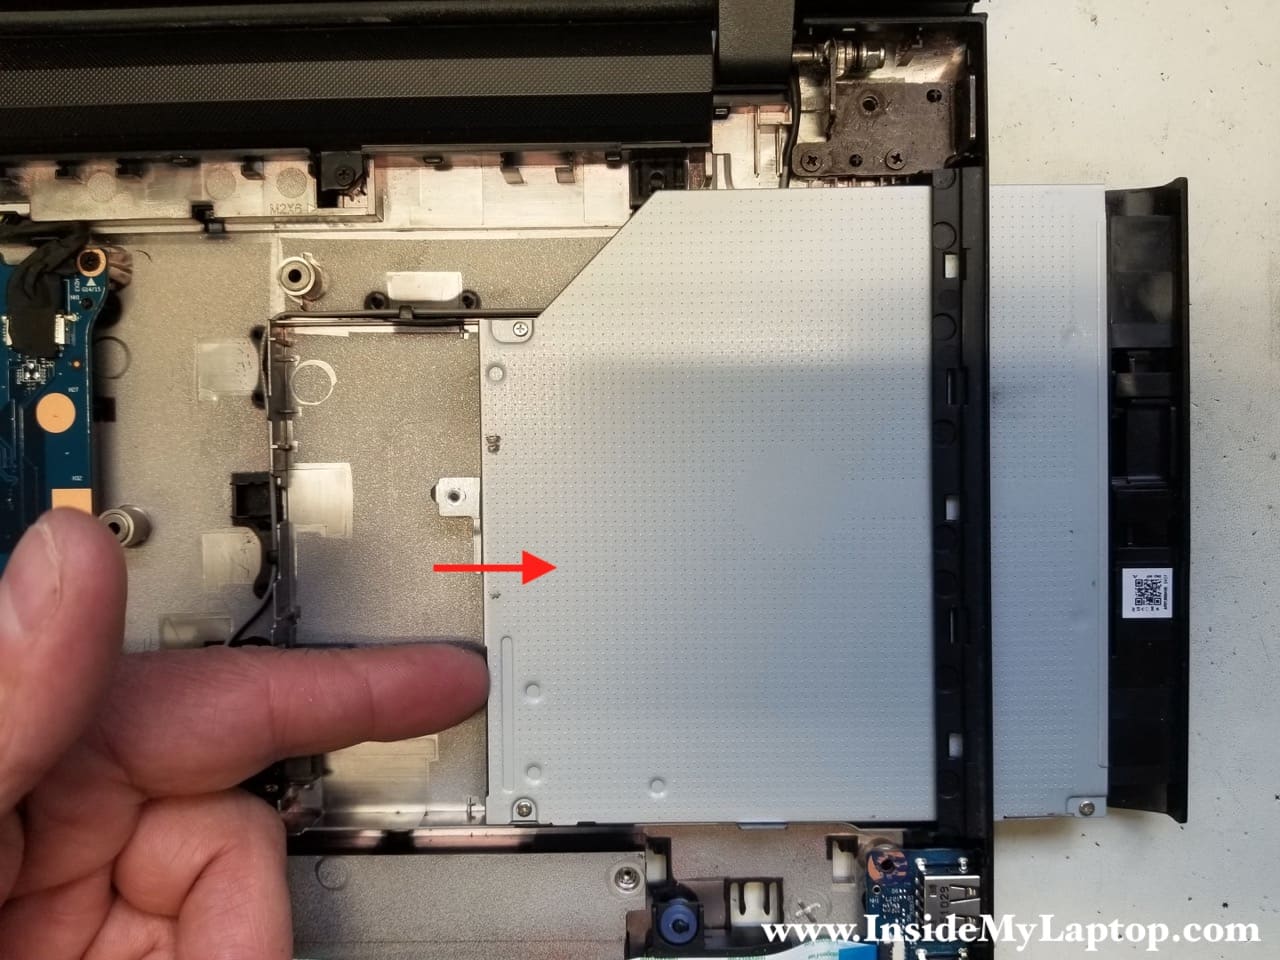
The optical drive was secured by one screw we removed in the step 7.
Push the optical drive out of the bottom case and remove it.
In Lenovo ideapad 300-15ISK laptop the DC power jack attached to the harness. It can be easily removed and replaced if necessary.
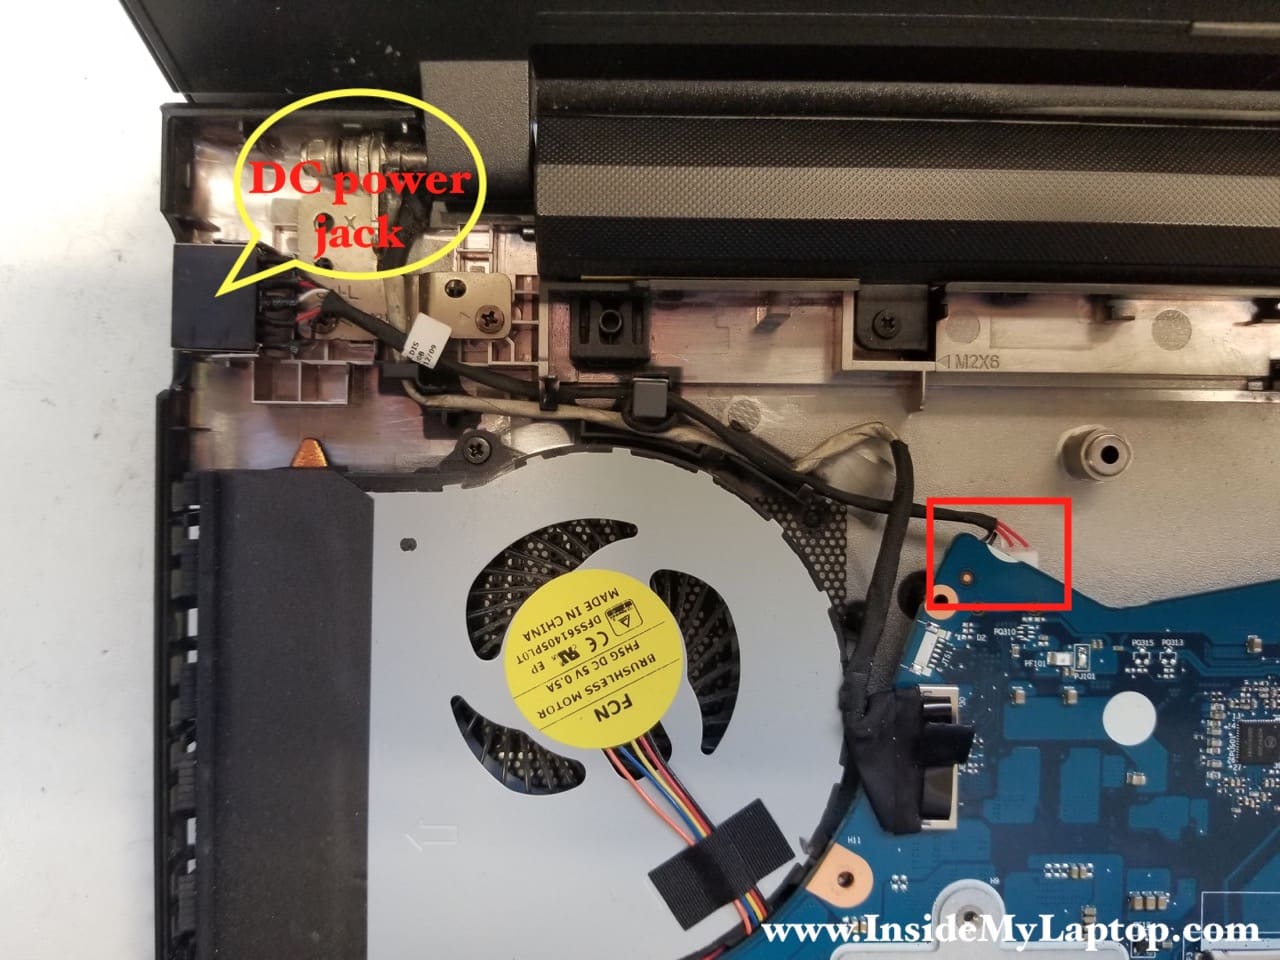
STEP 11.
Unplug the DC jack cable from the motherboard. The connector is hidden on the other side of the motherboard but it’s not far away from the edge.

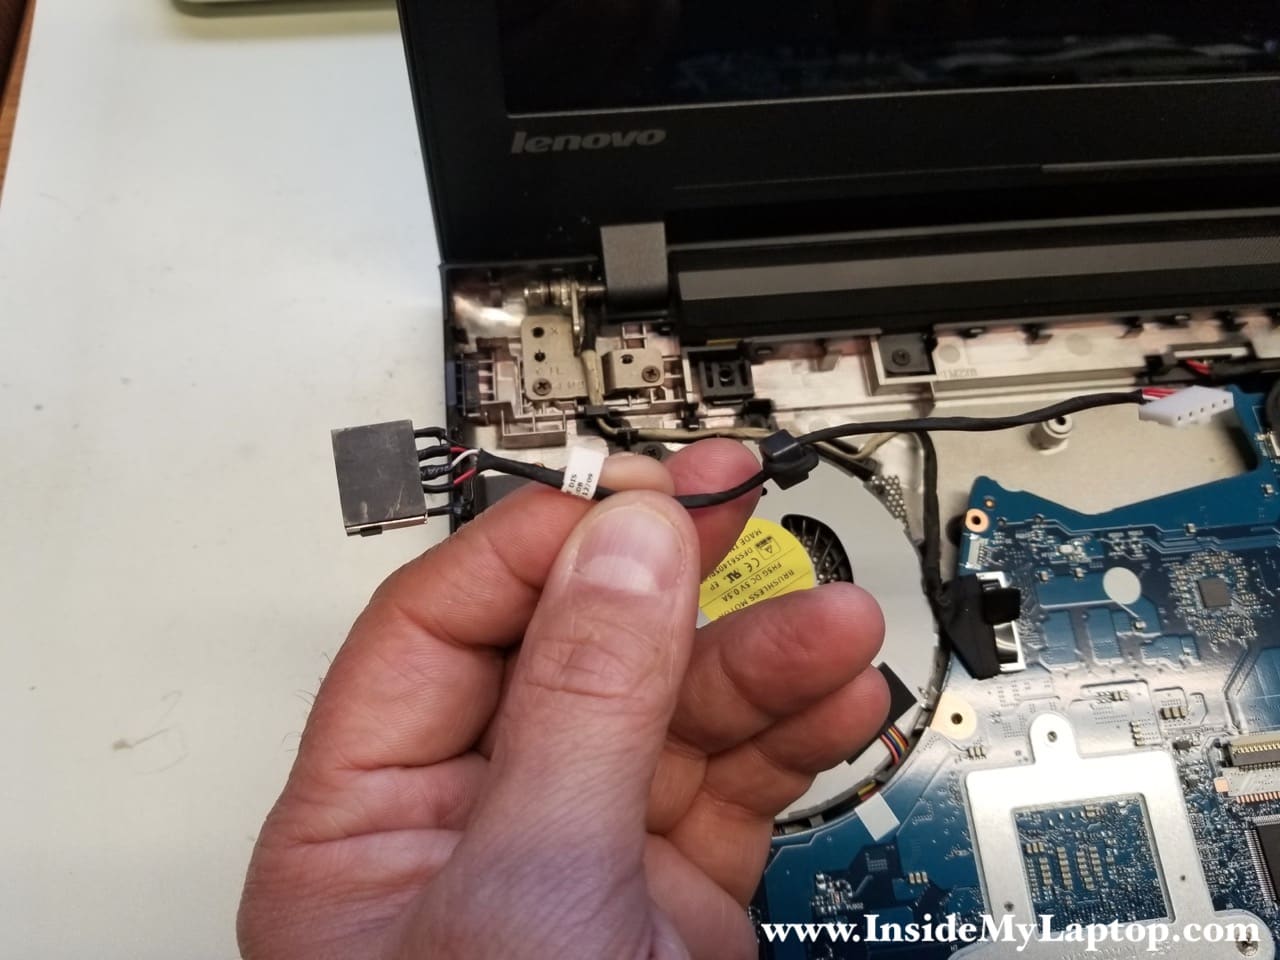
Remove the DC jack power harness.
STEP 12.
In Lenovo ideapad 300-15ISK you can remove the battery ONLY after you remove the top case.
The battery connected to the motherboard via the cable.
Unplug the battery cable from the motherboard.

Remove two screws securing the battery.

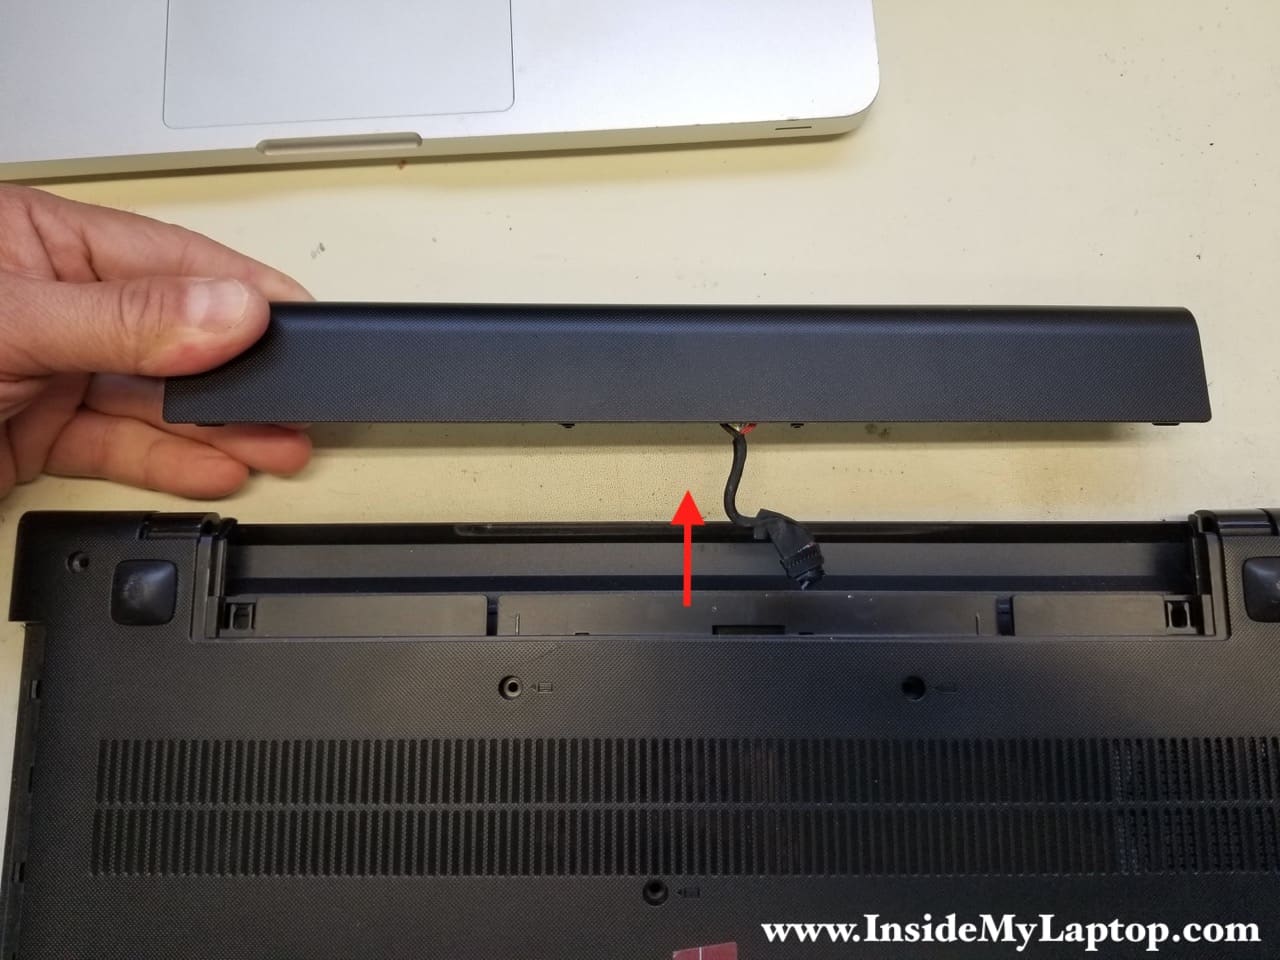
Close the display and place the laptop upside down.
Remove the battery. Carefully pull the battery cable through the opening in the case.
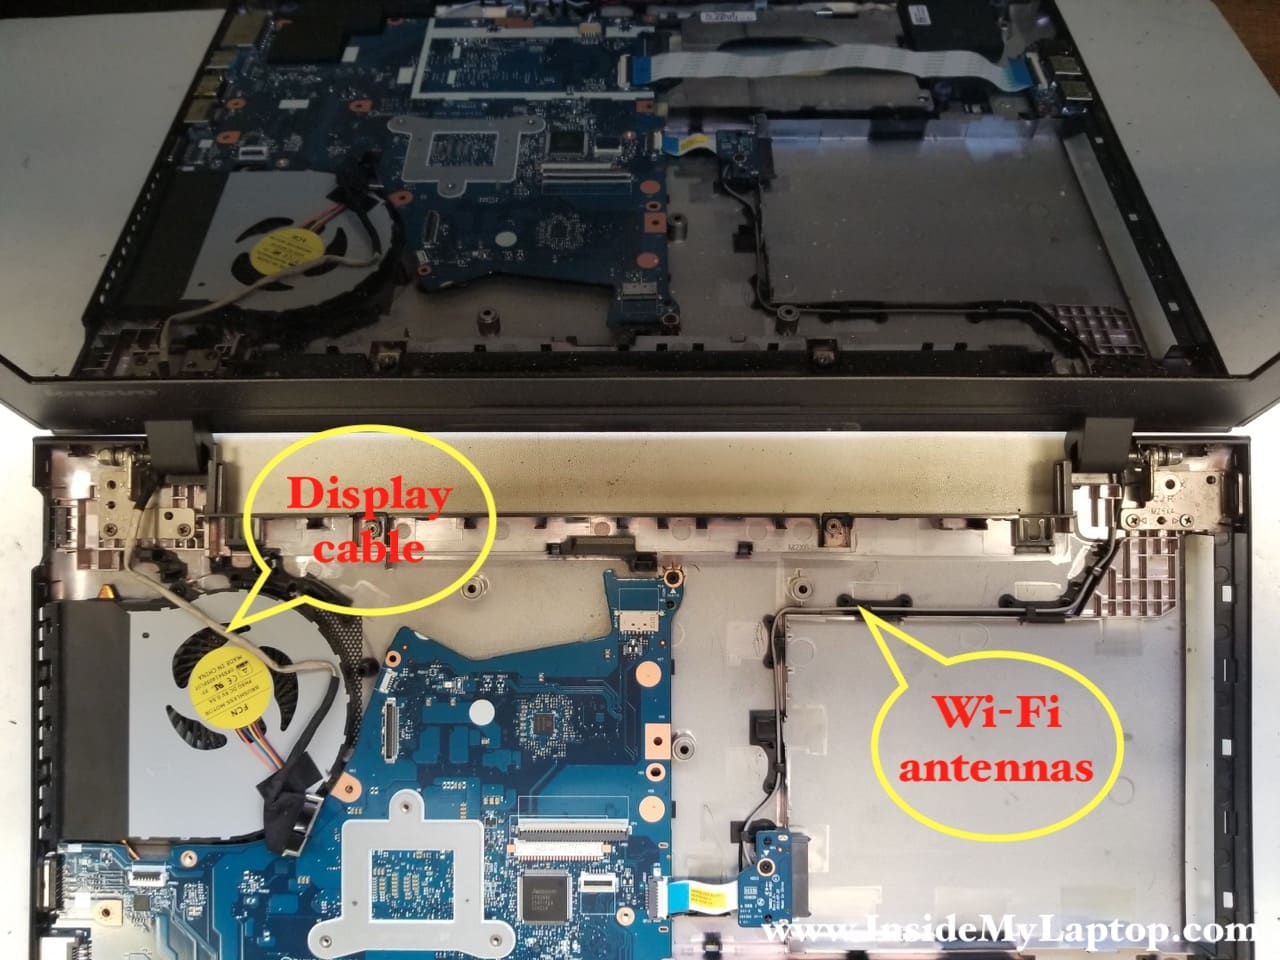
STEP 13.
Unplug the display cable from the motherboard.

Unroute the display cable from the guided path.
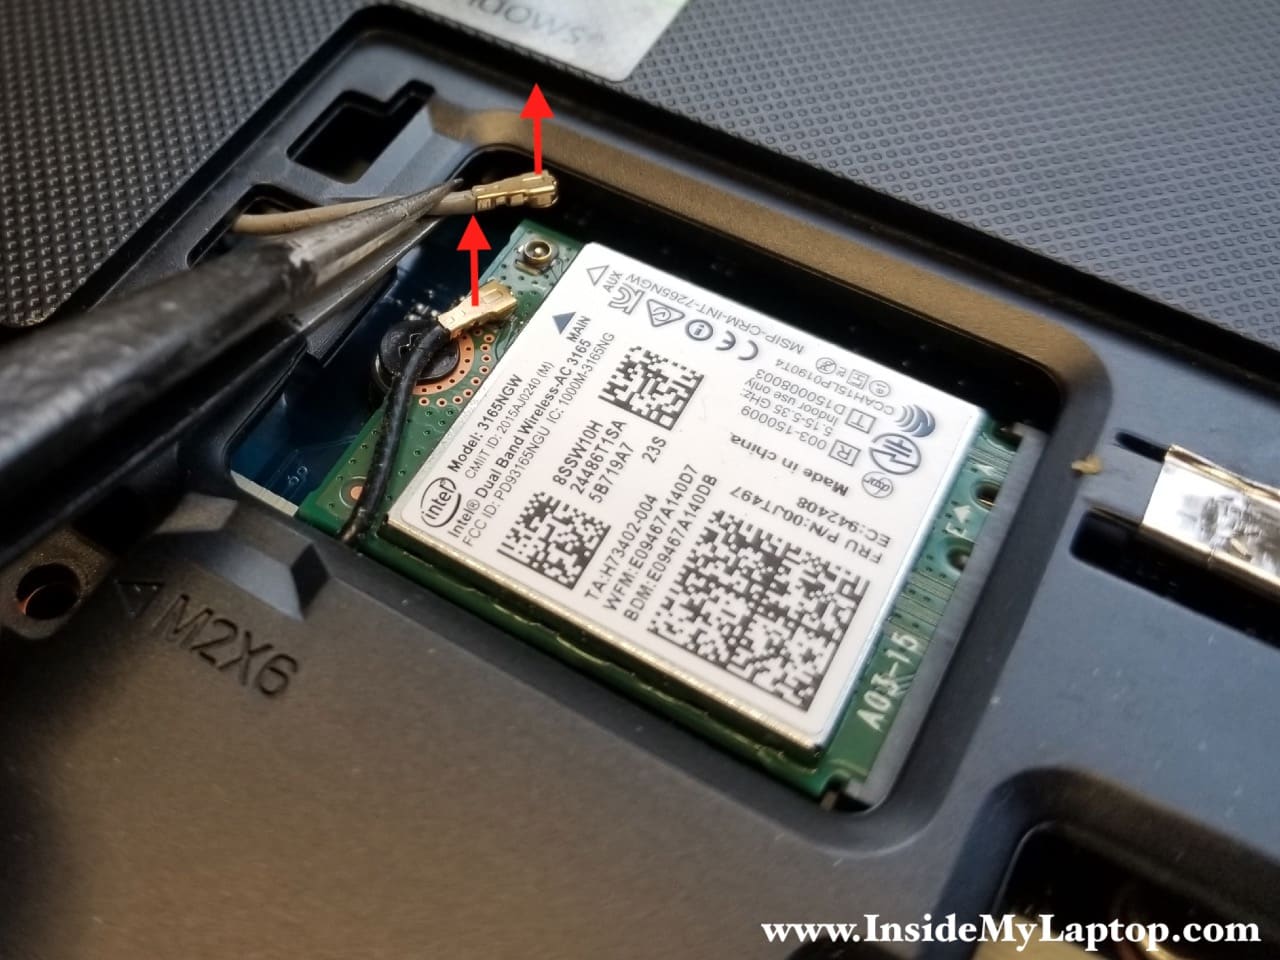
In order to unroute Wi-Fi antennas we’ll have to disconnect them from the wireless card first.
Unplug Wi-Fi antennas from the wireless card.
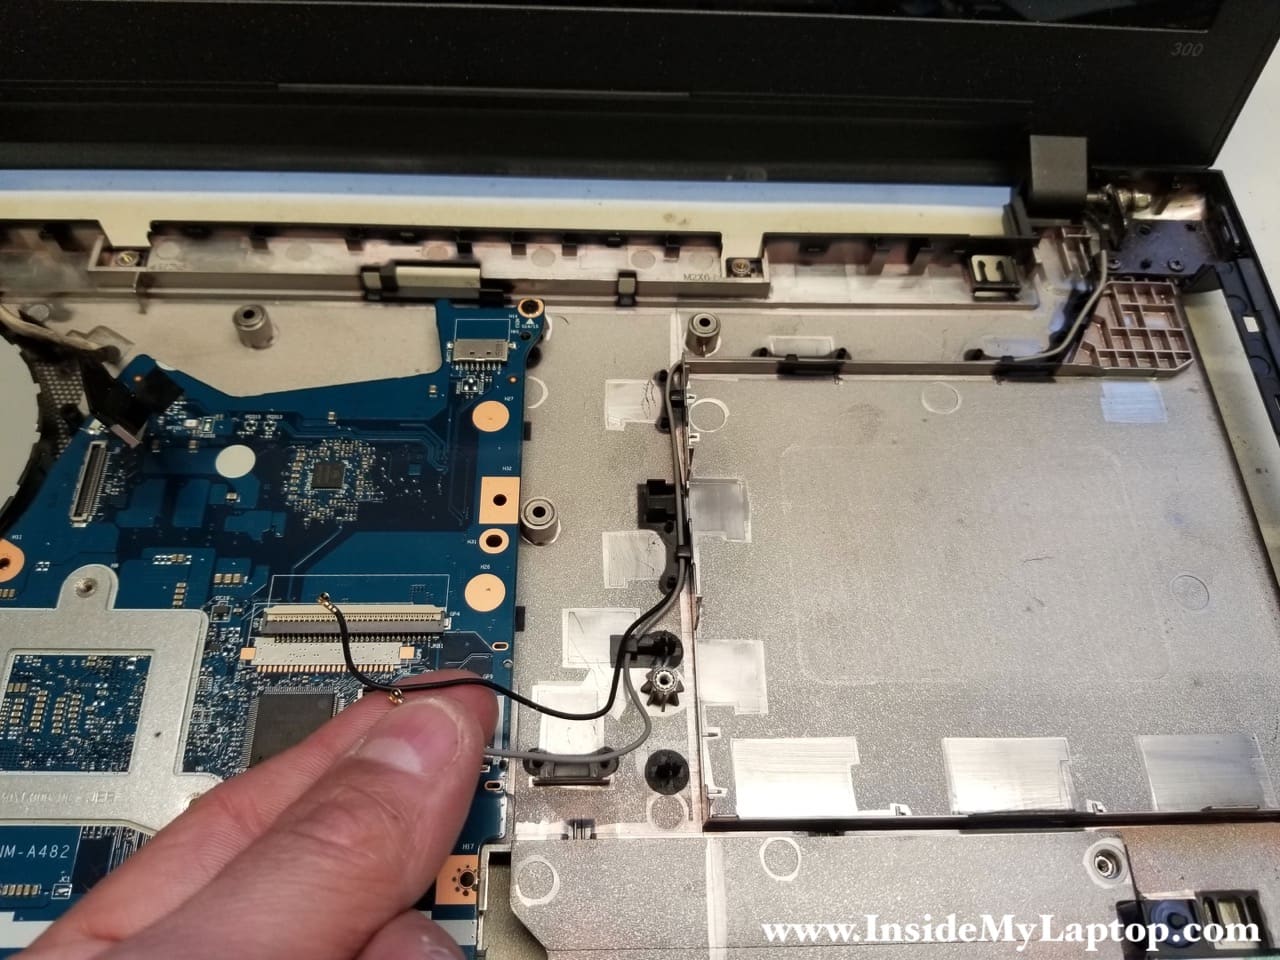
It will be easier to unroute Wi-Fi antennas if you remove the optical drive board.
Unlock the connector, release the cable. Remove one screw securing the board and remove it.

Now you can pull Wi-Fi antennas through the opening in the case and unroute it from the guided path.
STEP 14.
Remove four screws securing display hinges.
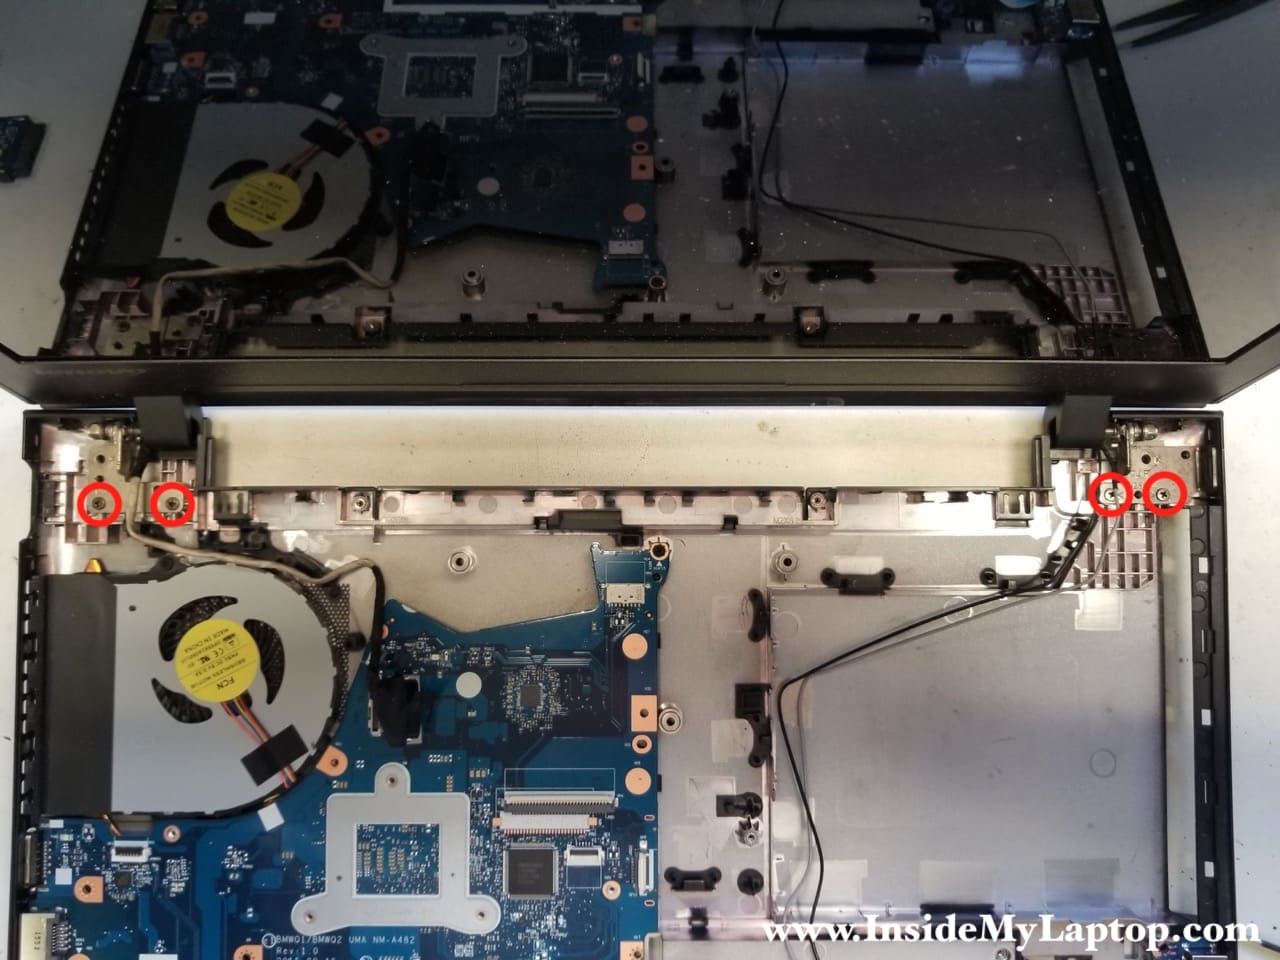
Separate the display assembly from the laptop base.

STEP 15.
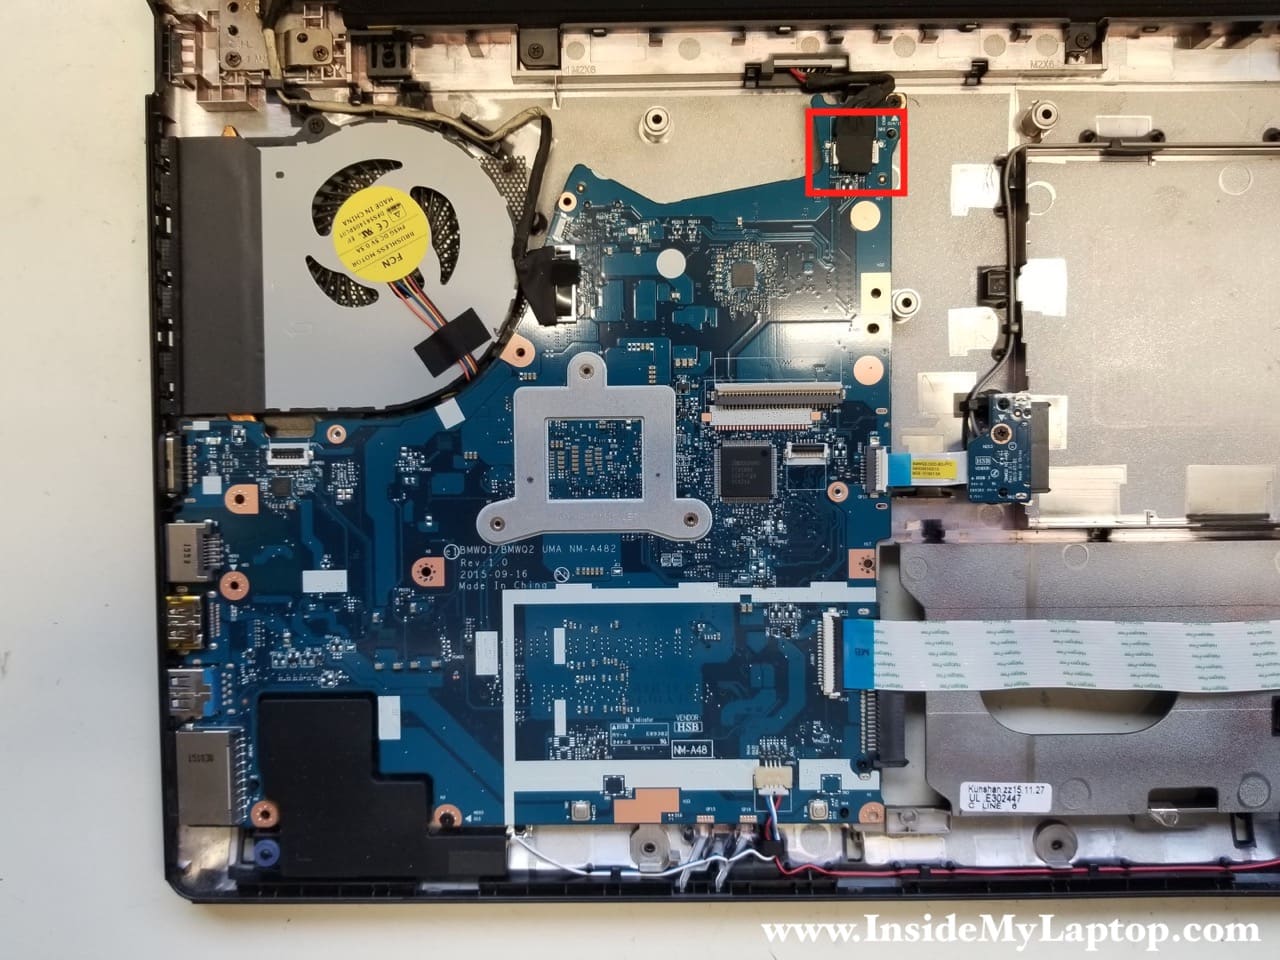
Remove three screws securing the motherboard.
Disconnect the speaker cable (red square) and USB board cable (red rectangle).
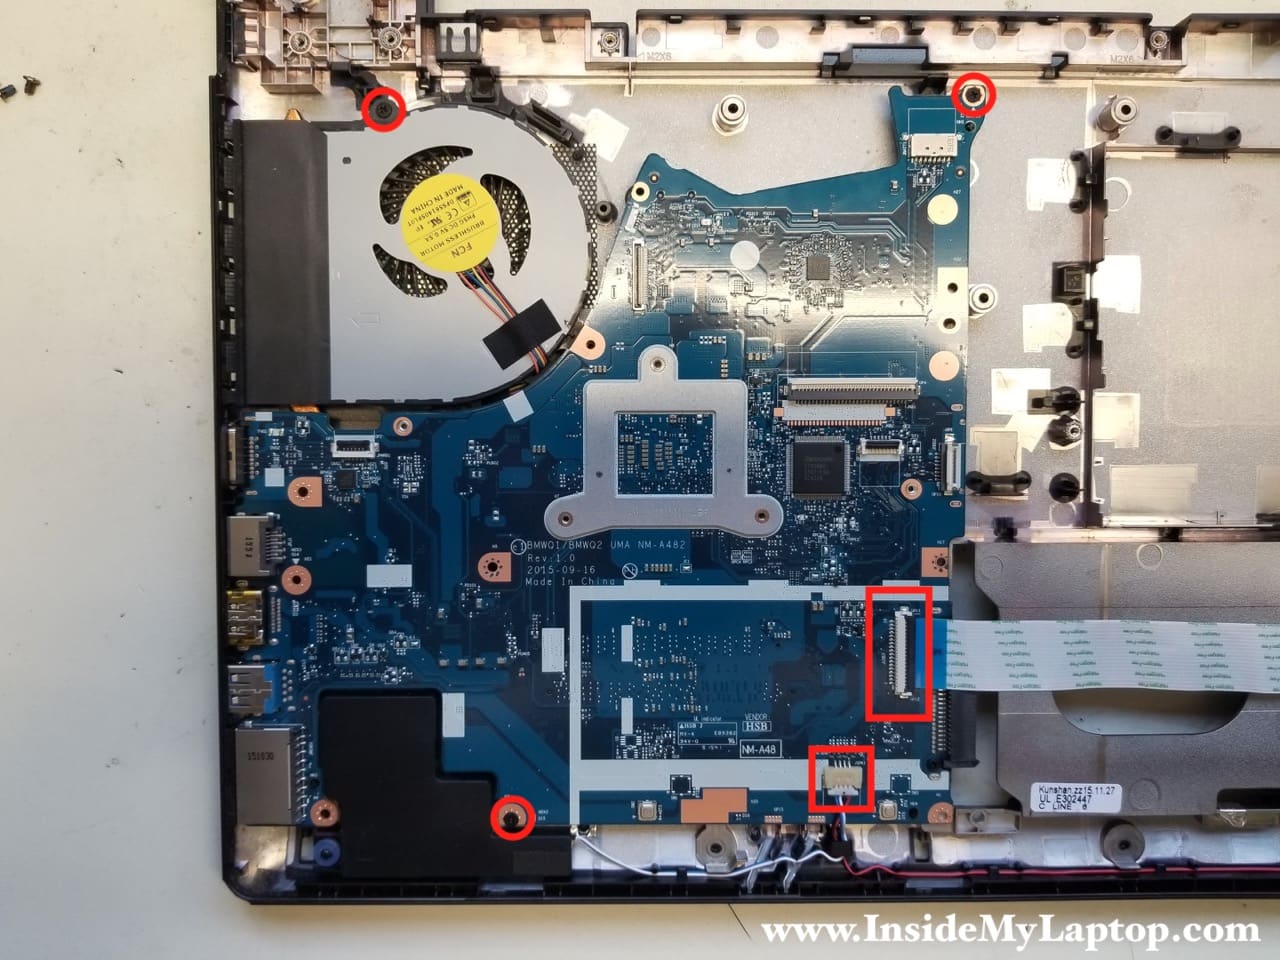
Lift up and remove the motherboard.
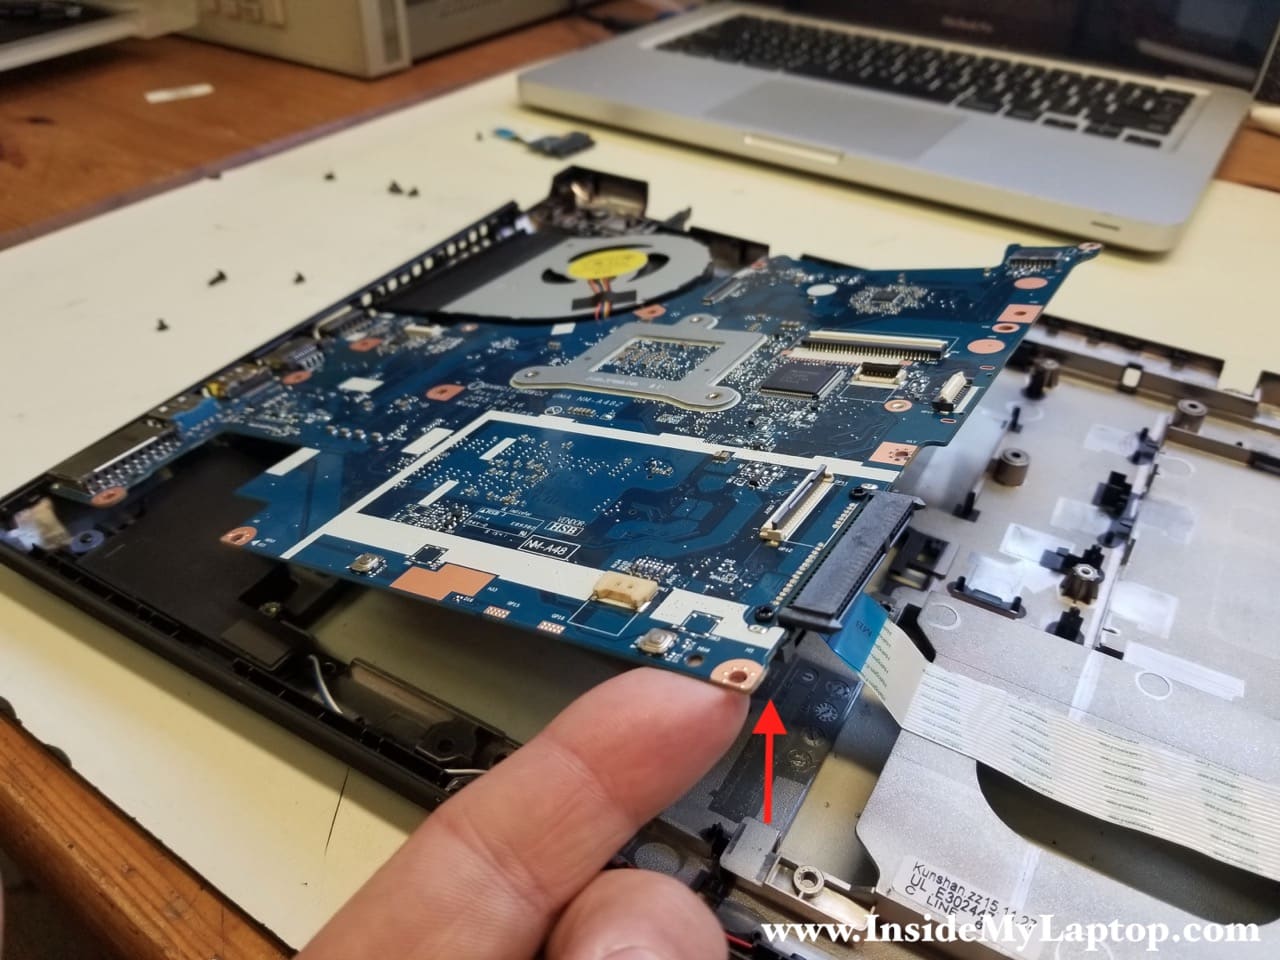
On the other side of the motherboard you can access the cooling fan assembly and SMOS battery.
Yes, in Lenovo ideapad 300-15ISK laptop it’s necessary to remove the motherboard in order to remove and replace the cooling fan.

STEP 16.
Disconnect fan cable from the motherboard.
Remove one screw securing the fan.

Peel off black tape securing the fan to the heatsink.
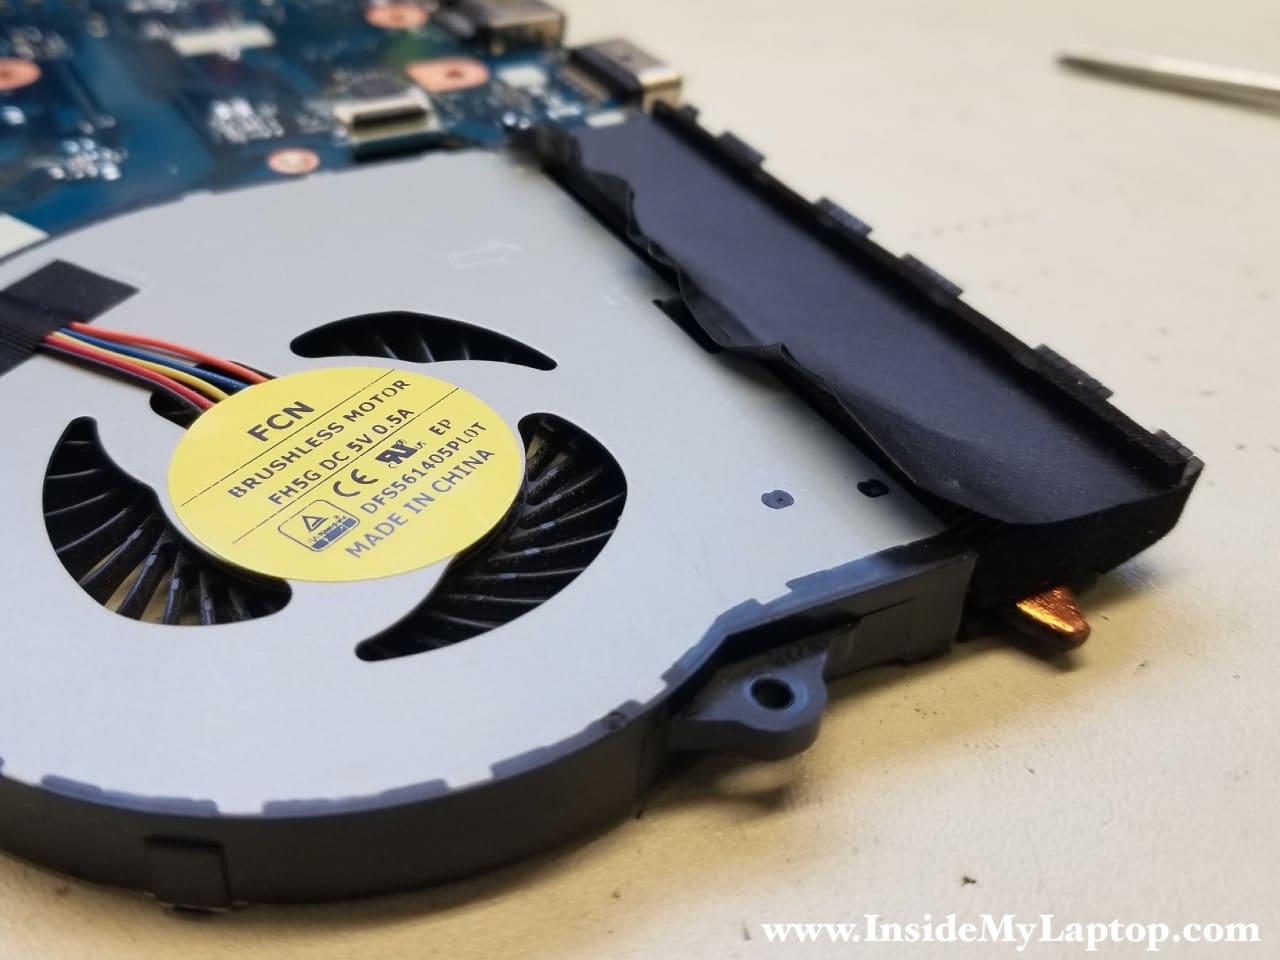
Remove and replace the cooling fan if necessary.

Lawrence Harman
I found these instructions VERY clear and helpful. Just made a donation to thank you and support the site. One very important question: I have a 17″, are there any important differences between this 15 and my 17? Also I need to replace upper and lower cases (main body and display), please tell me places I might find these plastic case/cover parts. Thanks, Lawrence.
IML Tech
@ Lawrence Harman,
Thank you for your donation. There shouldn’t be much difference between 15″ and 17″ models. I buy spare parts on eBay.
Rich
great and clear cut directions, bravo and thanks you
JohnAlan
Hi Master,
I would like to know that is there anyway to fix the display hinge as the plastic part is broke and screw are not attach to it.
Thanks, Alan.
prince
you did not show the cmos battery. whatsup?
IML Tech
@ prince,
You can see the CMOS battery in the step 15 on the last picture. It’s located under the heatsink. It’s a black disc with two wires plugged into the logic board.
Zu Mi
very professional, clear and strightforward. It helped me a lot. I highly appreciate it.
thank you
Gary
I spilled water on my lenovo 300 laptop and I quickly turned it off and turned it upside down. I had to blow the it with a hair dryer. Now it’s not turning on. I later realized that I made a mistake using a hair dryer. So I would like to know how much damage this caused?