In this guide I will disassemble a Gateway NV57H57u in order to access and replace failed DC jack harness.
In my case the DC jack started failing and the laptop was charging only when the AC adapter plug positioned correclty.
Also, you can use this guide for removing the top cover assembly, replacing the keyboard or cleaning the cooling fan.
Before you start the disassembly process make sure it’s turned off.
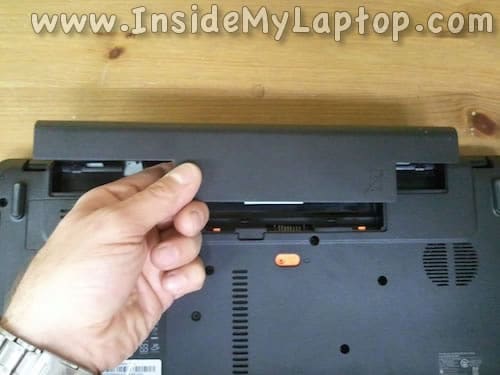
STEP 1.
Slide the orange lock to the right to unlock the battery.
Lift up and remove the battery.
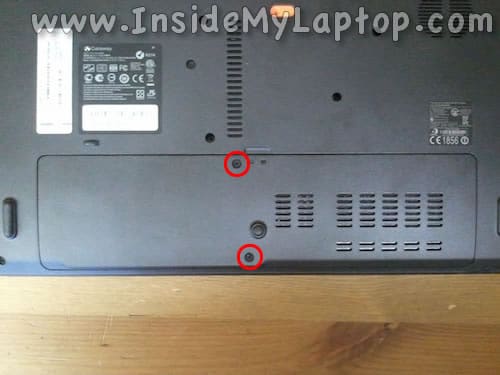
STEP 2.
Loosen two screws securing the service cover.
Lift up and remove the service cover.
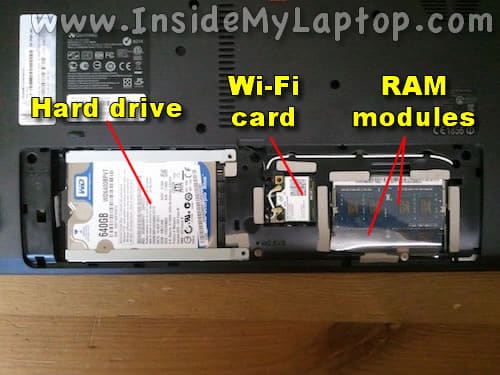
STEP 3.
Under the service cover you can access the hard drive, both RAM (memory) modules and wireless card.
STEP 4.
Here’s how to remove the hard drive.
Slide it to the left side to disconnect from the motherboard.
Now you can lift up and remove the hard drive assembly.

STEP 5.
Remove one screw securing the optical drive.
Slide the optical drive to the left and

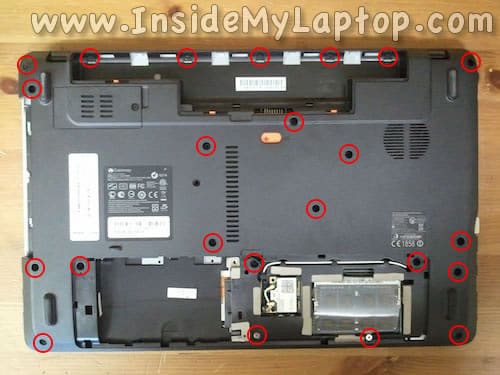
STEP 6.
Remove all shown screws from the bottom.
It’s not necessary to remove the wireless card for the purpose of my repair but I’ll show how to remove just in case in the following two steps.
STEP 7.
Disconnect both antenna cables from the wireless card.
Remove one screw securing the wireless card.

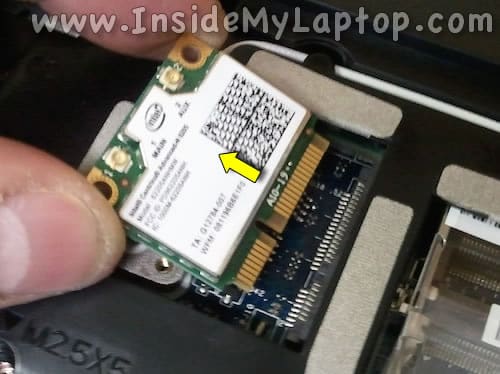
STEP 8.
Pull the wireless card from the slot.
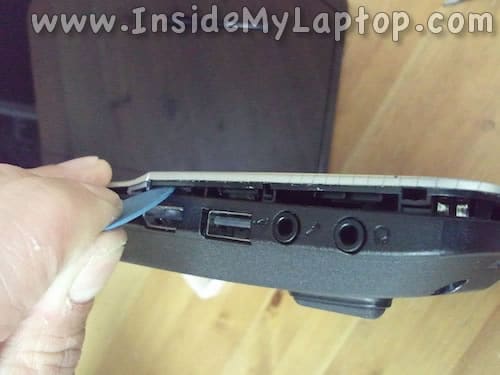
STEP 9.
Now you can start separating the palmrest assembly from the bottom case. I’m using a guitar pick for that.
STEP 10.
Continue separating the palmrest assembly from the bottom case.
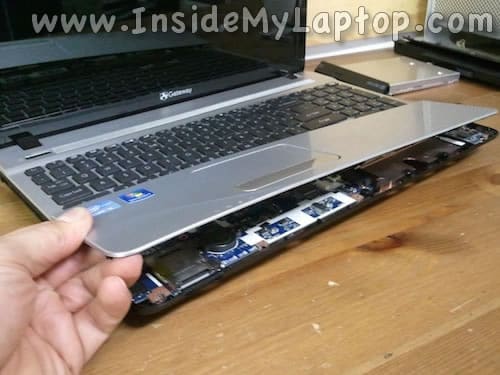
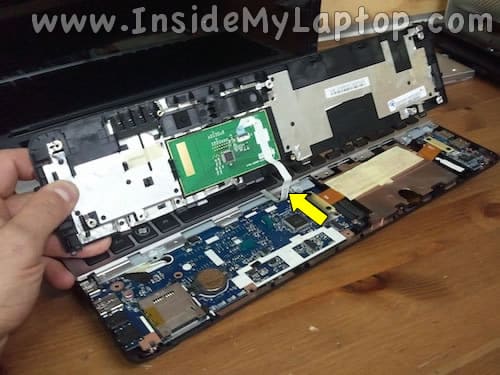
STEP 11.
Be careful, the trackpad cable still connected to the motherboard.
I’ll show how to unlock the connector and release the cable in steps 14-15.
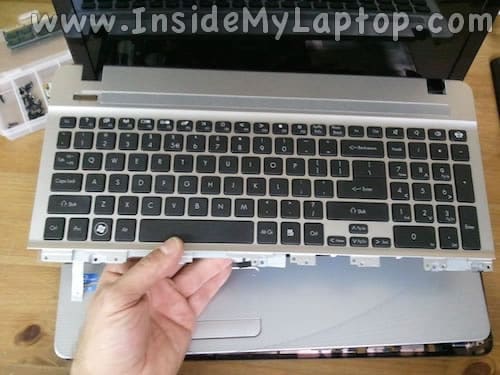
STEP 12.
Lift up the keyboard assembly and move it towards the display so you can access the keyboard cable underneath the assembly.

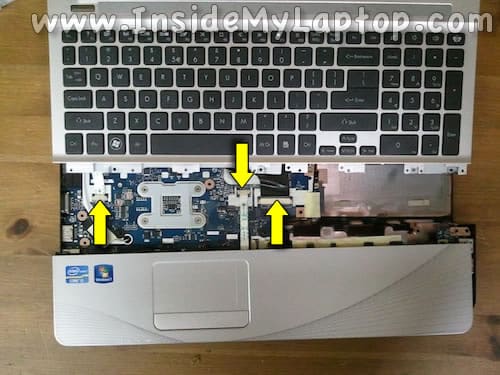
STEP 13.
In order to remove the keyboard assembly and palmrest completely, it’s necessary to unlock three connectors and release cables.
Cables left to right:
– Power button cable.
– Trackpad cable.
-Keyboard cable.
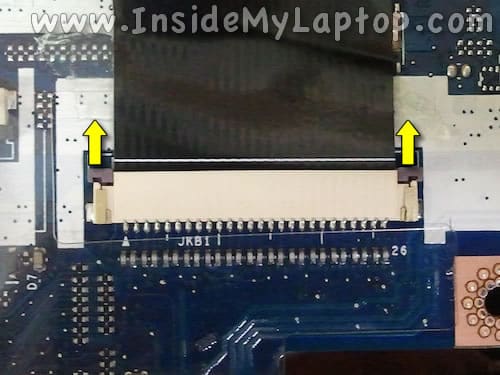
STEP 14.
All three connectors are similar and here’s how to unlock them.
Slide the cable retainer (brown piece) towards the cable about 1-2 millimeters.
The retainer must remain connected to the base.
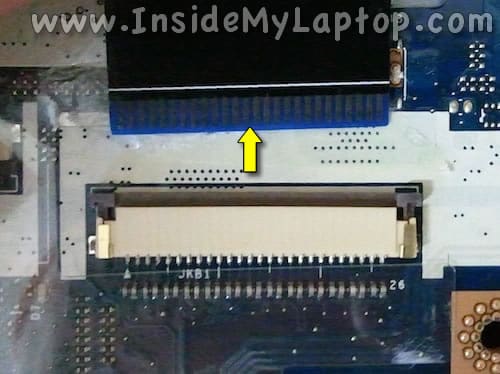
STEP 15.
On the following picture the same connector shown in the unlocked position.
Now you can pull the cable from the connector.
STEP 16.
Remove the keyboard assembly.
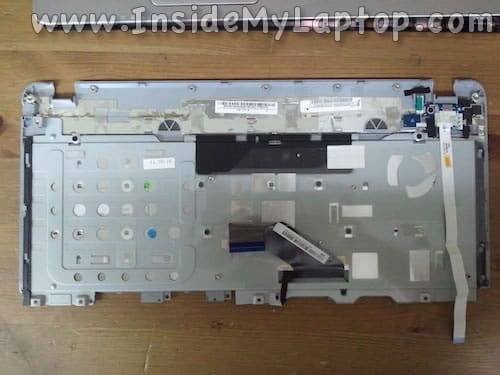
STEP 17.
Here’s the bottom side of the keyboard assembly.
I’m not going to separate the keyboard from the cover in this guide but it shouldn’t be very difficult.
I guess after you remove the screws, the keyboard can be separated from the cover and replaced (if necessary).
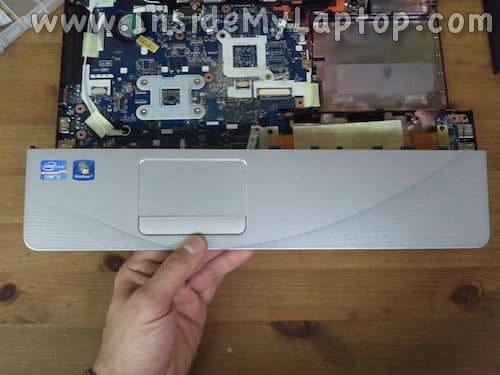
STEP 18.
Remove the palmrest/trackpad assembly.
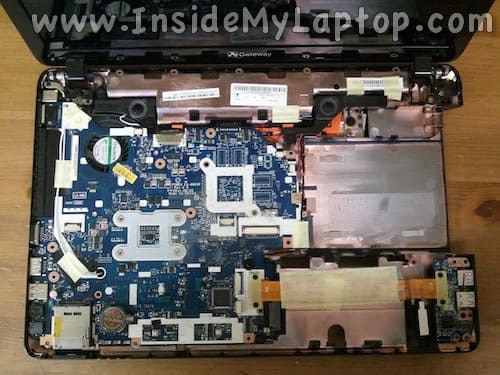
STEP 19.
On the following picture the laptop is shown with the keyboard assembly and palmrest assembly removed.
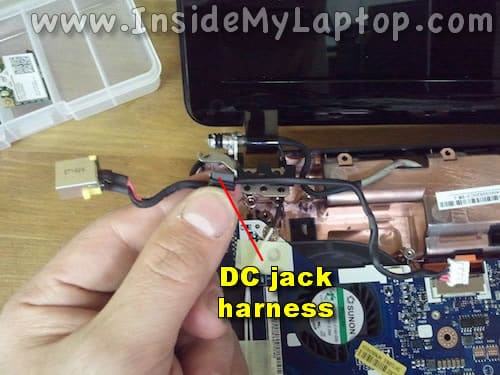
The DC jack located in the upper left corner.
In a Gateway NV57H57u laptop the DC jack attached to a harness. If the jack failed, there is no need to solder anything. Just unplug the failed DC jack harness from the motherboard and replace it with a new one.
By the way, when the keyboard assembly removed, you can get some limited access to the cooling fan. It should be enough for cleaning.
If the fan is dusty, just blow compress air into the fan until it’s clean.
Unfortunately, in order to remove and replace the cooling fan it’s necessary to remove the motherboard first.
STEP 20.
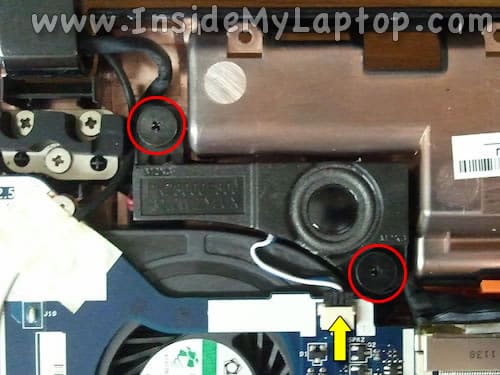
The DC jack cable routed under the left speaker and we’ll have to remove the speaker.
Remove two screws securing the left speaker.
Disconnect the speaker cable from the motherboard.
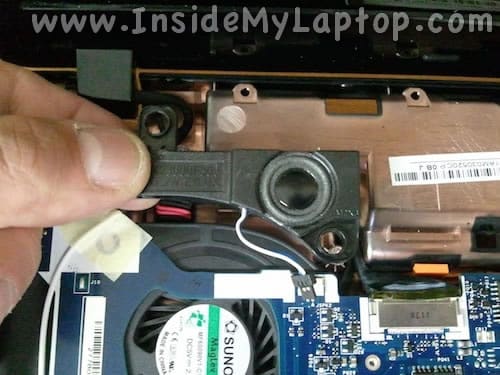
STEP 21.
Lift up and remove the left speaker.
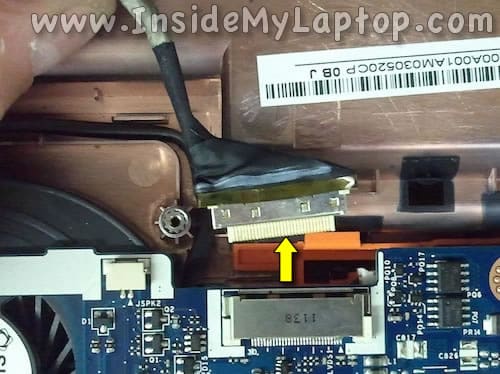
STEP 22.
Disconnect the display (video) cable from the motherboard.
STEP 23.
The DC jack cable connector located on the bottom side of the motherboard but it’s possible to replace the DC jack harness without removing the motherbaord.
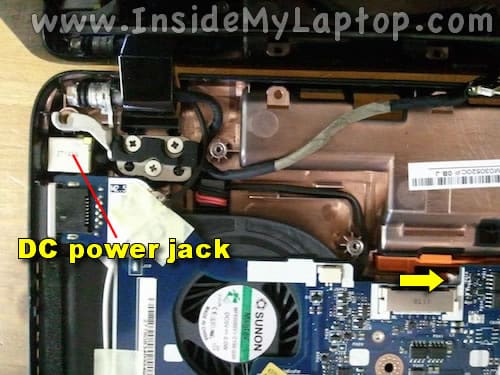
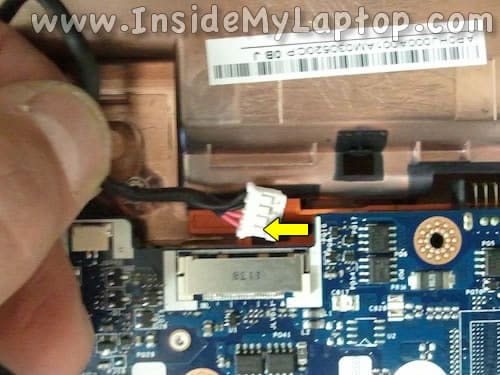
STEP 24.
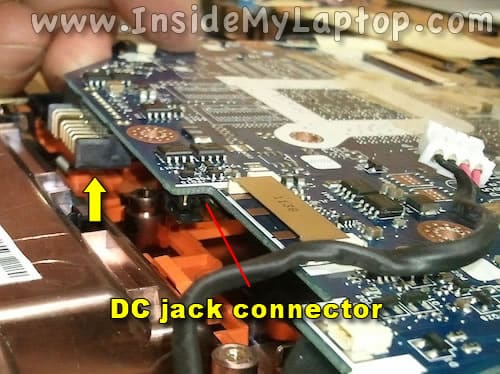
The DC jack connector located under the display connector.
When you unplug the cable pay attention how the DC jack cable connector is positioned.
Plugging it back as not as easy as disconnecting because the connector located on the bottom side of the motherboard.
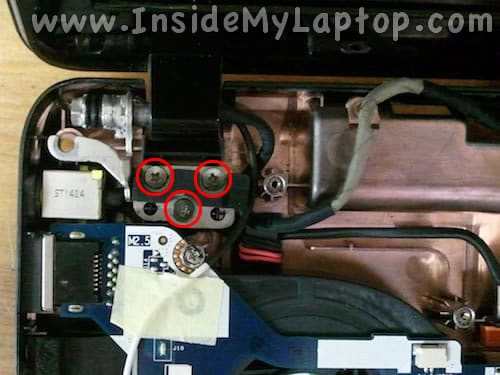
STEP 25.
The DC jack harness routed under the left hinge.
Remove three screws securing the left hinge.
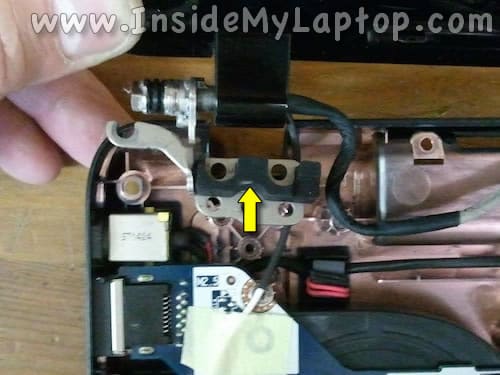
STEP 26.
Lift up the left side of the display assembly and move it a little bit away so you can access the DC jack cable.
STEP 27.
Lift up the DC jack from the case.
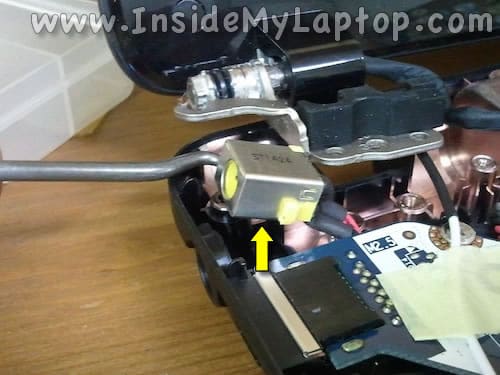
STEP 28.
Now you should be able to remove and replace the failed DC jack harness with a new one.
Here’s what I did in order to plug the new DC jack cable back into the motherboard.
Remove two shown screws securing the motherboard to the bottom case.
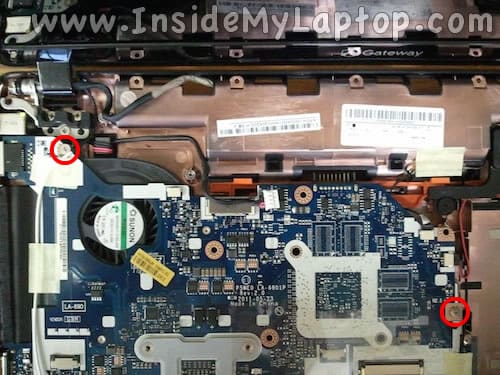
Now you can lift up the motherboard just enough to get a better access to the DC jack connector.
Plug in the cable and secure the motherboard.
Assemble the laptop back together following all disassembly steps in the reverse direction.