In this guide I show how to disassemble a Dell XPS 15 9500 (model P91F) laptop. Also, all disassembly steps should be identical for Dell Precision 5550 Workstation.
Dell XPS 15 9500 model highlights:
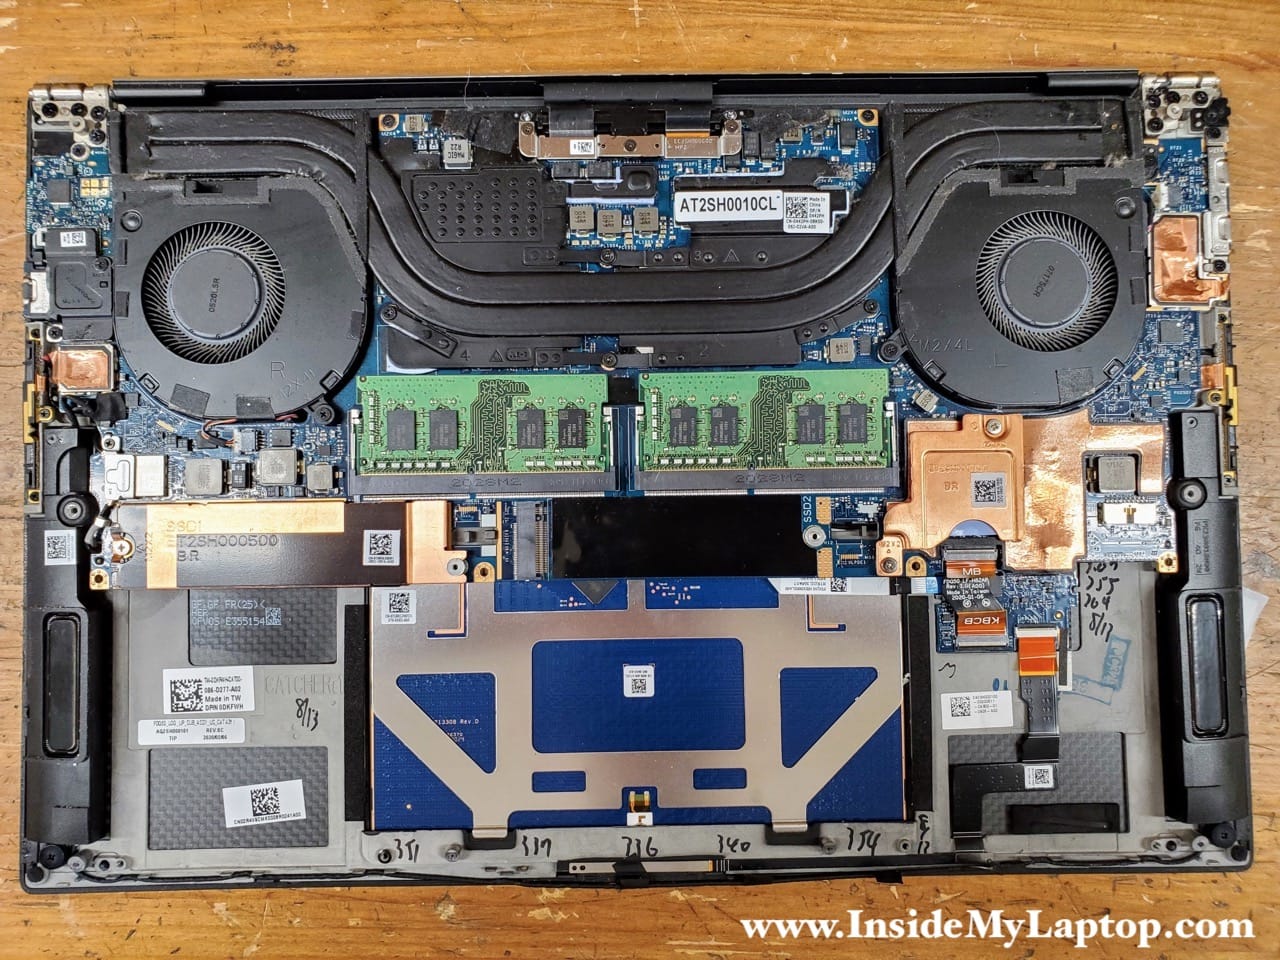
– the motherboard has two memory slots and RAM can be upgraded.
– the motherboard has two PCIe slots and second PCIe NVMe SSD can be installed.
For this disassembly you will need these tools: Torx T5 screwdriver, PH0 Phillips screwdriver, thin case opener tool.
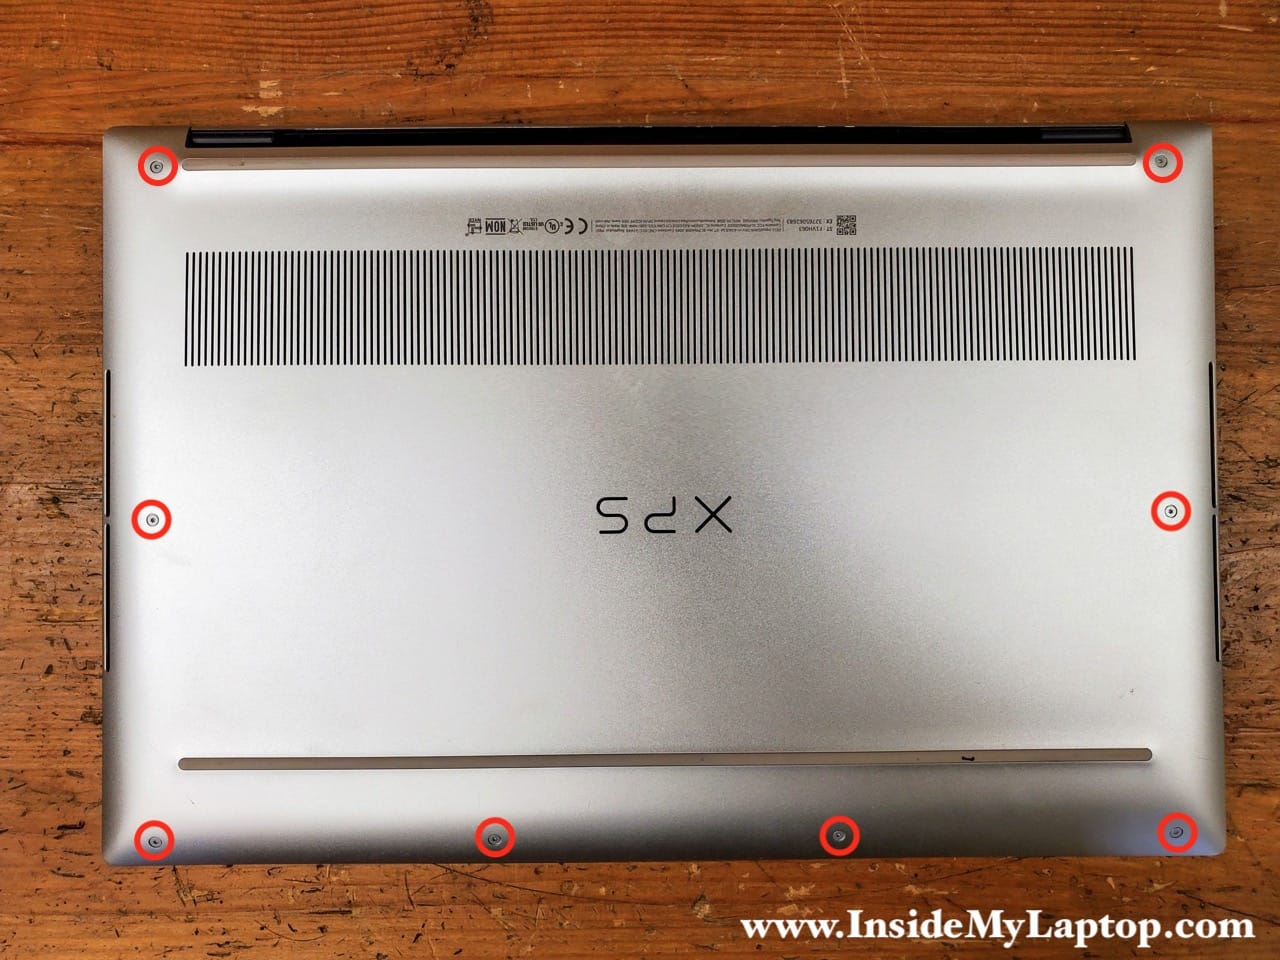
Bottom cover removal
Remove eight Torx T5 screws securing the bottom cover.
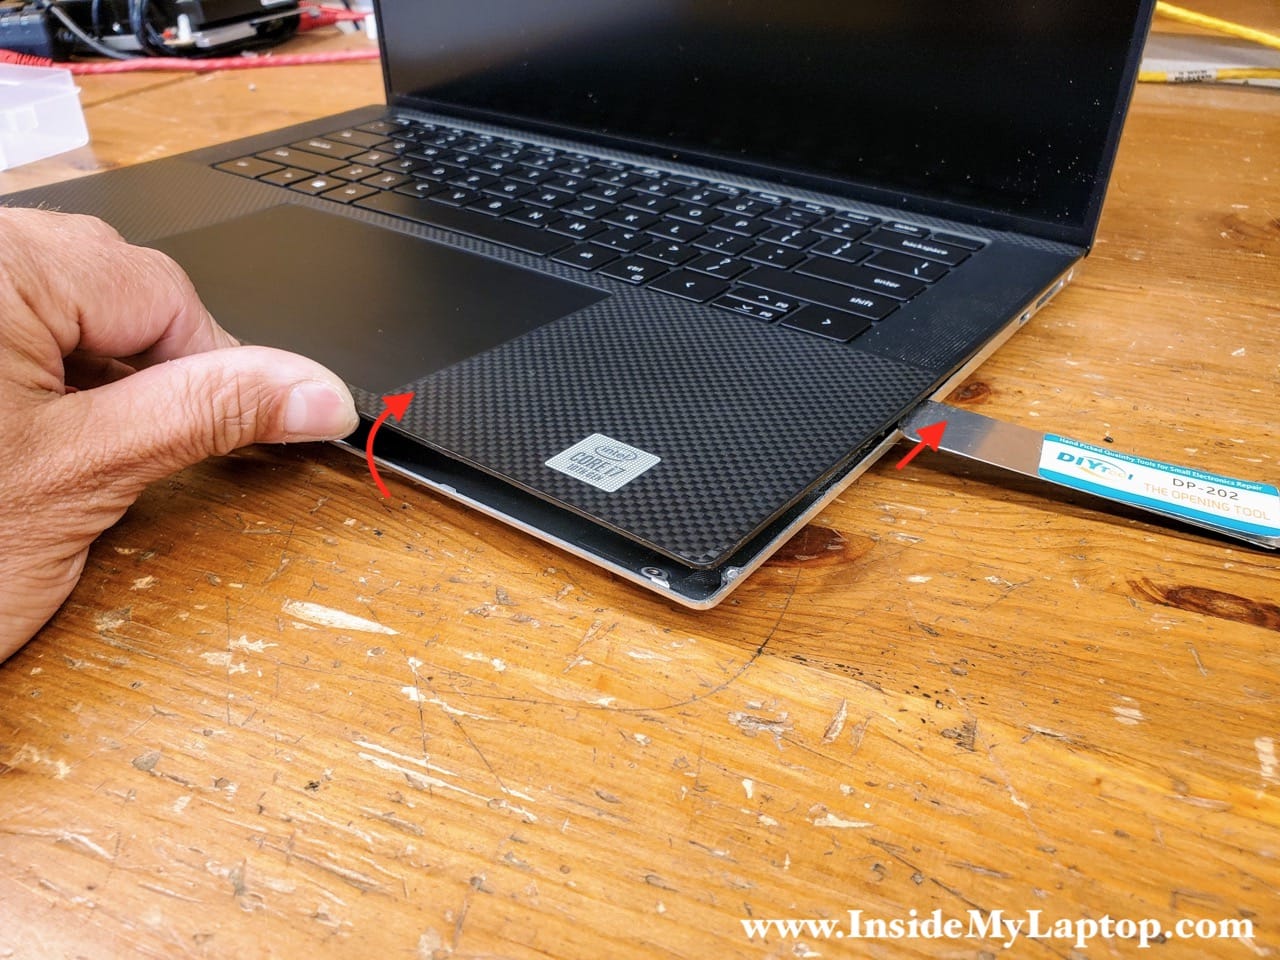
Insert a thin case opener tool between the palmrest assembly and the bottom cover. Start separating one from another. Both parts are fitted very tightly.

Continue separating the bottom cover and remove it completely.
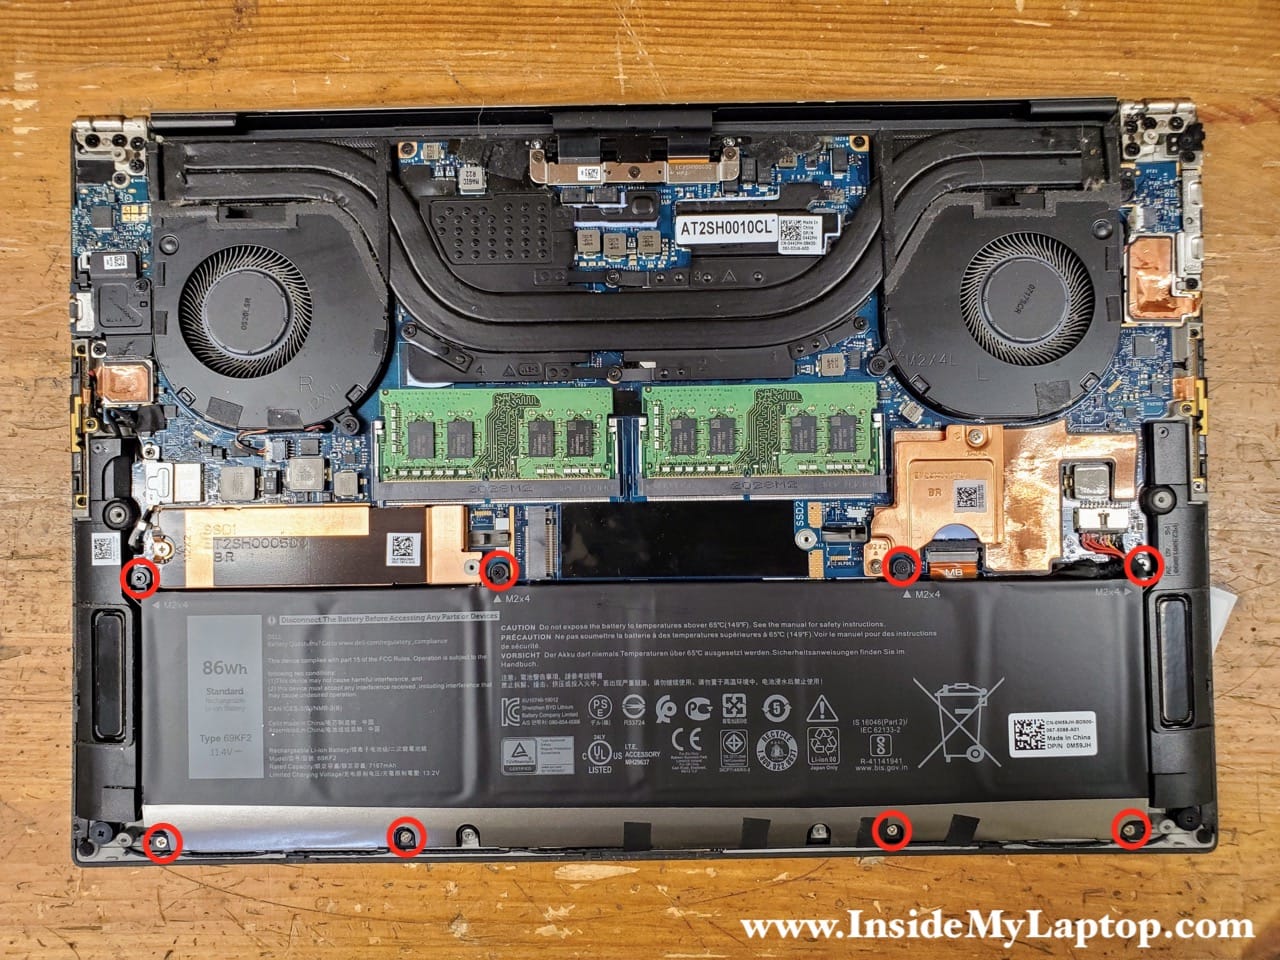
Battery removal and replacement
Remove eight screws securing the battery.
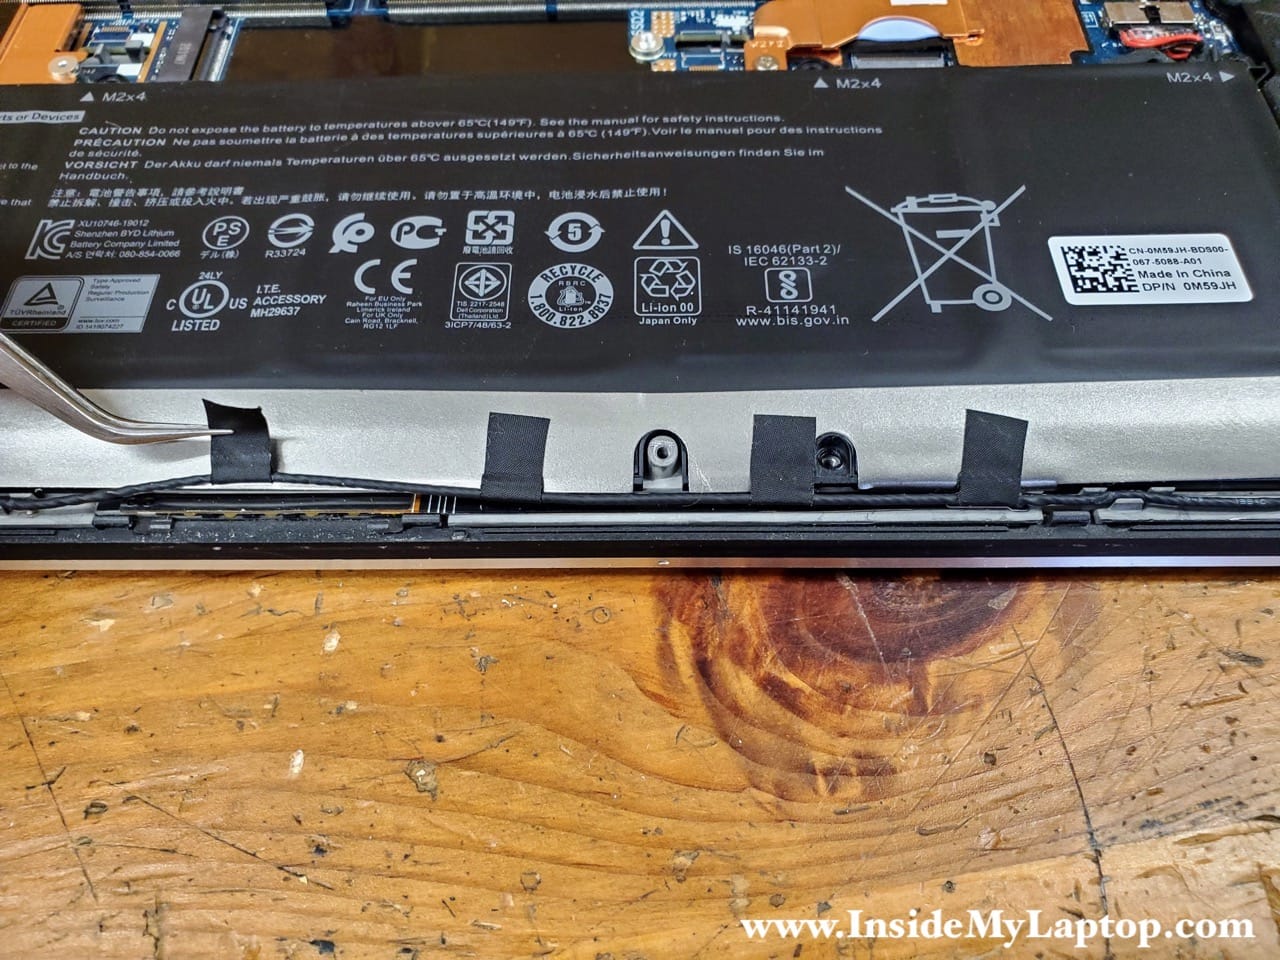
There is a speaker cable taped to the bottom of the battery. Separate the cable from the battery.
Lift up the battery and disconnect the battery cable from the motherboard.
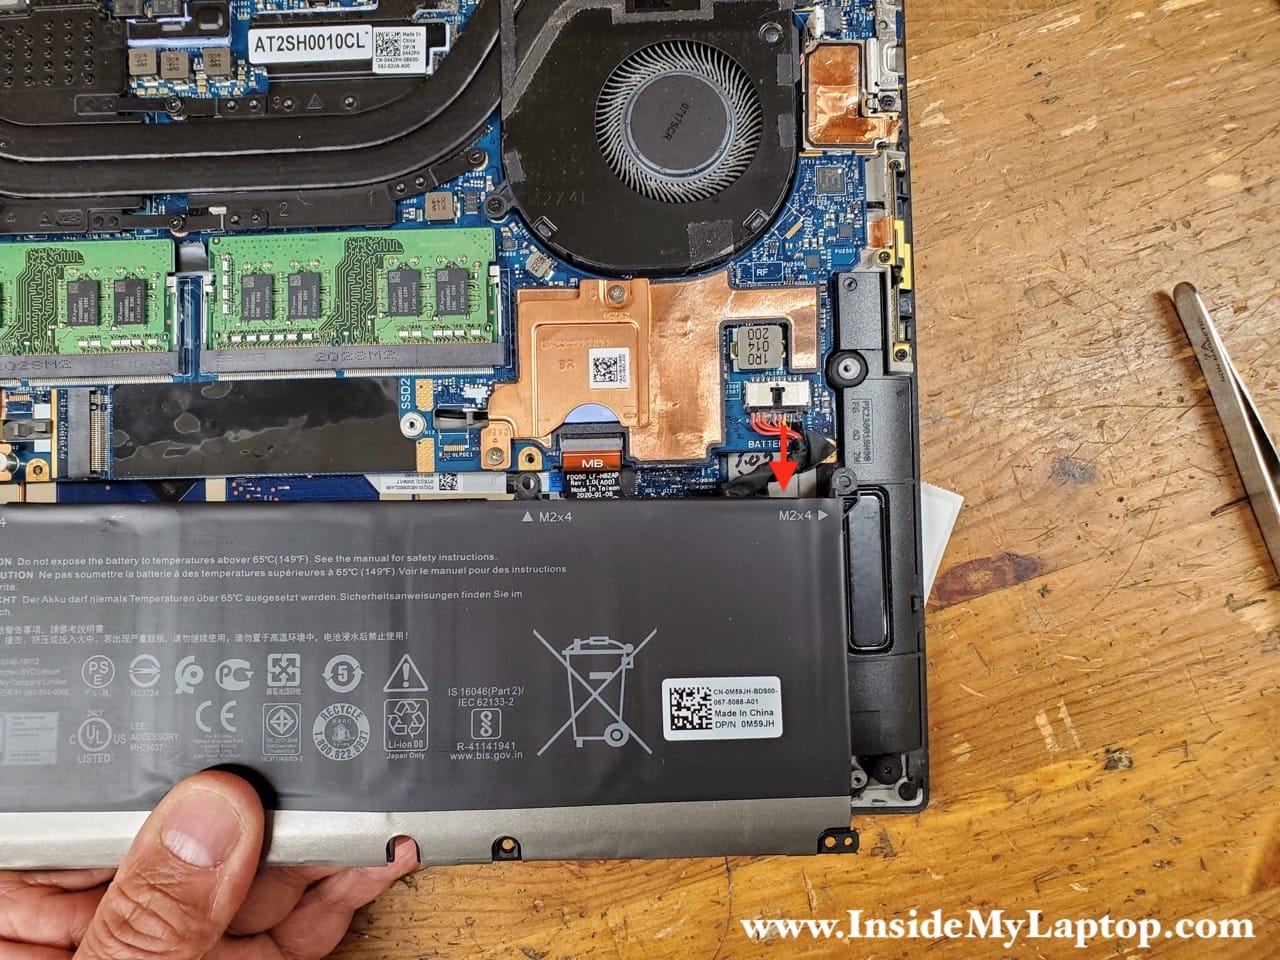
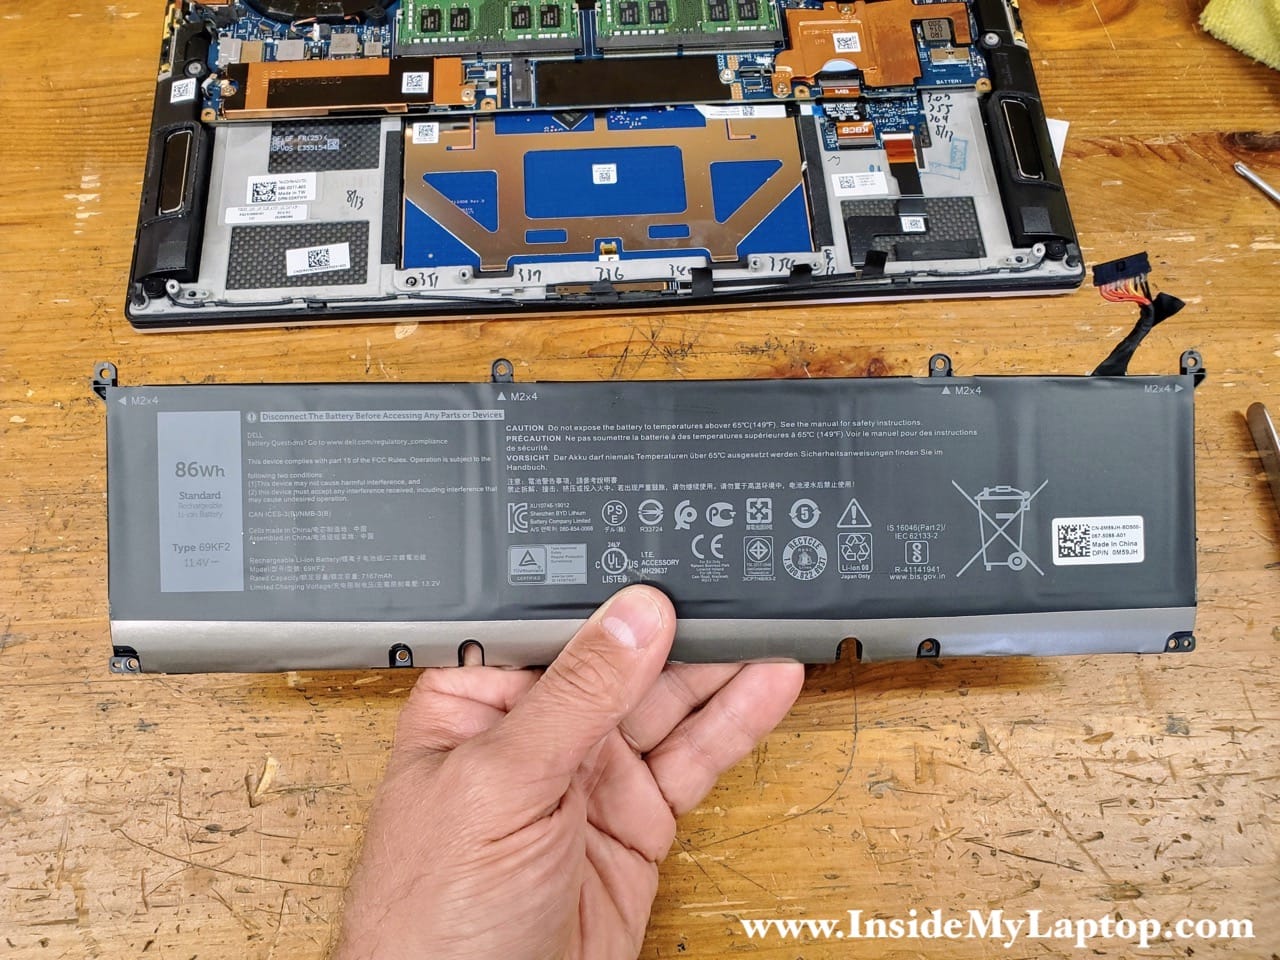
Remove the battery completely.
If you need a new battery, you can find if you search the type number: 69KF2. I recommend using genuine Dell battery instead of a cheap third-party replacement.
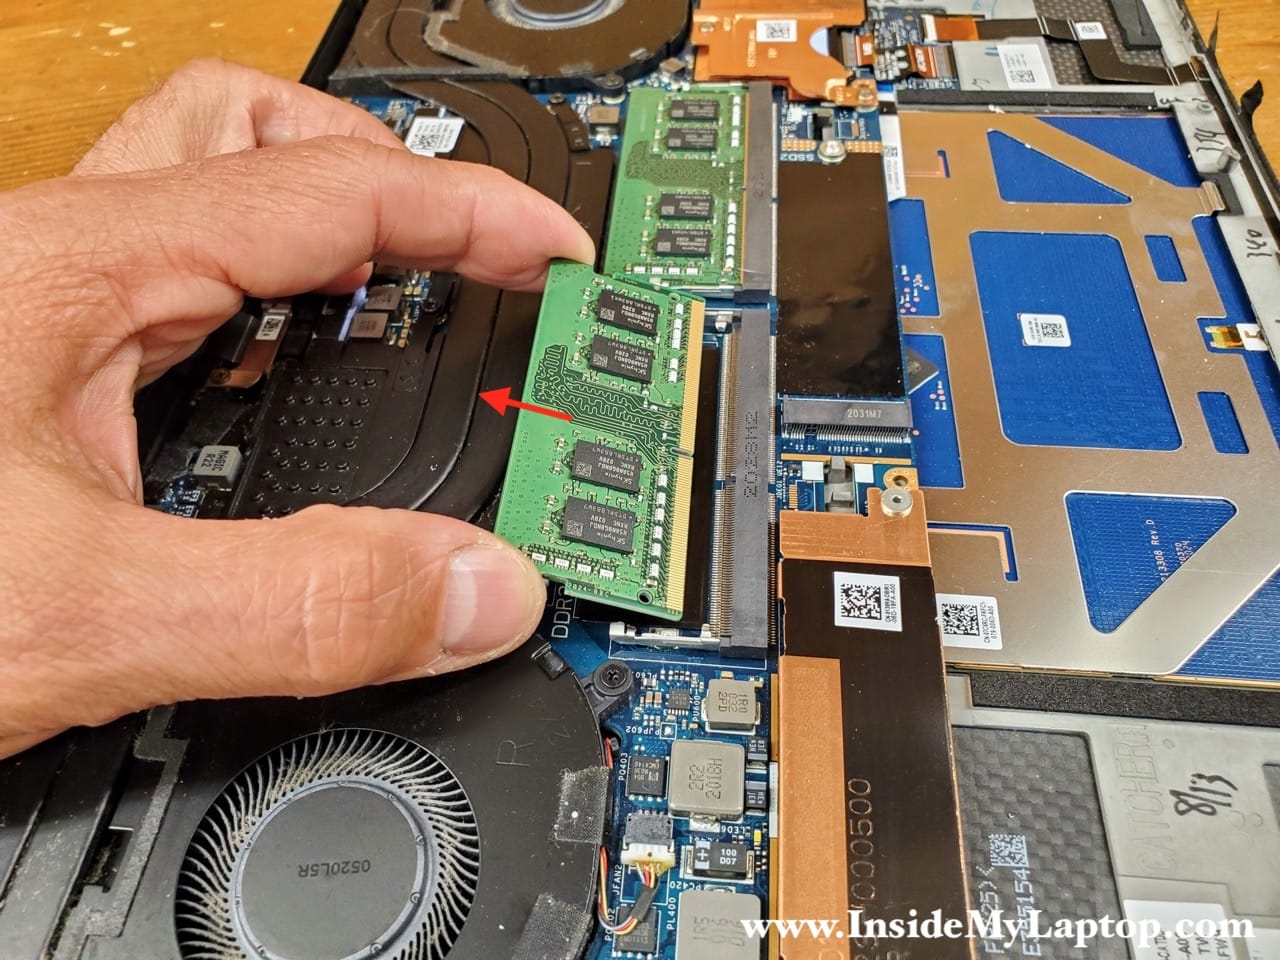
Memory (RAM) removal and replacement
As I mentioned at the beginning, Dell XPS 15 9500 laptop has two memory slots.
It can handle up to 64GB (2x32GB RAM modules). You can use DDR4-2666 or DDR4-3200 modules.
Make sure to use identical RAM modules in both slots so it operates in dual channel mode.
Spread two side latches in order to release the memory module. Pull the memory module out.
SSD removal and replacement
In its default configuration the laptop comes with one PCIe NVMe solid state drive (SSD) installed.
If you want to increase laptop storage capacity, you can install a second NVMe SSD into the SSD2 slot. Any third party NVMe SSD like Samsung, Western Digital, Crucial should work. Also, you will have to purchase another heatsink/bracket for the SSD2. Here’s the part number: 4TW9C
Remove one screws securing the SSD heatsink.
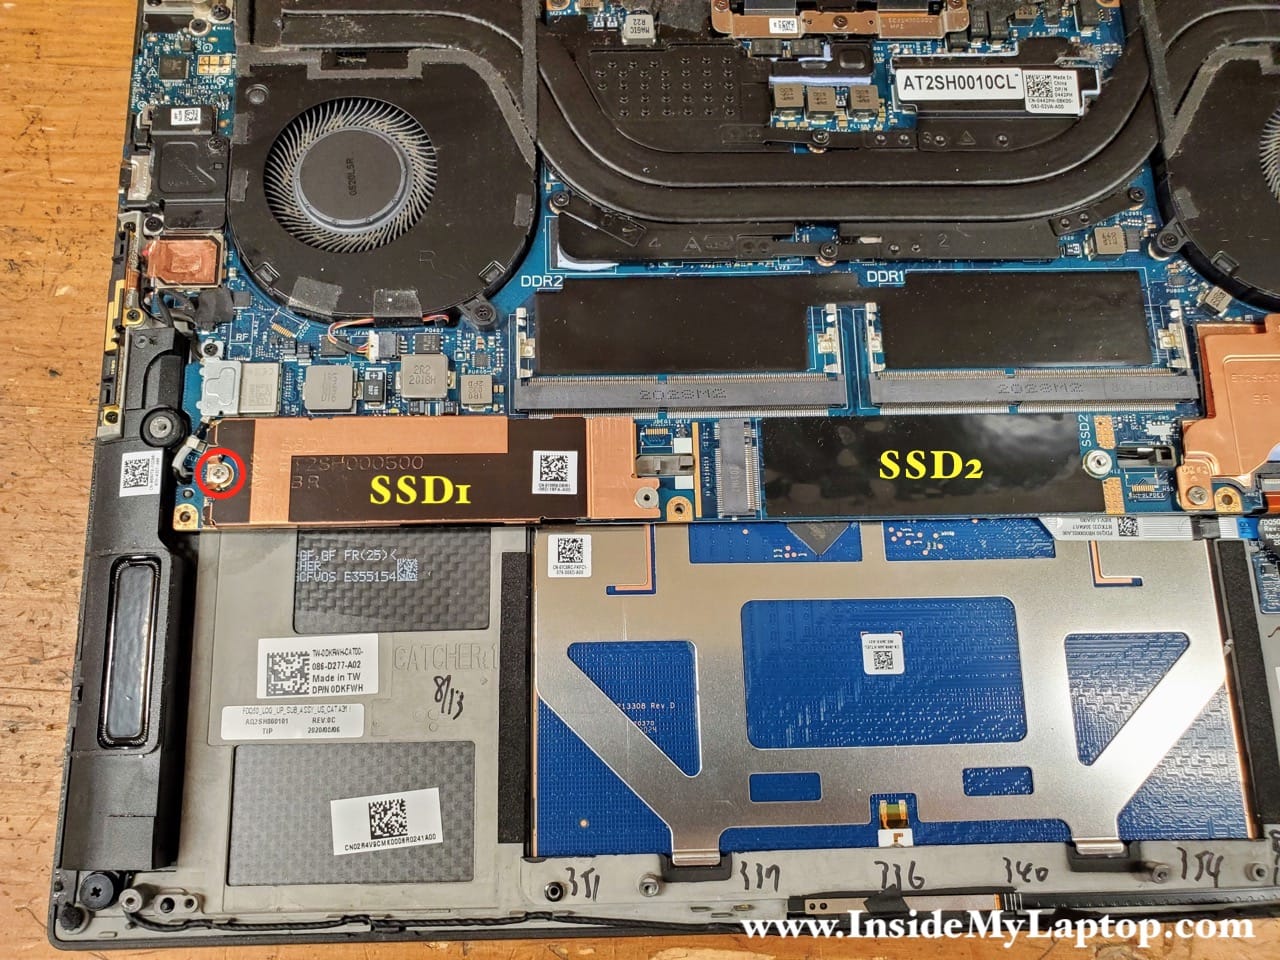
Lift up the left side of the SSD heatsink and slide it to the left to disengage from the stud (marked in yellow).
SSD 1 heatsink/bracket part number: 0130R6
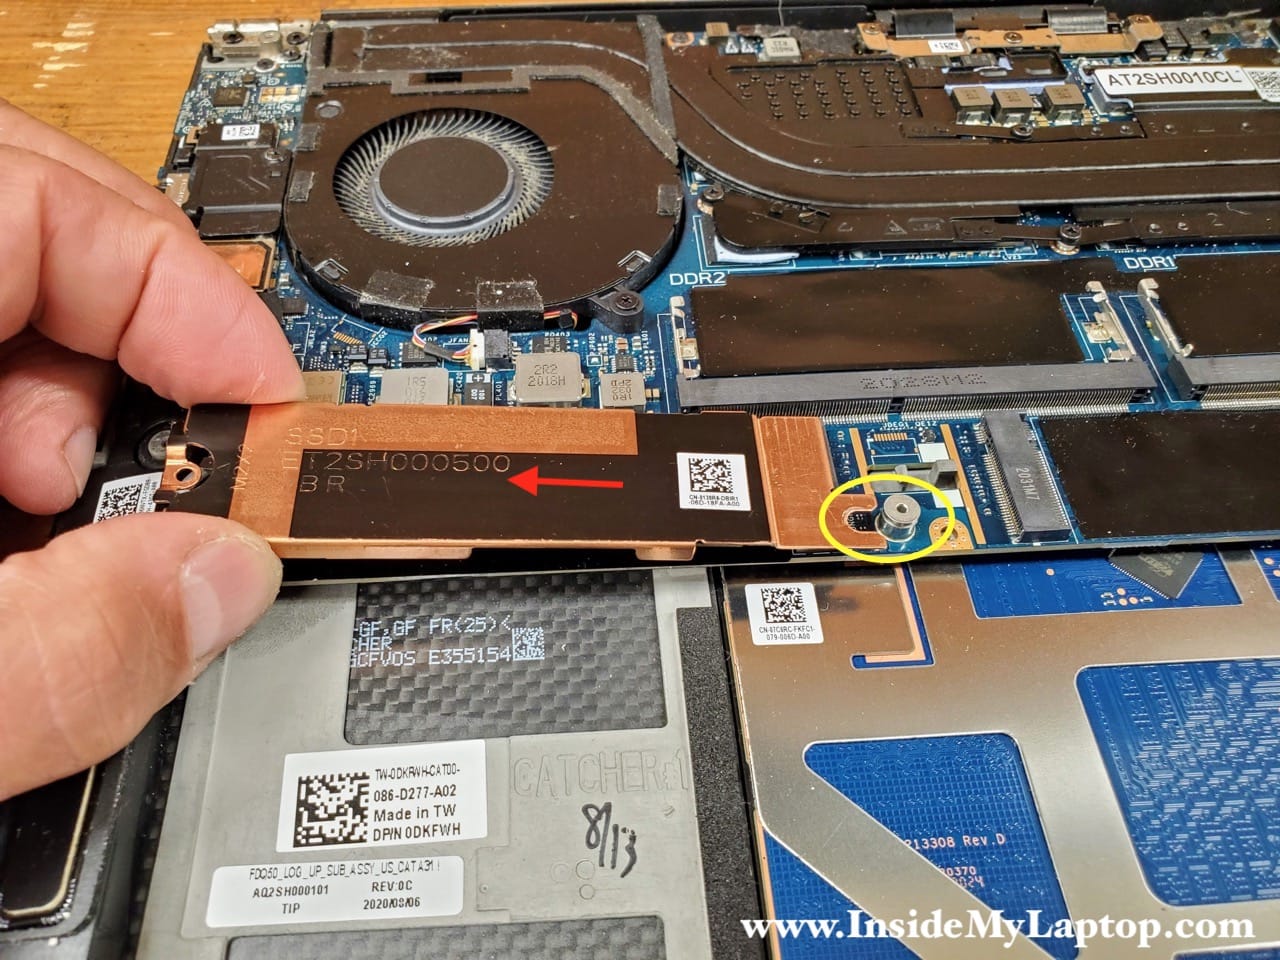
Now you can pull the SSD out of the slot and remove it.

Cooling fans removal and replacement
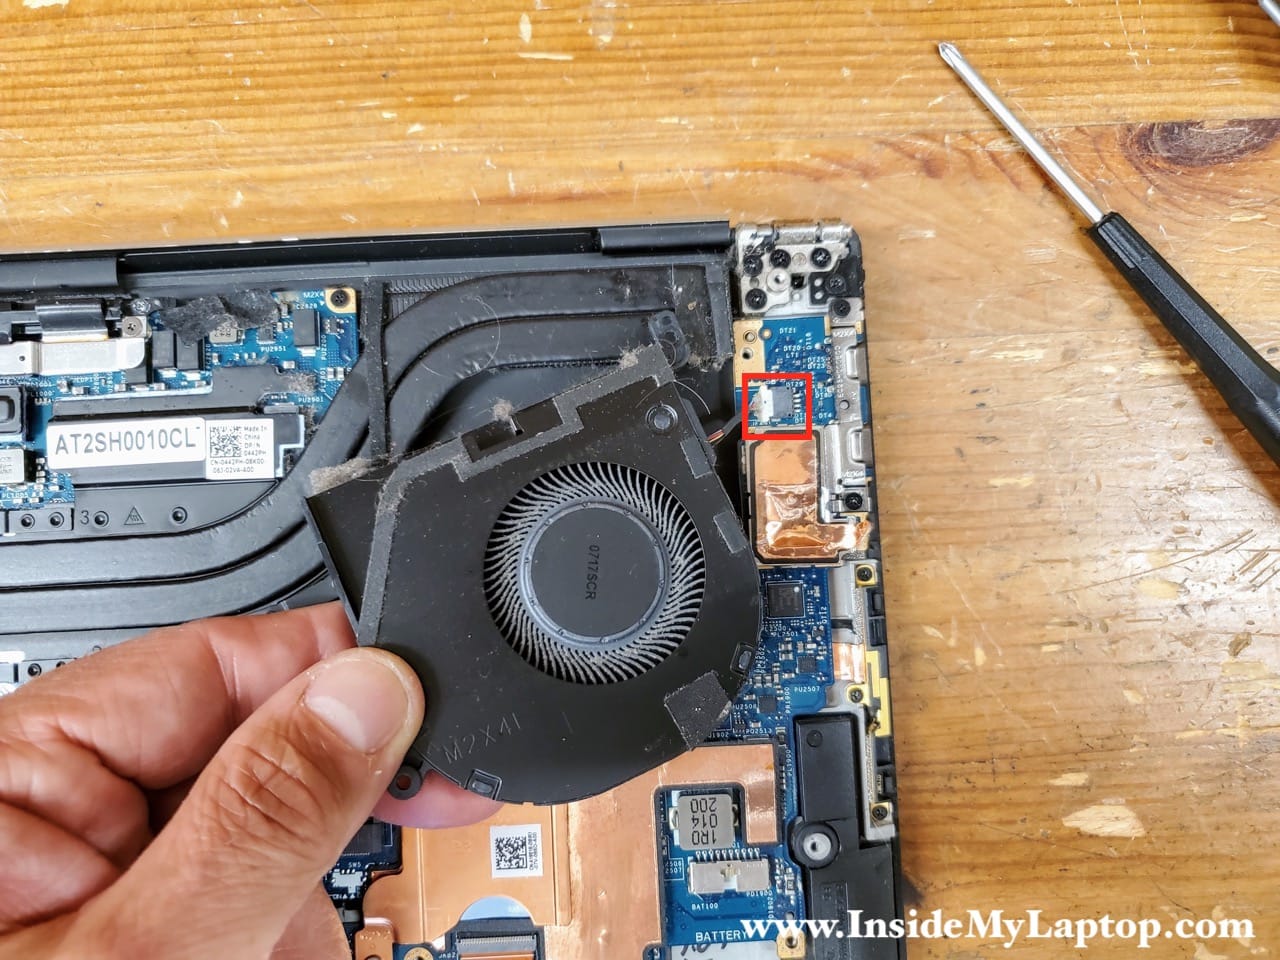
Dell XPS 15 9500 has two cooling fans. Let’s start with removing the right fan.
Remove three screws securing the right cooling fan and the I/O board bracket.
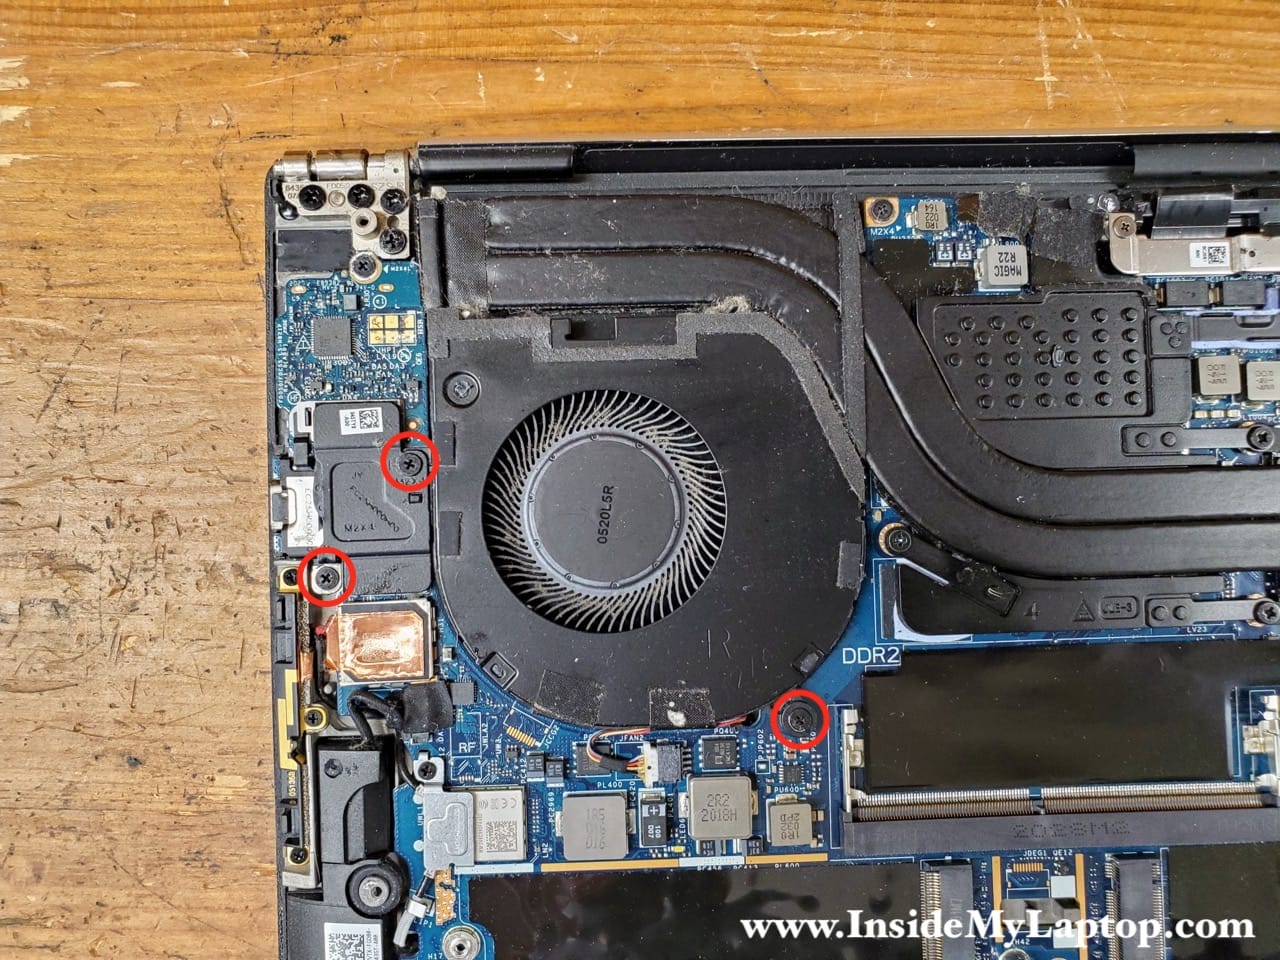
Remove the I/O board bracket.
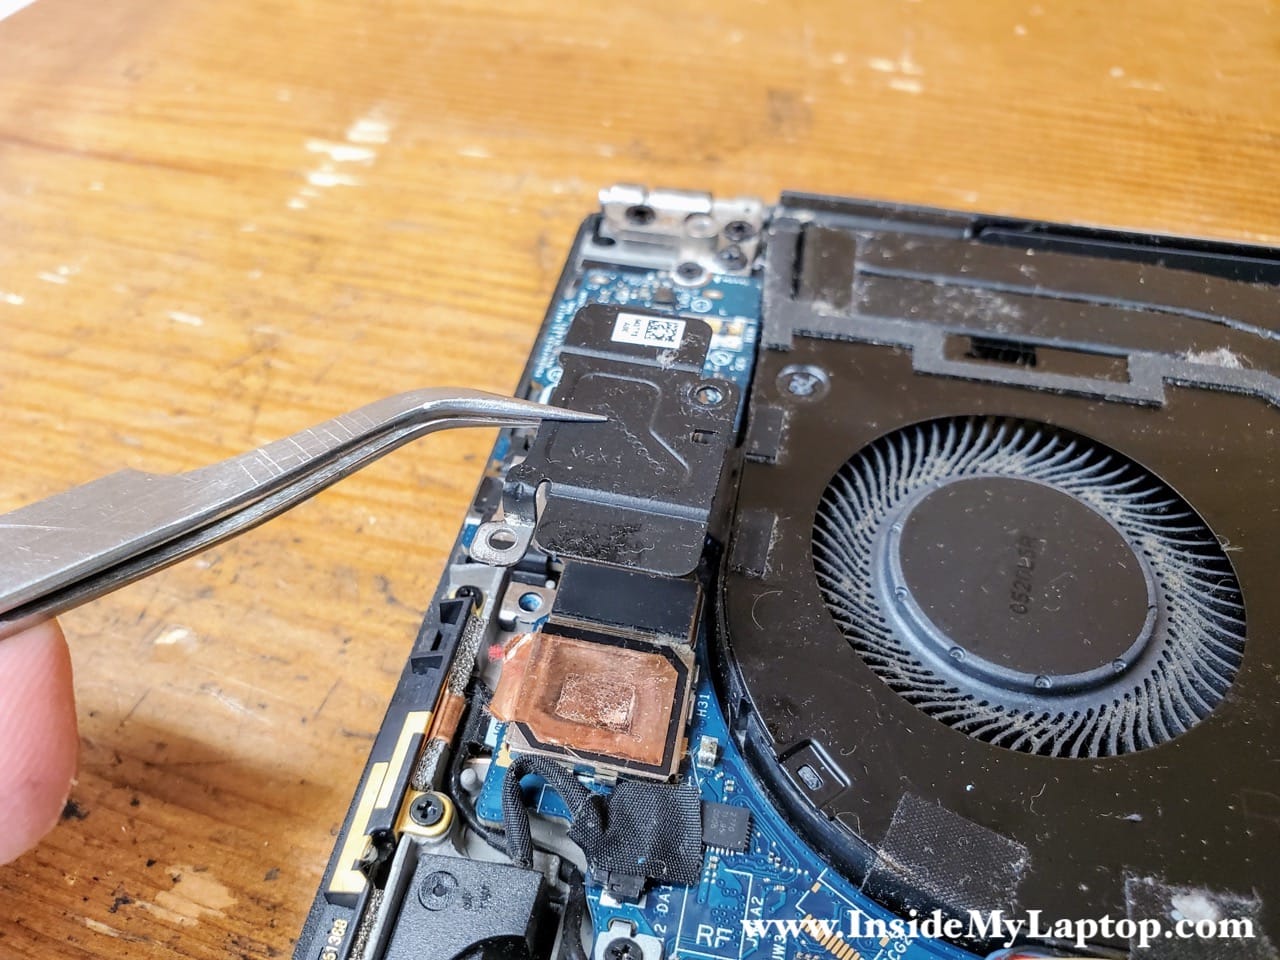
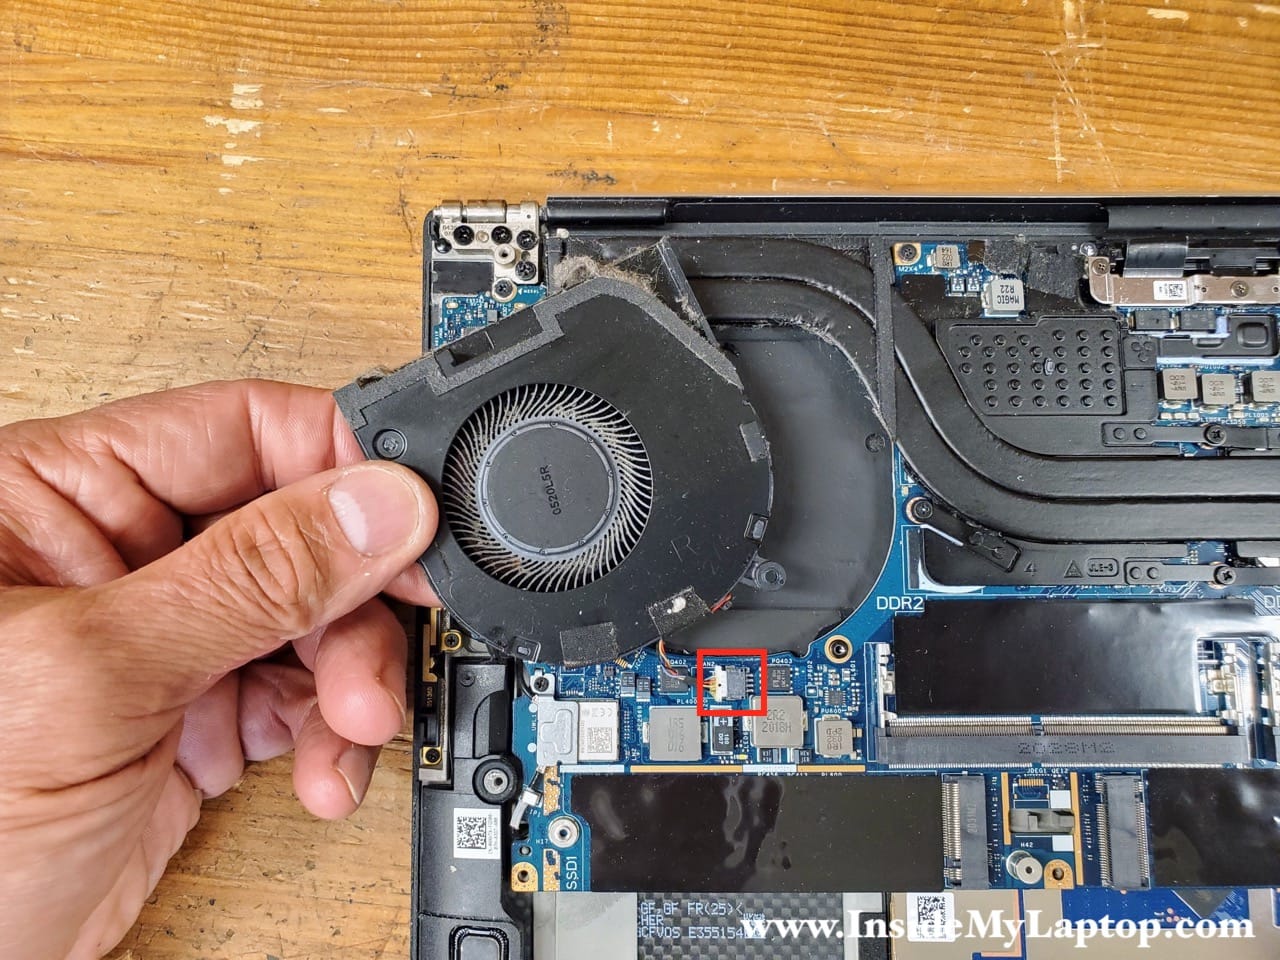
Remove the right fan and disconnect it from the motherboard.
If you need to replace the right fan here’s the part number: 0DJH35
Remove two screws securing the left cooling fan.
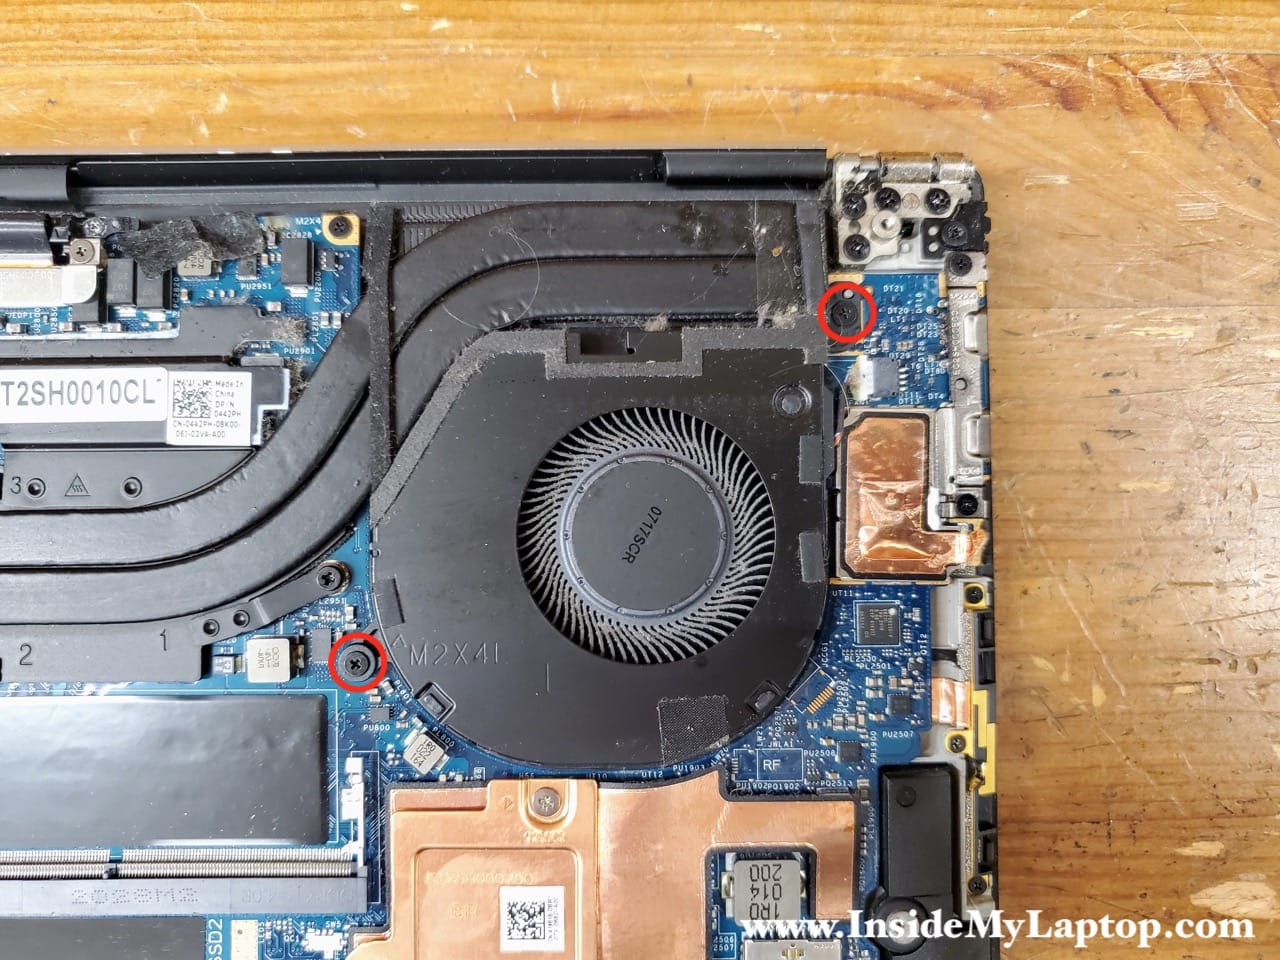
Remove the left fan and disconnect it from the motherboard.
If you need to replace the left fan here’s the part number: 009RK6
Display assembly removal
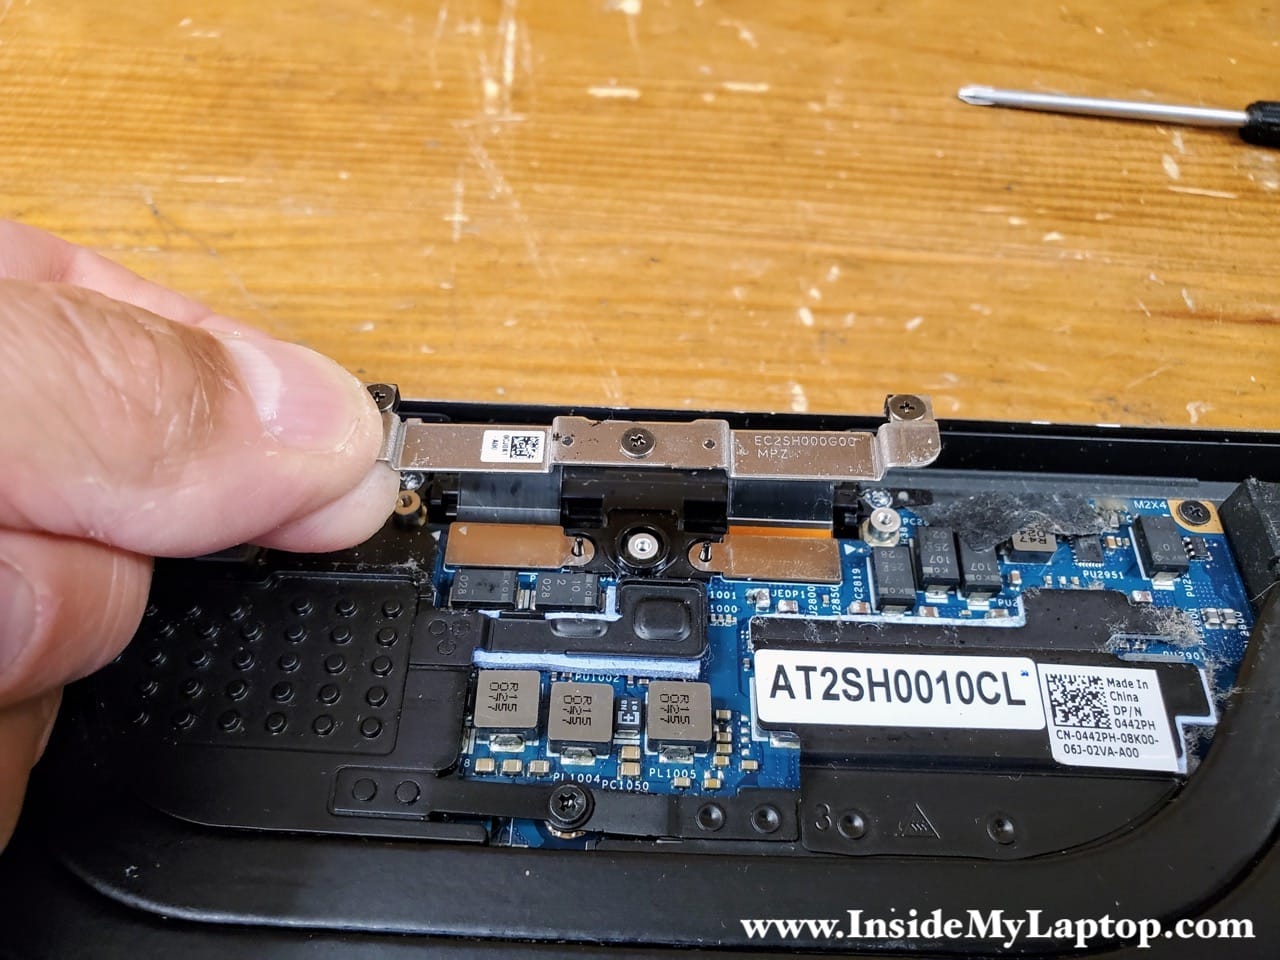
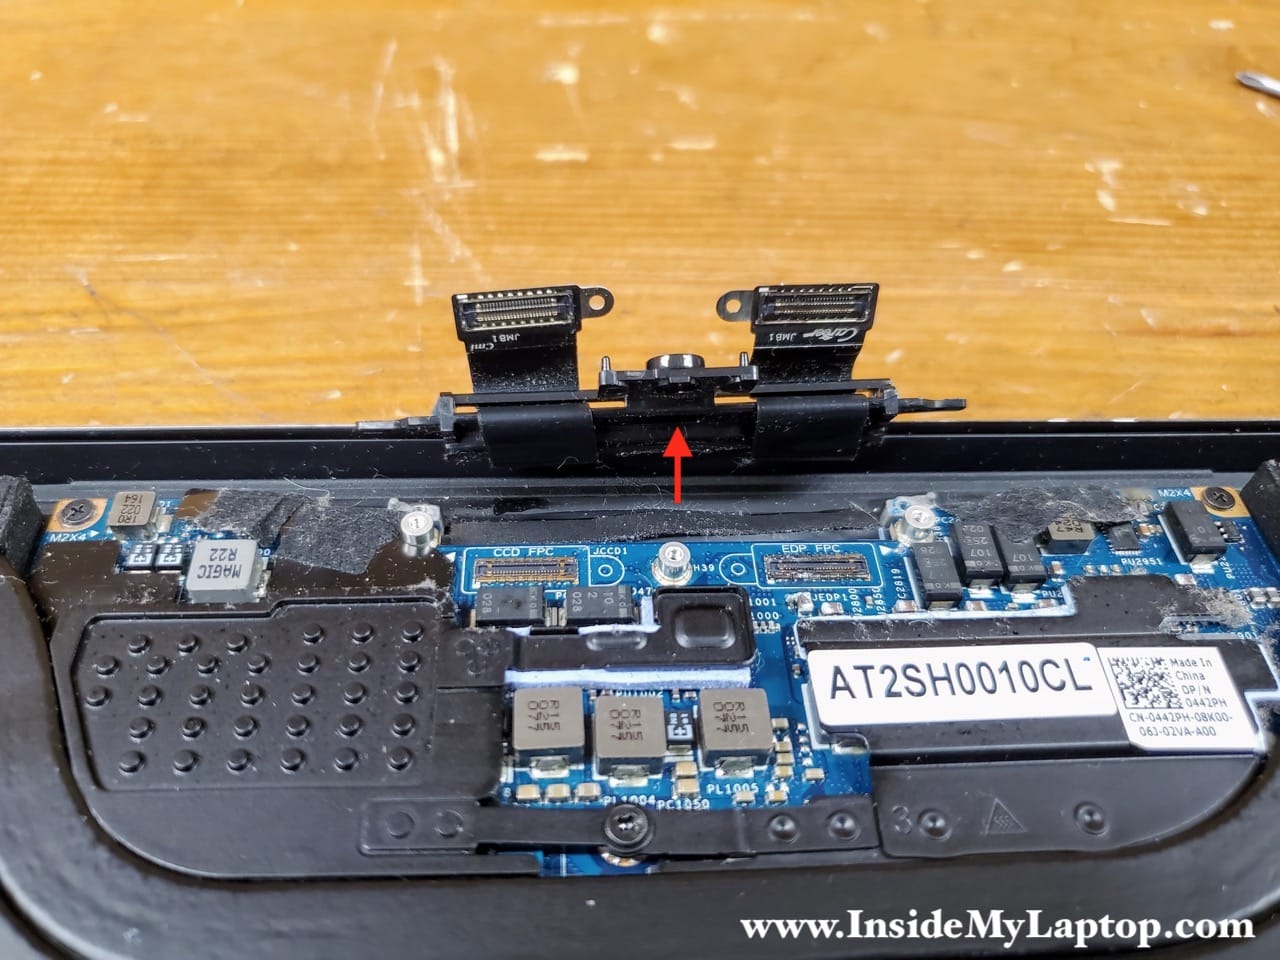
Loosen three screws securing the metal display cable bracket.
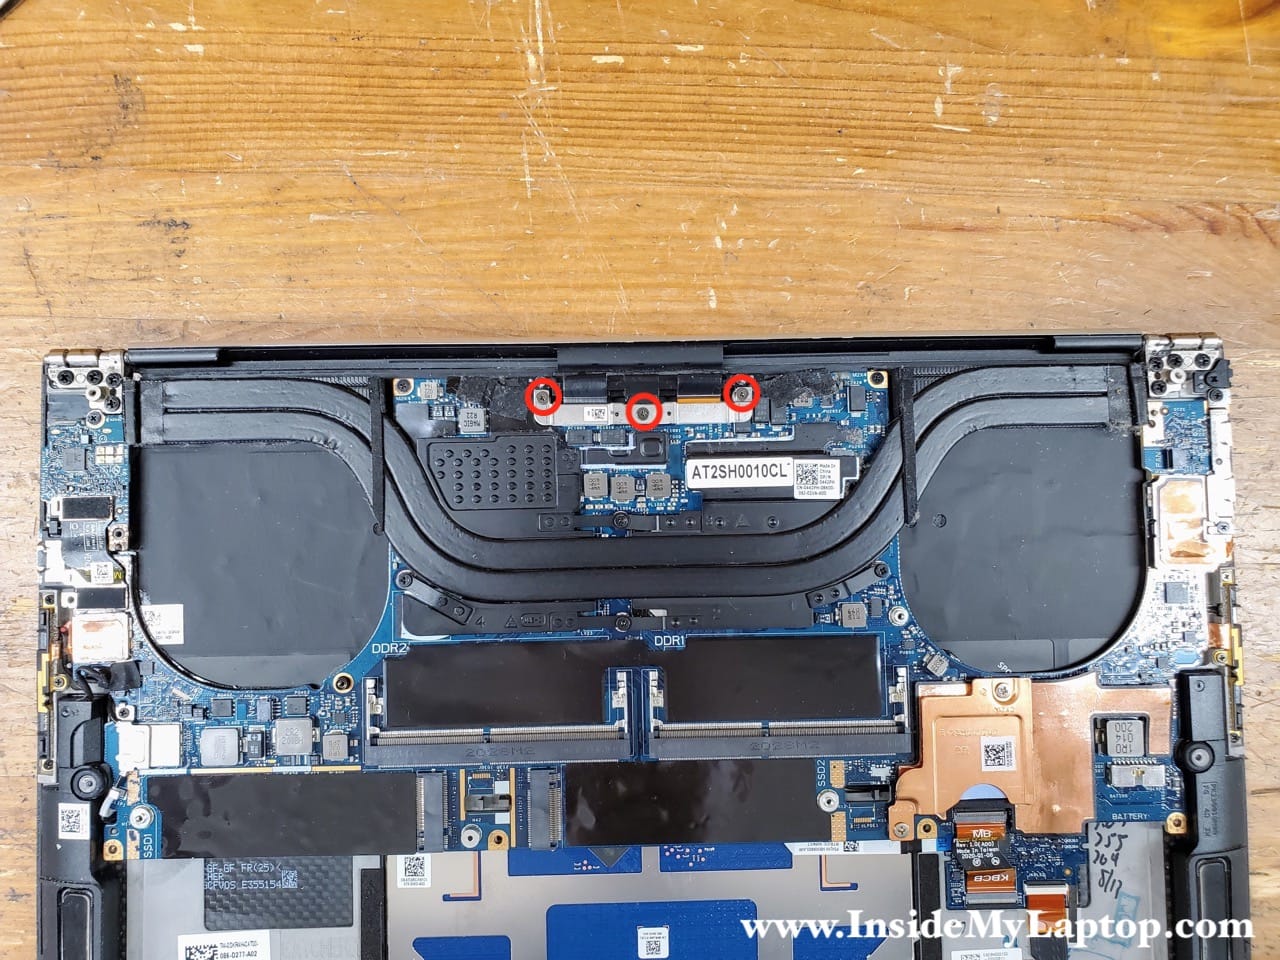
Lift up and remove the cable bracket.
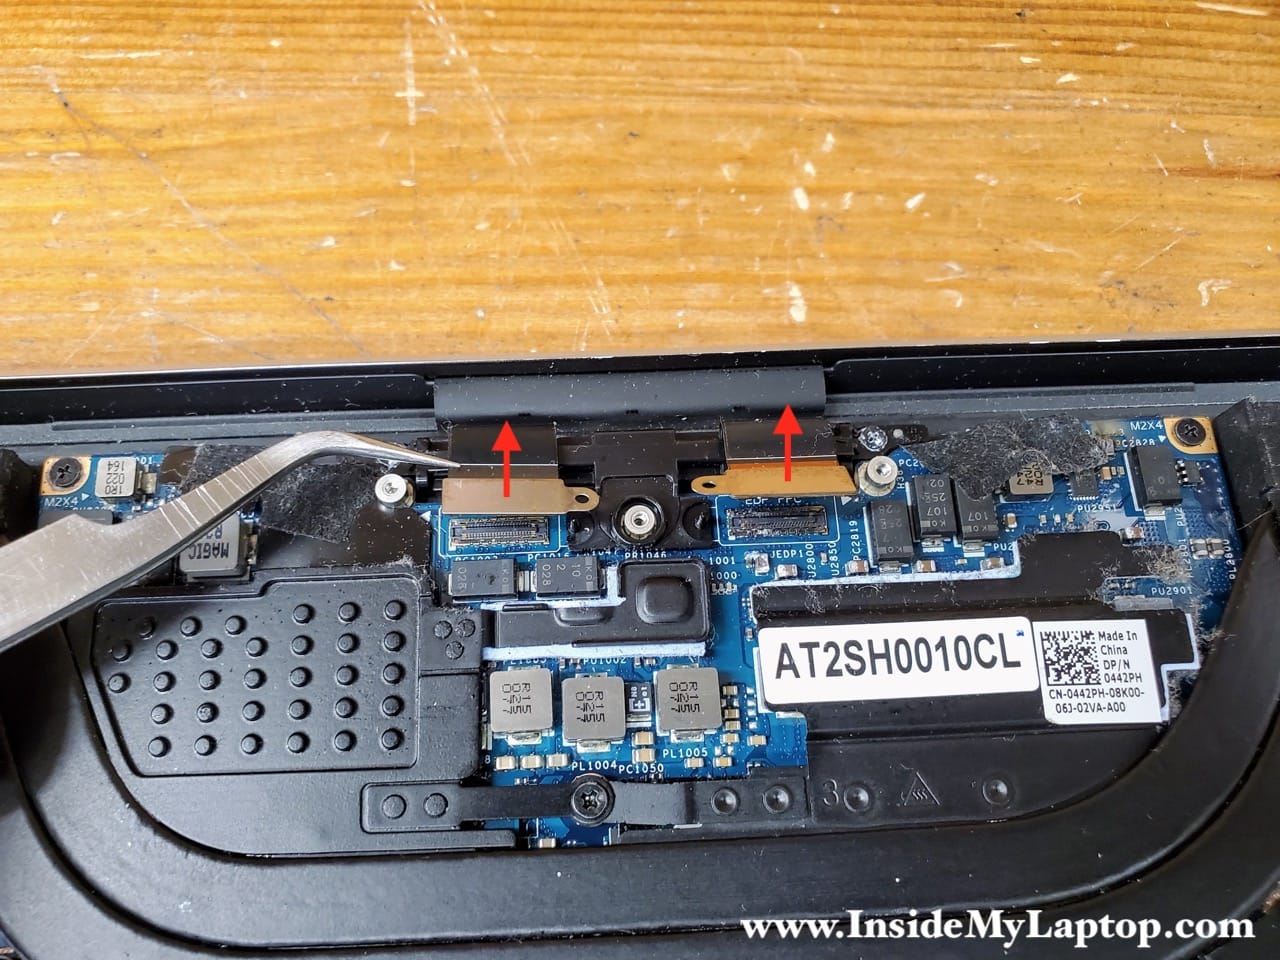
Lift up two display cable to disconnect them from the motherboard.
Remove two screws securing the display cable holder.

Lift up the display cable holder.
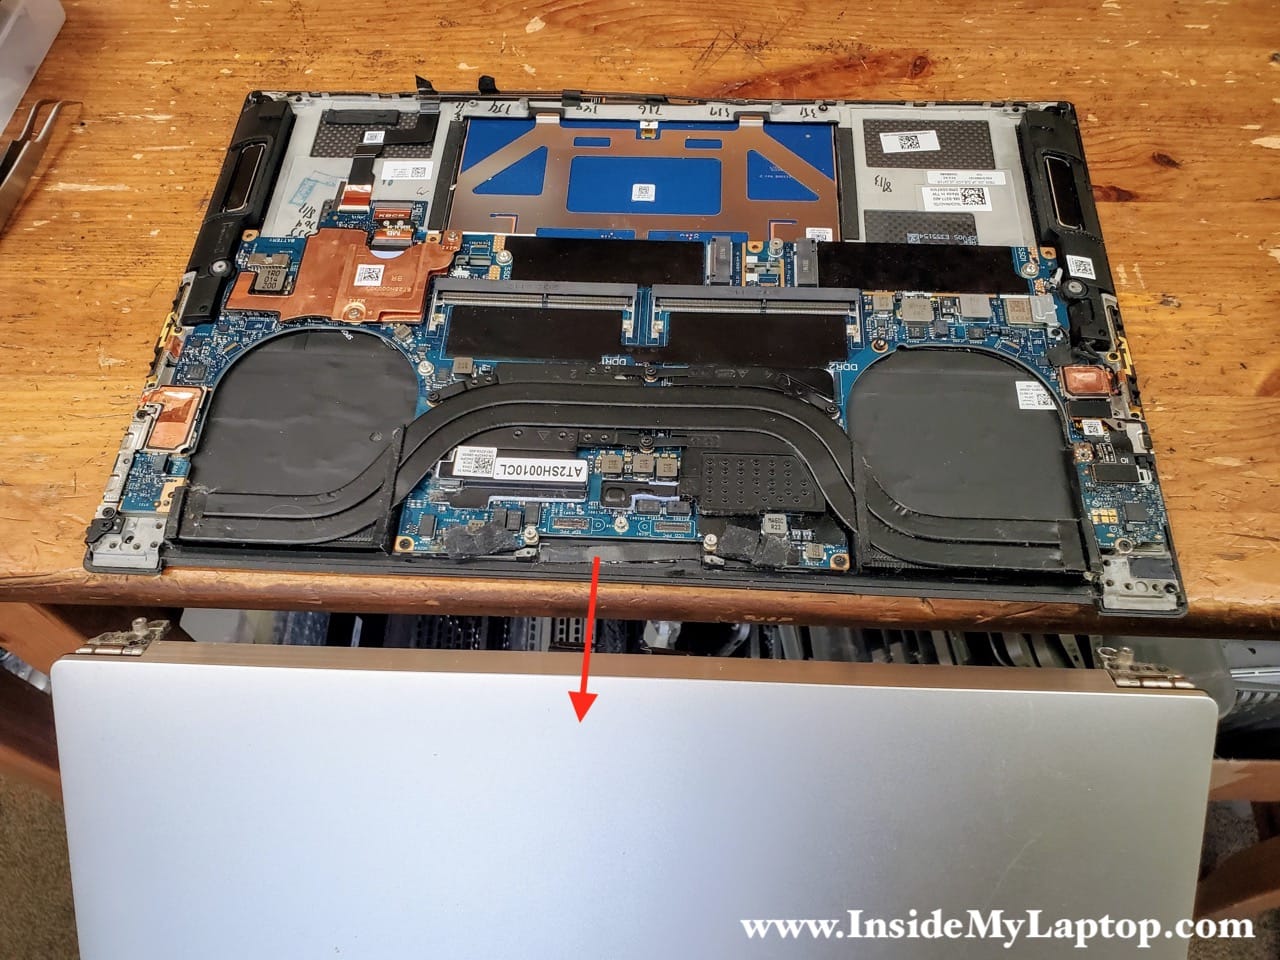
Open up the display panel and place the laptop upside down as it shown on the following picture.
Remove eight screws securing the display panel hinges.
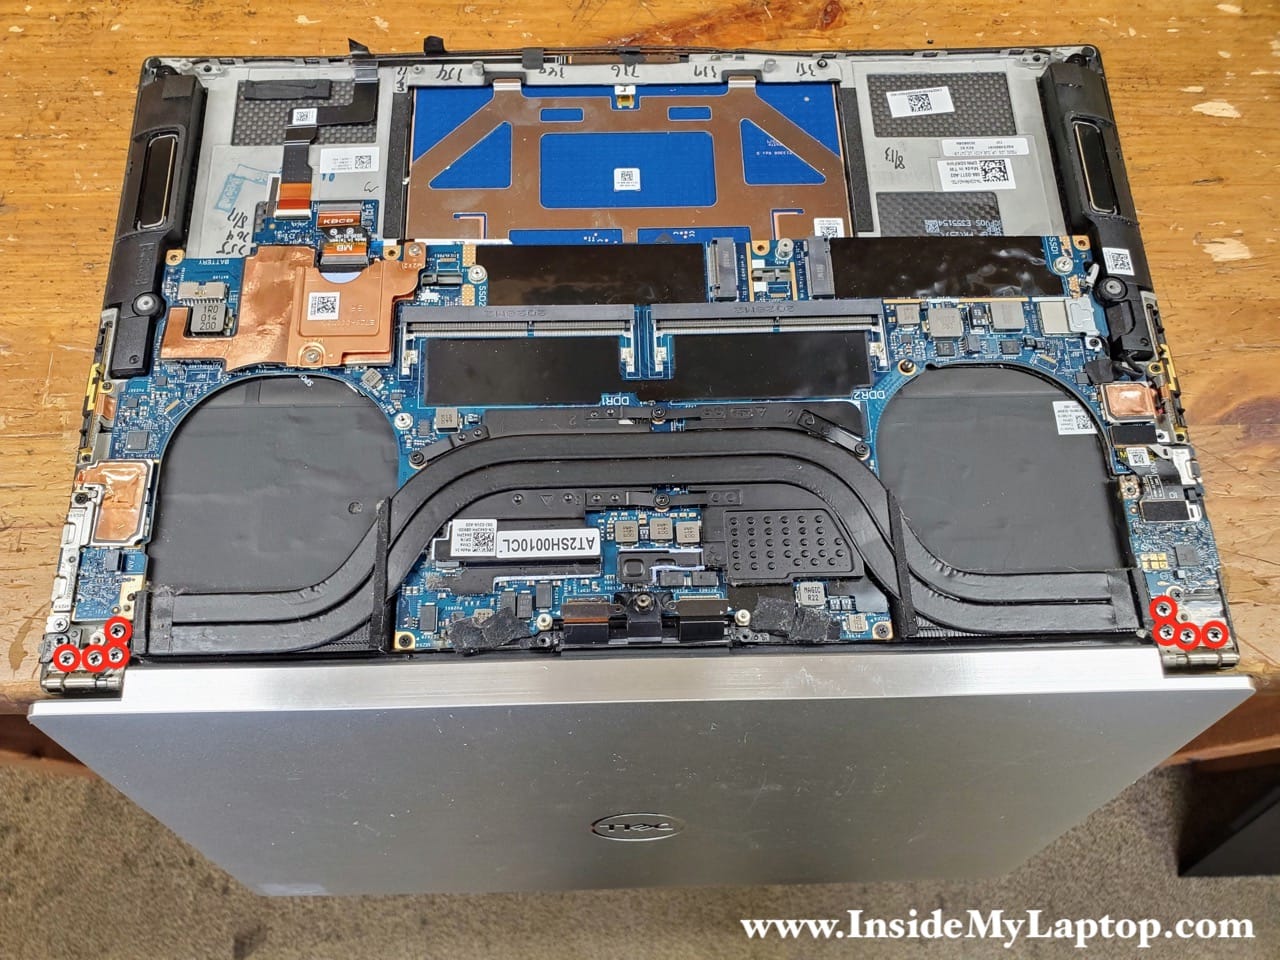
Remove the display panel.