Today I’ll be replacing failed LCD screen assembly on a Toshiba Satellite Radius P55W laptop. I’m replacing the screen because of failed digitizer. The touch screen started showing bubbles and registering phantom touches on the screen.
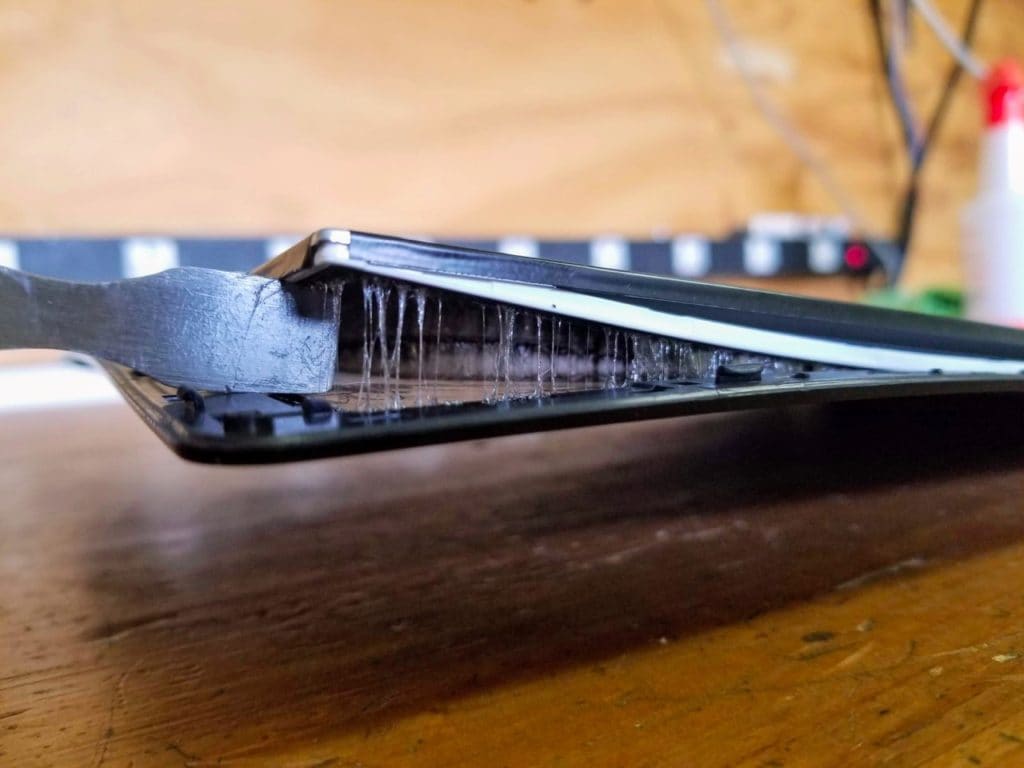
In Toshiba Satellite Radius P55W laptop the LCD screen permanently attached (glued) to the digitizer. If either of them failed, the entire LCD assembly has to be replaced.
I’ve seen some eBay sellers offering touch screen digitizers separately but I really doubt you can replace it and make look factory perfect again. I tried separating the LCD screen and digitizer just to find out if it’s possible and the experiment failed completely.
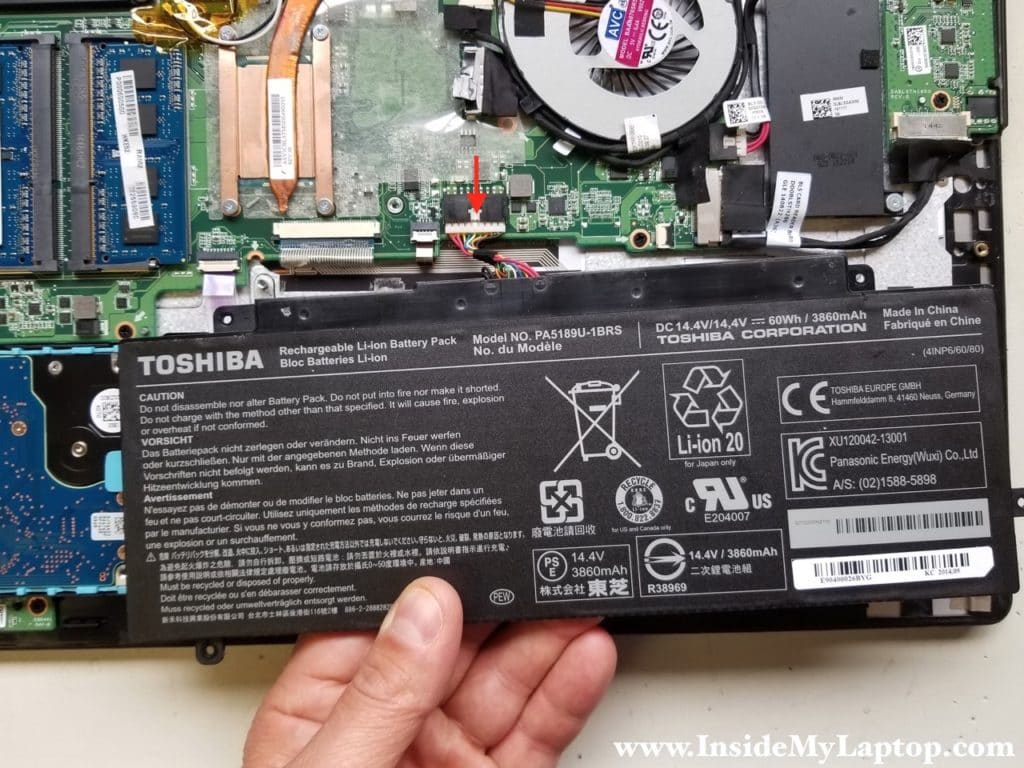
It’s a good idea to disconnect the battery before taking apart the display assembly. I explained how to access the battery in this Toshiba Satellite Radius P55W disassembly guide.
Removing LCD screen assembly
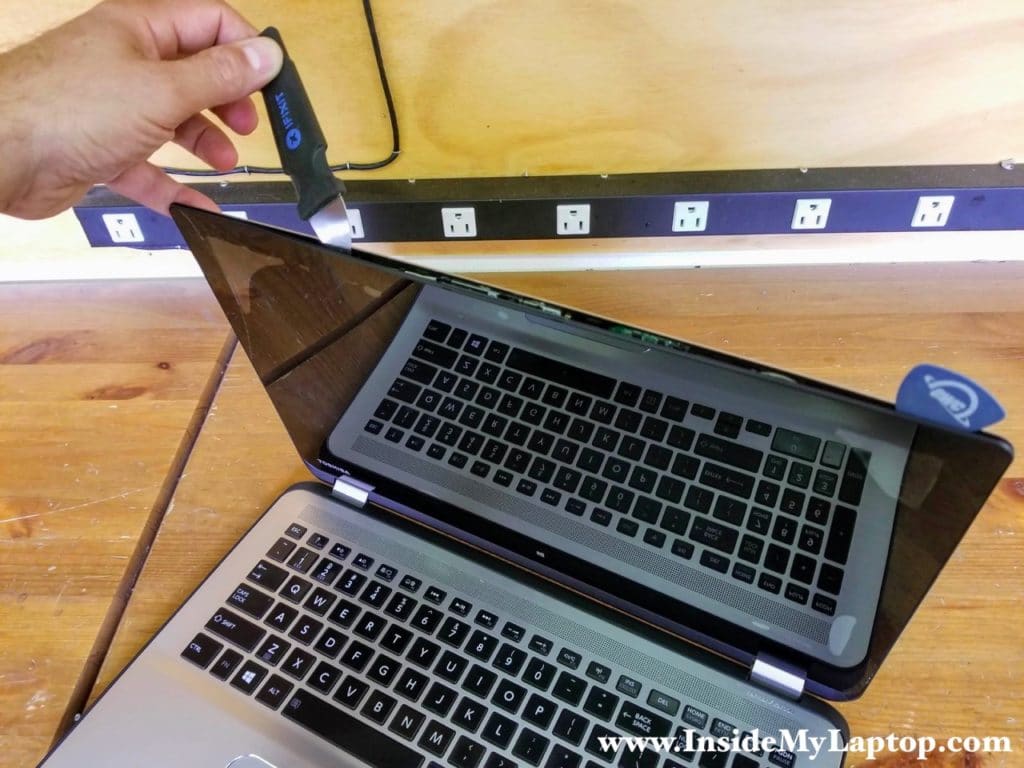
STEP 1.
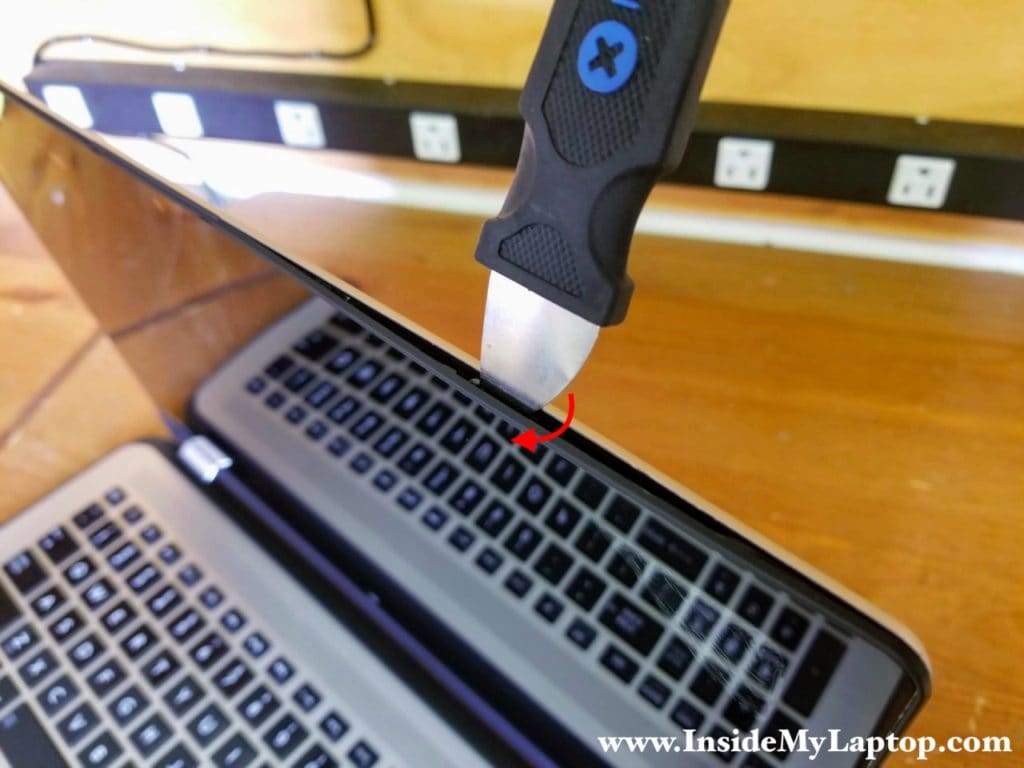
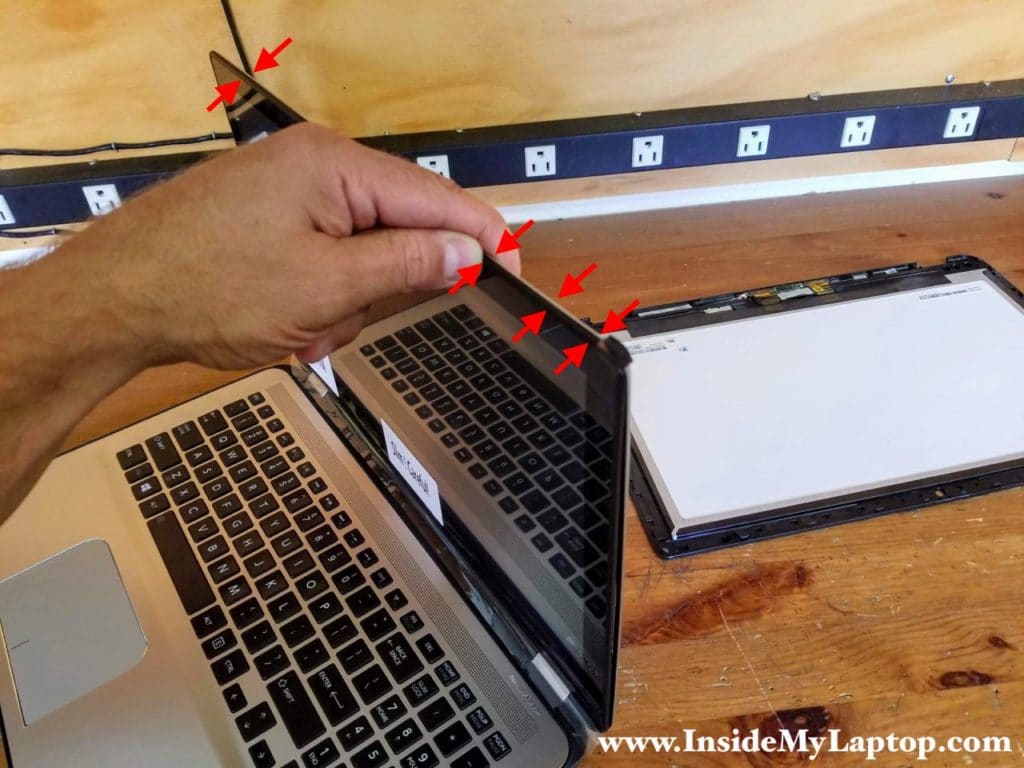
Start separating the LCD screen assembly from the back cover on the top side of the display. Insert a thin case opener tool between two and pry up the LCD assembly.
STEP 2.
Continue separating the LCD assembly on the sides.
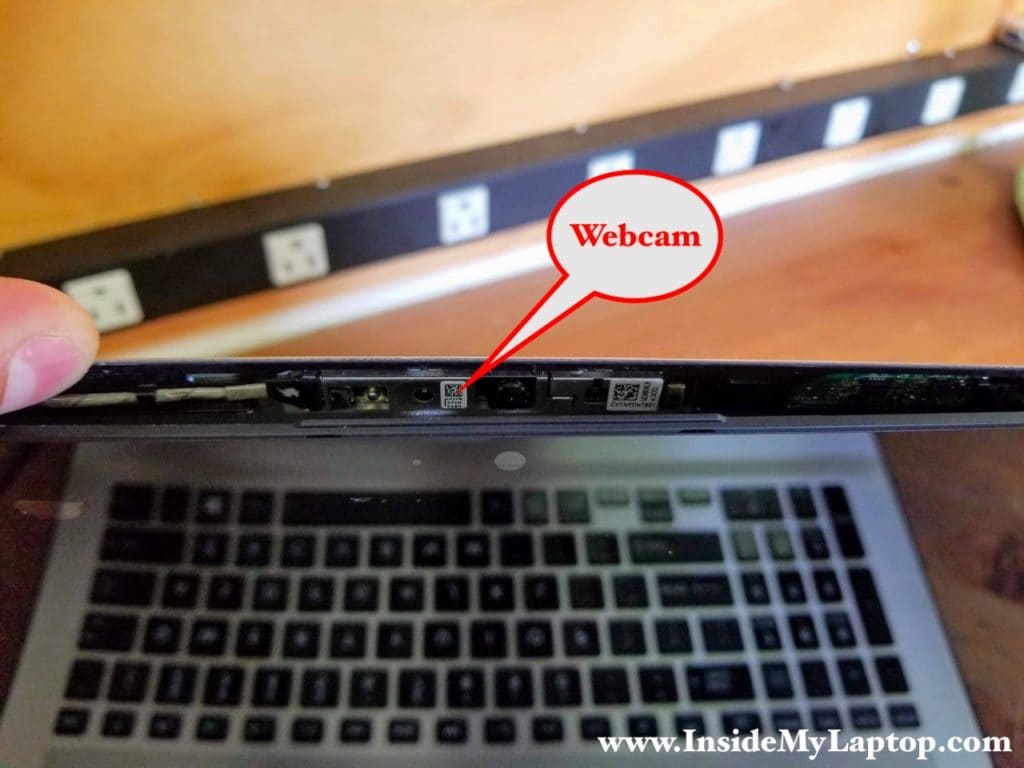
Be careful while working with the case opener tool. Do not insert it too far. The webcam and cables are routed close to the edge of the display.
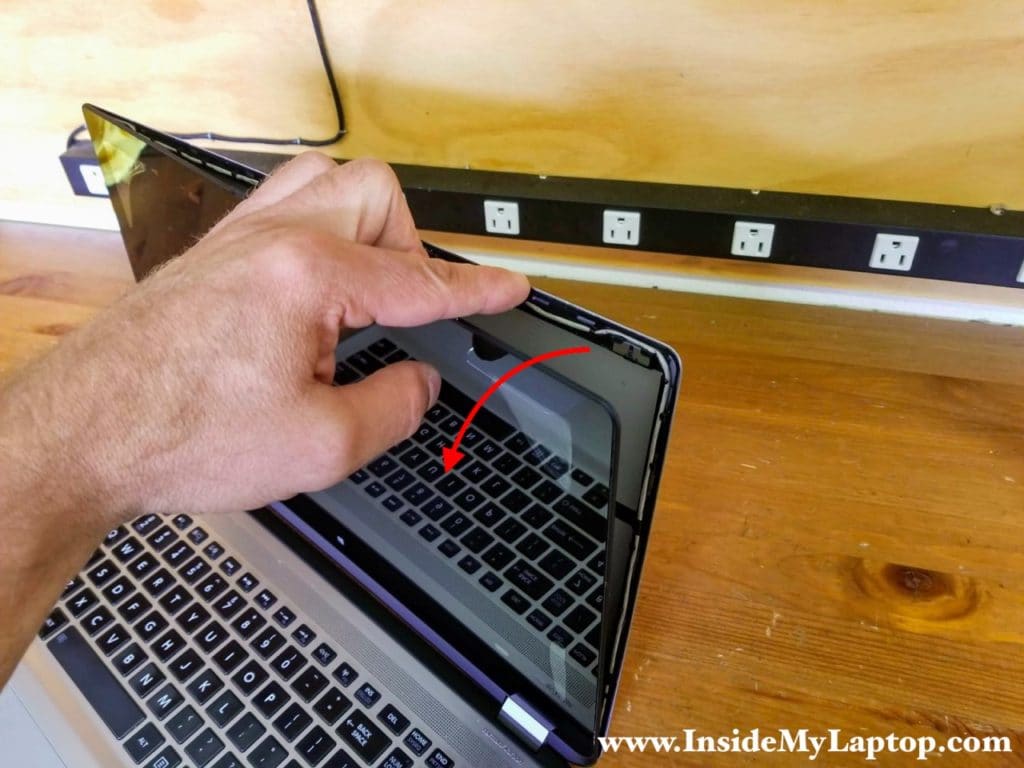
STEP 3.
When the gap is wide enough, continue removing the LCD screen assembly with your fingers.
STEP 4.
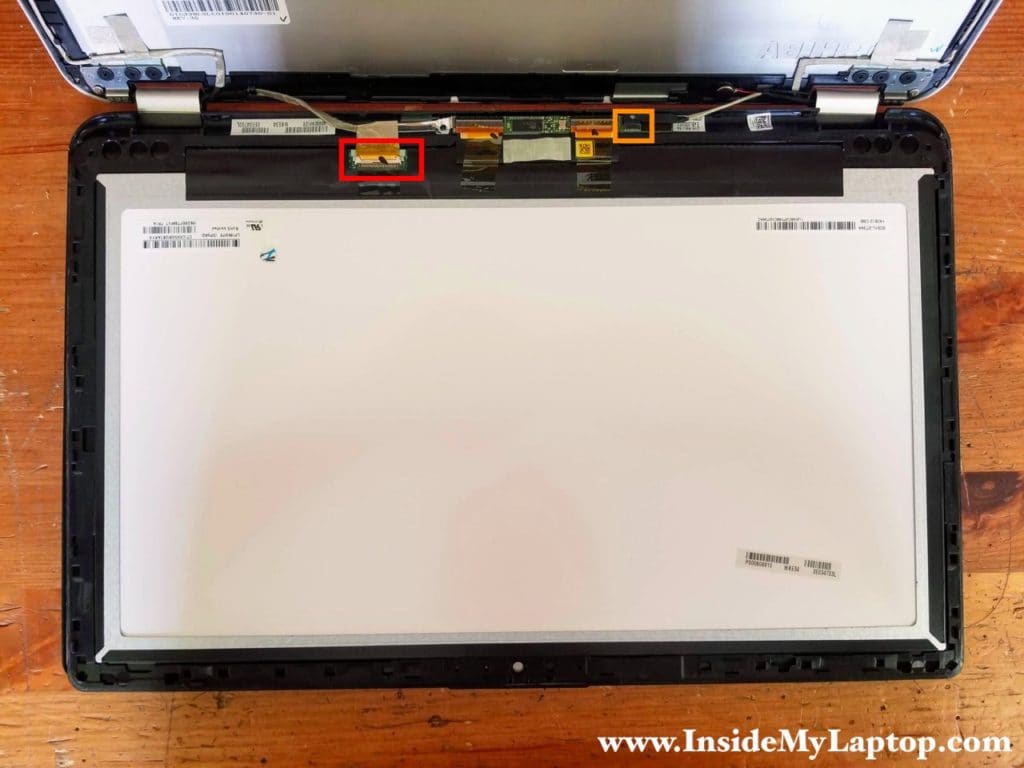
Separate the LCD assembly completely and place it on the palmrest.
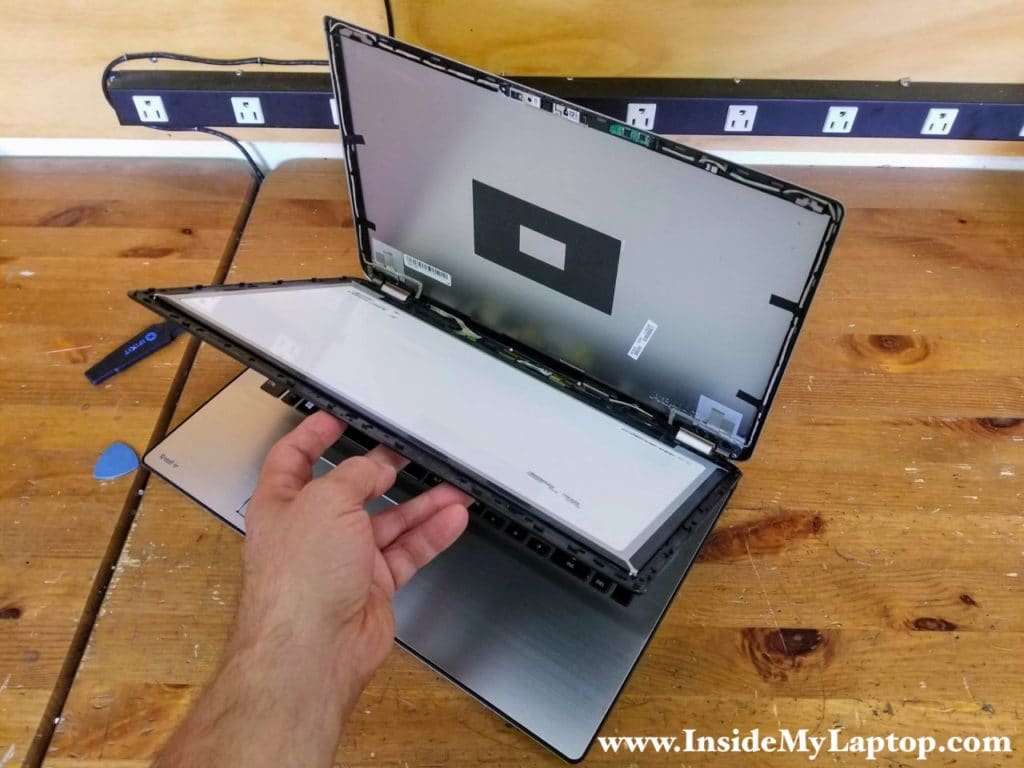
Now you can access and disconnect the display video cable (color-coded in red) and the digitizer cable (color-coded in orange).
STEP 5.
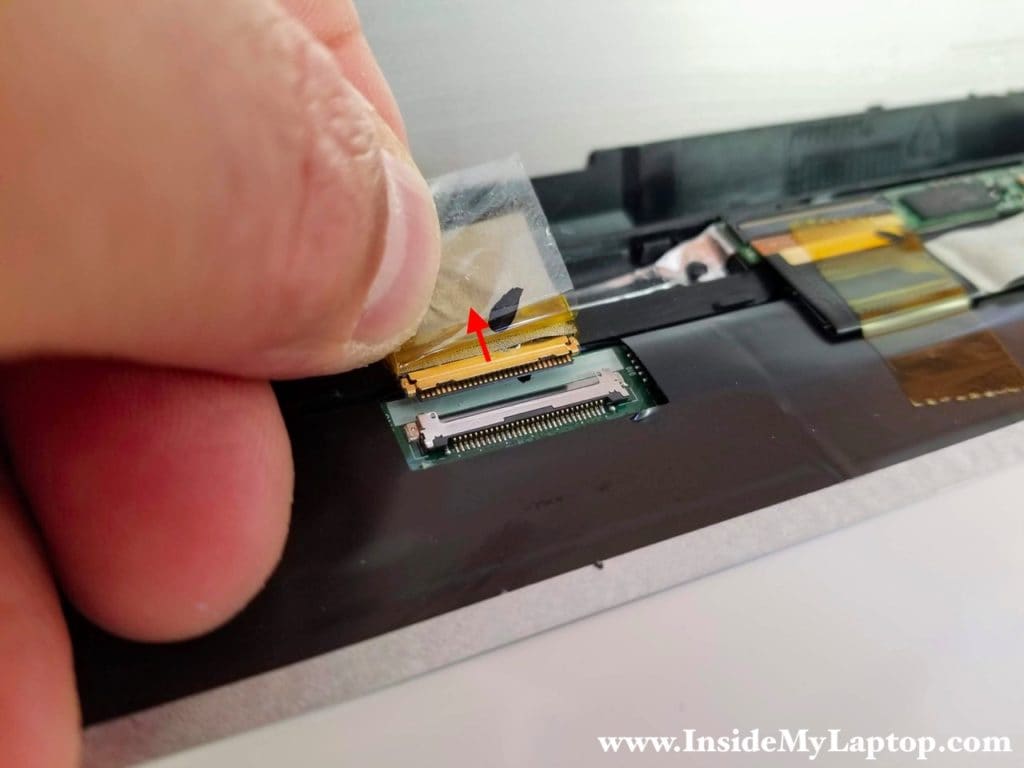
Peel off clear tape securing the display cable connector.
Unplug the display video cable from the LCD screen.
STEP 6.
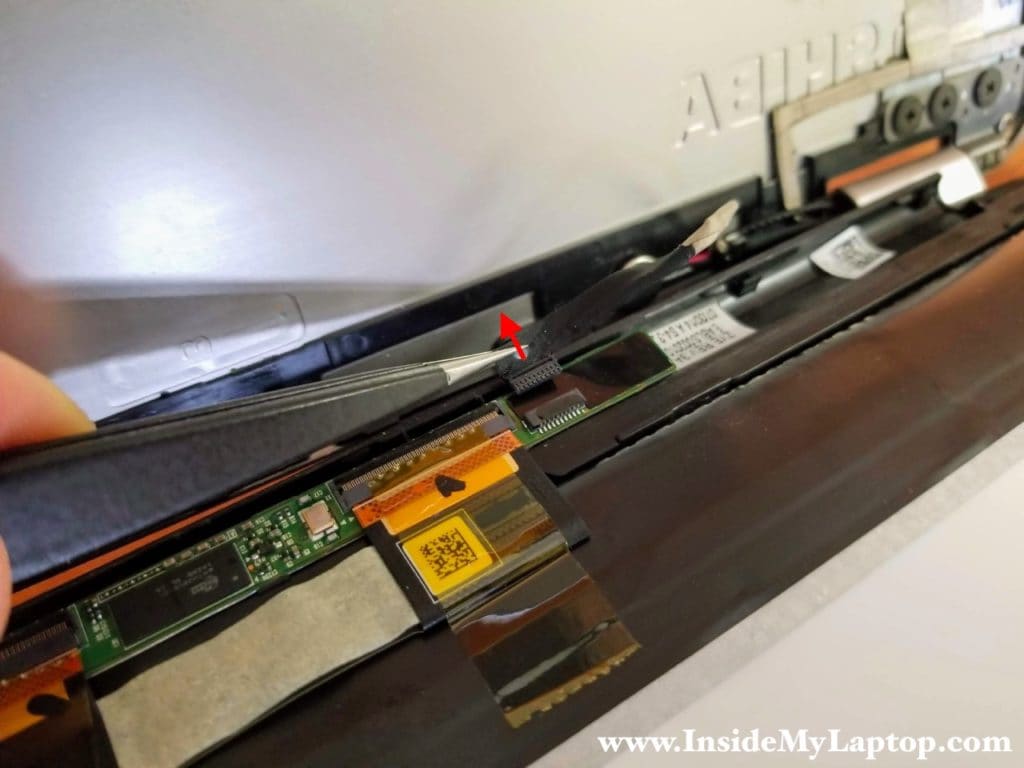
The touch screen cable glued to the frame by adhesive tape.
Carefully separate the cable from the frame.

STEP 7.
Unplug the touch screen cable from the digitizer circuit board.
STEP 8.
Remove the LCD screen assembly completely.
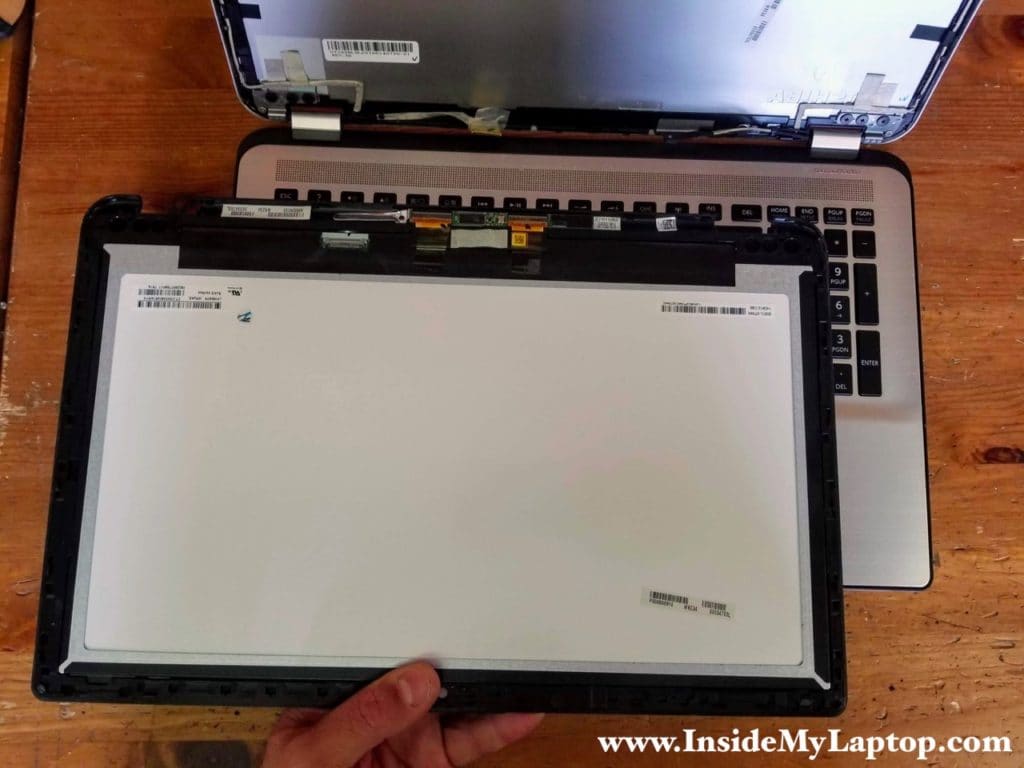
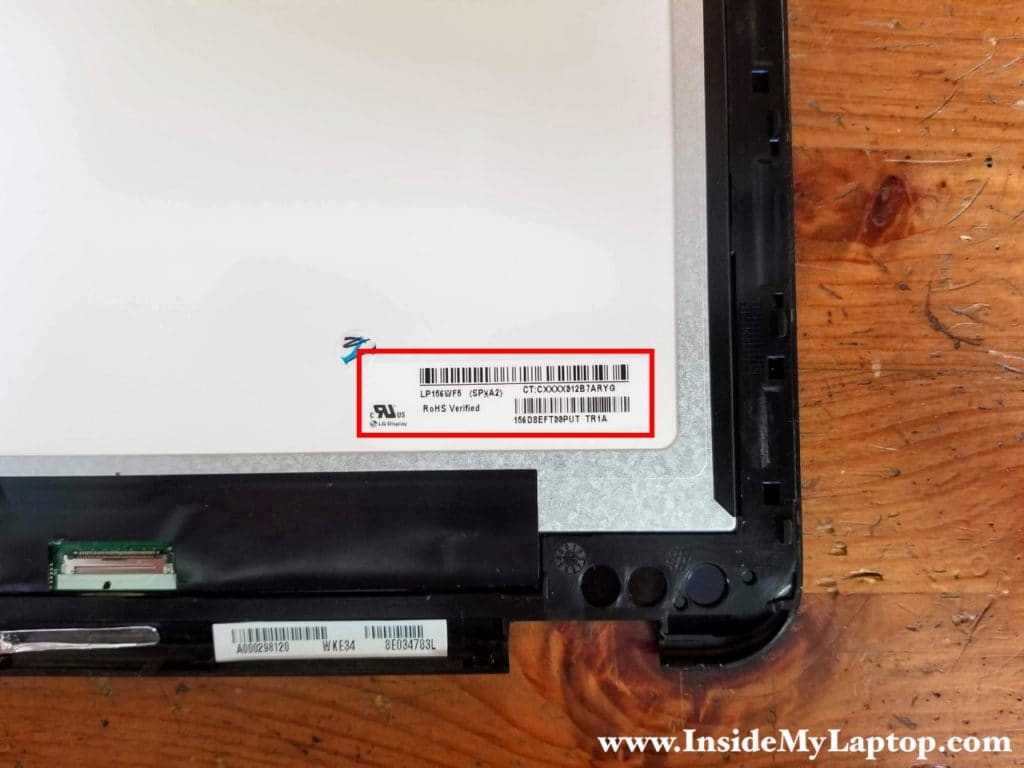
You can find a new replacement LCD screen assembly using the model number from the original part. It’s printed on the back.
In my example, Toshiba Satellite Radius P55W had the following screen installed: LP156WF5 (SP)(A2).
Installing new LCD screen assembly
Reconnect all internal cables and align the new LCD assembly with the back cover. Gently snap the new assembly back to the back cover. Start from the top and move the sides after that.
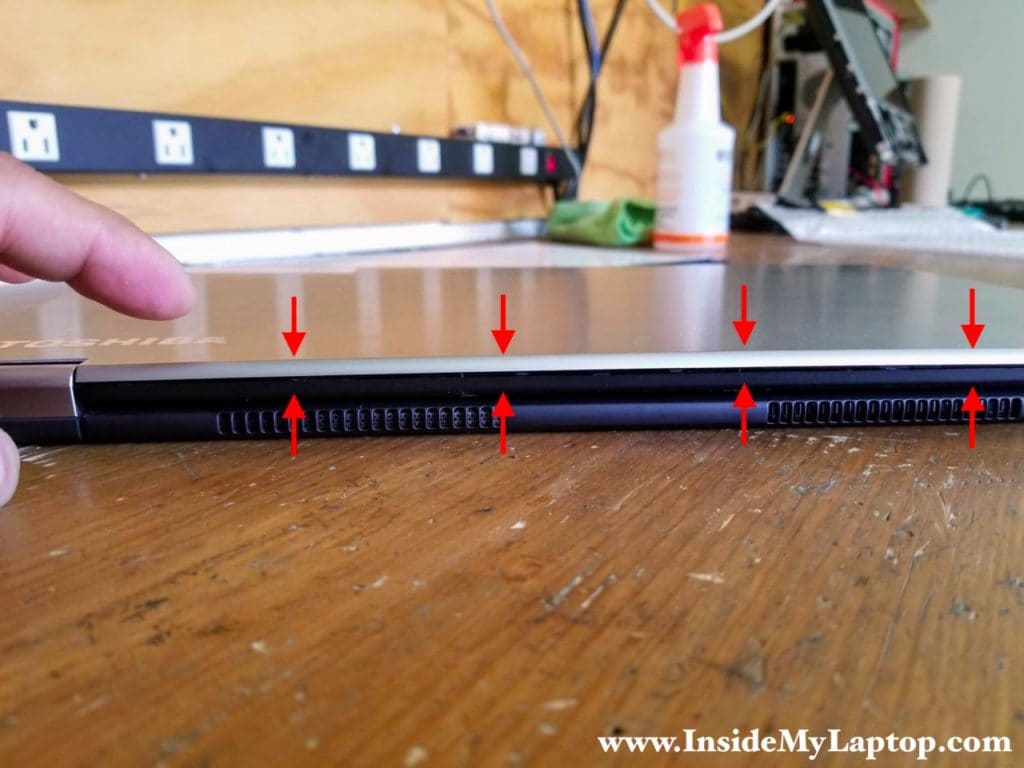
Finally finish up on the bottom.
michael j. patchan
Excellent site, I really appreciate you making the Toshiba site for me to replace the LCD and Glass screen which was broken and leaking fluid which was running on my Replacing the screen and glass was a tricky job since the sticky glue was all over the place in addition to the LCD fluid that was draining all over the place. I have the Toshiba Laptop apart and hopefully your pictures of replacing the plugs will make the computer work again. Thanks again for the information and pictures. Your time and effort for producing a great instructional for our use to repair computers is greatly appreciated.
IML Tech
Thank you! It feels good when my disassembly guides help people.
michael j patchan
Is pressure applied, to reconnect the red connector, by making sure that the connector fit securely male to female OR is it just taped to one connector to the other making contact ? I am confused from your picture and explaination of the reconnecting procedure. When I removed the LCD it was very sticky and wet from the LCD fluid leak and I could not see if the red connector came apart from pulling on it or just by removing the tape that was covering it.
Thank you for your clarification, I really appreciate it.
IML Tech
Michael, this is male to female type. You have to use just a little bit of force to fit one into another. The male part (located at the end of the cable) must fit into the female part (located on the LCD screen).
michael j. patchan
I didn’t intend to be texting again, but I wanted you to understand my total problem with the LCD replacement. When on vacation, I would pack the Toshiba in my suitcase and the airlines may have packed heavy objects on the suitcase, perhaps causing a crack in the LCD and over the years a LCD failure. The leakage was a shock to me as I was not aware of liquid in the LCD. Leakage caused a problem in removal in addition to the sticky substance.
I just wanted to update you that I am in the process of replacing the LCD and the glass due to it breaking in the removal.
Perhaps this may assist someone in the future, that there is liquid in a LCD and may crack and leak if damaged.
Thanks again.
michael j. patchan
IML Tech
Michael, there is NO liquid inside the LCD. It’s not an aquarium. 🙂
I’ve repaired thousands of different laptops but never seen a cracked screen causing the damage you are describing.
Most likely something was spilled on your laptop.
michael j. patchan
I found this info on the internet which noted LCD leakage, that is why I made the comment. Here is a copy of the info:
A Toshiba Laptop LCD Leaking
Crack in laptop screen is “leaking”?
I dropped my laptop on the floor when i was lying in bed and a crack formed on the bottom left corner, connecting from the side to the bottom. When it cracked there was like red color coming from the crack. I can still read in the red parts, but they are stuck red. After a few days, a lot of the red disappeared, leaving only about an inch of black color which i can’t see anything through. Recently the red color has started leaking out of it again along parts of the crack, one part stretching up to the top of the screen. How can I stop this “leaking” and what is it exactly. It’s not bad right now, I just don’t want it getting worse. I don’t know anything about monitors. My laptop is a Dell inspiron 1545. Thanks
9 years ago
Best Answer
The screen is called and LCD, which stands for Liquid Crystal Display. This means that there is liquid in the screen which is used to make it work. There are also two thin glass plates that are sandwiched together inside that help create the images you see. When there is enough impact force or pressure, the glass inside will crack and the liquid inside will leak out, which is what you’re seeing.
If the monitor/computer is not moved, the damage will likely not get worse, but if it’s moved, it will cause the damage to grow in size slowly. Also, just using the computer will cause some heat to build and also cause the damage to grow slowly.
The only way to fix it will be to replace the LCD screen panel inside. It’s not too hard to do if you know what you’re doing, otherwise you’d need to have someone do it for you. Depending on the cost of repair, it might be cheaper to get another computer. Call around and get some repair quotes.
Until I found and read this article, I thought there was no liquid in the LCD. Is the person wrong in his conclusion ? Sorry, but I had a copy of the information and thought you may have further info on the matter or chose to add it in your LCD replacements.
Akeel Maroof
Hi. Thanks for your great work. May I know where you got a new screen, please?
IML Tech
You can find it on eBay. Search for “P55W screen”.