
In this guide I explain how to remove the keyboard from a Dell Inspiron 700m laptop.
You can use the guide for replacing the keyboard or removing the hidden memory module.
There are two memory slots in this model. One of them located on the button and another one under the keyboard.
Let’s take it apart. First of all, turn it off and remove the battery.
STEP 1.
Remove two screws securing memory cover on the bottom.

STEP 2.
Carefully spread latches on both sides of the slot.
The memory module will pop up at a 30 degree angle.
Pull the memory by the edges.
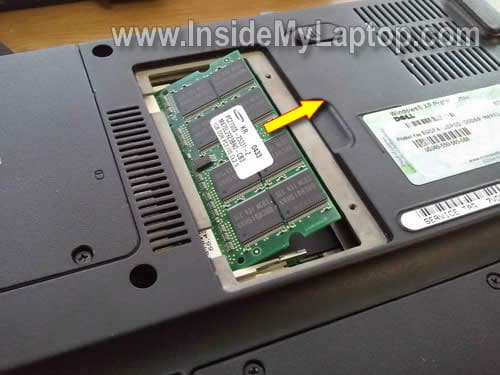
In the following steps we’ll remove the keyboard and access the internal slot.
STEP 3.
Lift up the left side of the power button cover with a small screwdriver.
Continue removing the cover with your fingers.
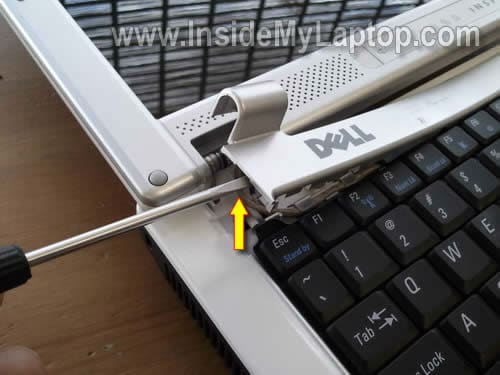
The power button cover has been removed.
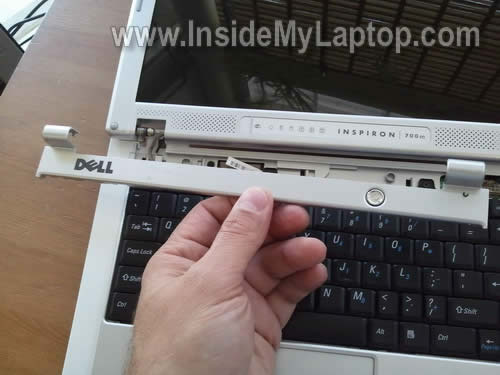
STEP 4.
Remove two screws securing the keyboard.
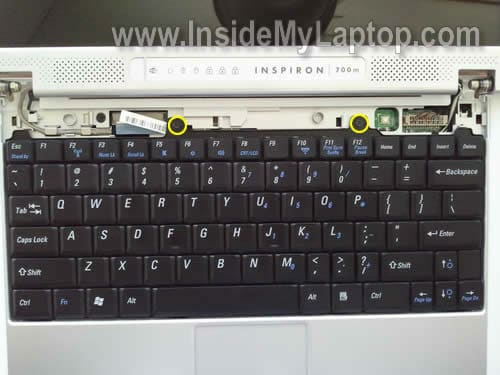
STEP 5.
Lift up the keyboard from the laptop. Be careful because it is still attached to the motherboard.

STEP 6.
If you are replacing the keyboard, you have to unlock the cable connector first. Only after that you can pull the cable from the connector.
In order to unlock the connector, very carefully move the locking clip about 2 millimeters towards the LCD screen.
Do not disconnect the locking clip from the connector base. The connector clip must stay attached to the base.
The cable is jammed between the locking clip and connector base.
After you unlock the connector, you can pull the cable and remove the keyboard completely.

STEP 7.
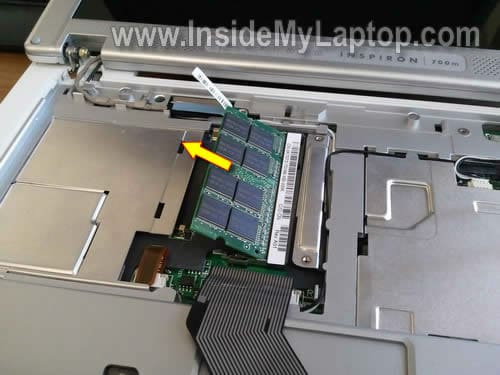
If you are just removing the internal memory module, it’s not necessary to disconnect the keyboard. Simply turn it upside down and place on the palmrest.
Remove two screws from the internal memory slot cover. Remove the cover.

STEP 8.
Remove memory module from the internal slot same way you removed from the external slot.
scott
You are awesome, My sound does not work on my 700m and needed the validation to go ahead and take the system apart….thanks!
Mario Moreno
I’m a cheap Bas#@$% and when the computer tech told me it would cost big $$$$ to fix the key board and replace the hard drive on my machine I found this website. The Speaker solution was a bonus! I’m no technical expert but i know my way around electronics, since I was ten I have had my way with (much to my parents dismay) countless VCR’s, Cathode ray tube TVs, and a few DVD players. Do-it myself cost is a fraction of that! For what i need it for I’m happy with my little 700M
Thanks!
KS fr Hongkong
Thanks for your great site.
The other day a friend gave me his dying Dell 700m, I found the fan cannot move because of dust jammed. The hard disk had too many bad sectors, most probably due to heat problem, and also the speakers’ wire broken problem.
Follow your instructions I fixed all these and had this tiny laptop playing with.
Calde
I followed the steps above the cables were indeed broken but the worse part is that my screen was working perfectly and now its gone black, I can only see with an external monitor, Help, how do I fix that?
Frank
Thank you very much. Your instructions and shots are very clear and allowed me to upgrade my 700M in in just 10 minutes, start to finish.
Thanks again.
Frank
Deborah
Thanks for the great tutorial, my trusty old 700m now has the max memory. Next project is to fix the sound, and I see you have a guide for that as well. >’.'<