In this post I show how to disassemble Toshiba Satellite C55D C55 laptops. In the first part I will take apart the laptop base and in the second part will remove the LCD screen.
You can use this disassembly guide for the following Toshiba Satellite models:
- C55D-A5107, C55D-A5108, C55D-A5102, C55D-A5146, C55D-A5150, C55D-A5163, C55D-A5170, C55D-A5175, C55D-A5201, C55D-A5206
- C55-A5100, C55-A5104, C55-A5105, C55-A5126, C55-5137, C55-5140, C55-A5166, C55-A5172, C55-A5180, C55-A5180
- C50-A, C55-A, C50D-A, C55D-A
How to disassemble the laptop base.
STEP 1.
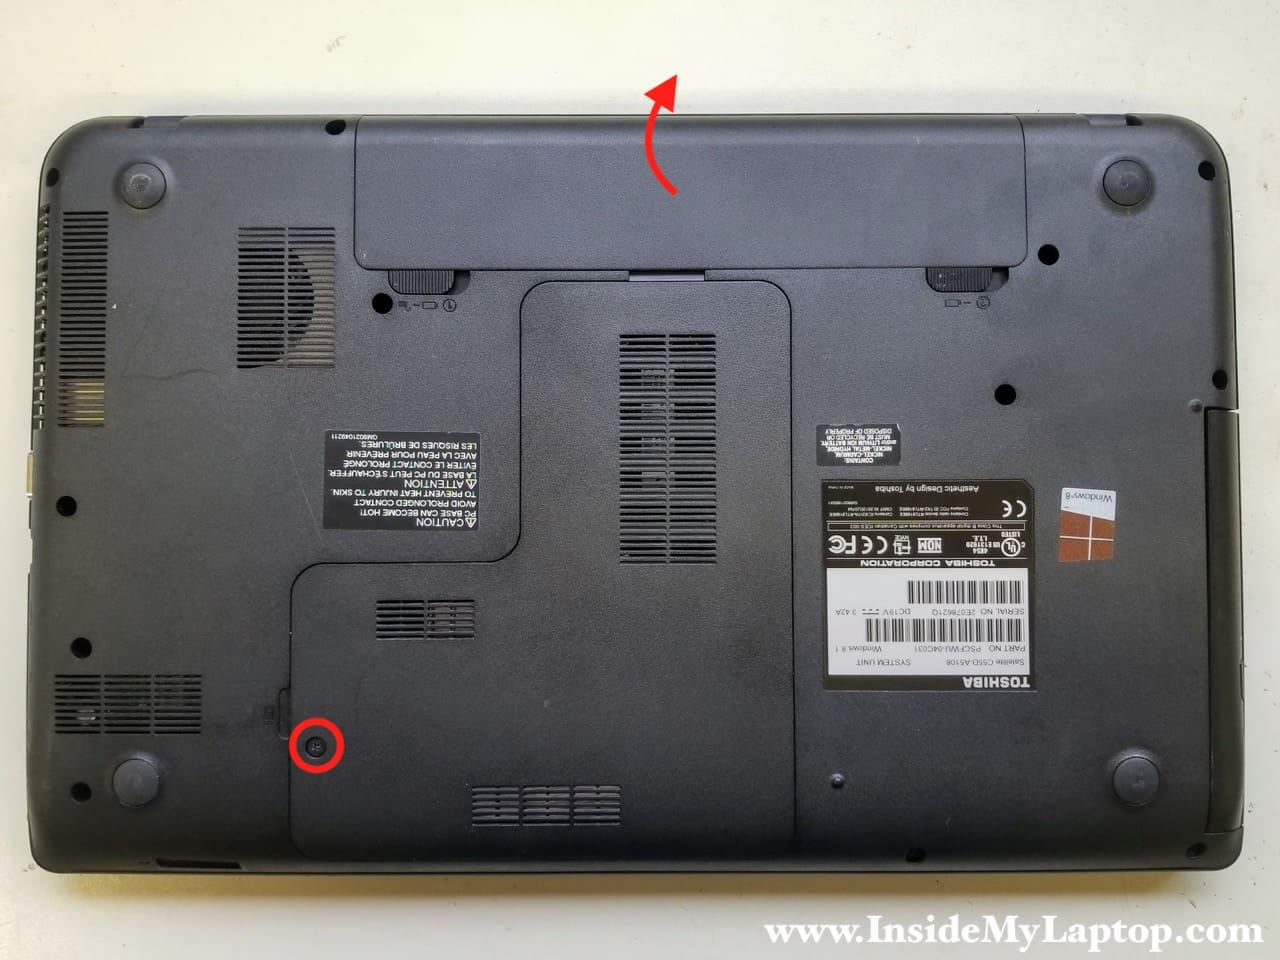
Unlock and remove the battery.
Remove one screw fastening the service cover. Remove the cover.
Replacement battery model: PA5109U-1BRS.
STEP 2.
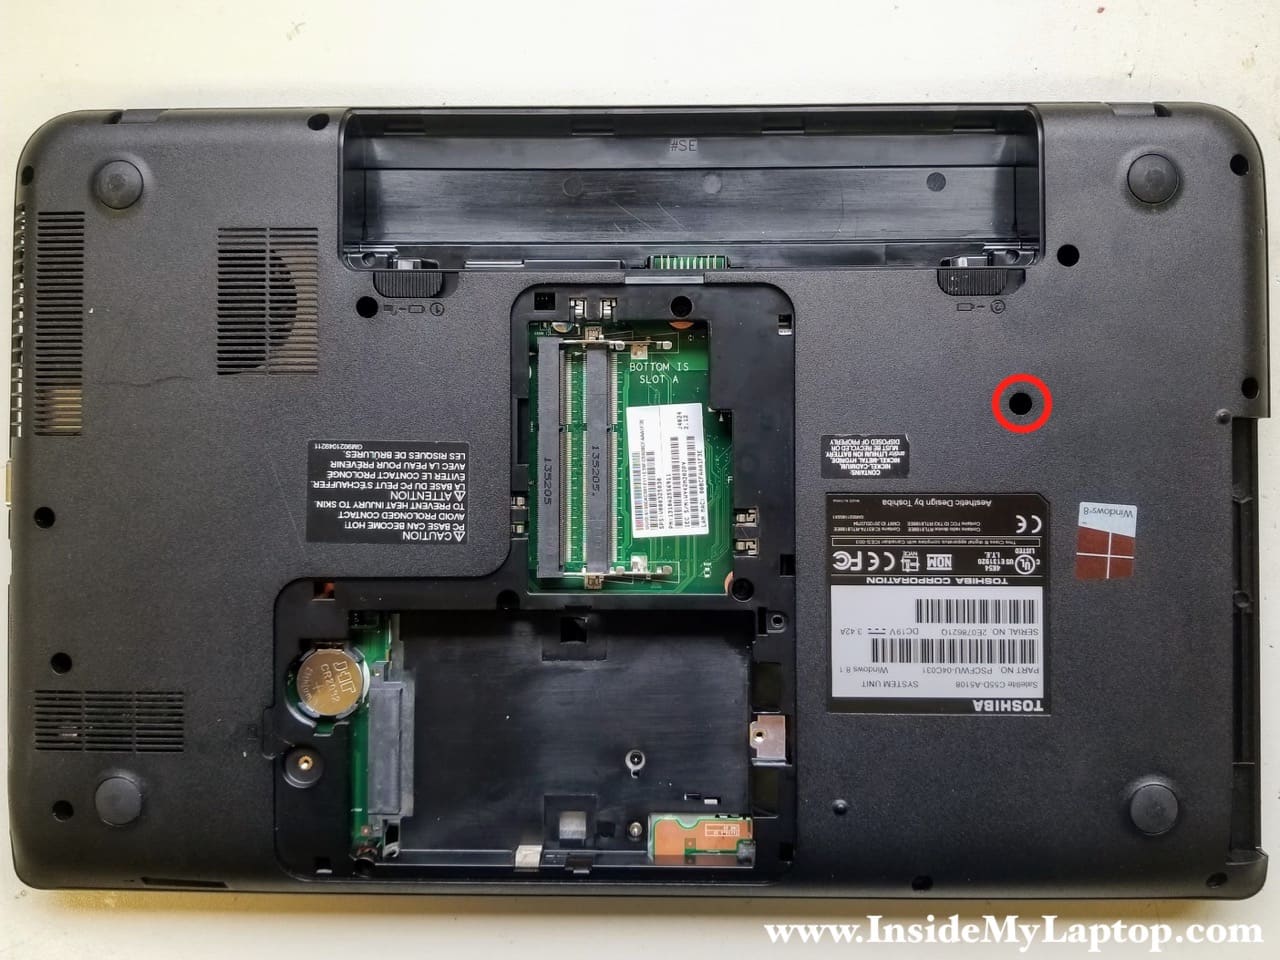
Remove one screw securing the optical CD DVD drive (yellow circle). Pull the drive out and removed it from the base.
Remove one screw securing the hard drive assembly (red circle).

STEP 3.
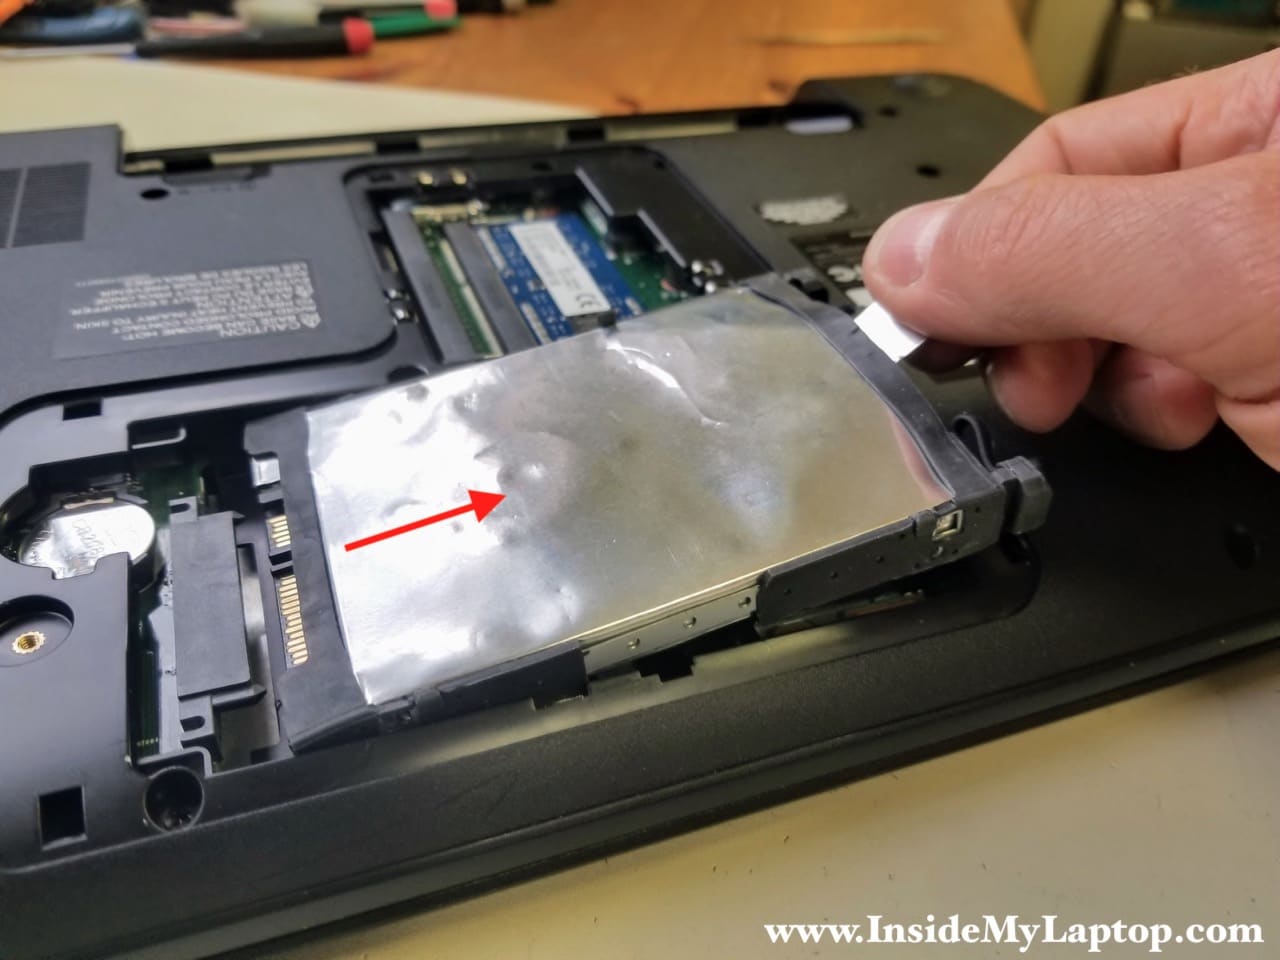
Lift up the back side of the hard drive using the aluminum tab on the shielding.
Pull the hard drive to the right to disconnect it from the motherboard and remove it from the base.
I recommend upgrading this regular hard drive to a 2.5″ SATA solid state drive to improve laptop performance.
STEP 4.
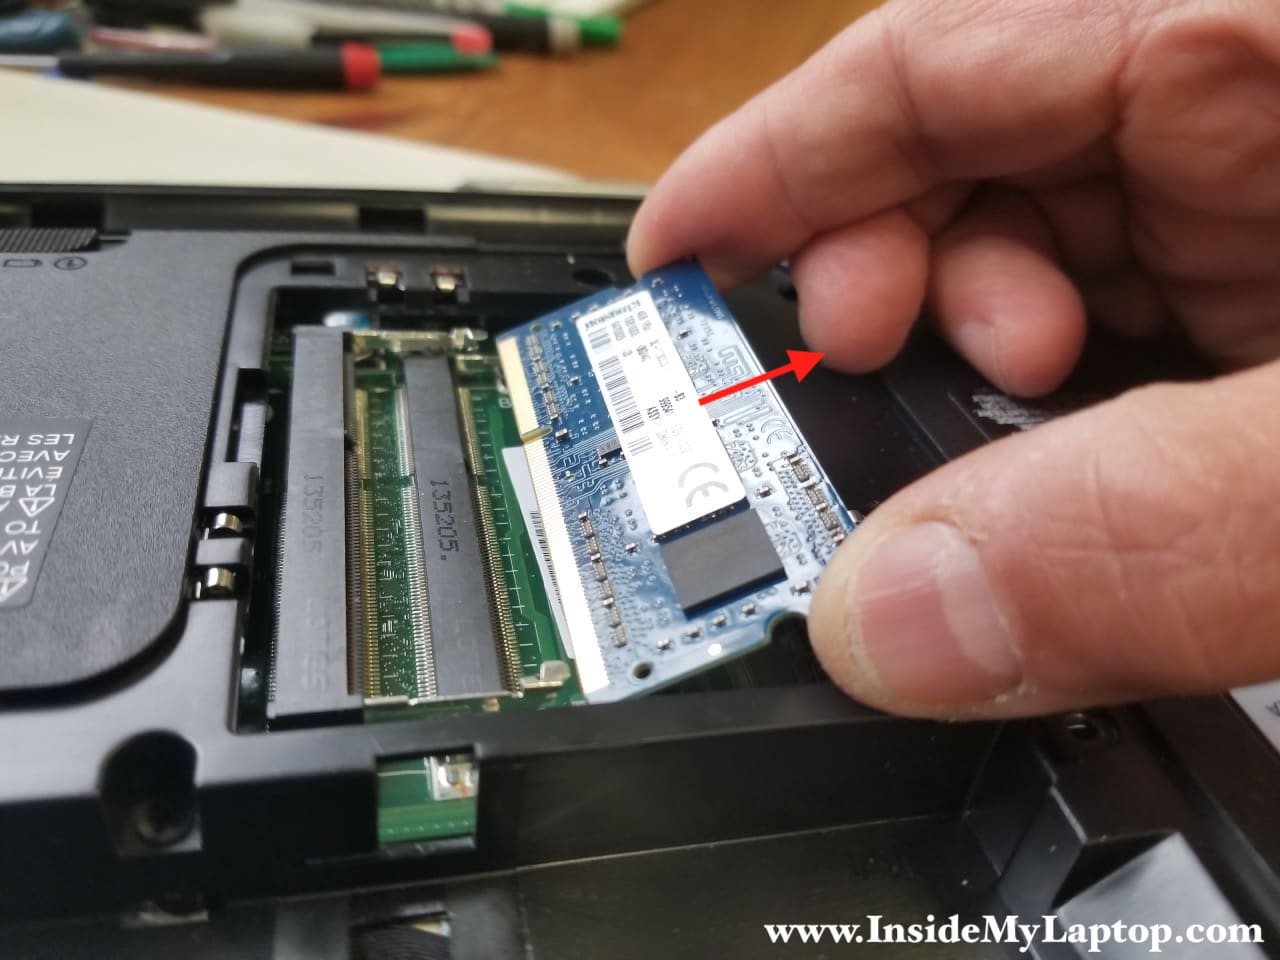
There are two memory RAM slots on the motherboard. Remove the memory module. This step is optional and you can leave the memory module connected.
You can install up to 16GB (2x8GB) DDR3-12800 SODIMM RAM modules into these slots.
STEP 5.
In order to remove the keyboard you’ll have to remove only one screw on the bottom.
STEP 6.
Removing the keyboard can be a little bit tricky on Toshiba Satellite C55D C55 laptops.
There are seven hidden latches securing the keyboard to the palmrest assembly. You need a thin metal case opener (or a knife) to unfasten these latches.
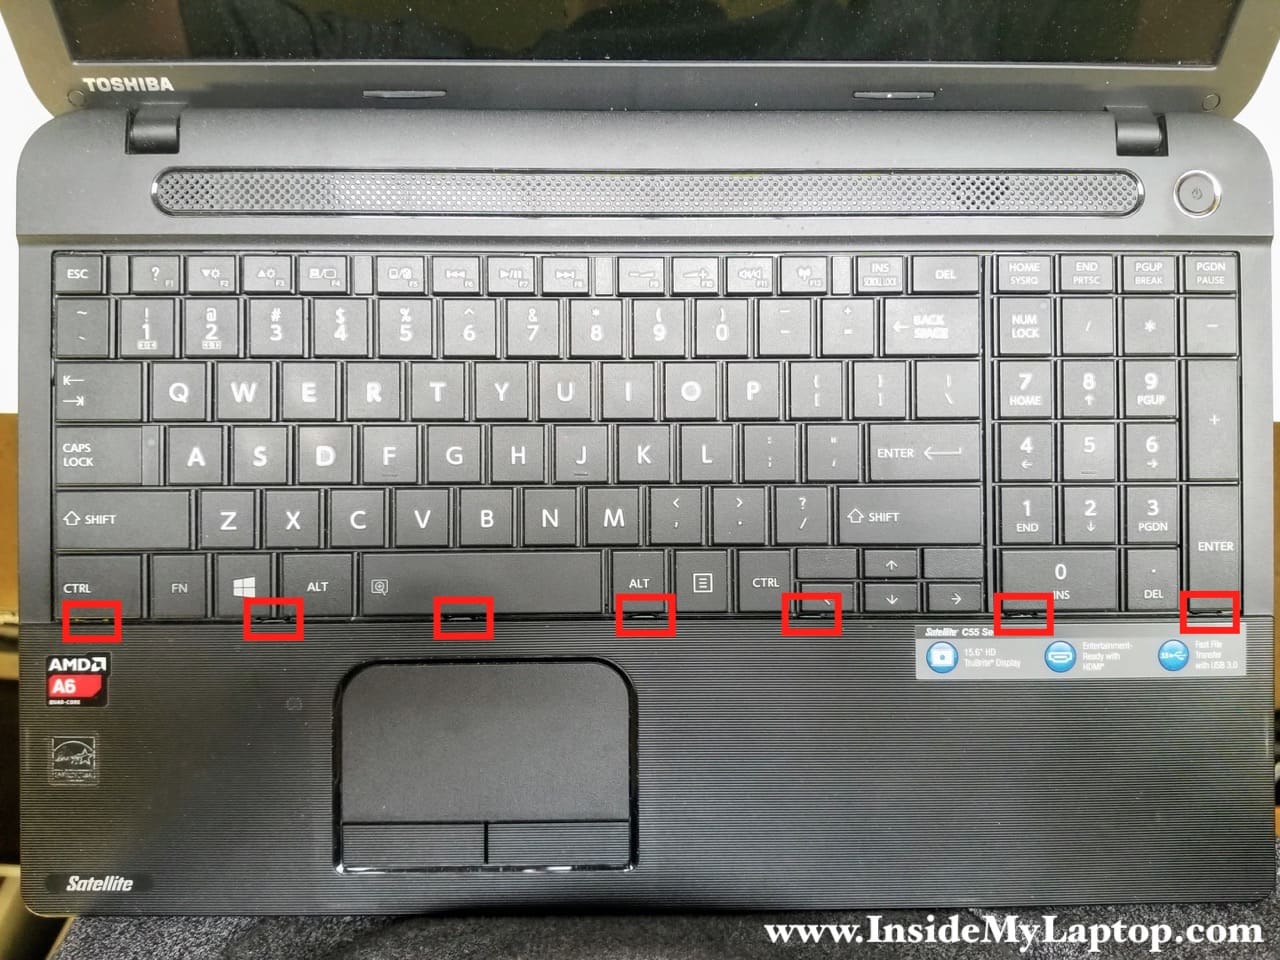
Insert the case opener between the keyboard and palmrest so the latch moves inside.
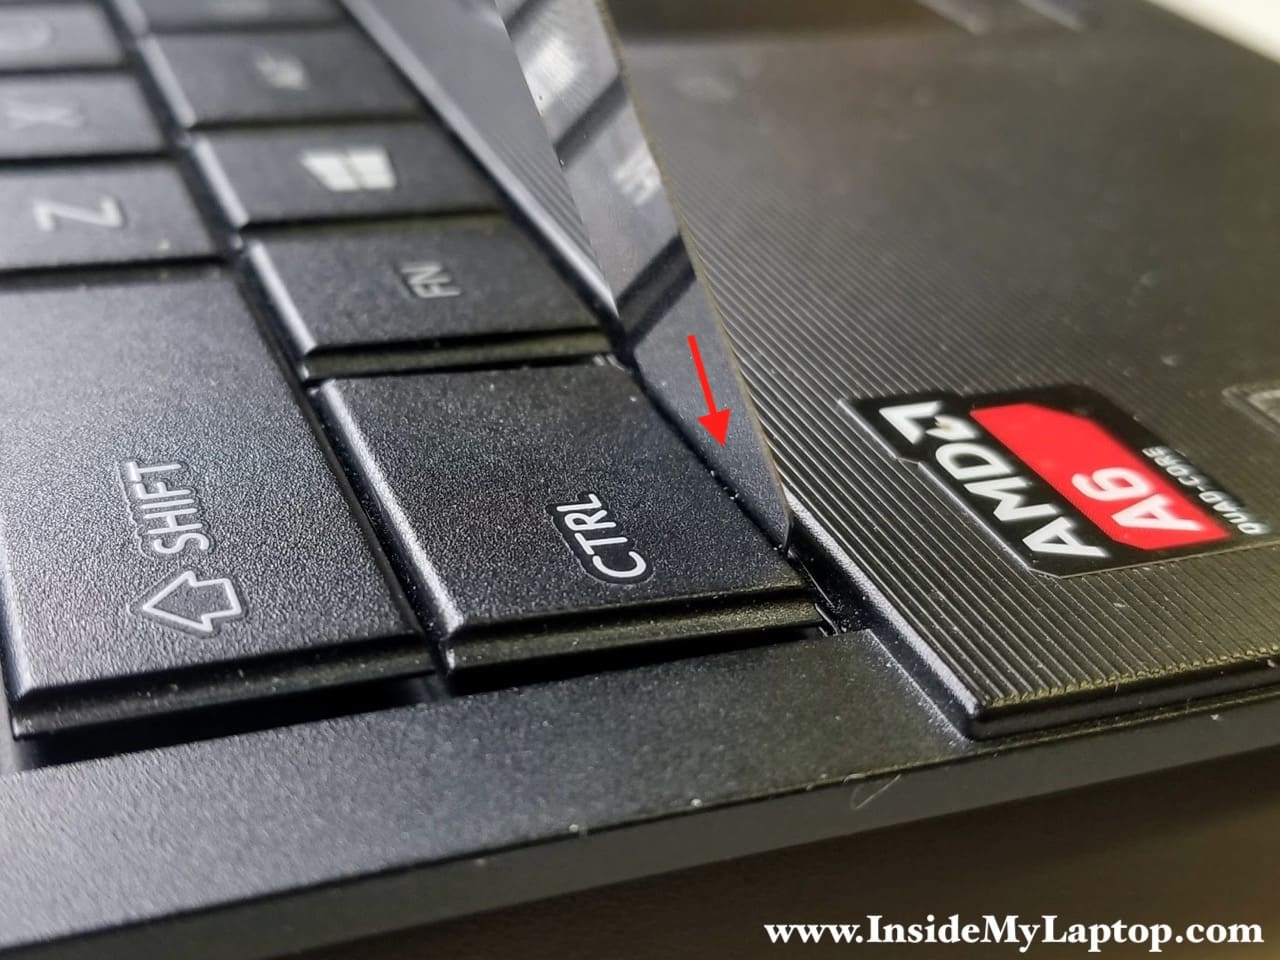
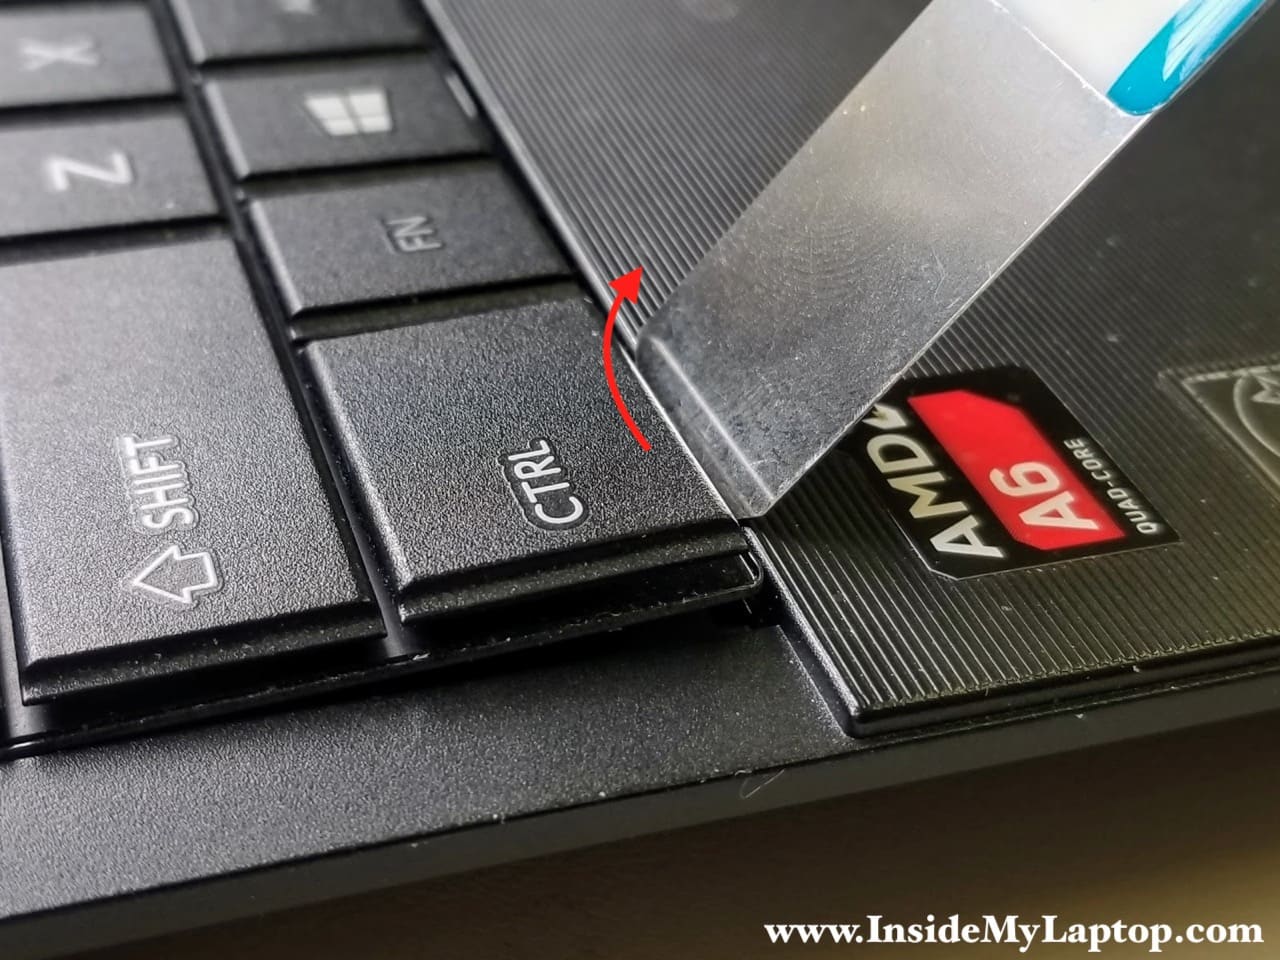
Lift up the keyboard to detach it from the latch.
STEP 7.
Unfasten all latches and separate the keyboard from the top case.

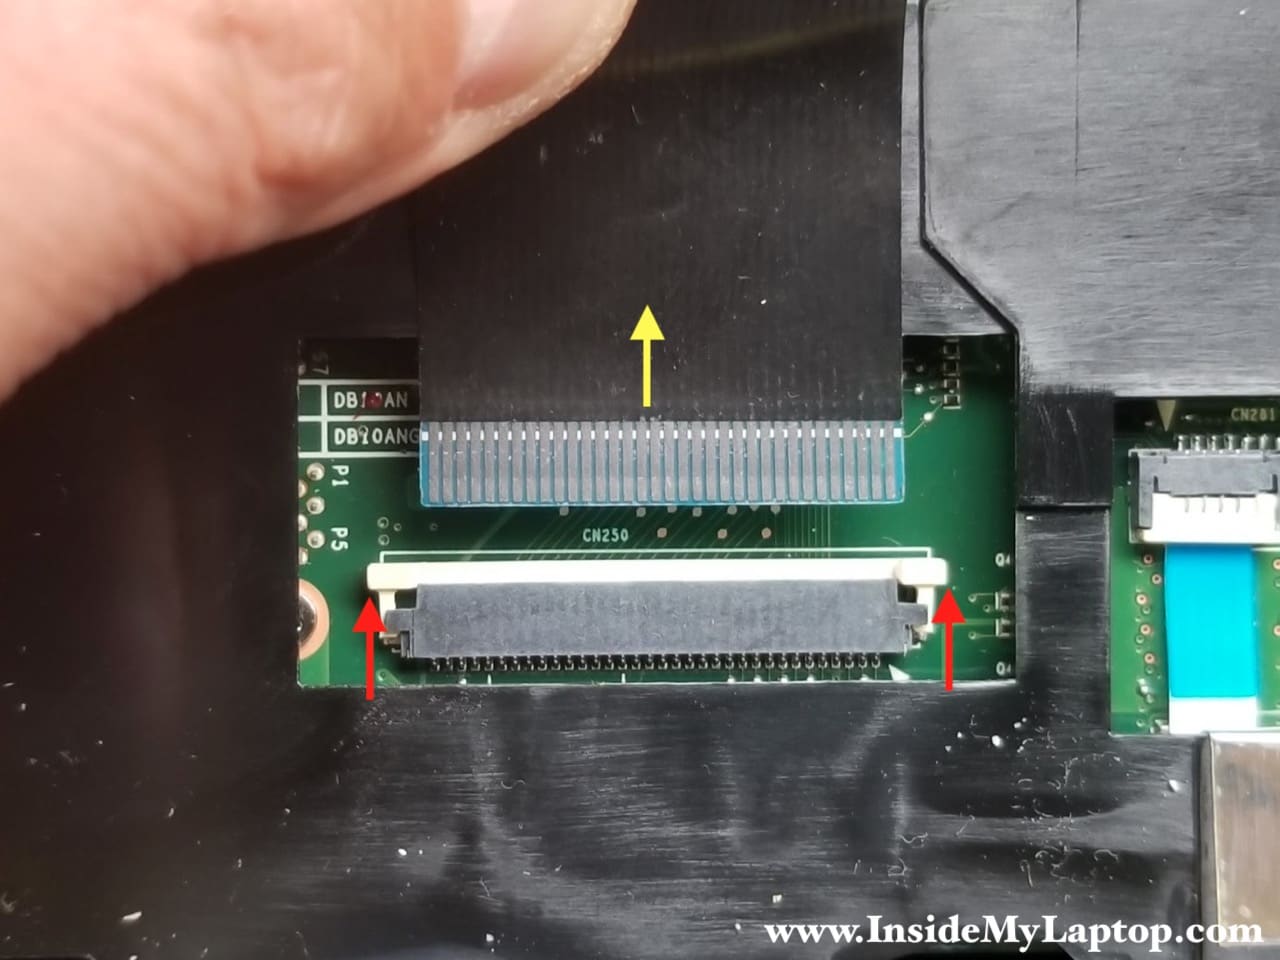
STEP 8.
Move the keyboard towards the LCD screen to access the cable underneath.
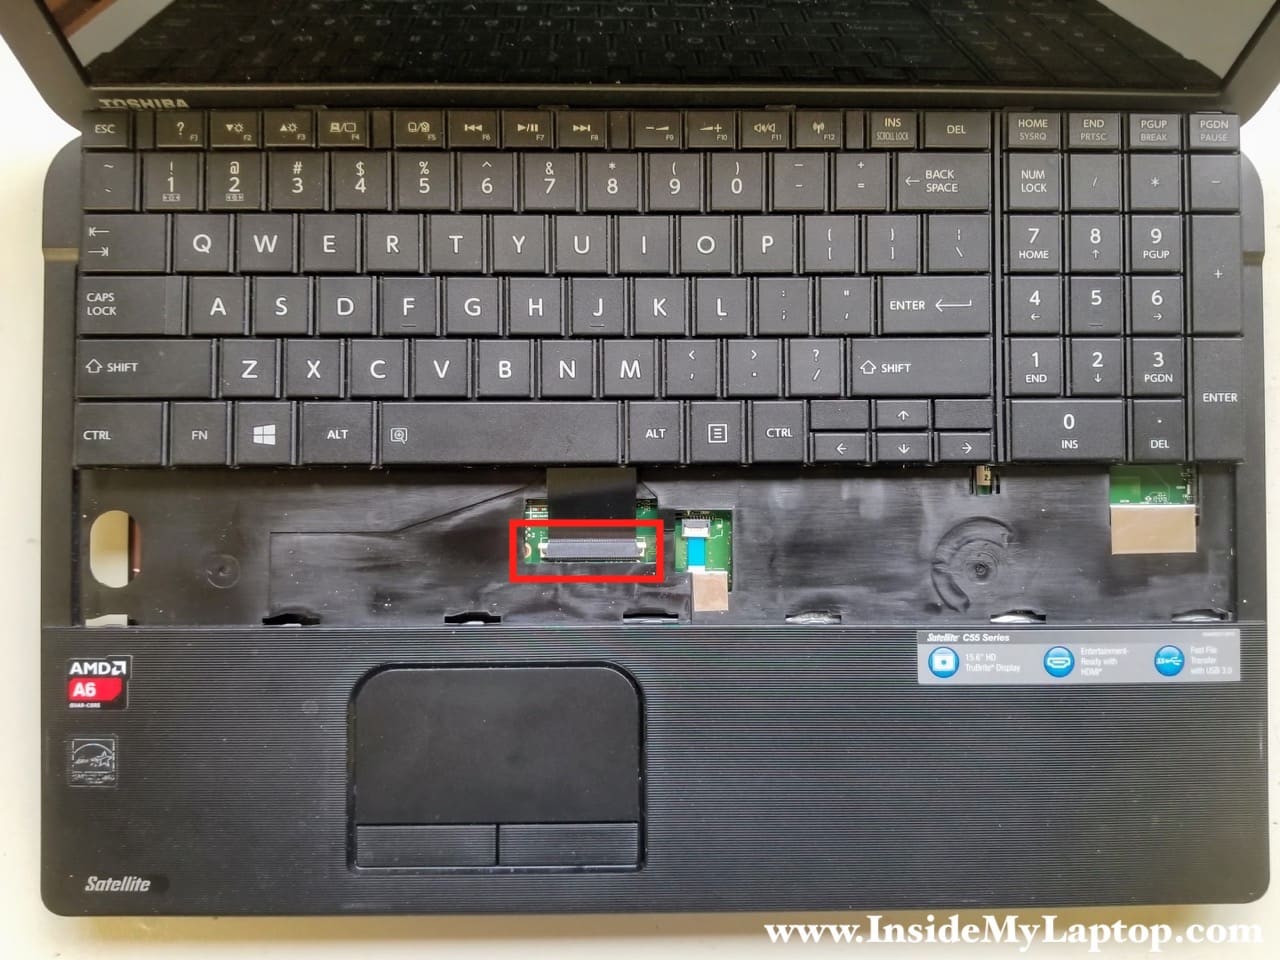
Here’s how to release the cable.
- Slide the locking tab about 2 millimeters up (red arrows).
- Pull the keyboard cable out.
Now you can remove the keyboard completely.
STEP 9.
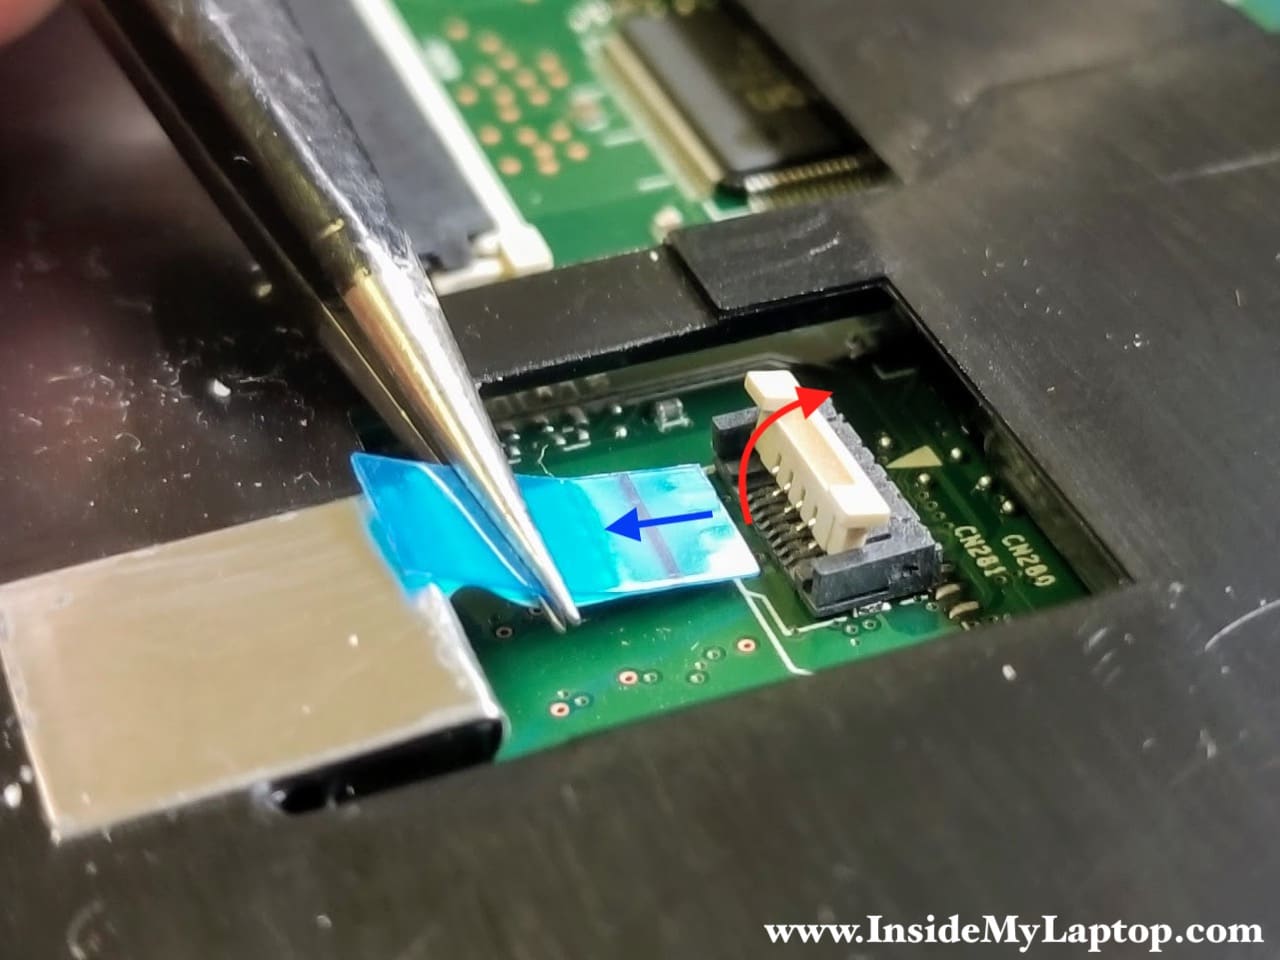
If you are going to remove the motherboard, you will have to disconnect the touchpad and speakers cables.
Here’s how to release the touchpad cable:
- Unlock the connector by lifting up the locking tab (red arrow). It will open up at a 90 degree angle.
- Pull the touchpad cable out of the connector.
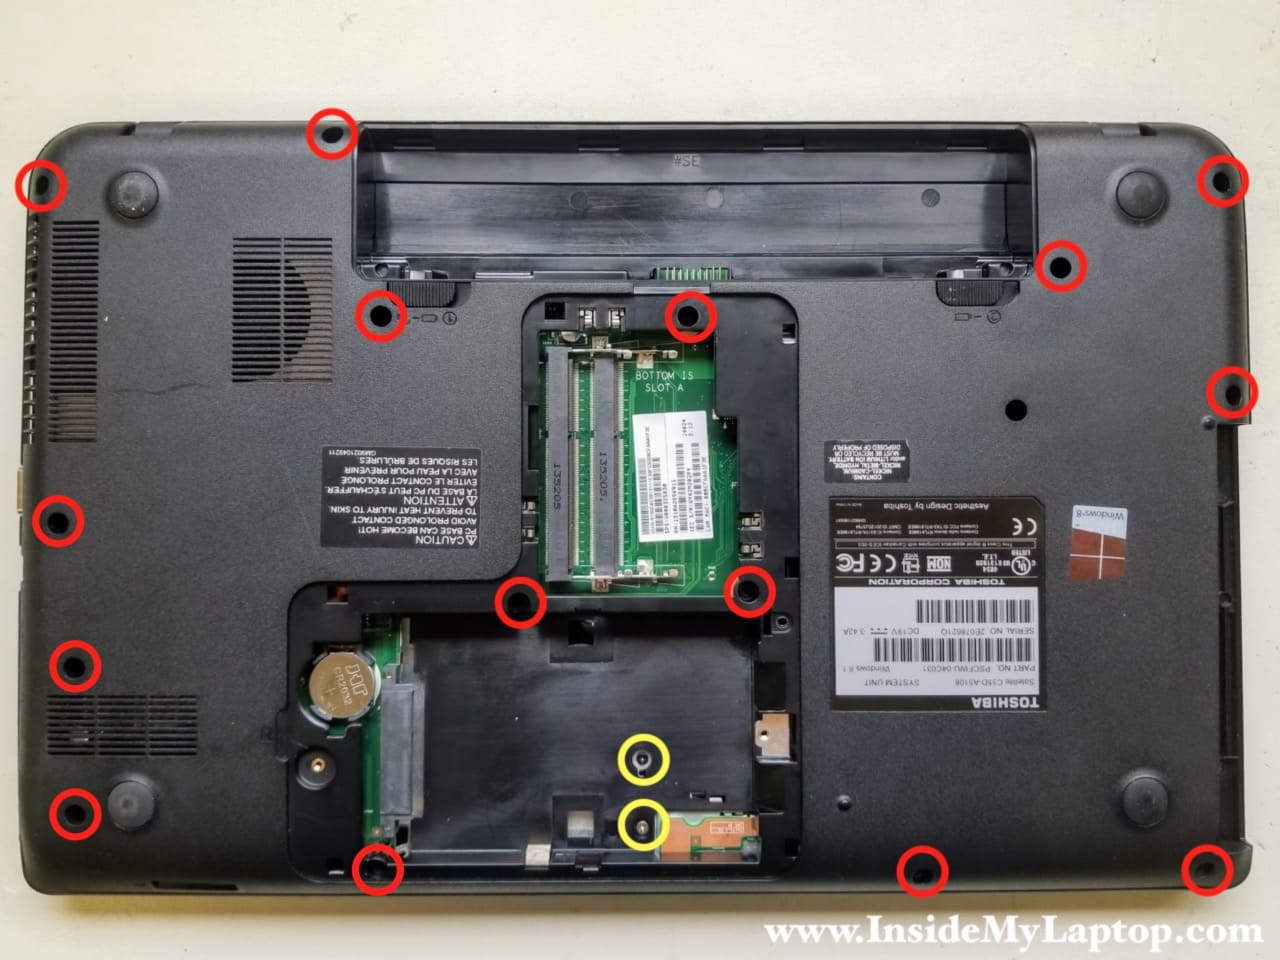
STEP 10.
Remove all screws fastening the bottom case. Don’t forget about two screws (yellow circles) located in the hard drive bay.
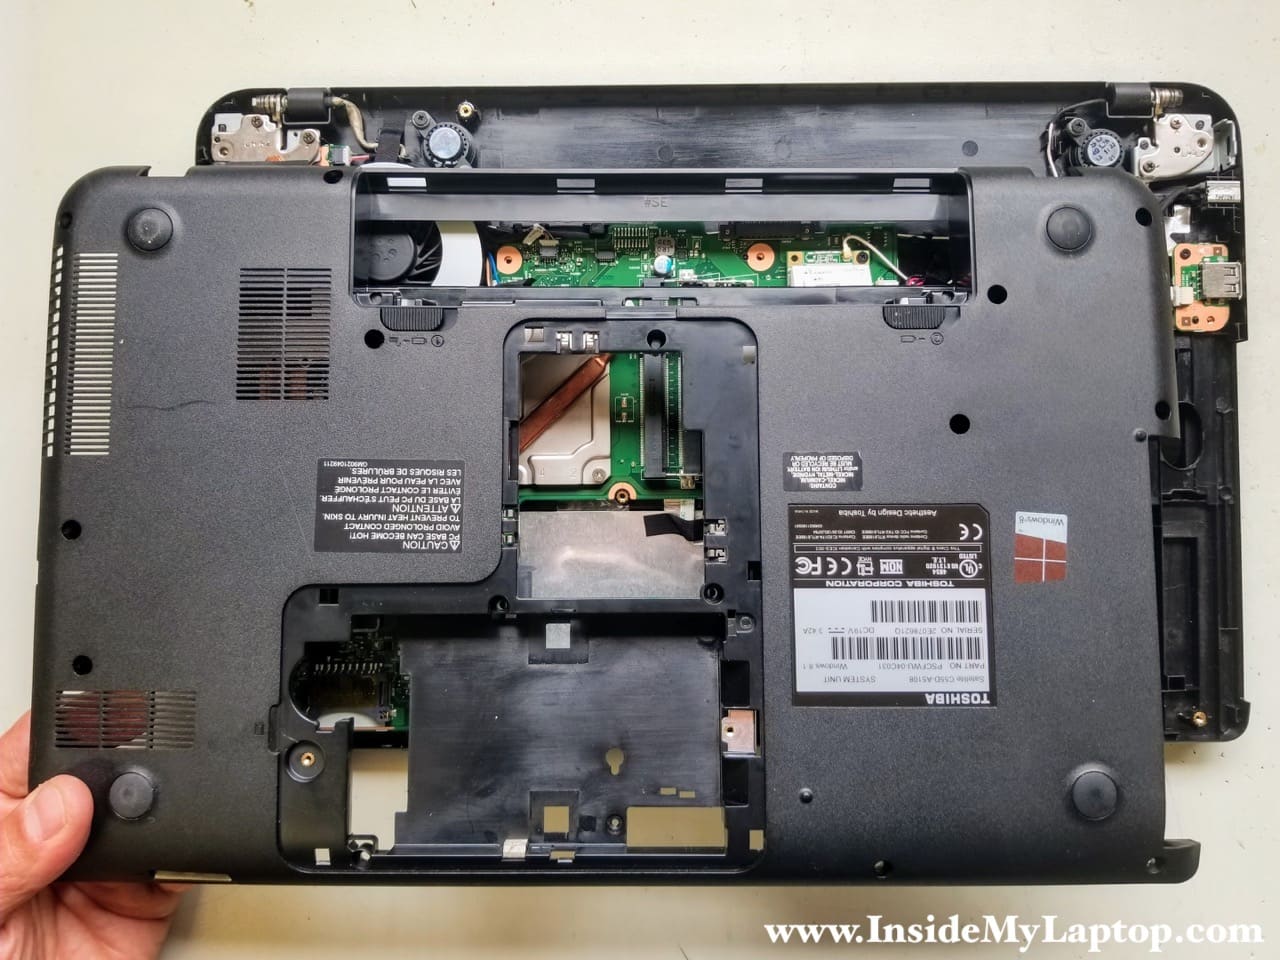
STEP 11.
Detach the bottom case from the rest of the laptop.
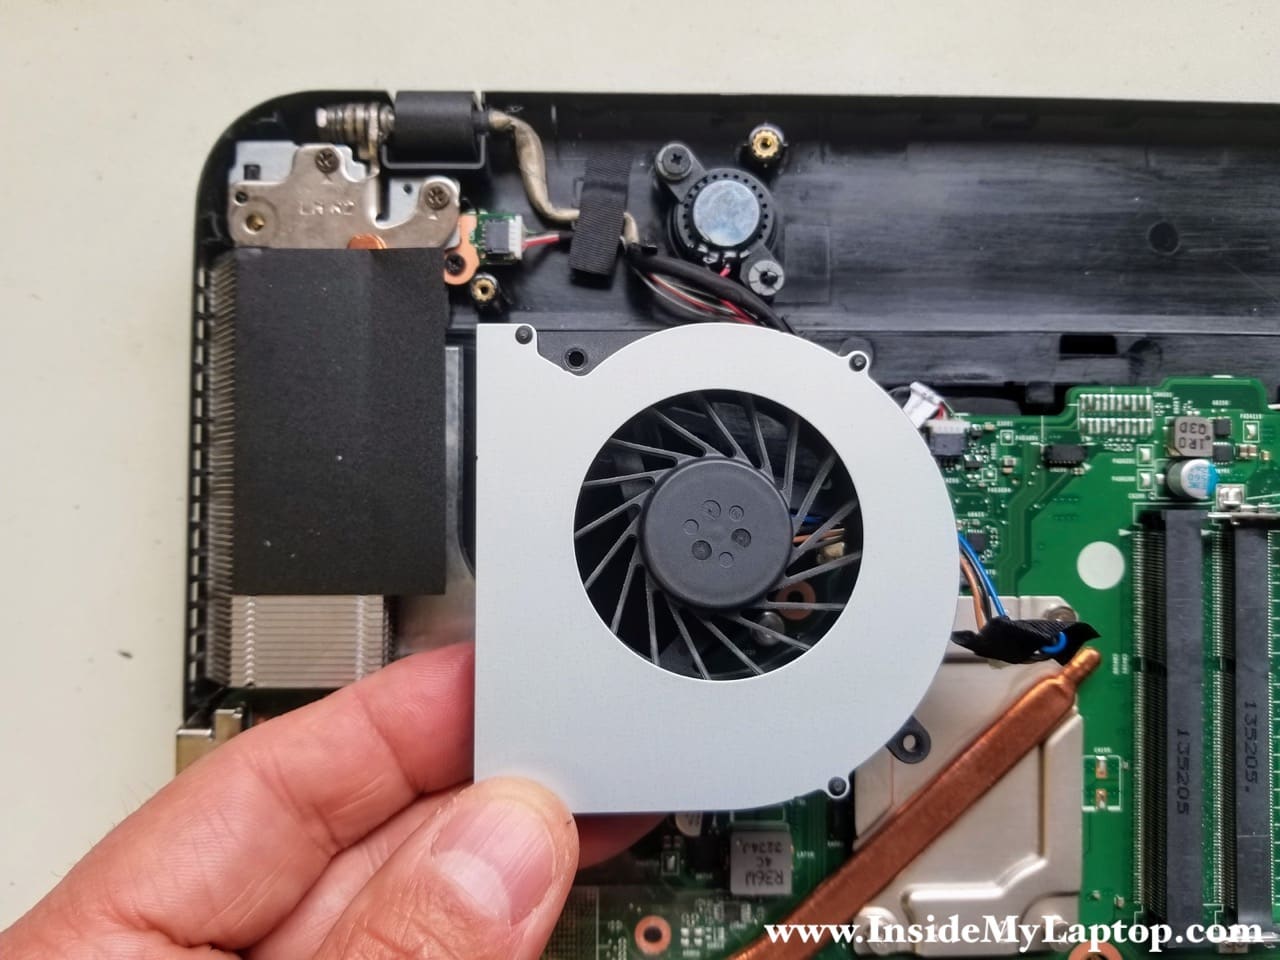
STEP 12.
Remove two screws attaching the cooling fan to the top case. Unplug the fan cable from the motherboard.

STEP 13.
Remove the cooling fan.
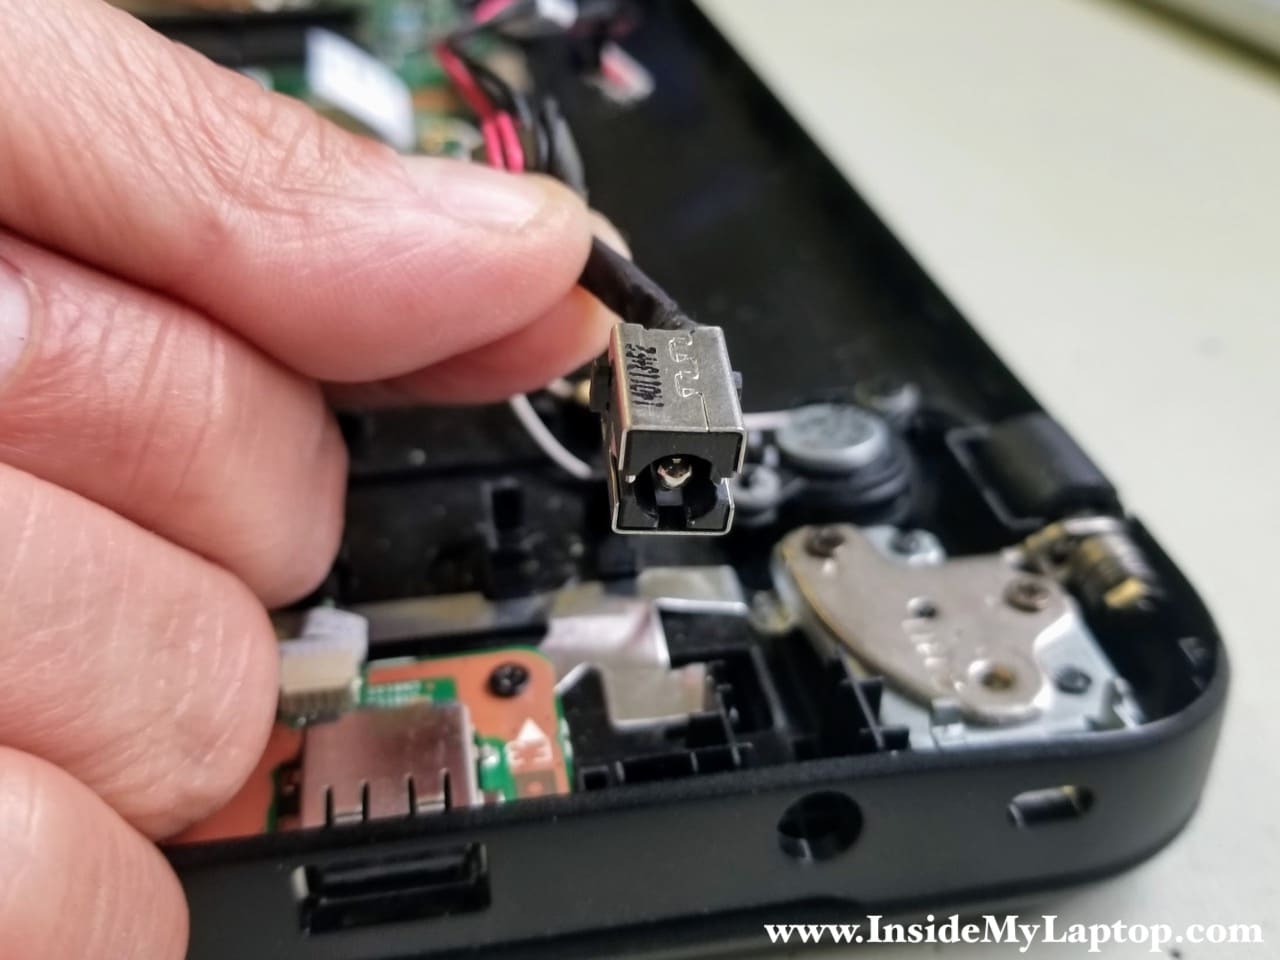
STEP 14.
Disconnect the DC power jack cable from the motherboard.

STEP 15.
Remove the DC jack harness.
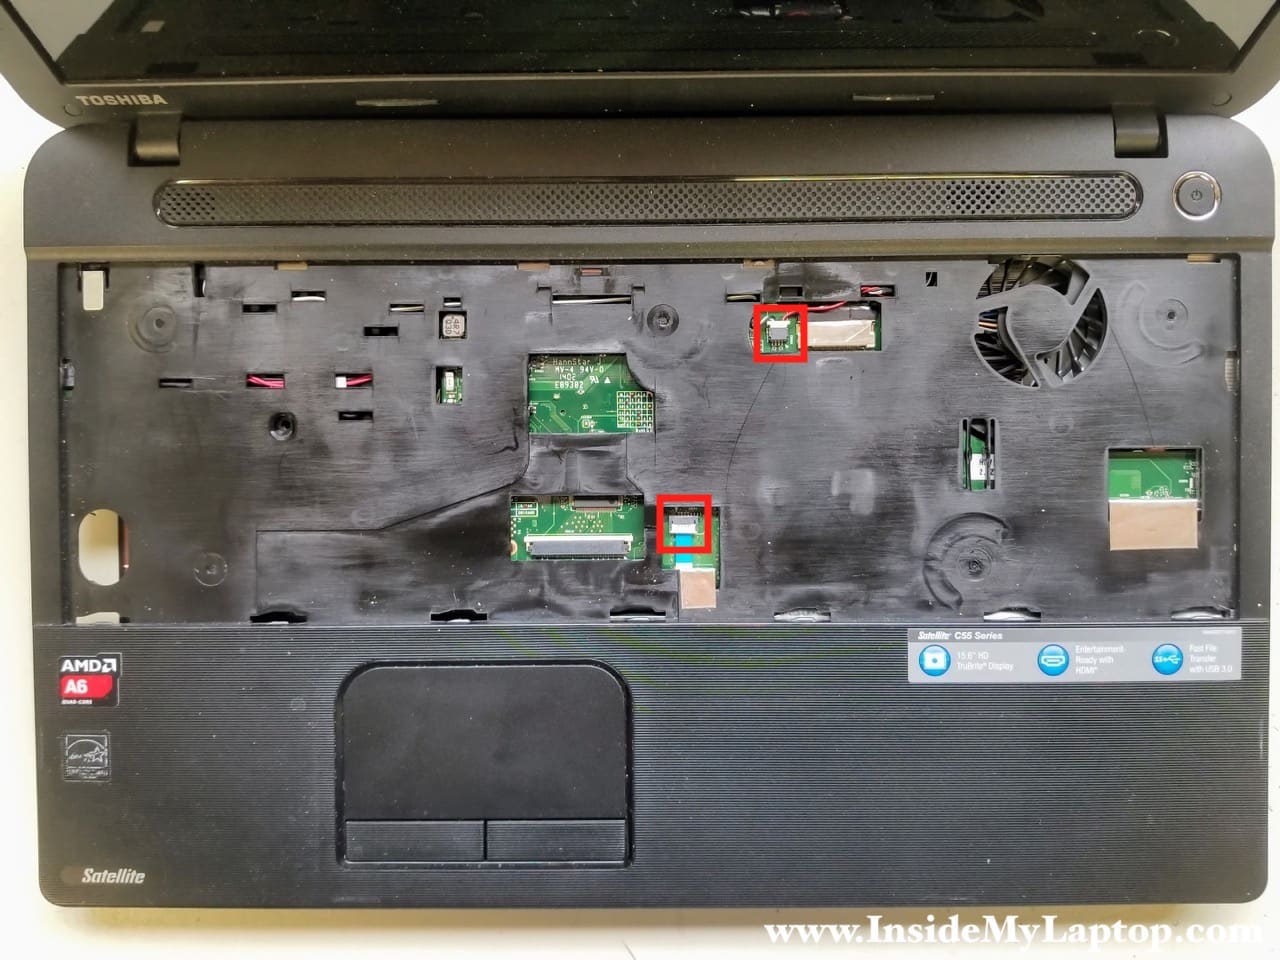
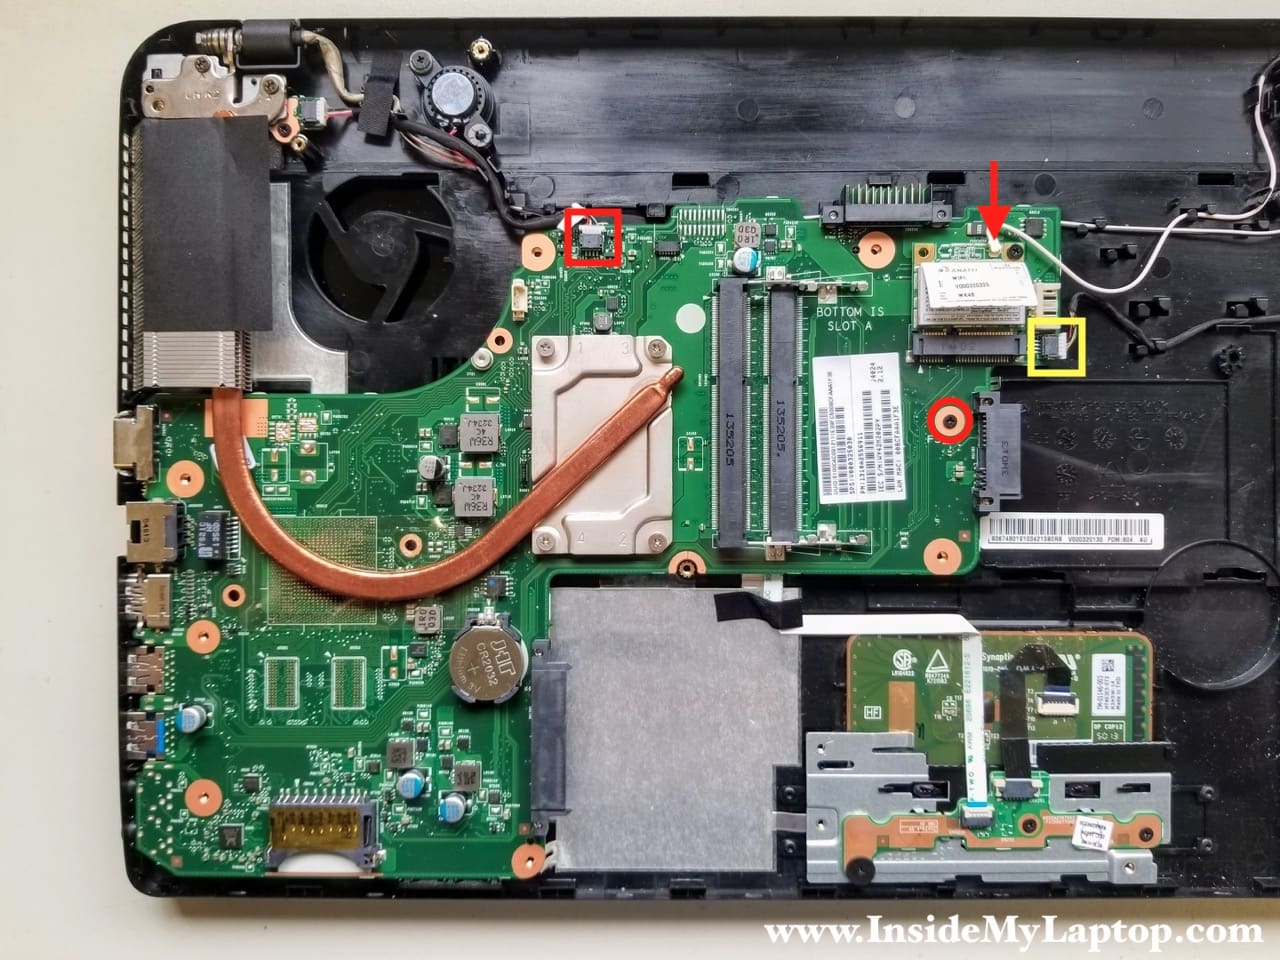
STEP 16.
Disconnect the power button board cable (red square).
Disconnect the Wi-Fi antenna cable from the wireless card (red arrow).
Disconnect the USB board cable (yellow circle).
Remove one screw securing the motherboard to the top case.
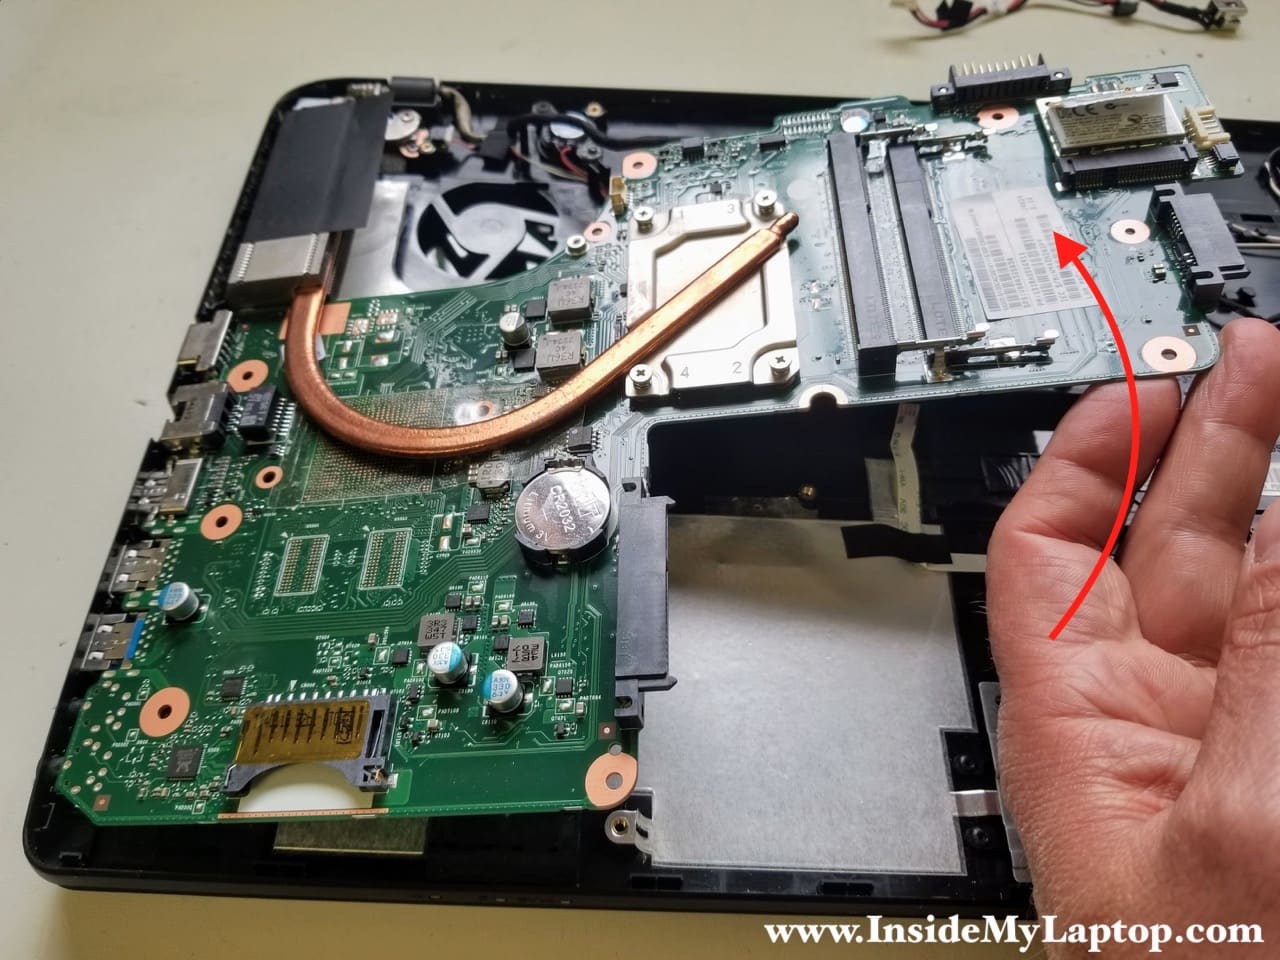
STEP 17.
Separate the motherboard from the top case. Be careful because the video cable is still attached to the other side.
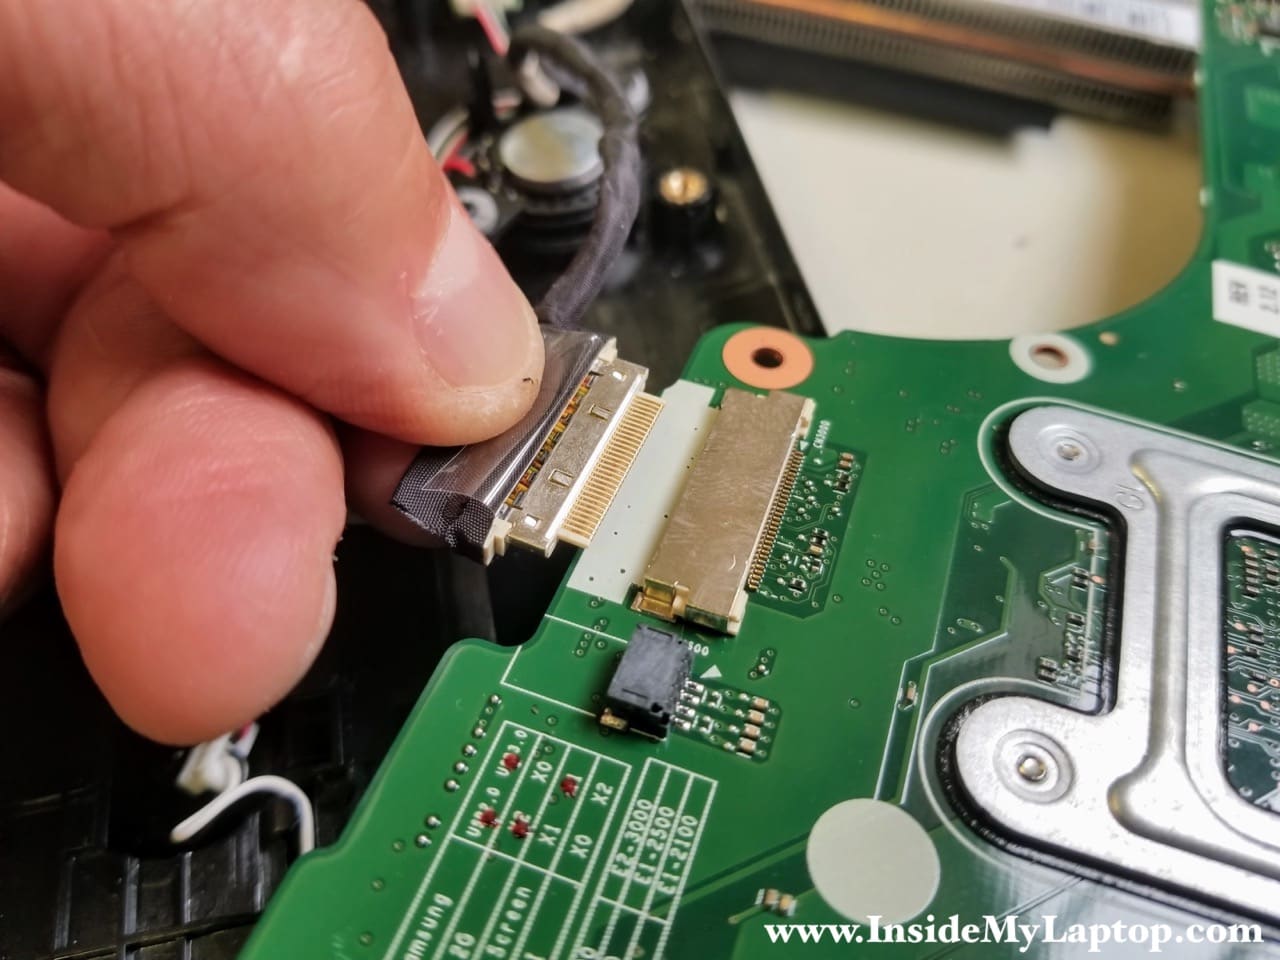
STEP 18.
Turn the motherboard upside down to access the video cable connector.
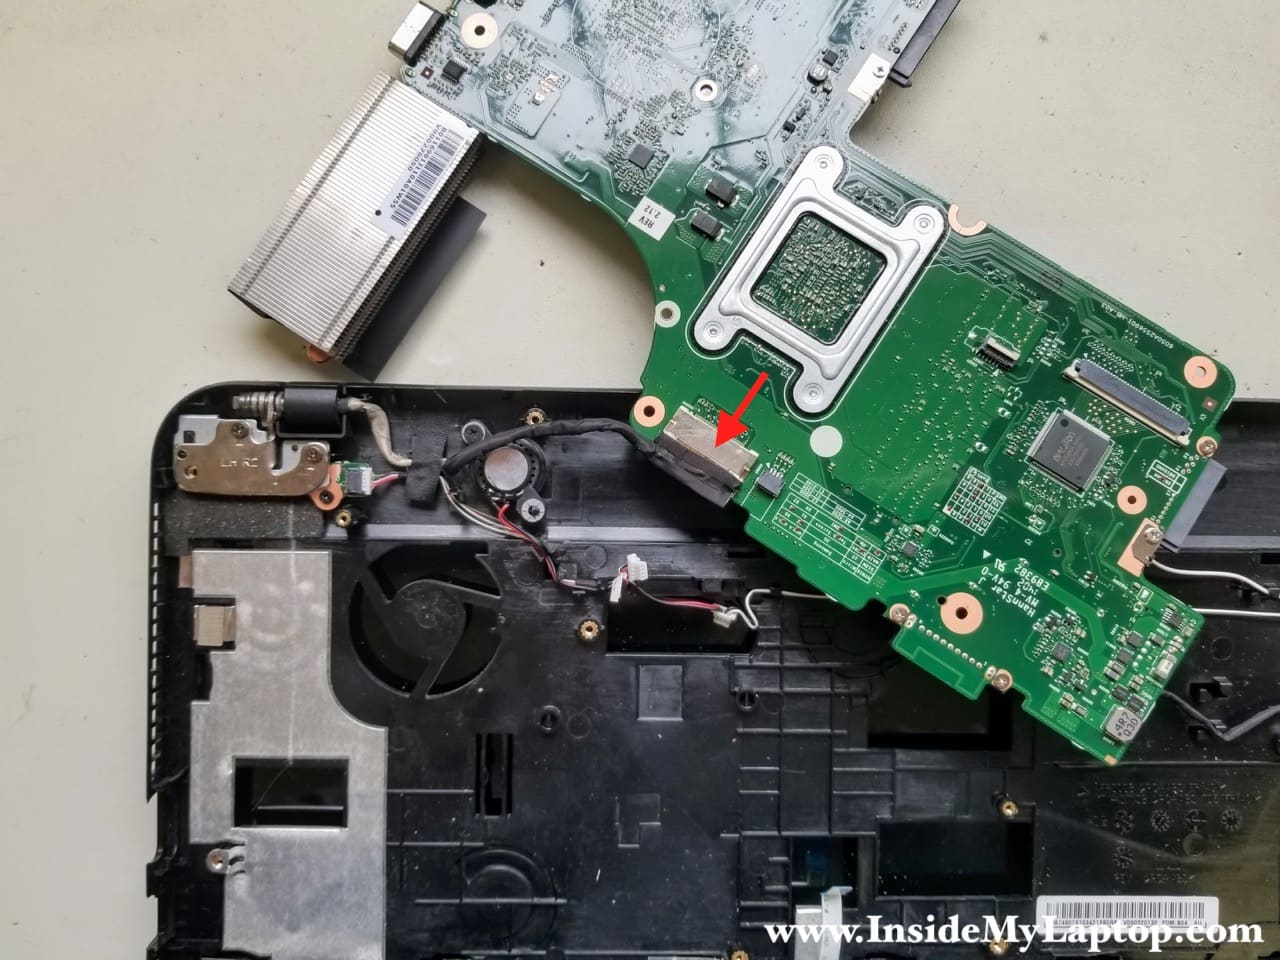
Peel off sticky tape securing the connection and unplug the video cable connector from the motherboard.
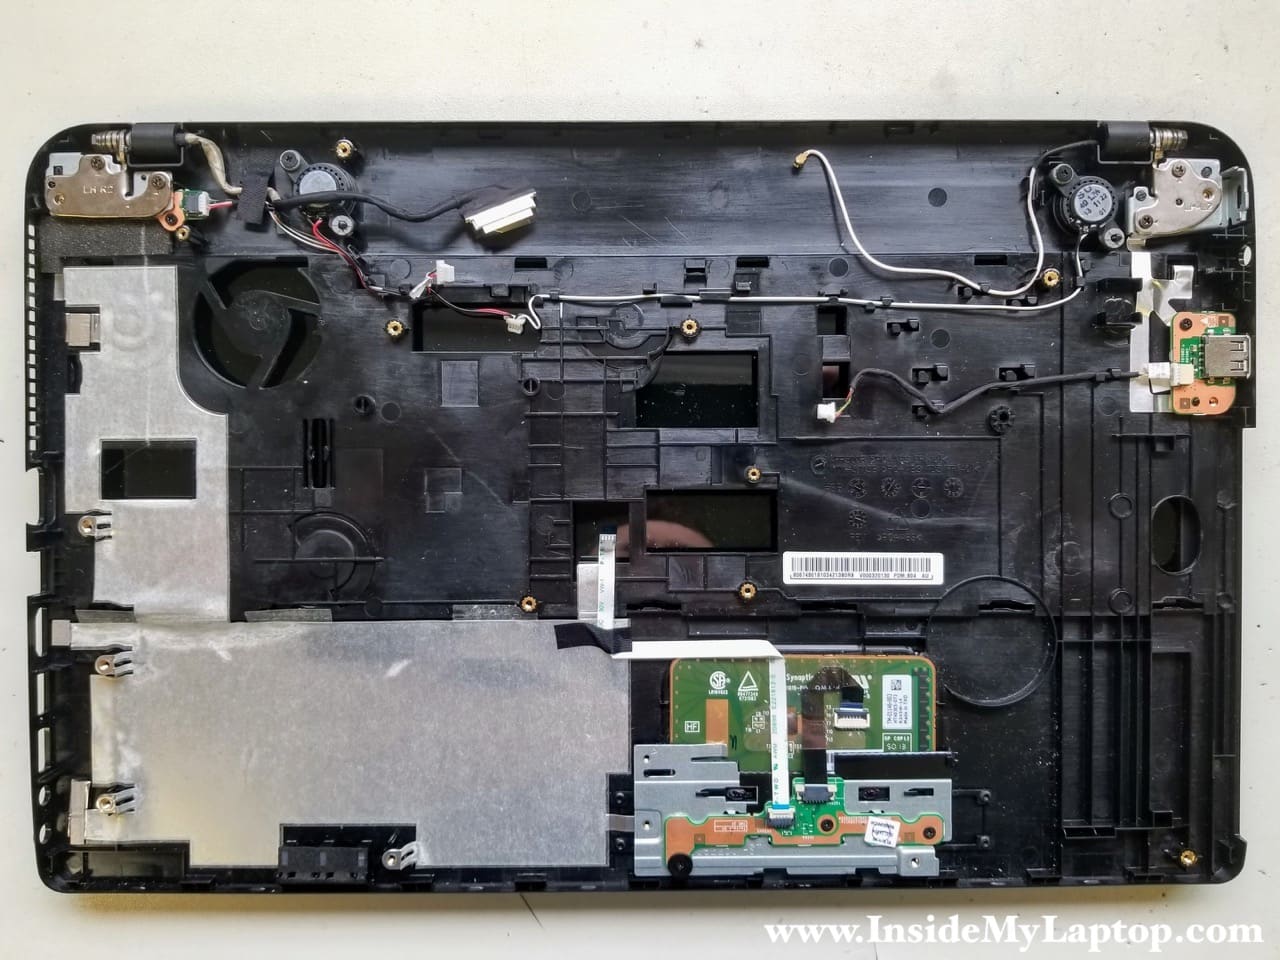
There are a few components still attached to the top case:
- Power button board
- USB board
- Touchpad and touchpad button board
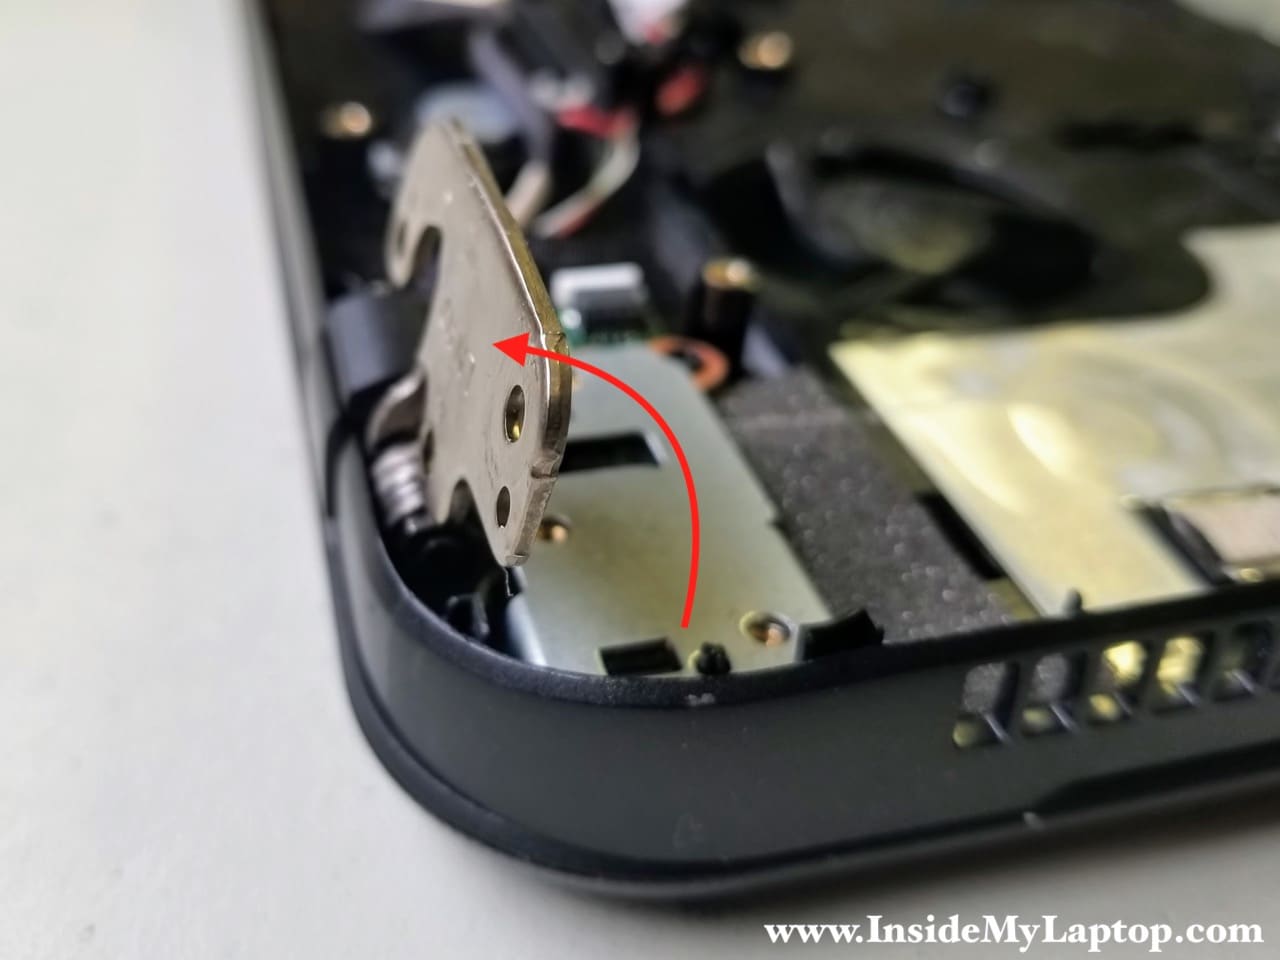
STEP 19.
The power button board is mounted under the hinge. Remove two screws securing the hinge.
Lift up the hinge so it opens up at a 60-90 degree angle.
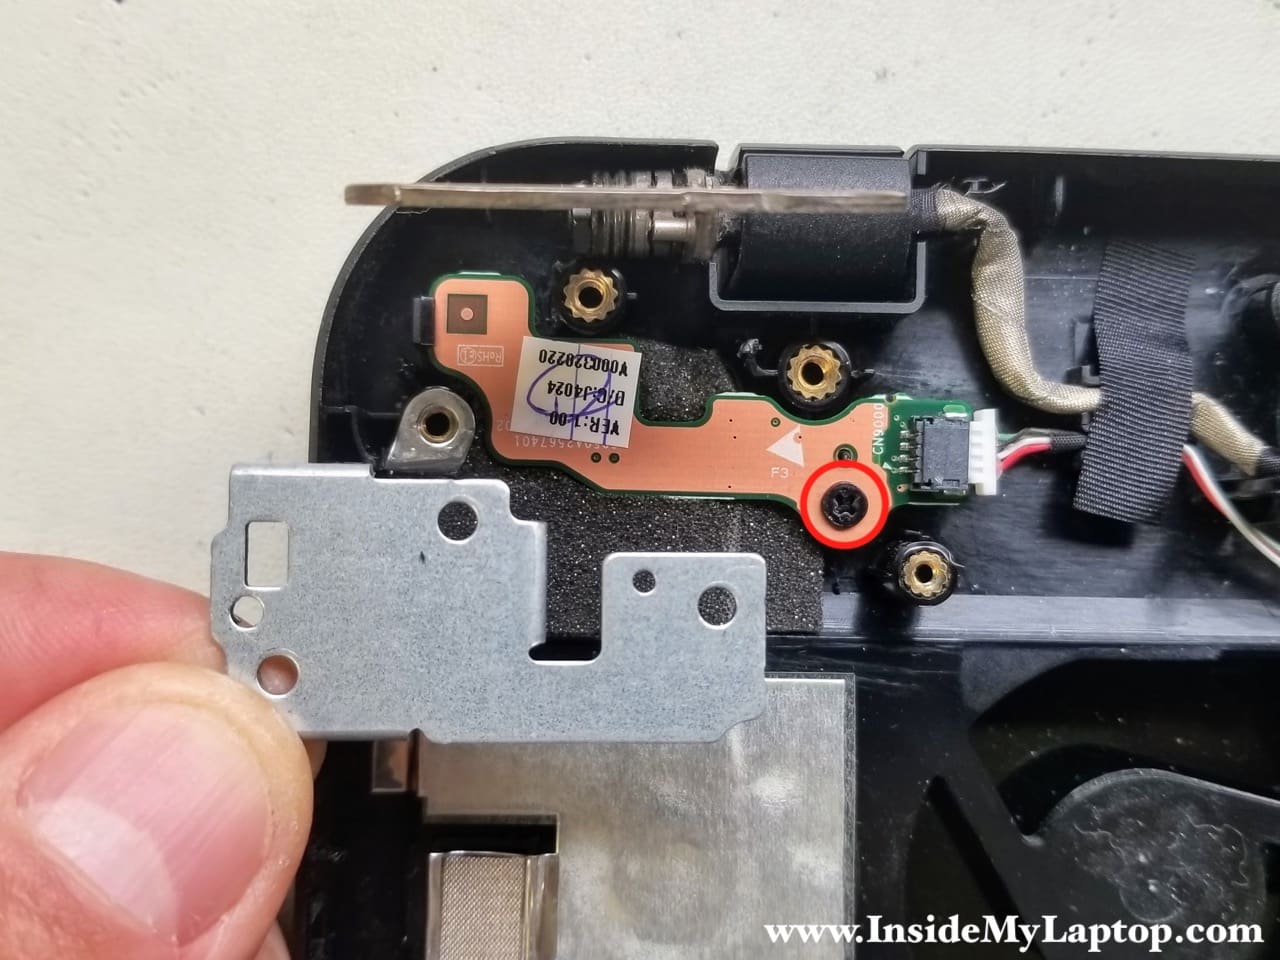
STEP 20.
Remove the metal plate covering the power button board.
Remove one screw securing the board.
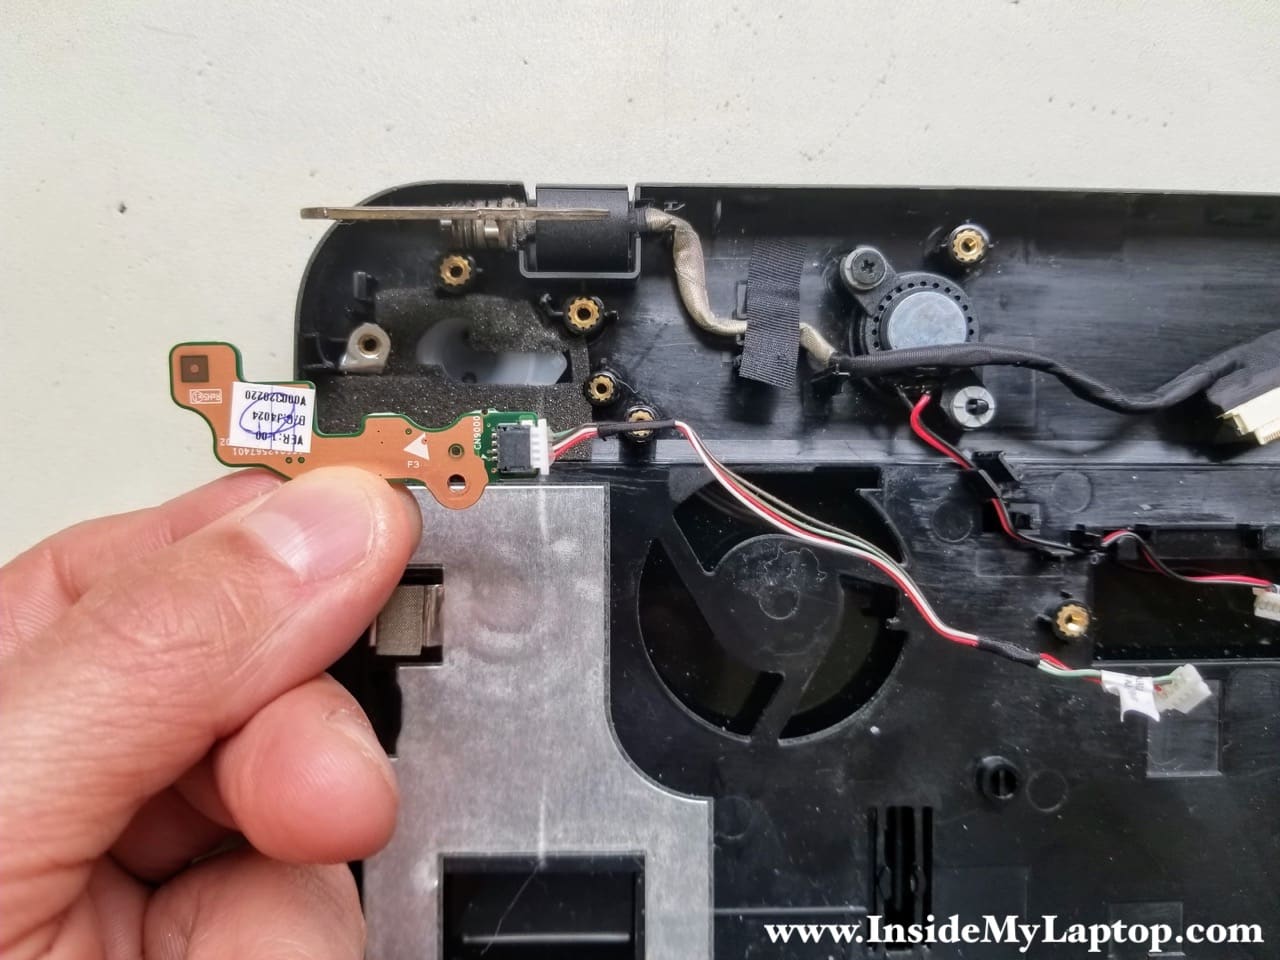
STEP 21.
Remove the power button board.
How to remove the LCD screen.
Now I will show how to remove the LCD screen. It can be done while the display is still attached to the laptop base. You don’t have to go though all previous disassembly steps.
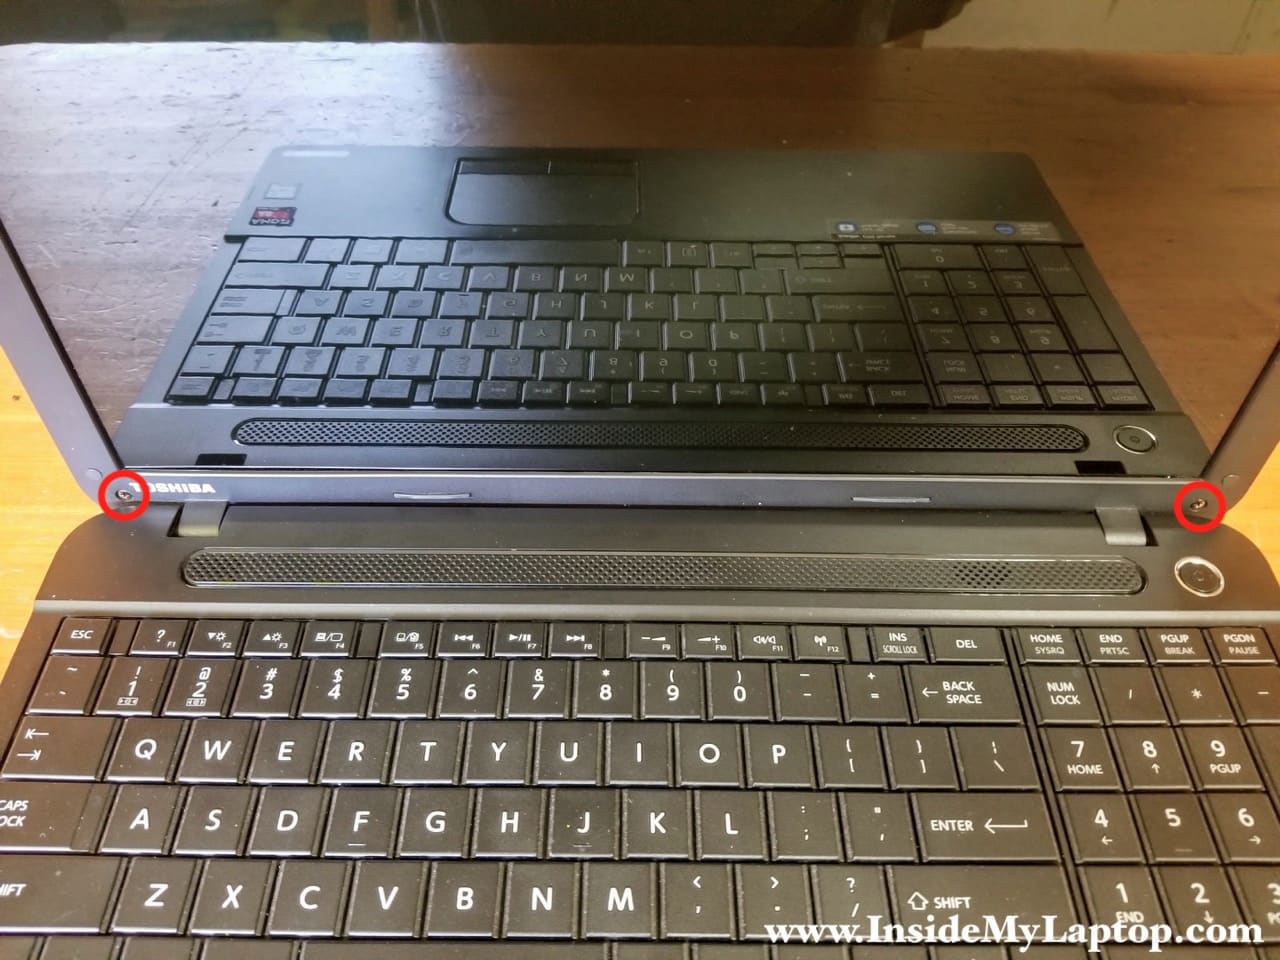
STEP 1.
Remove two screws from the lower side of the screen bezel. These screws are hidden under two stickers.
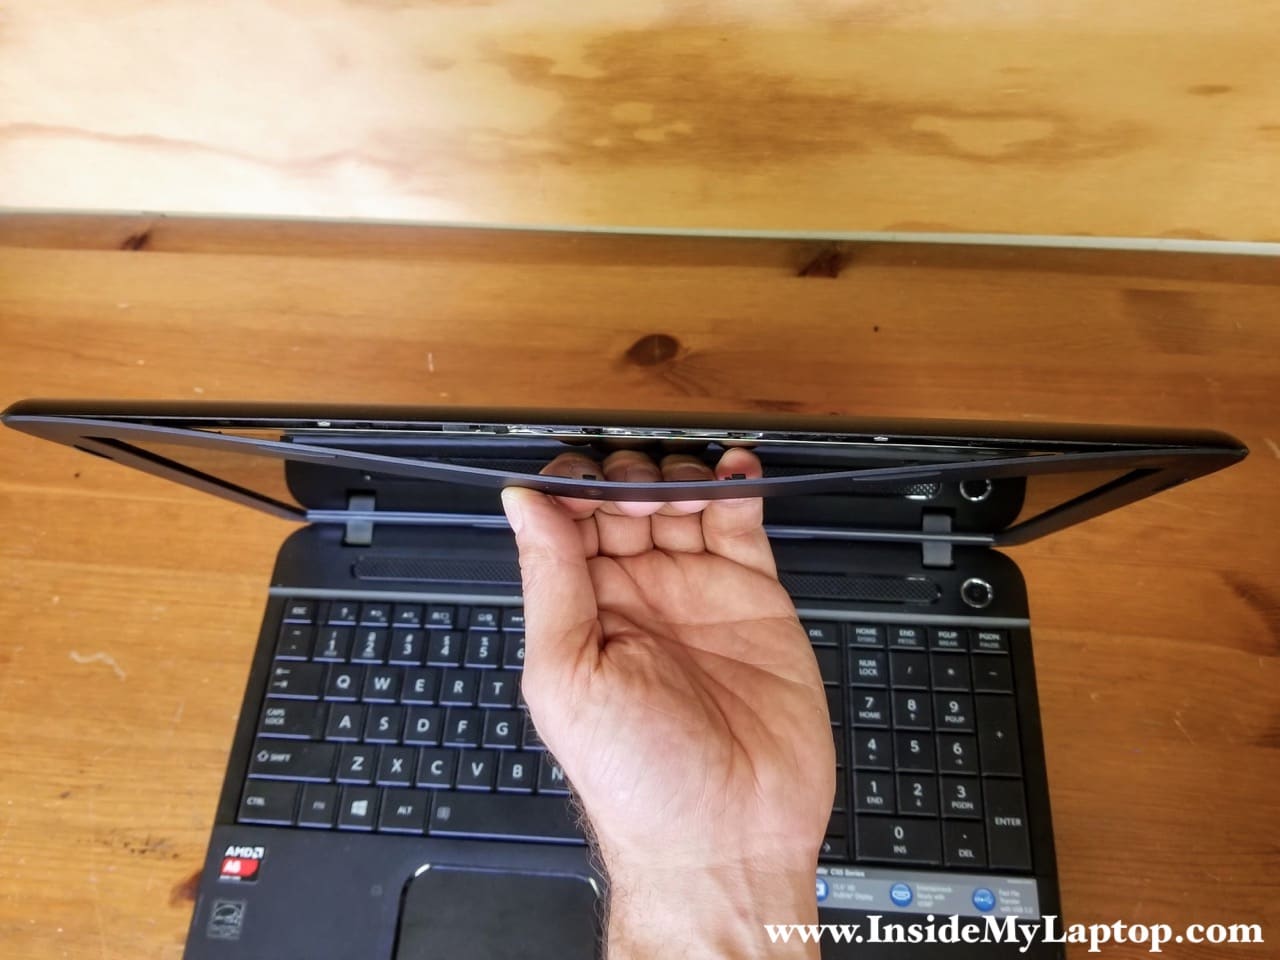
STEP 2.
Start separating the screen bezel from the back cover on the upper side of the display assembly.
STEP 3.
Continue removing the bezel on the display sides.
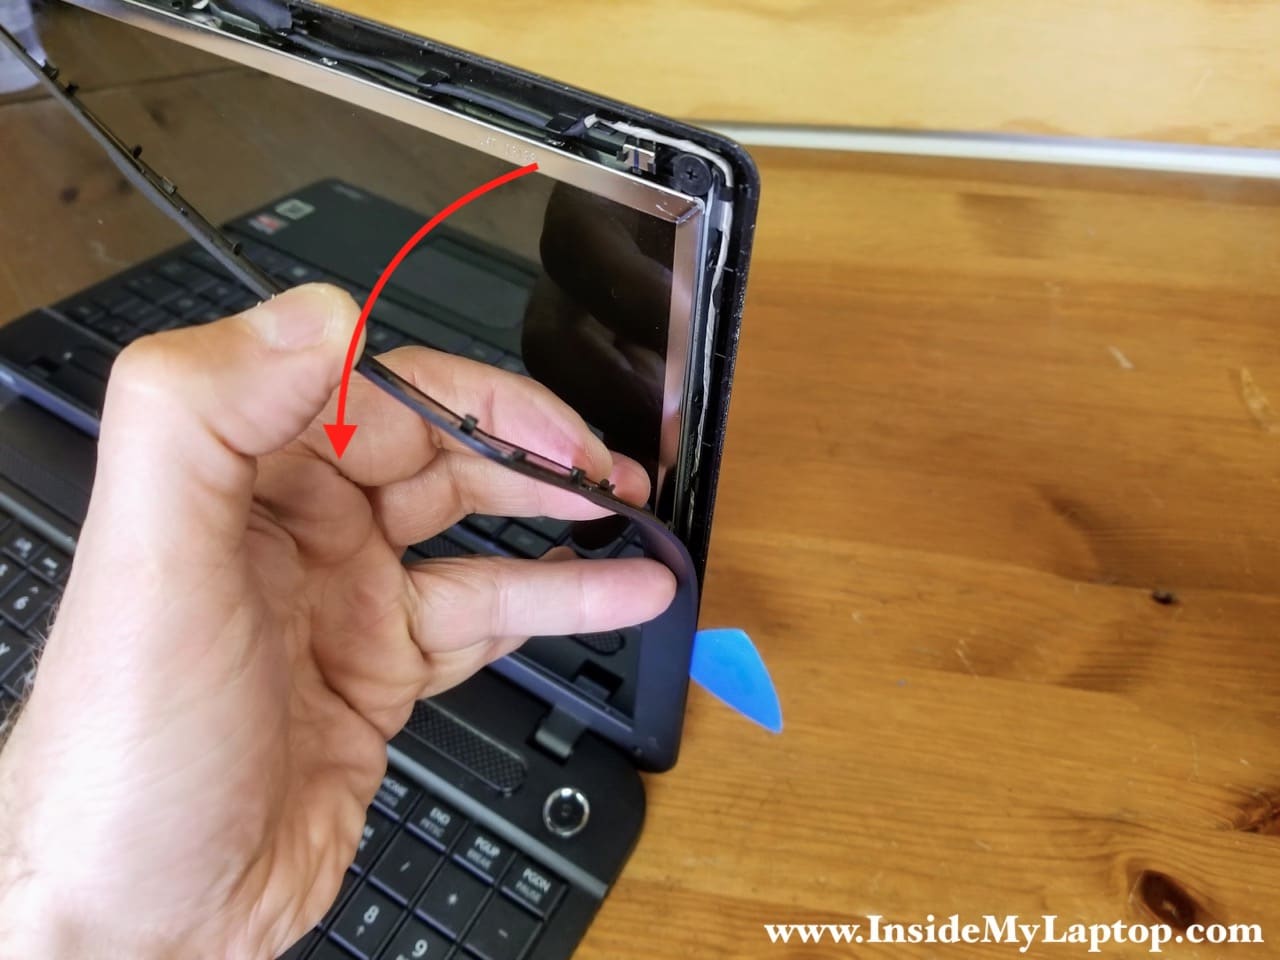
STEP 4.
Remove the bezel completely.

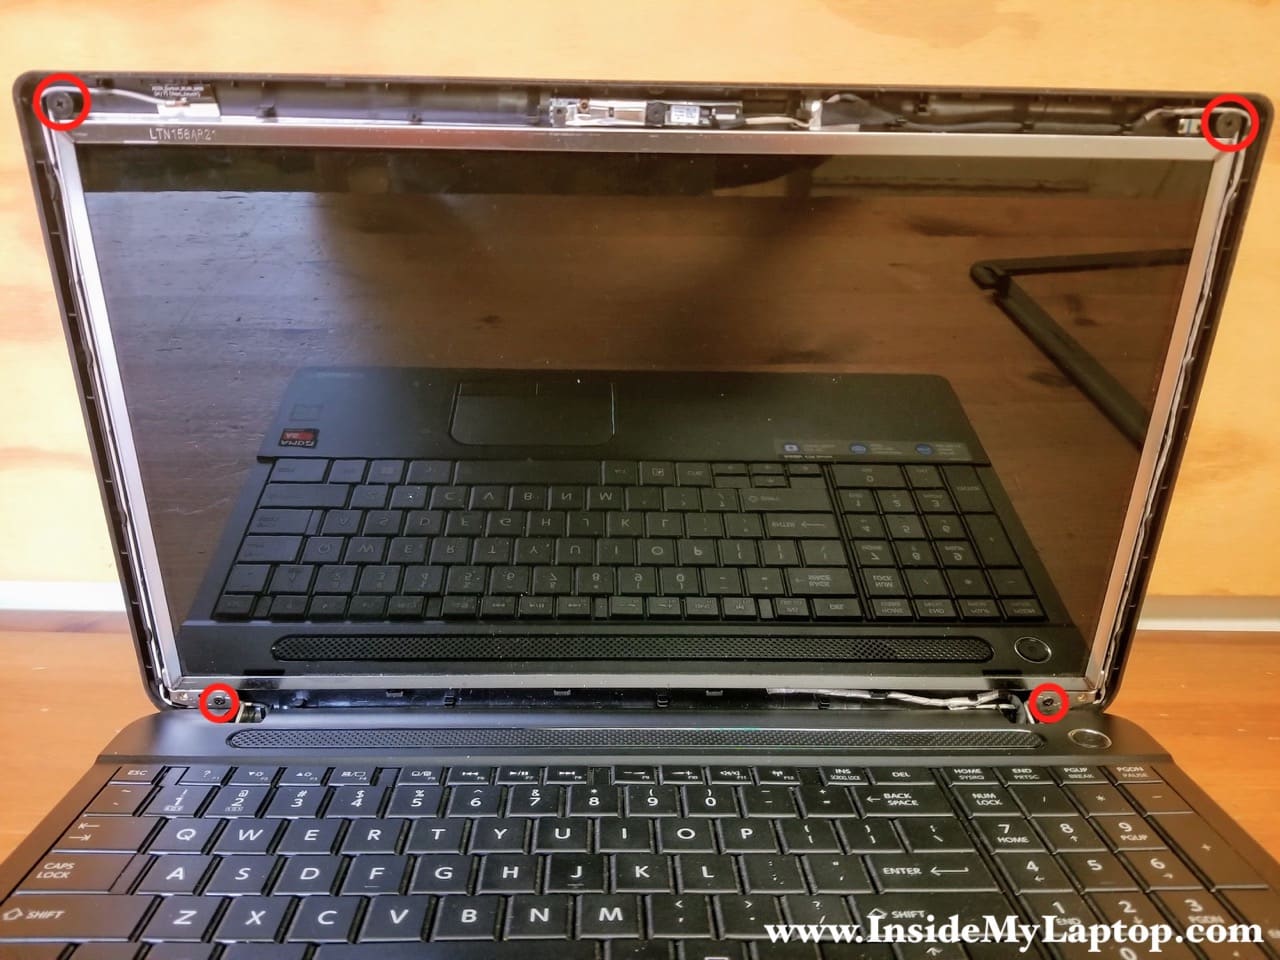
STEP 5.
Remove four screws securing the LCD screen to the back cover.
STEP 6.
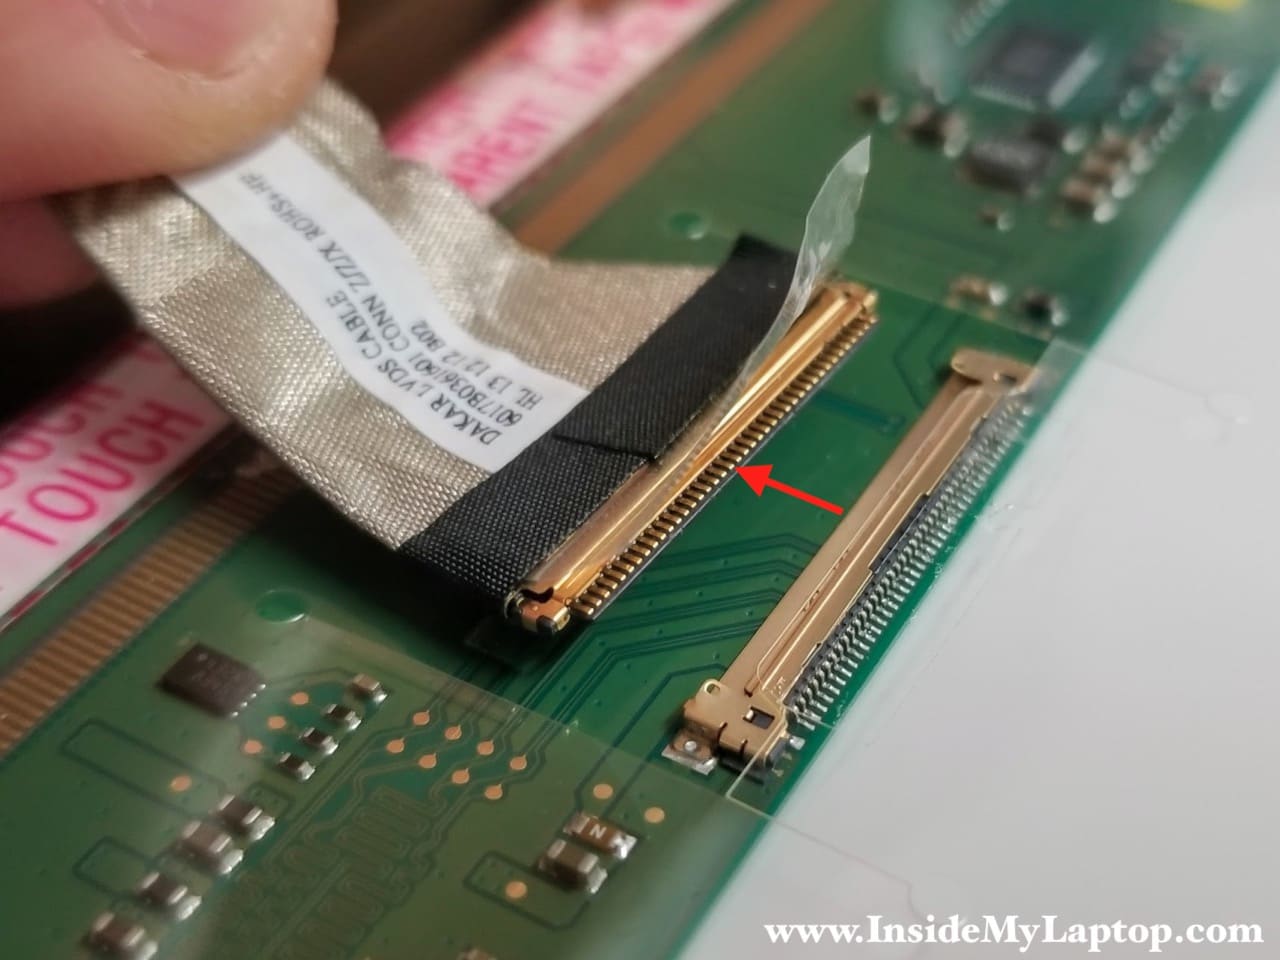
Separate the back cover from the screen and access the video cable connector on the back.

STEP 7.
Peel off the sticky tape securing the connection and unplug the video cable from the screen.
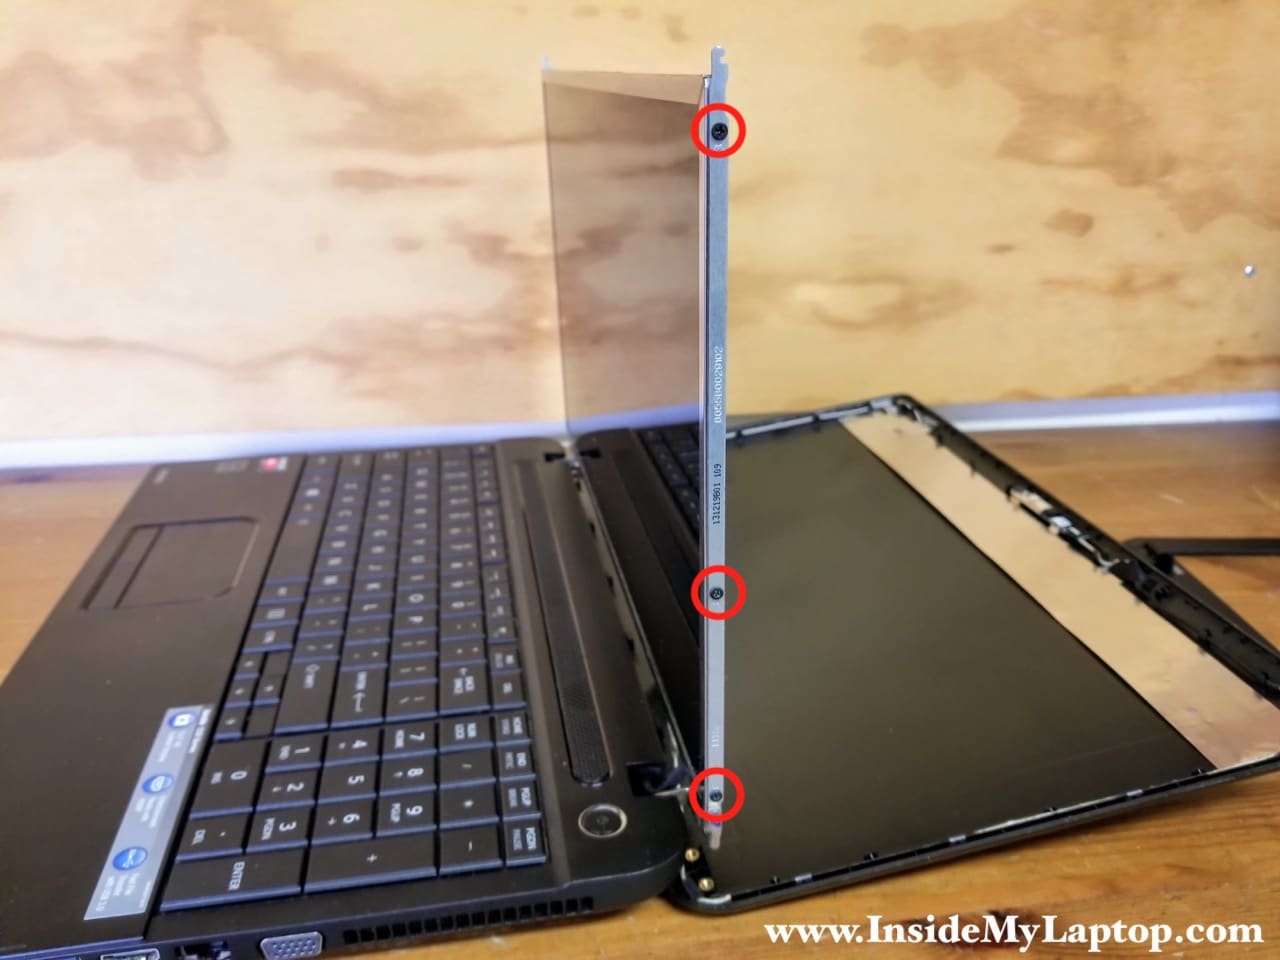
STEP 8.
Remove three screws securing the LCD screen to the right side bracket.
Remove three more screws from the left bracket.
STEP 9.
Now you can remove the LCD screen and replace it with a new one if necessary.
You can find a new replacement screen using the part number printed on the back. In my case it is LTN156AT32-T01.

Brit
This is EXACTLY what I was looking for! I spilled coffee on my mom’s Toshiba Satellite. Your instructions are so clear and easy! Thanks a lot! Crossing my fingers! Hope I can fix it!
Maria
Concerning my Toshiba Satellite C55D-B5310: If the screen does not work on my laptop when it is powered on, shouldn’t plugging it in with an HDMI to a monitor/TV allow you to still use the laptop? I tried it and it doesn’t, so does that mean there may be something more wrong with it than just the screen?
Nedda
Can the keyboard be removed without the first two steps?
Nedda
or rather…can you skip some steps to get the keyboard off to change it?
IML Tech
Yeah, start with the step 5. Remove one screw on the bottom and after that you should be able to remove the keyboard.
Nedda
What do you need to move the 7 latches.? Tried different things but no movement. Do they move in? or down? Thanks. I guess I don’t have the right tool.