Today I will be taking apart a Lenovo Flex 2 15 (model name 20405) laptop. All the following disassembly steps should be similar for Flex 2 14 model too.
The main design features of this model:
– The keyboard can be easily removed without taking apart the entire machine.
– The main battery is mounted under the base cover.
– The RTC battery is removable and it’s a standard CR2032 battery.
– The motherboard has two memory slots.
– The DC power jack is removable.
Laptop repair tools needed: Phillips screwdriver #0, case opener tool, tweezers.
STEP 1.
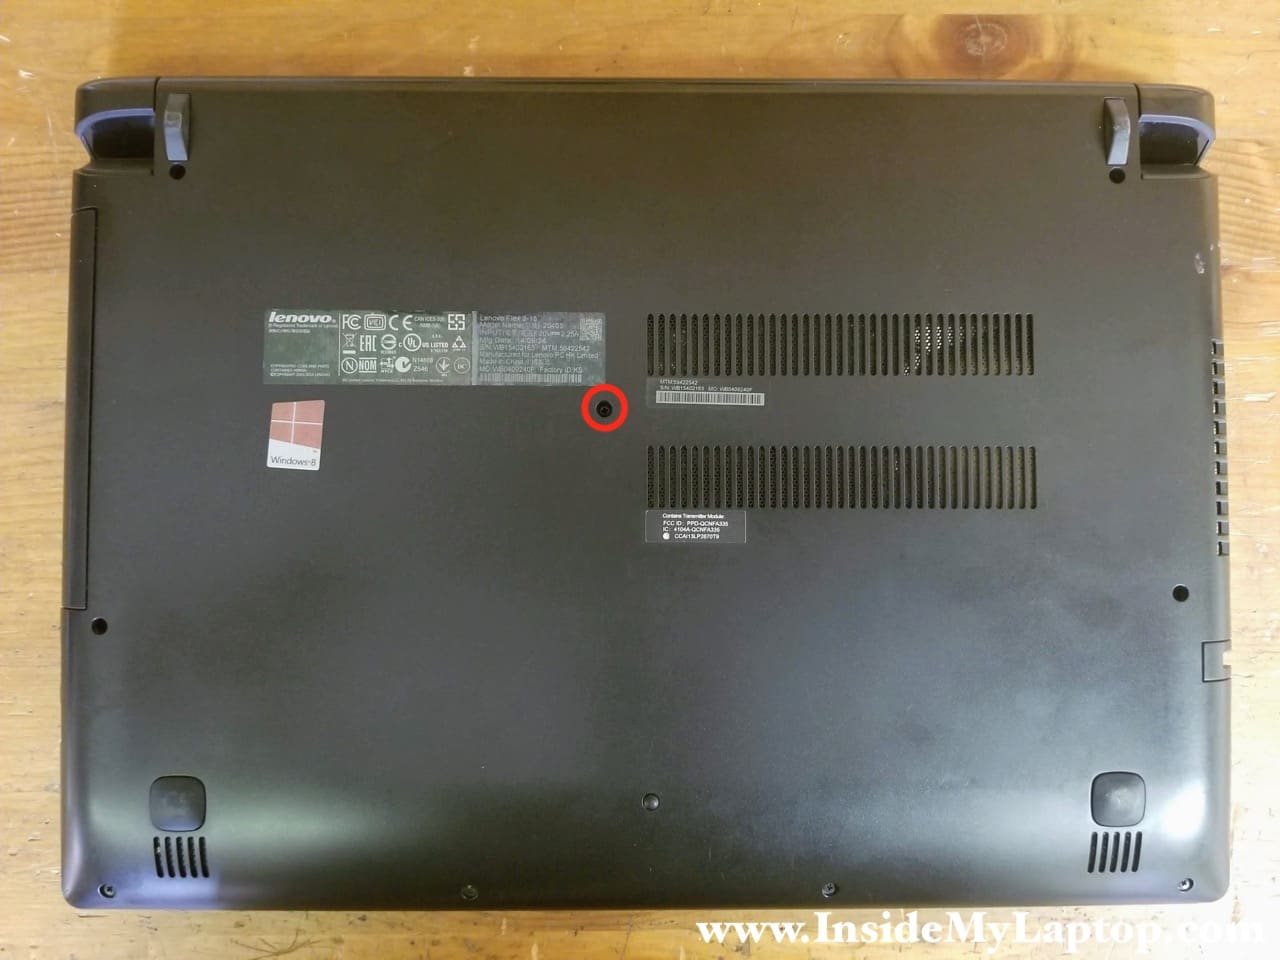
Let’s start the disassembly process with removing the keyboard.
Remove one screw securing the keyboard on the bottom of the laptop.
STEP 2.
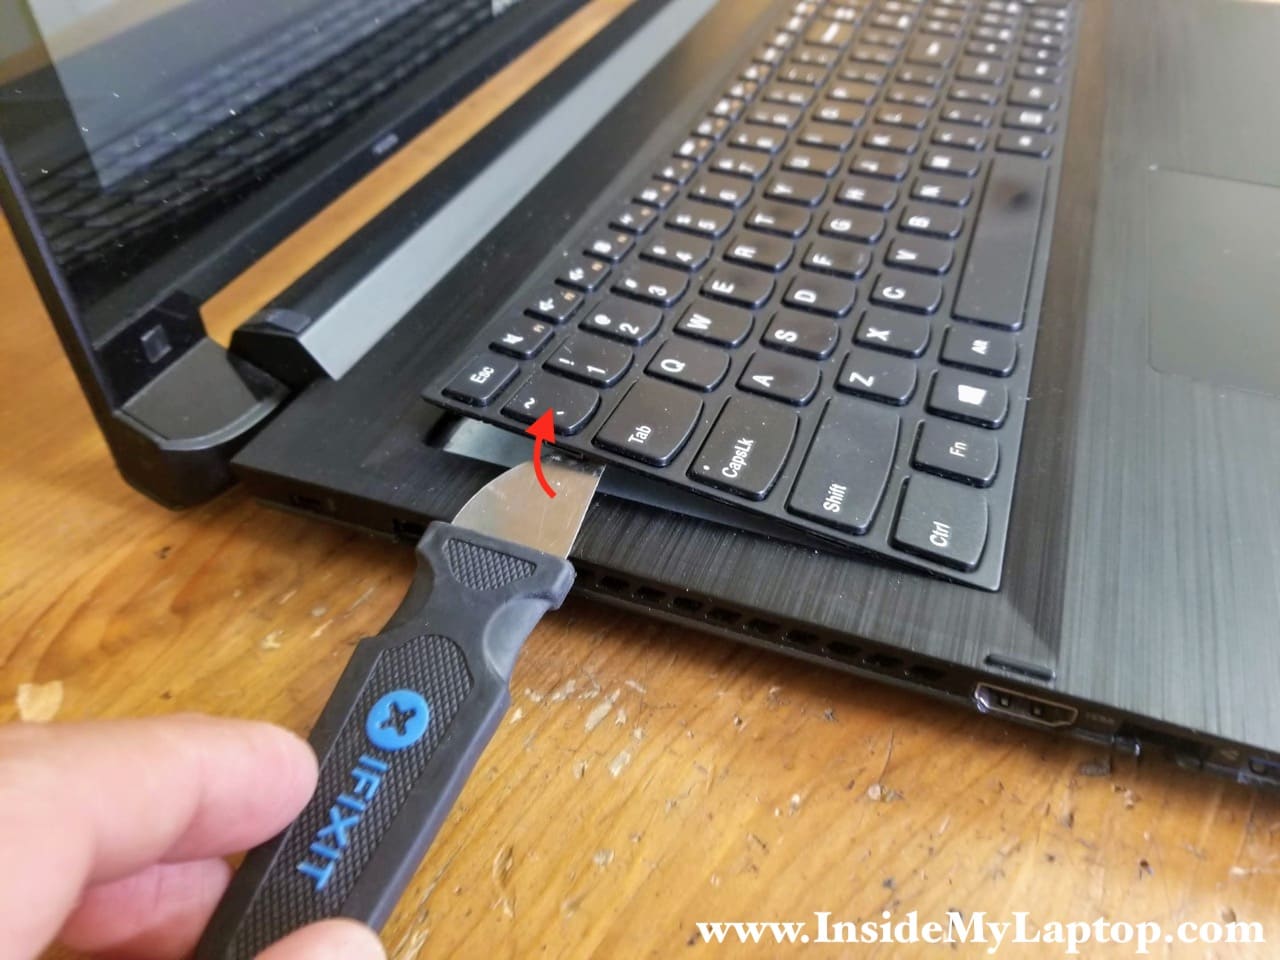
Pry up the keyboard using a thin metal case opener tool.
There are many hidden latches securing the keyboard. You’ll have to apply some reasonable force in order to separate the keyboard from the top case.
STEP 3.
Continue separating the keyboard from the top case until all hidden latches are released.

STEP 4.
Move the keyboard towards the display panel in order to access the cable connector underneath. Disconnect the cable from the motherboard.
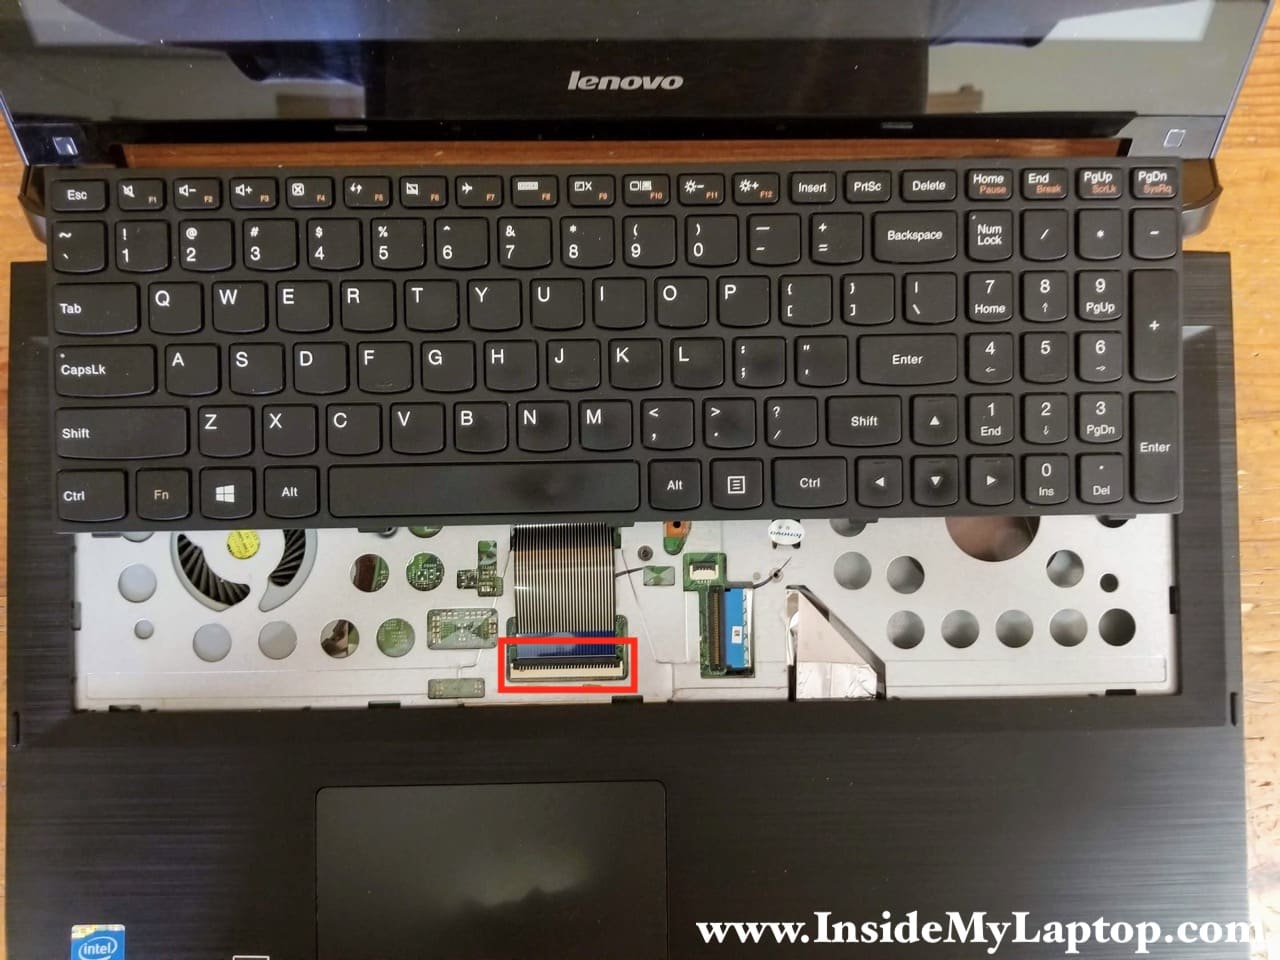
Here’s how to disconnect the keyboard cable:
Lift up and the locking tab at a 90 degree angle (red arrow) and pull the cable out (yellow arrow).

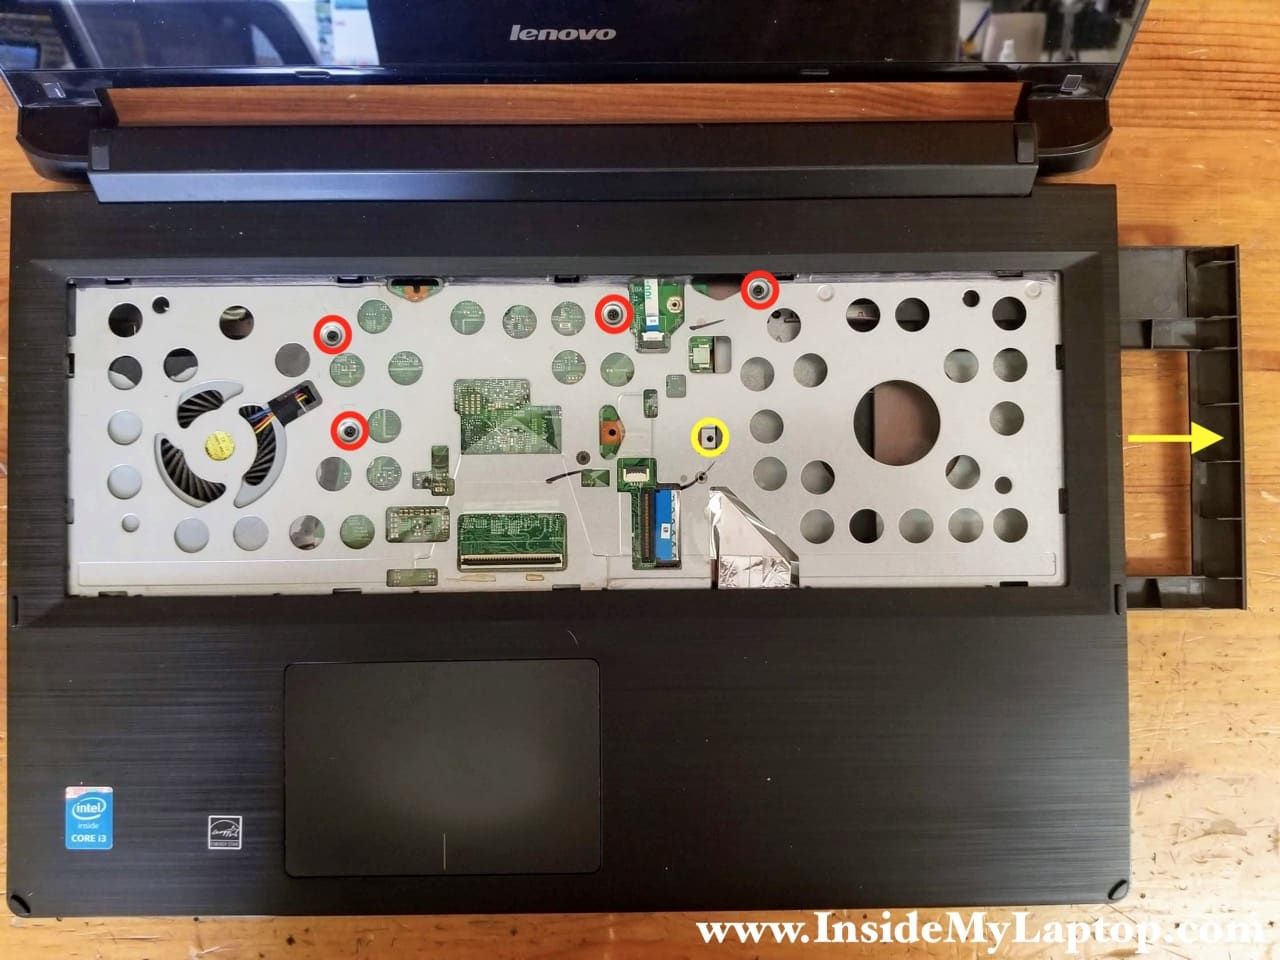
STEP 5.
Remove five screws found under the keyboard.
One of the screws (yellow) securing the CD/DVD optical drive or empty placeholder (like in my example).
Pull the optical drive/placeholder out.
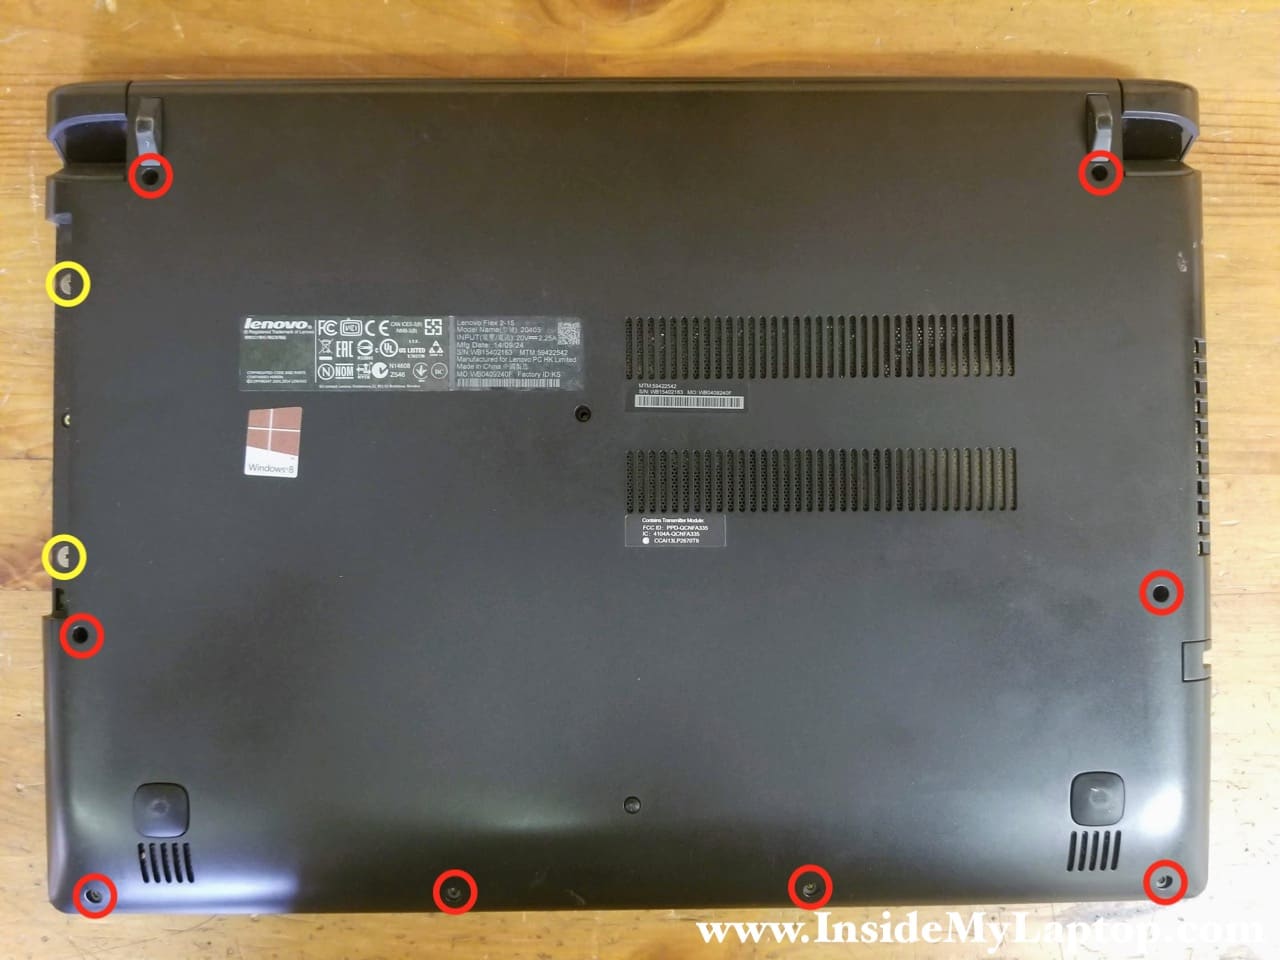
STEP 6.
Remove all screws securing the laptop base cover. Don’t forget two screws (yellow) located in the CD/DVD drive bay.
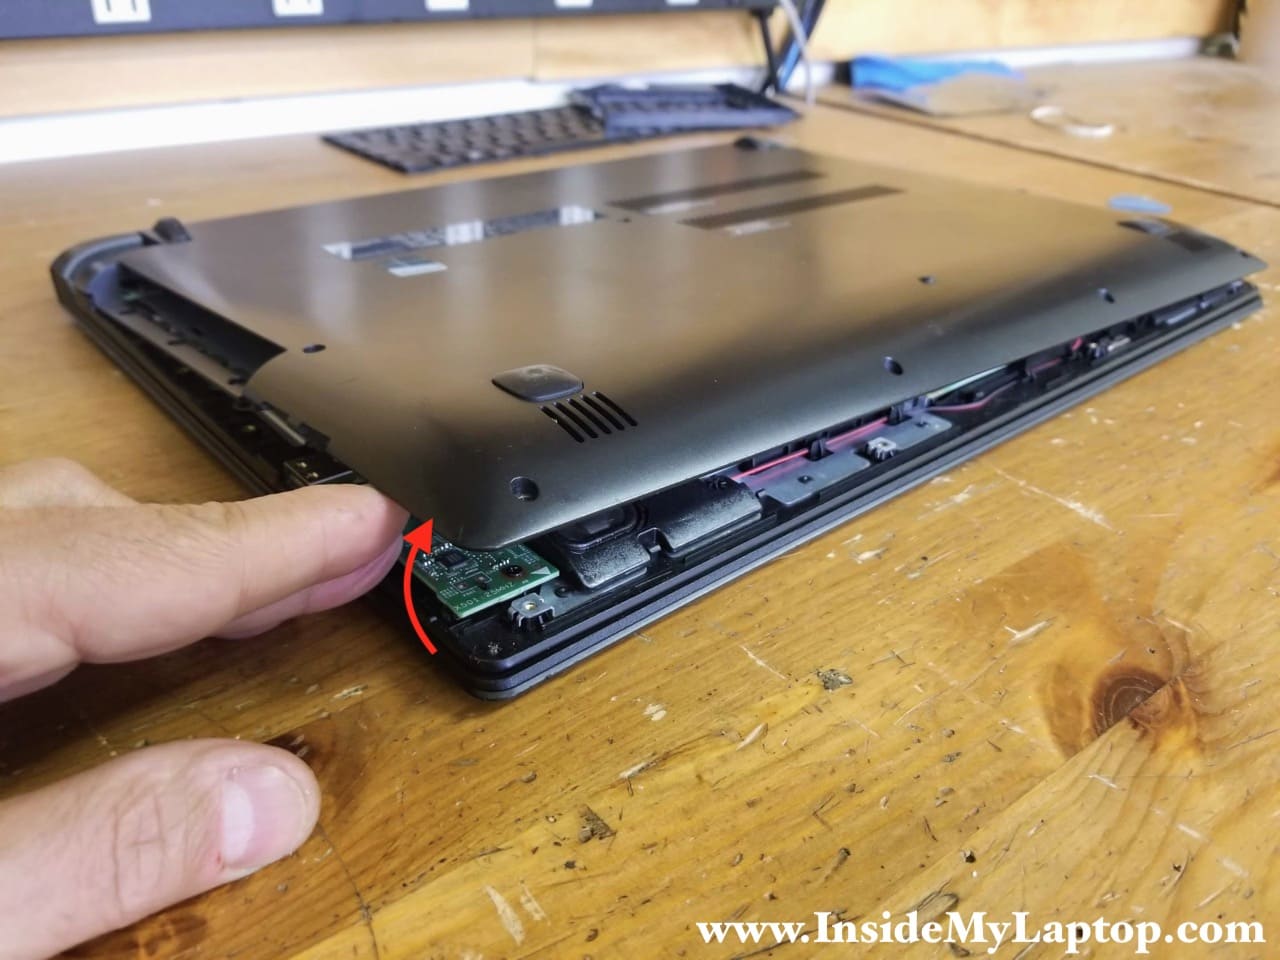
STEP 7.
Remove the base cover.
STEP 8.
Remove four screws securing the main battery.
NOTE: With the base cover removed you can easily accessed both memory slots.
Lenovo Flex 2 15 laptop supports DDR3L-1600 SODIMM modules and can handle up to 16GB total (8GB in each slot).
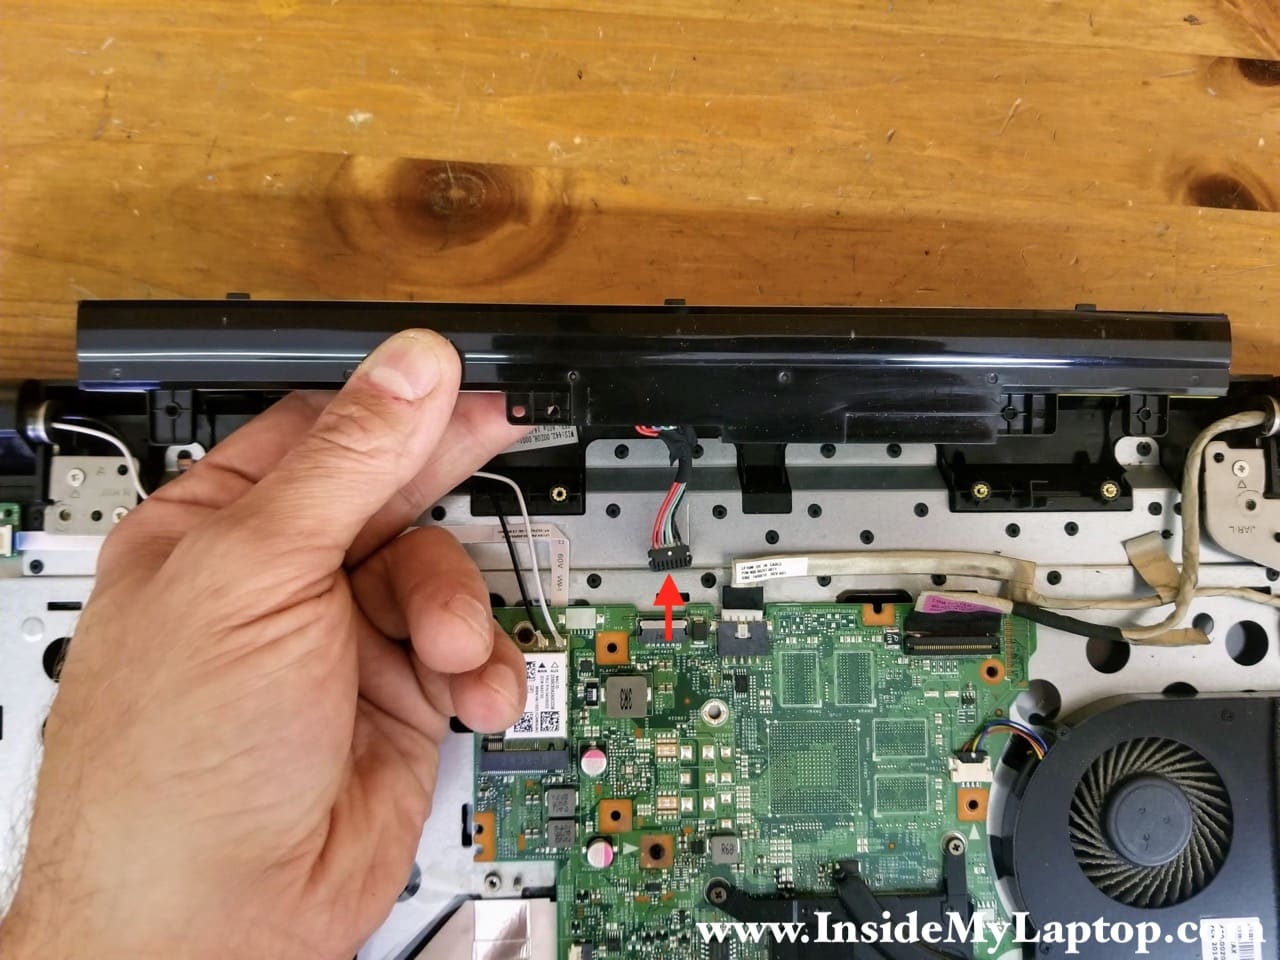
STEP 9.
Lift up the battery and disconnect the battery cable from the motherboard.
Remove and replace the battery if necessary.
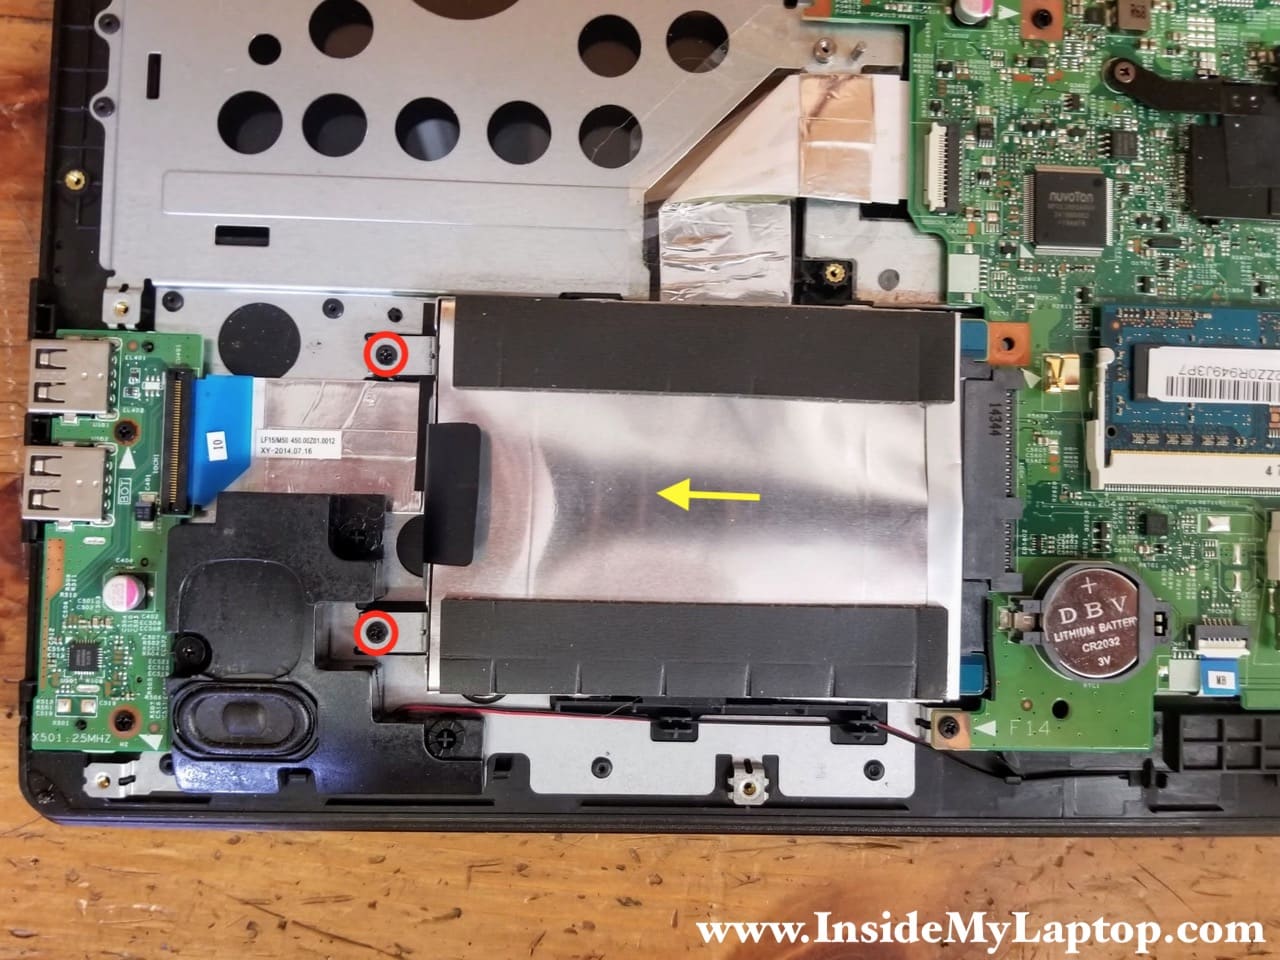
STEP 10.
Remove two screw securing the hard drive bracket.
Slide the hard drive assembly to the left to disconnect from the SATA port on the motherboard.
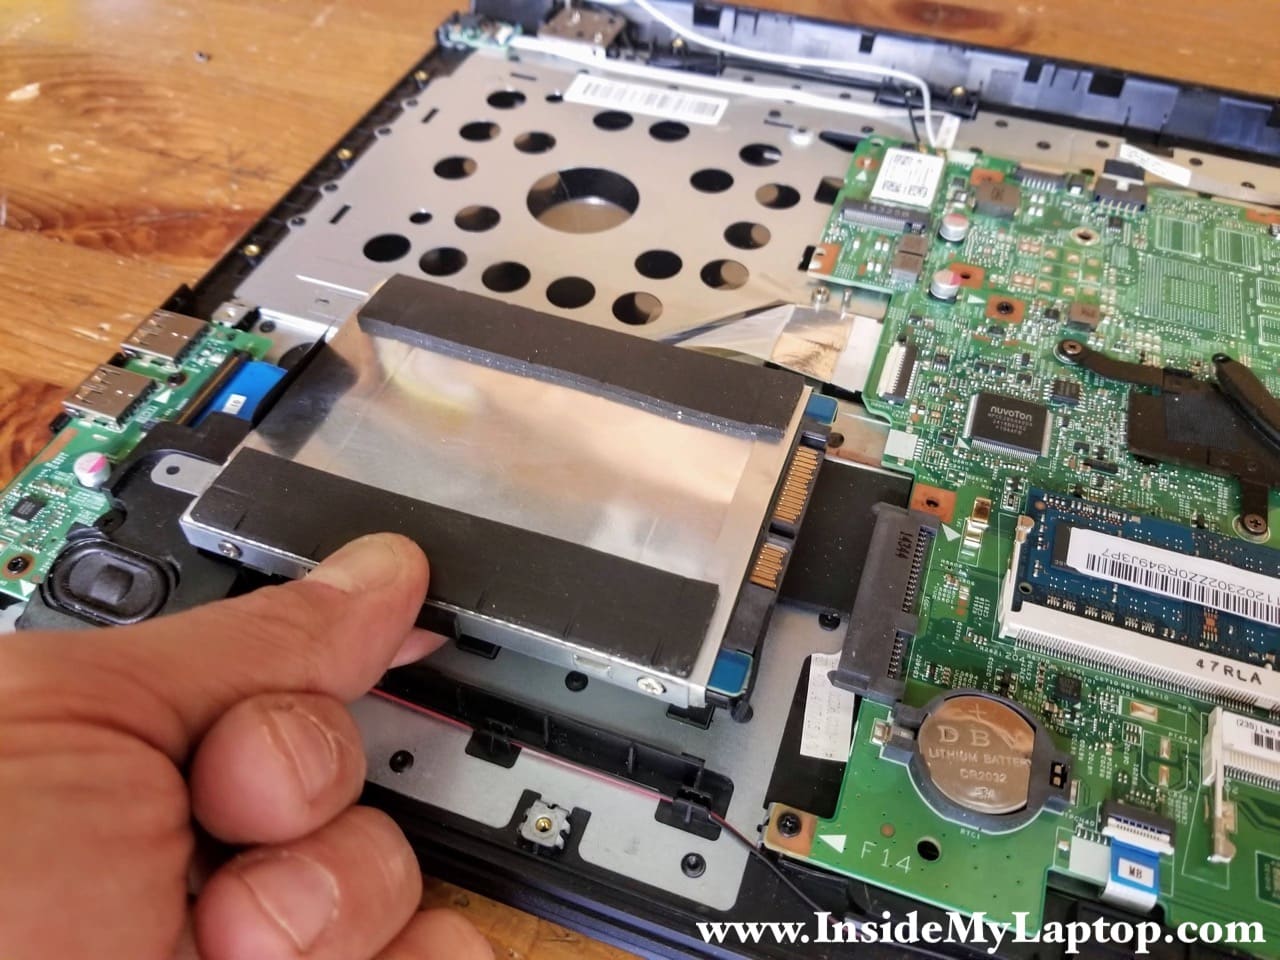
STEP 11.
Remove the hard drive assembly. Upgrading this drive with a solid state drive will improve the laptop performance significantly.
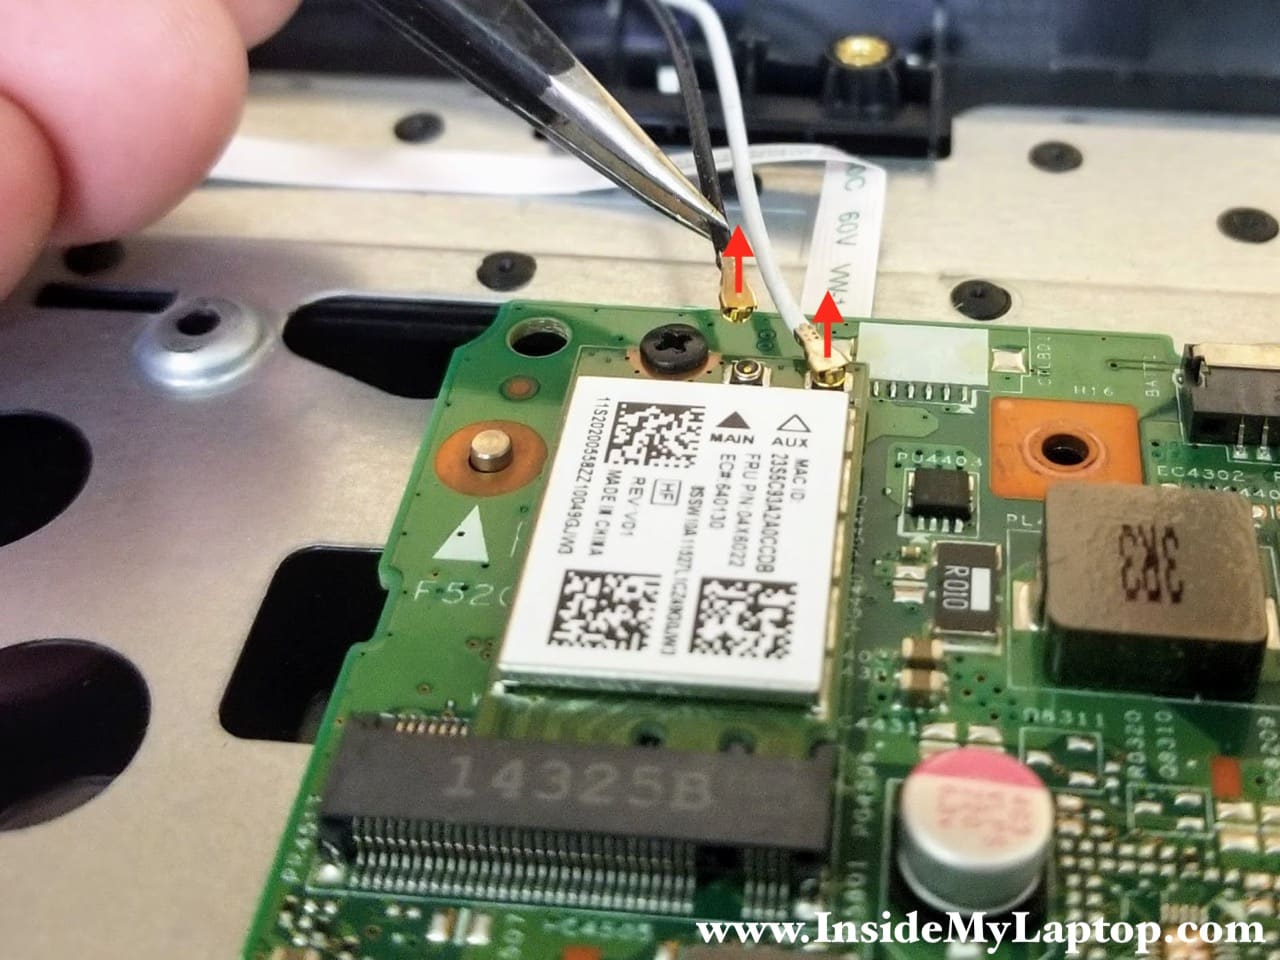
STEP 12.
Disconnect both antenna cables from the wireless card.
STEP 13.
Un-route both antenna cables from the guided path.
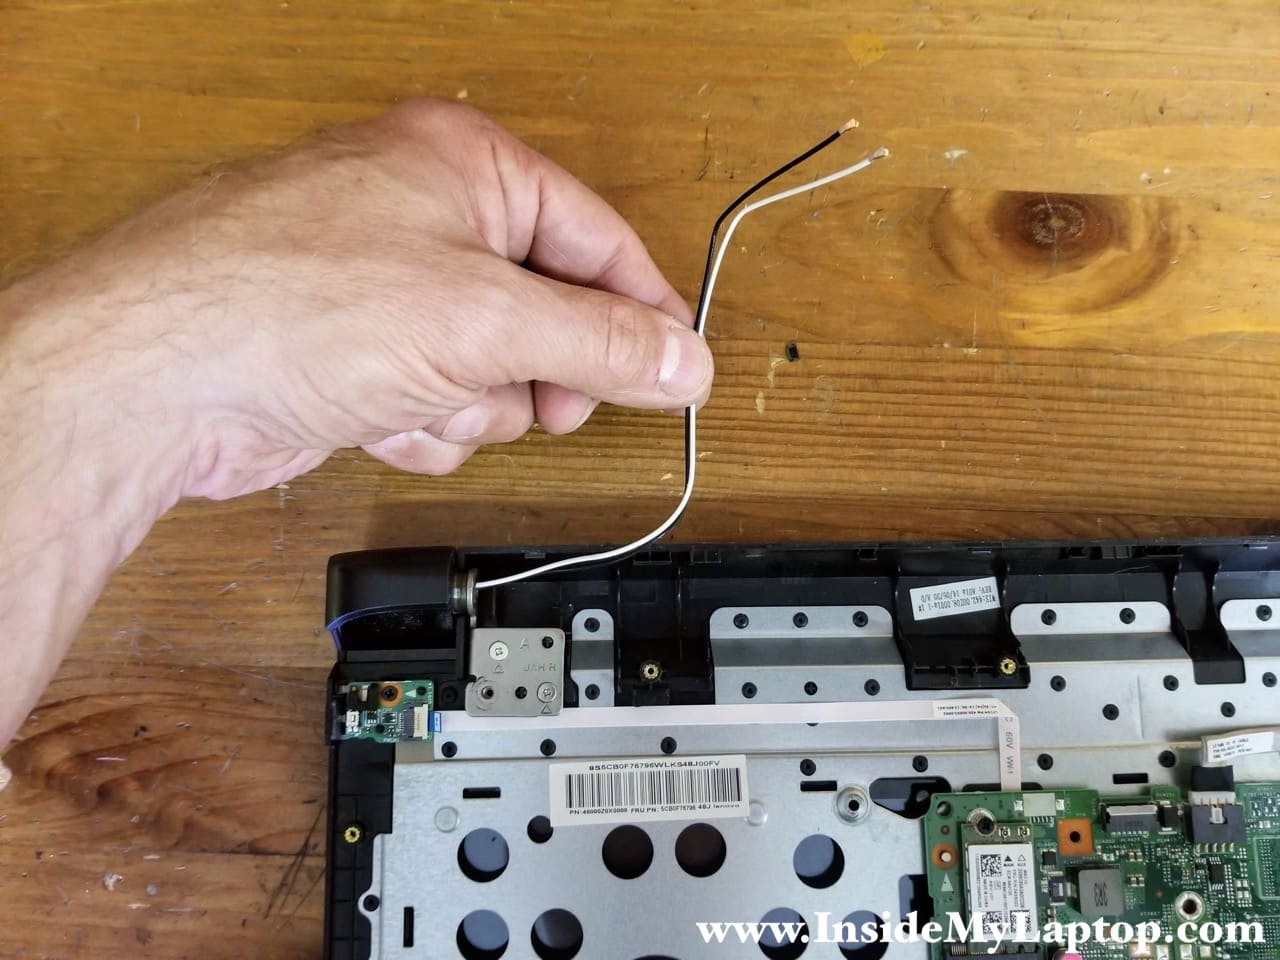
STEP 14.
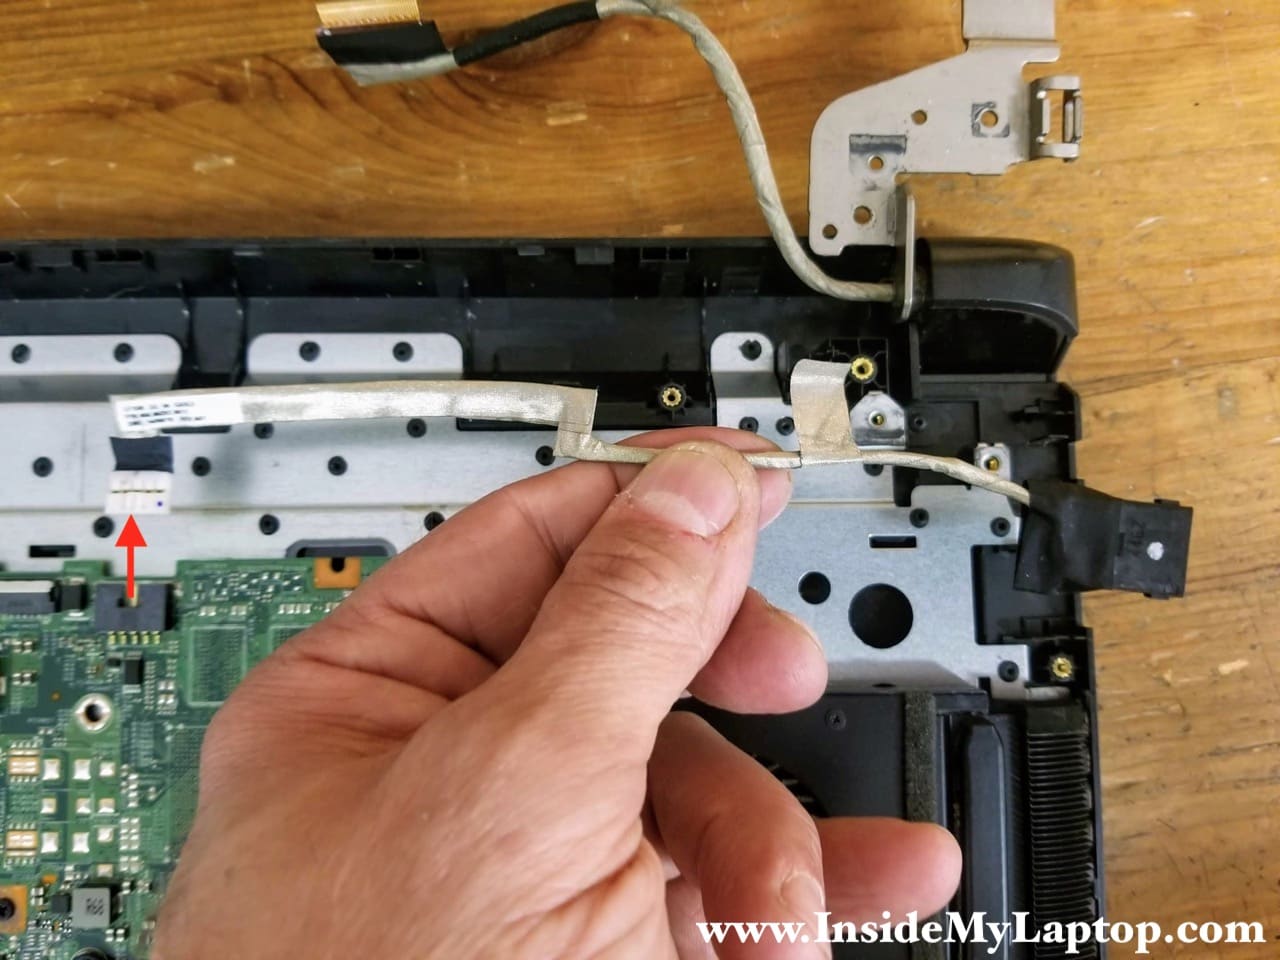
Disconnect the display cable from the motherboard.
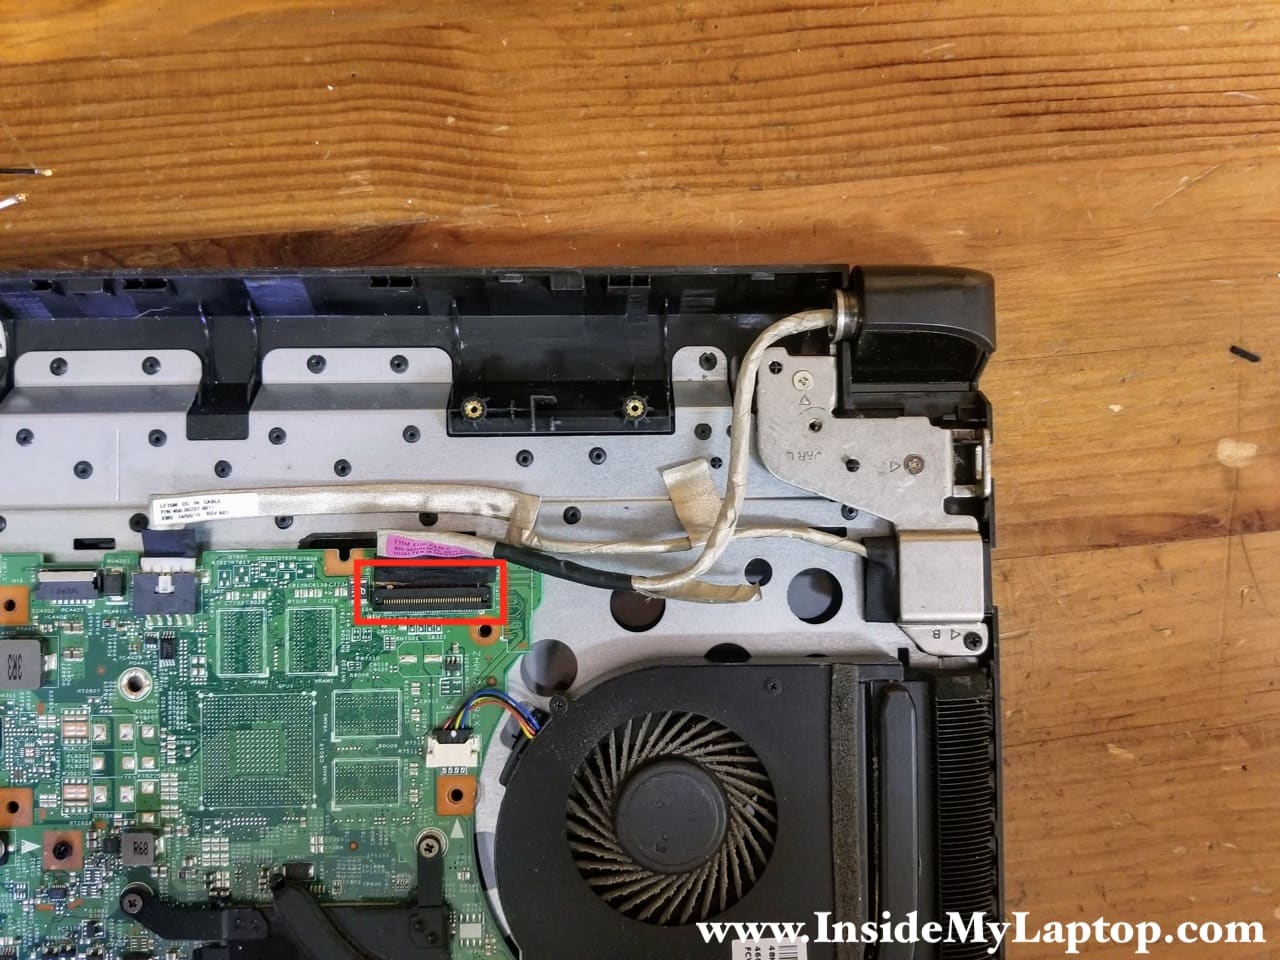
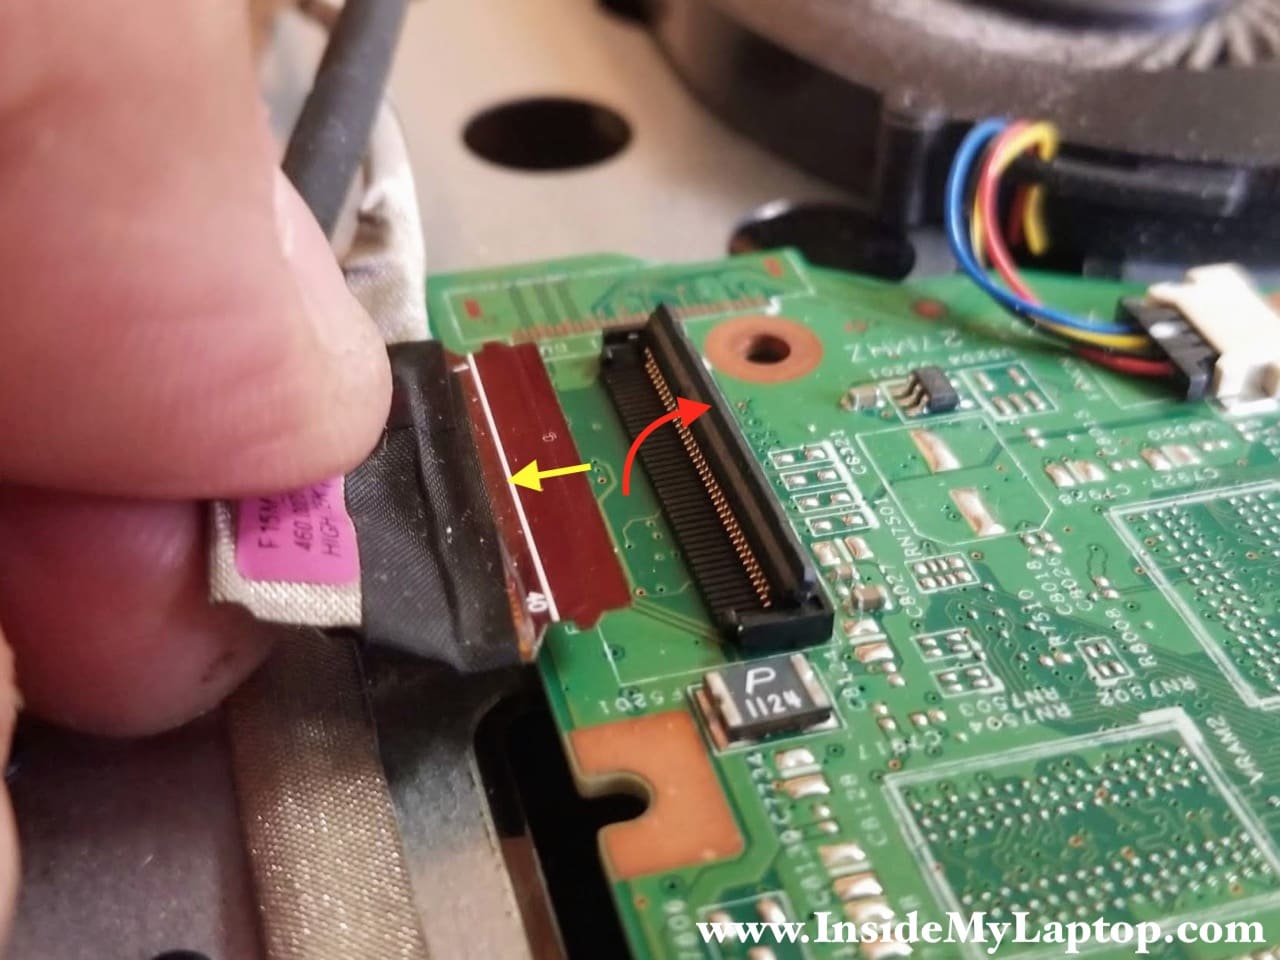
Here’s how to disconnect the display cable.
Lift up the locking tab to unlock the connector (red arrow). Lift up and remove the display cable from the connector (yellow arrow).
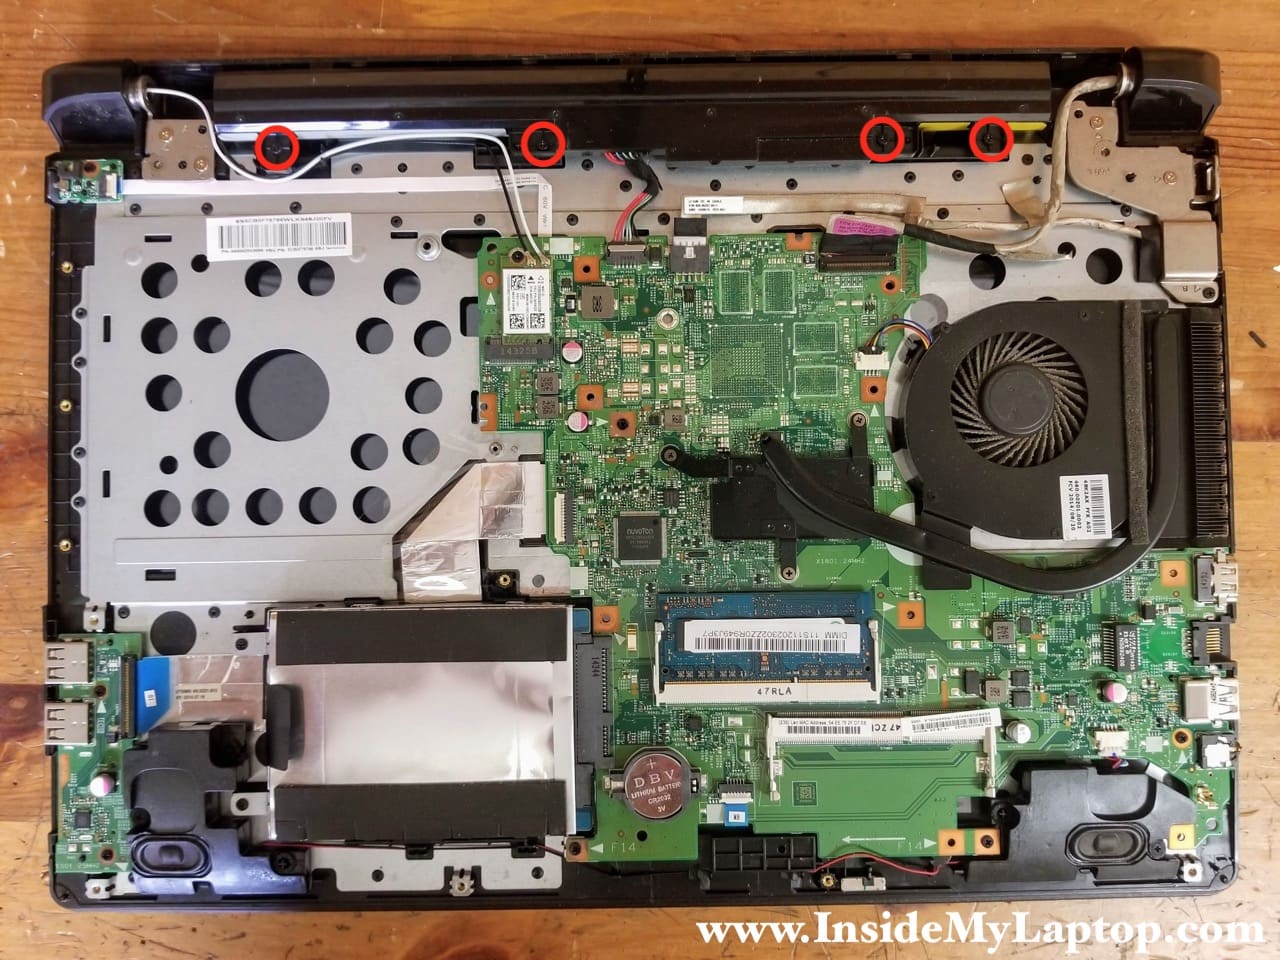
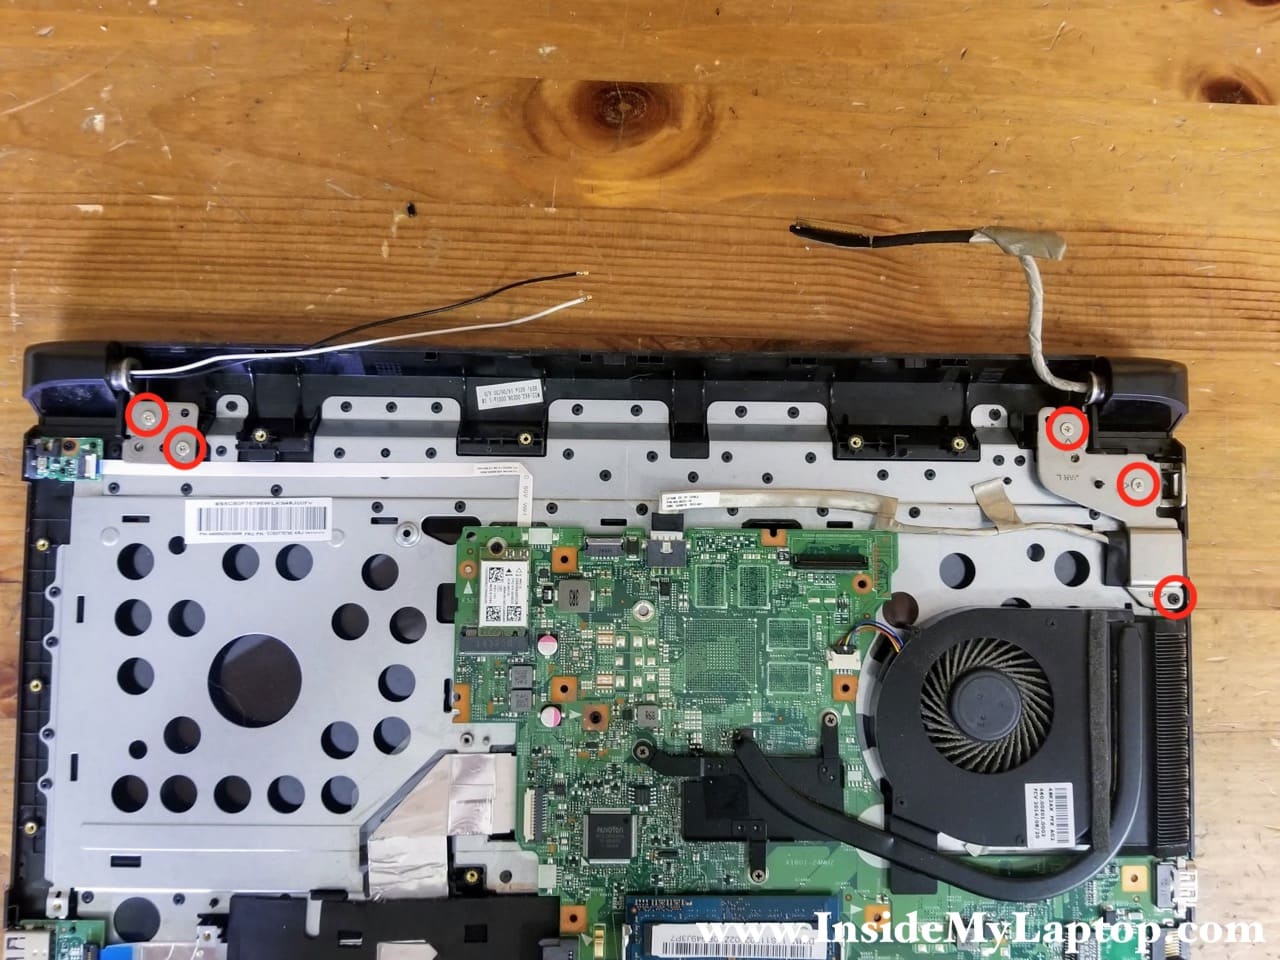
STEP 15.
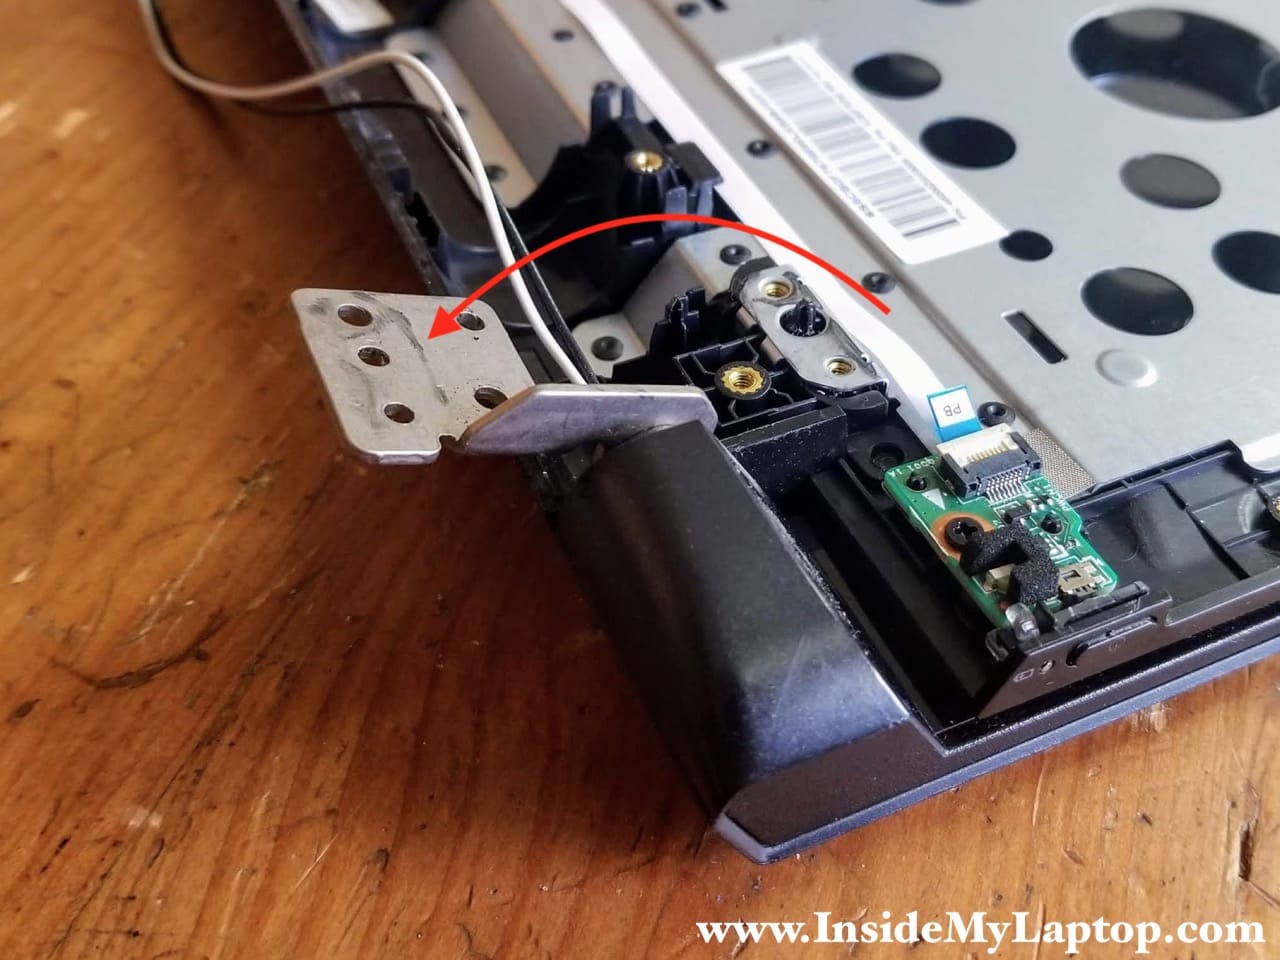
Remove two screws securing the right display hinge.
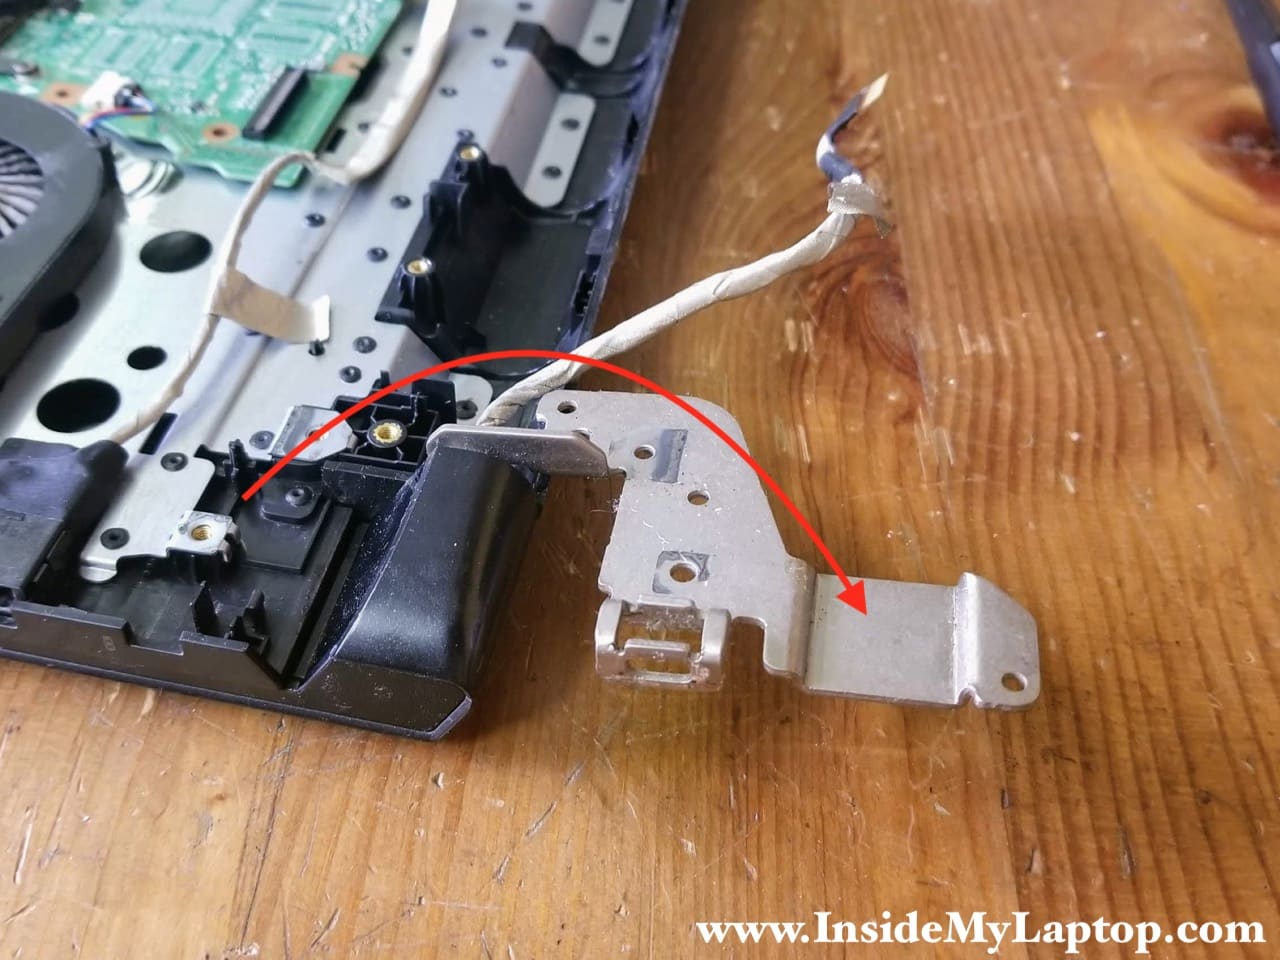
Remove three screws securing the left display hinge.
STEP 16.
Open up the right display hinge as far as it goes.
STEP 17.
Open up the left display hinge as far as it goes.
STEP 18.
The DC power jack is mounted under the left hinge.
Disconnect the DC jack cable from the motherboard and remove it.
STEP 19.
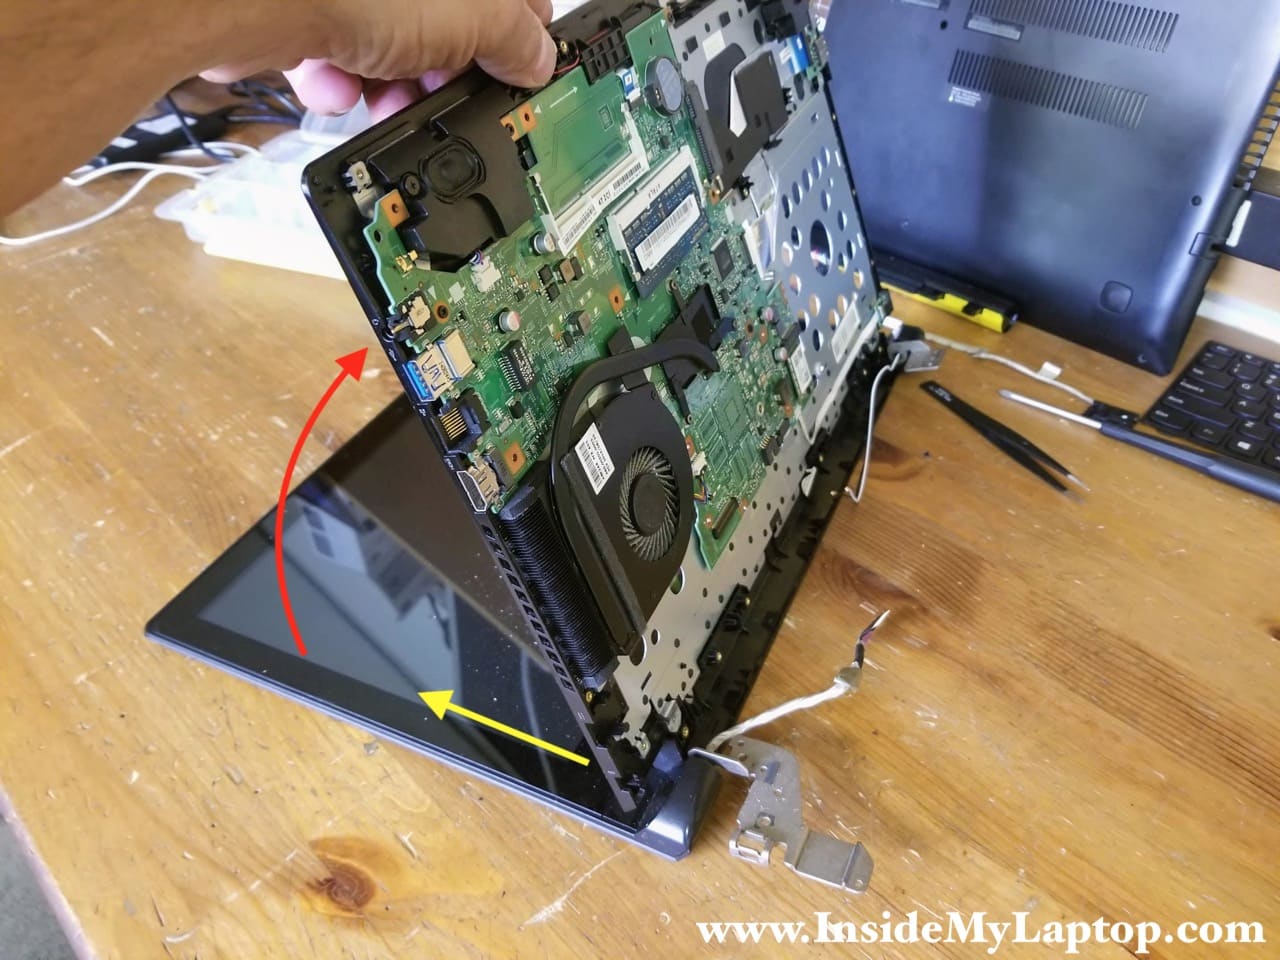
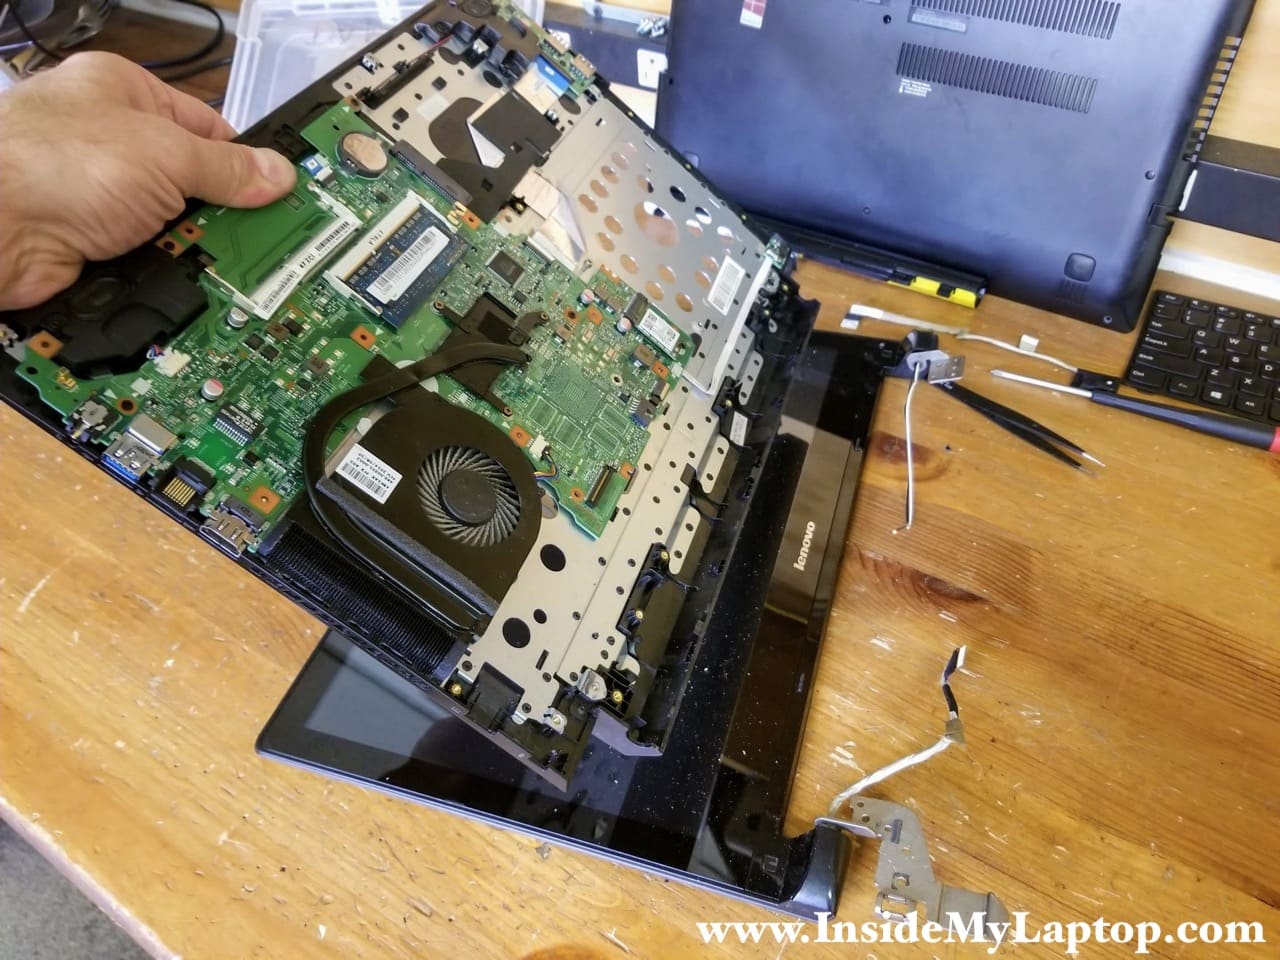
With all display cable disconnected and both hinges opened up you can start separating the top case assembly from the display.
Lift up the top case (red arrow) and slide it from under the display hinges (yellow arrow).
STEP 20.
Remove the top case assembly.
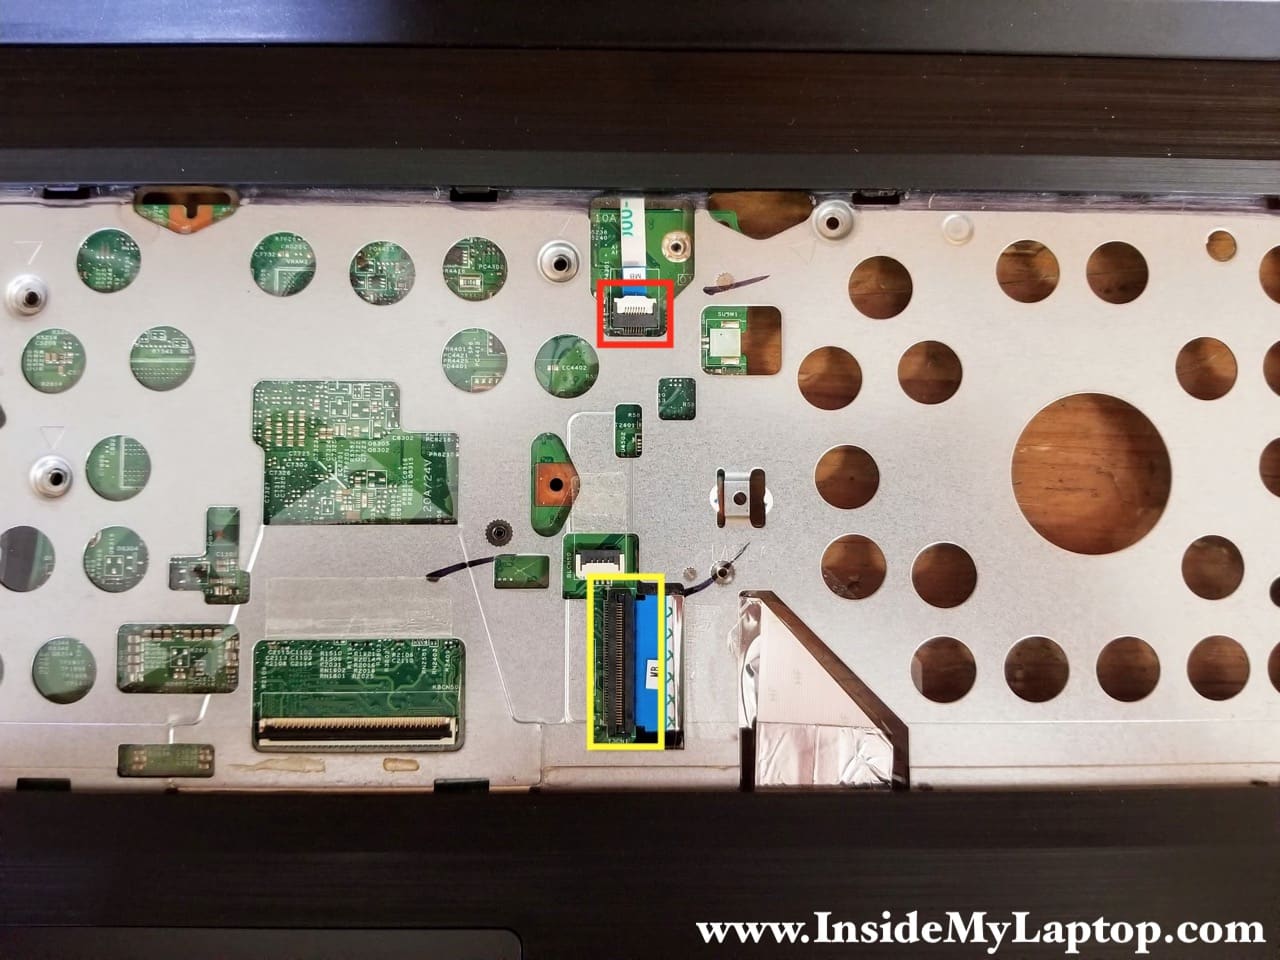
STEP 21.
In order to remove the motherboard it’s necessary to disconnect two more cables located on the top side – the power button cable (red) and the USB/Audio port/SD card boar cable (yellow).
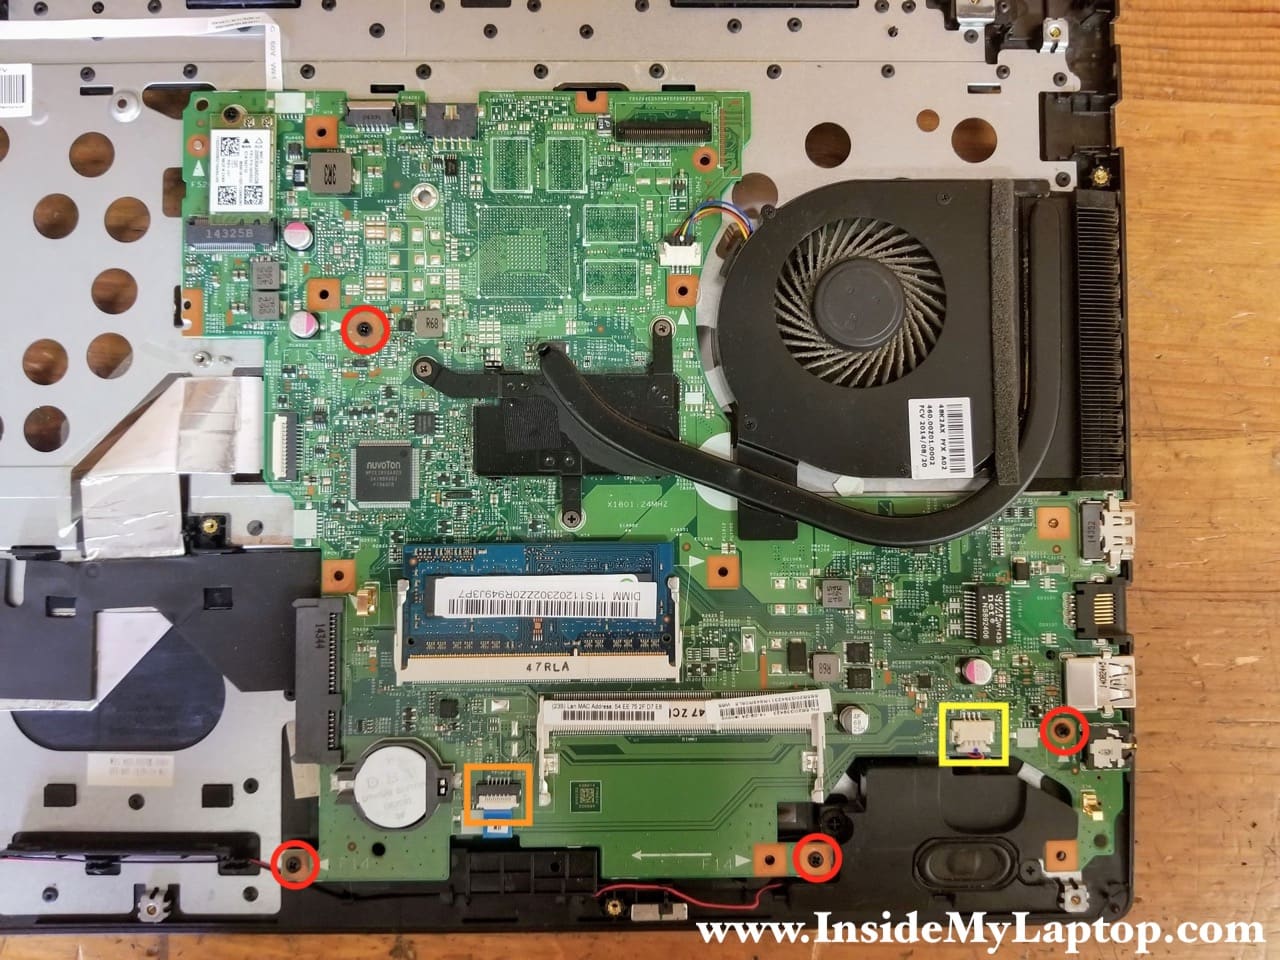
STEP 22.
Remove four screws securing the motherboard.
Disconnect the touchpad cable (orange) and speaker cable (yellow).
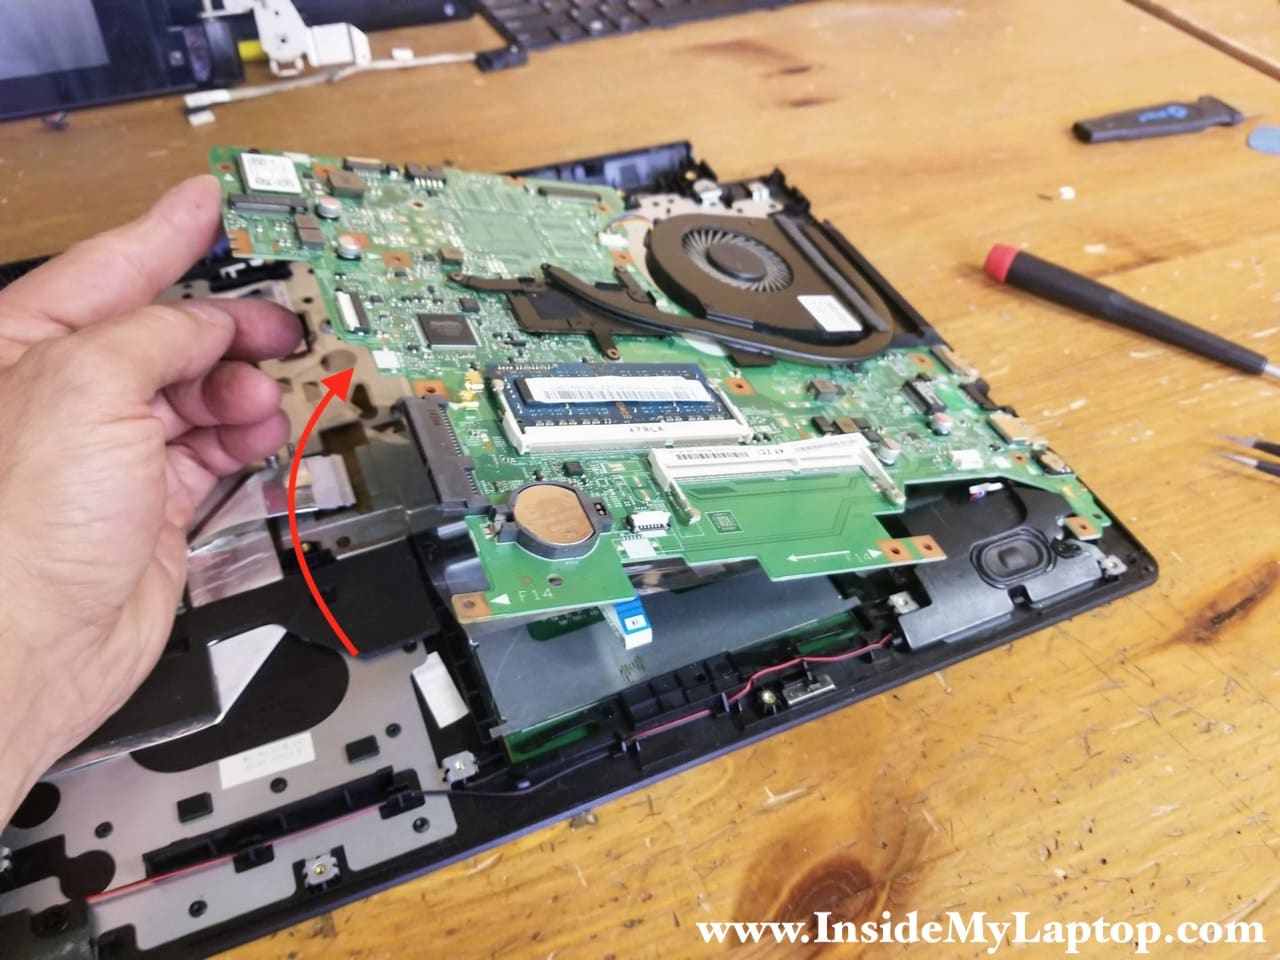
STEP 23.
Separate the motherboard from the top case and remove it completely.
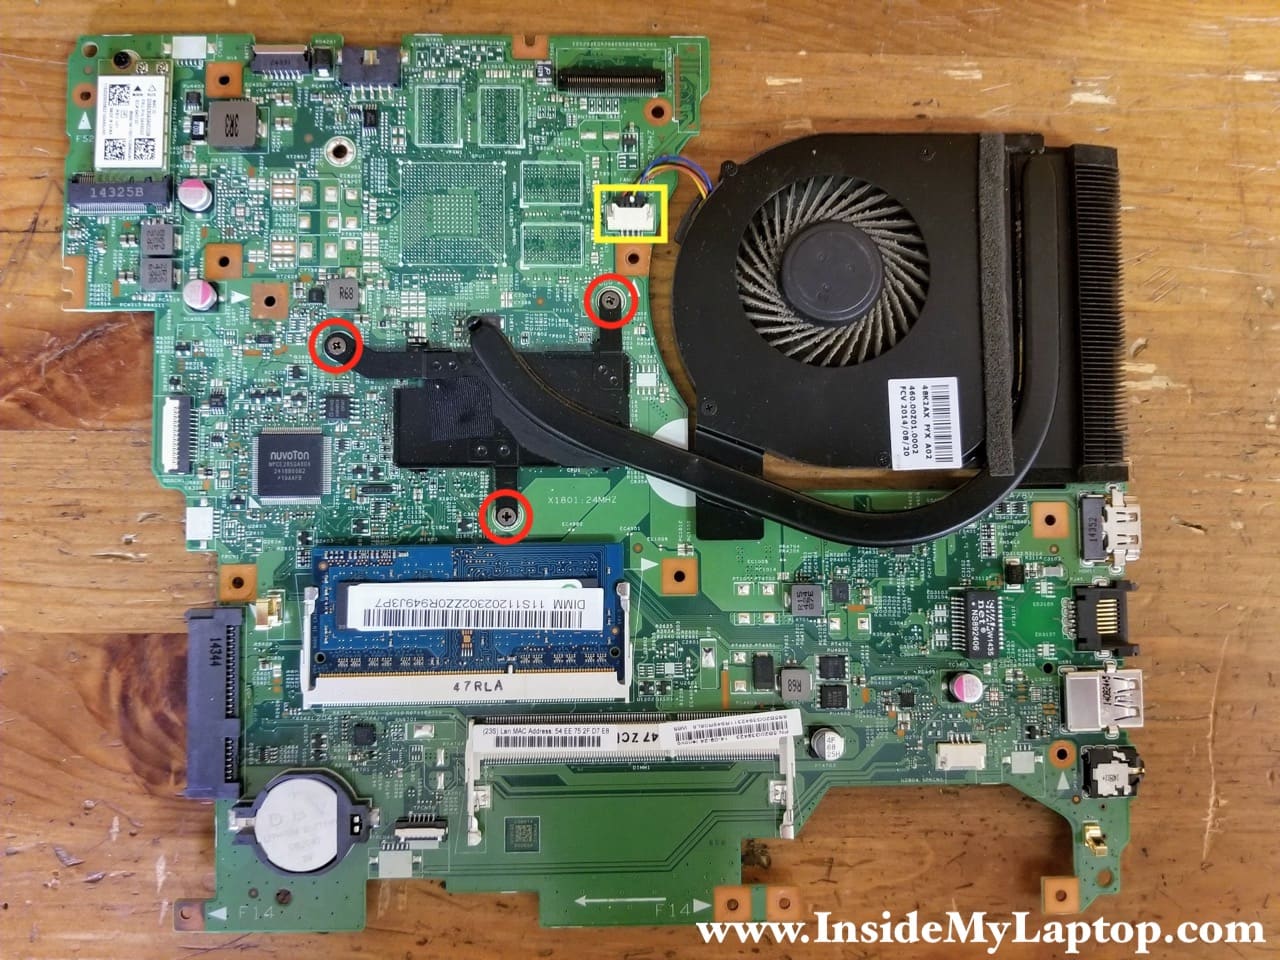
STEP 24.
The cooling fan is a part of the heatsink assembly.
Remove three screws securing the heatsink and disconnect the fan cable. Remove the heatsink assembly.
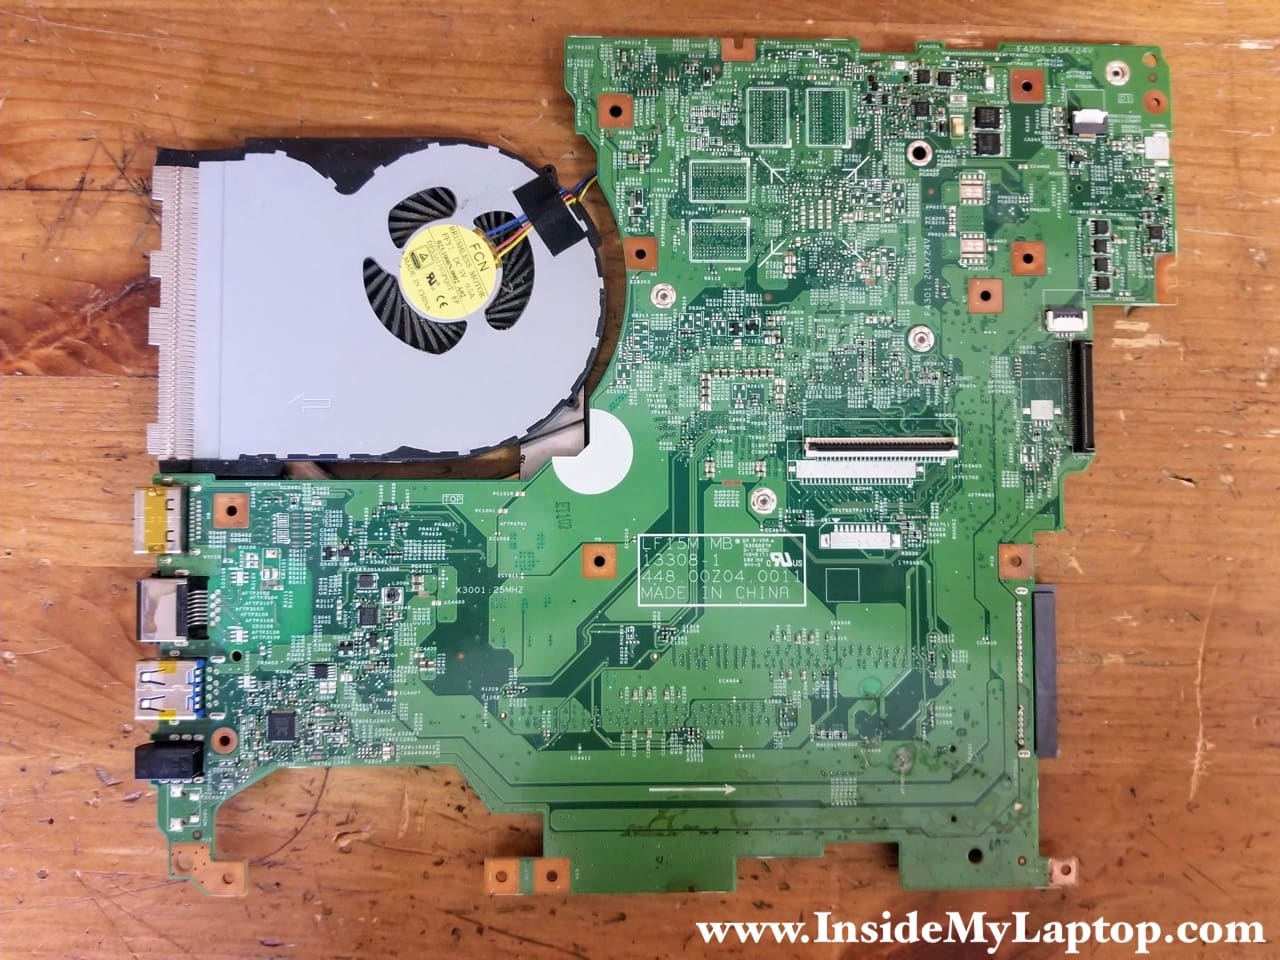
Here’s the other side of the motherboard.
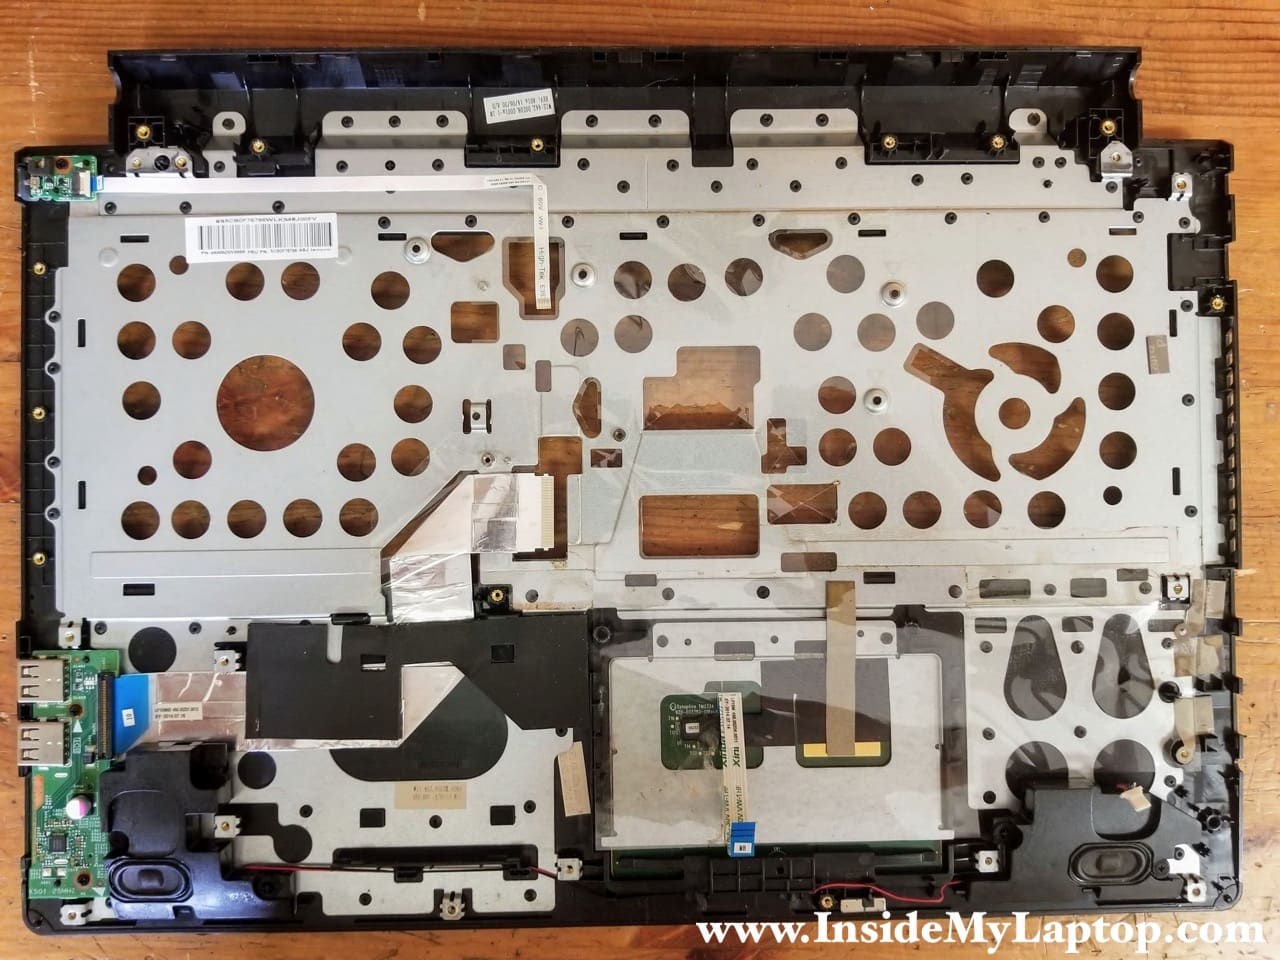
Here’s the top case with the motherboard removed.
The power button and USB/Audio jack/SD card reader board are still attached but can be easily removed too if necessary.
s
Question on the flex 2-15 earphone jack. Is it the same part as the one used in the Flex 2 14s? I need to replace the earphone jack on the main board and need to know which part to buy.