In the following guide I explain how to remove and replace the screen on a Lenovo E530 laptop.
In my case it failed and started showing thin vertical lines running from top to bottom.
Before you start make sure the computer is turned off and battery removed.
STEP 1.
There are four square screw covers on the display bezel.
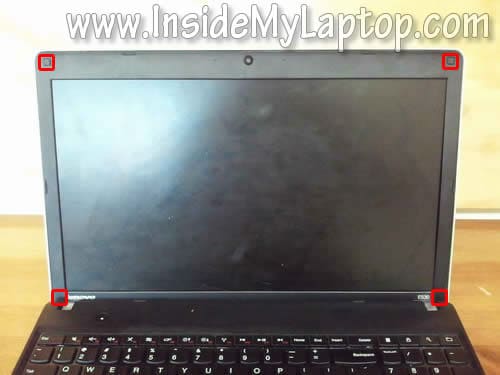
Using a sharp object remove screw covers from the top side of the display.
Remove two more covers from the bottom side.

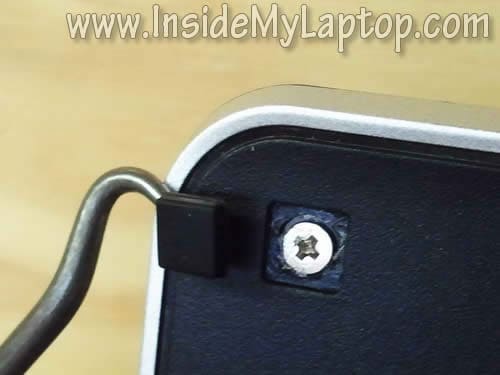
STEP 2.
Remove all four screws located under those covers.
You’ll have to use a small screwdriver in order to remove bottom screws.
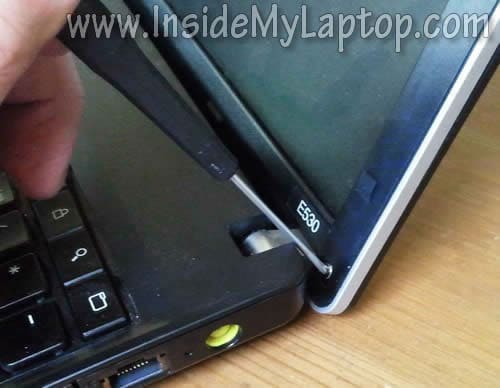
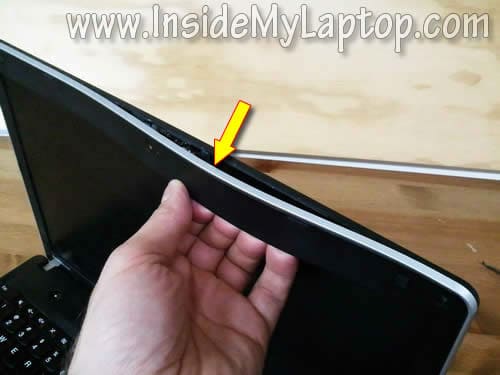
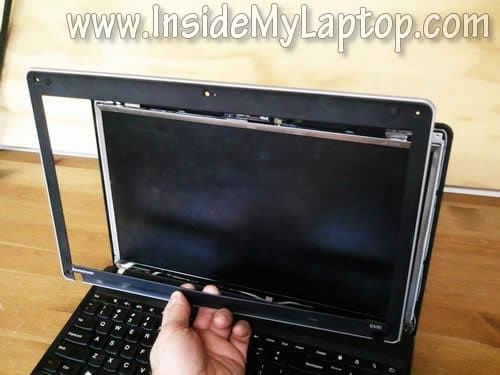
STEP 3.
Insert your fingers under the bezel and start separating it from the display assembly.
You’ll have to wiggle the bezel in order to unlock hidden latches.
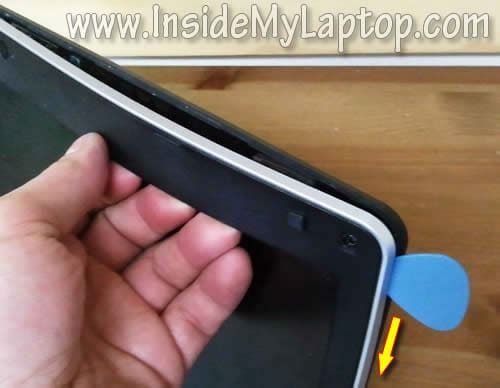
Continue separating the bezel on both sides of the display assembly. I’m using the guitar pick for that.
STEP 4.
After the bezel separated on the top, move to the bottom side.
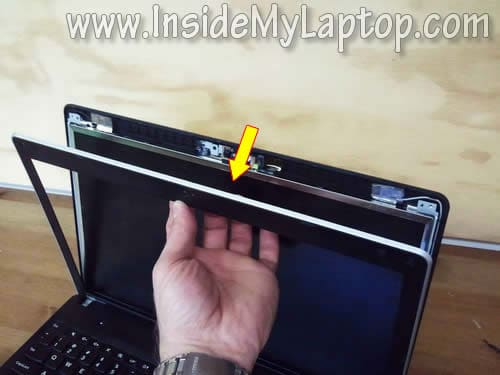
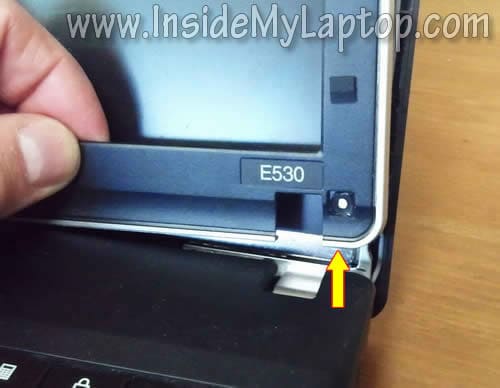
Lift up the bezel. As you see, the hinge cover is not part of the bezel.
STEP 5.
Remove the bezel from the display assembly.
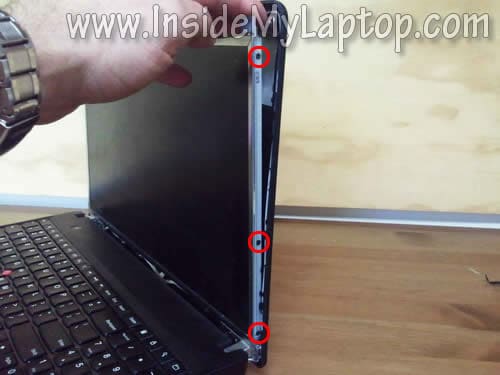
STEP 6.
Carefully separate the LCD from the display back cover and remove three screws from the right mounting bracket.
STEP 7.
Remove three more screws from the left mounting bracket.

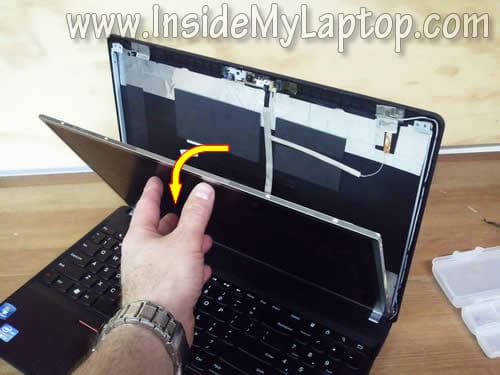
STEP 8.
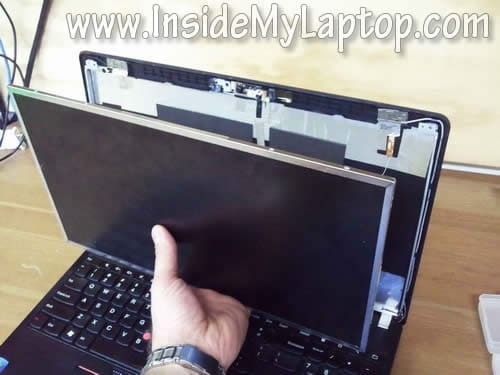
Now you can separate the LCD assembly from the display cover and place it the front side down on the keyboard.
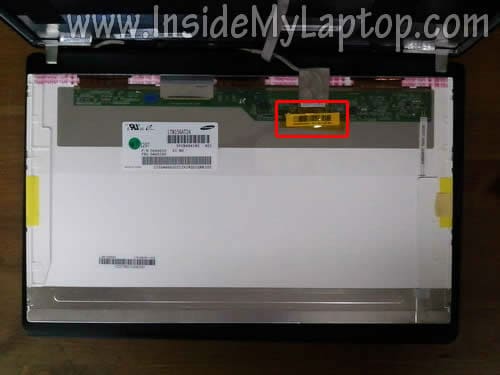
STEP 9.
The next step will be disconnecting the video cable.
The video cable connector secured by clear tape. Carefully peel off the tape.
STEP 10.
Disconnect the video cable.

STEP 11.
Finally, you can remove the failed LCD screen from the display assembly and replace it with a new one.
After the replacement assemble the laptop following all disassemble steps in the reverse order.
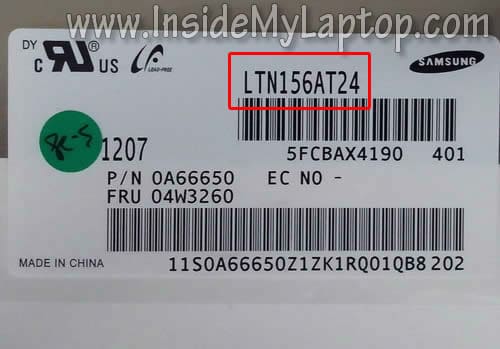
You can search for a new replacement screen using the model number from the original one.
The model number printed on the back label. In my case I had the following screen installed originally: model LTN156AT24.
laptop screens
Brilliant article. This will come in very handy when I get some free time at the weekend. Big thanks.
TechArticulate
These instructions worked flawlessly. Very helpful, thank you!
niceguy
Very good article… many many thanks…. it was so easy replacing my broken screen.
Harut
Hi,
can I replace my Lenovo 530 -Display with a not matte screen???
IML Tech
Harut,
Most likely yes. Try searching on Amazon or eBay for “Lenovo E530 glossy screen”. I think you’ll find it easy.
Laura-Lee
What types of screwdrivers are needed? I’ve seen “laptop repair kits” online for between $15 and $40 dollars but they all seem to be for a specific brand – none of which are Lenovo. I’d prefer to use regular screw drivers if that is possible.
IML Tech
@ Laura-Lee,
You’ll need regular phillips screwdrivers. I use Wiha 7 Pc Precision Screwdriver Set.
Chris
I bought a e530 “replacement” screen on Amazon – it is not an LG screen as in the original and part numbers do not match, but it is an exact fit. Display appears to be made by LEOO. Have you had any experience with this display? Is there a site where I can check compatibility?
IML Tech
@ Chris,
I don’t know this brand and have no ides where you found it.
I googled for “e530 LENOVO screen” and it didn’t bring me any results.
WinCrazy
All LCD screens of the same dimensions, e.g., 15.6″, same resolution, e.g., 1366×768 (max), and same backlight type, e.g., LED lighting, are exactly the same physical dimensions and use the same connector, mounting holes, etc. This makes the a “form, fit and function” match for each other. The only major difference is that some screen surfaces are made glossy and some are matte (reflection reducing). One minor difference I found is that some panels have coarser adjustment increments for the screen brightness.
Both (used; see eBay) matte and glossy screens seem to sell for about the same price. While colors may seem to “pop” out from glossy screens, the nuisance of ambient light reflections can soon wear out your patience and give you a headache. I always opt for a matte screen which greatly reduces eye fatigue.
John875
Many many thanks!!! Turned out the problem with my laptop was just that the video connector had become unplugged. With these instructions and a set of jewelers screwdrivers it took me about 1/2 an hour to fix!!
Bruce
cannot get new screen to work. Not sure how the connection at step 11 is supposed to go together.
IML Tech
@ Bruce,
The display cable just plugs in into the display.