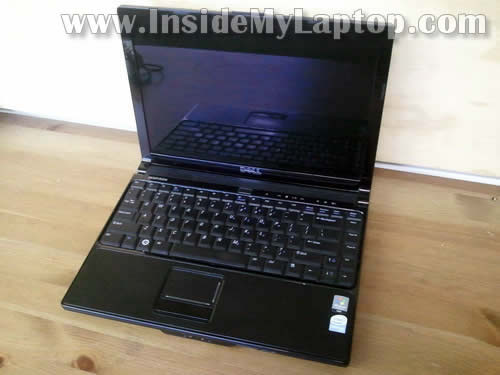
In this guide I explain how to remove LCD screen from a Dell Inspiron 1318 laptop.
Also, I’ll show how to remove the inverter board.
STEP 1.
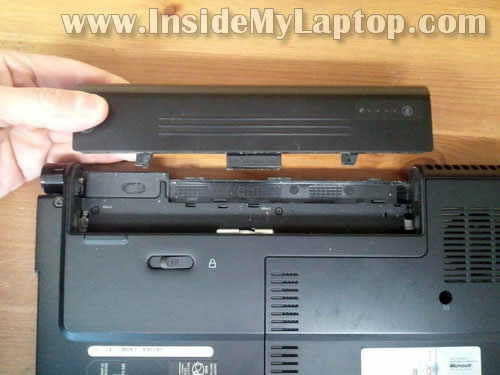
Turn off the computer and remove the battery.
STEP 2.
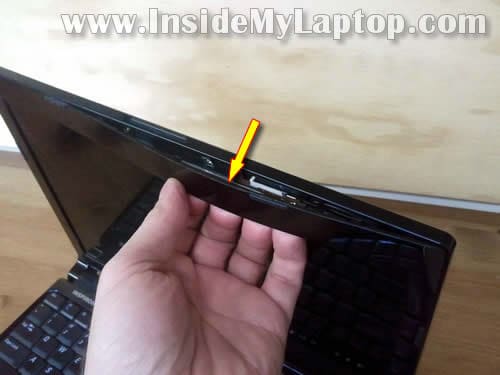
Start separating the display bezel from the back cover.
Insert your fingers under the bezel and wiggle it.
There are hidden plastic latches securing the bezel. When you wiggle the bezel you’ll be able to disengage the latches.
STEP 3.
Continue separating the bezel on the top of the display assembly.
STEP 4.
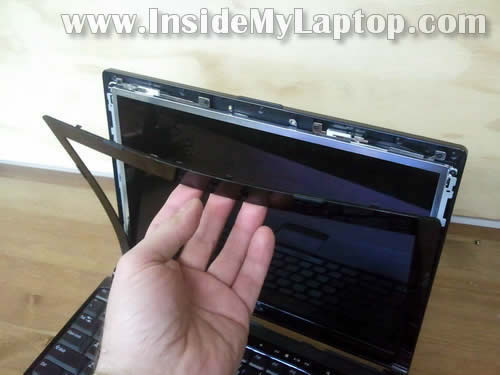
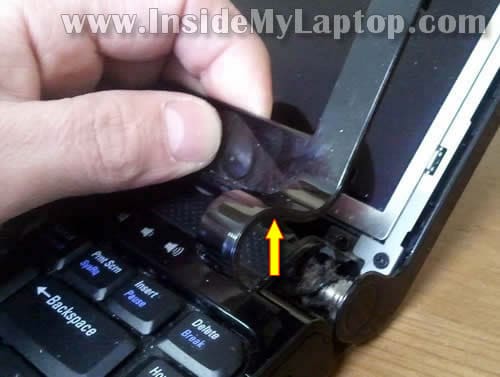
After that move to the lower part of the bezel.
Carefully lift up the part of the bezel which covers the hinges.
STEP 5.
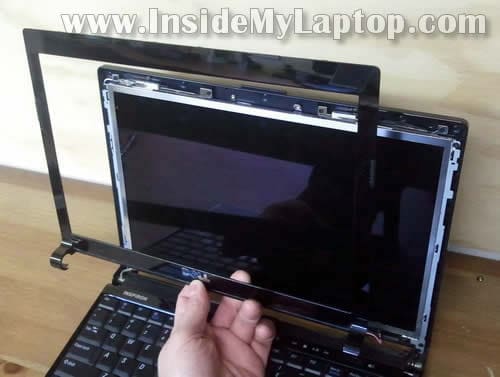
Remove the bezel from the display assembly.
STEP 6.
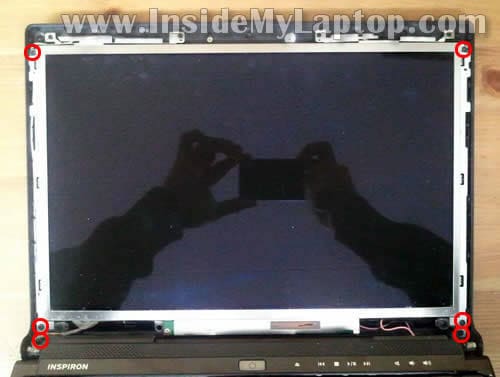
Remove six screws securing the LCD assembly to the display back cover.
STEP 7.
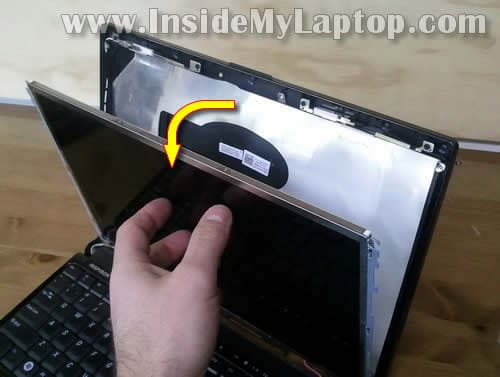
Separate the LCD from the back cover and place it face down on the keyboard.
STEP 8.
Now you can access the video cable.
One end of the harness is connected to the inverter board. The second end is connected to the screen.
If your Dell Inspiron 1318 has a LED-backlit LCD screen there will be NO inverter board.
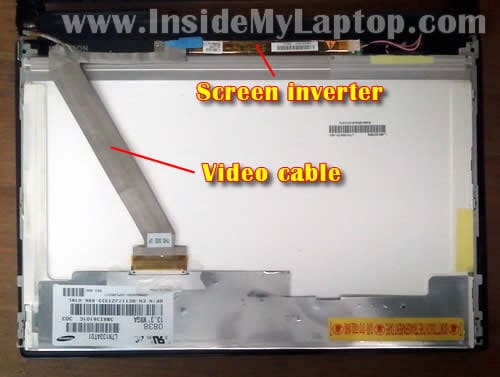
STEP 9.
Unplug connector from the inverter board.
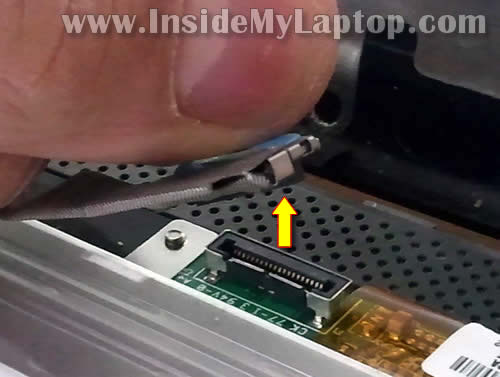
STEP 10.
Remove sticky tape securing the video cable connector.
Disconnect the video cable.
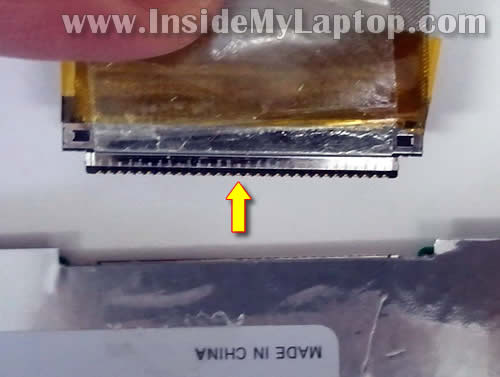
STEP 11.
Now you can remove the LCD assembly from the laptop.
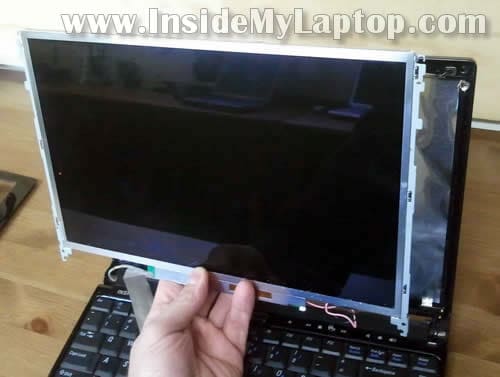
STEP 12.
Like in many other Dell laptops, the inverter is mounted on the bottom side of the screen.
In the following three steps I’ll show how to remove the inverter board.
STEP 13.
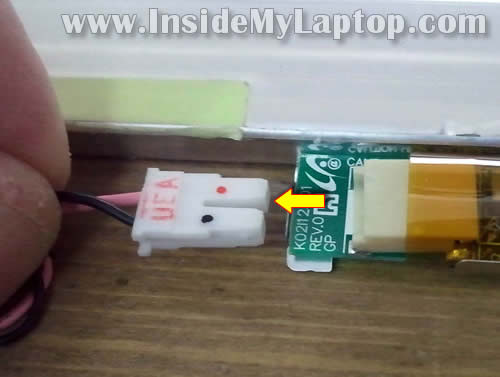
Disconnect one cable from the left side of the inverter board.
STEP 14.
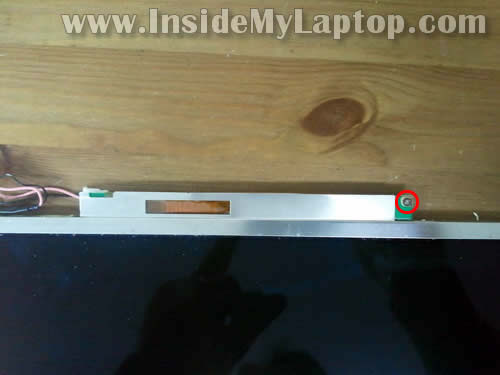
Remove one screw securing the inverter board to the mounting bracket.
STEP 15.
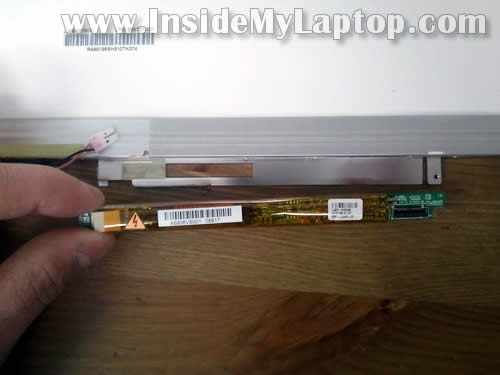
Remove the inverter board from the bracket.
NOTE: most likely the inverter board will be glued to the mounting bracket with double sticky tape.
You’ll have to insert something between the inverter and bracket and separate it.
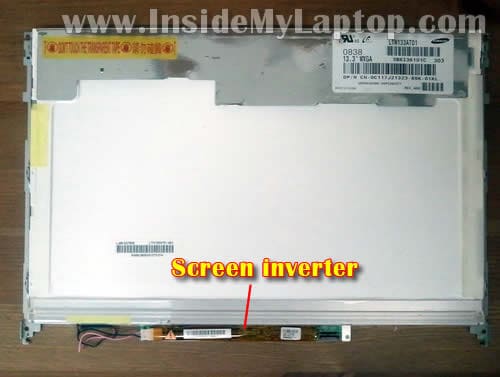
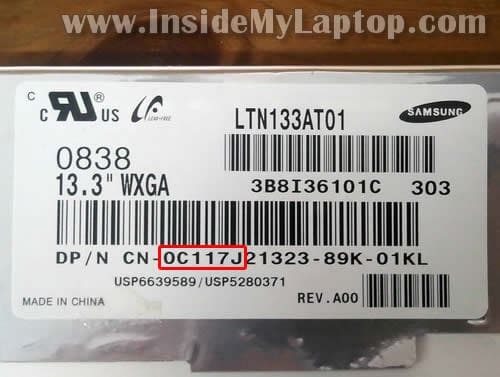
You can find a new replacement LCD using the Dell part number from the back of the original part.
You can see it on the following picture. The part number is six digits and letters after CN-.
In my Dell Inspiron 1318 I had the following LCD installed: 0C117J.
You can skip “0” while searching for a new screen. Just search for C117J.
Dell Inspiron 1318 might have two different screen types installed:
1. CCFL backlit – screen with backlight lamp inside.
2. LED backlit. This screen doesn’t require the inverter board.
Again, make sure to buy the correct one: CCFL backlit or LED backlit.
If you are buying a CCFL LCD screen, I would advice to buy one with the inverter board attached. In this case there will be no compatibility issues.
Shashi
Hello Sir,
This repair tip with photographs is very helpful. I have a problem with my laptop (Dell Inspiron 1318 model. Screen went black but I can barely see the things on the screen. when I checked with a different moniter, it is functioning normally. I searched on the web and found out that the inverter could be a problem or the backlight screen. So first I want to check with a new inverter and see if it works. If it does’nt work I will have to buy the screen too.
My screen has the same part number C117J and has an inverter board (Just same as shown above). So, Is my screen a CCFL backlit LCD ? I Just want to confirm with you before I buy one if needed. And can you suggest me where I can buy the inverter for this model?
Appreciate your help,
Thanks much,
Shashi
Prakash
Hello Friend !!
Thanks a lot !! Information is quite useful,
Regards,
Prakash Dhole
ManK
Hi:
I followed the steps to replace the display monitor. By some reason, I broke the black cable located on the left side of computer connected to the mother board shown in the picture about step 5. Do you know what is the cable about? Will the computer work even the black cable is broken?