In this guide I explain how to disassemble an Acer Aspire F5-573 Series laptop. Model number N16Q2. In this particular case I’m taking apart an Aspire F5-573G-78R2.
STEP 1.
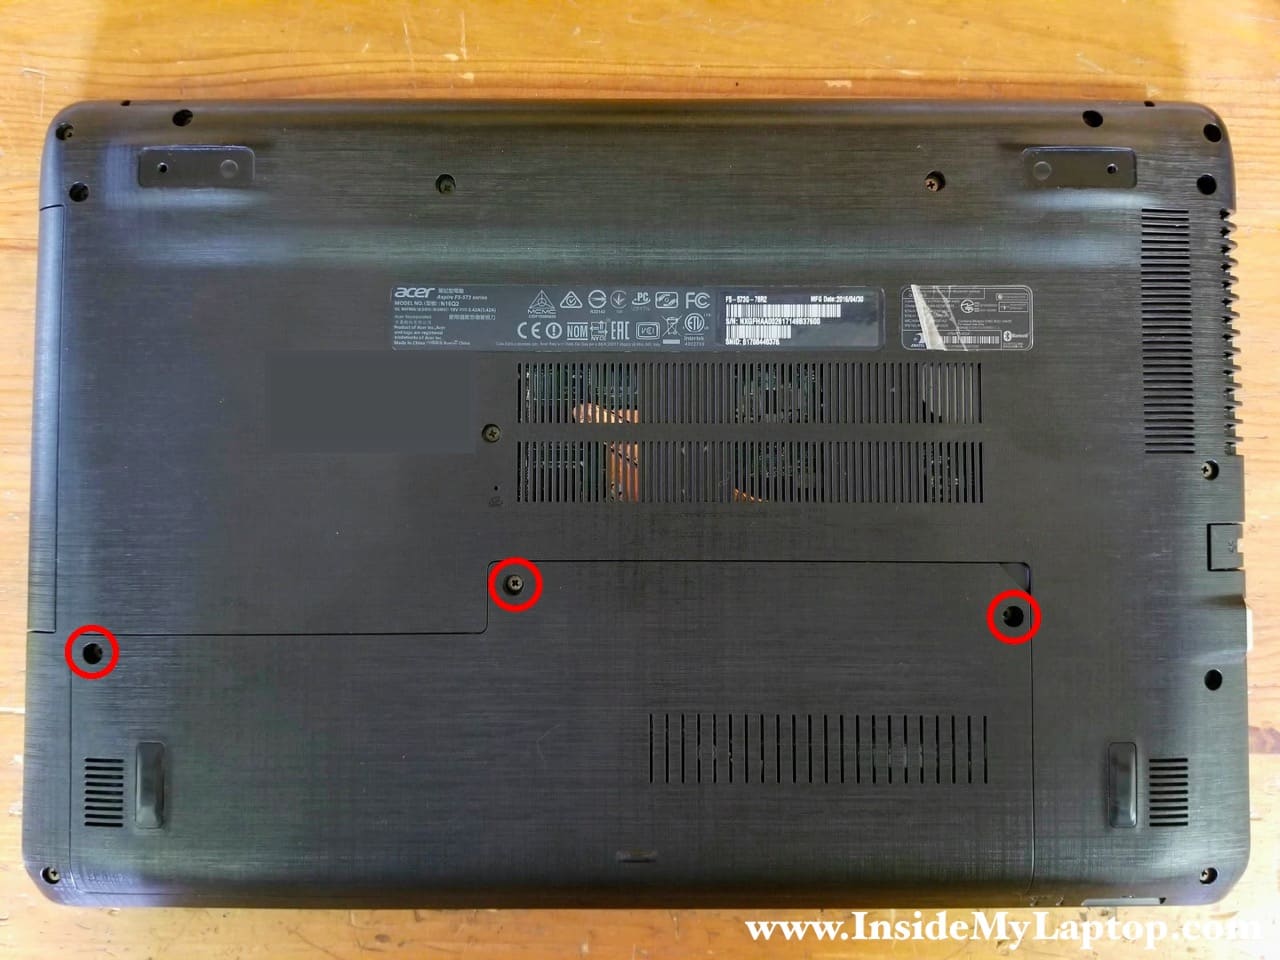
Remove three screws securing the HDD/RAM cover.
Lift up and remove the cover.
Unlike in Acer Aspire E5 573, in this model the HDD/RAM cover is removable which makes it easier for HDD and RAM upgrades.
STEP 2.
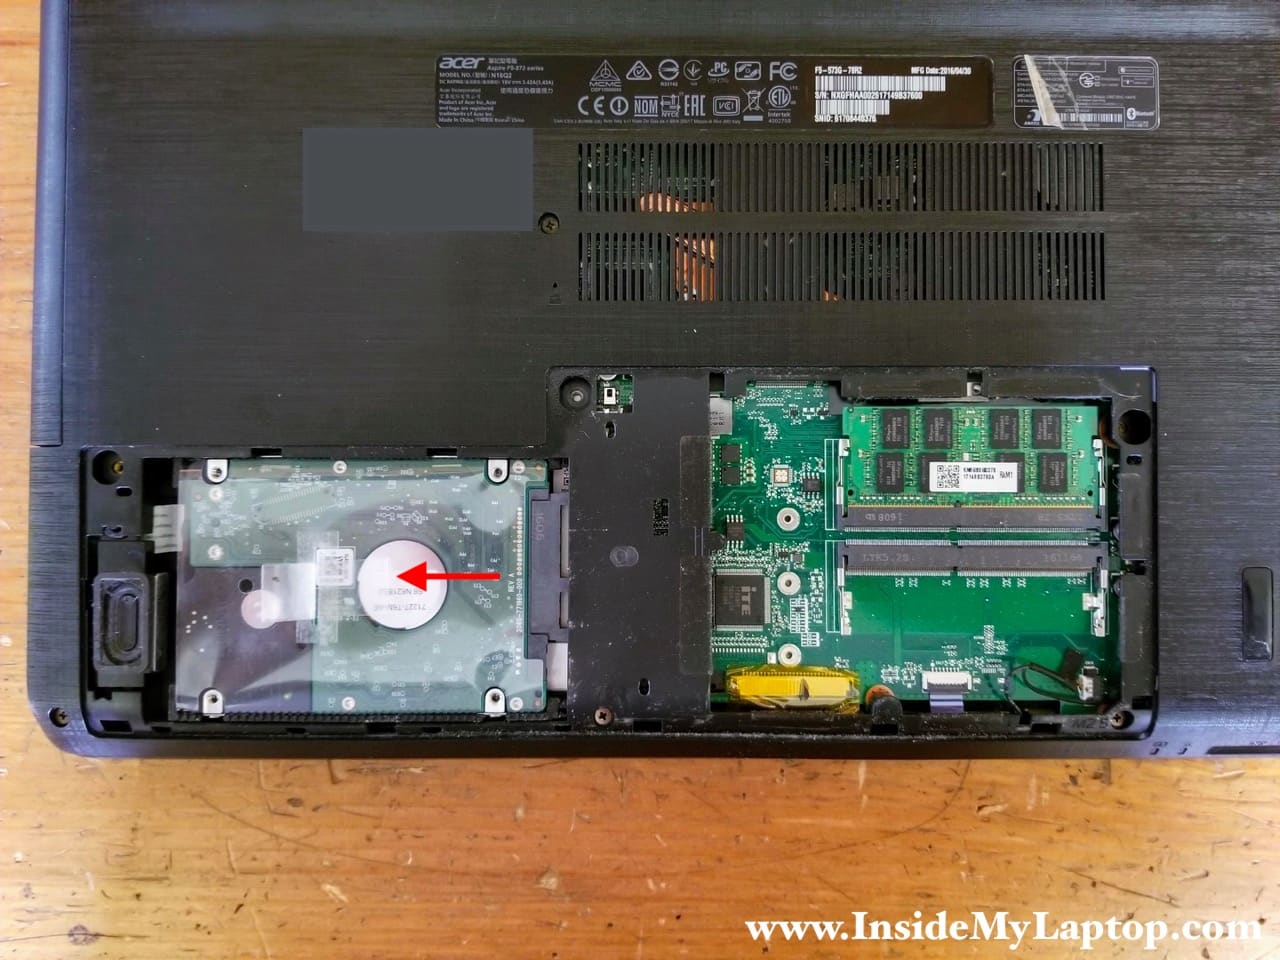
Slide the hard drive away from the SATA port.
After the hard drive is disconnected you can remove it from the laptop.
Acer Aspire F5-573 series motherboard has two memory slots. In my configuration only one RAM module was installed. I’ll leave it in the slot but you can remove if necessary.
This laptop can take up to 32GB DDR4 2400/2666/3200 SODIMM RAM.
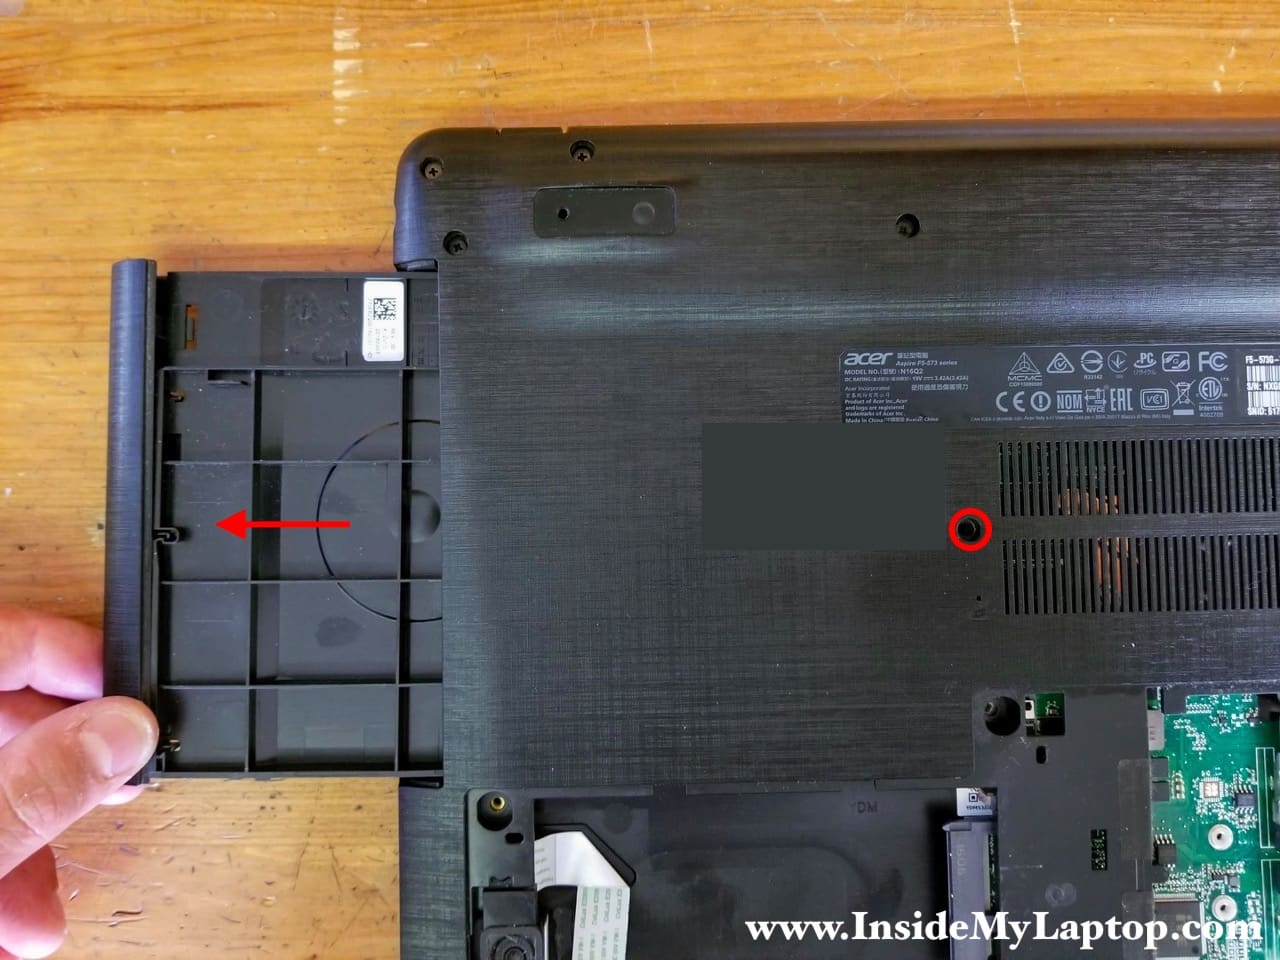
STEP 3.
Remove one screw securing the DVD optical drive.
Pull the drive out. You can upgrade this drive to a 2.5″ SATA solid state drive to speed up the system.
In my laptop I had a plastic replacement, not a real DVD drive.
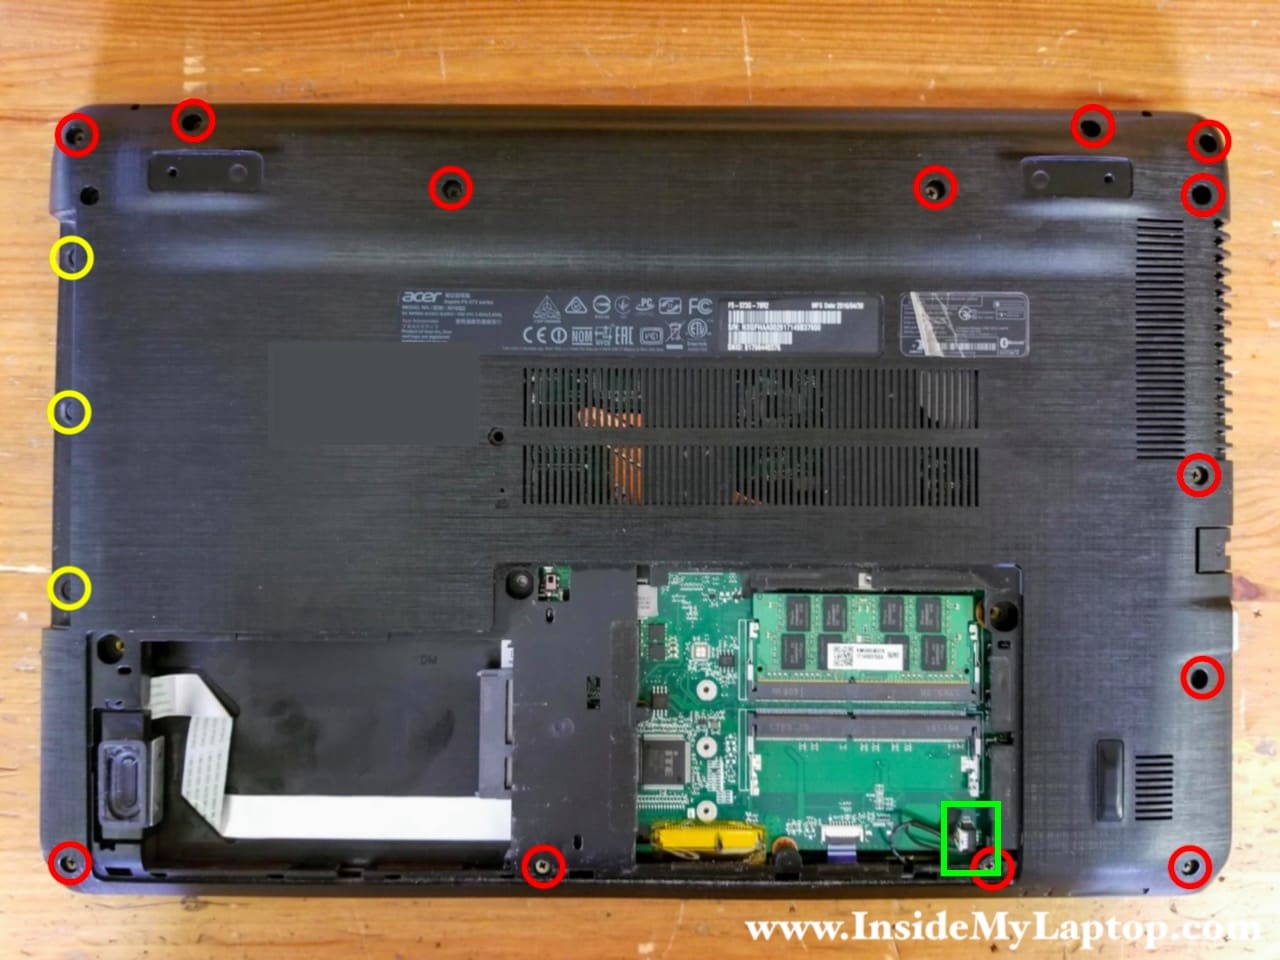
STEP 4.
Remove all screws from the bottom cover.
Don’t forget three screws located in the optical drive bay. I color-coded them in yellow.
Disconnect the speaker cable from the motherboard. This connector is located in the memory compartment (green square).
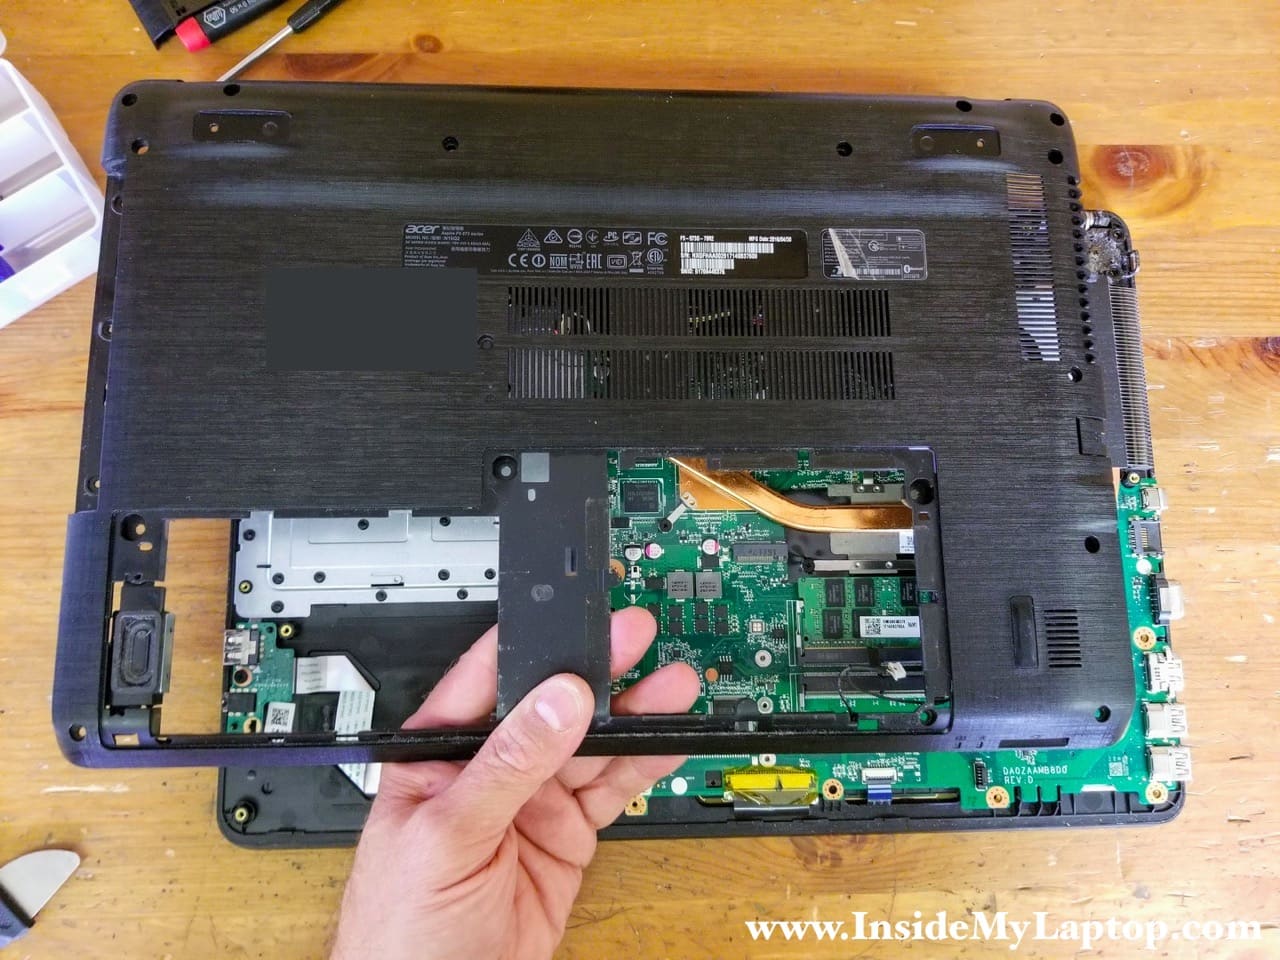
STEP 5.
Start separating the bottom cover from the top case.
I found it’s easier to do if you start from the optical drive side.

STEP 6.
Remove the bottom cover.
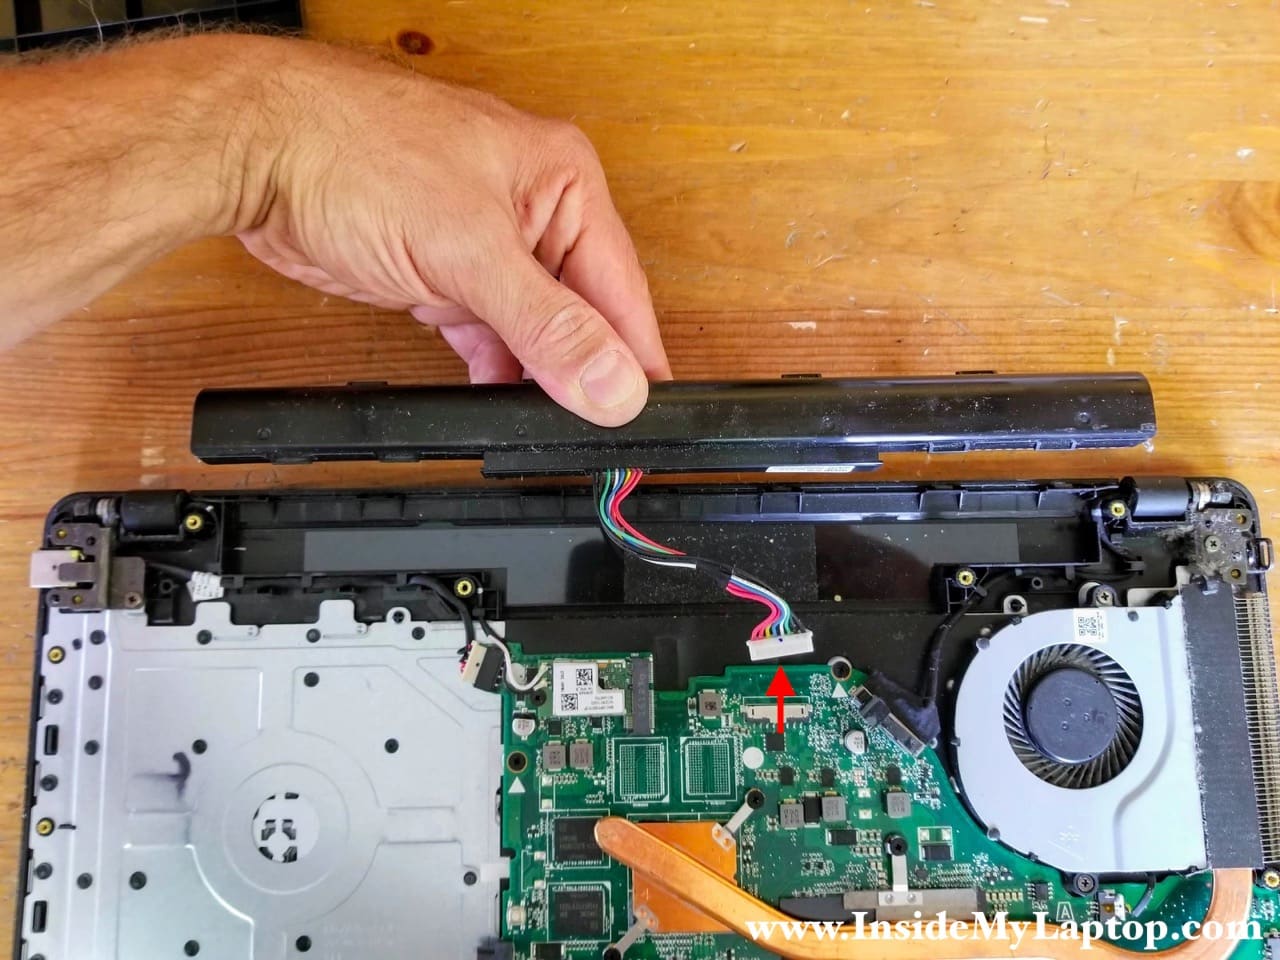
STEP 7.
Lift up the battery and disconnect the battery cable from the motherboard.
Now you can remove and replace the battery if necessary.
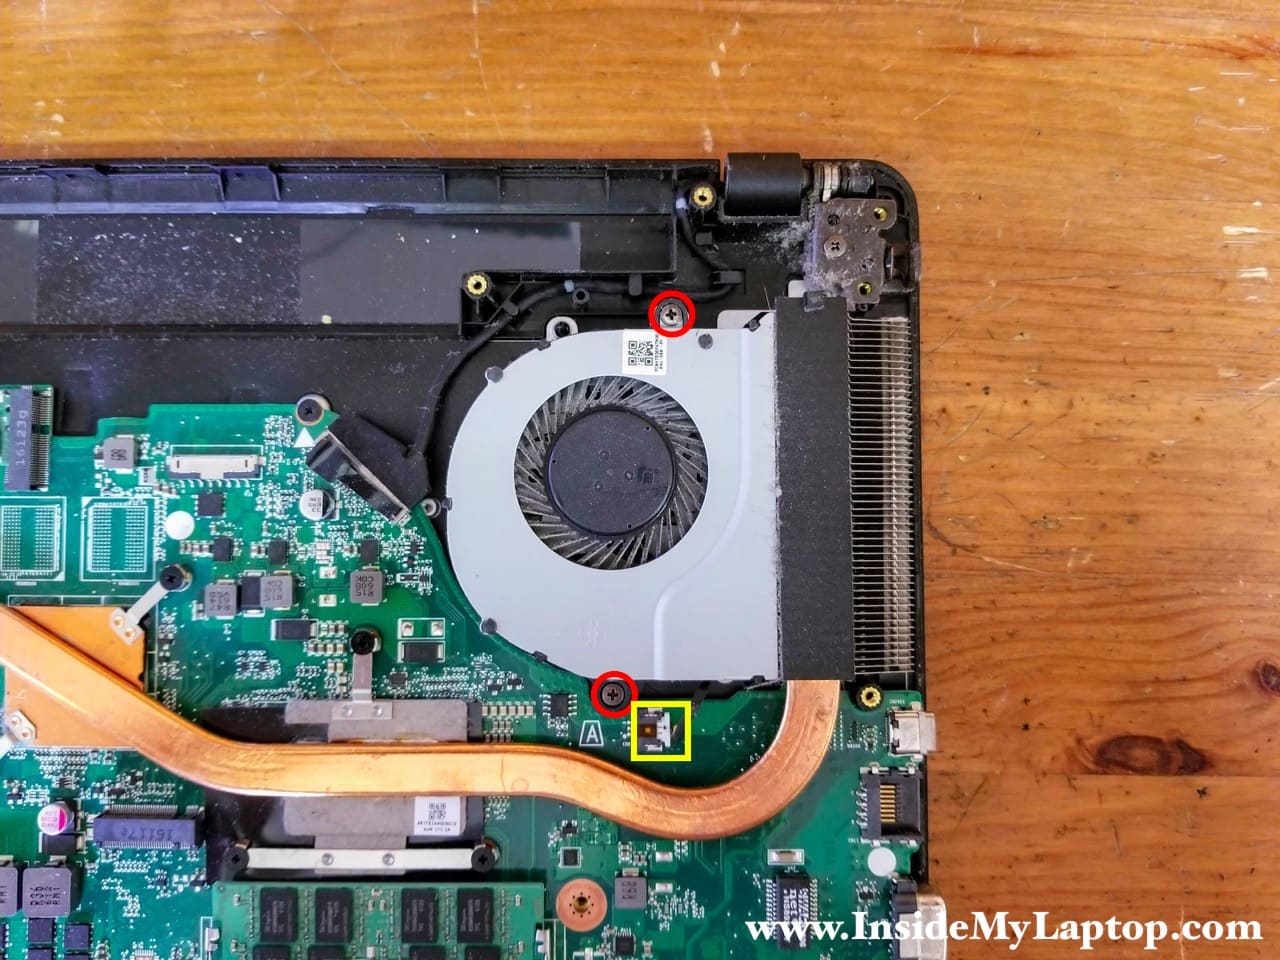
STEP 8.
Remove two screws securing the cooling fan.
Disconnect the fan cable from the motherboard.
Now you can remove the fan and clean it up if necessary. Mine was very dusty.
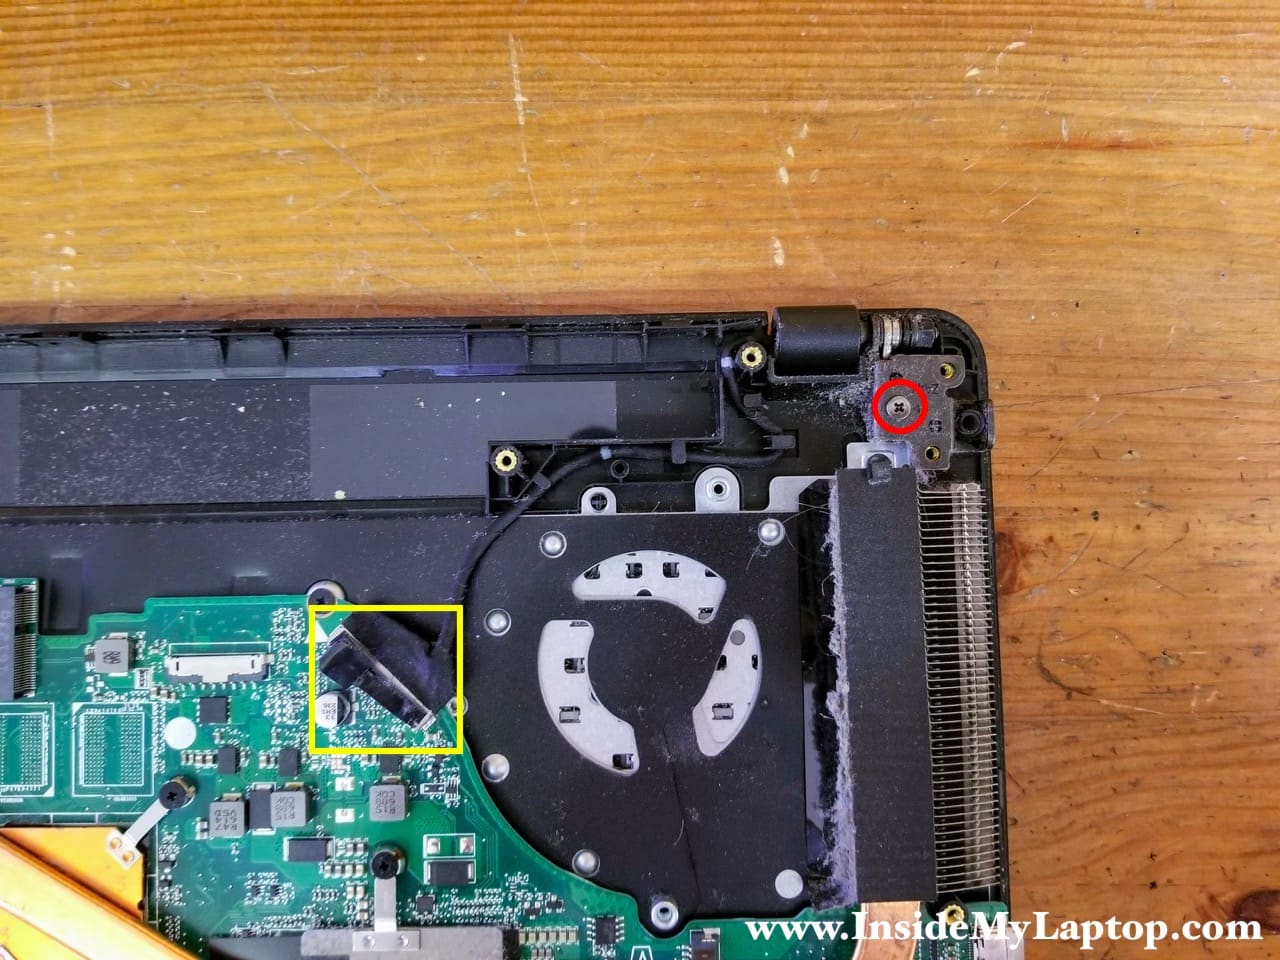
STEP 9.
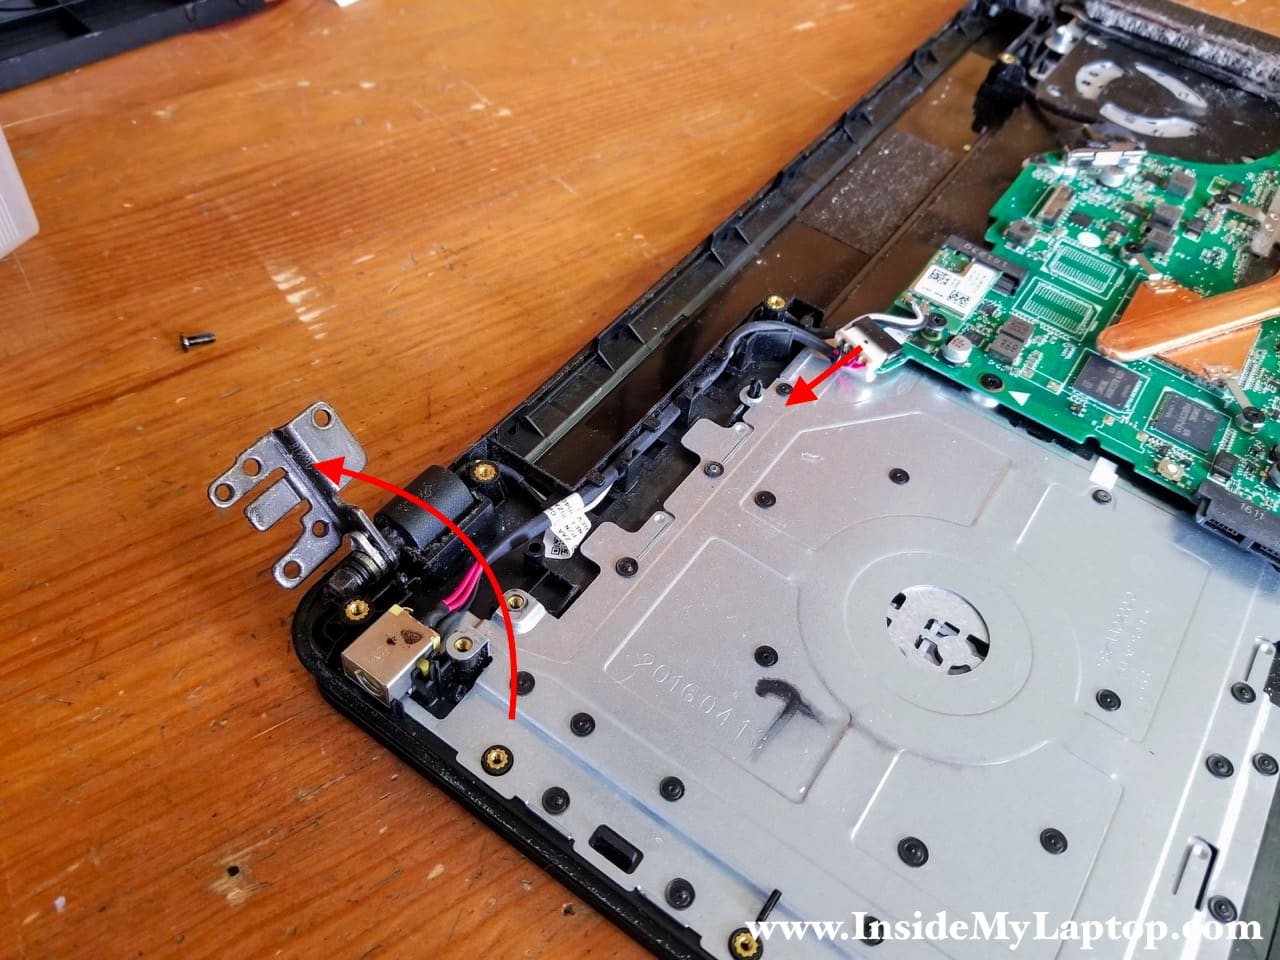
The DC power jack is mounted under the right display hinge.
Remove one screw securing the display hinge.

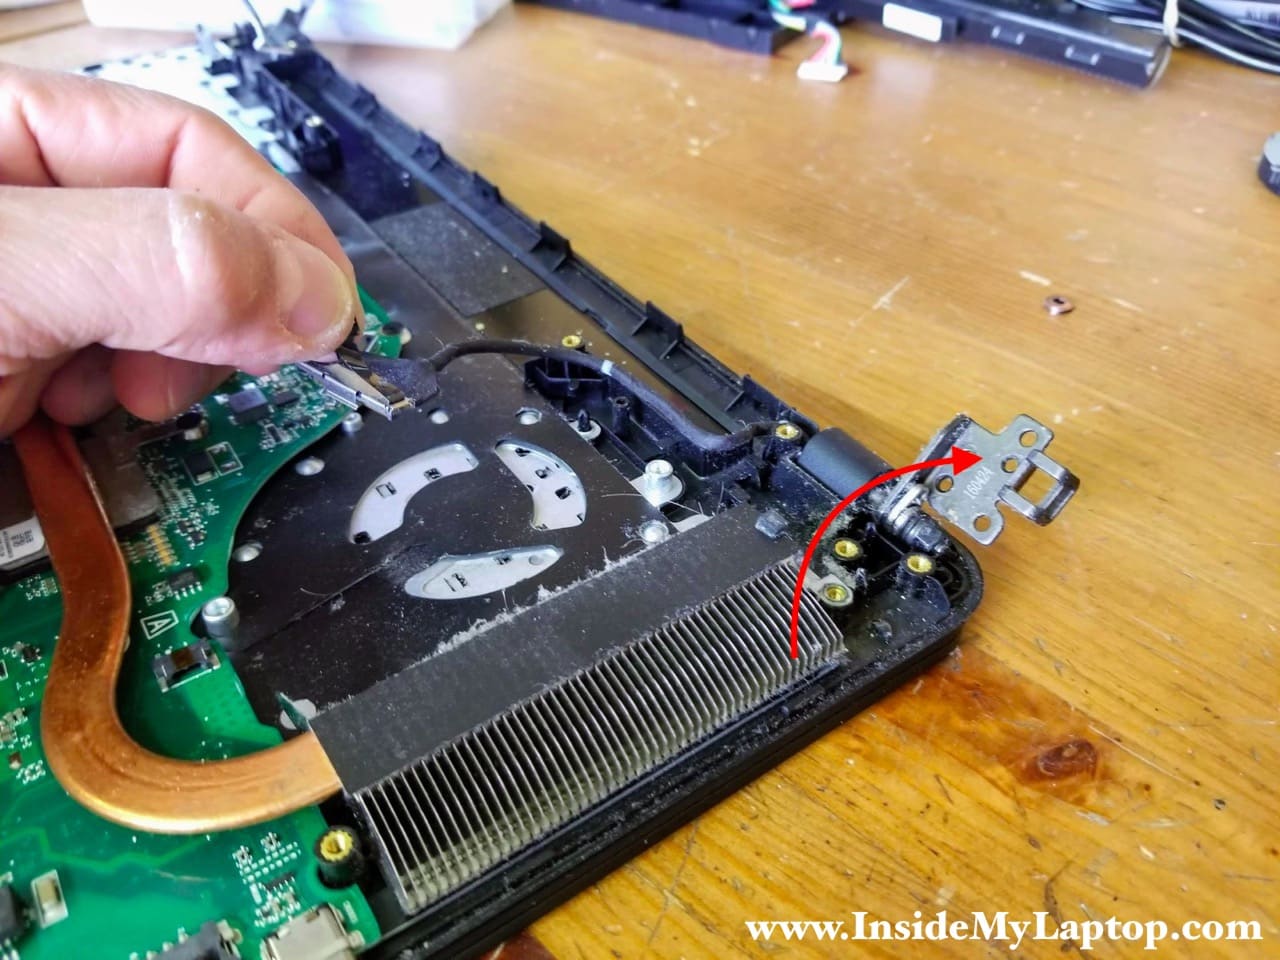
STEP 10.
Open the display hinge as it shown on the following picture.
Now you can disconnect the DC jack cable from the motherboard and remove it completely.
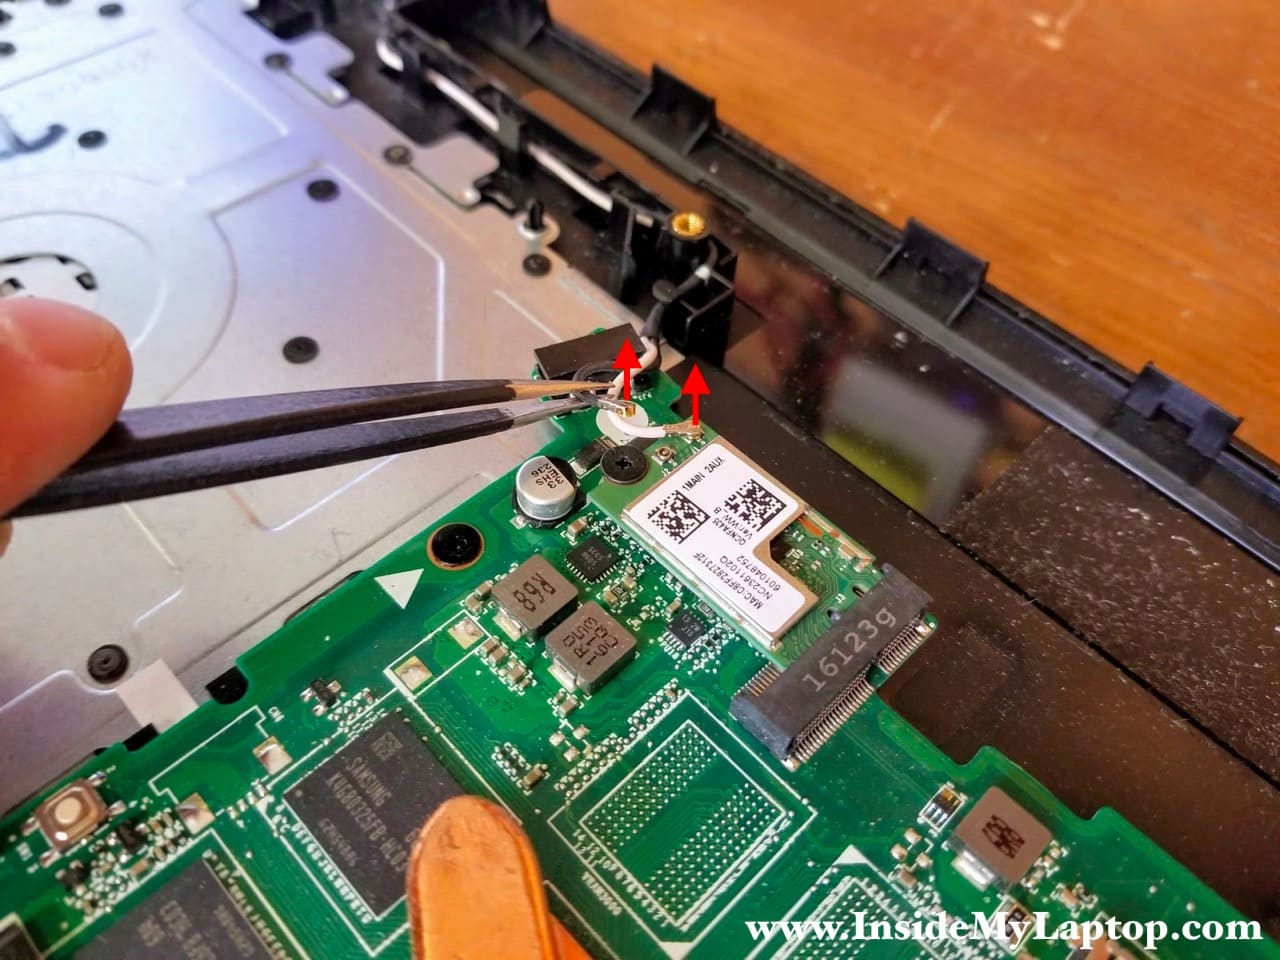
STEP 11.
Carefully disconnect the black and white antenna cables from the wireless card.
Remove one screw attaching the card to the motherboard.
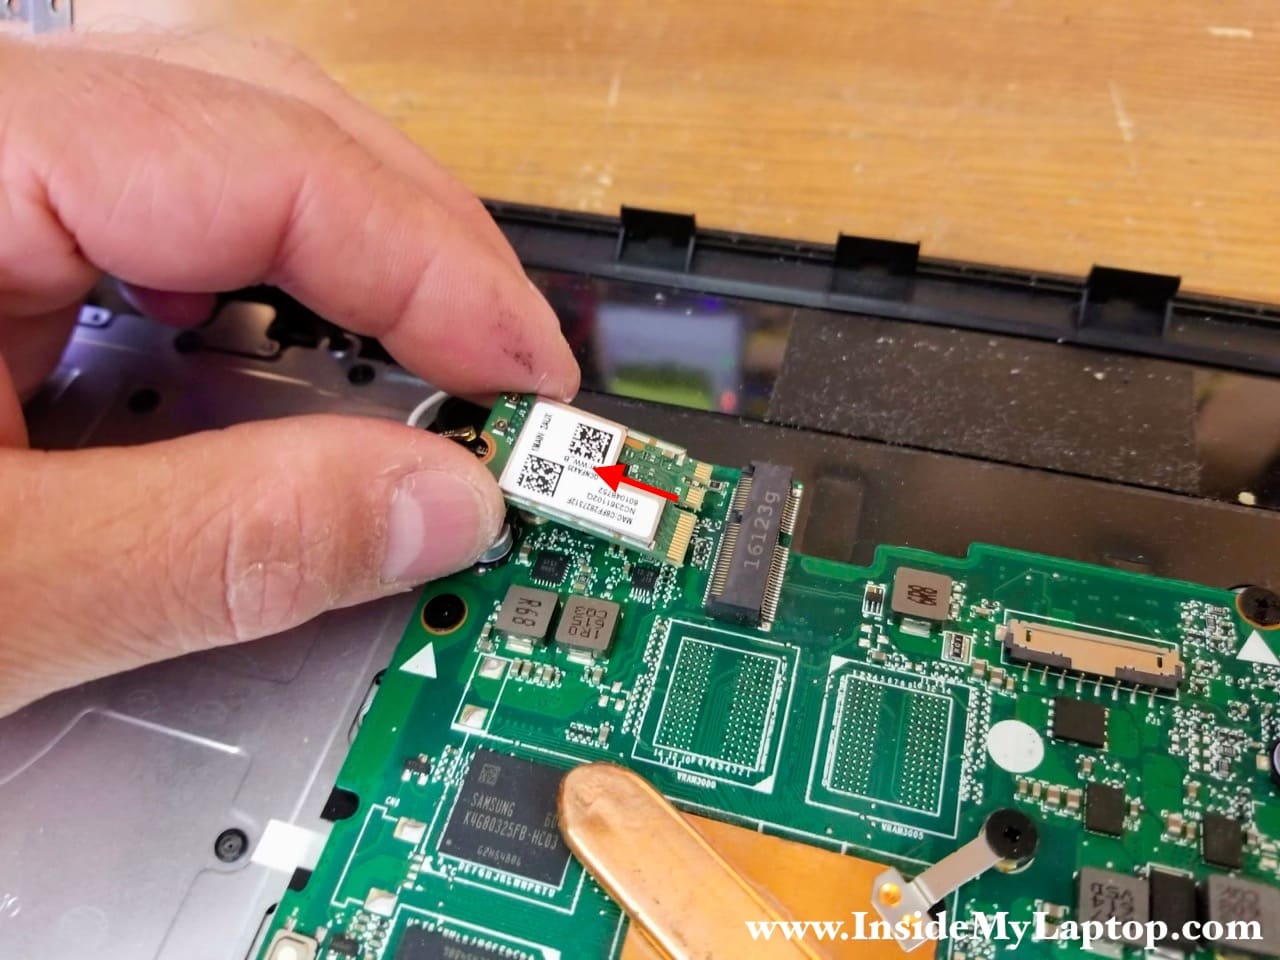
STEP 12.
Pull the wireless card out.
STEP 13.
Unroute both wireless card antenna cables from the guided path on the top case.
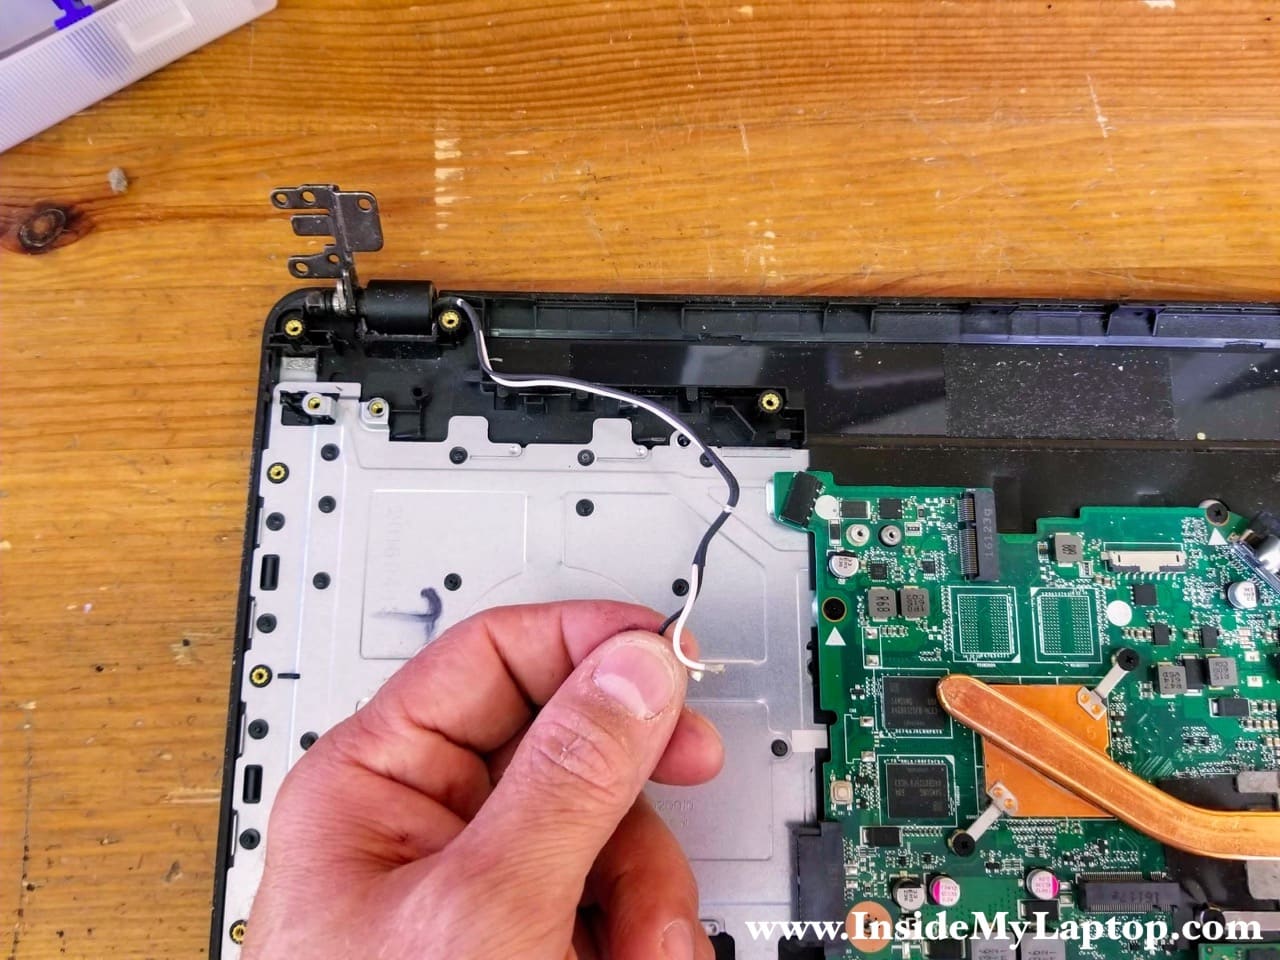
STEP 14.
Remove one screw securing the left display hinge.
Disconnect the display video cable from the motherboard. The connector has a black belt on top. Simply lift it up by the belt.
STEP 15.
Open the left display hinge.
Unrout the display video cable from the guided path on the top case.
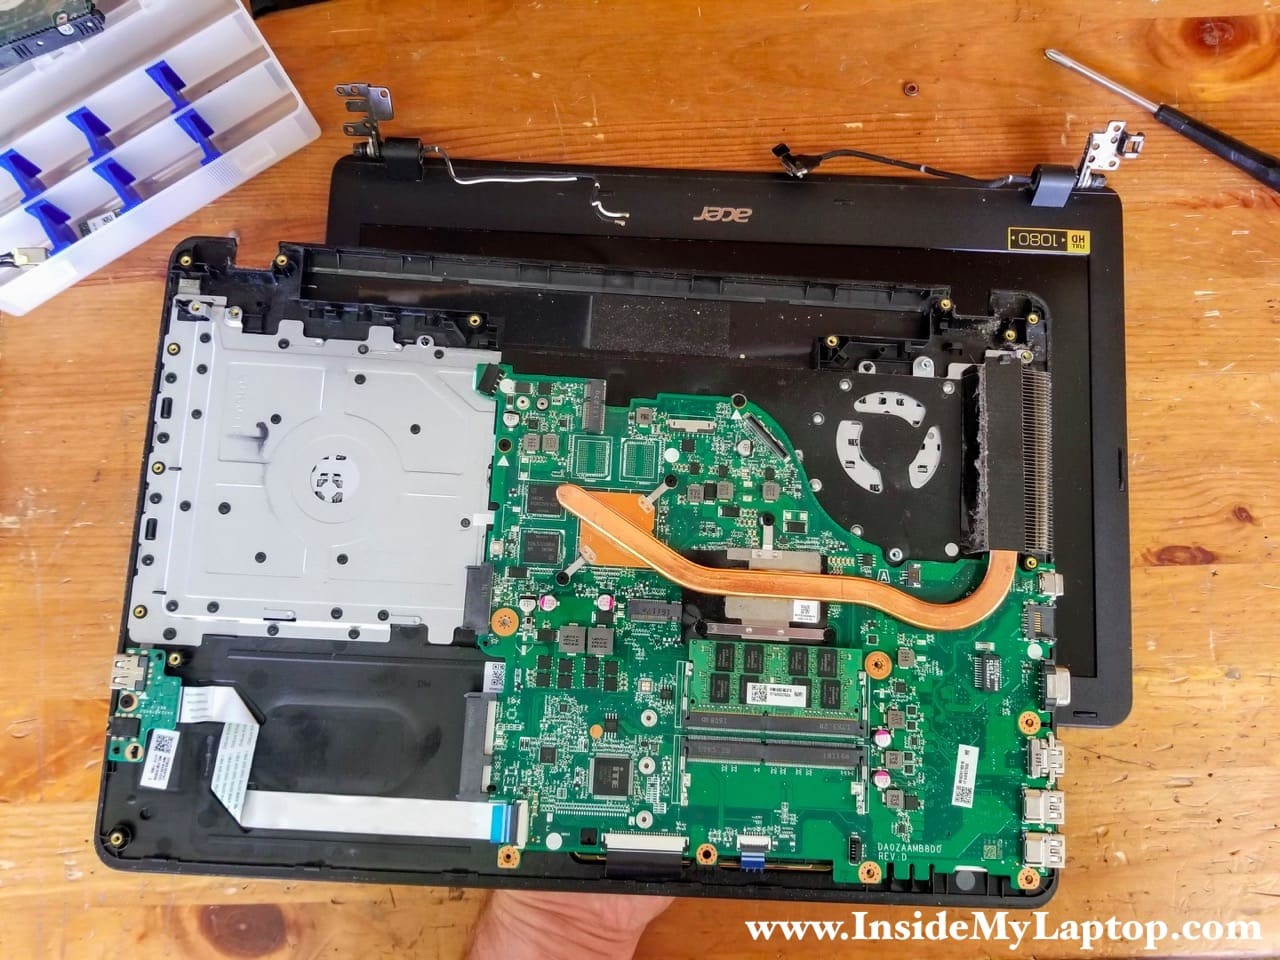
STEP 16.
Separate the top case assembly from the display.
For the display disassembly instructions please refer to the Acer Aspire E5-574 screen removal guide. All disassembly steps should be pretty much identical.
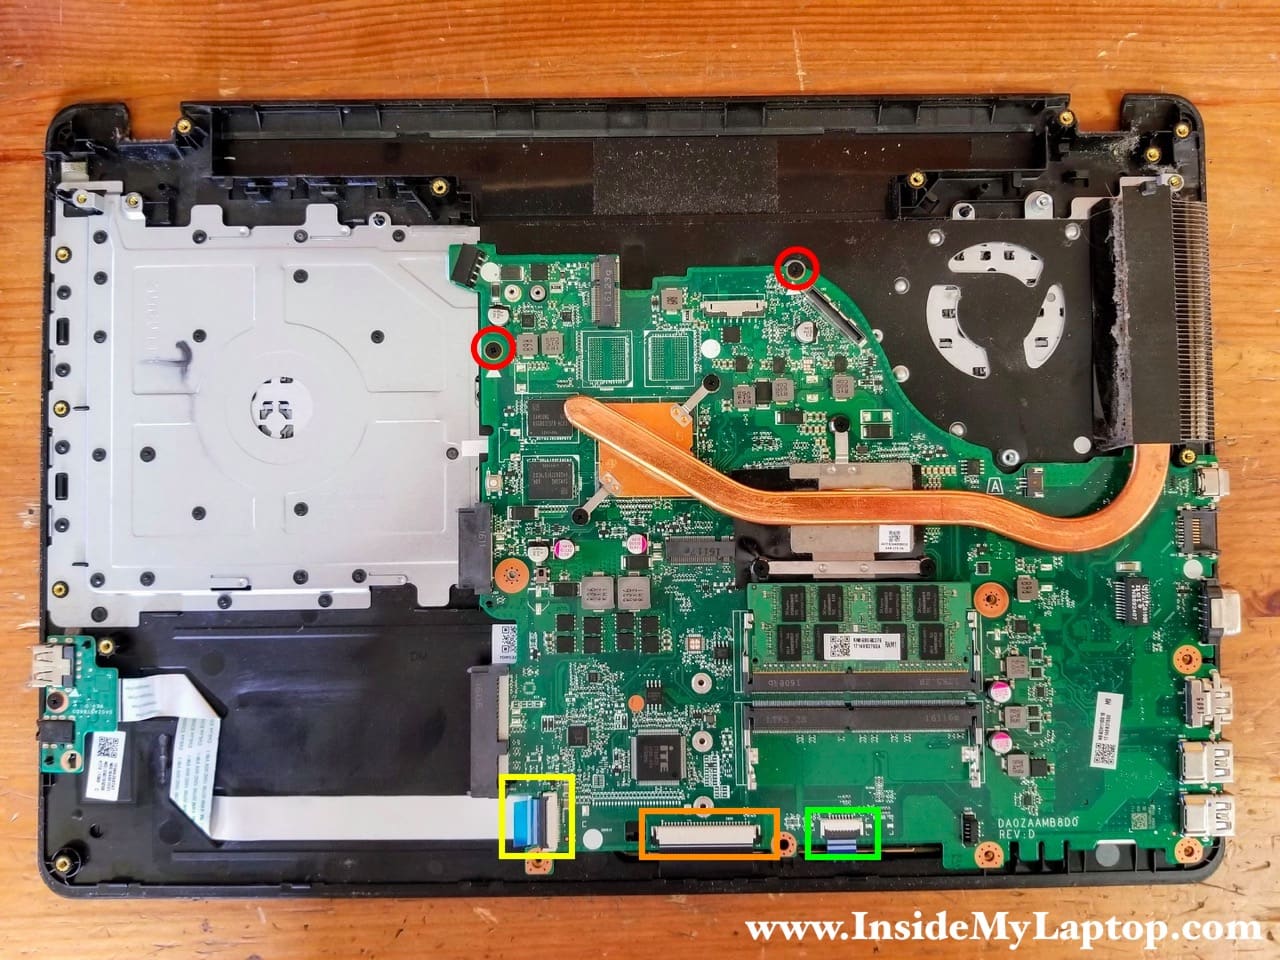
STEP 17.
In order to remove the motherboard you’ll have to remove two screws and disconnect the USB audio board cable (yellow), keyboard cable (orange) and touchpad cable (green).