
In this guide I present to you a complete disassembly of a Lenovo Ideapad 510-15IKB laptop (model 80SV). Also this guide will work for a Lenovo Ideapad 510-15ISK (model 80SR).
In the first part of the guide I take apart the laptop base. In the second part I will show how to remove the LCD screen. For your convenience, at the end of this guide I include a link to the official Lenovo service manual.
Some of the design features of this laptop:
– There is only one RAM slots available for memory upgrade.
– The keyboard is permanently attached to the top case assembly.
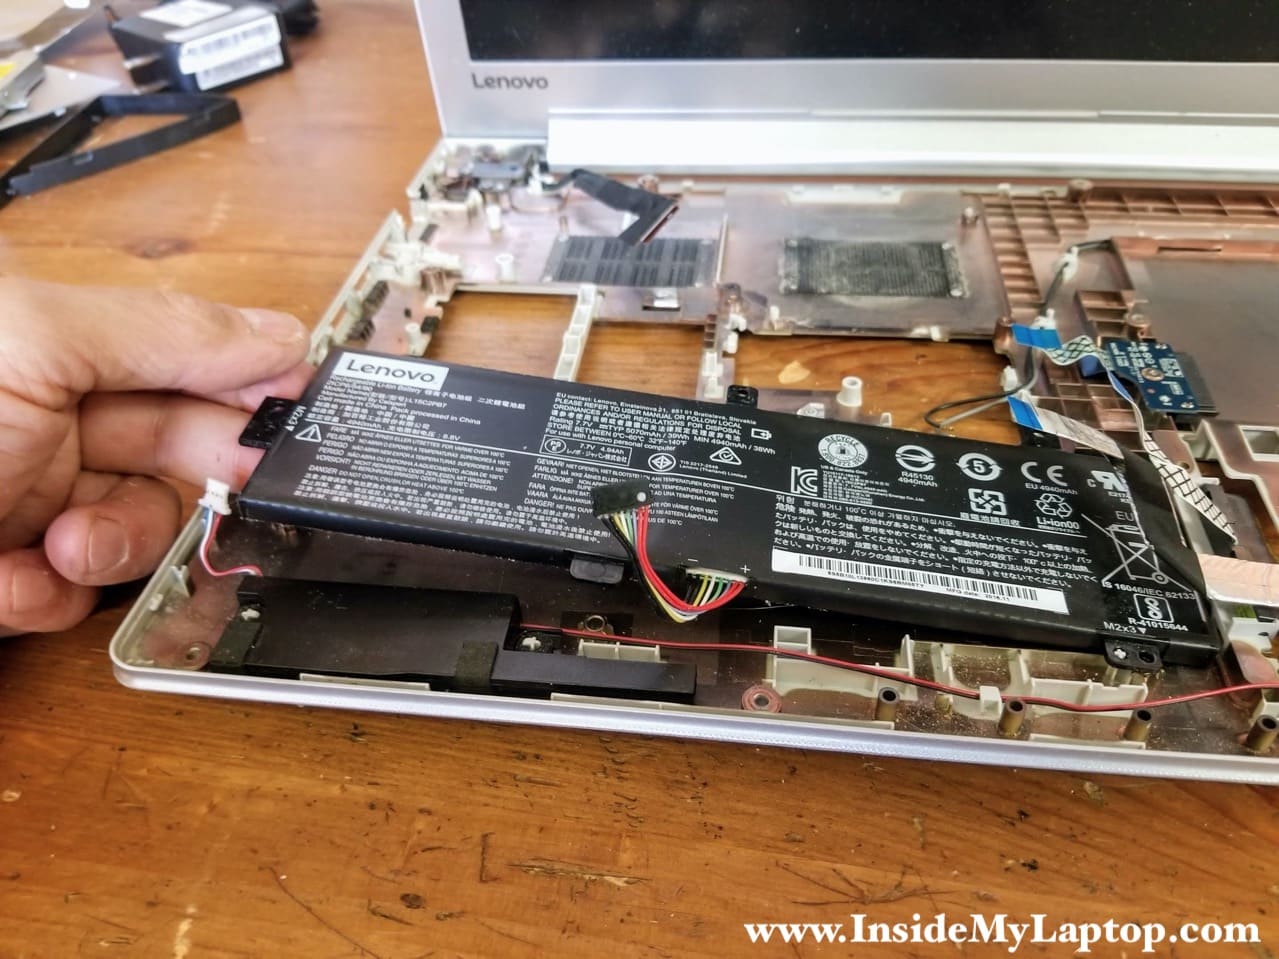
– The battery can be removed only after motherboard removal.
– The cooling fan is mounted under the motherboard.
Lenovo Ideapad 510 base disassembly
STEP 1.
Remove two screws securing the hard drive and the memory module covers. Pry up and remove both covers.
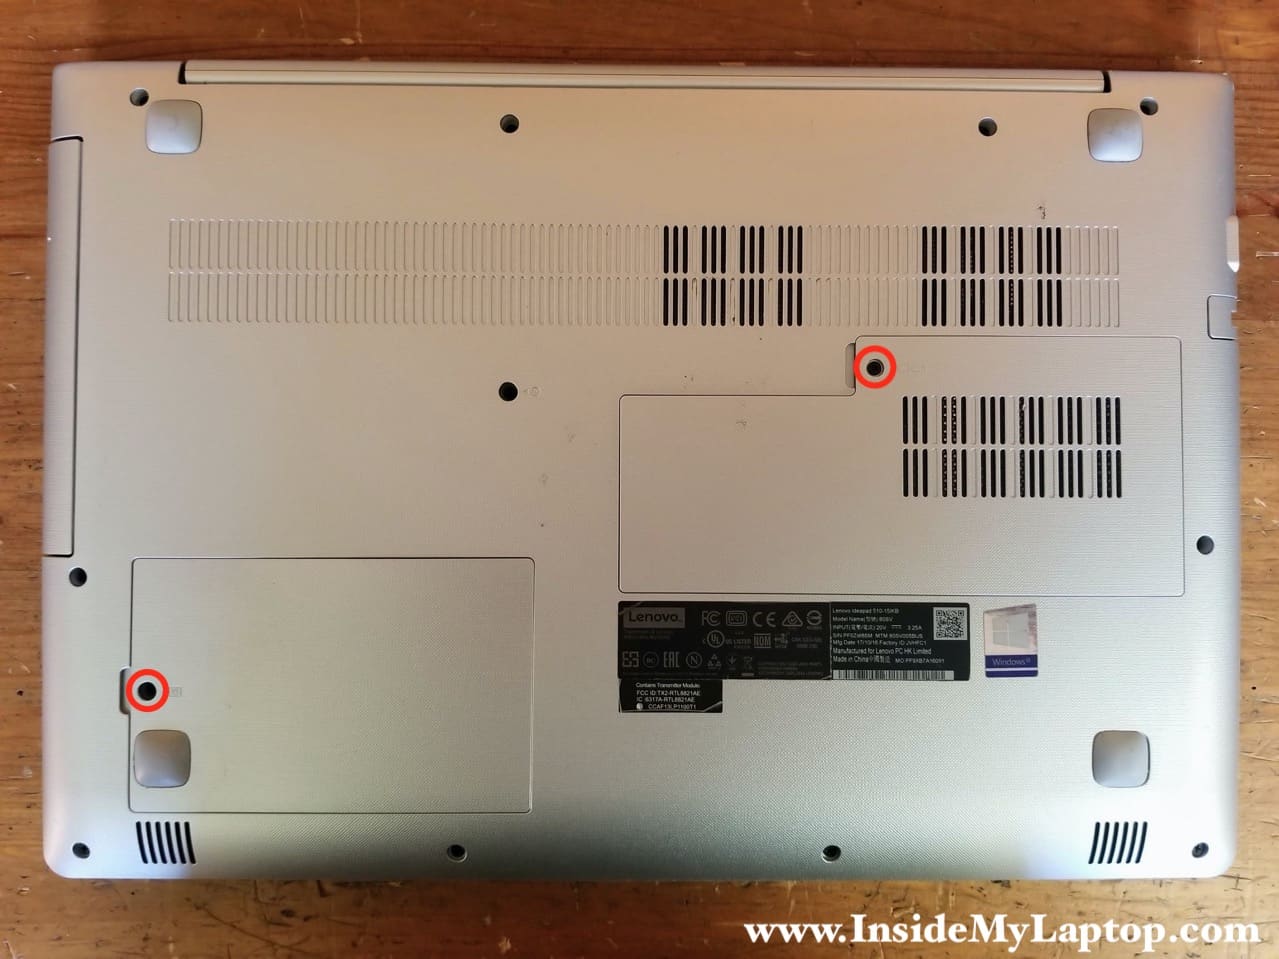
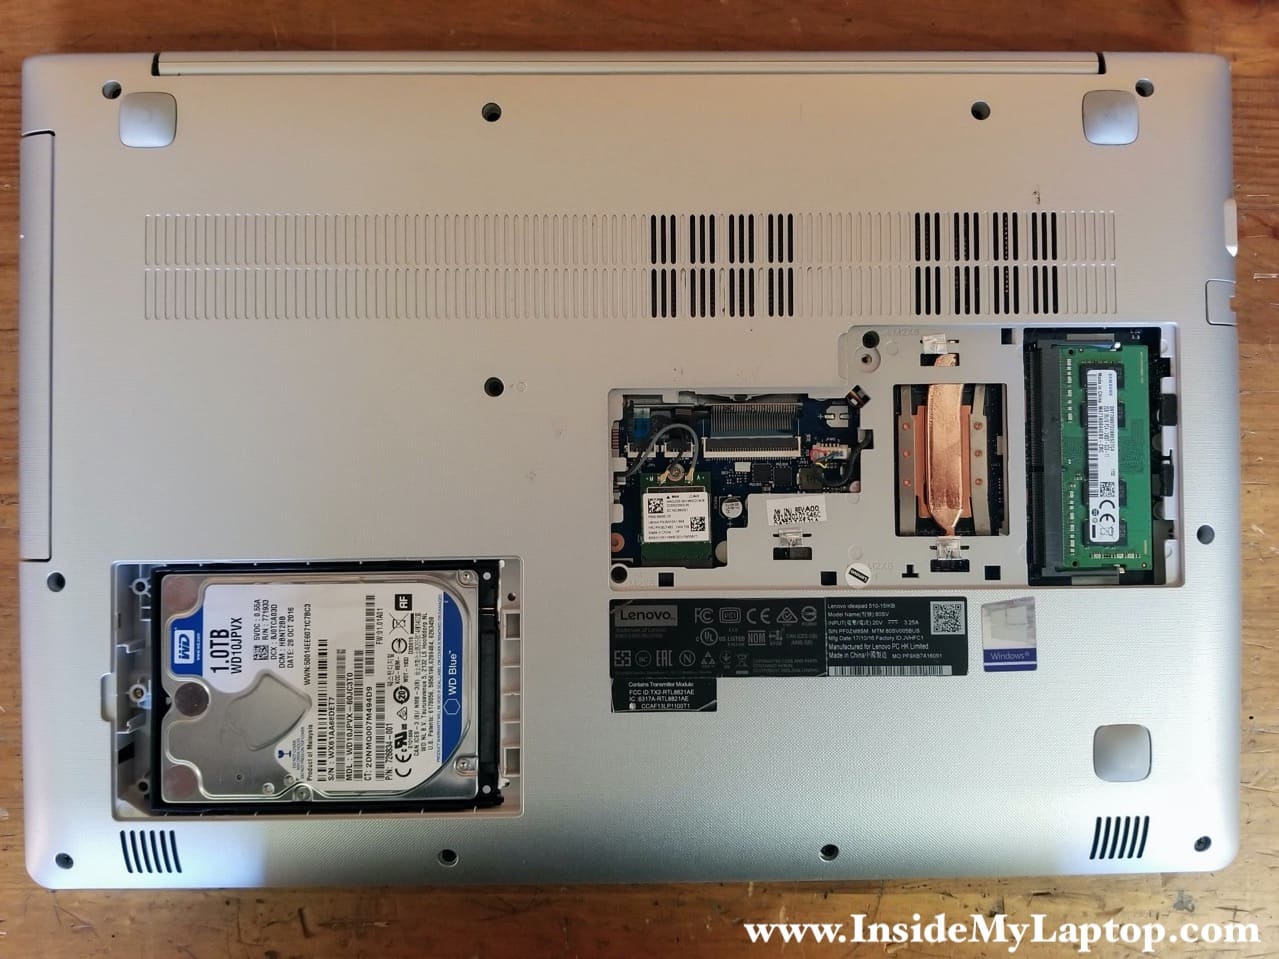
Under the covers you will find a regular 2.5″ hard drive, wireless card and RAM module.
Lenovo IdeaPad 510 has 4GB non-removable memory (built into the motherboard) and one memory slot. You can install up to 16GB DDR4-2400 SODIMM memory module into the slot. Maximum memory is 20GB.
STEP 2.
Remove all screws from the laptop base. Three screws located under the RAM cover (color-coded in yellow) are smaller than all other screws.

STEP 3.
Lift up the left side of the hard drive and pull it to the left to disconnect from the SATA port on the motherboard.
Replacing this drive with a 2.5″ solid state drive will improve laptop performance significantly.

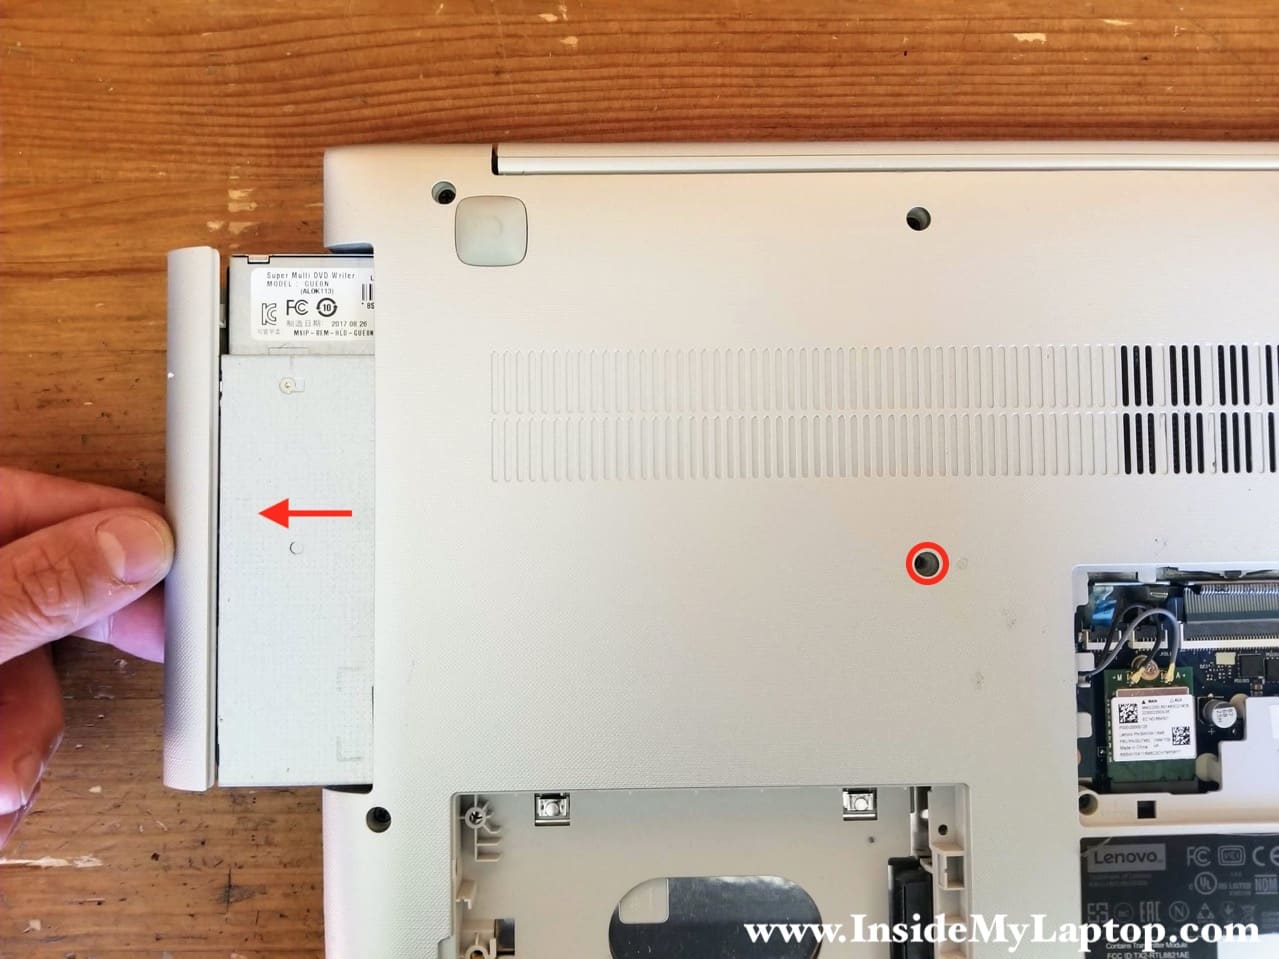
STEP 4.
Remove one screw securing the optical drive and pull it out.
STEP 5.
Disconnect two antenna cables from the wireless card.

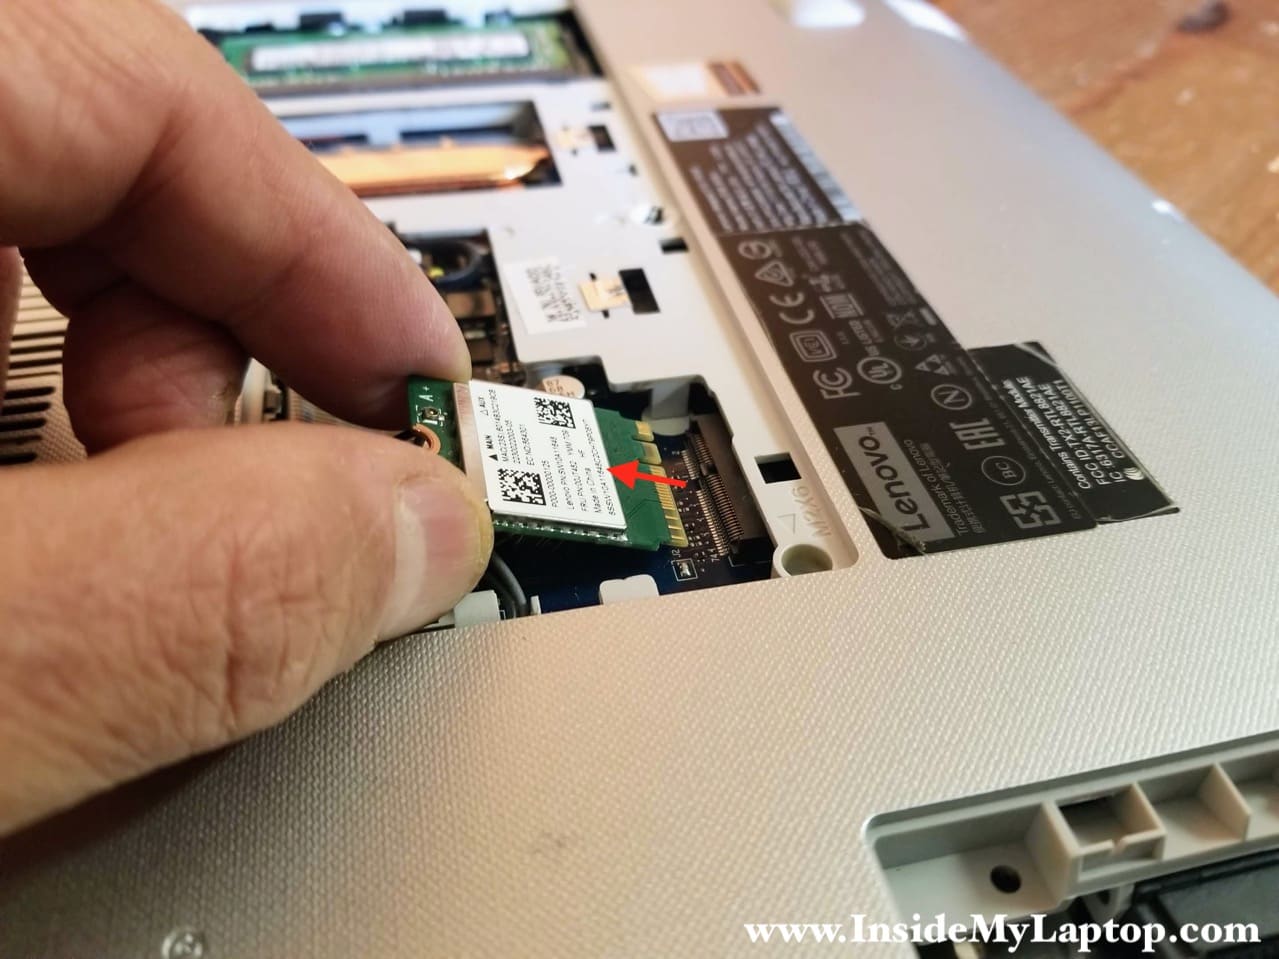
STEP 6.
Remove the wireless card from the slot.
STEP 7.
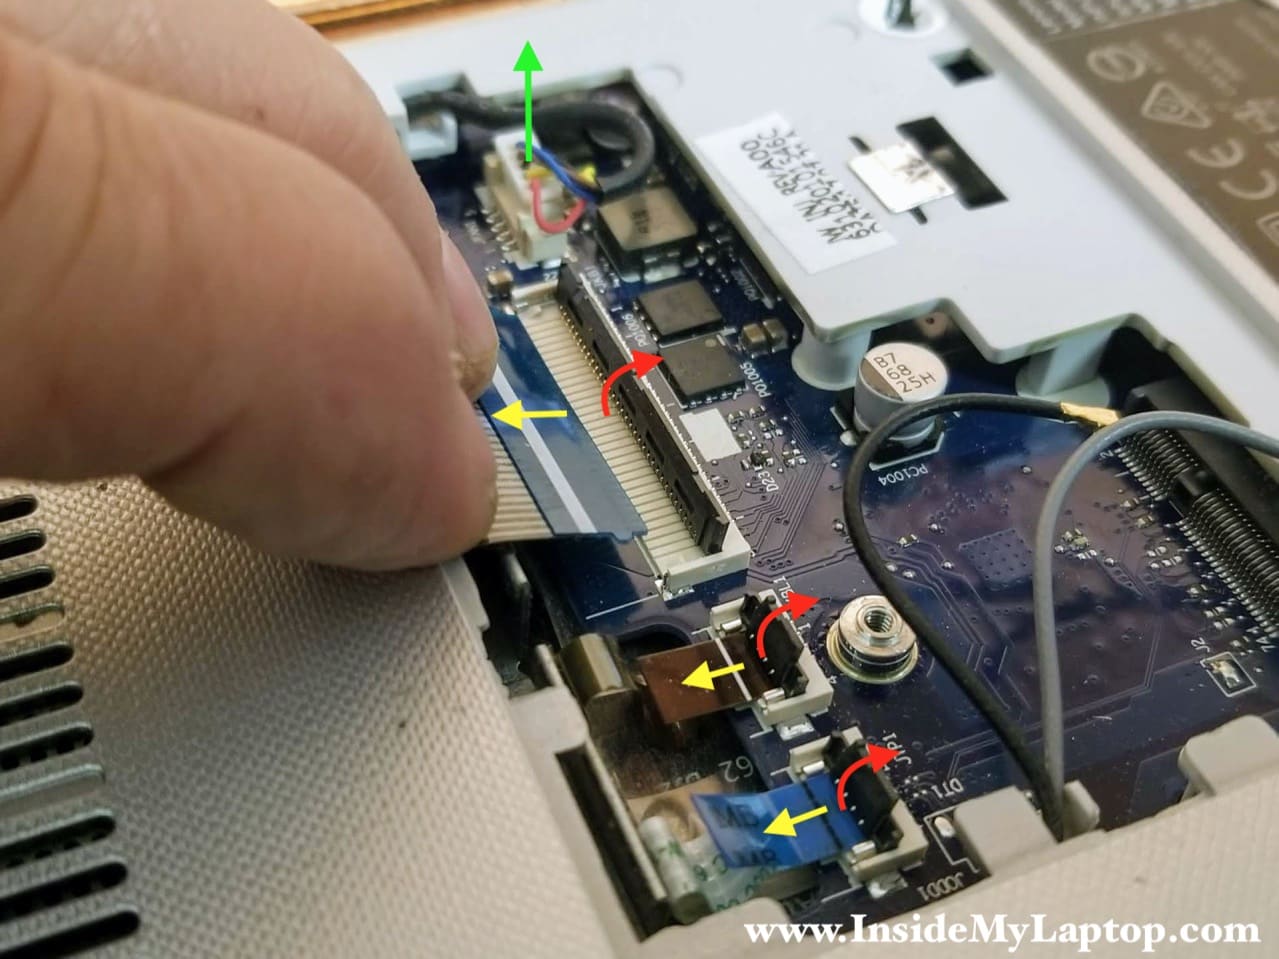
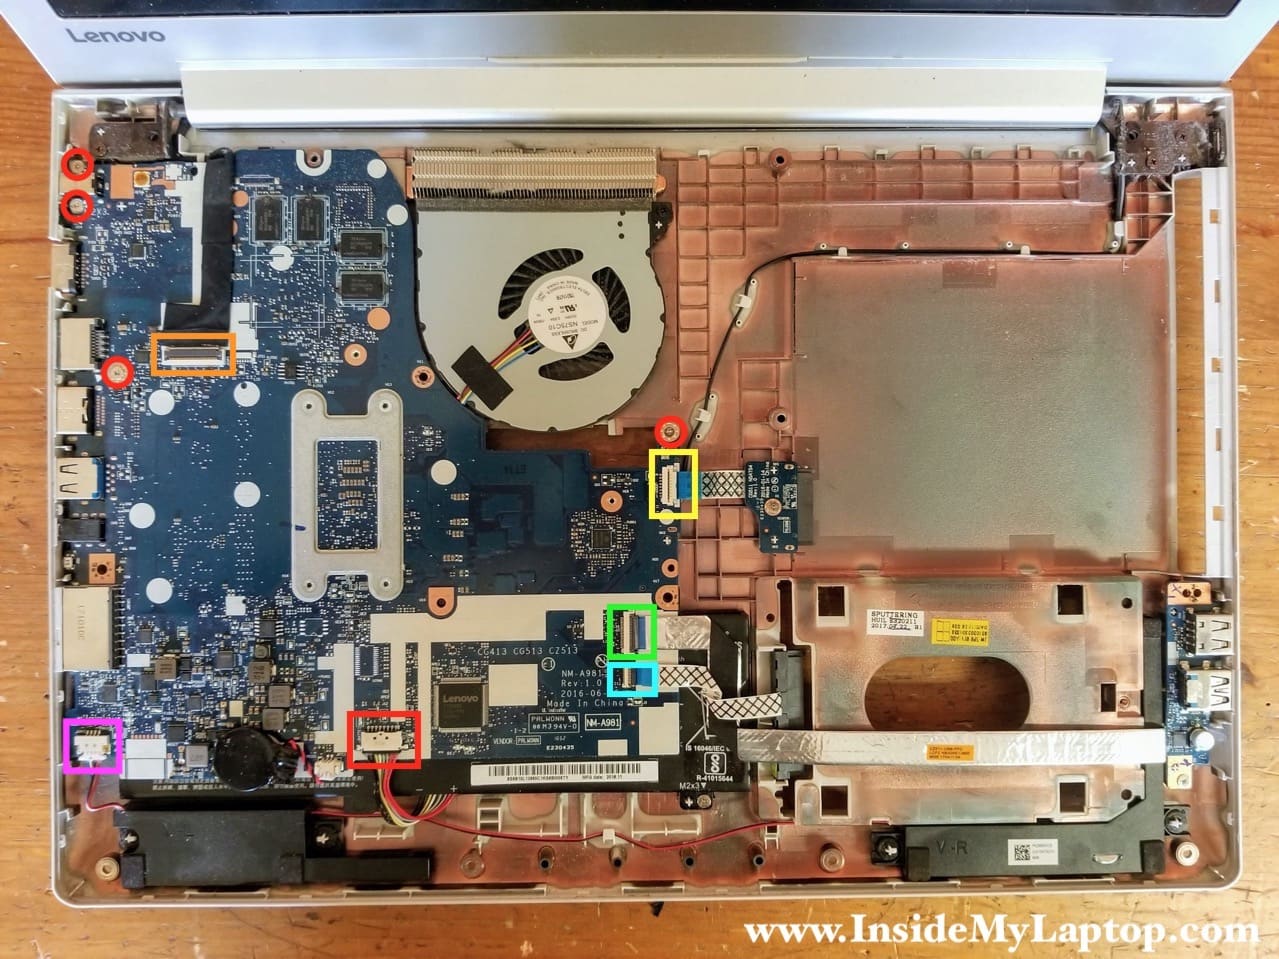
Disconnect three flat cables found under the memory slot cover – the touchpad cable, the keyboard backlight cable, the keyboard cable. The flat cable connectors must be unlocked (red arrows) before removing the cables (yellow arrow).
The cooling fan cable also located here. If you plan to remove the motherboard you will have to disconnect this cable too (green arrow).
STEP 8.
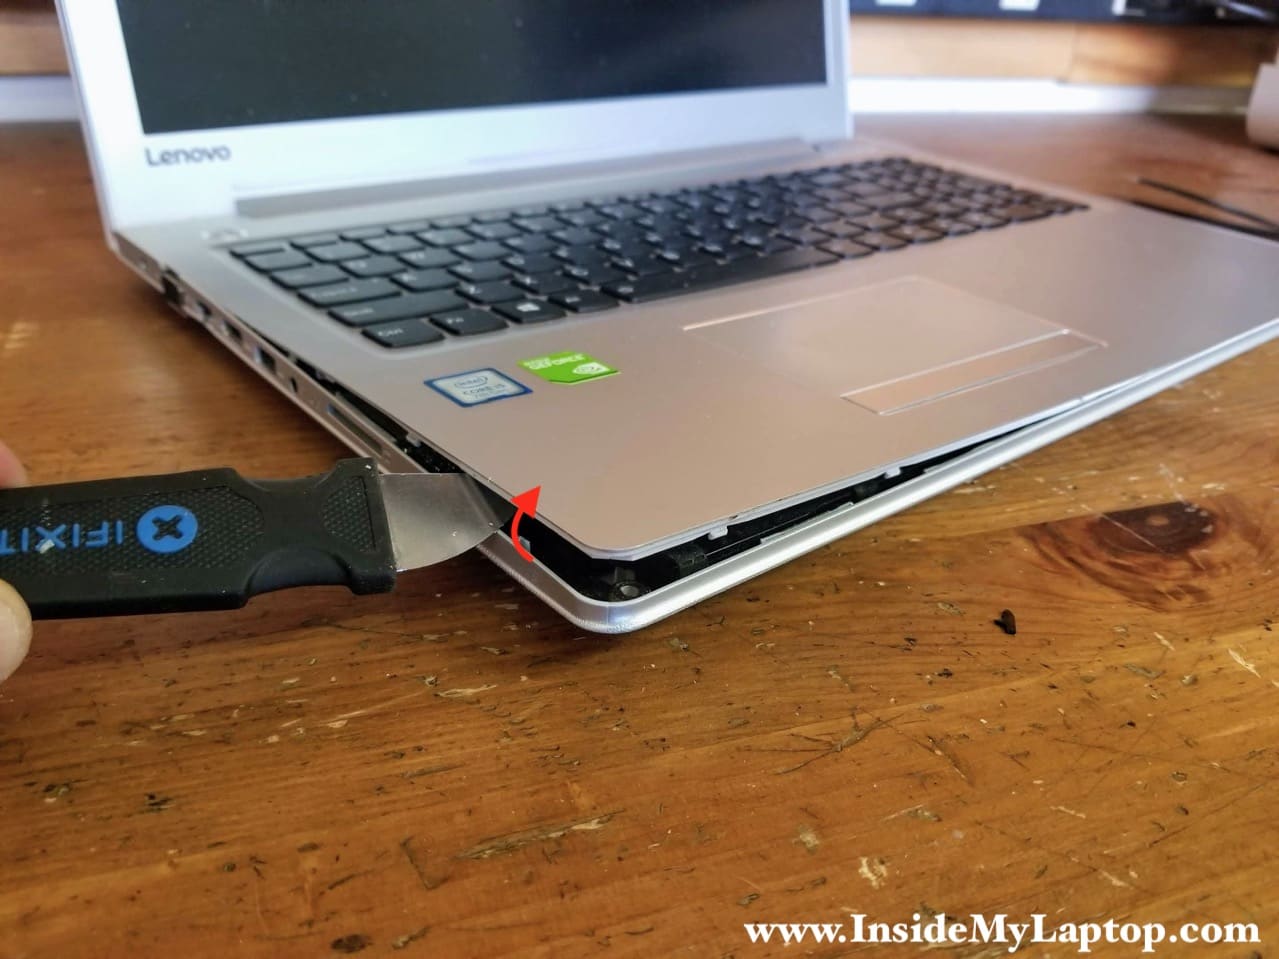
Using a case opener tool pry up the top case assembly and start separating it from the base with your fingers.
STEP 9.
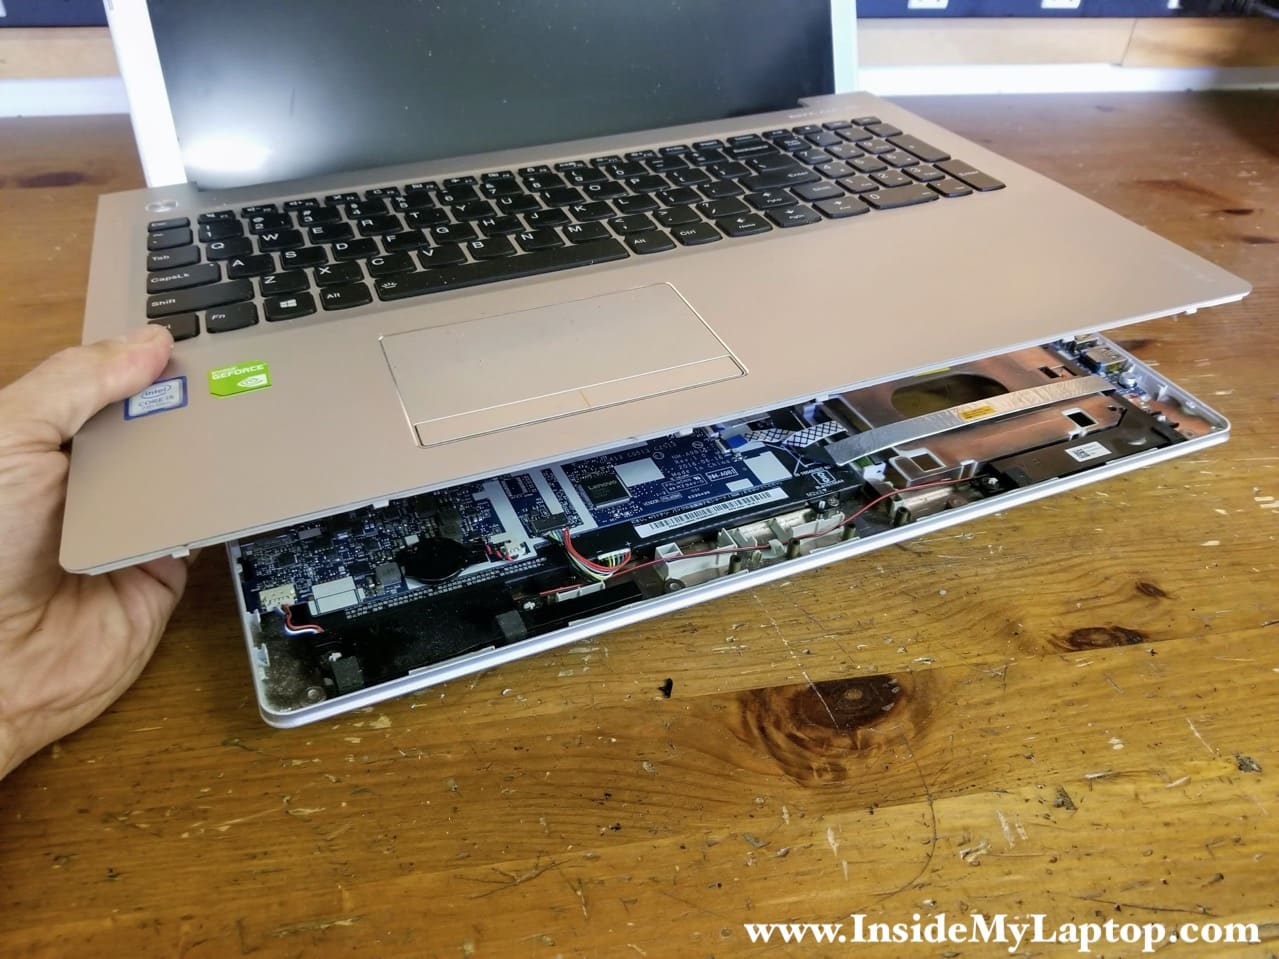
Remove the top case assembly.
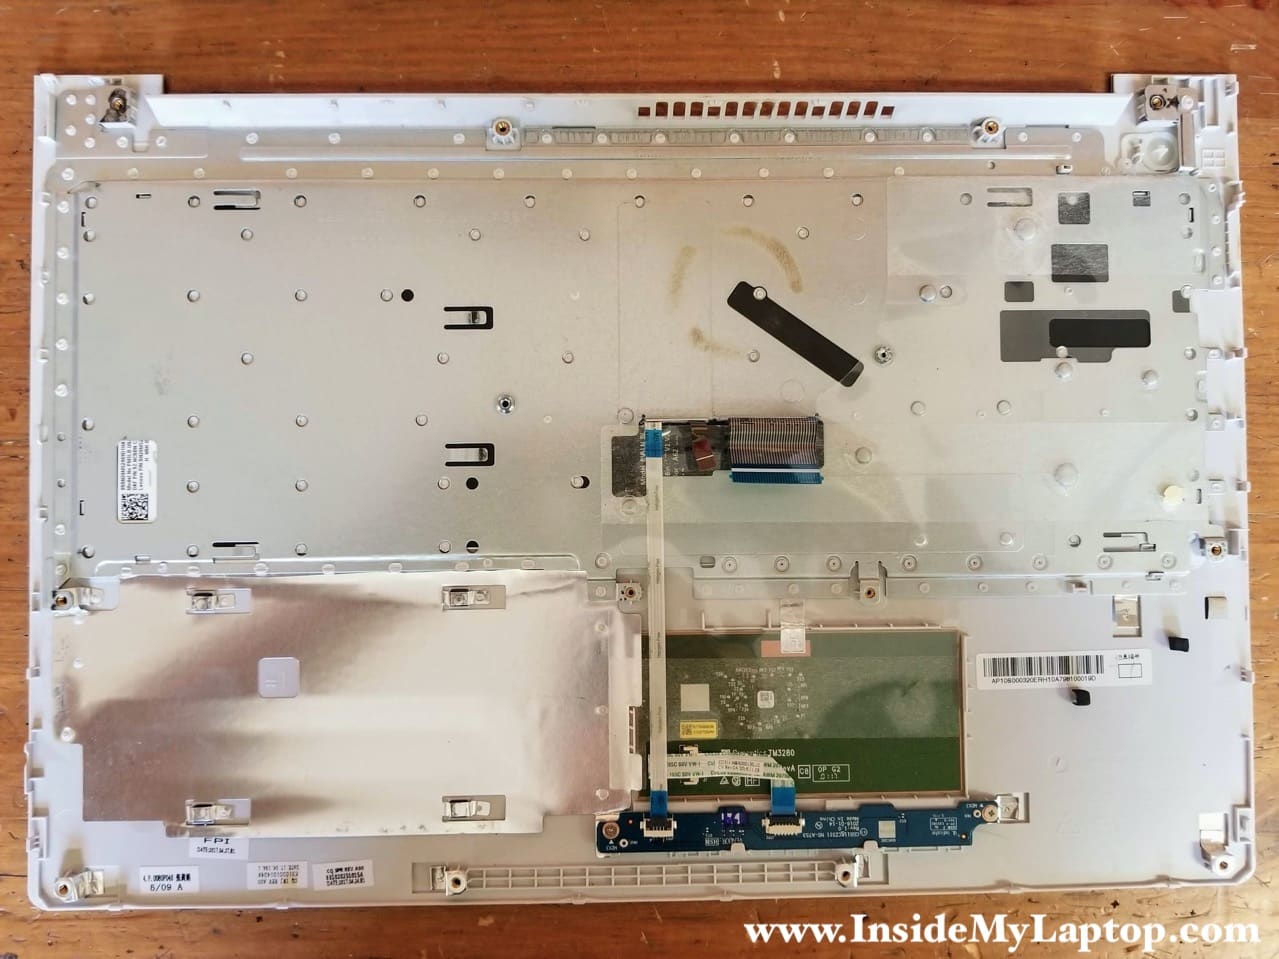
Here’s the other side of the top case assembly.
Lenovo Ideapad 510-15IKB / 510-15ISK laptop has the keyboard permanently attached to the top case. The keyboard cannot be removed and replaced separately unless you want to try this method. If you have a problem with the keyboard, the entire top case has to be replaced.
STEP 10.
Remove four screws securing the motherboard.
Disconnect the following color-coded cables:
– Battery cable (red). Disconnect it first.
– Display cable (orange).
– Optical drive board cable (yellow).
– USB board cable (green).
– Hard drive SATA cable (blue).
– Speaker cable (pink).
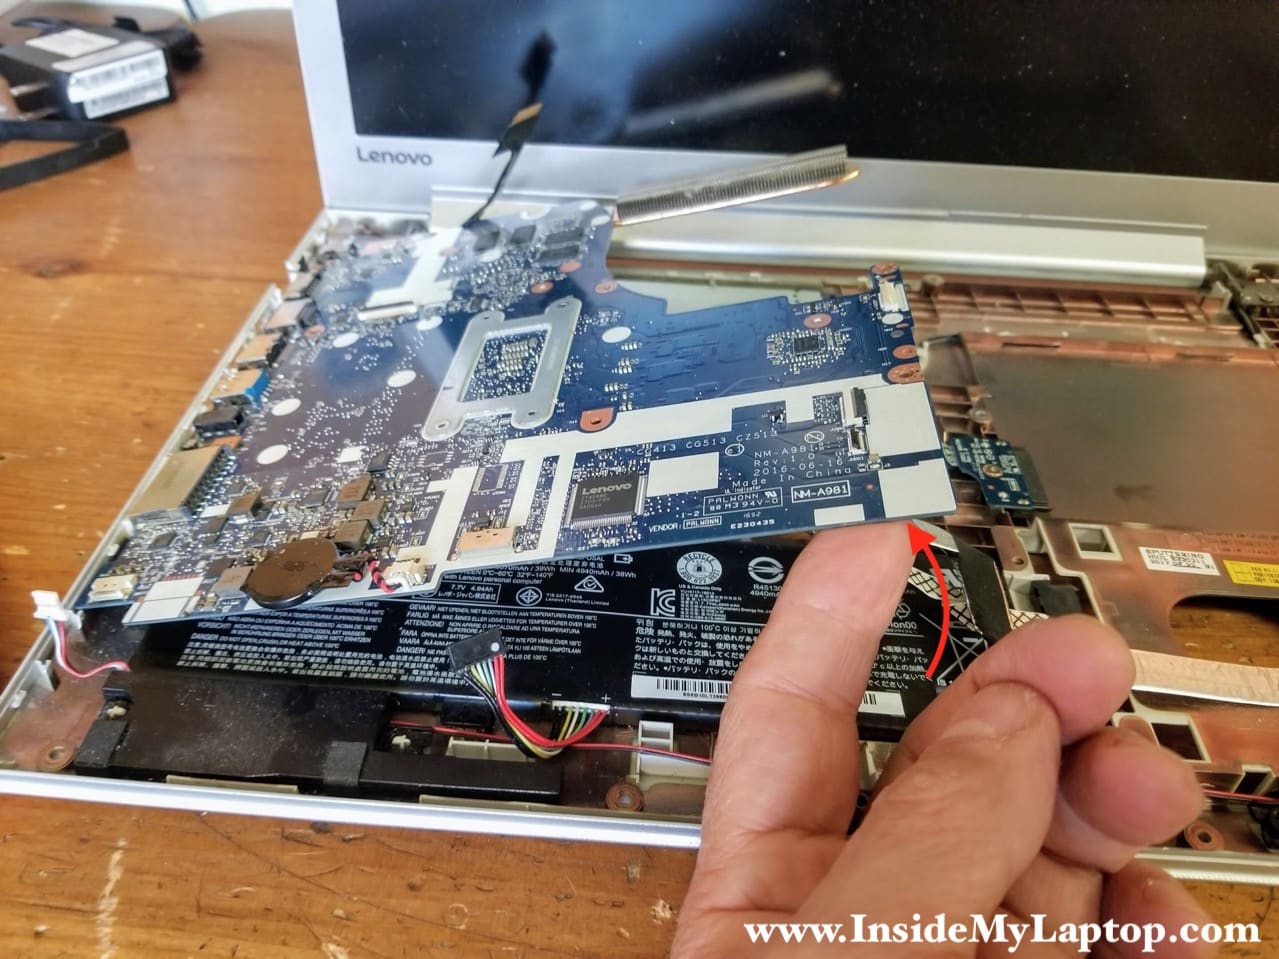
STEP 11.
Lift up and remove the motherboard. I left the RTC battery connected to the motherboard.
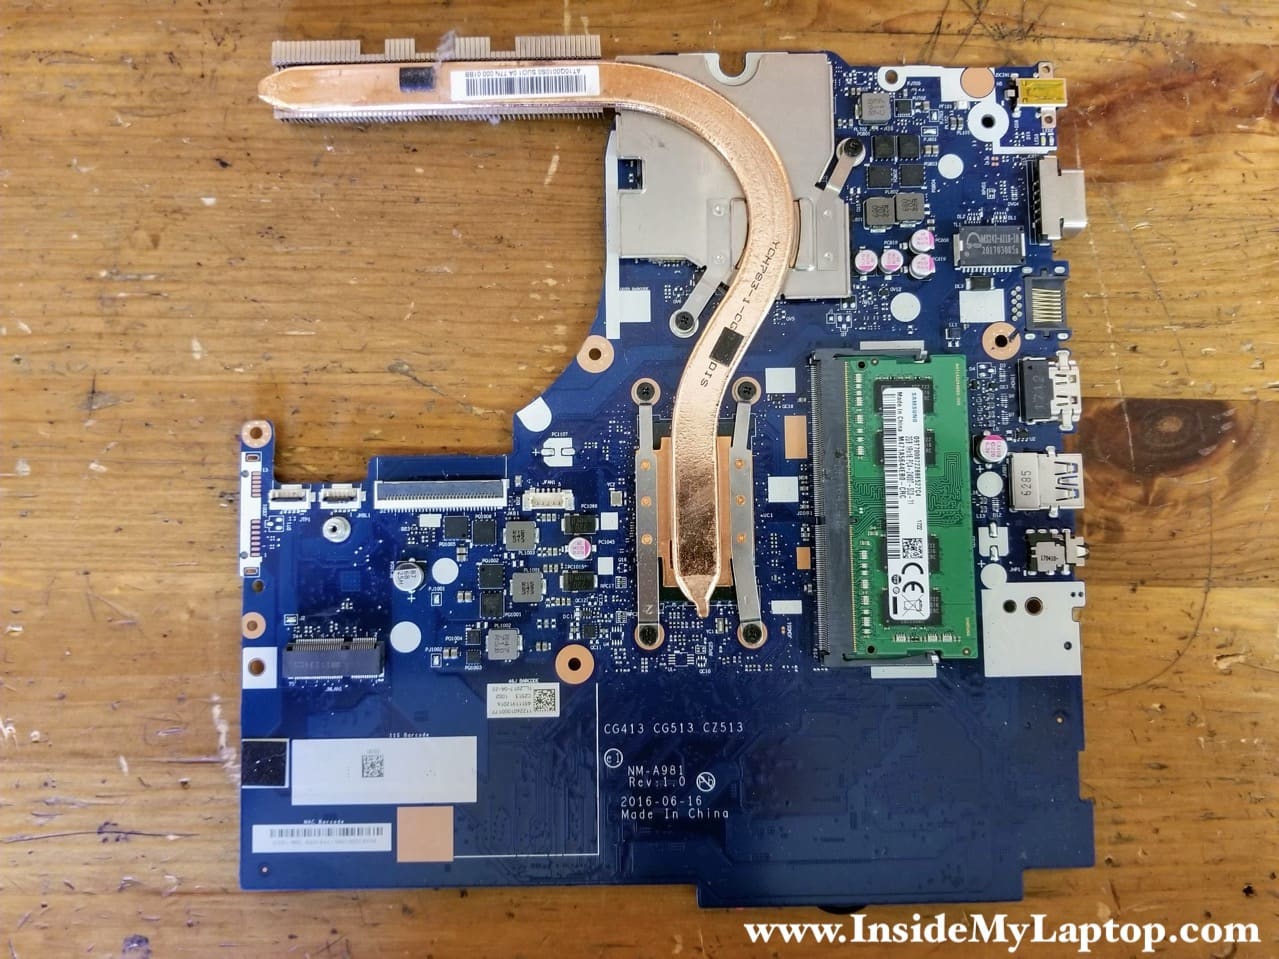
Here’s the other side of the motherboard. Now you can remove the heatsink and replace thermal grease if necessary. The DC jack is soldered.
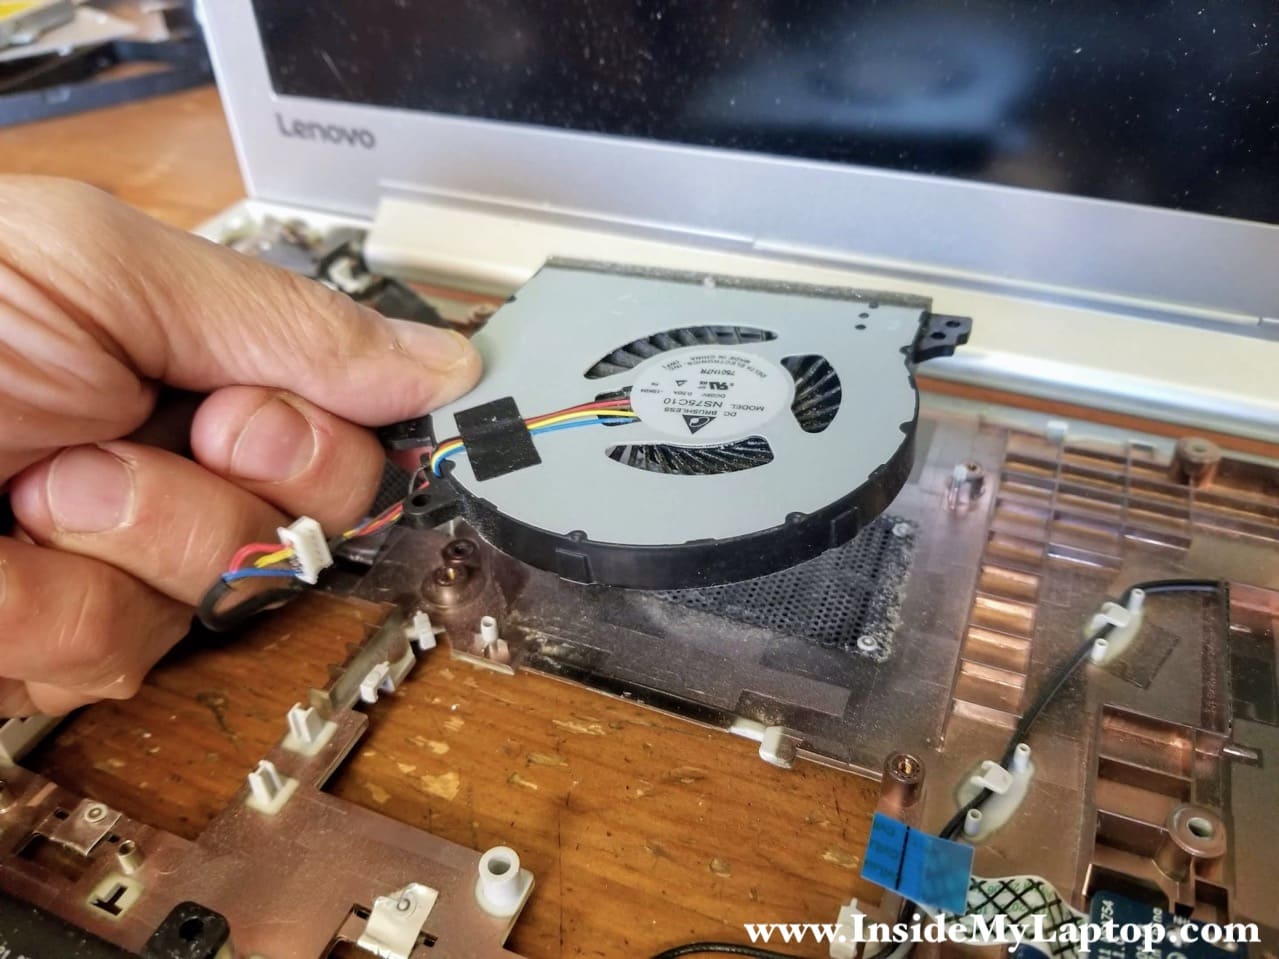
With the motherboard removed, you can access the cooling fan. In Lenovo Ideapad 510-15IKB laptop the cooling fan just seats on two guides.
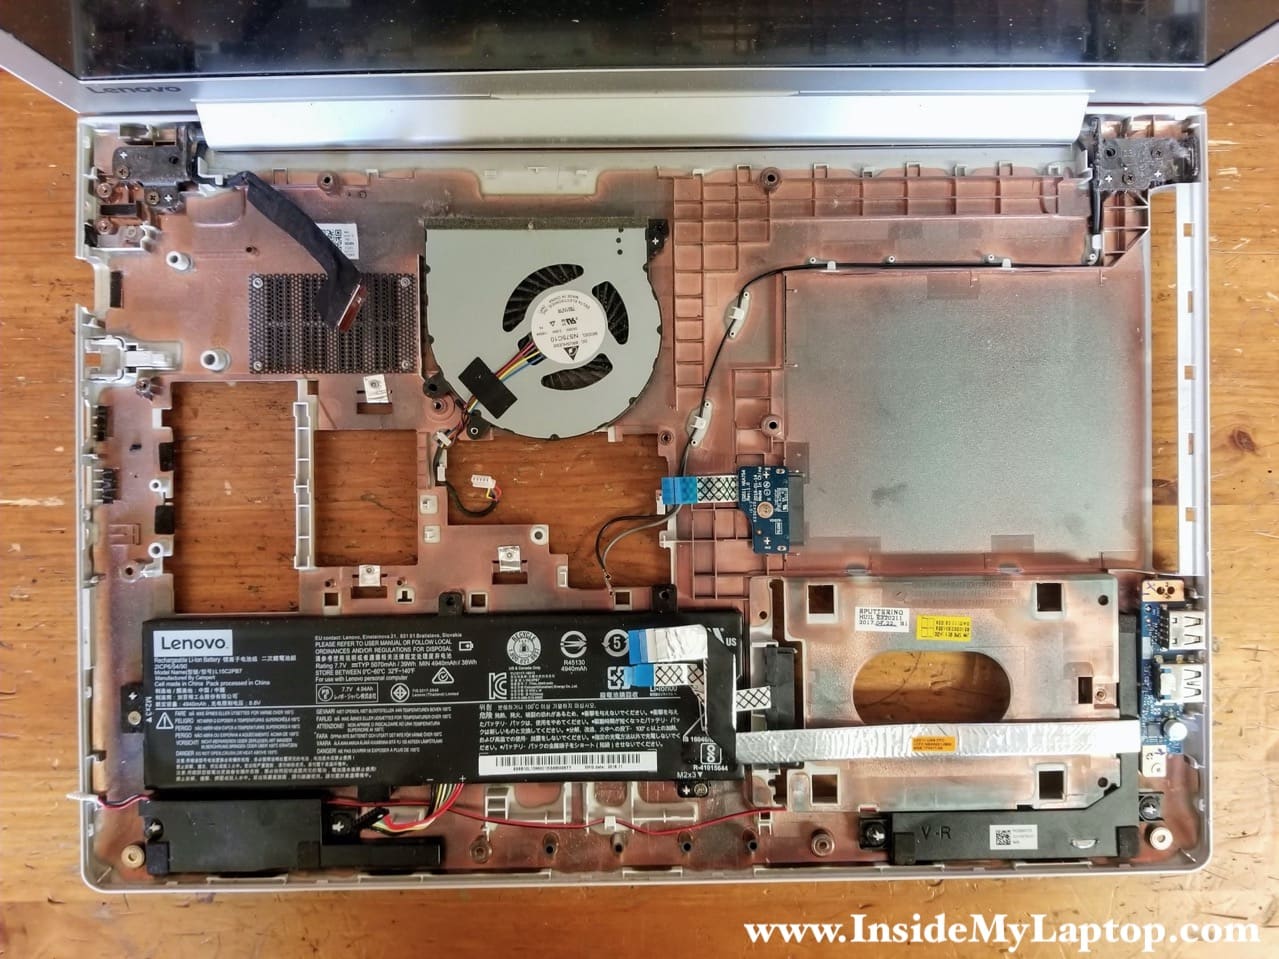
STEP 12.
Lift up and remove the cooling fan.
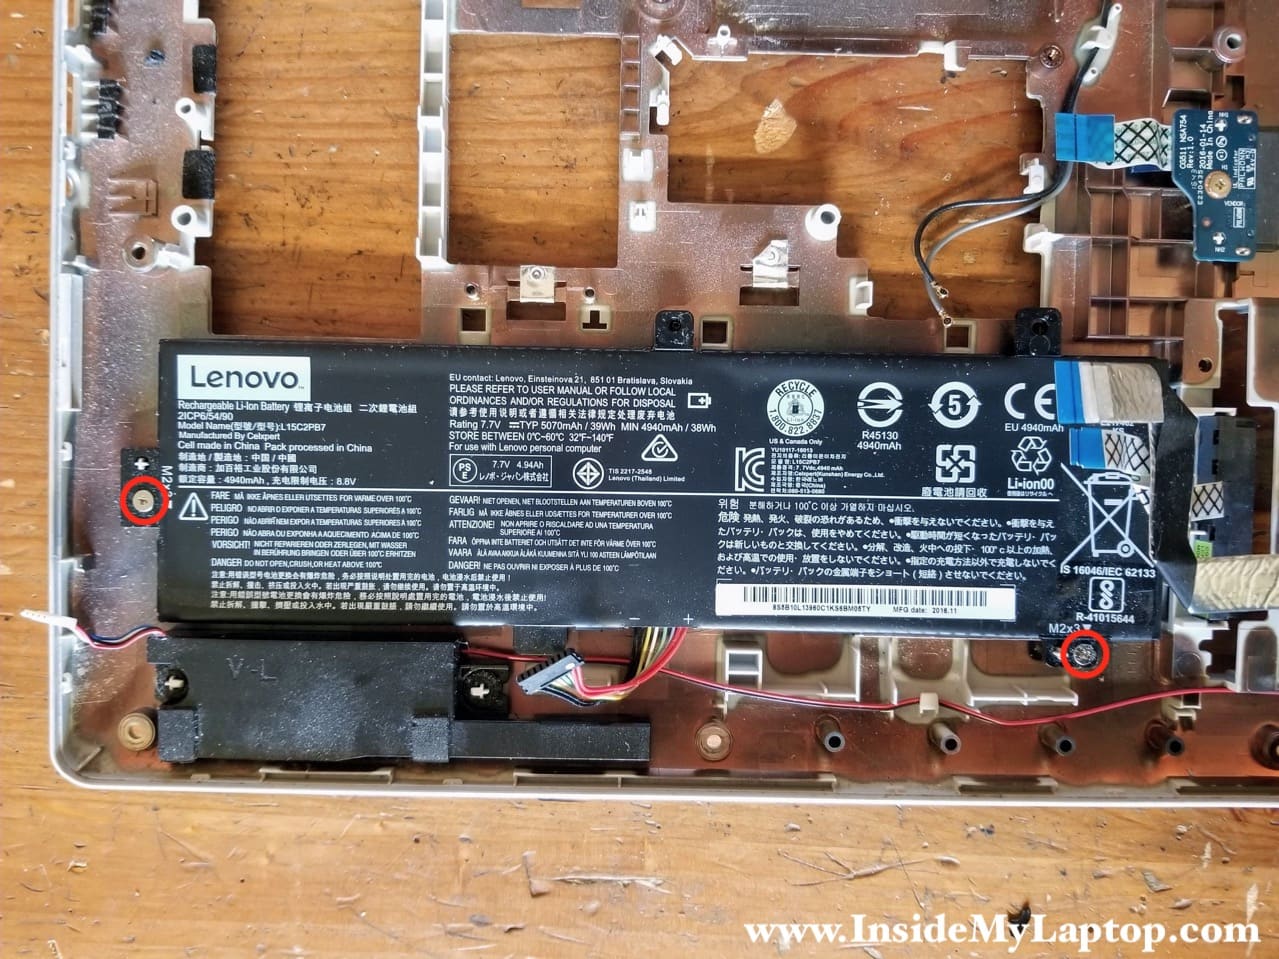
STEP 13.
Remove two screws securing the battery.
Lenovo Ideapad 510-15IKB / 510-15ISK battery model: L15C2PB7.
STEP 14.
Lift up and remove the battery.
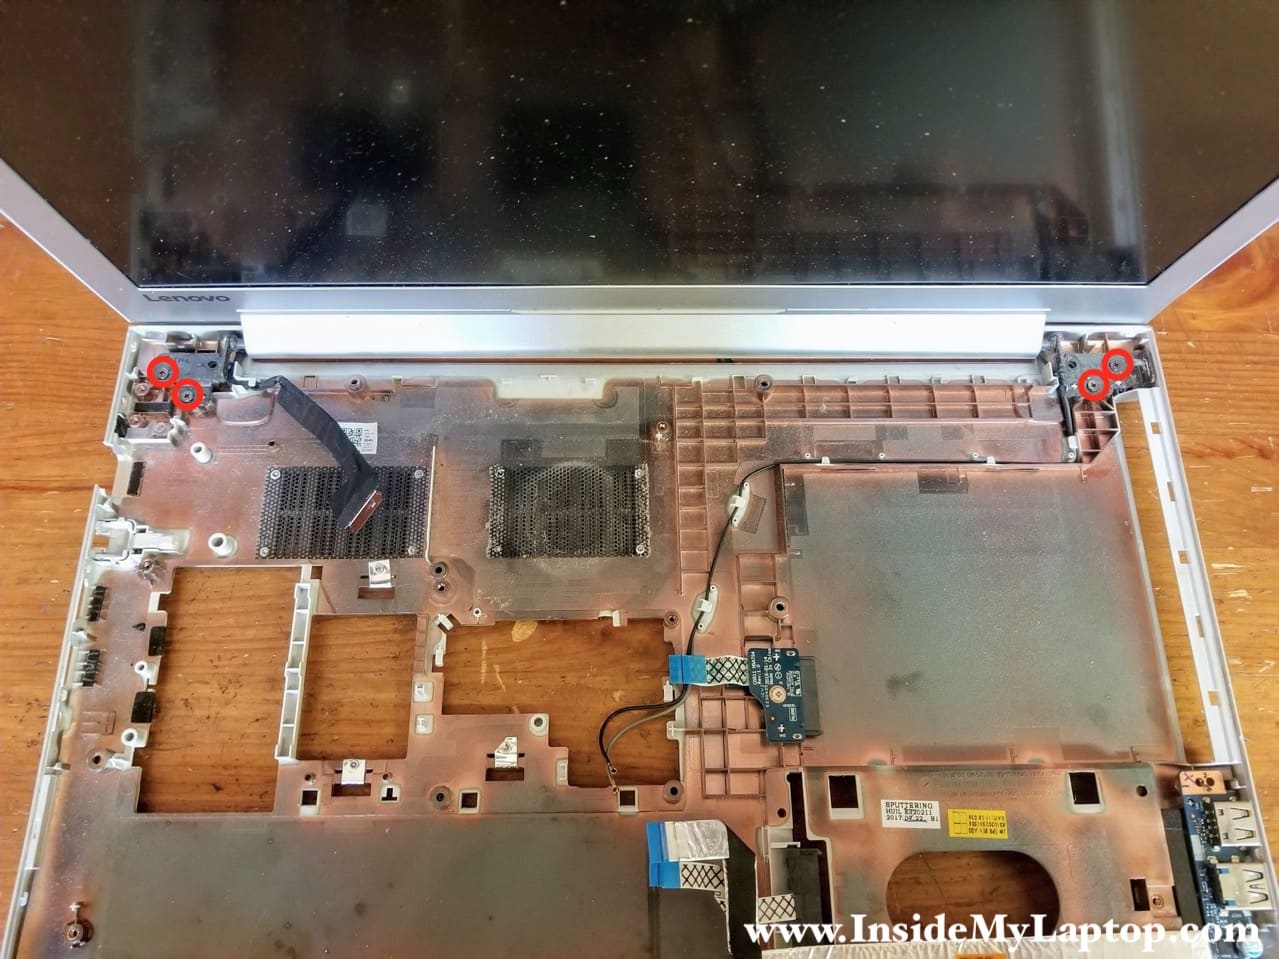
STEP 15.
In order to separate the display panel from the base you’ll have to remove four screws securing both display hinges.
Lenovo Ideapad 510 LCD screen removal
It is NOT necessary to disassemble the laptop base in order to open up the display panel and remove the LCD screen. You can do it while the laptop is still assembled.
STEP 16.
Insert your fingers under the bezel and start separating it from the display cover. Wiggle the bezel to release the hidden latches securing the bezel.
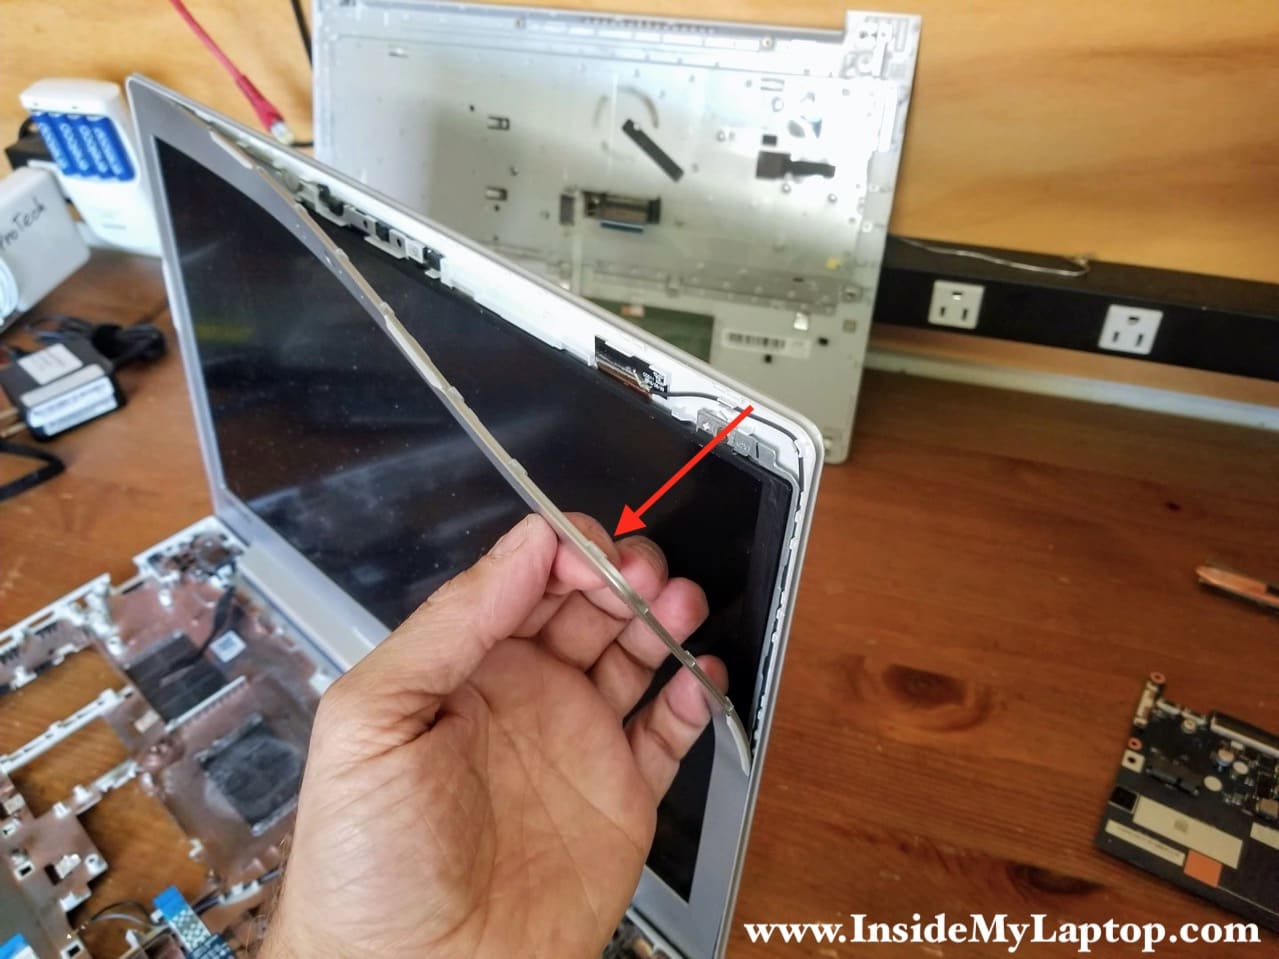
STEP 17.
Continue separating the bezel from the display and remove it completely.
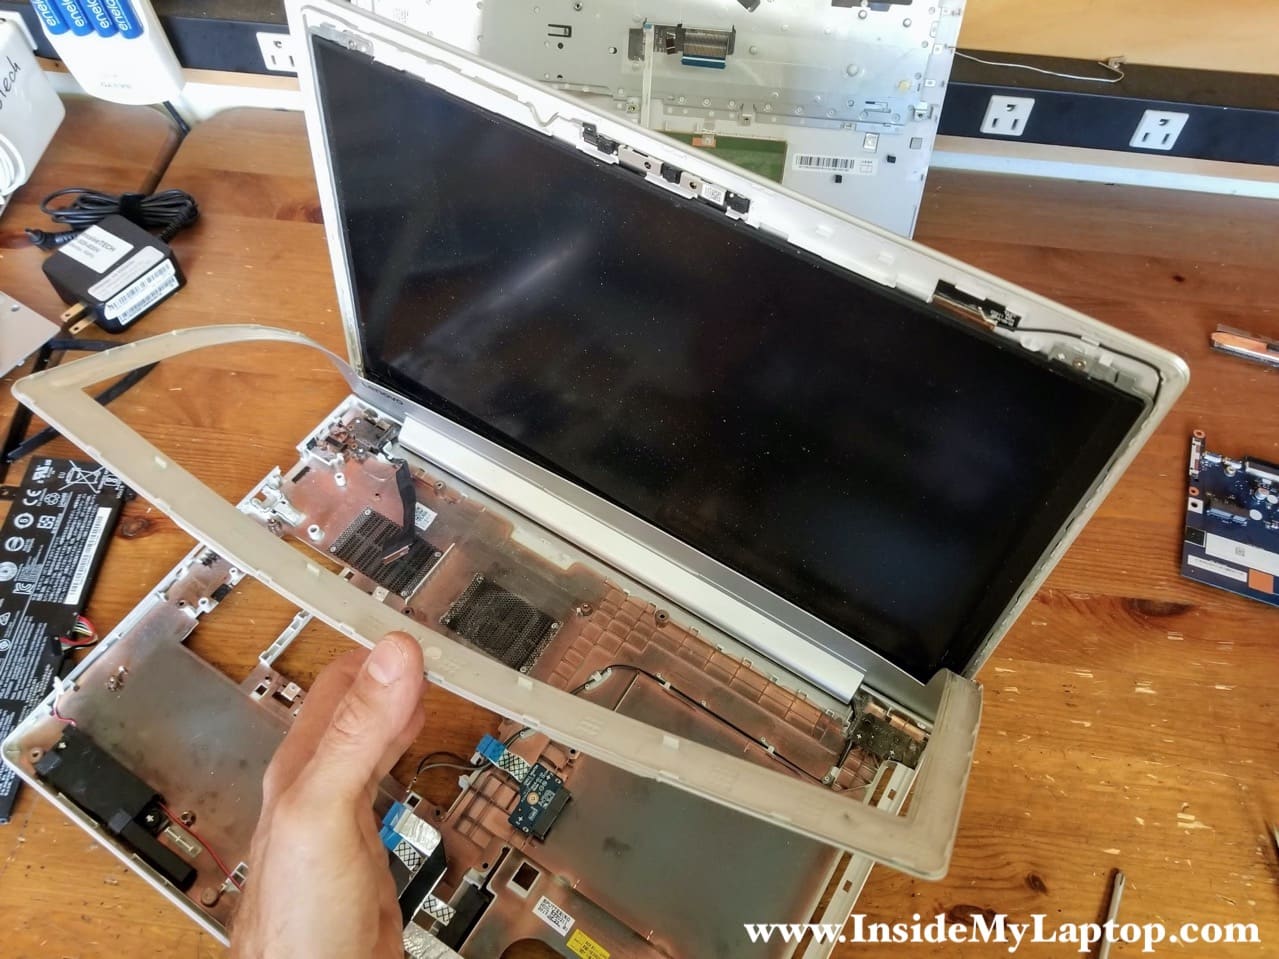
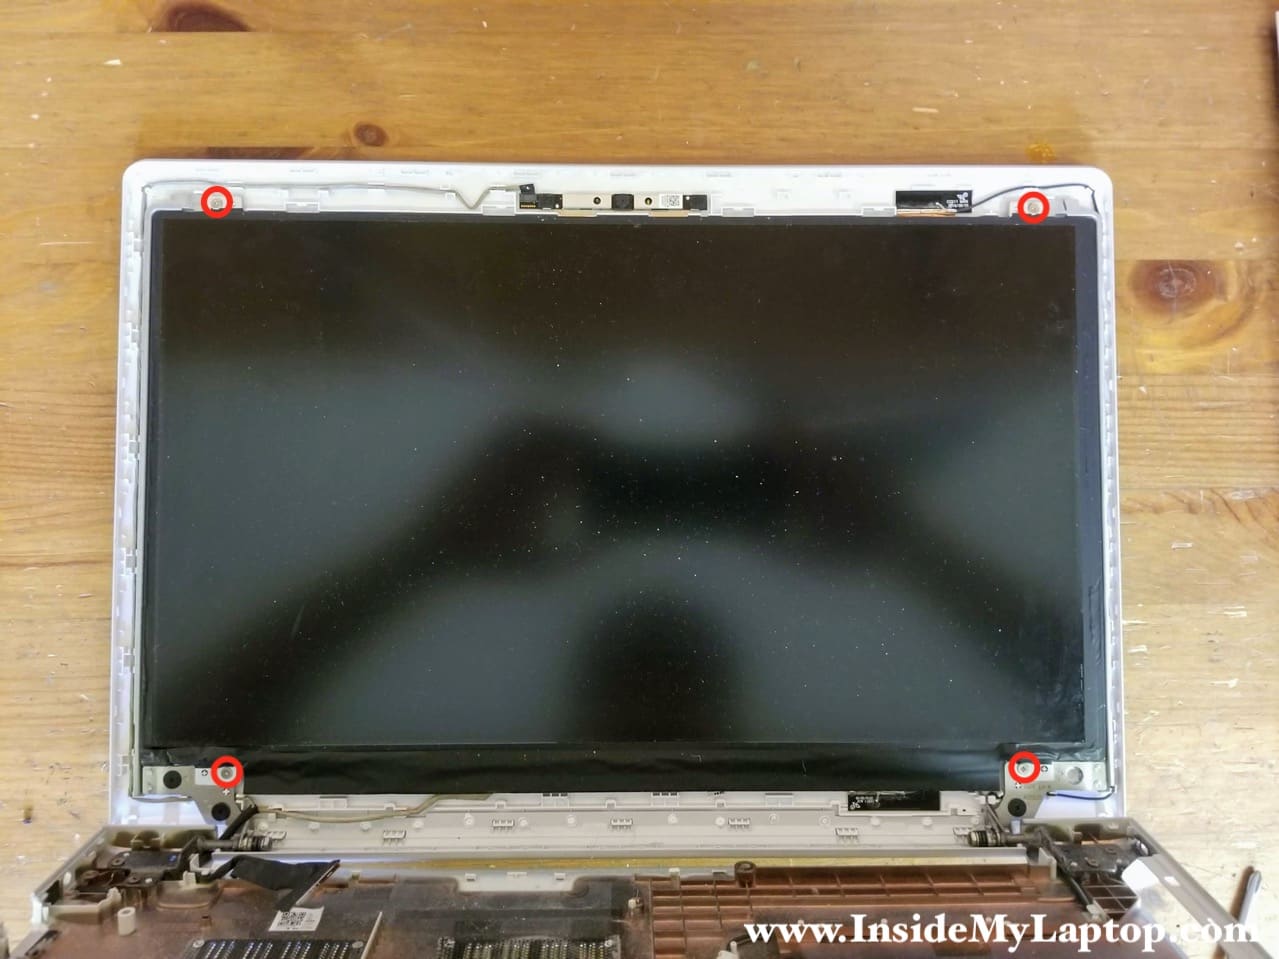
STEP 18.
Remove four screws securing the LCD screen.
STEP 19.
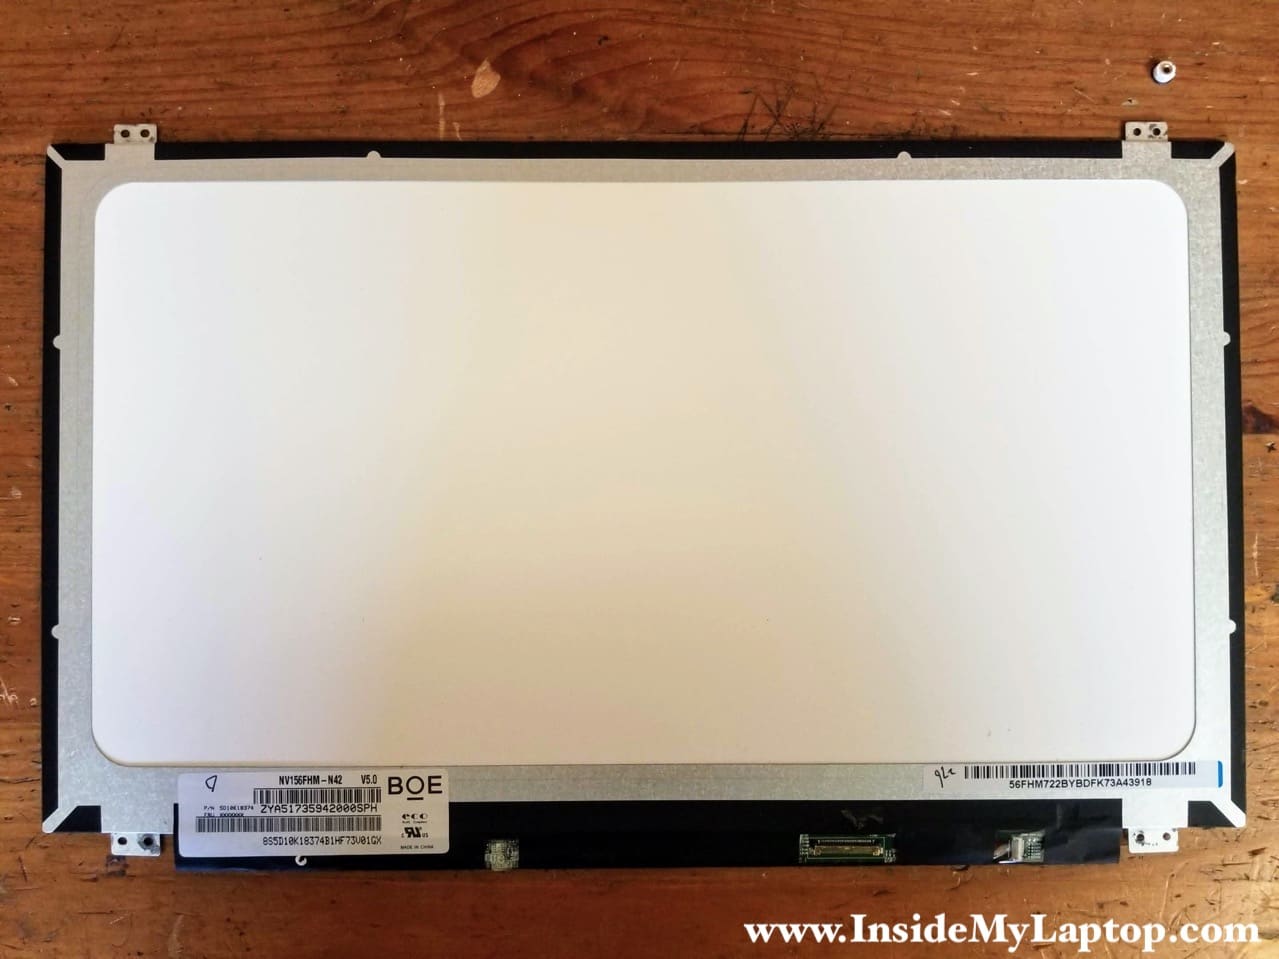
Separate the LCD screen from the cover. Now you can access the display cable on the lower side of the screen and disconnect it.
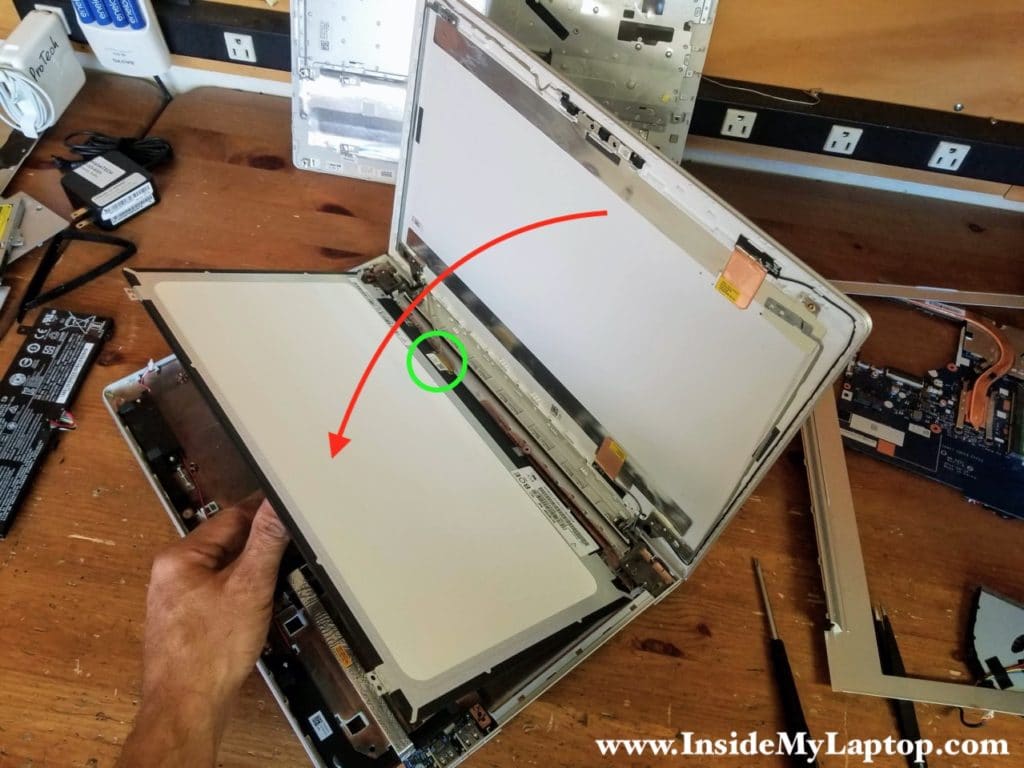
STEP 20.
Peel off the tape securing the connection. Unplug the display cable from the LCD screen.

You can find a new replacement screen by searching the model number printed on the original screen.
In my Lenovo Ideapad 510-15IKB laptop I had the following screen model installed: NV156FHM-N42 v5.0
Luc
Hello,
Thank you for the disassembly instruction of the
Lenovo idepad 510 151KB.
But I still have a question, I have 2 HDD , 1 SSD 128 GB, and 1 HDD 1 TB.
Where is de location of the HDD 1TB ?
In can not find this position in your disassembly instruction .
Can you help me ?
Regards,
Luc