
You can follow this Dell Inspiron 5570 complete teardown guide for a full or partial laptop disassembly. There is a good chance these instructions will work for some other Dell Inspiron 5000 series laptops.
Steps 1-20 explain how to take apart the base assembly in order to access and remove all internal components.
Steps 21-28 explain how to remove and take apart the display assembly in order to remove the LCD screen and hinges.
STEP 1.
Remove one screw securing the optical drive and pull the drive out.

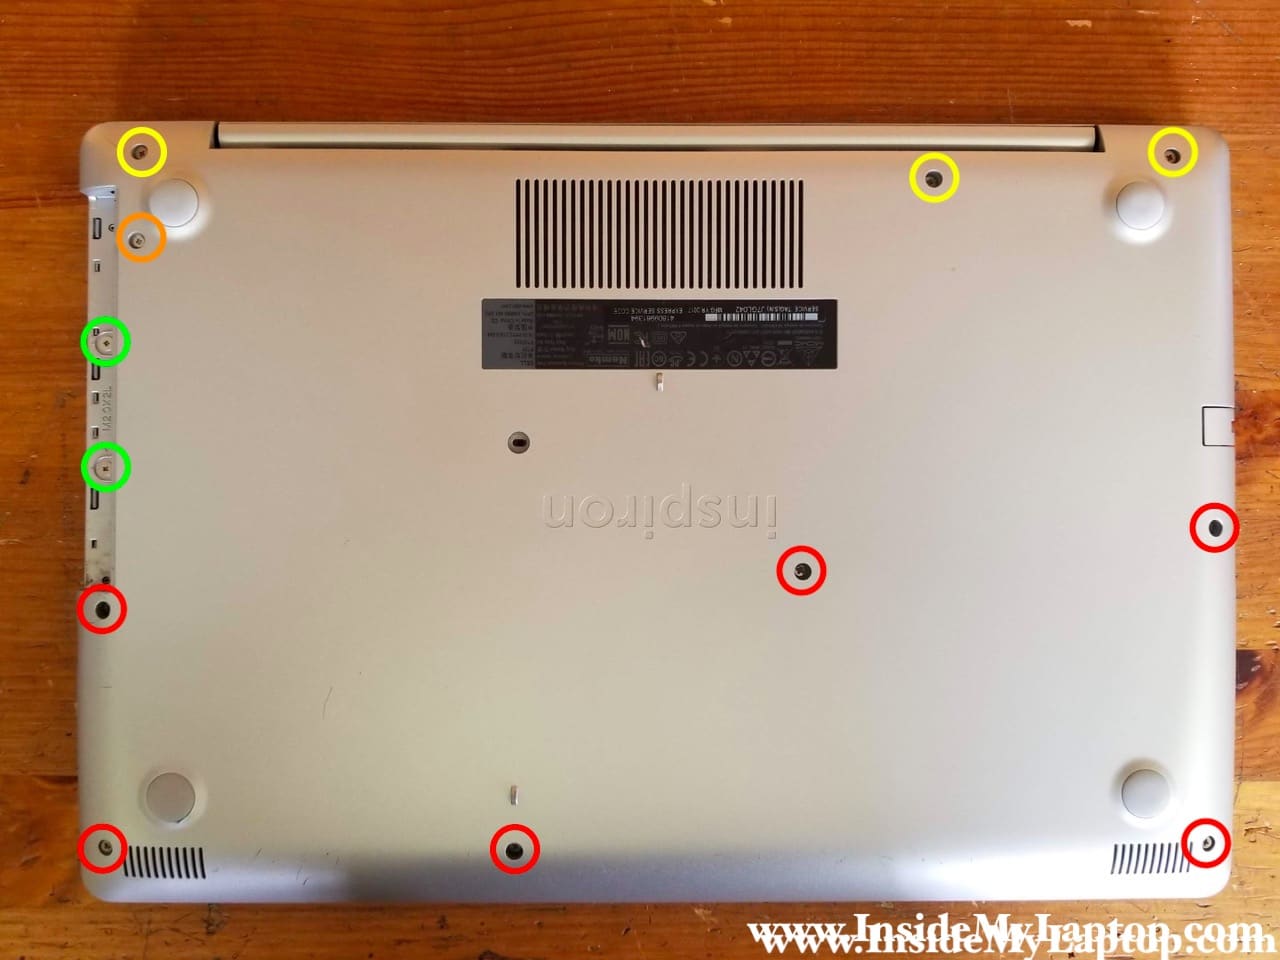
STEP 2.
The bottom cover secured to the palmrest assembly by 12 screws.
Three screws color-coded in yellow will stay attached to the bottom cover. You can unscrew them but do not try to remove completely. All other screws can be removed.
All screws have different length and I color-coded them differently.
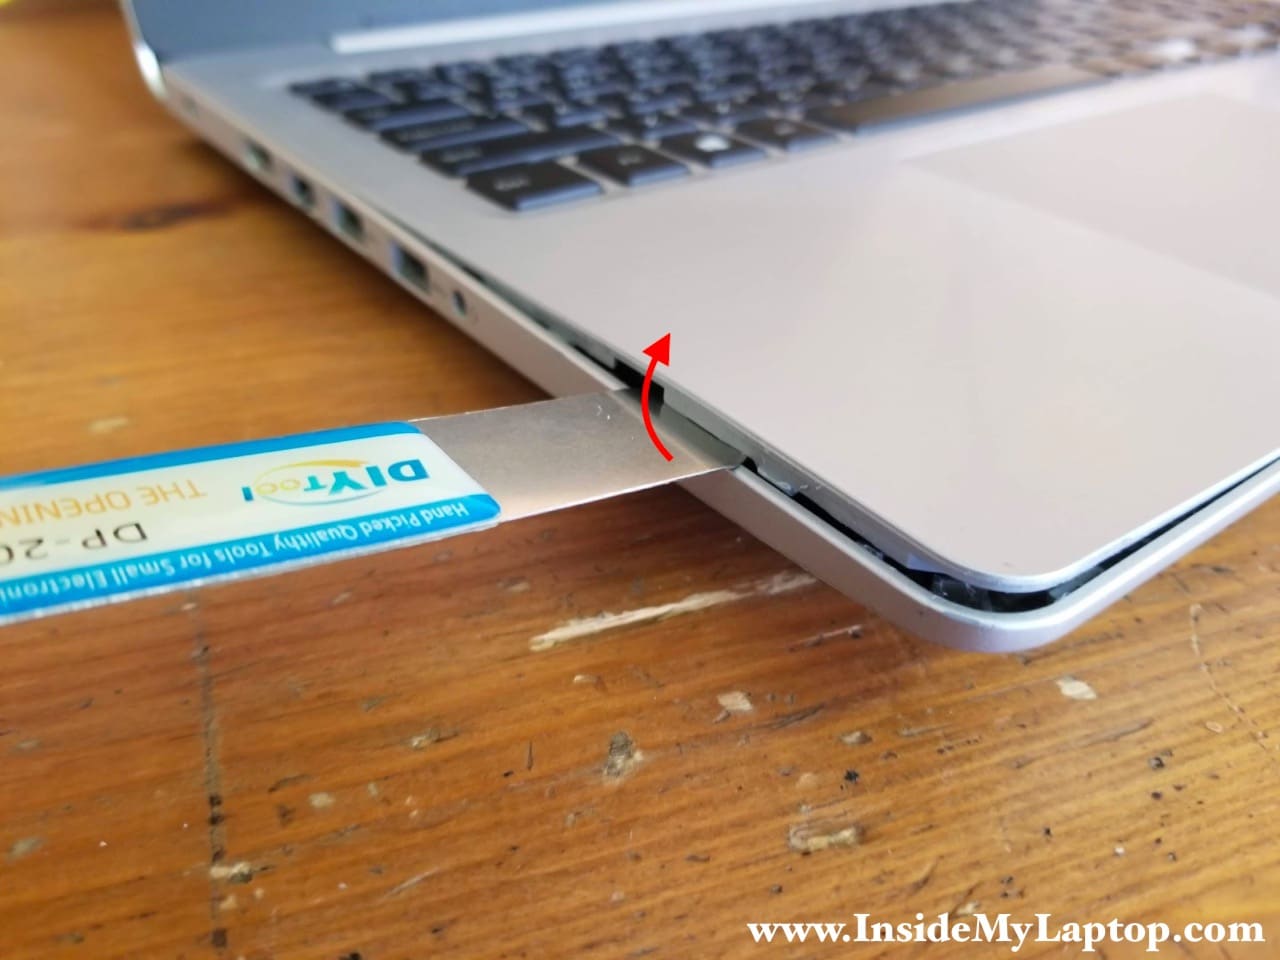
STEP 3.
Start separating the palmrest assembly from the bottom cover using a thin case opener tool. Pry up the palmrest to disengage hidden latches.
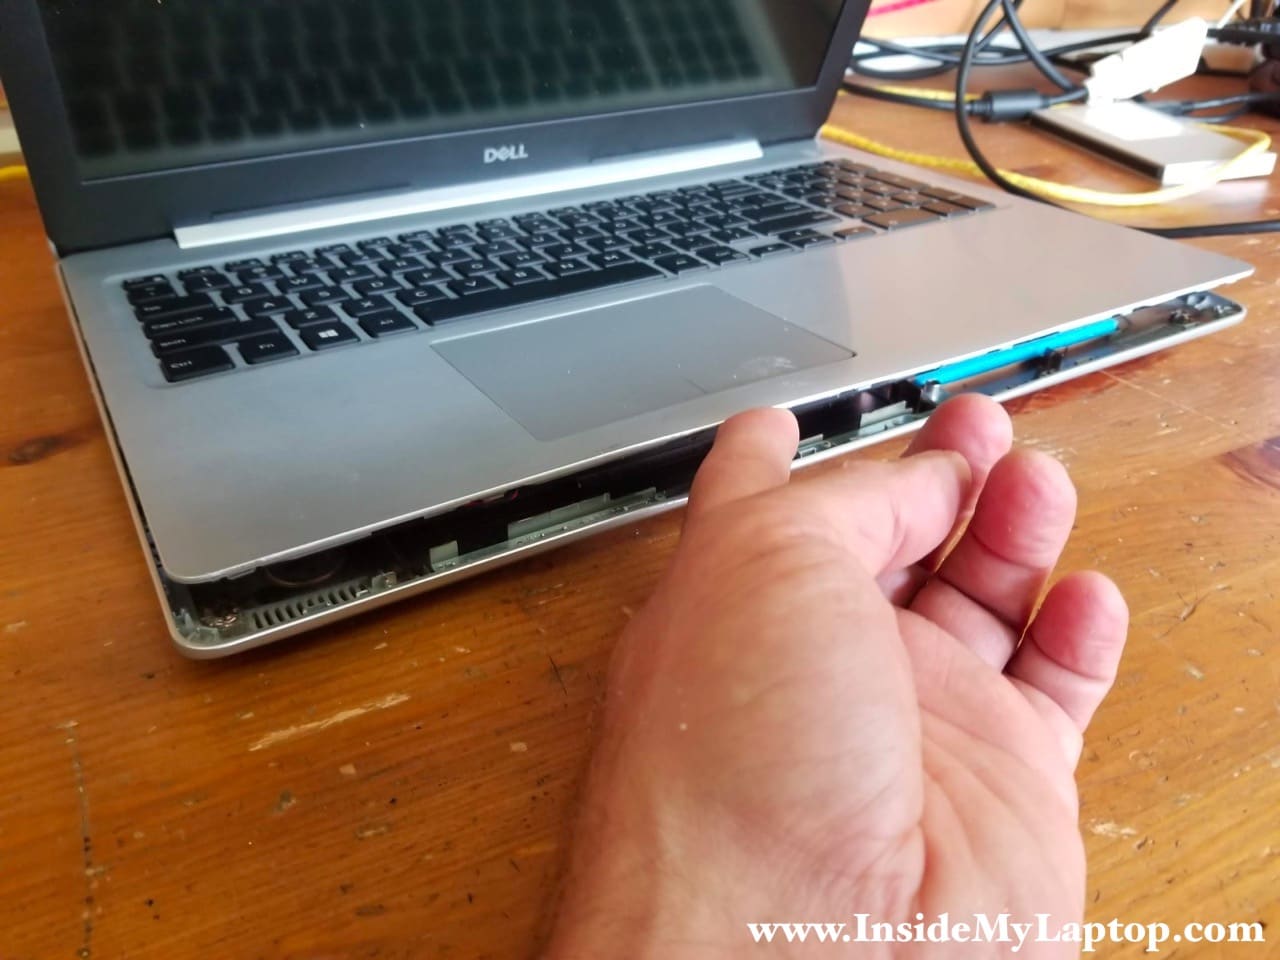
STEP 4.
Continue separating the palmrest from the bottom cover with your fingers.
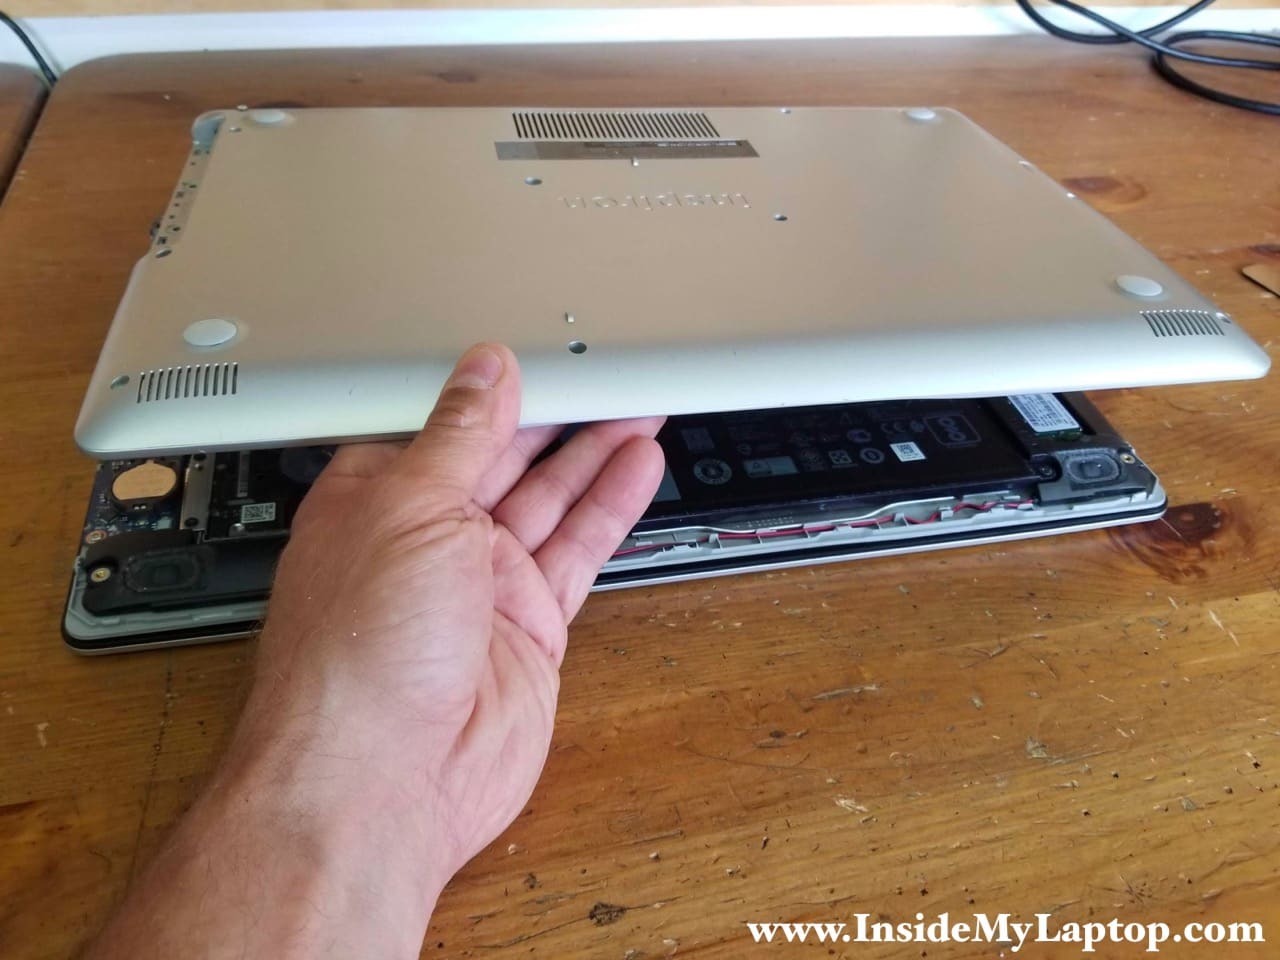
STEP 5.
Now you can turn the laptop upside down and remove the bottom cover completely.
Removing internal Dell Inspiron 5570 components
With the bottom cover removed you can access all internal laptop components. Let’s remove them one by one.
STEP 6.
Remove four screws securing the battery and unplug the battery cable.
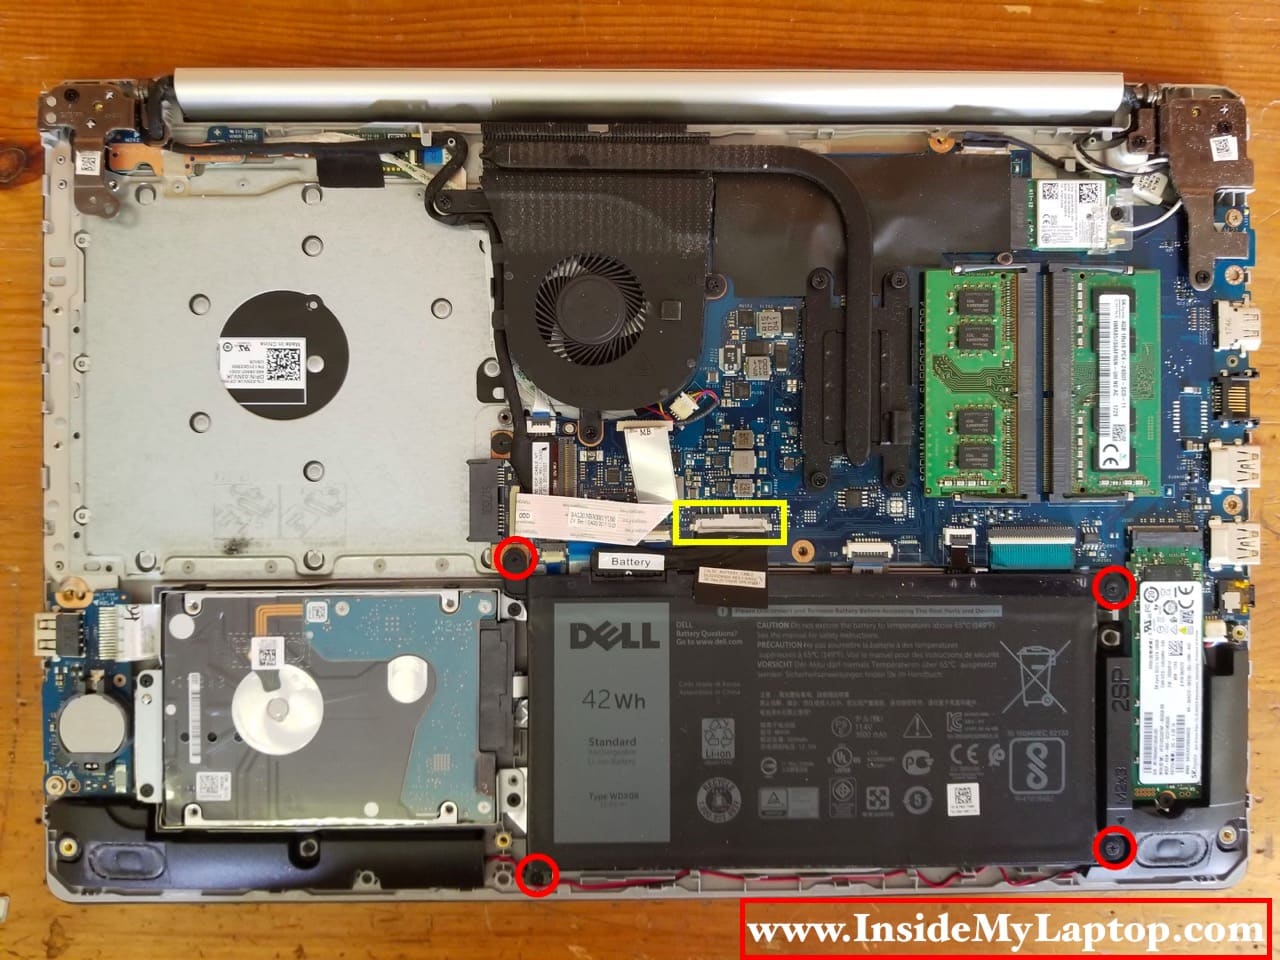
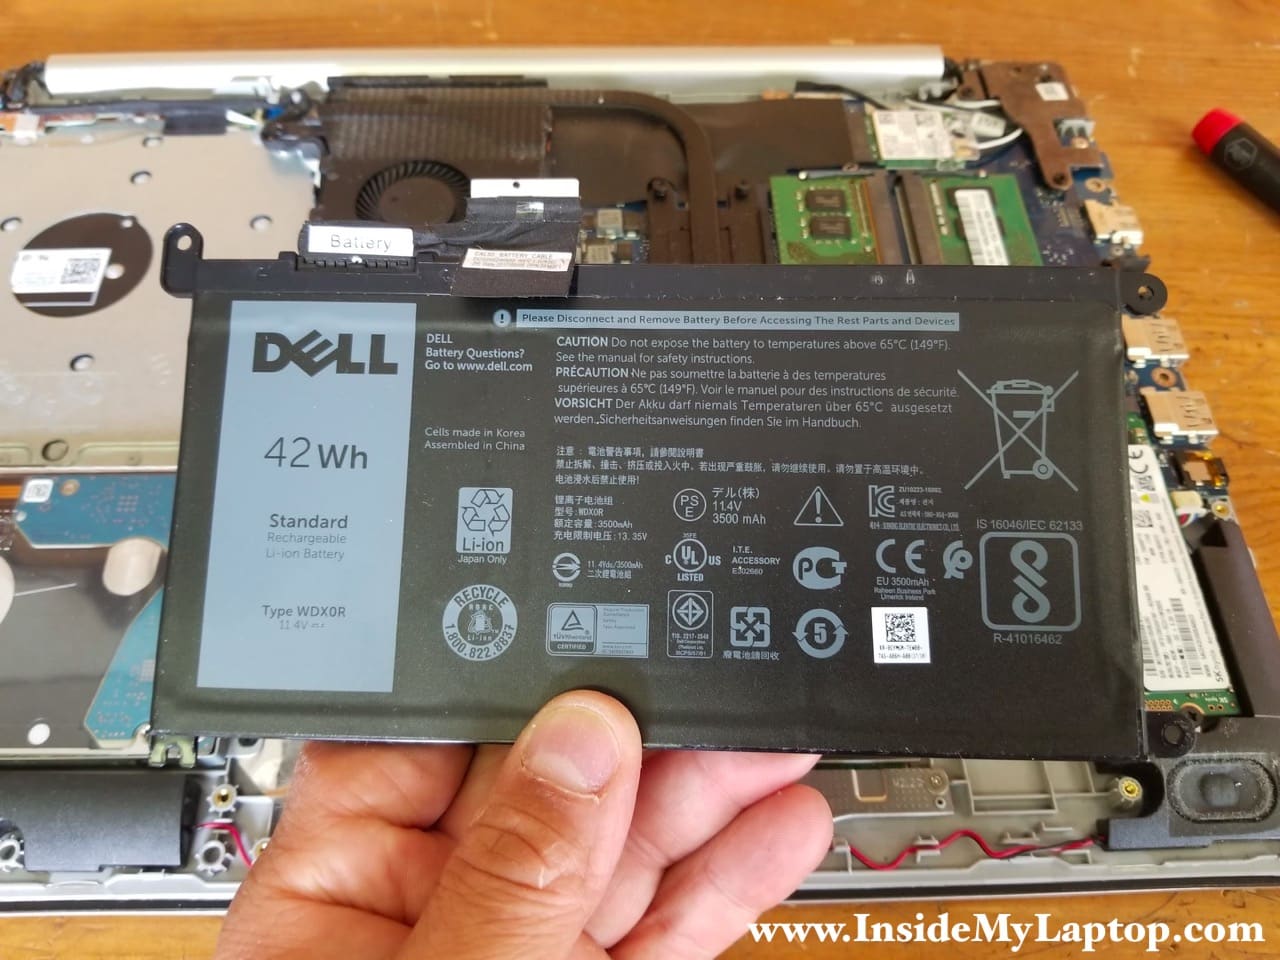
STEP 7.
Remove the battery. This is battery type WDX0R.
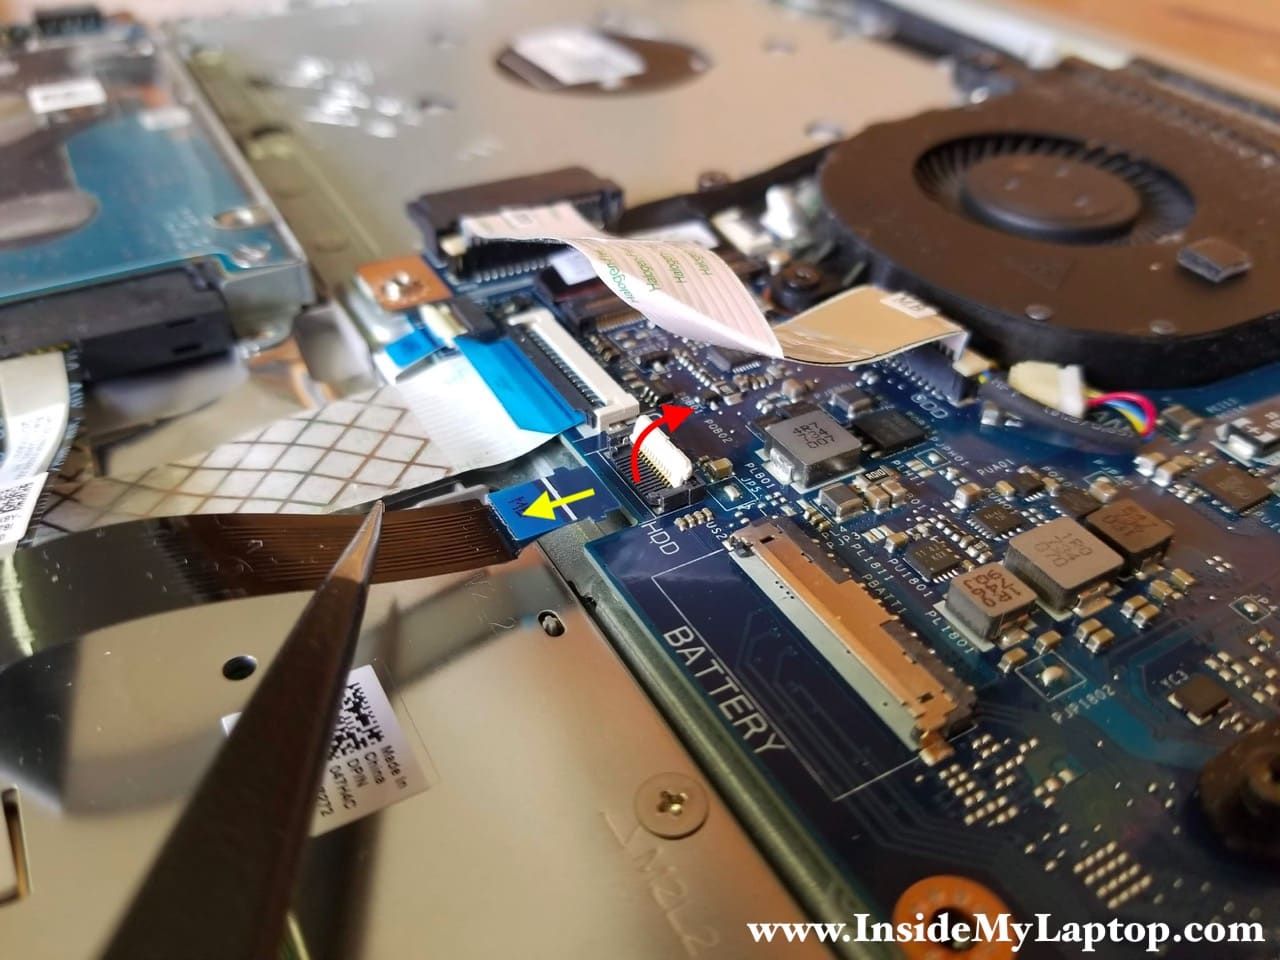
STEP 8.
Remove four screws securing the 2.5″ hard drive bracket.
Disconnect the hard drive cable from the motherboard.
Upgrading this regular hard drive to a 2.5″ solid state drive will improve laptop performance.

Here’s how to disconnect the hard drive cable.
Unlock the connector by lifting up the white tab (red arrow).
Pull the cable out of the connector (yellow arrow).
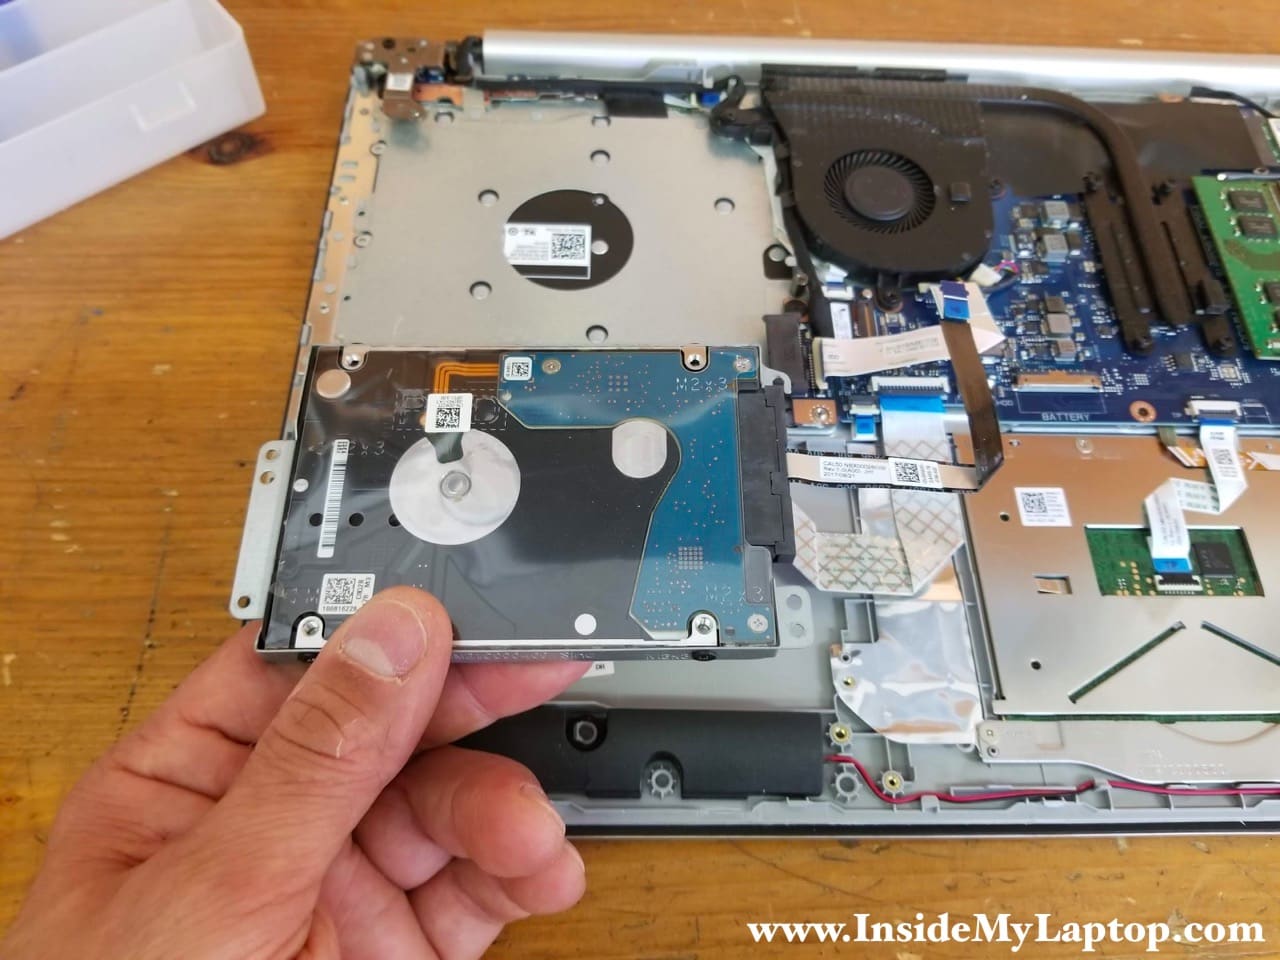
STEP 9.
Remove the hard drive assembly with the cable attached to it.
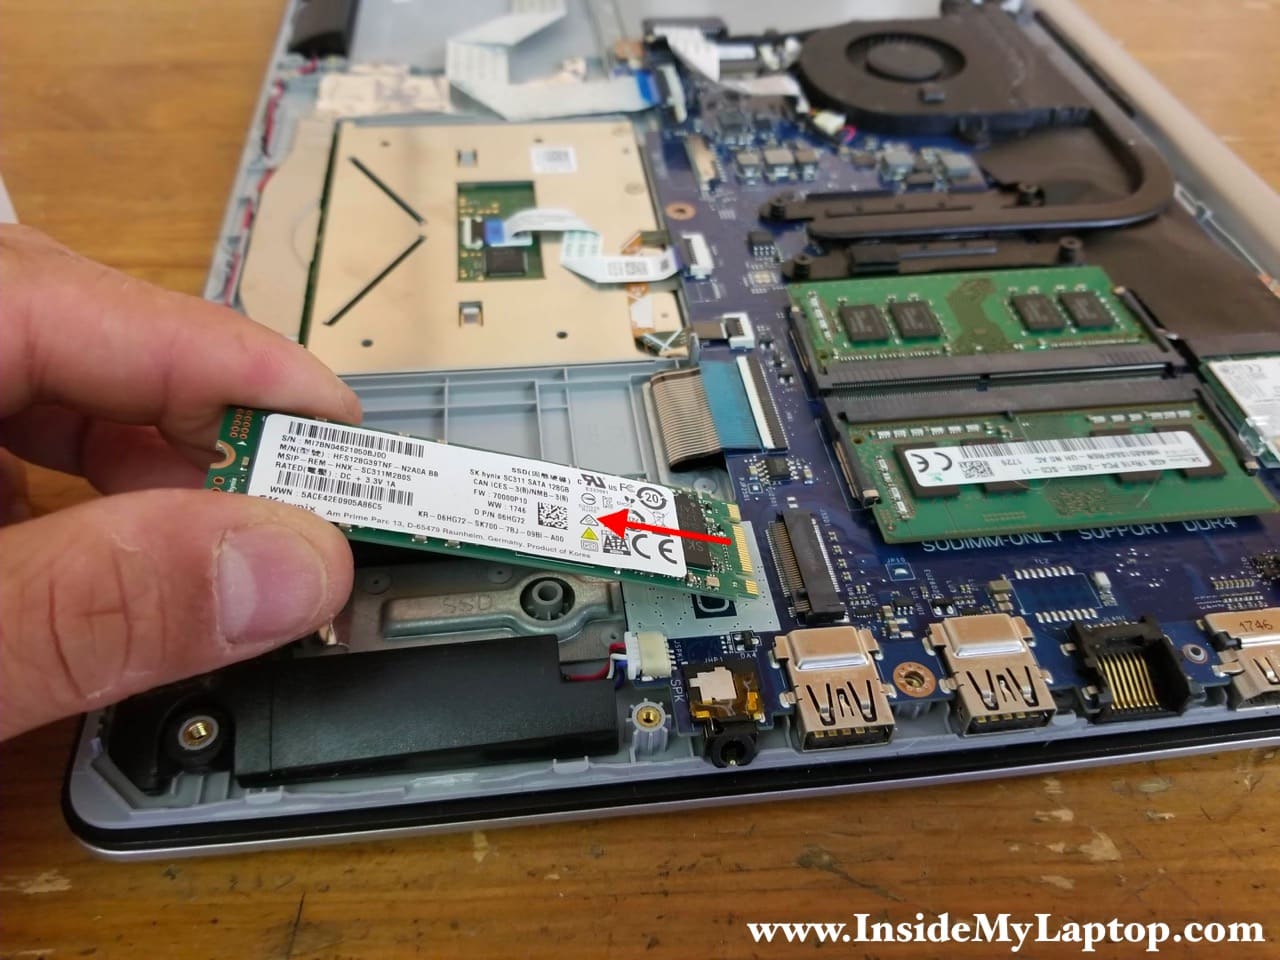
STEP 10.
Remove one screw securing the solid state drive. Pull the SSD out.
This is m.2 SATA III solid state drive (256GB max size for this model). According to Dell, you can install up to 512GB m.2 NVMe PCIe SSD into this slot.
Dell Inspiron 5570 has two memory slots and can handle up to 32GB (2x16GB) DDR4 2400/2666/3200 SODIMM RAM modules.
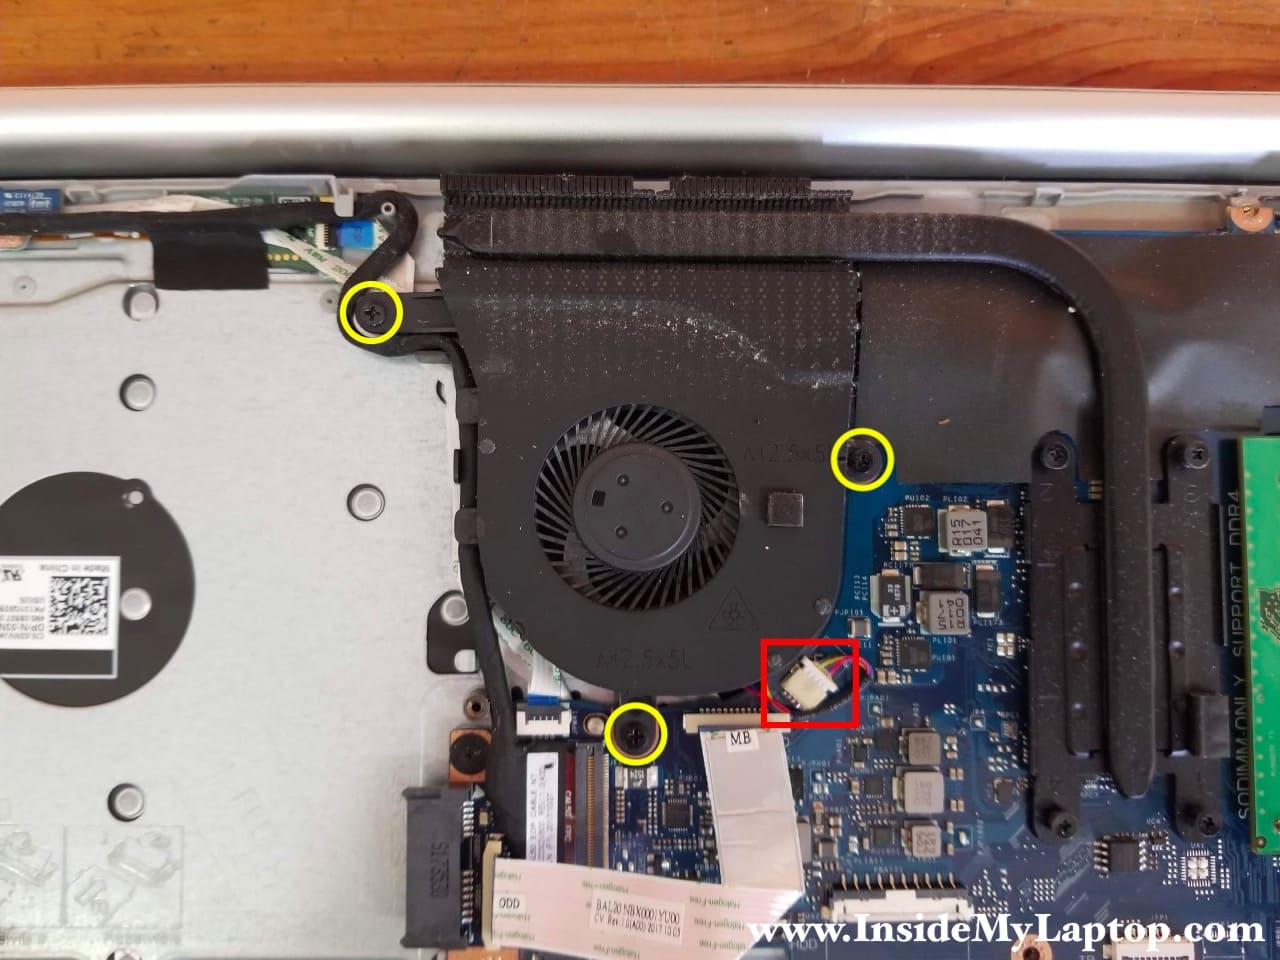
STEP 11.
Remove three screw securing the cooling fan. Disconnect fan cable from the motherboard.
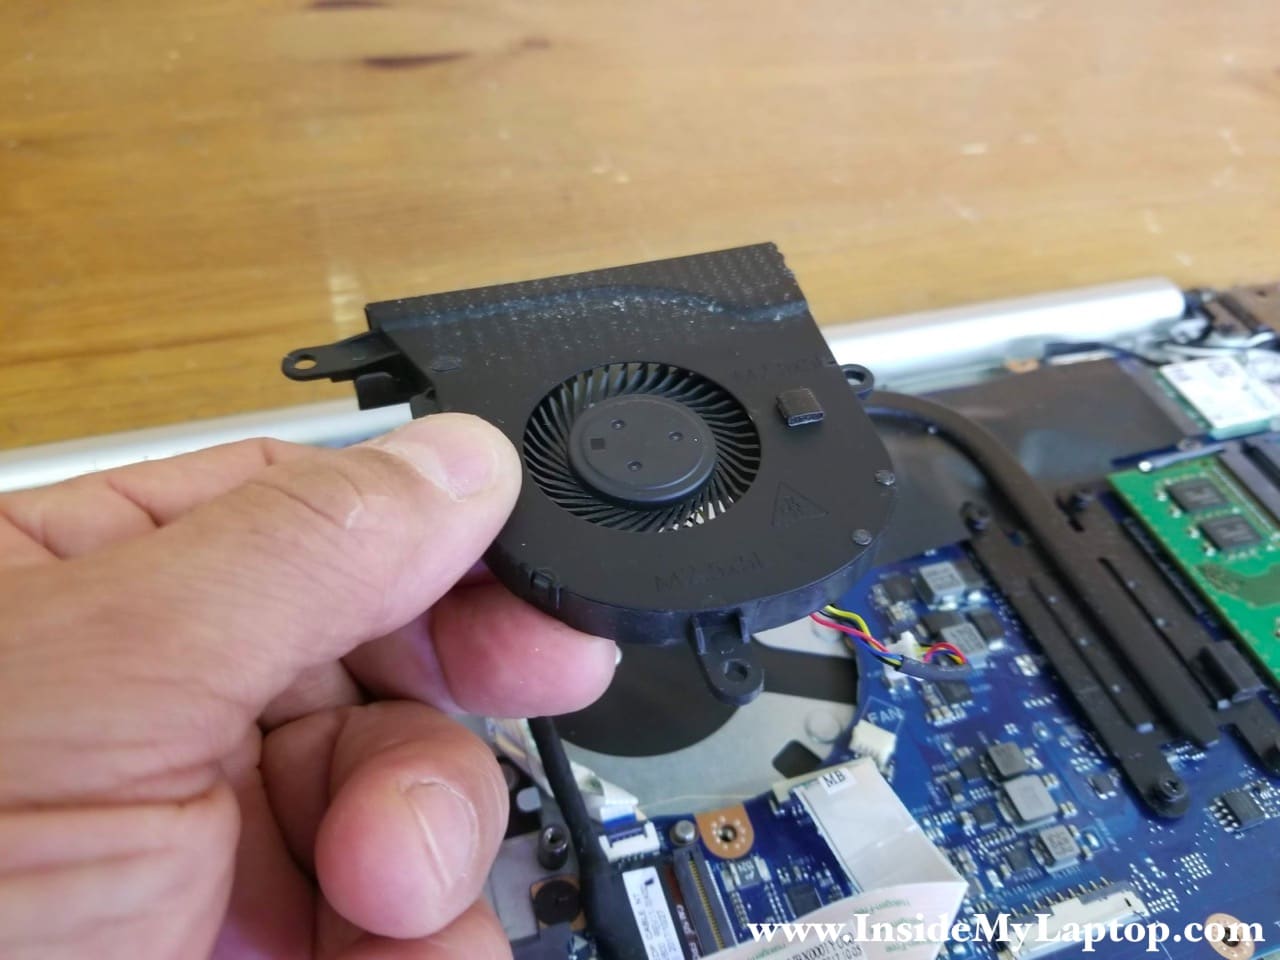
STEP 12.
Remove the cooling fan.
STEP 13.
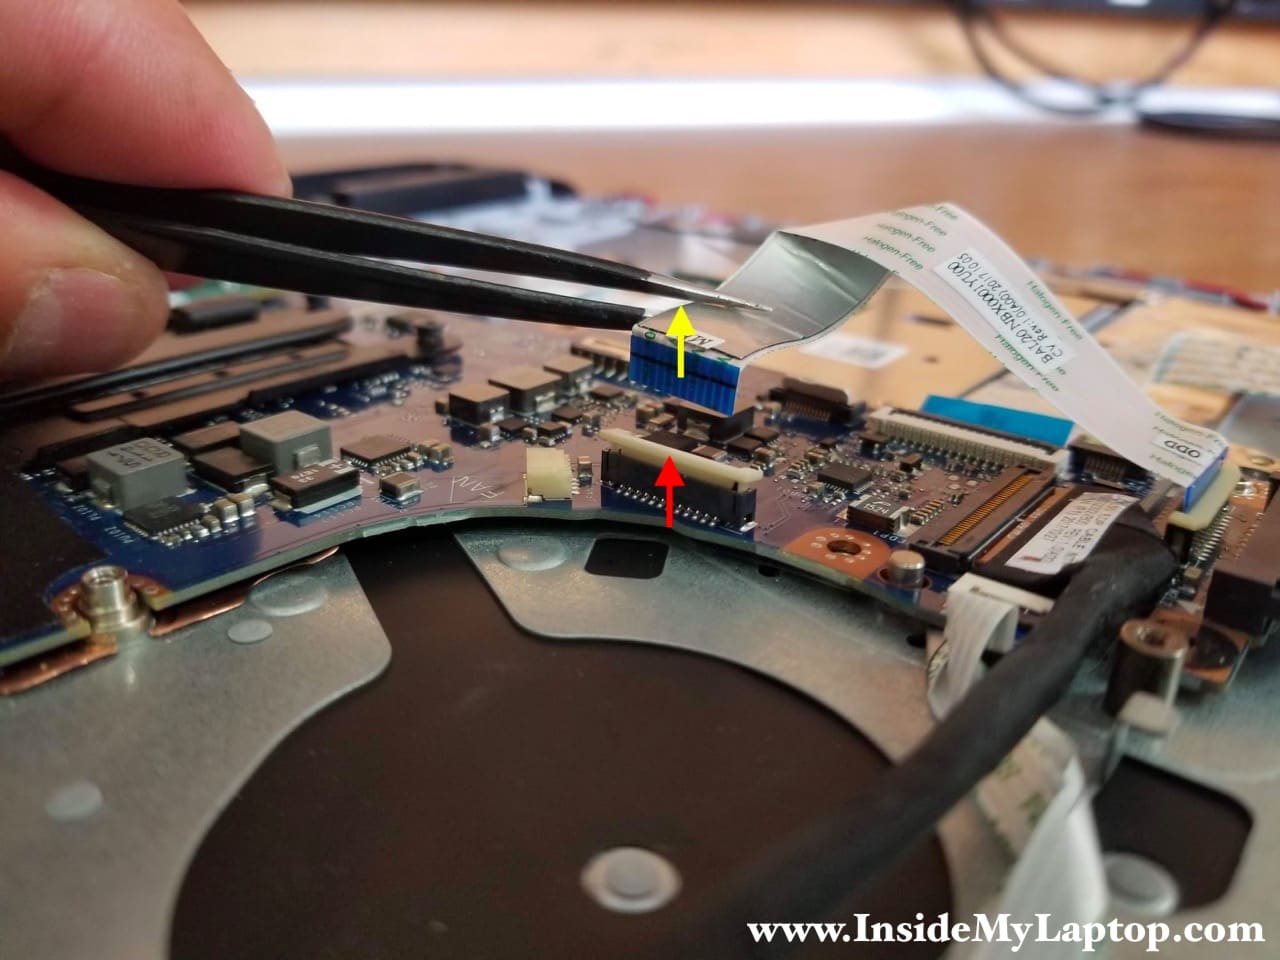
Remove one screw securing the optical drive connector board. Disconnect the board cable from the motherboard.
Here’s how to disconnect the cable.
Lift up the white locking tab (red arrow). Do not apply any force. The tab must stay attached to the connector.
Pull the cable out (yellow arrow).
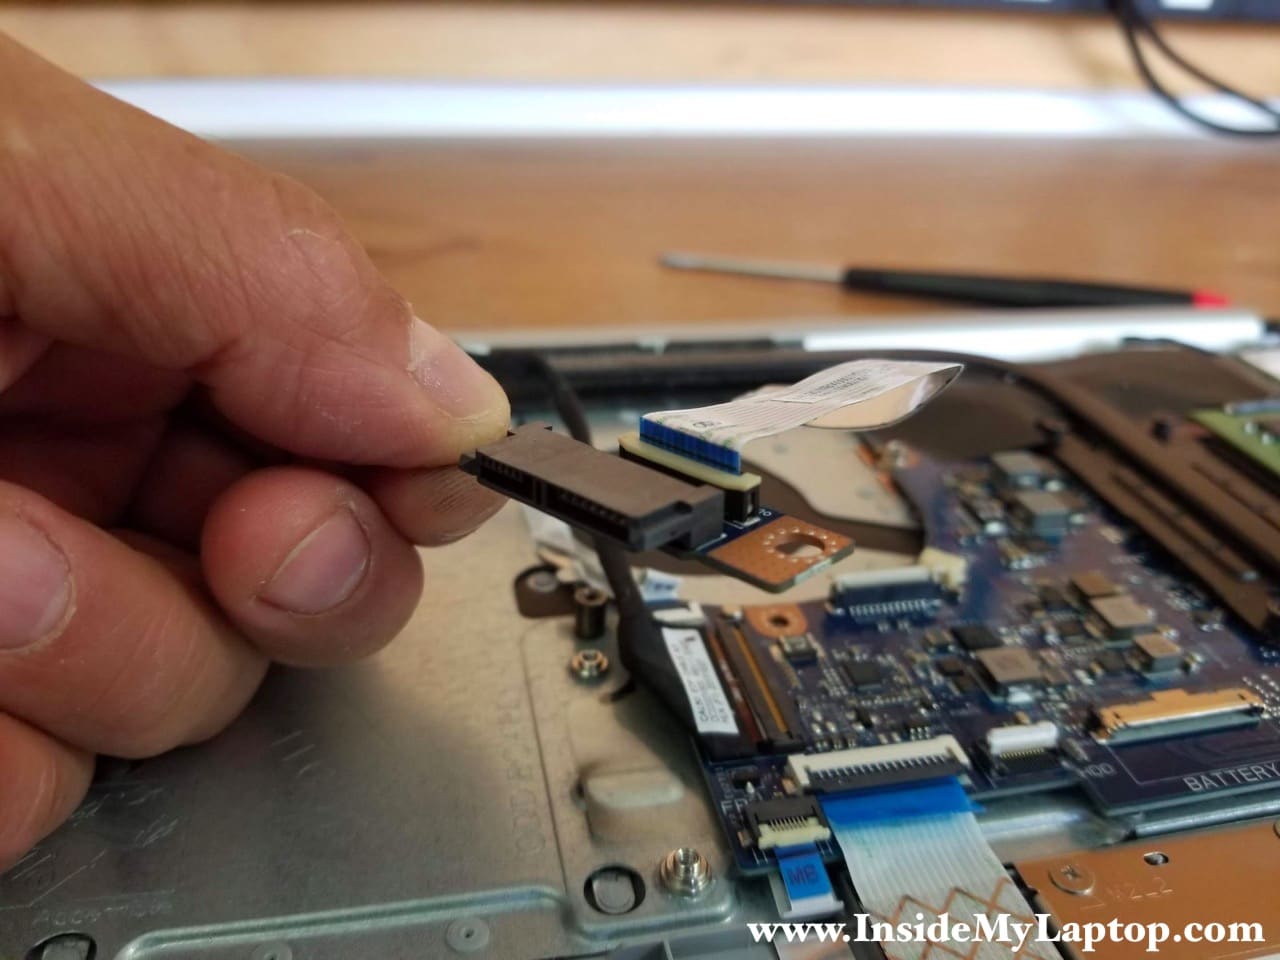
STEP 14.
Remove the optical drive connector board.
STEP 15.
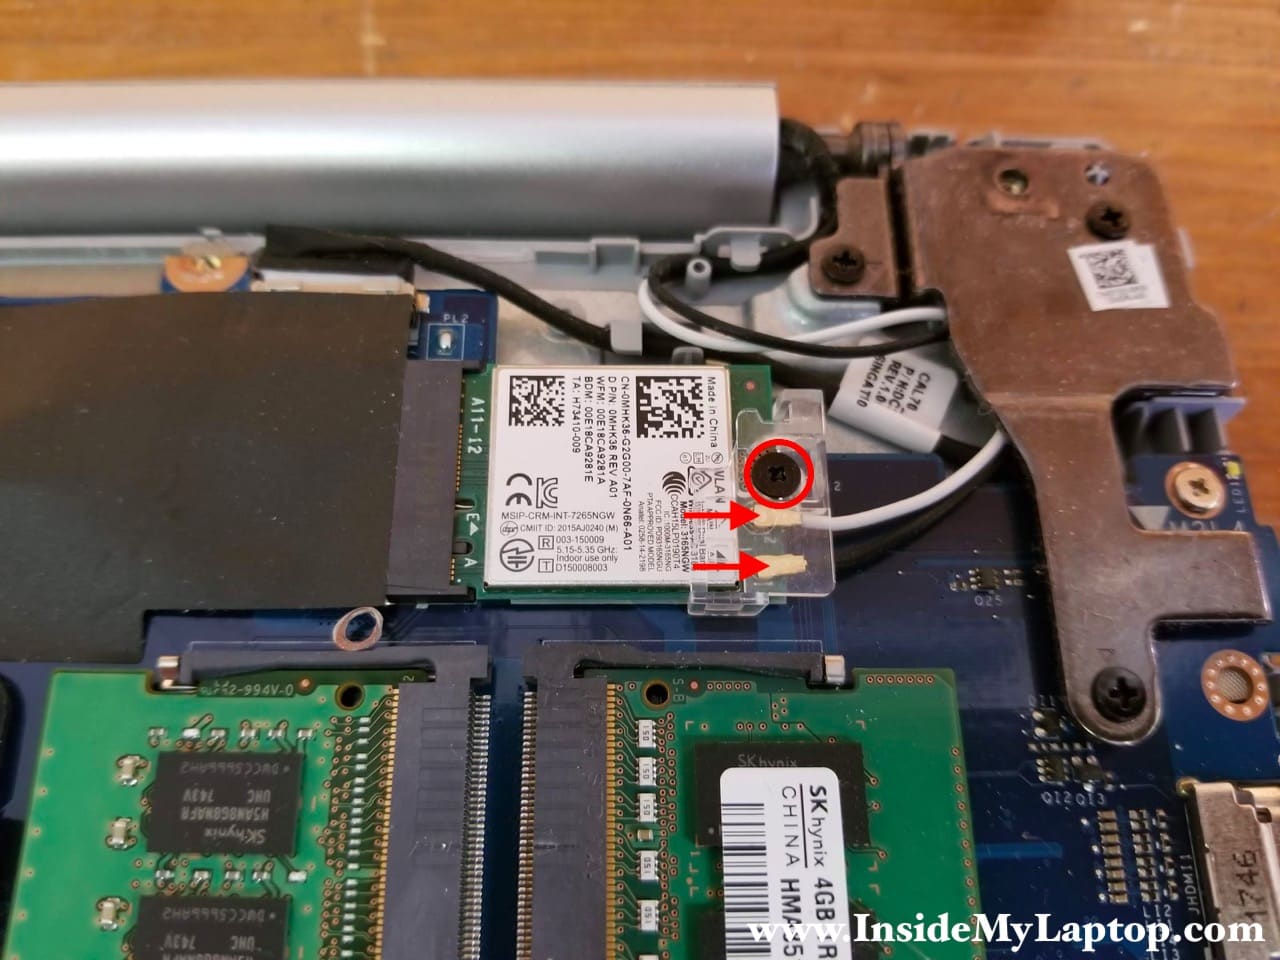
Remove one screw securing the wireless card cover. Remove the cover.
Pay attention how this cover installed so you know how to put it back in place correctly.
Disconnect both antenna cables from the wireless card. Carefully lift up the golden antenna connector to unsnap it from the card.
Remove the wireless card. Simply pull it out of the slot as you removed the SSD.
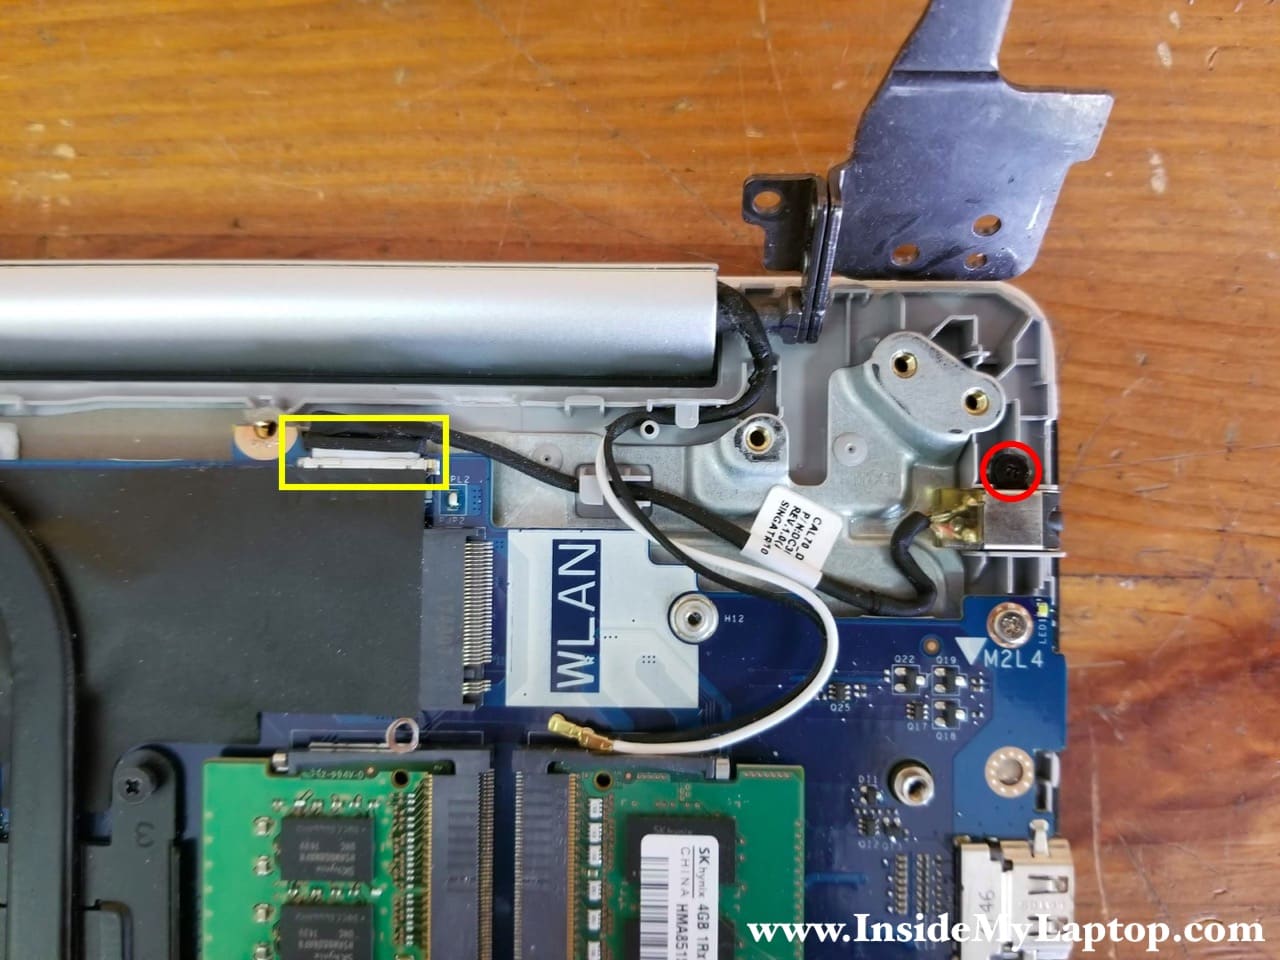
STEP 16.
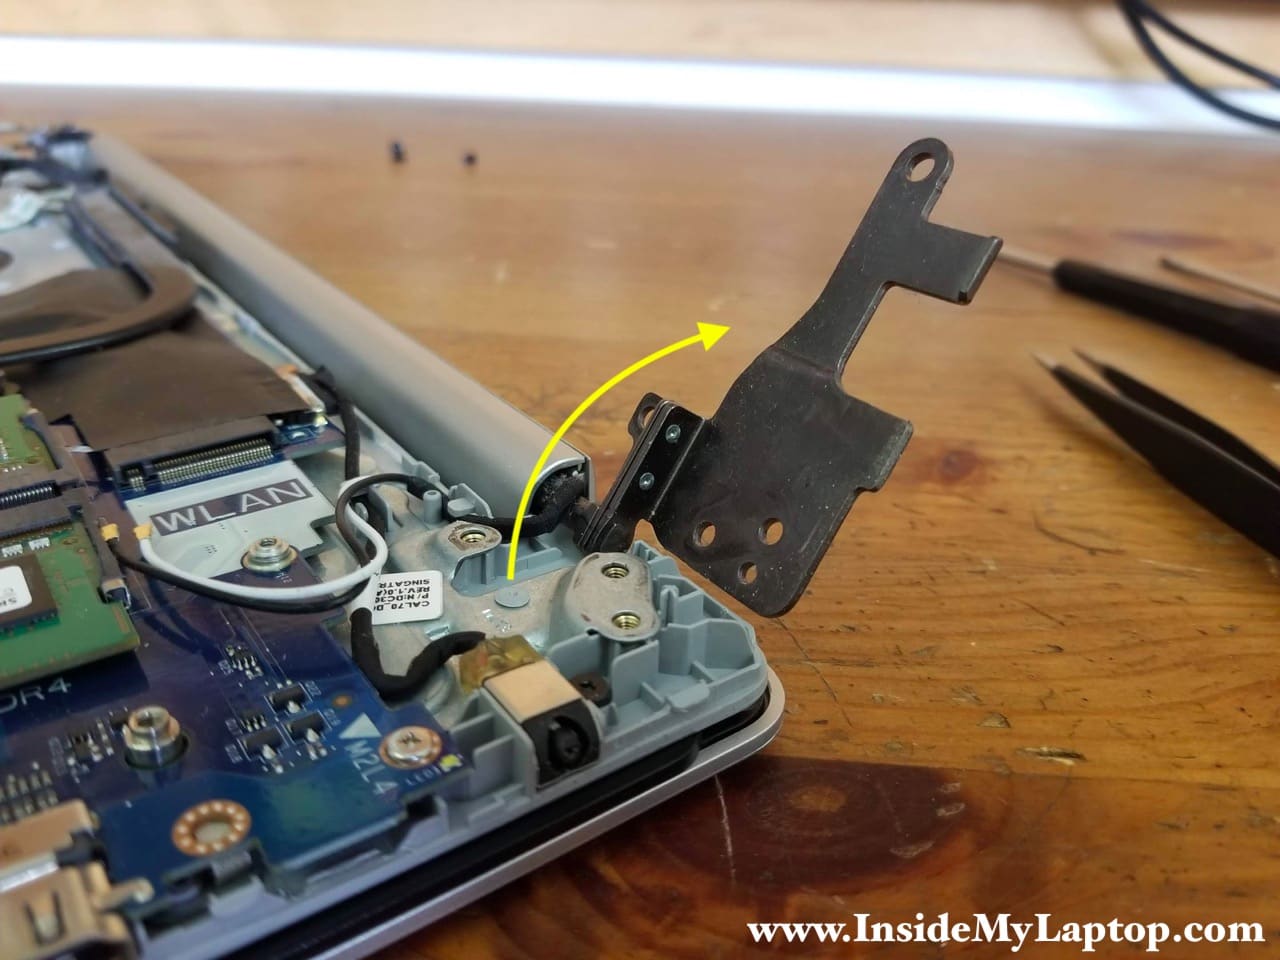
In Dell Inspiron 5570 the DC power jack mounted under the left hinge. In order to remove the DC jack it’s necessary to open the hinge.
Remove three screws securing the left display hinge.

STEP 17.
Lift up the left hinge.
Now you can access the DC power jack.
STEP 18.
Remove one screw securing DC jack to the case.
Disconnect DC jack cable from the motherboard and remove the harness completely.
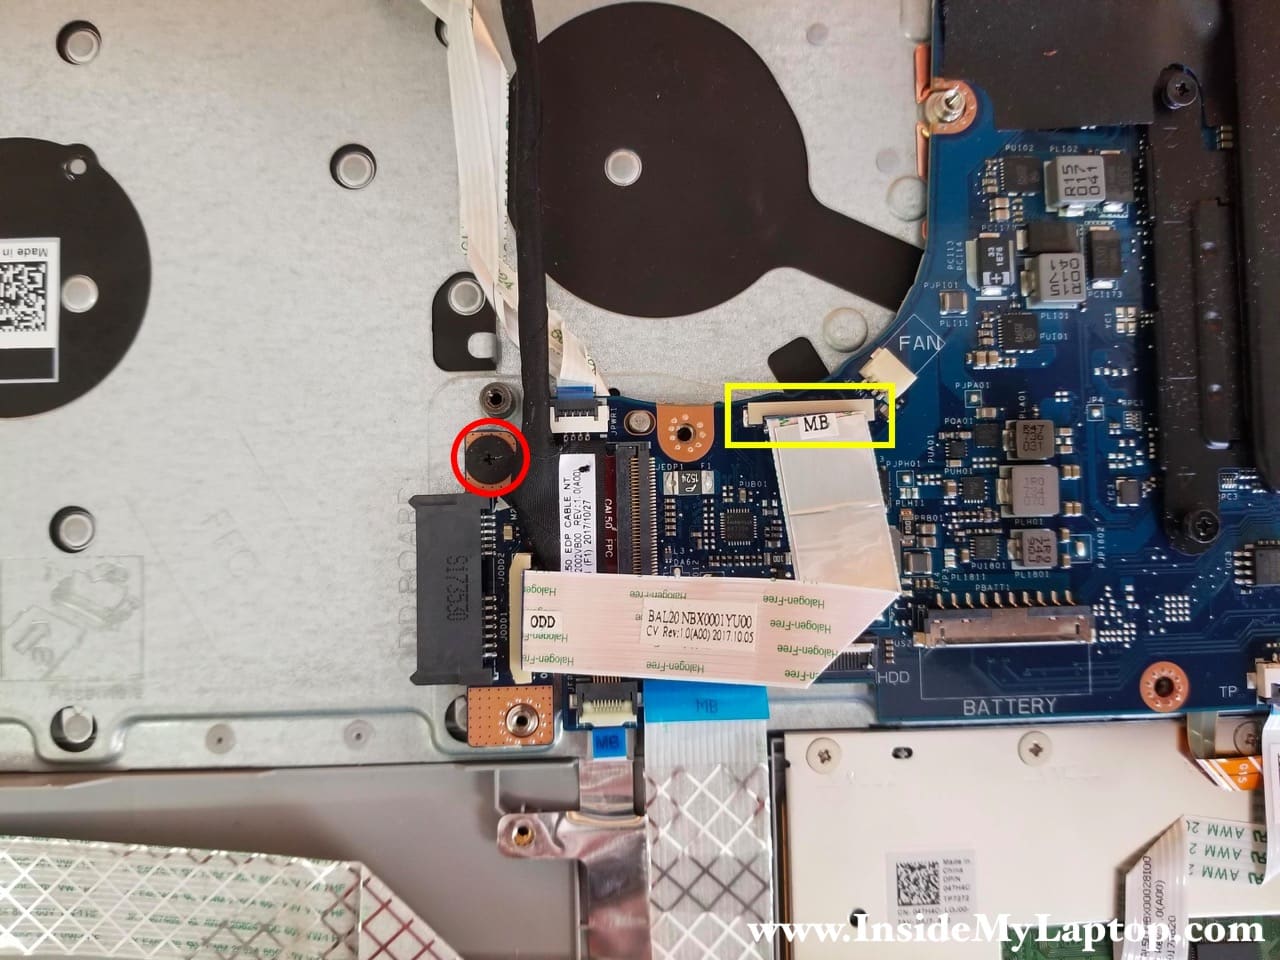
STEP 19.
Disconnect all shown cables from the motherboard.
Remove one screw securing the motherboard.
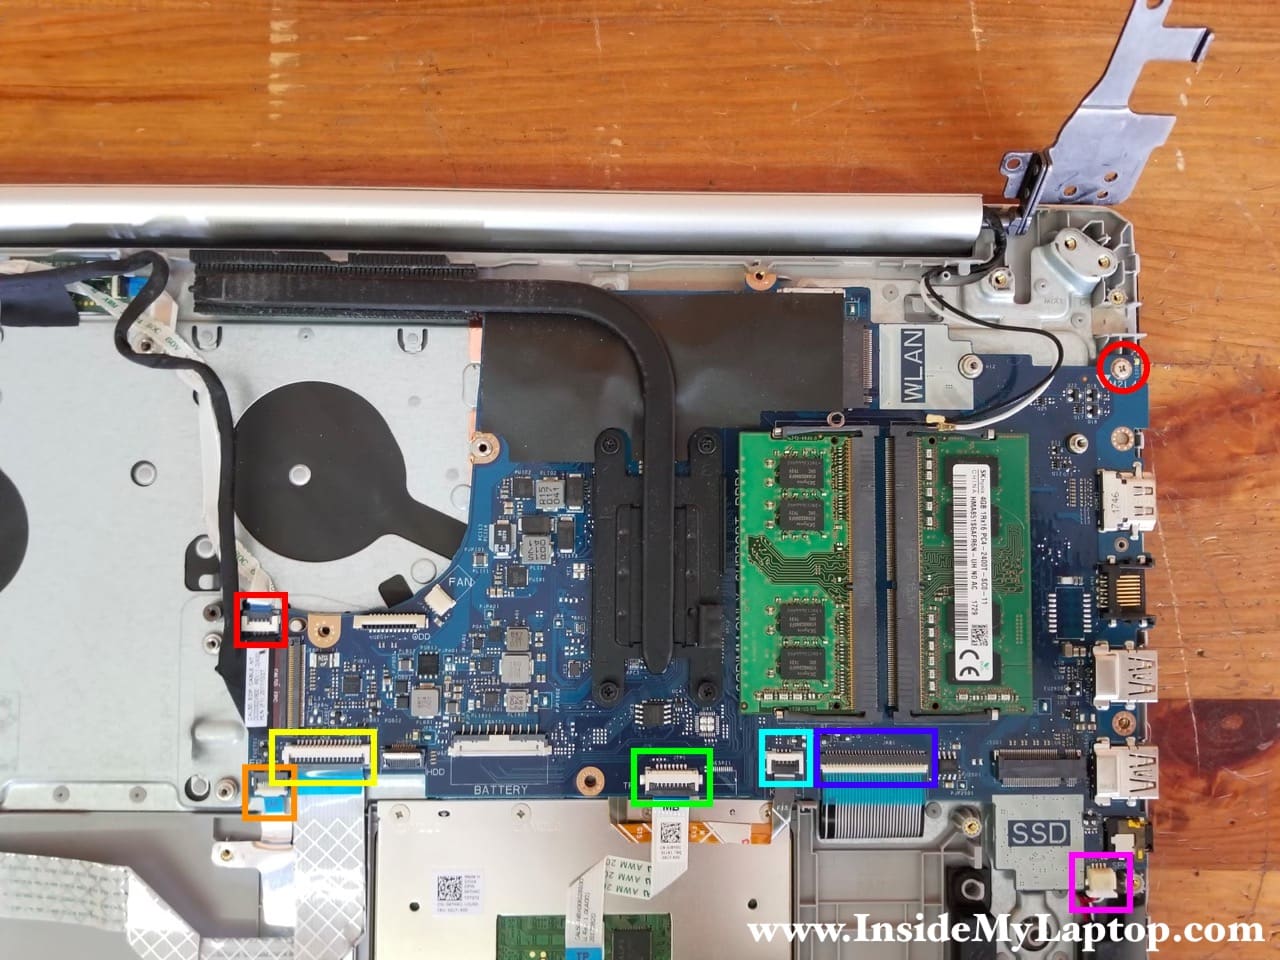
Here’s how to disconnect flat cables. Unlock the connectors first (red arrow) and after that pulled the cables out (yellow arrow).

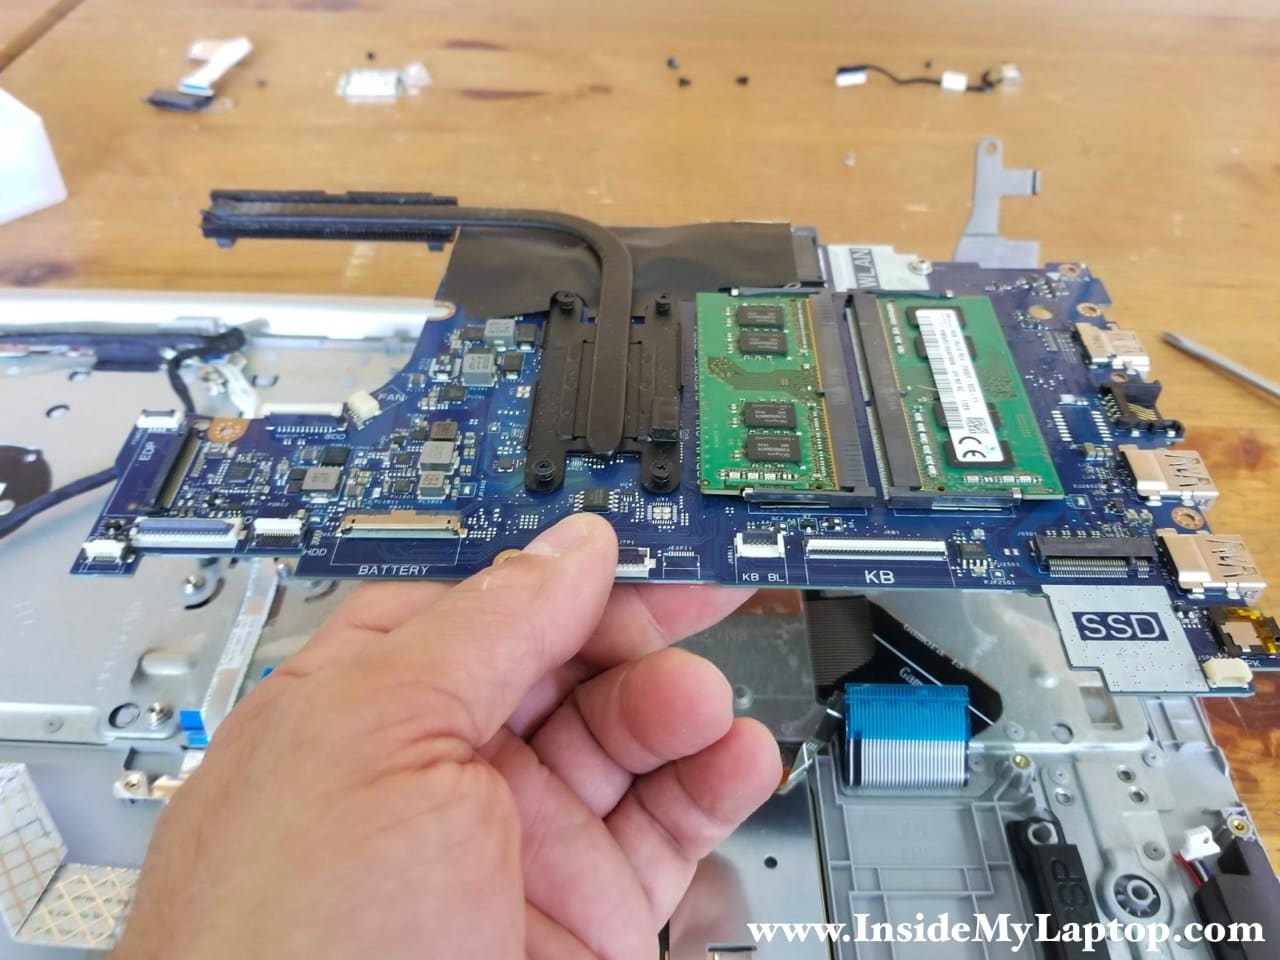
STEP 20.
Carefully lift up and remove the motherboard.
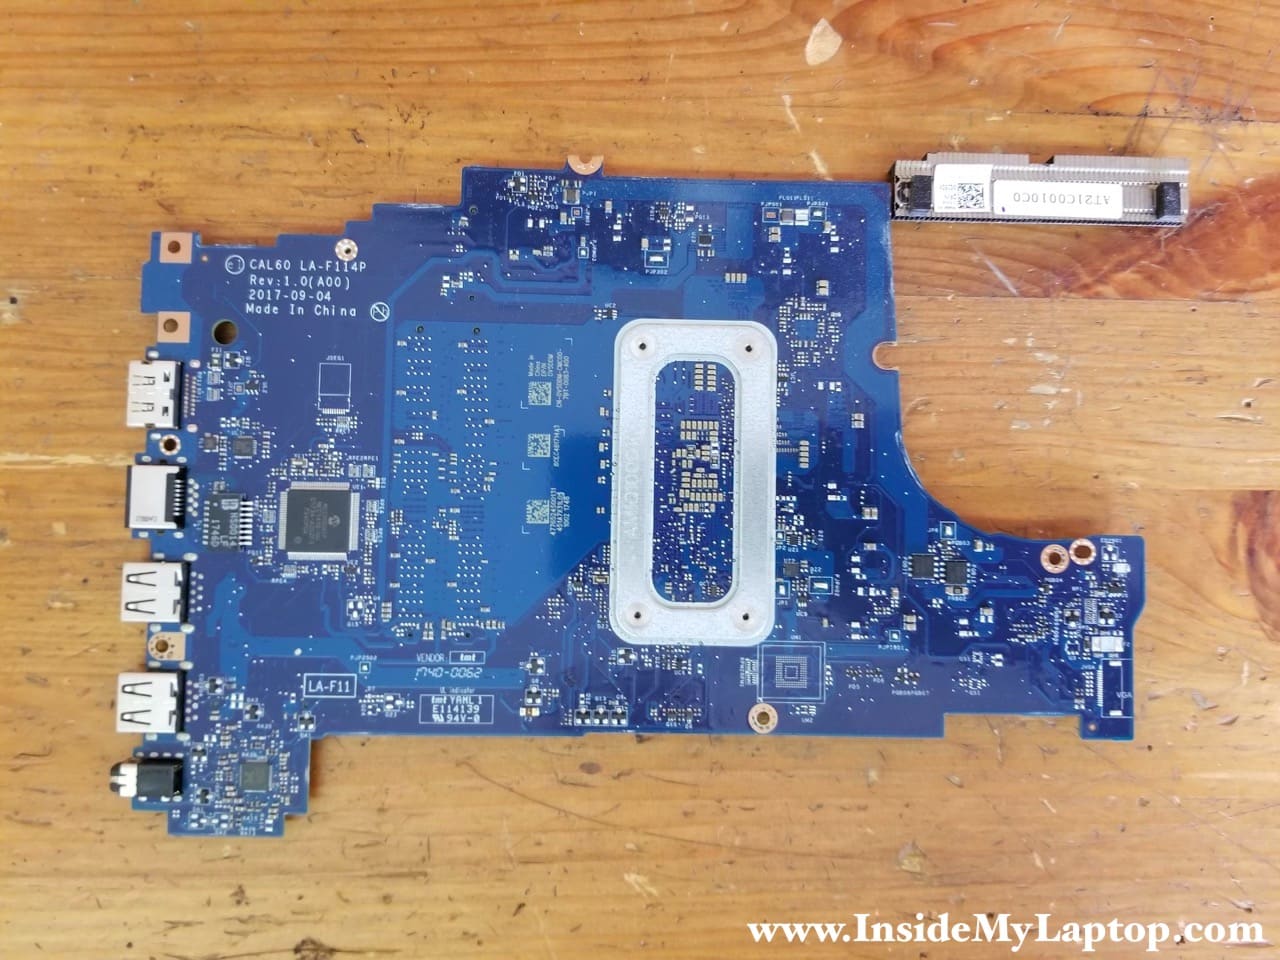
Here’s a picture of the other side, just in case you need it.
Removing and taking apart the display assembly
STEP 21.
Unroute the display cable from the routing channel.
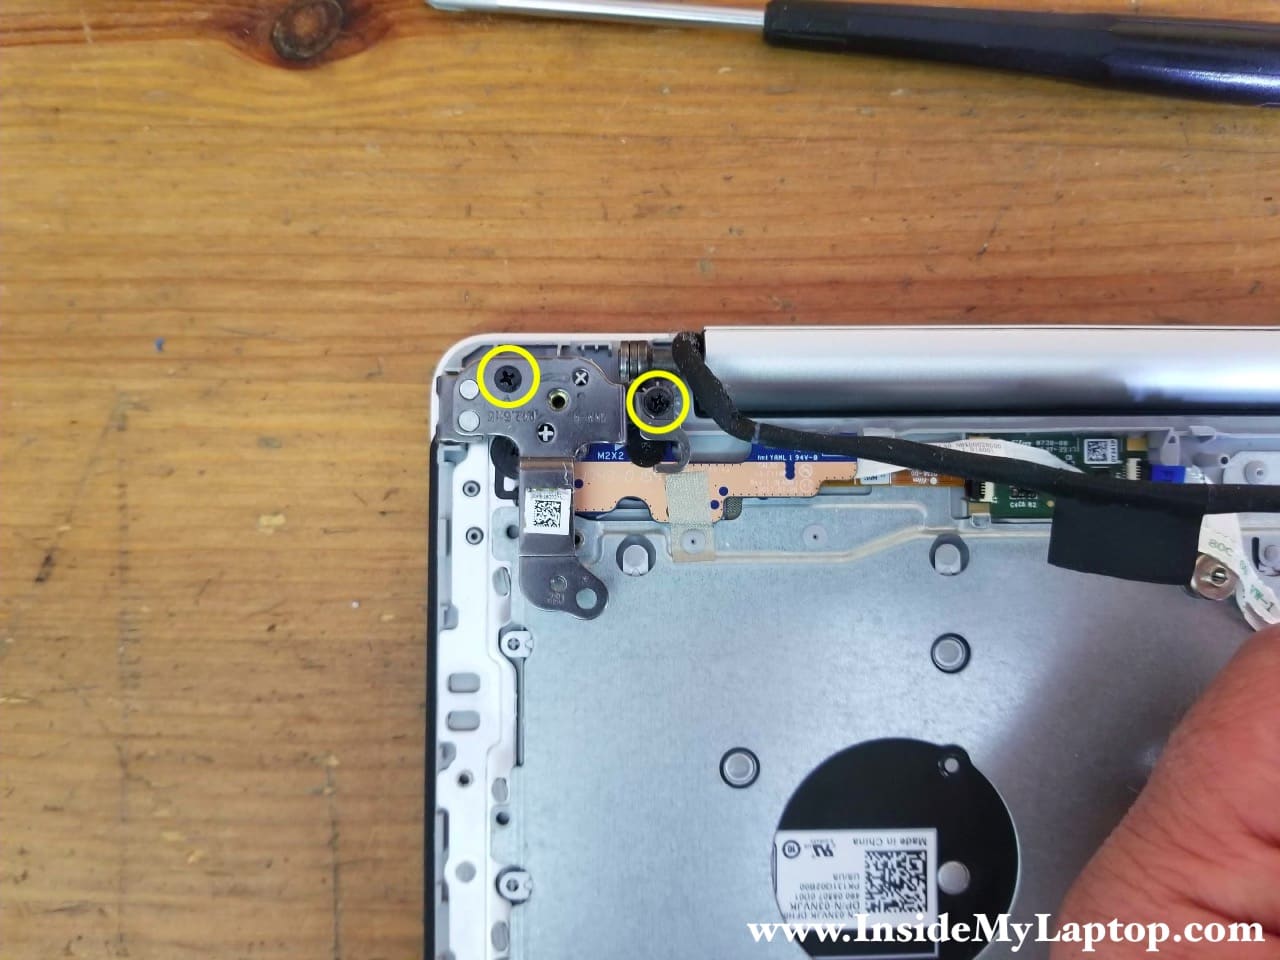
Remove two screws securing the right display hinge.
Lift up the right hinge (as you remember, we already lifted up the left hinge in the step 17).
STEP 22.
Now you can separate the palmrest from the display assembly.
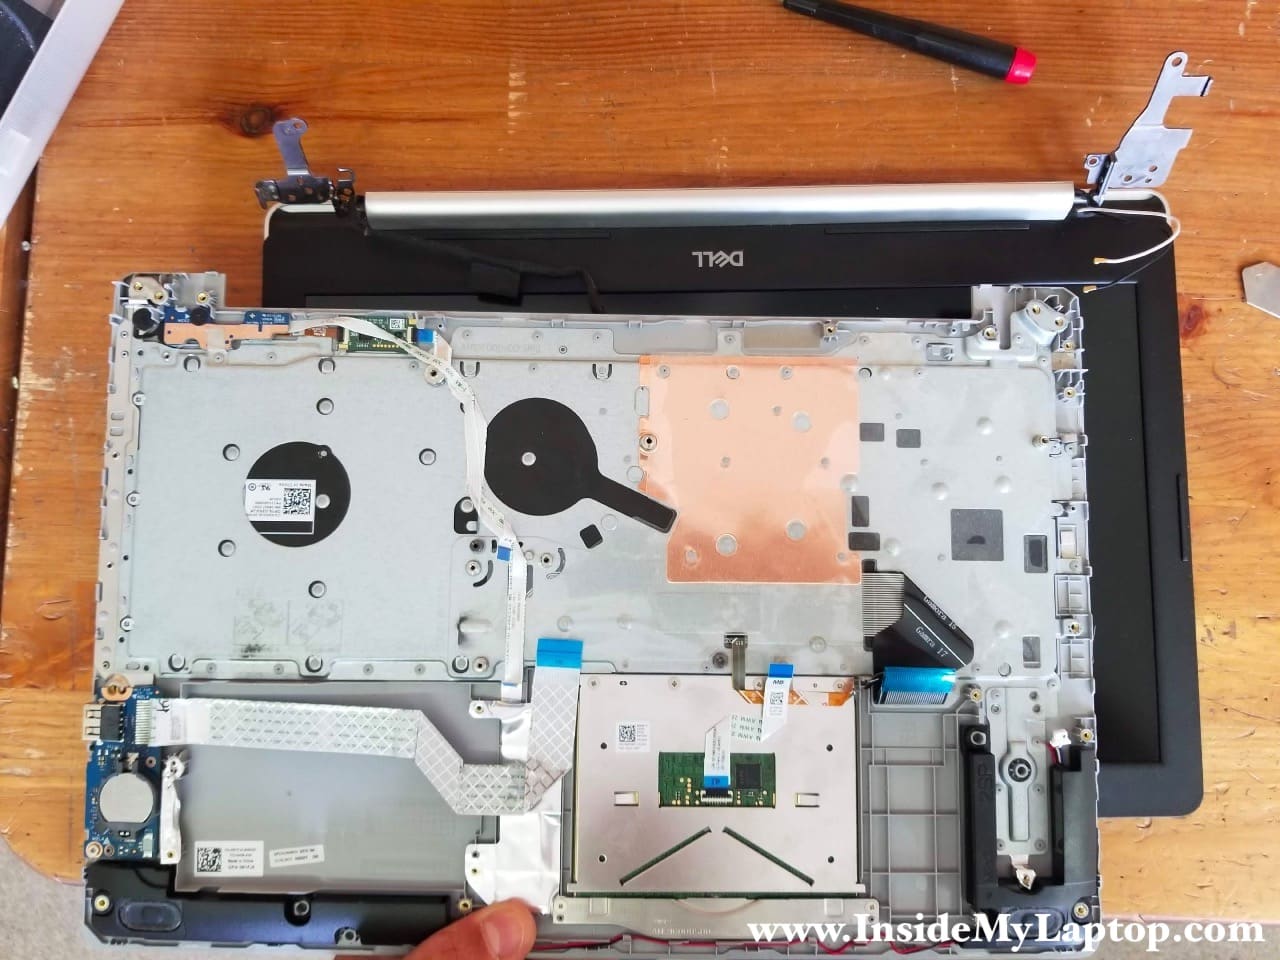
The USB SD card reader board still attached to the palmrest.
Notice that CMOS battery is connected to this board and can be easily removed if necessary. It’s a regular CR2032 3V lithium battery.
The trackpad also can be removed. The keyboard, on the other hand, permanently riveted to the palmrest and cannot be easily removed.
Replacement palmrest/keyboard assemblies available here: https://ebay.to/2PLTy0p

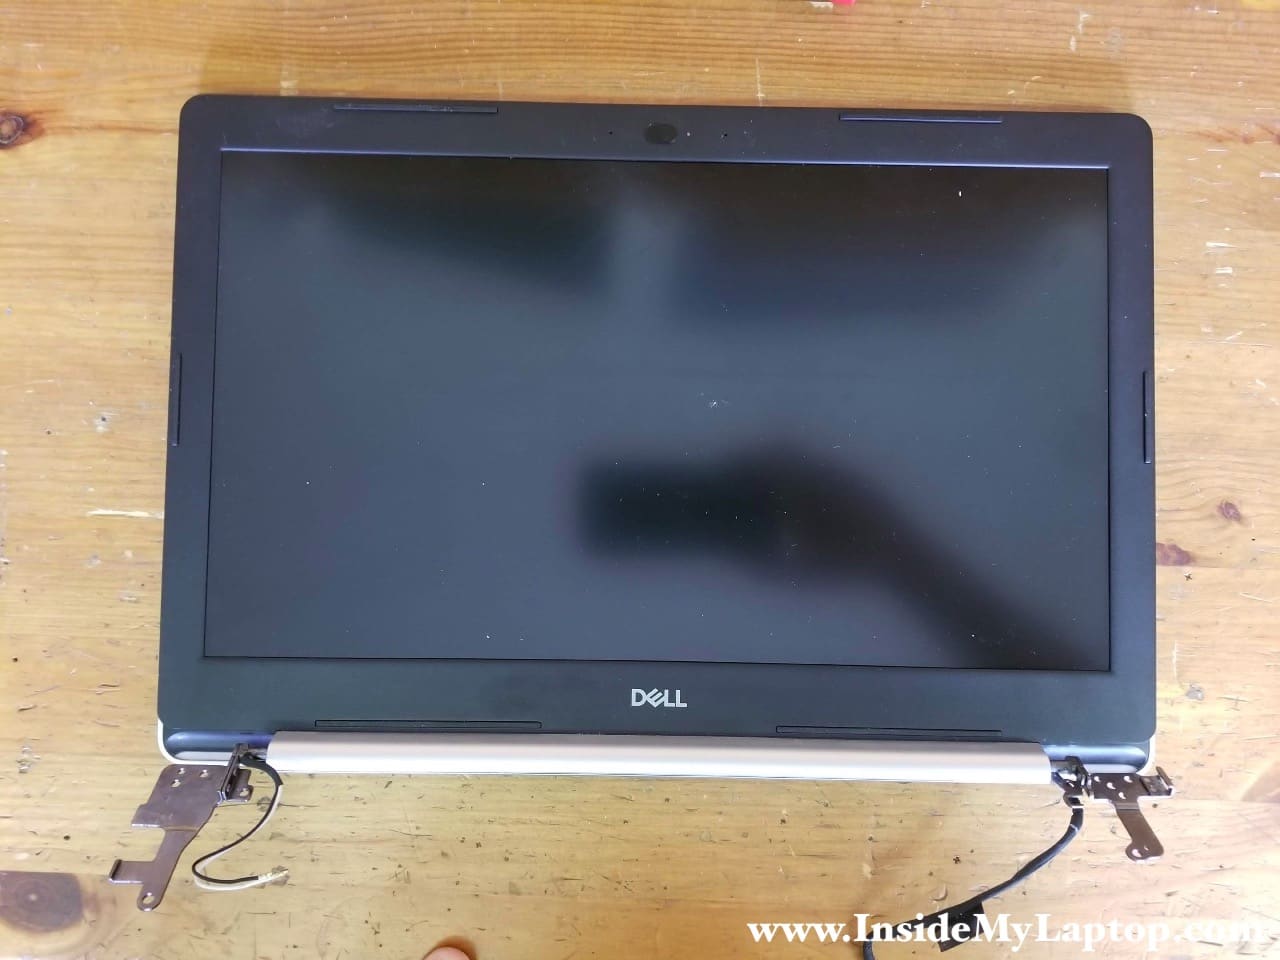
STEP 23.
Now let’s take apart the display assembly and remove the LCD screen.
NOTE: the display can be disassembled while it’s still attached to the laptop base. It’s not necessary to remove the display completely in order to take it apart and remove the LCD screen.
STEP 24.
Start separating the LCD bezel from the display cover. Wiggle the bezel in order to disengage hidden latches.

STEP 25.
Continue removing the bezel.
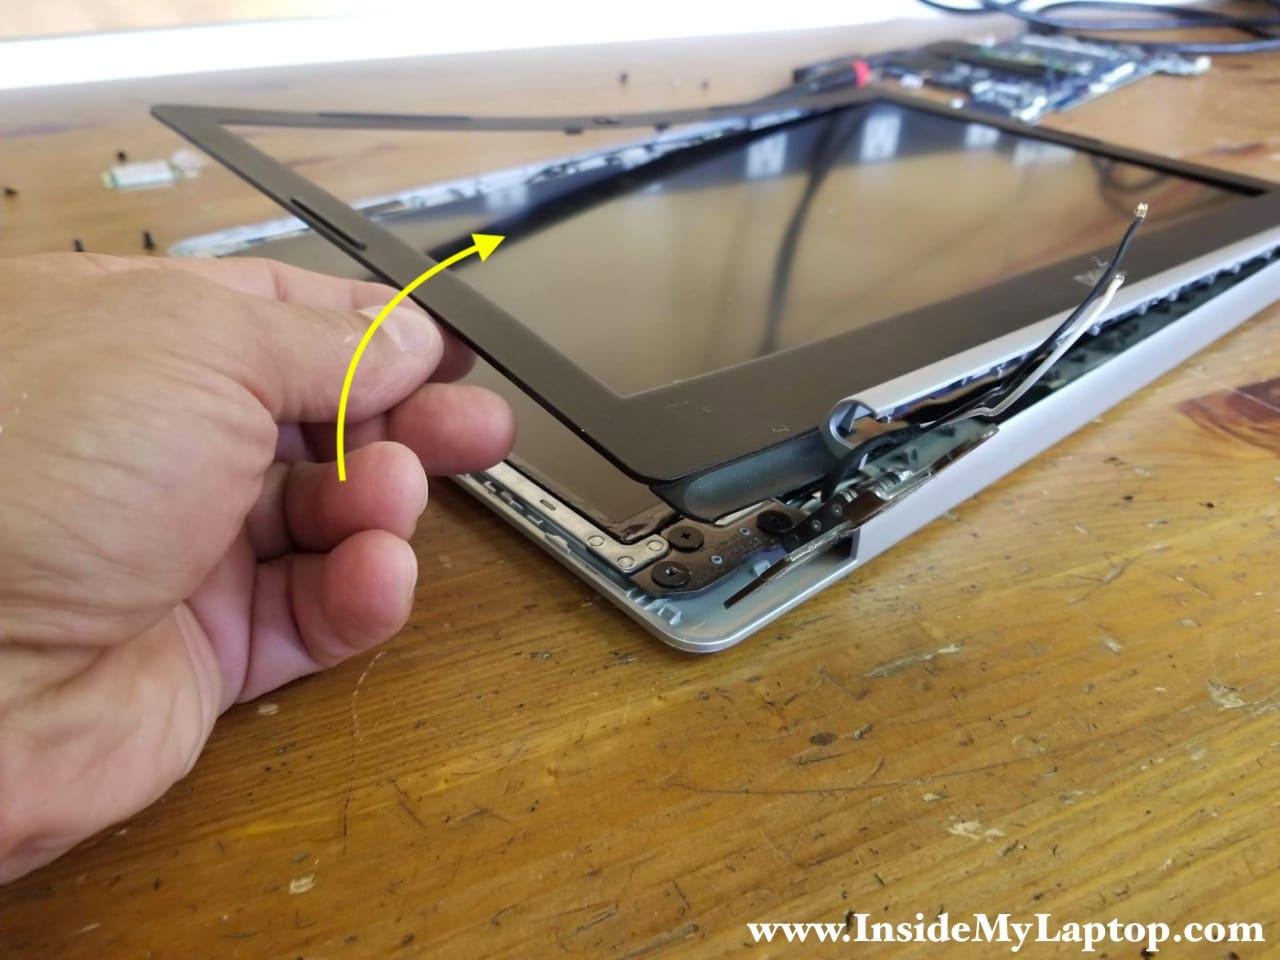
STEP 26.
Remove LCD bezel completely.
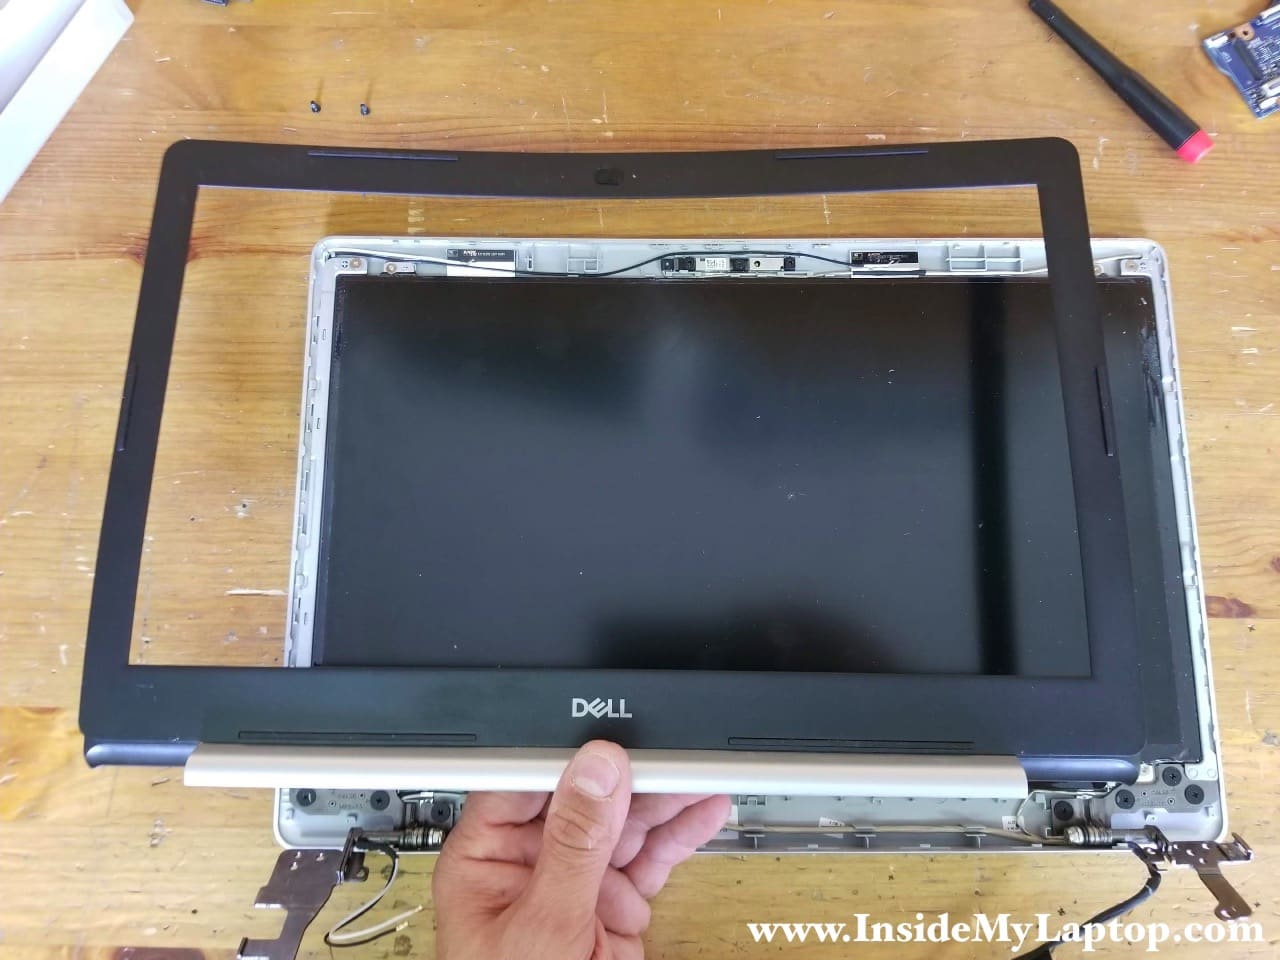
As I said, the bezel also can be removed without complete laptop disassembly.
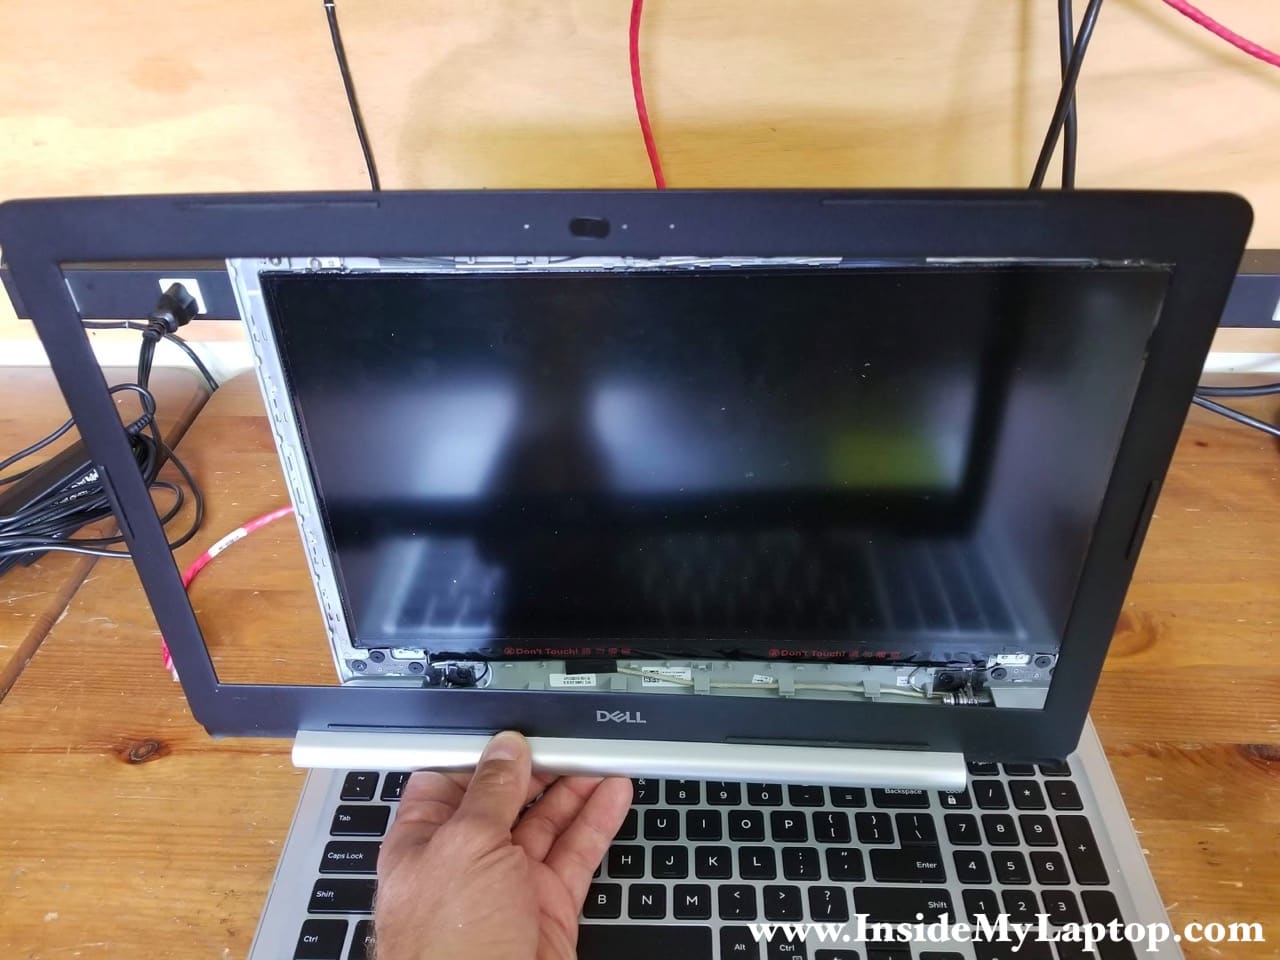
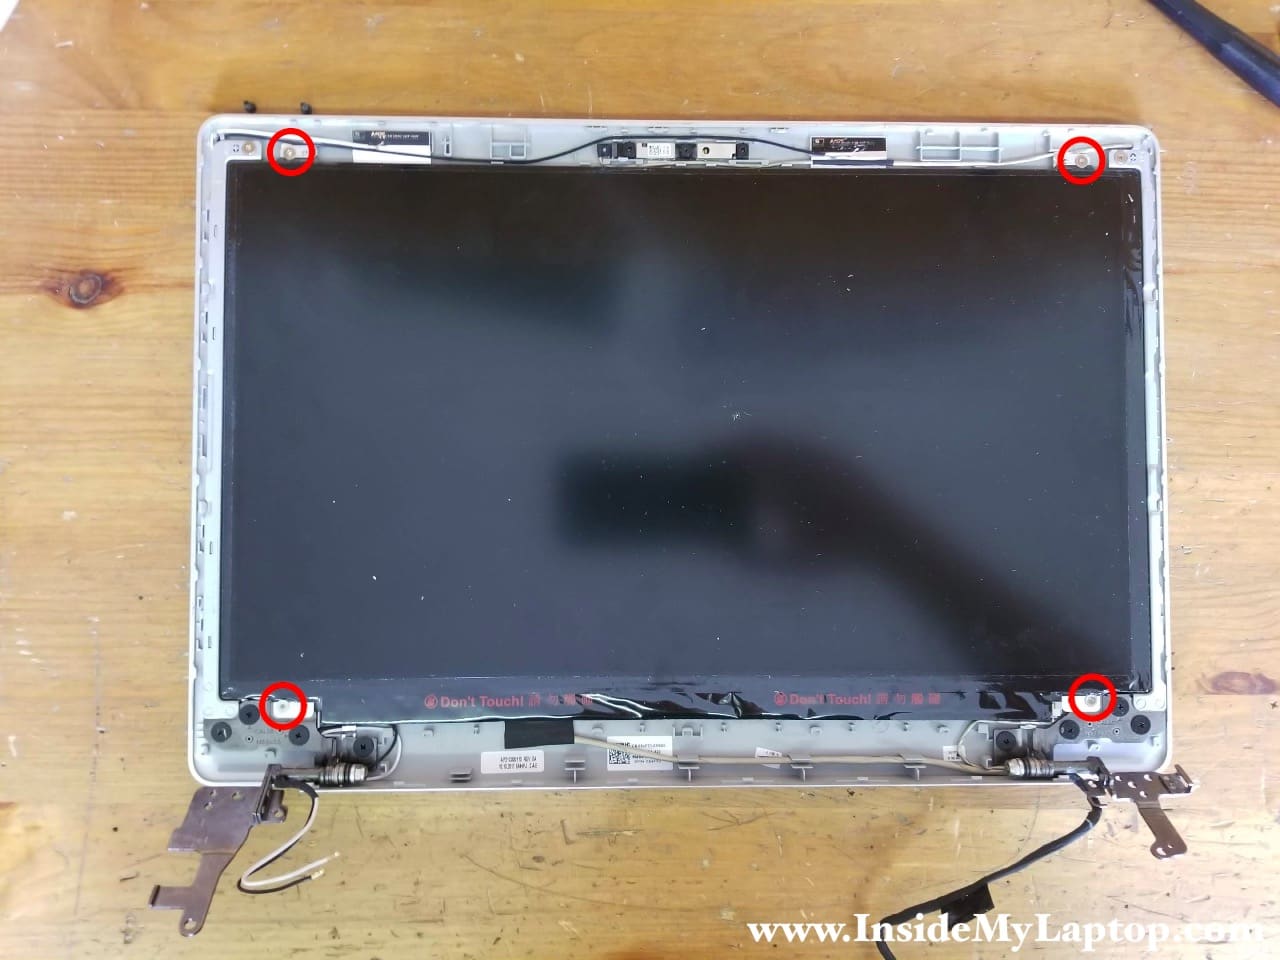
STEP 27.
In order to remove the LCD screen (not shown in my guide) you’ll have to remove four screws and disconnect the display cable on the other side.
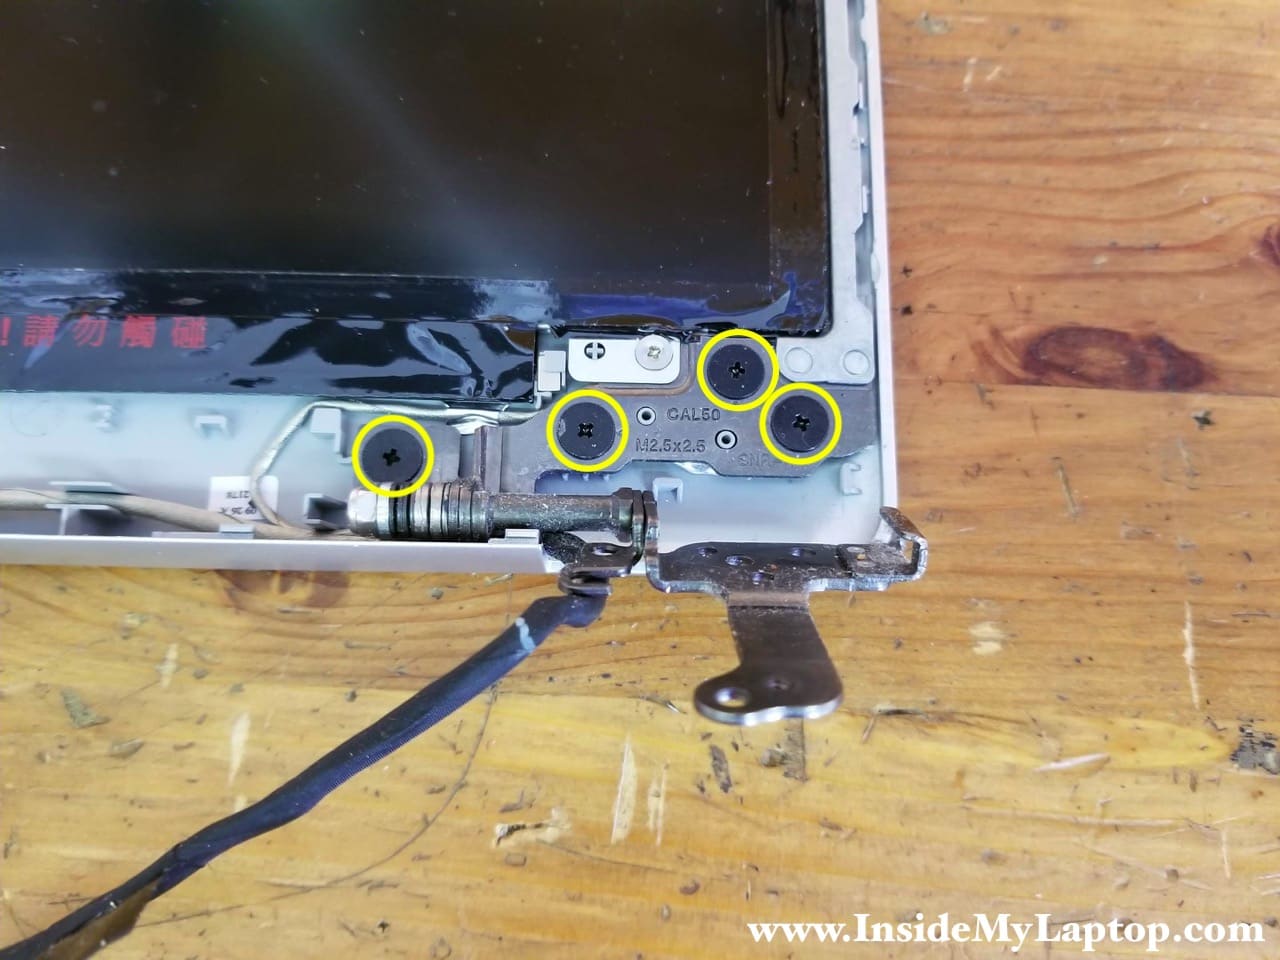
STEP 28.
Finally, you can remove both display hinges if you need to replace them.
The left hinge secured to the display cover by four screws.
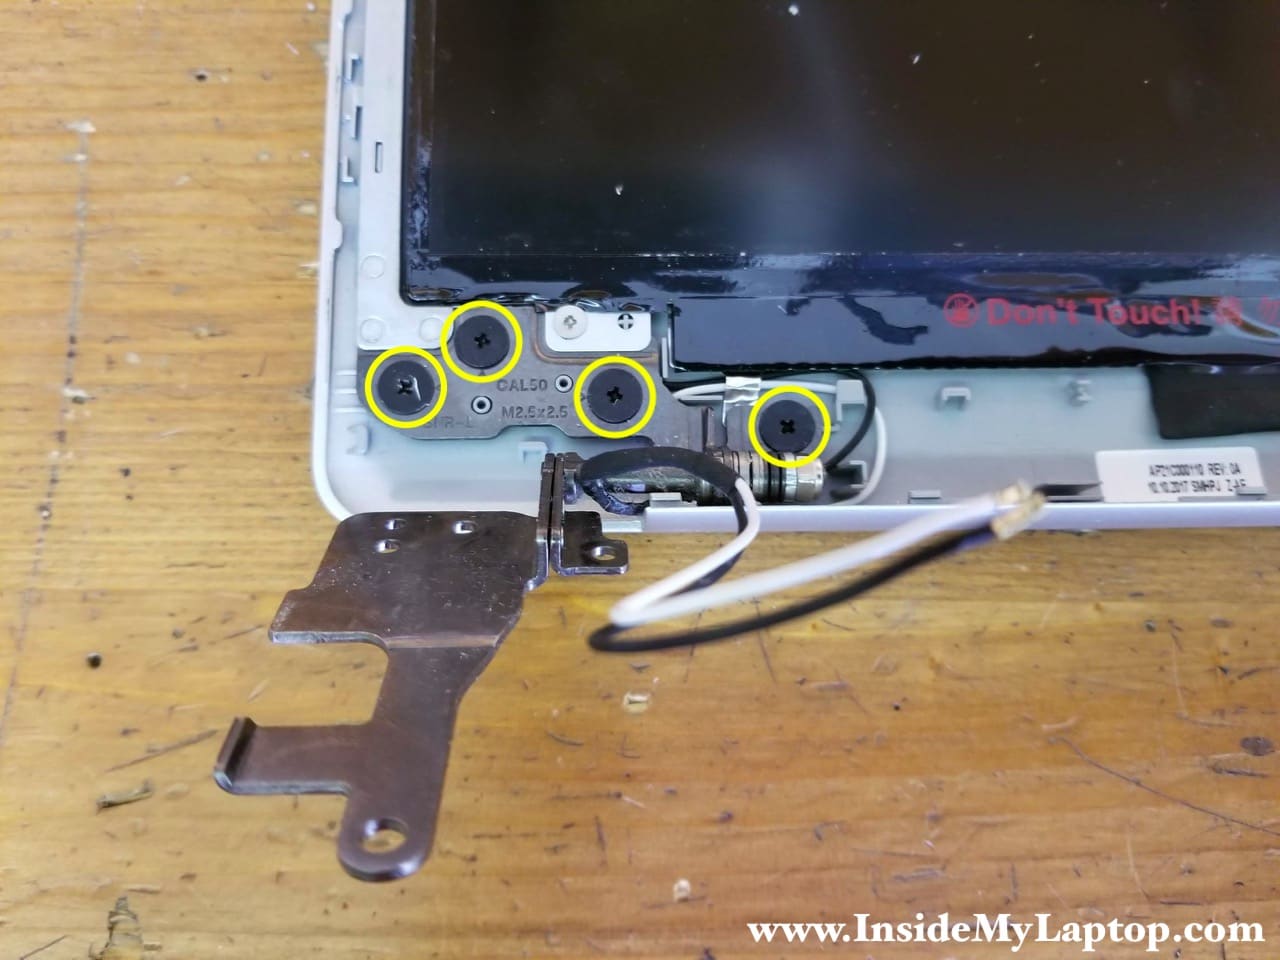
The right hinge also secured by four screws.
J.ghorbani
Hello i want ask can i use this removal instruction for 5575 ?